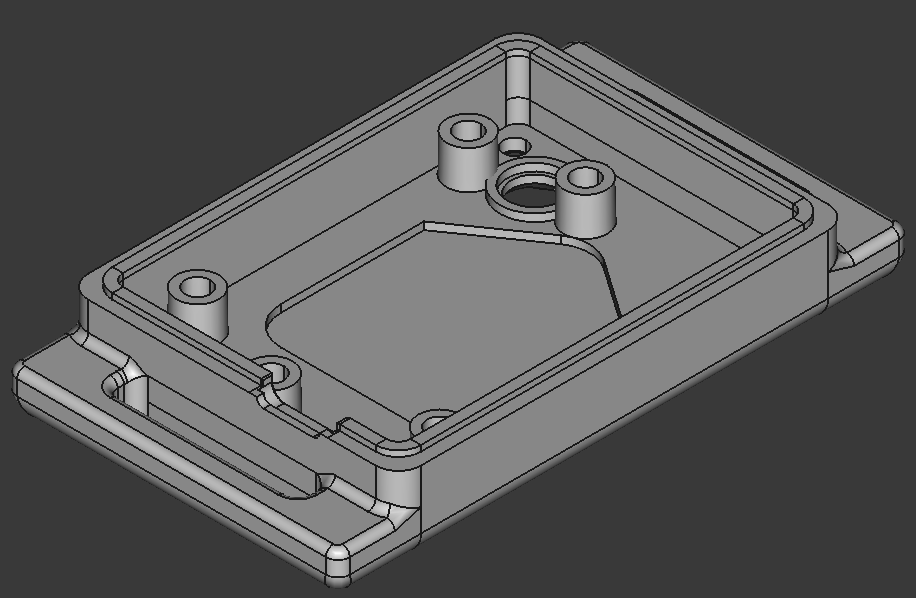
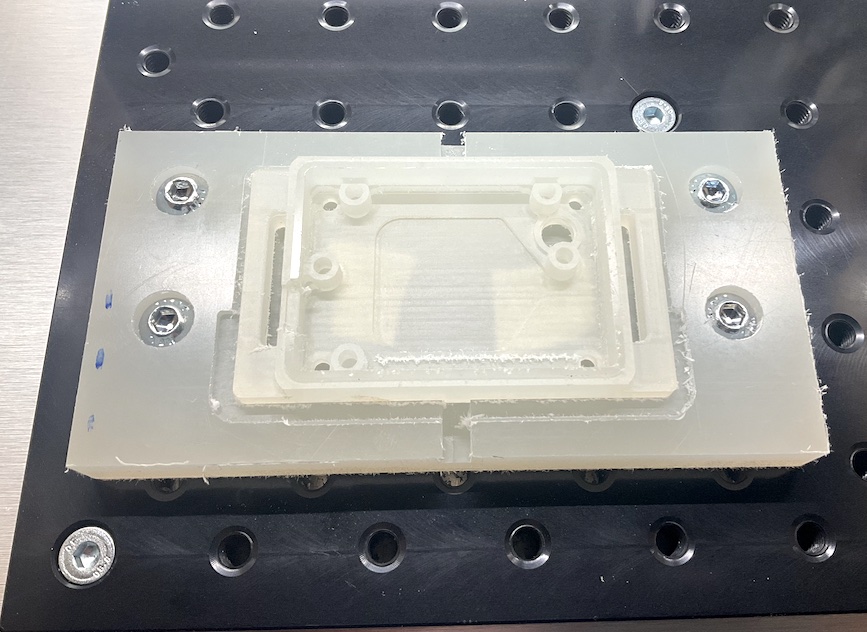
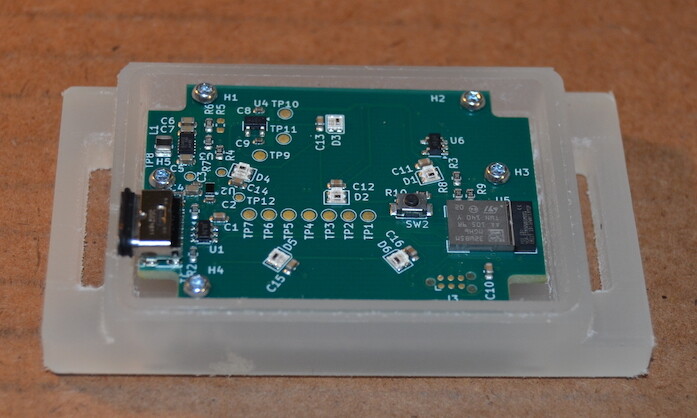
I am milling an electronics project enclosure (see attachment), dimensions ~1x2x3" on the Nomad3
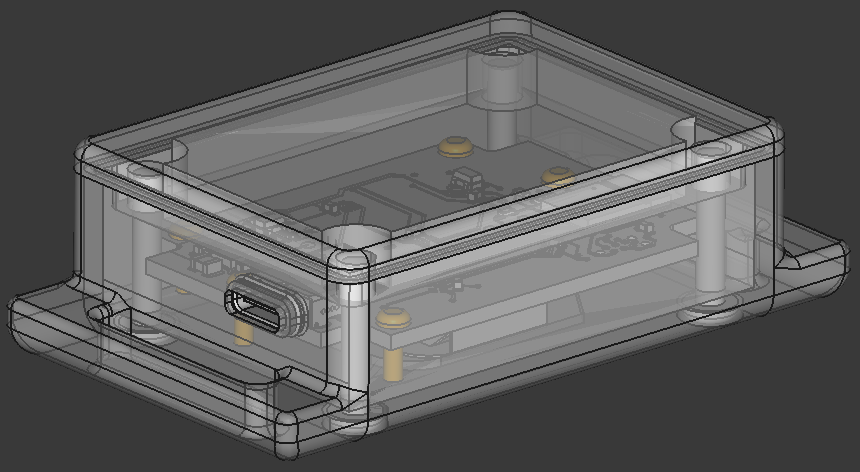
The enclosure will be machined in two parts, separated nearly midway in the vertical axis. This accommodates a circuit board access port on the side.
I am milling an electronics project enclosure (see attachment), dimensions ~1x2x3" on the Nomad3
The enclosure will be machined in two parts, separated nearly midway in the vertical axis. This accommodates a circuit board access port on the side.
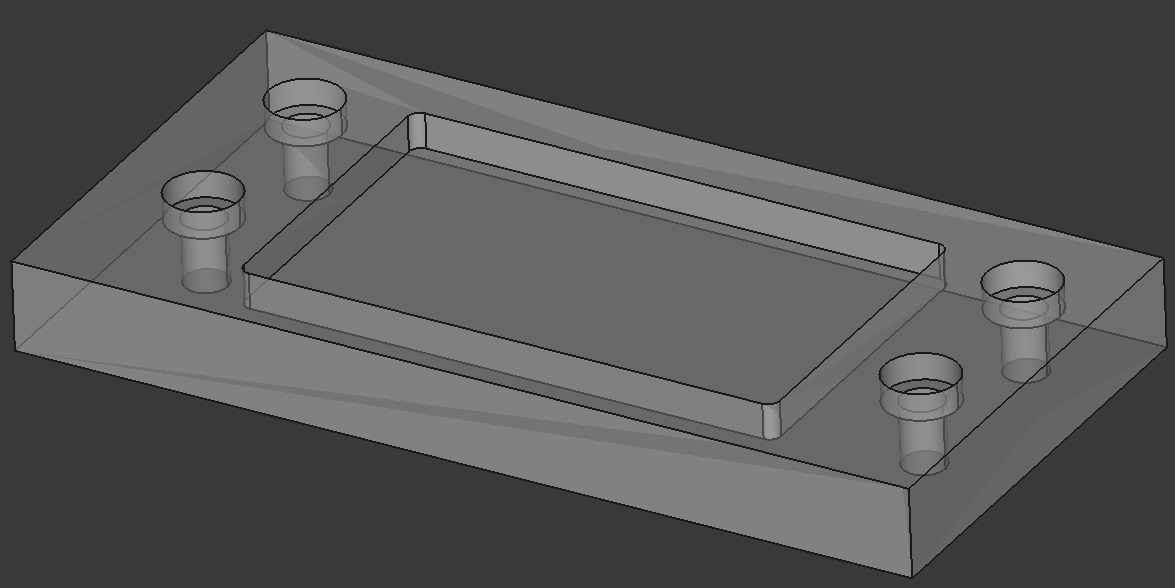
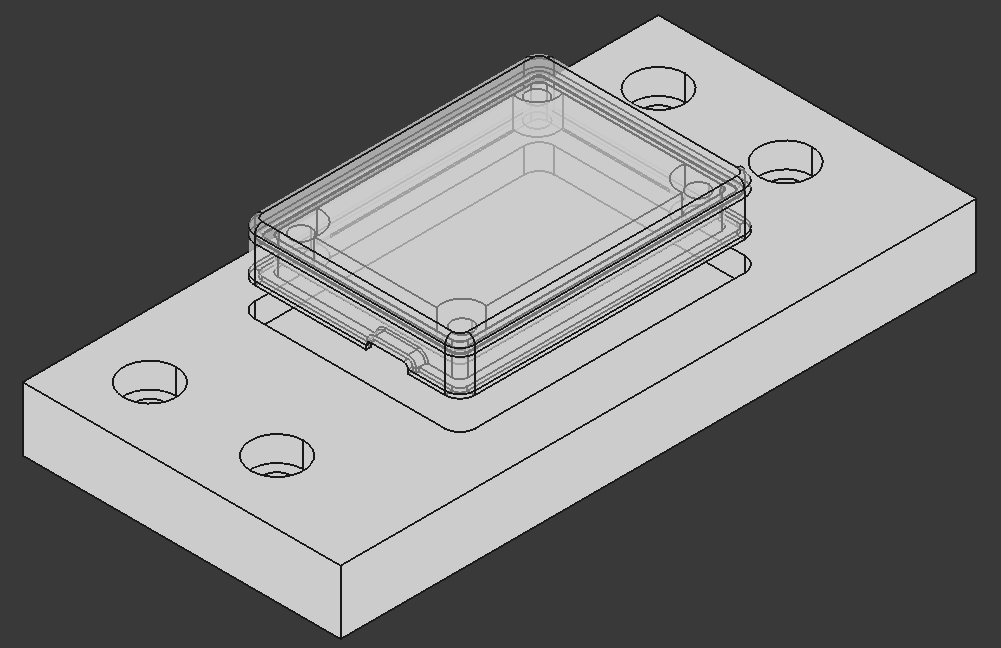
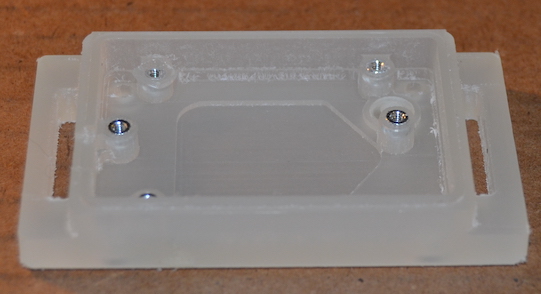
To help with alignment on the work table, I’m milling a fixture to fit the Nomad Threaded Table, using the 1" pitch array of M6 threaded holes
The design intent of this fixture is:
I’m not sure what the mating surface looks like on your enclosure but you might be interesting in shadow lines
Shadow lines are great–I’ve used them on my 3D-printed estop enclosures.
Integrating the shadow line with the case split at the USB port level would be interesting. I envision a wide shadow line (the height of the current USB opening) with the USB port set in it like the turbo exhaust port in the Death Star equator trench… ![]()
Seriously, @andres , I like your design. Hidden assembly fasteners and you have thought through the fixturing as part of the design process. ![]() And doing it on a Nomad.
And doing it on a Nomad. ![]()
![]()
Thanks for the reference! I will incorporate a shadow line into the mating surface of the milled parts.
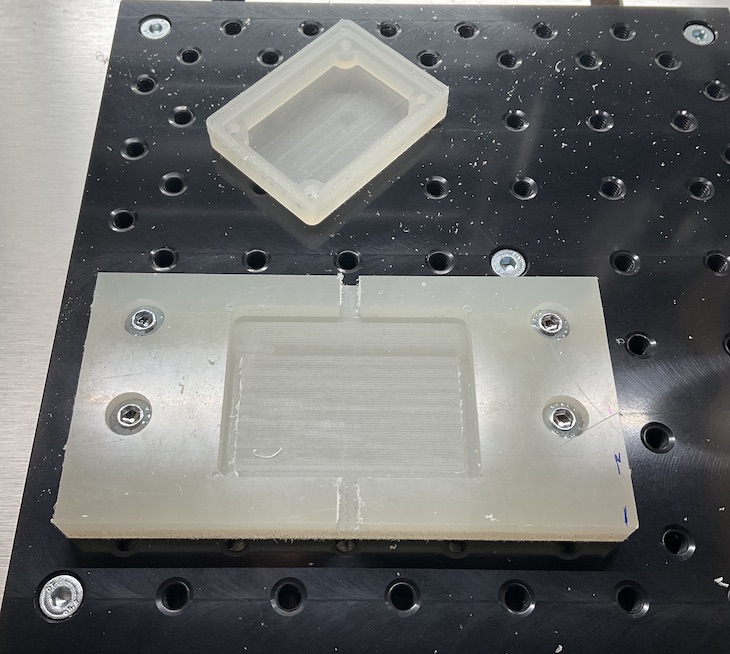
Channels are added to the fixture to aid removal. The “blank” press fits into the fixture’s pocket.
Workflow is:
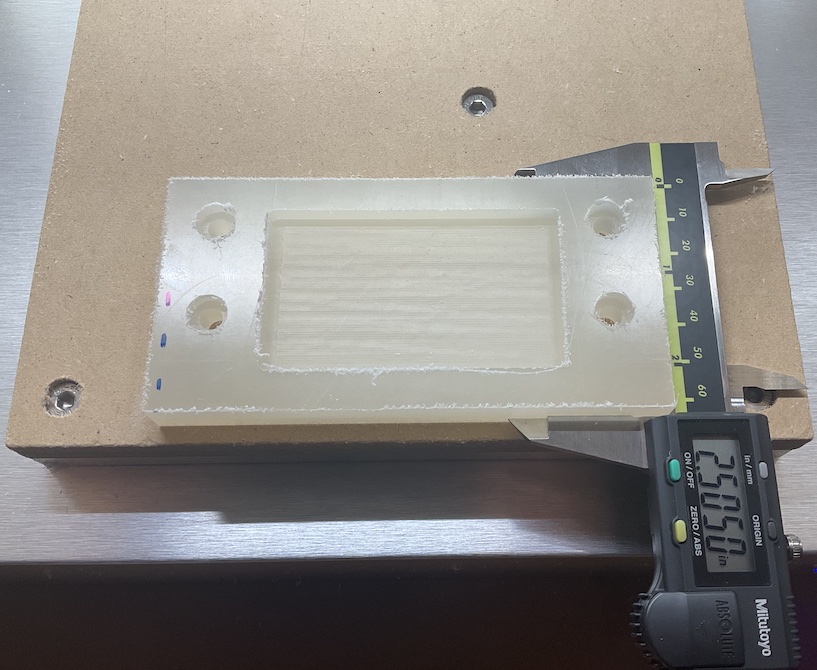
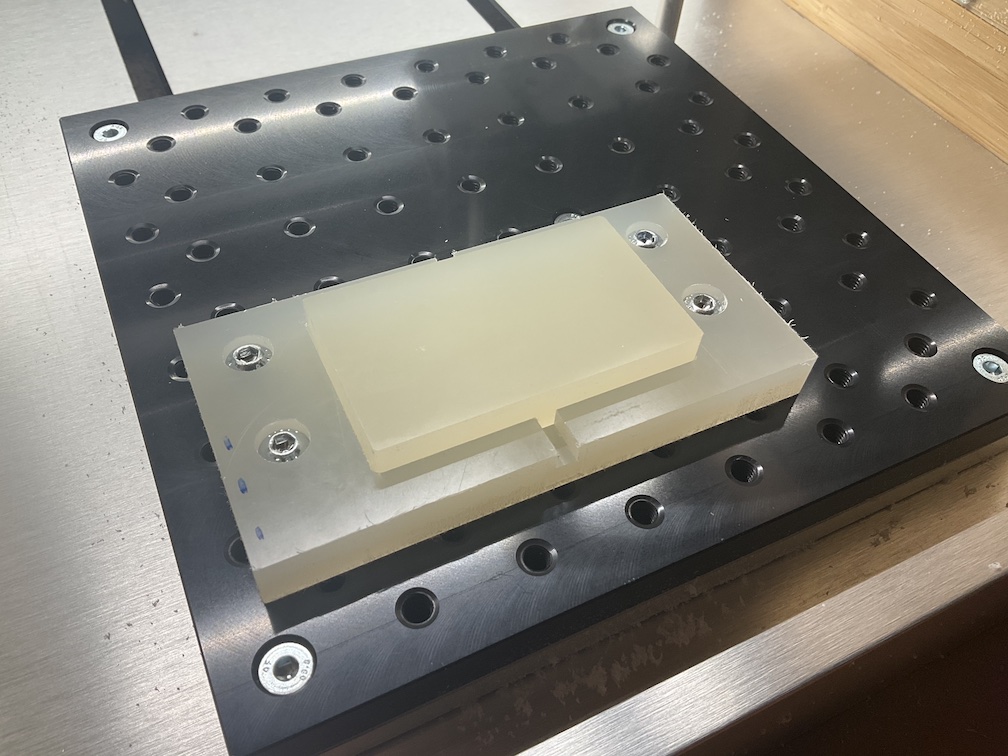
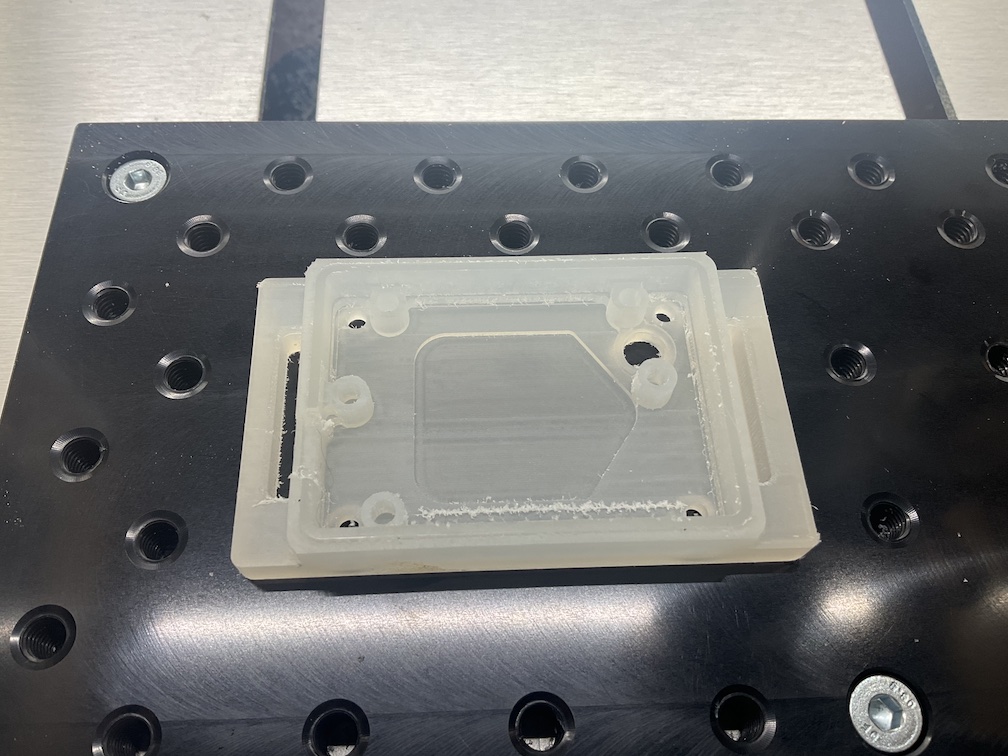
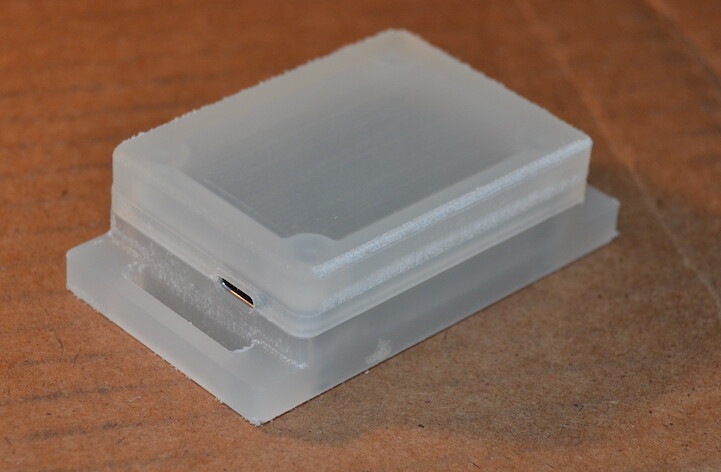
I added a shadow line / lip feature to the lower enclosure and milled it today. It turned out well!
MeshCAM’s “Area to Machine: Whole Stock” helped save time and material. Some material was accidentally removed from the fixture due to a bad z-axis zero.
Looking good. I think most folks have removed a bit of their fixture at one time or another. Fortunately you’ve learned that lesson in a forgiving material ![]()
(I might have accidentally plunged a bit several mm into 7075 aluminum when I learned that lesson ![]() )
)
thank you @HeuristicBishop and @Randy for the encouraging words!
You’re welcome ![]()
The heat set inserts being silver is really nice as well, I’ve only ever seen brass for some reason. I might have to pick some up.
Oh or are they just standard nuts maybe?
And the shine through is really nice as well…makes me want to design a track ball with an rgb ring embedded for silly things like lighting the ring in the direction of cursor movement. Too many other projects on the stack though. Maybe someday ![]()
These inserts are aluminum and very shiny. Stainless-steel is also an option. Brass is the least expensive, but contains lead which is undesirable. ref: mcmaster.com
This is my first time using these. Only one boss was melted in this effort ![]()
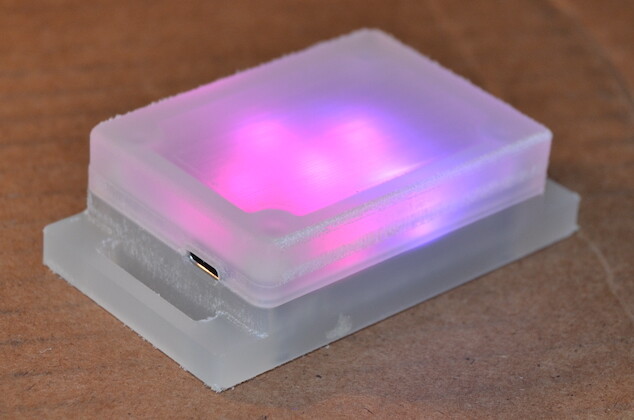
Very nice, @andres ! What does this do? With the pentagon of LEDs do you plan to polish the top surface, or is the diffusing part of your desired effect? I do like the very clean design.
Thanks! I designed this as a wearable visibility light. Prototype v1. The front/top of the enclosure acts as a diffuser. The original design intent supports swappable front elements, and I would like to try an epoxy resin cast as well (with the mold cut on the nomad). This build cycle has been educational. Next version will be smaller. ![]()
The mold could be cut out of hdpe or machinable wax if you’re looking for something quick/easy to cut, cheap to buy, and nonstick to epoxy.
In theory the wax can be reclaimed and remelted to make iterations really cheap but it’s not a straightforward process.
(Delrin also works a treat but it’s expensive. Maybe worthwhile for high usage molds if/when you’ve vetted the geometry with your lower cost molds)
Regardless of your mold material, if it’s rigid you’ll want a bit of draft on the mold. Getting a straight walled part out of a mold can be a nightmare.
They are for a friend’s daughter so not sure. I think they will be painted and decorated and given to family members. Need 20 and got 15 done so far. Just a few more to go.
Did we enter the “Twilight Zone”?
Got it, just wondered if they would be hung up or set on a stand.
We are in the Twilight Zone (haha). We are really in the matrix anyway. Not sure what they are going to do with them. I just make them, someone else will finish them.
This topic was automatically closed 30 days after the last reply. New replies are no longer allowed.