n.b. looks like these are more often called “propagation stations”. Lots of very cool ideas but none that integrate a dedicated filling and draining area.
I’m putting together a little plant station that’s probably best described as a nursery. Each pod will be a glass vial (test tube) and they will all be connected to the same wooden holder.
The wooden holder will have water channels so the wife only needs one large pour zone.
I’ve got a few questions:
What kind of wood should I use to prevent rot on the pieces that come into direct contact error water. Or maybe any wood is fine with a safe sealer like bees wax?
The test tubes will be in direct sunlight. I’ve seen issues with focal points on larger vases causing hot spots with direct sunlight. I’m thinking those multi colored glass marbles would disrupt the light while still looking good and being low maintenance. Does this sound like a sane solution?
And the biggest question:
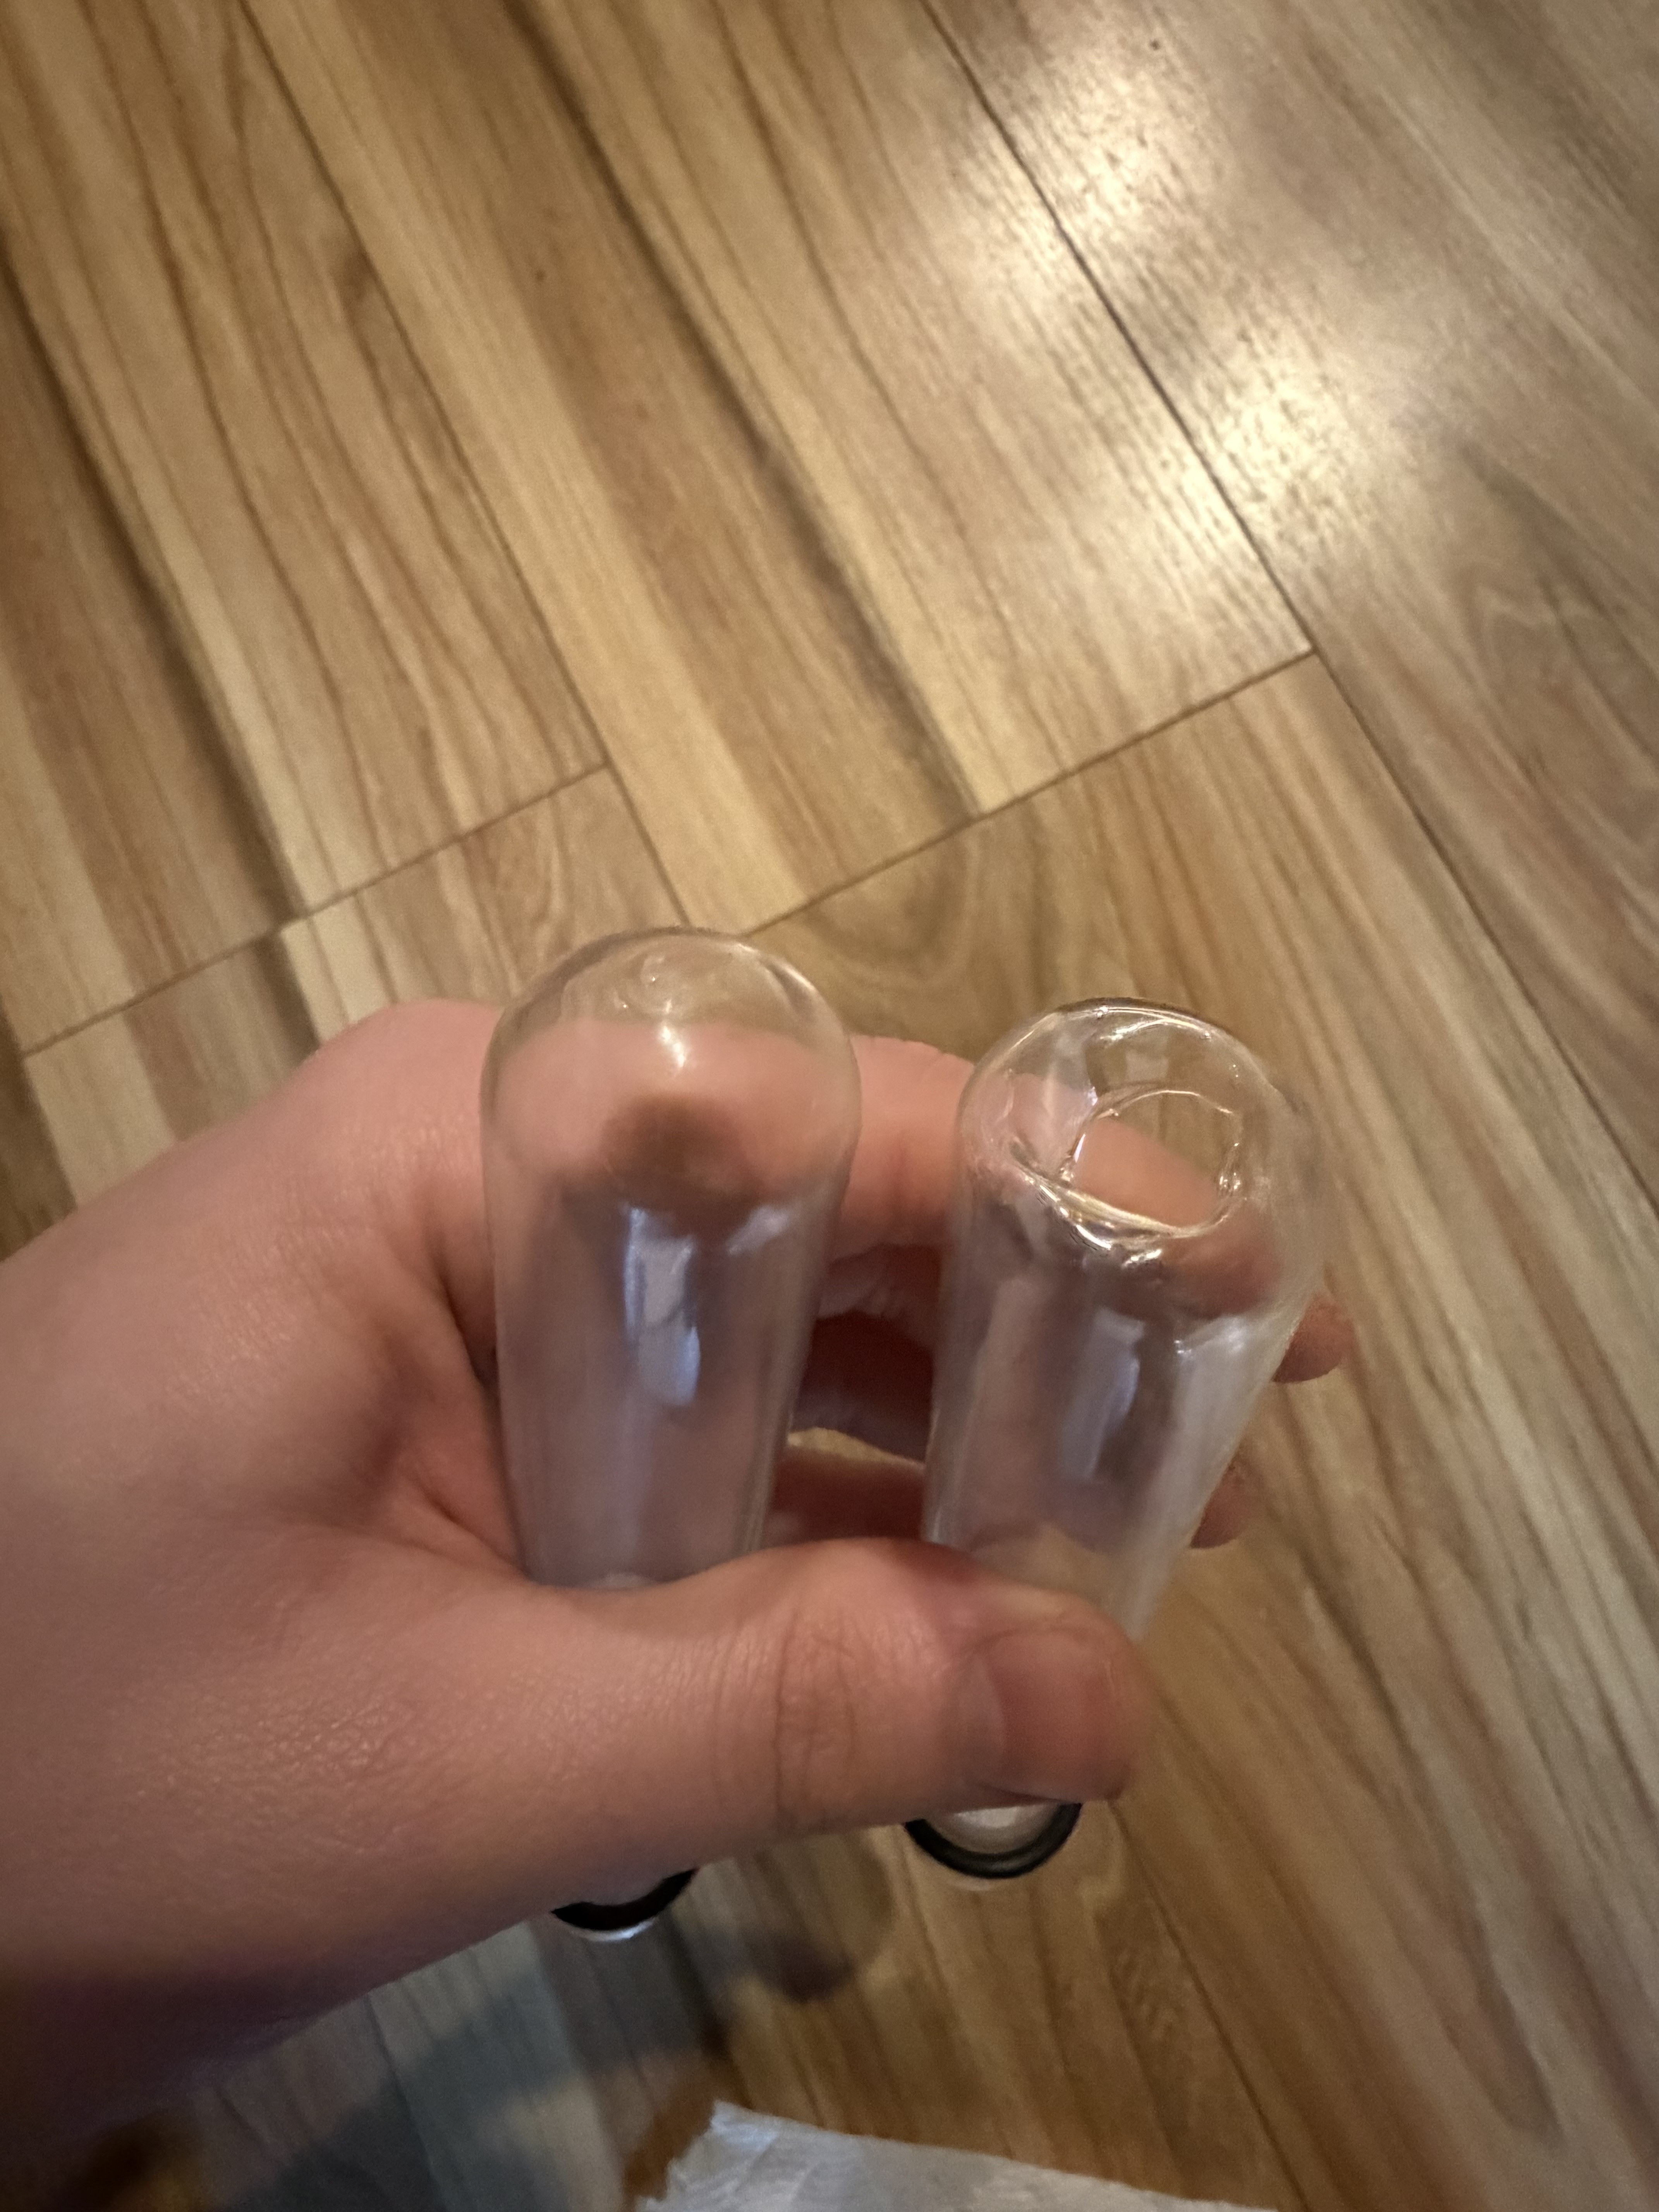
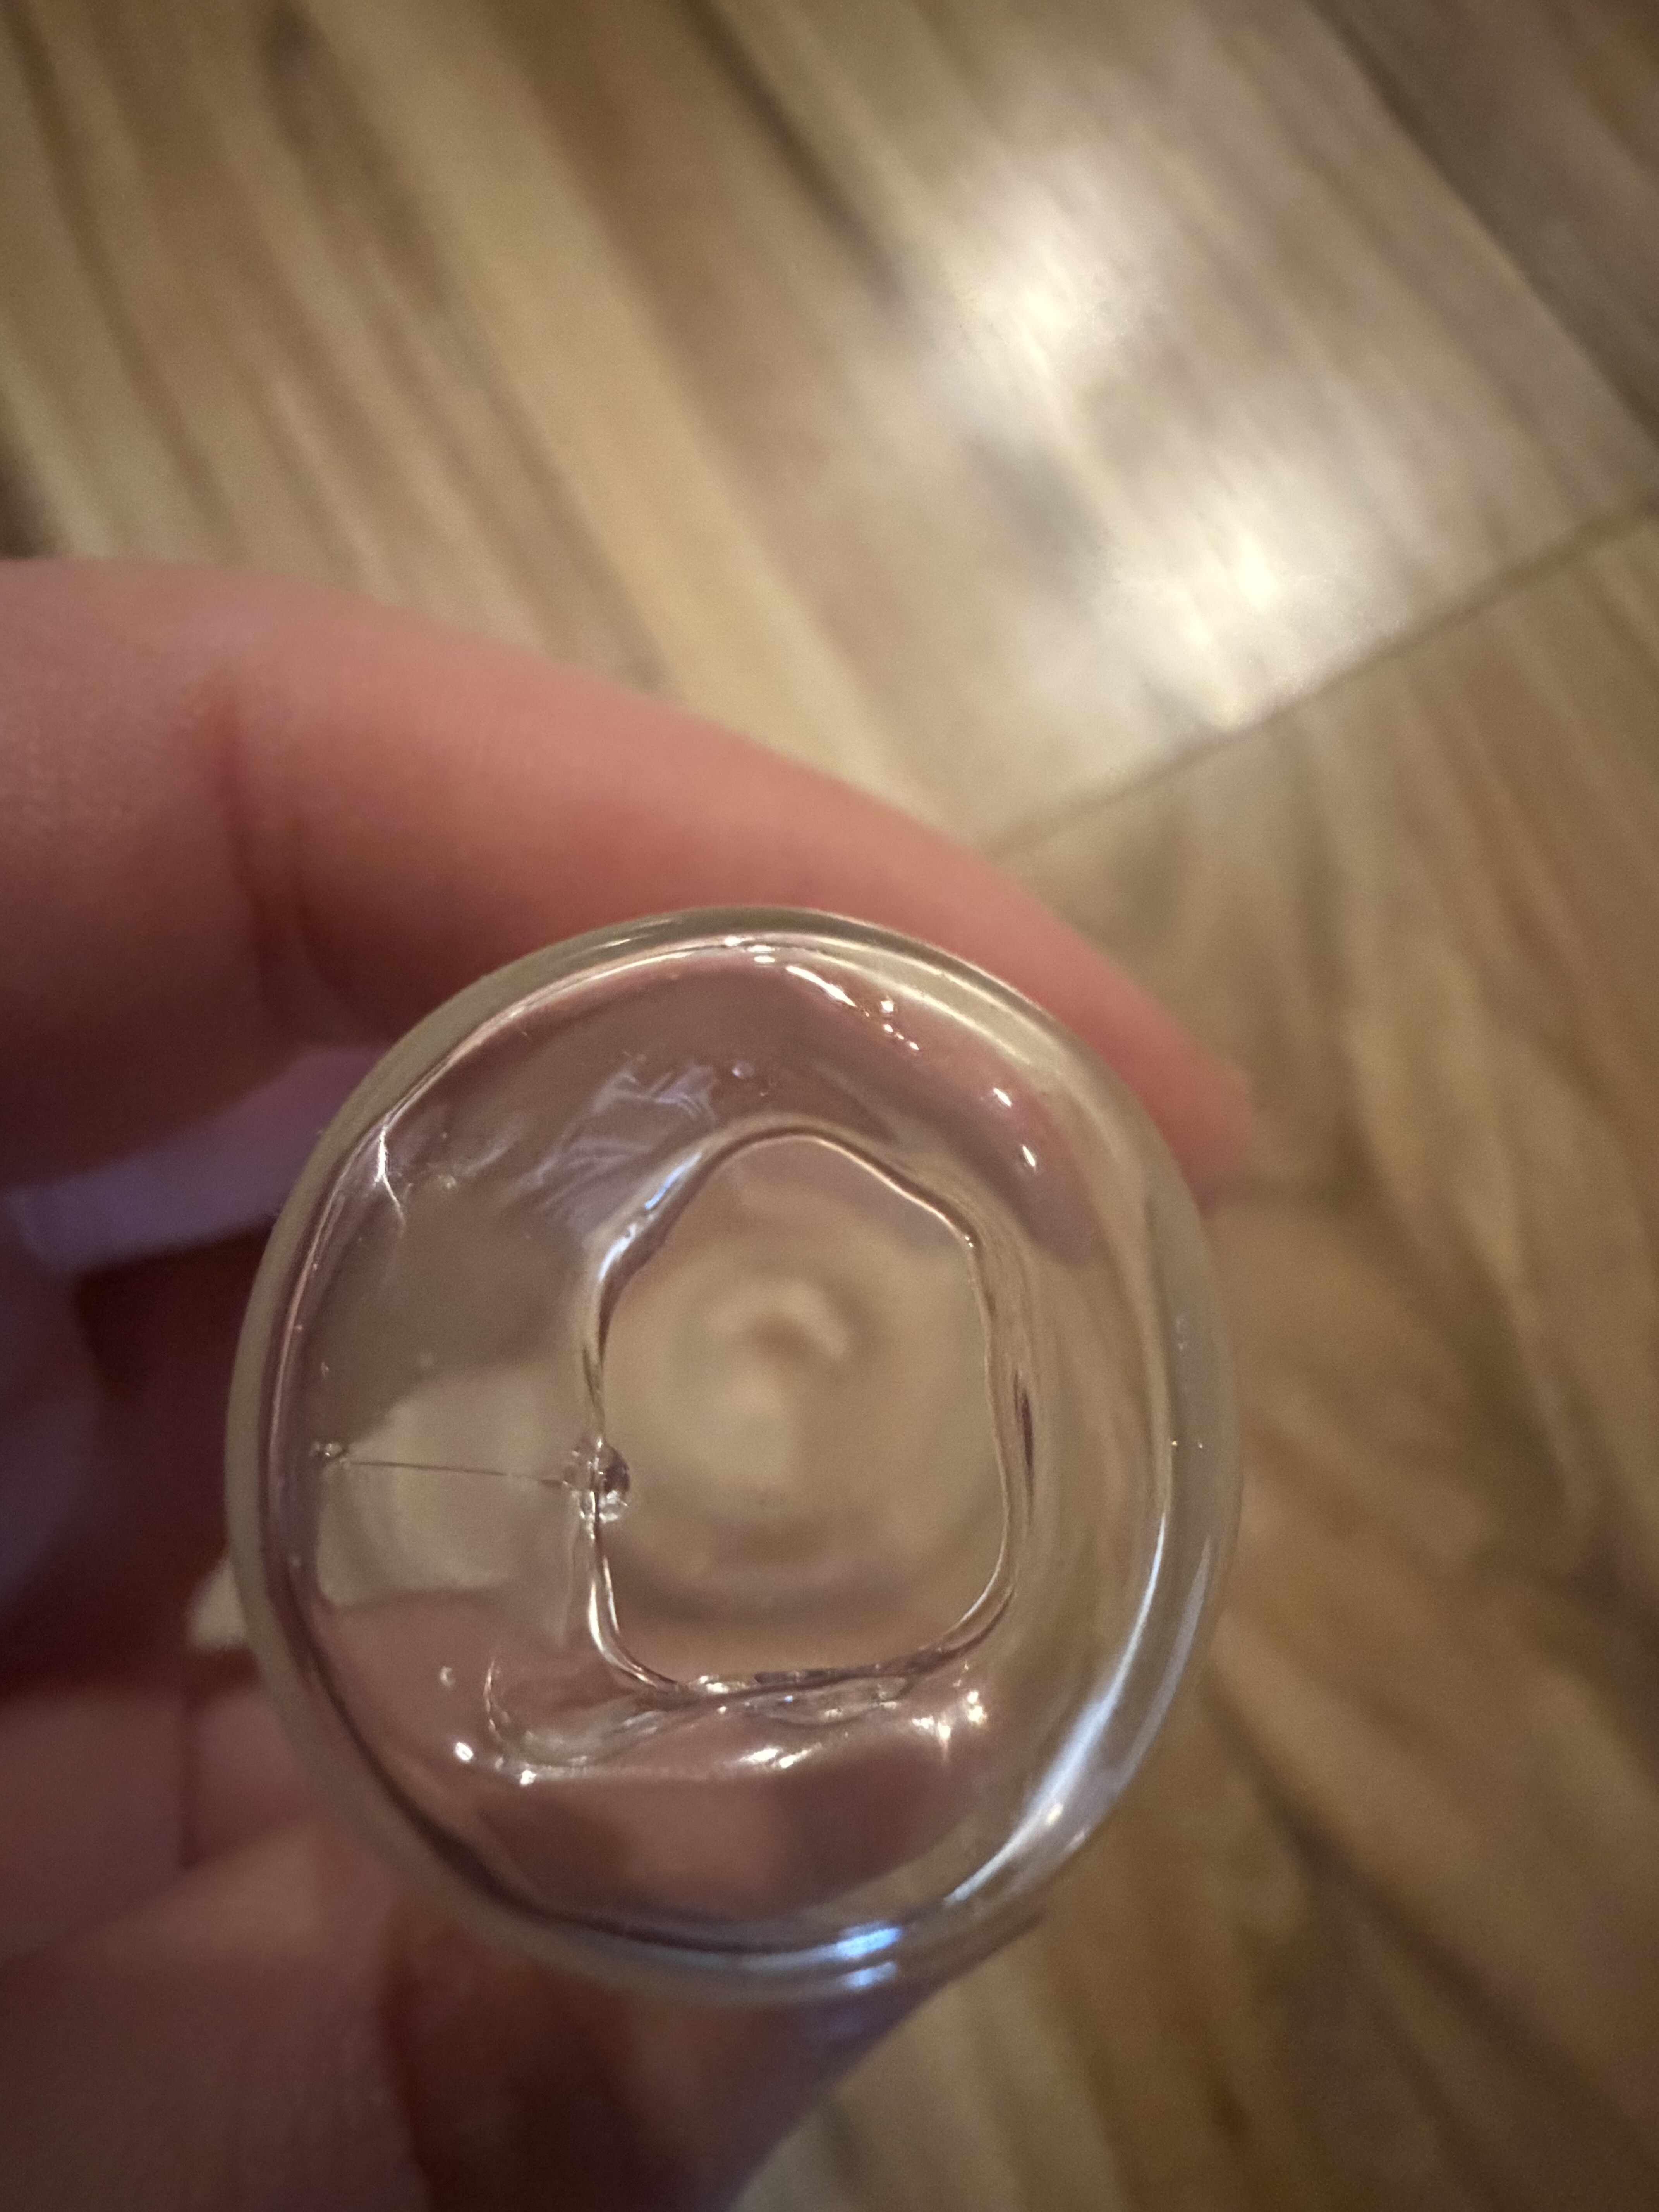
What kind of gasket should I use in between the glass tube and wooden holder/water distributor?
I’m thinking silicone or hdpe since I could just pour silicone or mill the hdpe. They are both relatively safe in a flooded environment (not going to harbor bacterial growth or leach anything to the water)
I could also just go with some o-rings of the same id as the tube od, groove the inside of the tube holder to seat the rings, and drop the tubes in. Which material would the o-rings be? Something water tight with enough compressive give to conform to the imperfect glass. It also can’t crack the glass as the wood shifts from environmental changes.
Let me know what y’all think.
This will be a little one day build to test out a two tube holder so if you comment, you should see some feedback pretty quickly
This will probably be used to keep a bunch of spring onions going. We go through an awful lot of them in this house.
Cypress is knows as rot resistant. Also certain cedar species are rot resistant. No wood is completely immune to rot but how much and how long wood is exposed to the water is a factor. Wood that occasionally gets some water as opposed to wood that is continuously wet is another factor. Cypress would be my first choice.
There is a “type” of wood sold at one of my local wood shops called “Cambia [wood type]”, like “Cambia Alder” and “Cambia Ash”, and what the “Cambia” part of the name means is the wood was “thermally modified” by Northland Forest Products - according to their website:
“The Cambia thermal modification process uses high heat in a controlled atmosphere to improve the durability of the wood as well as to increase its dimensional stability. We achieve a deep, natural color in our special drying process that provides a rich finished product that looks exotic without hurting the environment.”
From other websites who reviewed their wood, they put the wood in a kiln and the wood was heated up in a vacuum - or at least an oxygen free enviromnent - and all the organic part of the wood was boiled / burned / evaporated out. Whatever the term is (it escapes me now) the wood should now be rot and insect resistant without a chemical treatment because there is nothing left but the indigestible cellulose cell structure of the wood, and nothing else.
I bought a couple of pieces of the Cambia Alder, because it actually doesn’t look that bad. Kind of a nice dark walnut kind of color. It still has the woodgrain look of Alder, just a nice dark brown that is the same color all the way through.
Wow, a bit wordy to say just about any wood that is continuously exposed to water will rot unless it is chemically treated, so maybe this stuff might work better.
The most common o-ring is Buna-N. There are - no joke - hundreds of sizes in this material that (for the most part) are commonly stocked, so shipping should be pretty immediate. Buna-N - also known as NBR and Nitrile rubber - o-rings are considered to be water resistant, so they should last a while. They are susceptible to UV (sunlight) so that should be considered.
I’ll pick up some of the Cambia to play with. It sounds like they are taking it the very edge of being charcoal which is pretty neat.
I’ve got a ton of the nitrile o-rings. I’ll look for some softer ones as these feel like they might crack the glass with the wood movement.
Thinking about it more, the gasket choice will end up coming down to how many I intend to make. Just enough for the house means I can do a lot more manually, not as much need for widely available replacement parts.
Realistically I’ll end up with the nitrile o-rings if I can hide them well enough and find a reasonable shore hardness to fit the bill.
If you went with an o-ring with a larger cross section (but same ID), that would allow more wood movement without increasing the forces on the test-tube as much as an o-ring with a smaller cross section. Like running oversized tires on your car vs. low profile tires on your car. You feel the road much more with the low profile tires.
Yeah that’s a great point. Maintenance would be a breeze, especially if I source a material that doesn’t need oiled. Though maybe the lifetime of the product means I’d never need to oil a buna-n anyway
On the point of maintenance, I do want to make it as low maintenance as possible. I’m playing with the idea of the lower support also being a drain. That means double the gaskets but it also means a single drain location for flushing/replacing the water at some cadence. So it’s probably worthwhile.
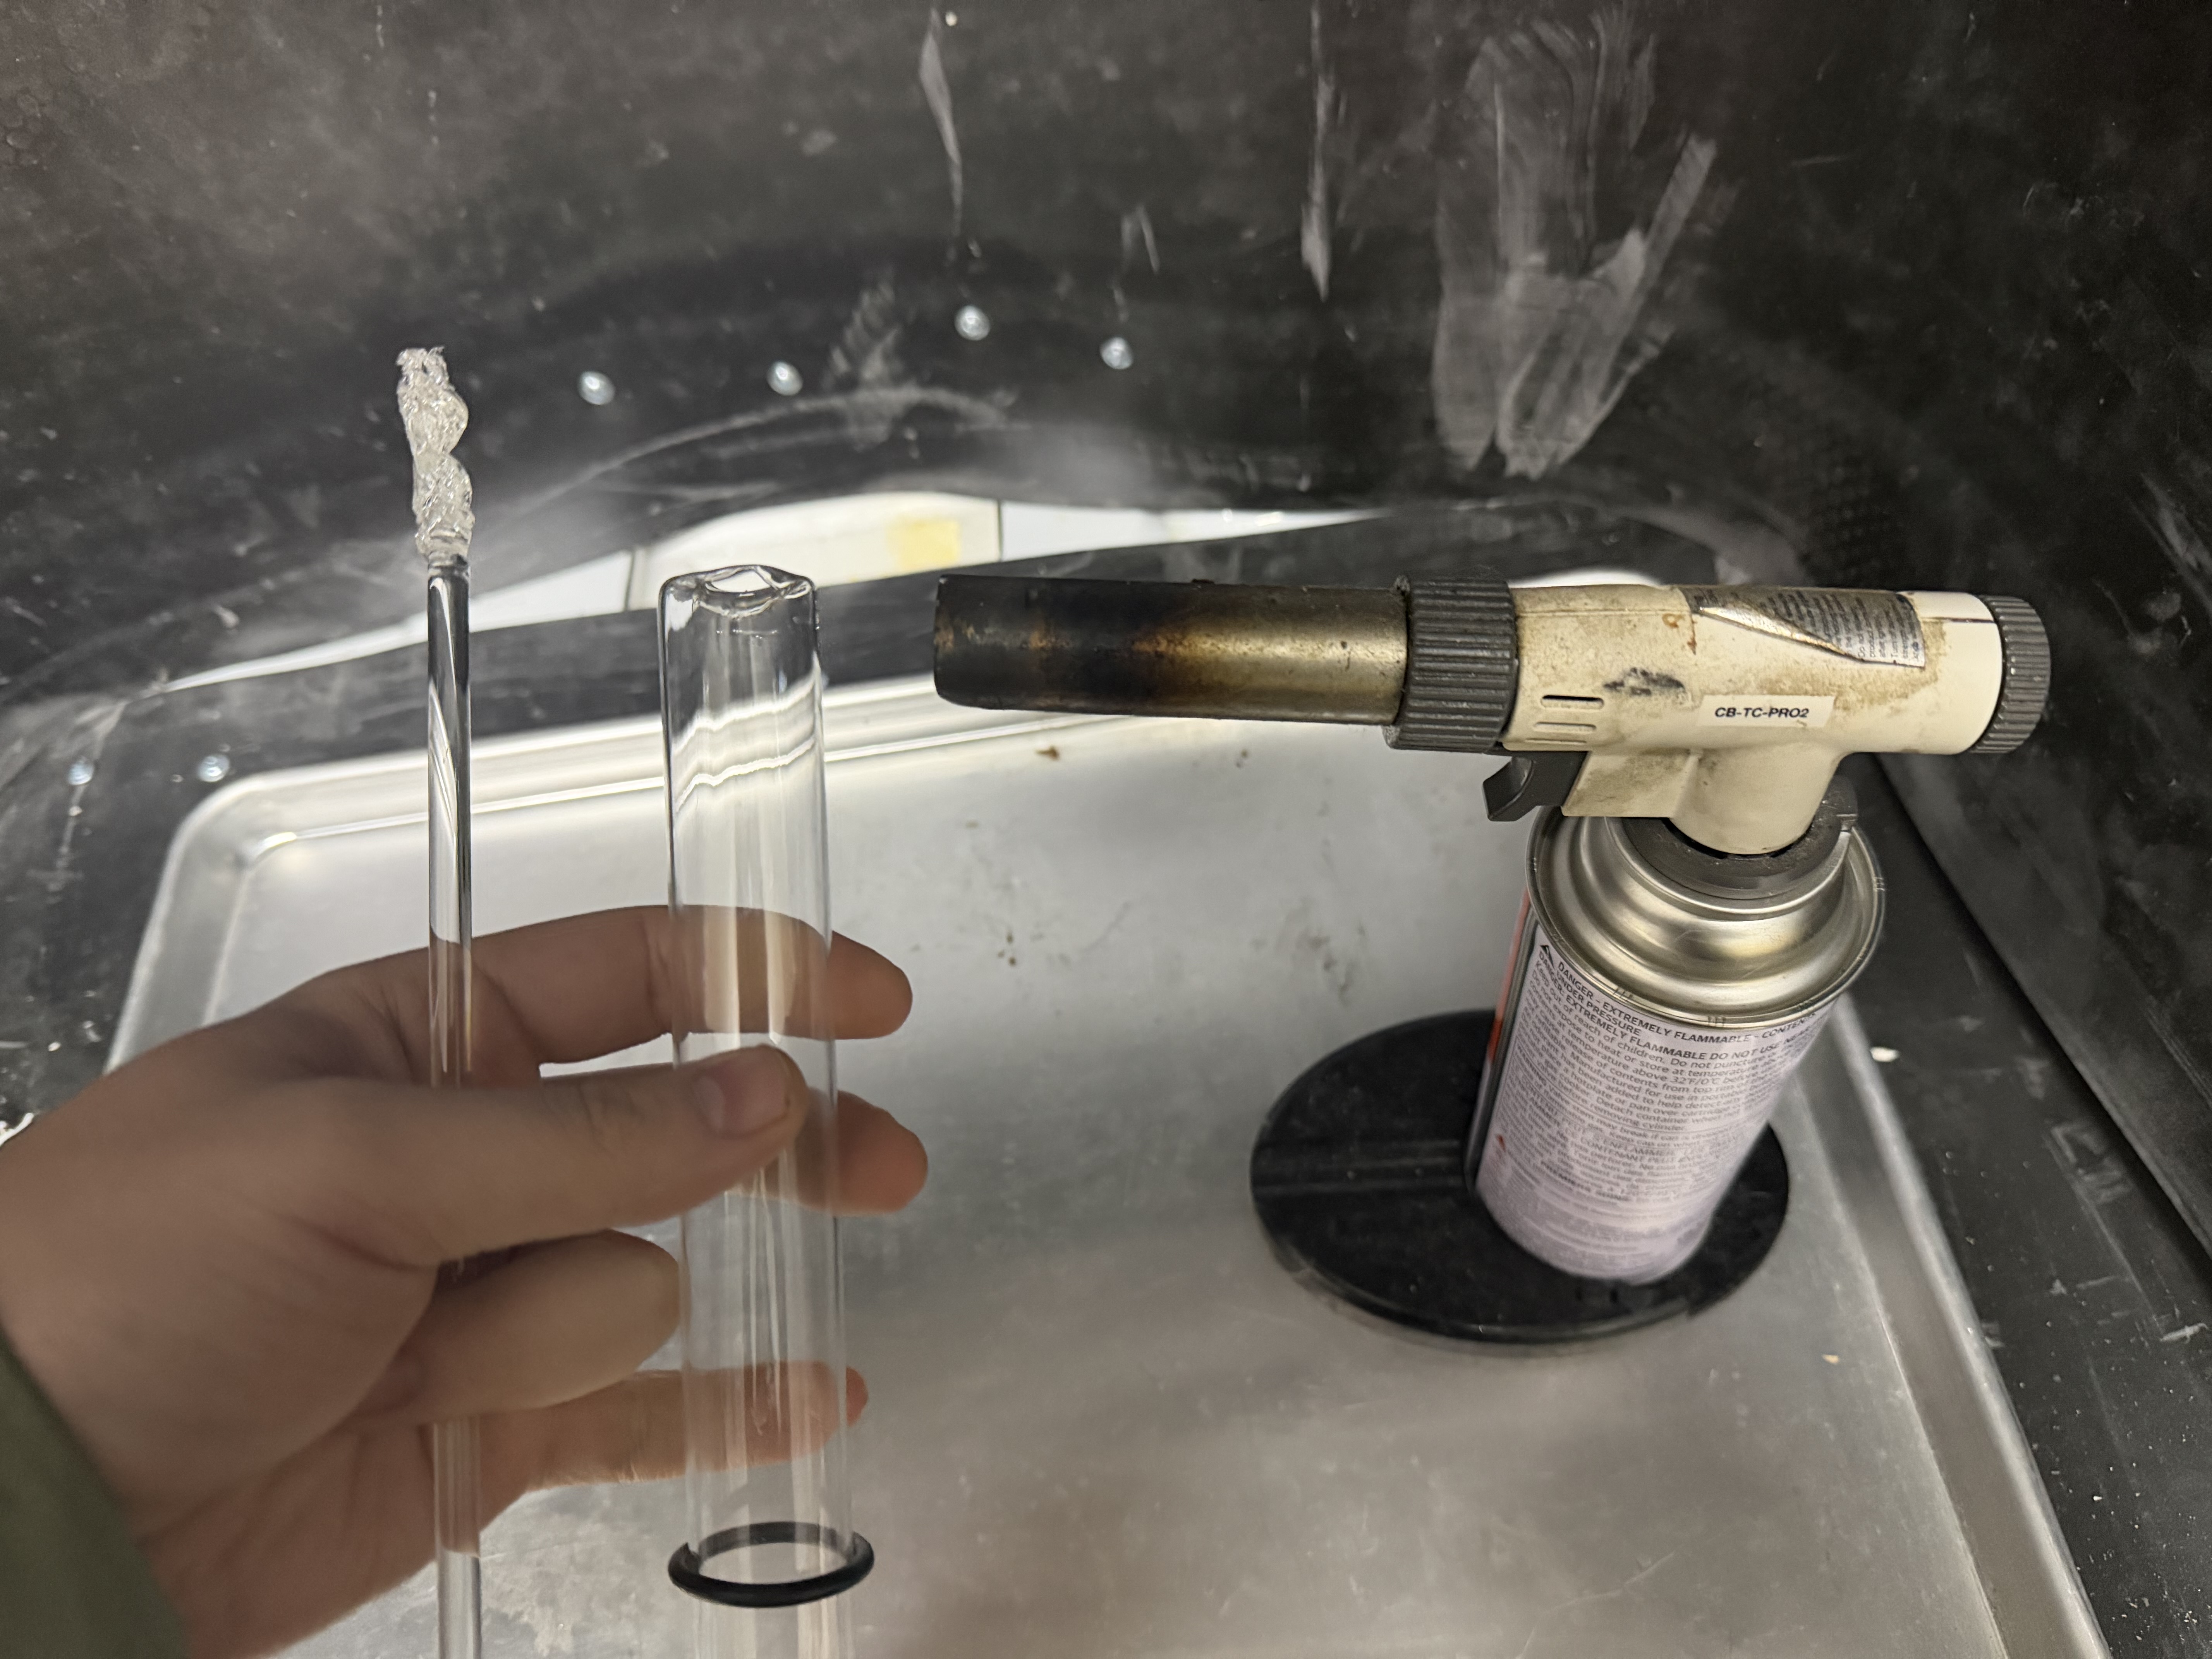
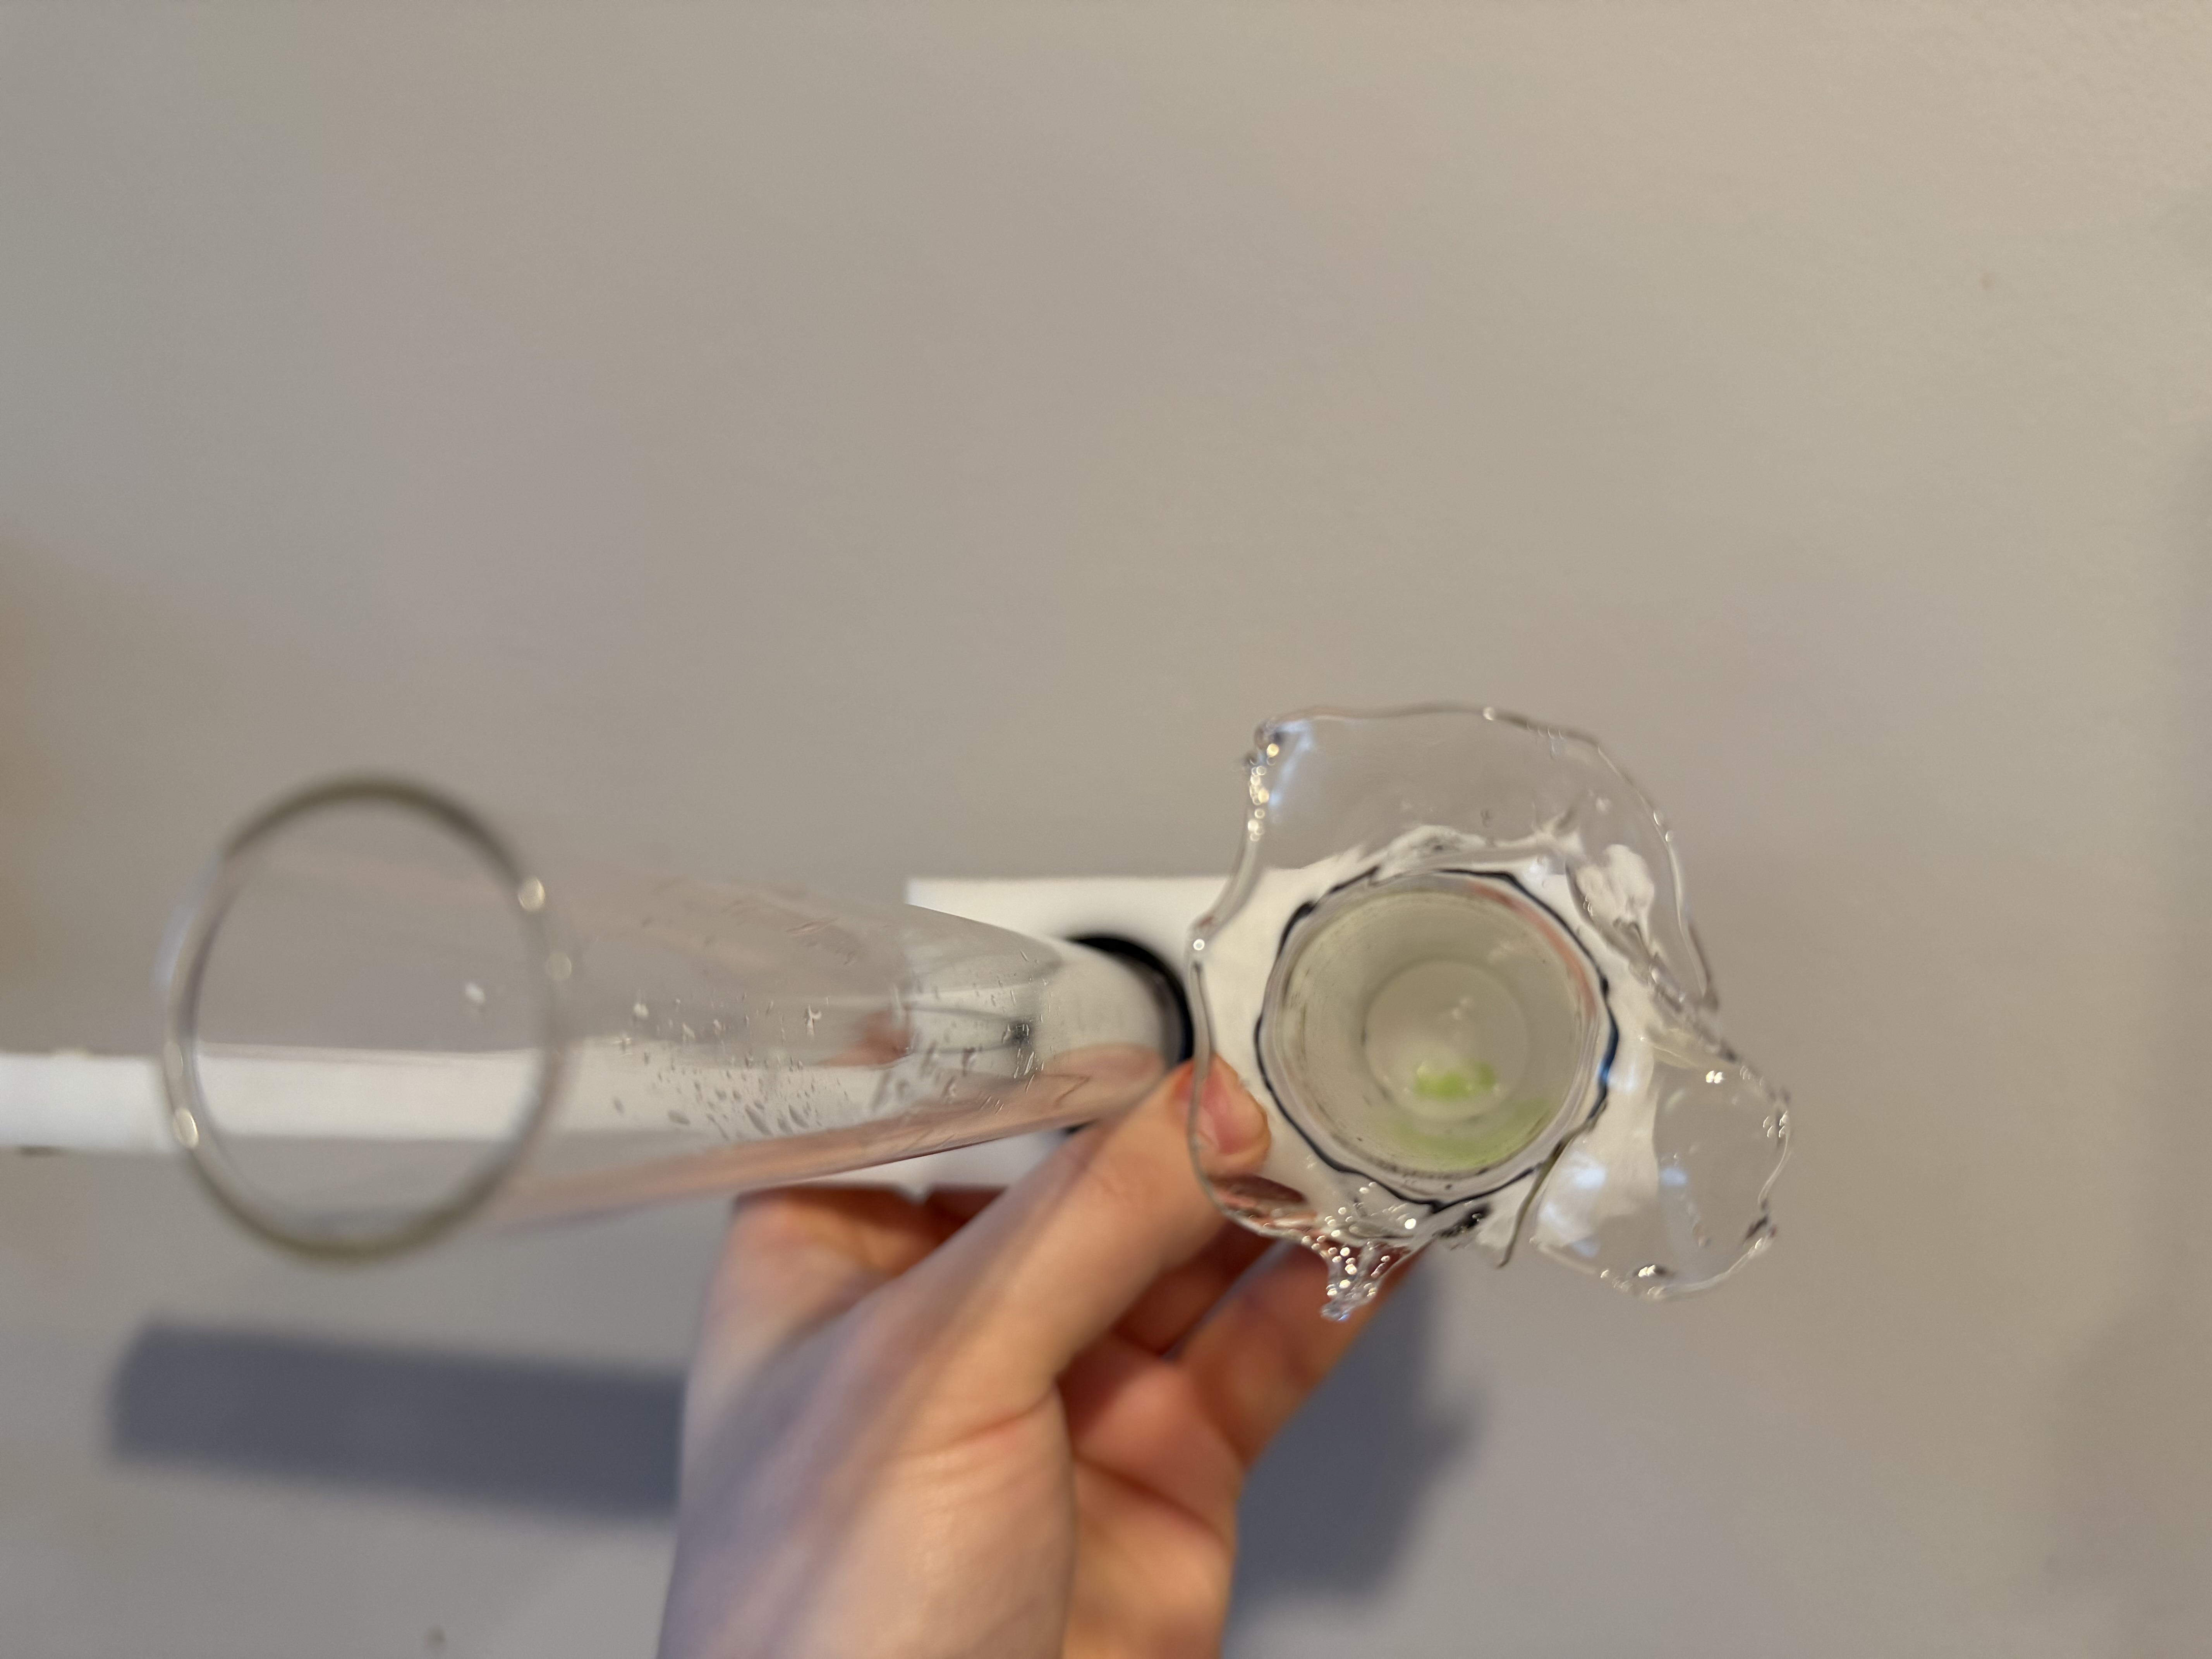
I was gearing up to grind some glass, I’ve done plenty of glass cutting and drilling to be comfortable with it. But then I saw a squirrel…and that squirrel looked an awful lot like a torch.
So I figured I’d try my hand at heated glass working.
Not terrible for a first attempt. I fully expected it to shatter and prepared as much. Full face shield, apron, blast chamber, the whole 9 yards
Turns out there was no fuss, it took about a minute, and it worked well enough that it might warrant a metal form tool to poke the hole consistently.
Glass working is one of those things I’ve been wanting to try for a very long time. You ever have the feeling that you just know you’re going to love something in an unhealthy way? That’s glassblowing for me…and this experience just proved that’s still the case. It was absurdly fun in all the right ways
Earlier I had recommended cypress and that is a valid choice. However I forgot about white oak. White oak is what they made sailing ships out of because of its rot resistance. White oak may be easier to get than more exotic woods. Red oak will rot easily so make sure it is white oak.
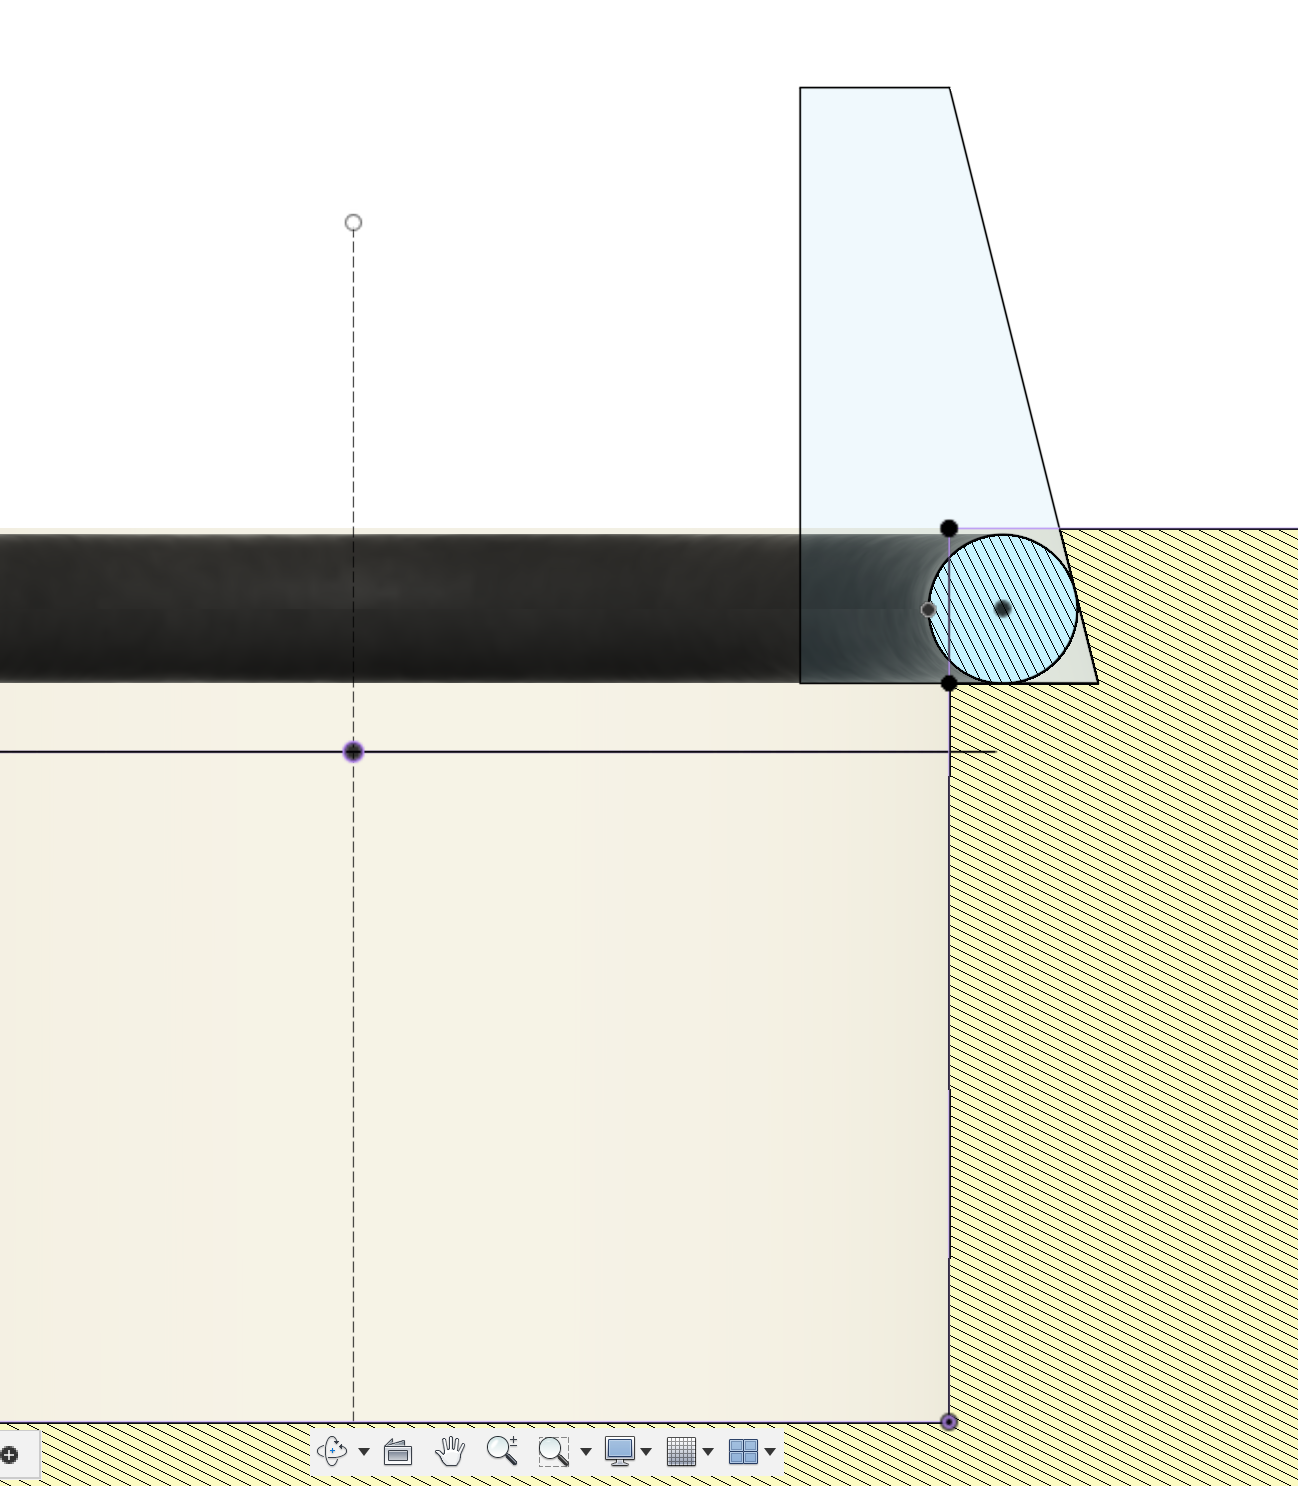
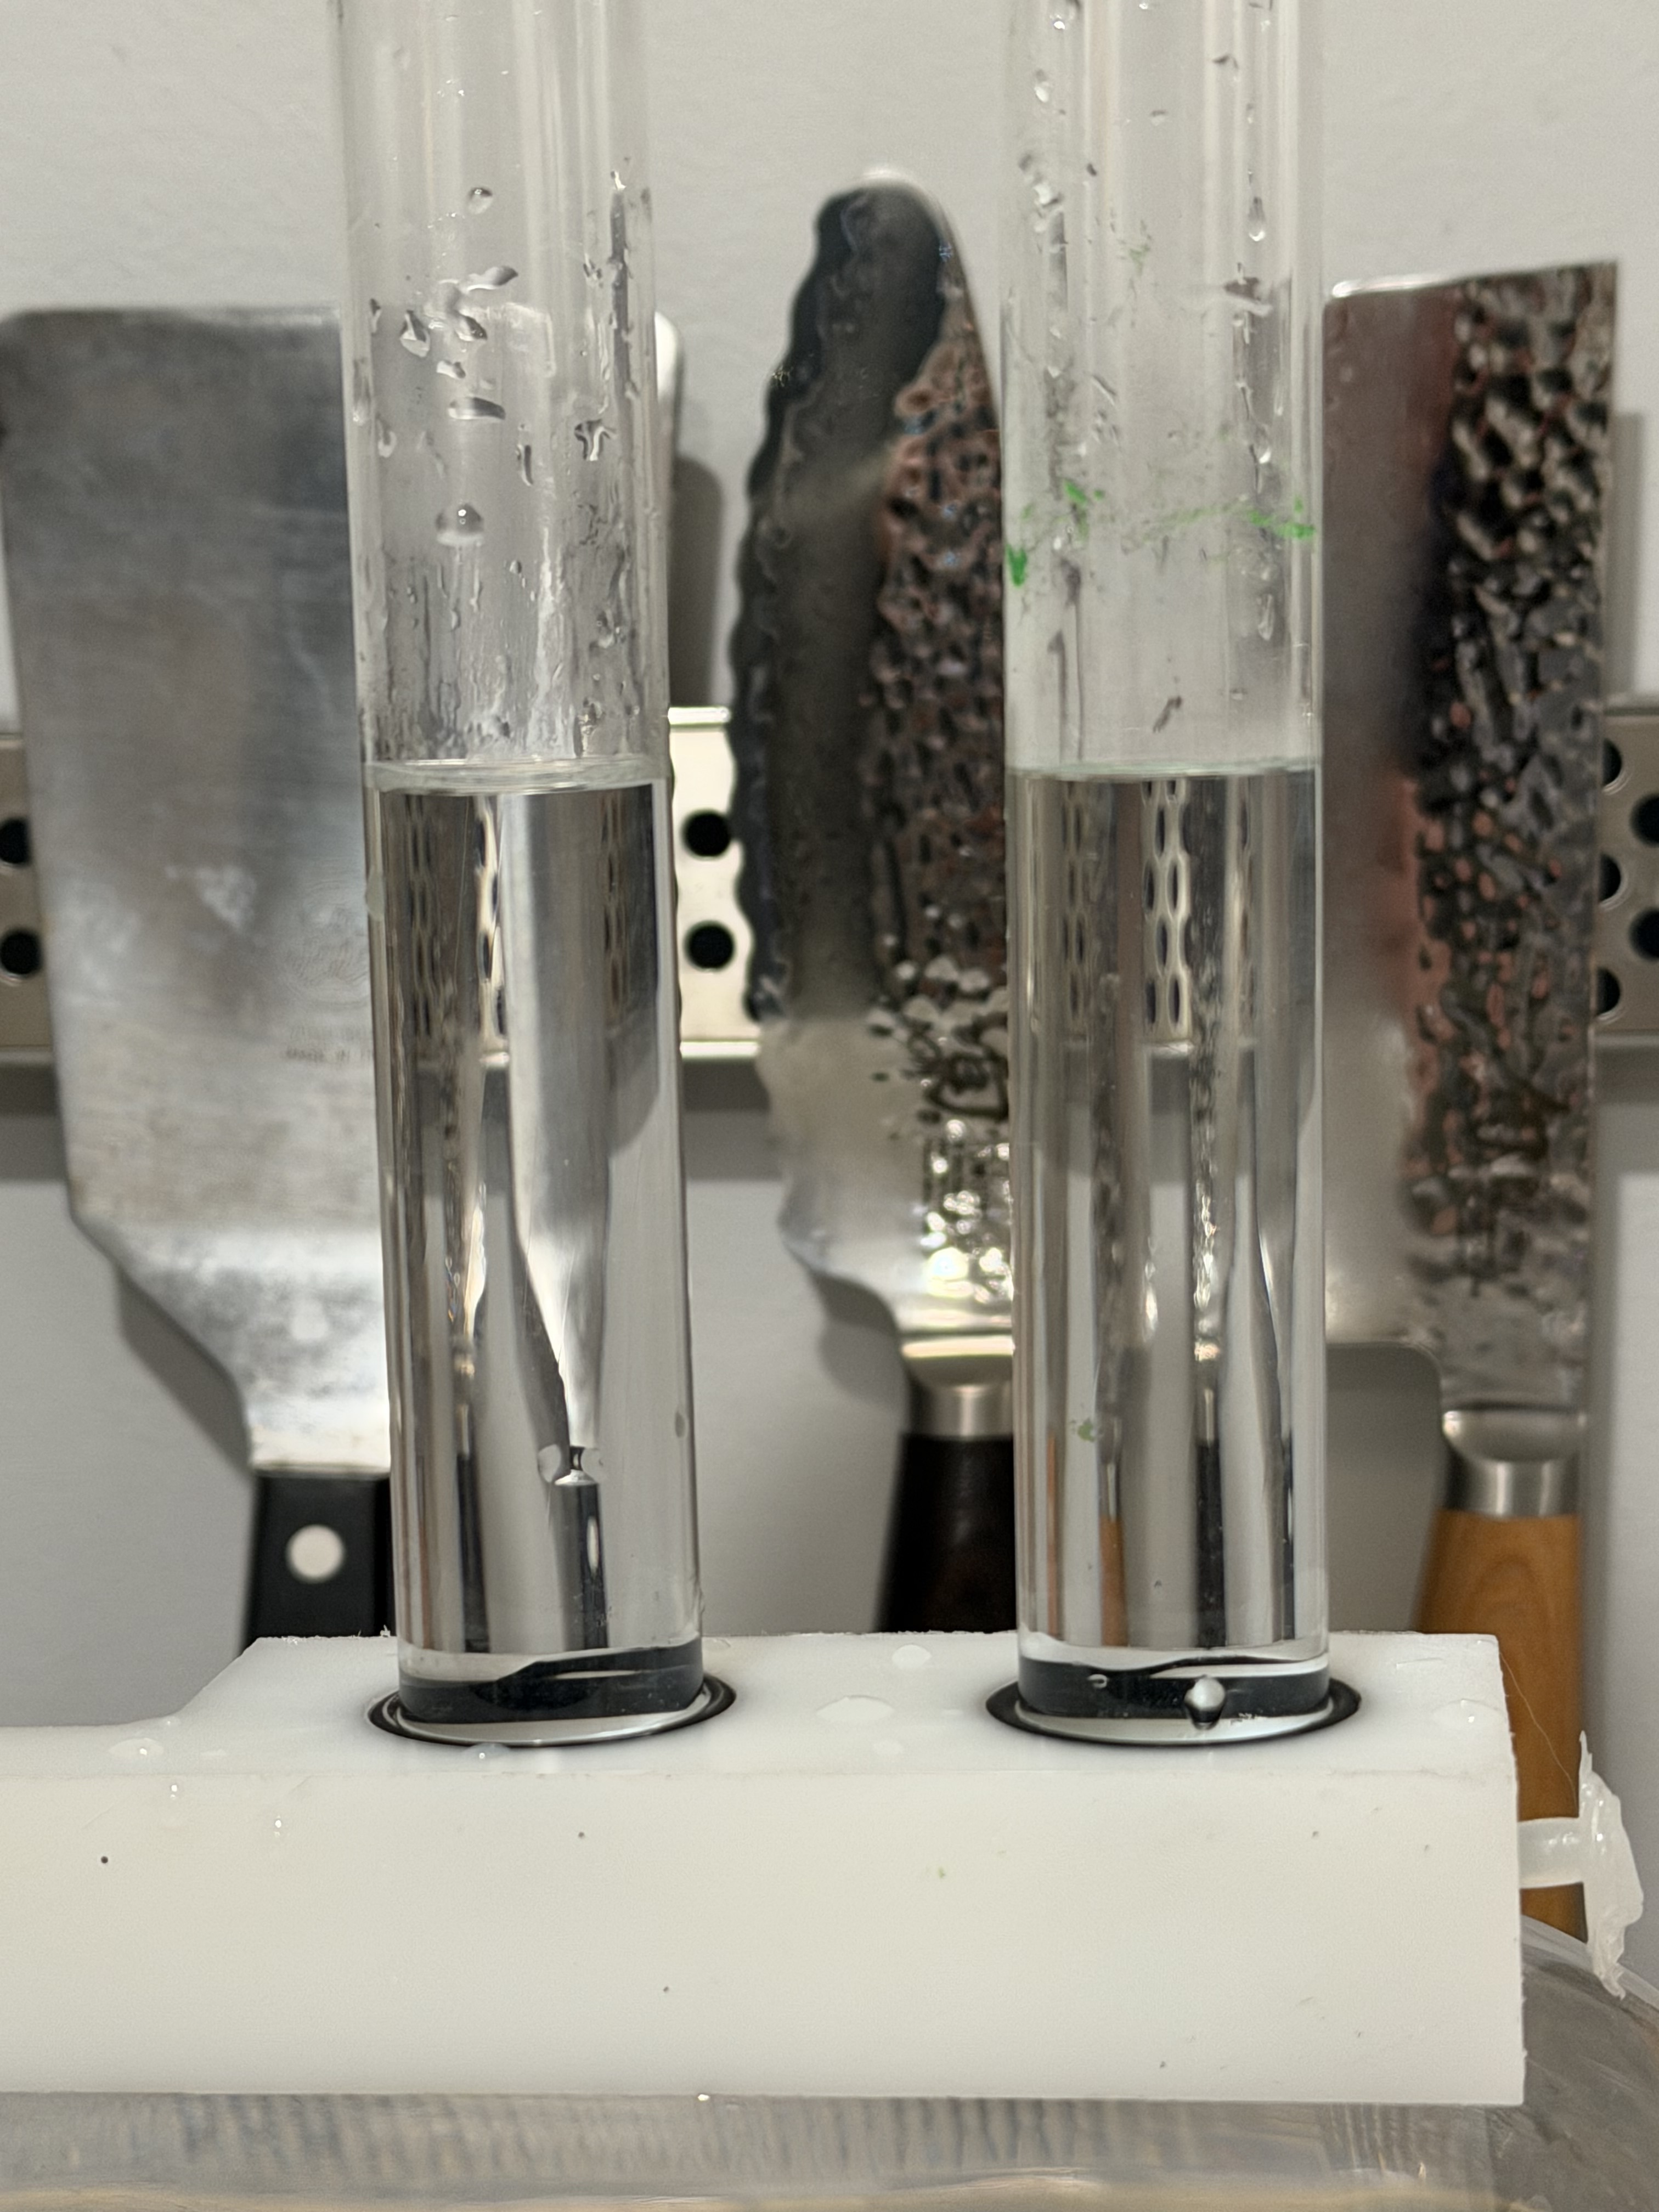
So the bottom block is essentially just a manifold connecting each tube. This means we can throw a drain on the manifold and simply use any tube as a fill spout. The head of each tube will level off automagically because physics.
This means the top section would simply be for aesthetics.
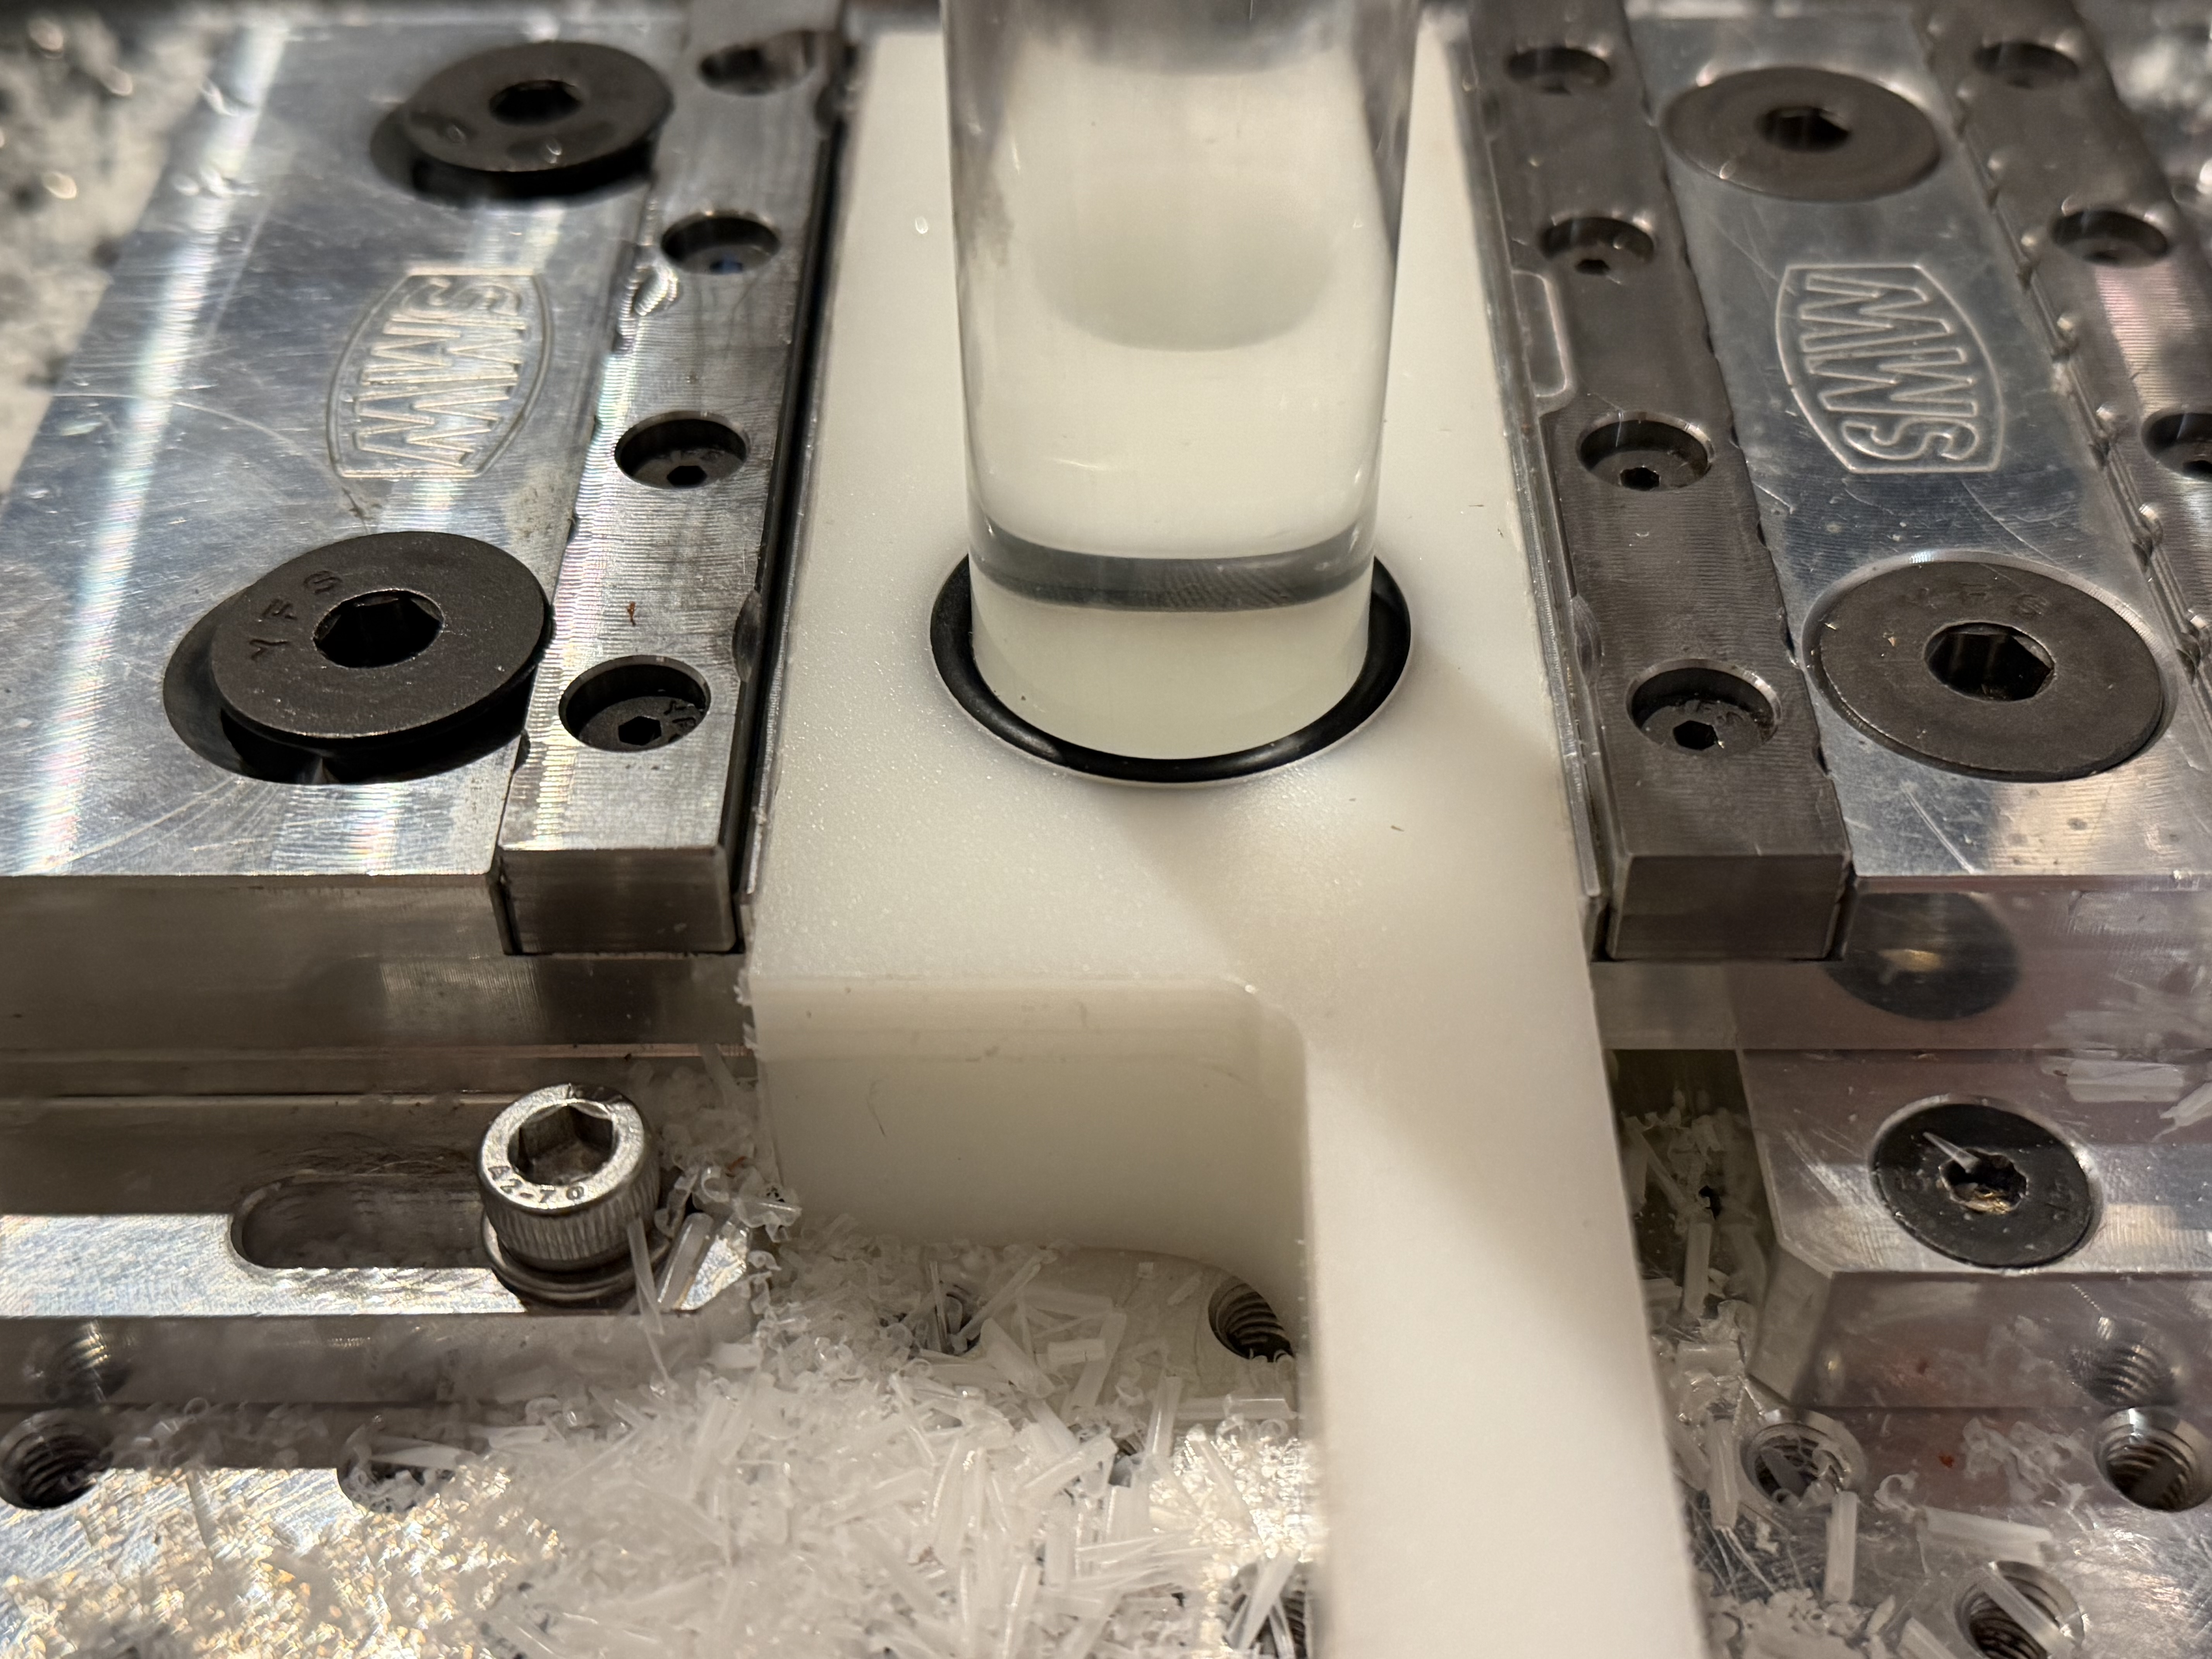
I am going to try out this bottom manifold idea with a chunk of hdpe and just see how it would for a week or so. If it proves itself out functionally, I’ll start thinking about the aesthetic more.
We’re pivoting to the bottom manifold being cut in two pieces and having integrated seals all around since it’s easy enough to do in hdpe.
A proper aesthetic piece would likely be in wood with a bit of gasket in between like a vacuum table. Maybe some nice brass hardware to provide compression.
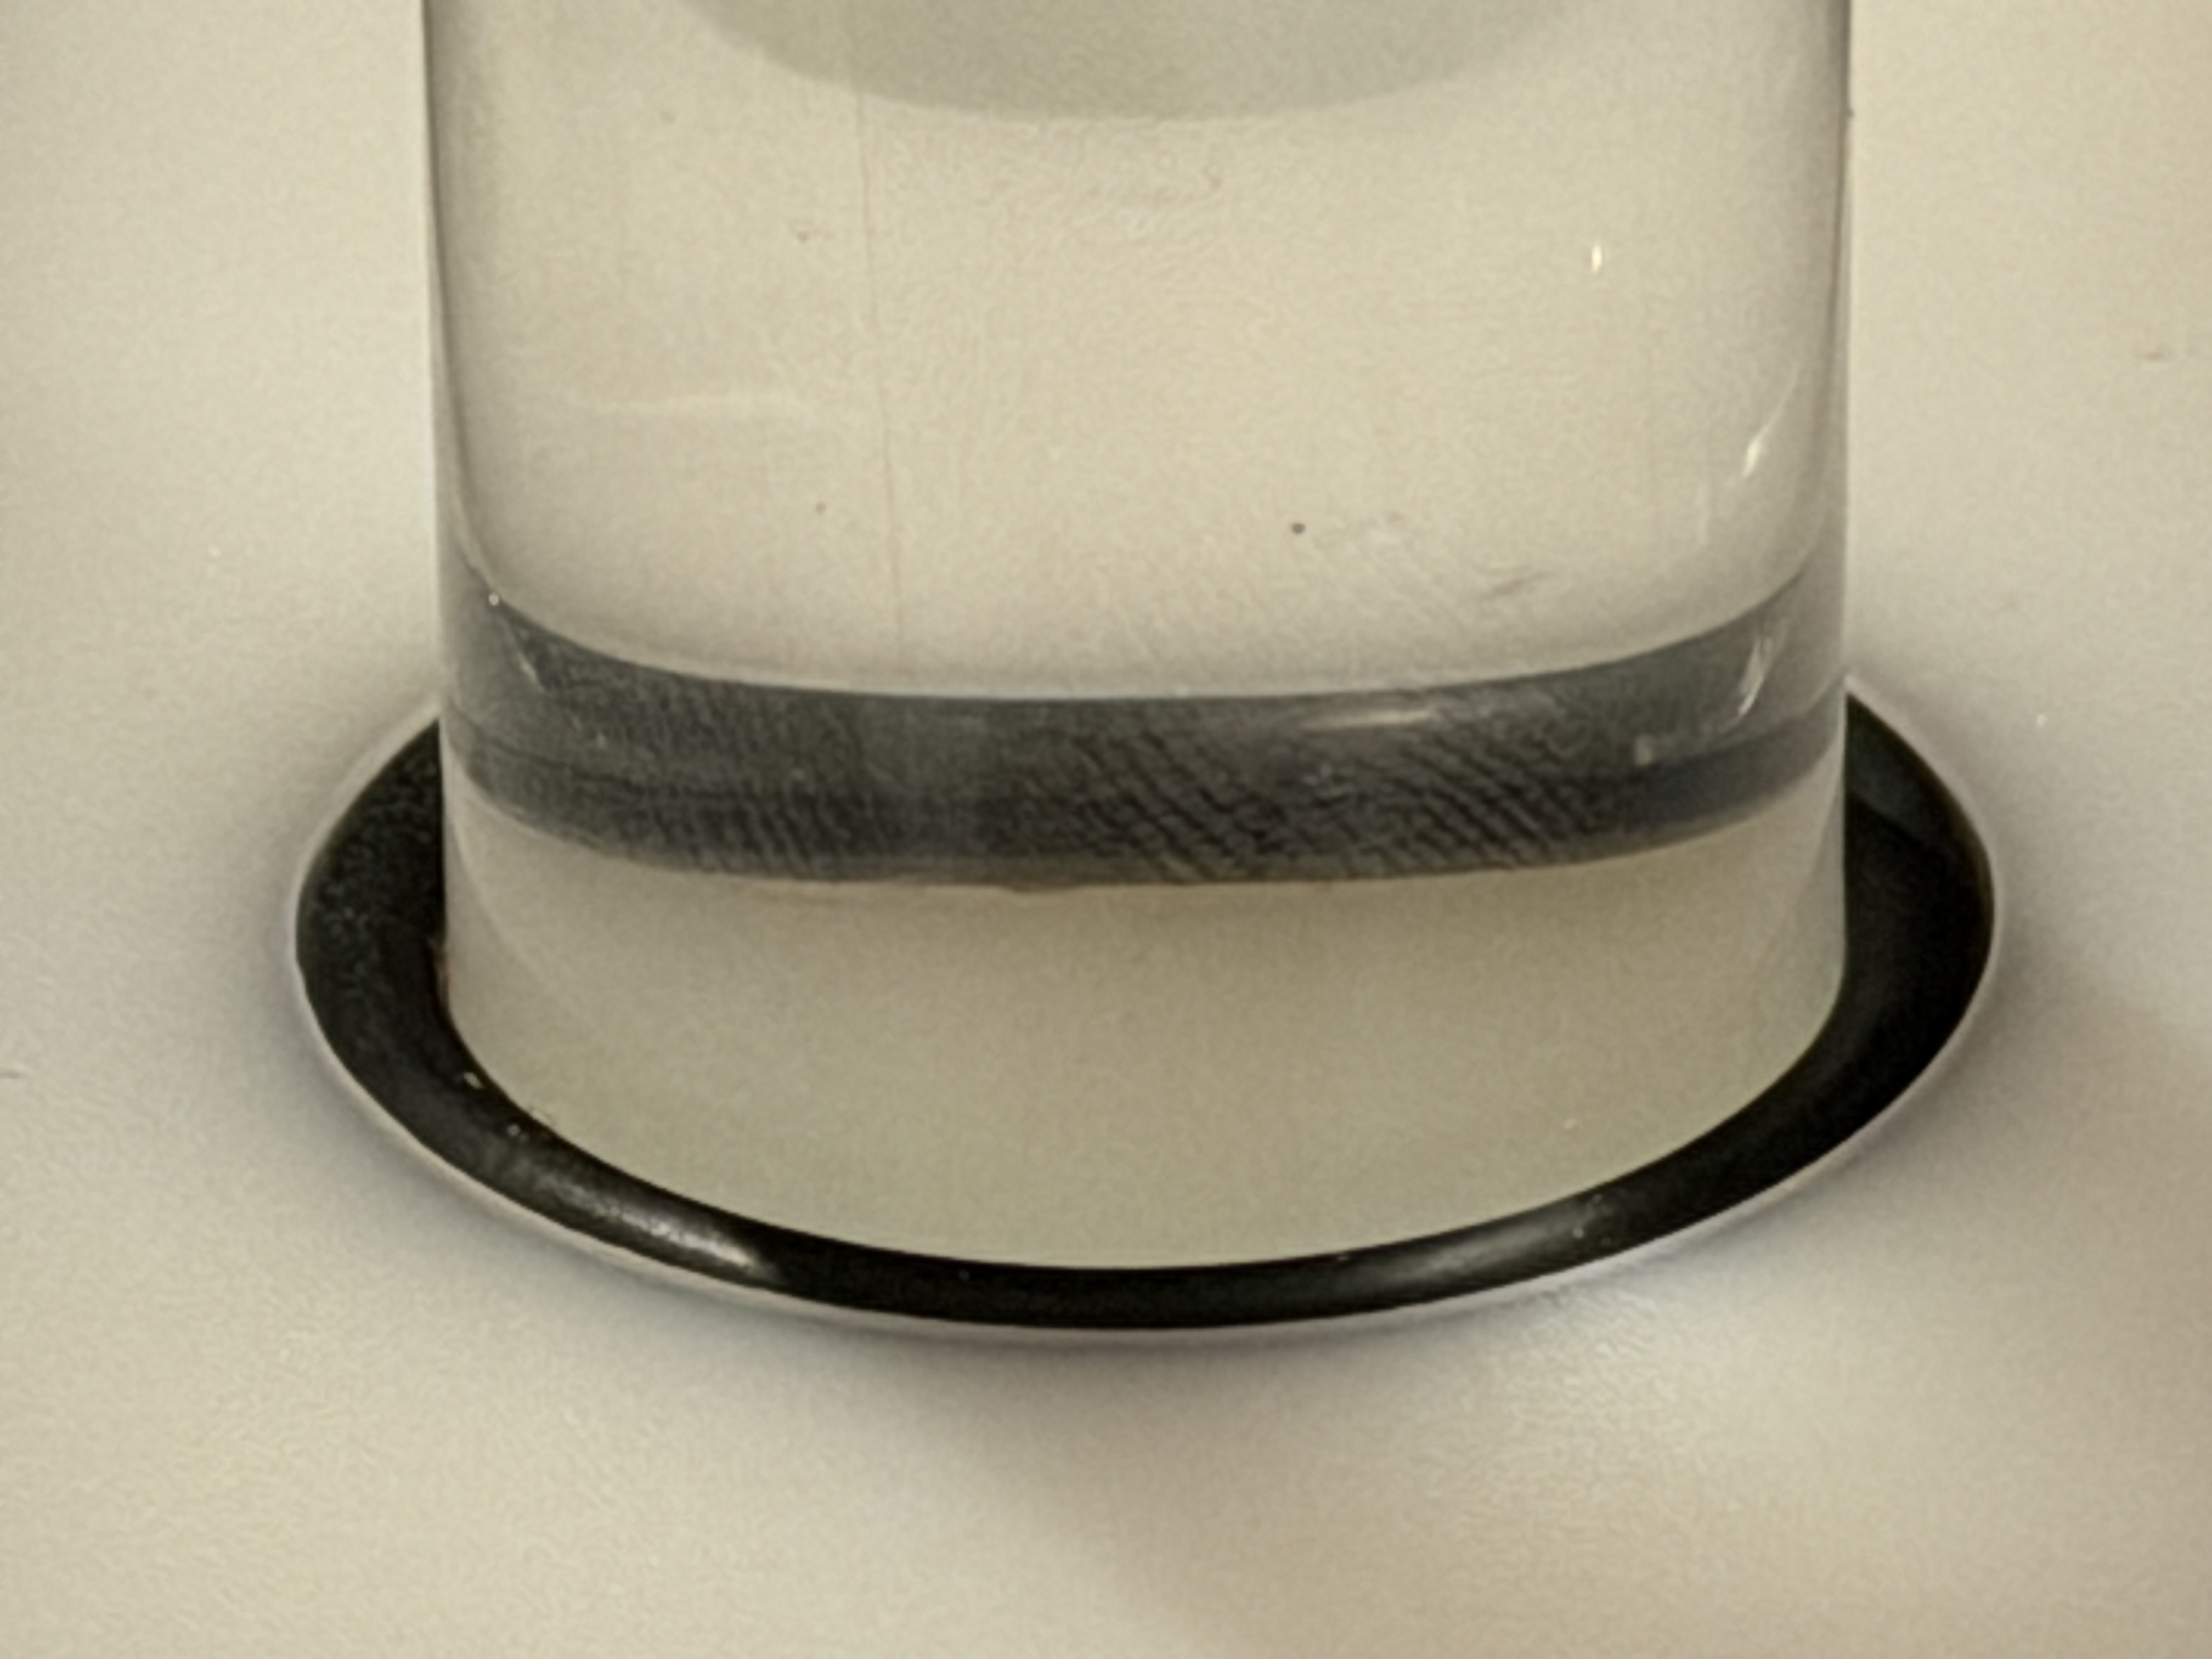
And another small pivot, I tried the 14 degree dovetail as a groove cutter for the 1/8" nitrile o-ring.
It worked out pretty well! There is about 1mm of compression on the o-ring, some of the compression can be in the z axis as the dovetail provides some relief.
Water leveling works as expected. For a quick prototype hot glue makes a fine removable drain plug.
Proof of concept is done, not bad for a lazy Sunday.
I mean, it’s not terribly hard to believe that a gasket holds water but let’s still celebrate the small victories
I believe my recollection is correct when I recall that Texas post oak was secretly used to build “Old Ironsides” way back in the day. Perhaps I should have searched, but I’m headed into my nightly shutdown!
I think I’ve decided on the general theme for my piece. It’ll be free standing and look something like a small landscape/terrarium.
The bottom piece will still be a single manifold with gaskets for each tube. The water reservoir will probably look something like a little lake on a small mountain to get the head height where it needs to be.
There will be an overflow path that looks like a little water fall. This will make filling a little more enjoyable as overfilling will simply result in a nice trickle down the fall into a designated area…instead of an annoying mess.
I haven’t done much wood carving with rotary tools so I picked up some kutzall carbide burrs. The plan is to power carve the scene into the wooden manifold. A simple winding creek, maybe with some epoxy to act as the water.
Preserved moss and stones will help add depth.
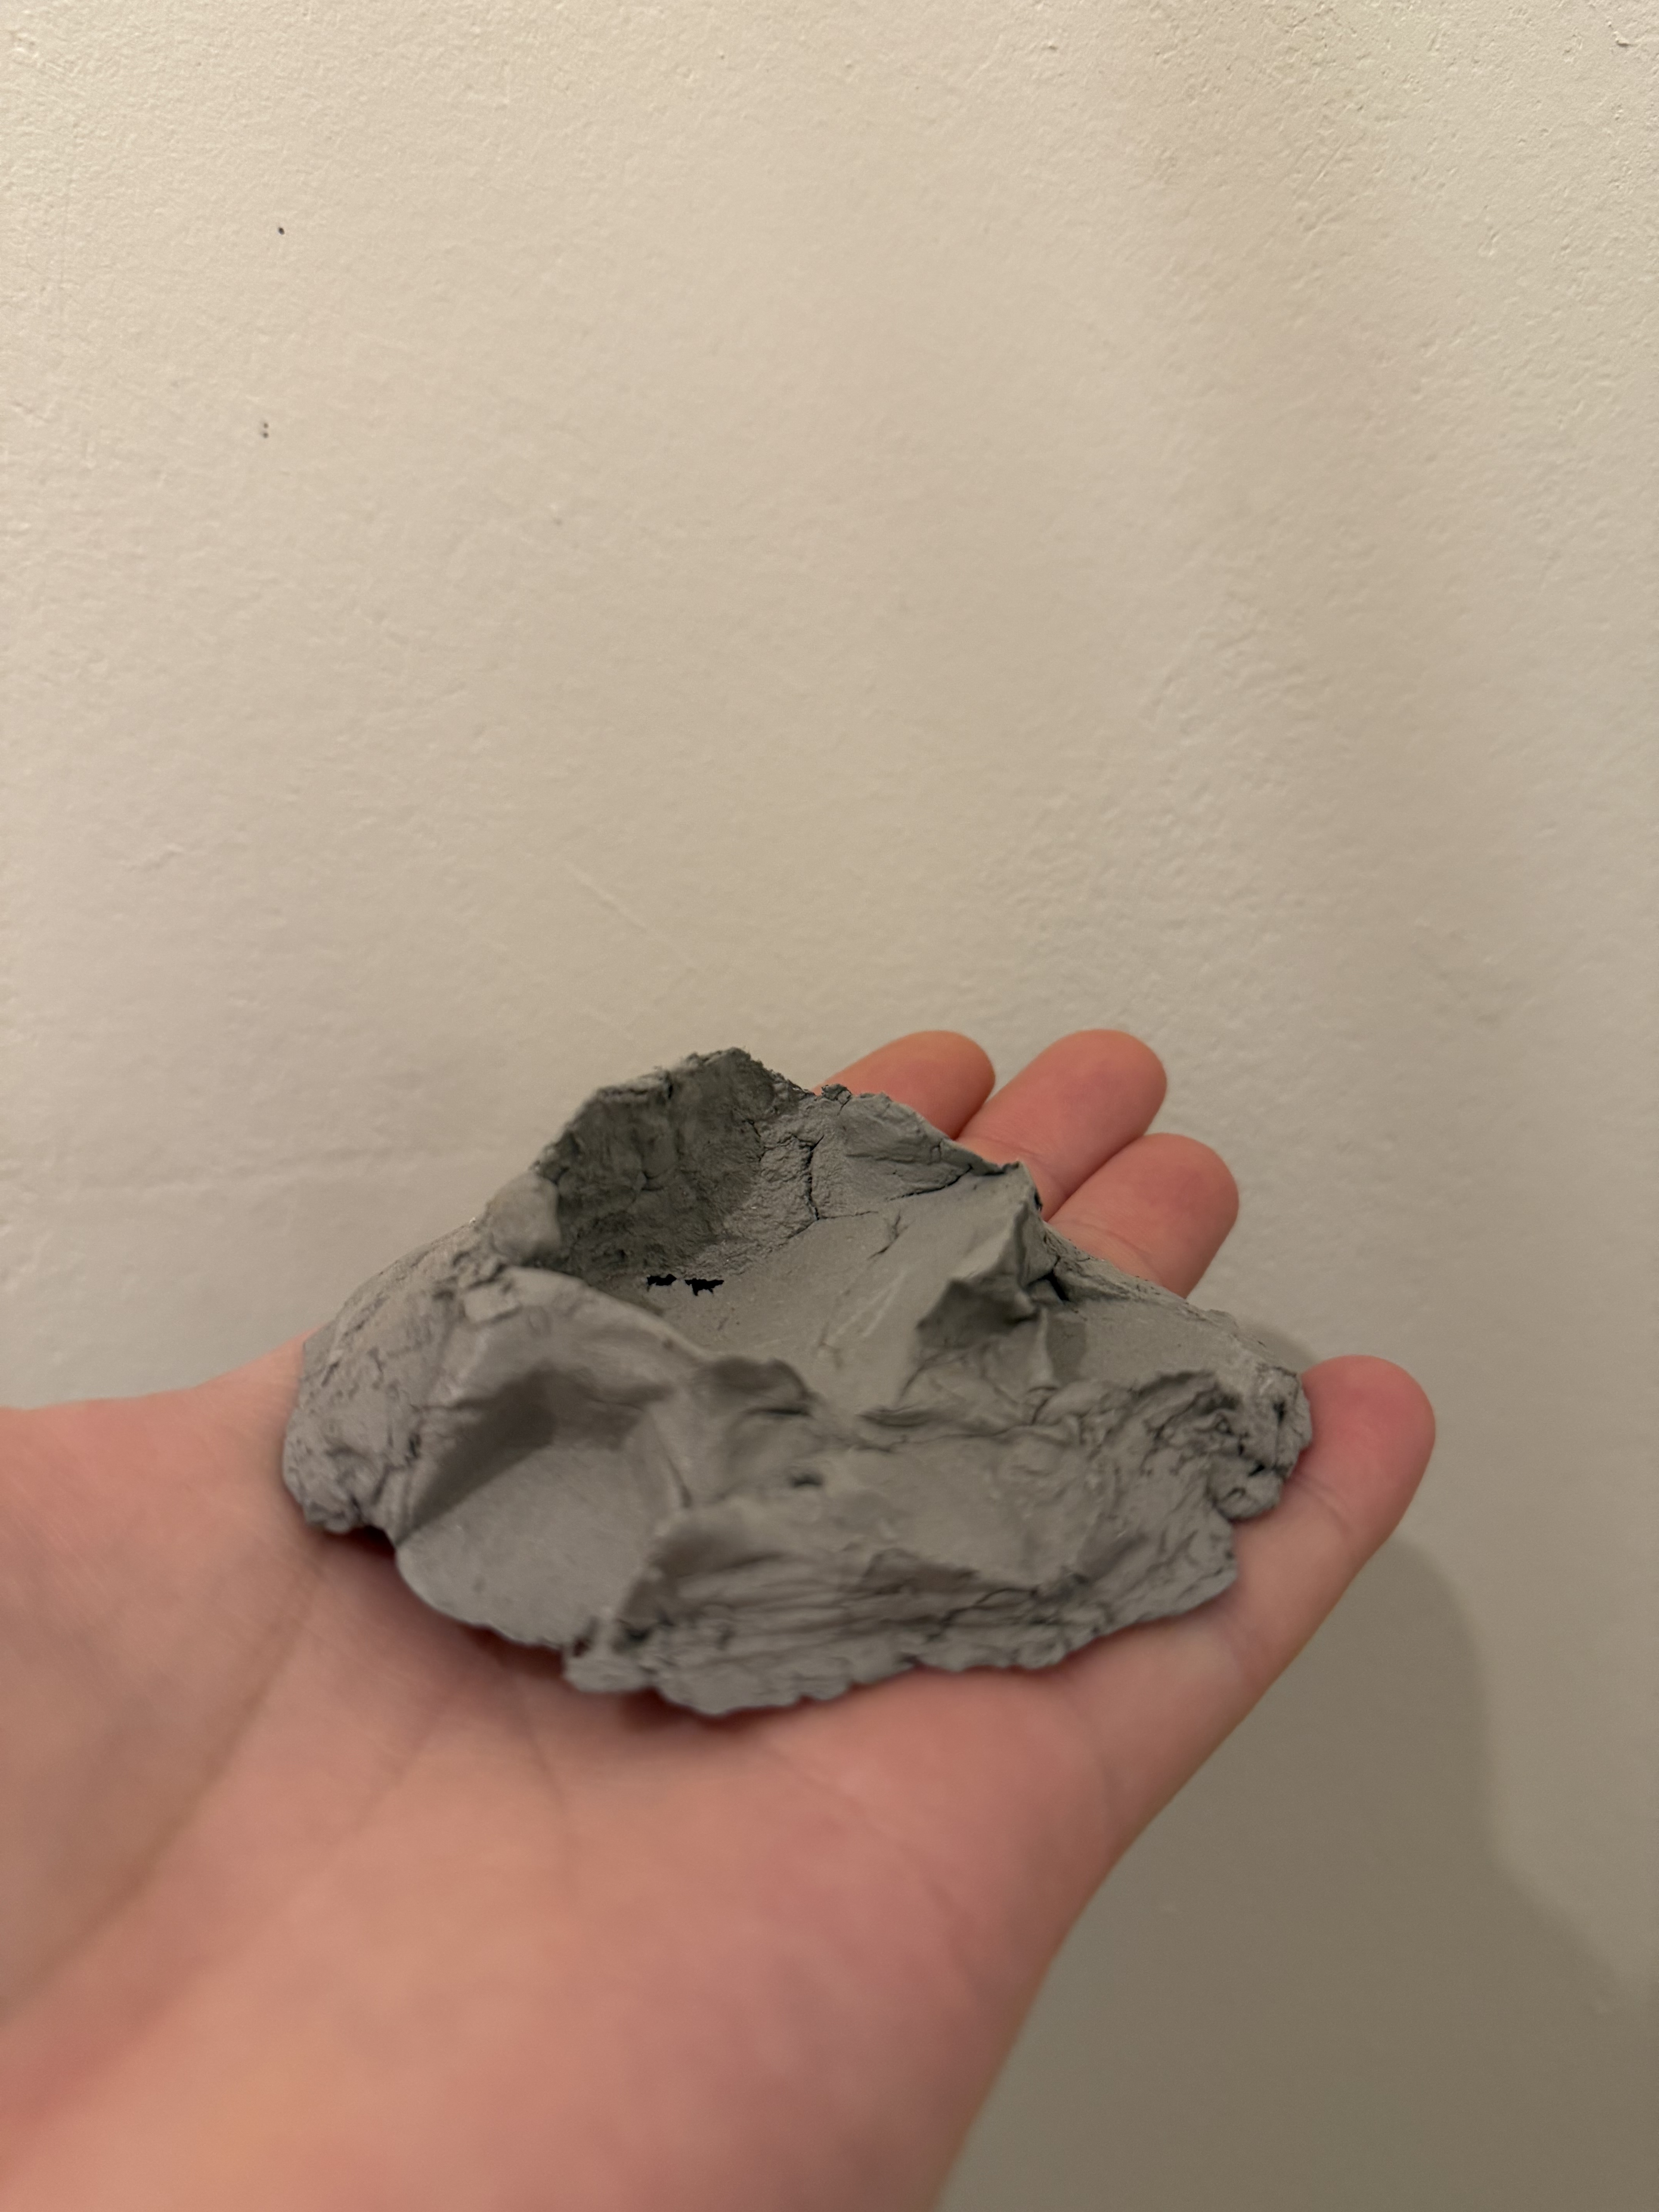
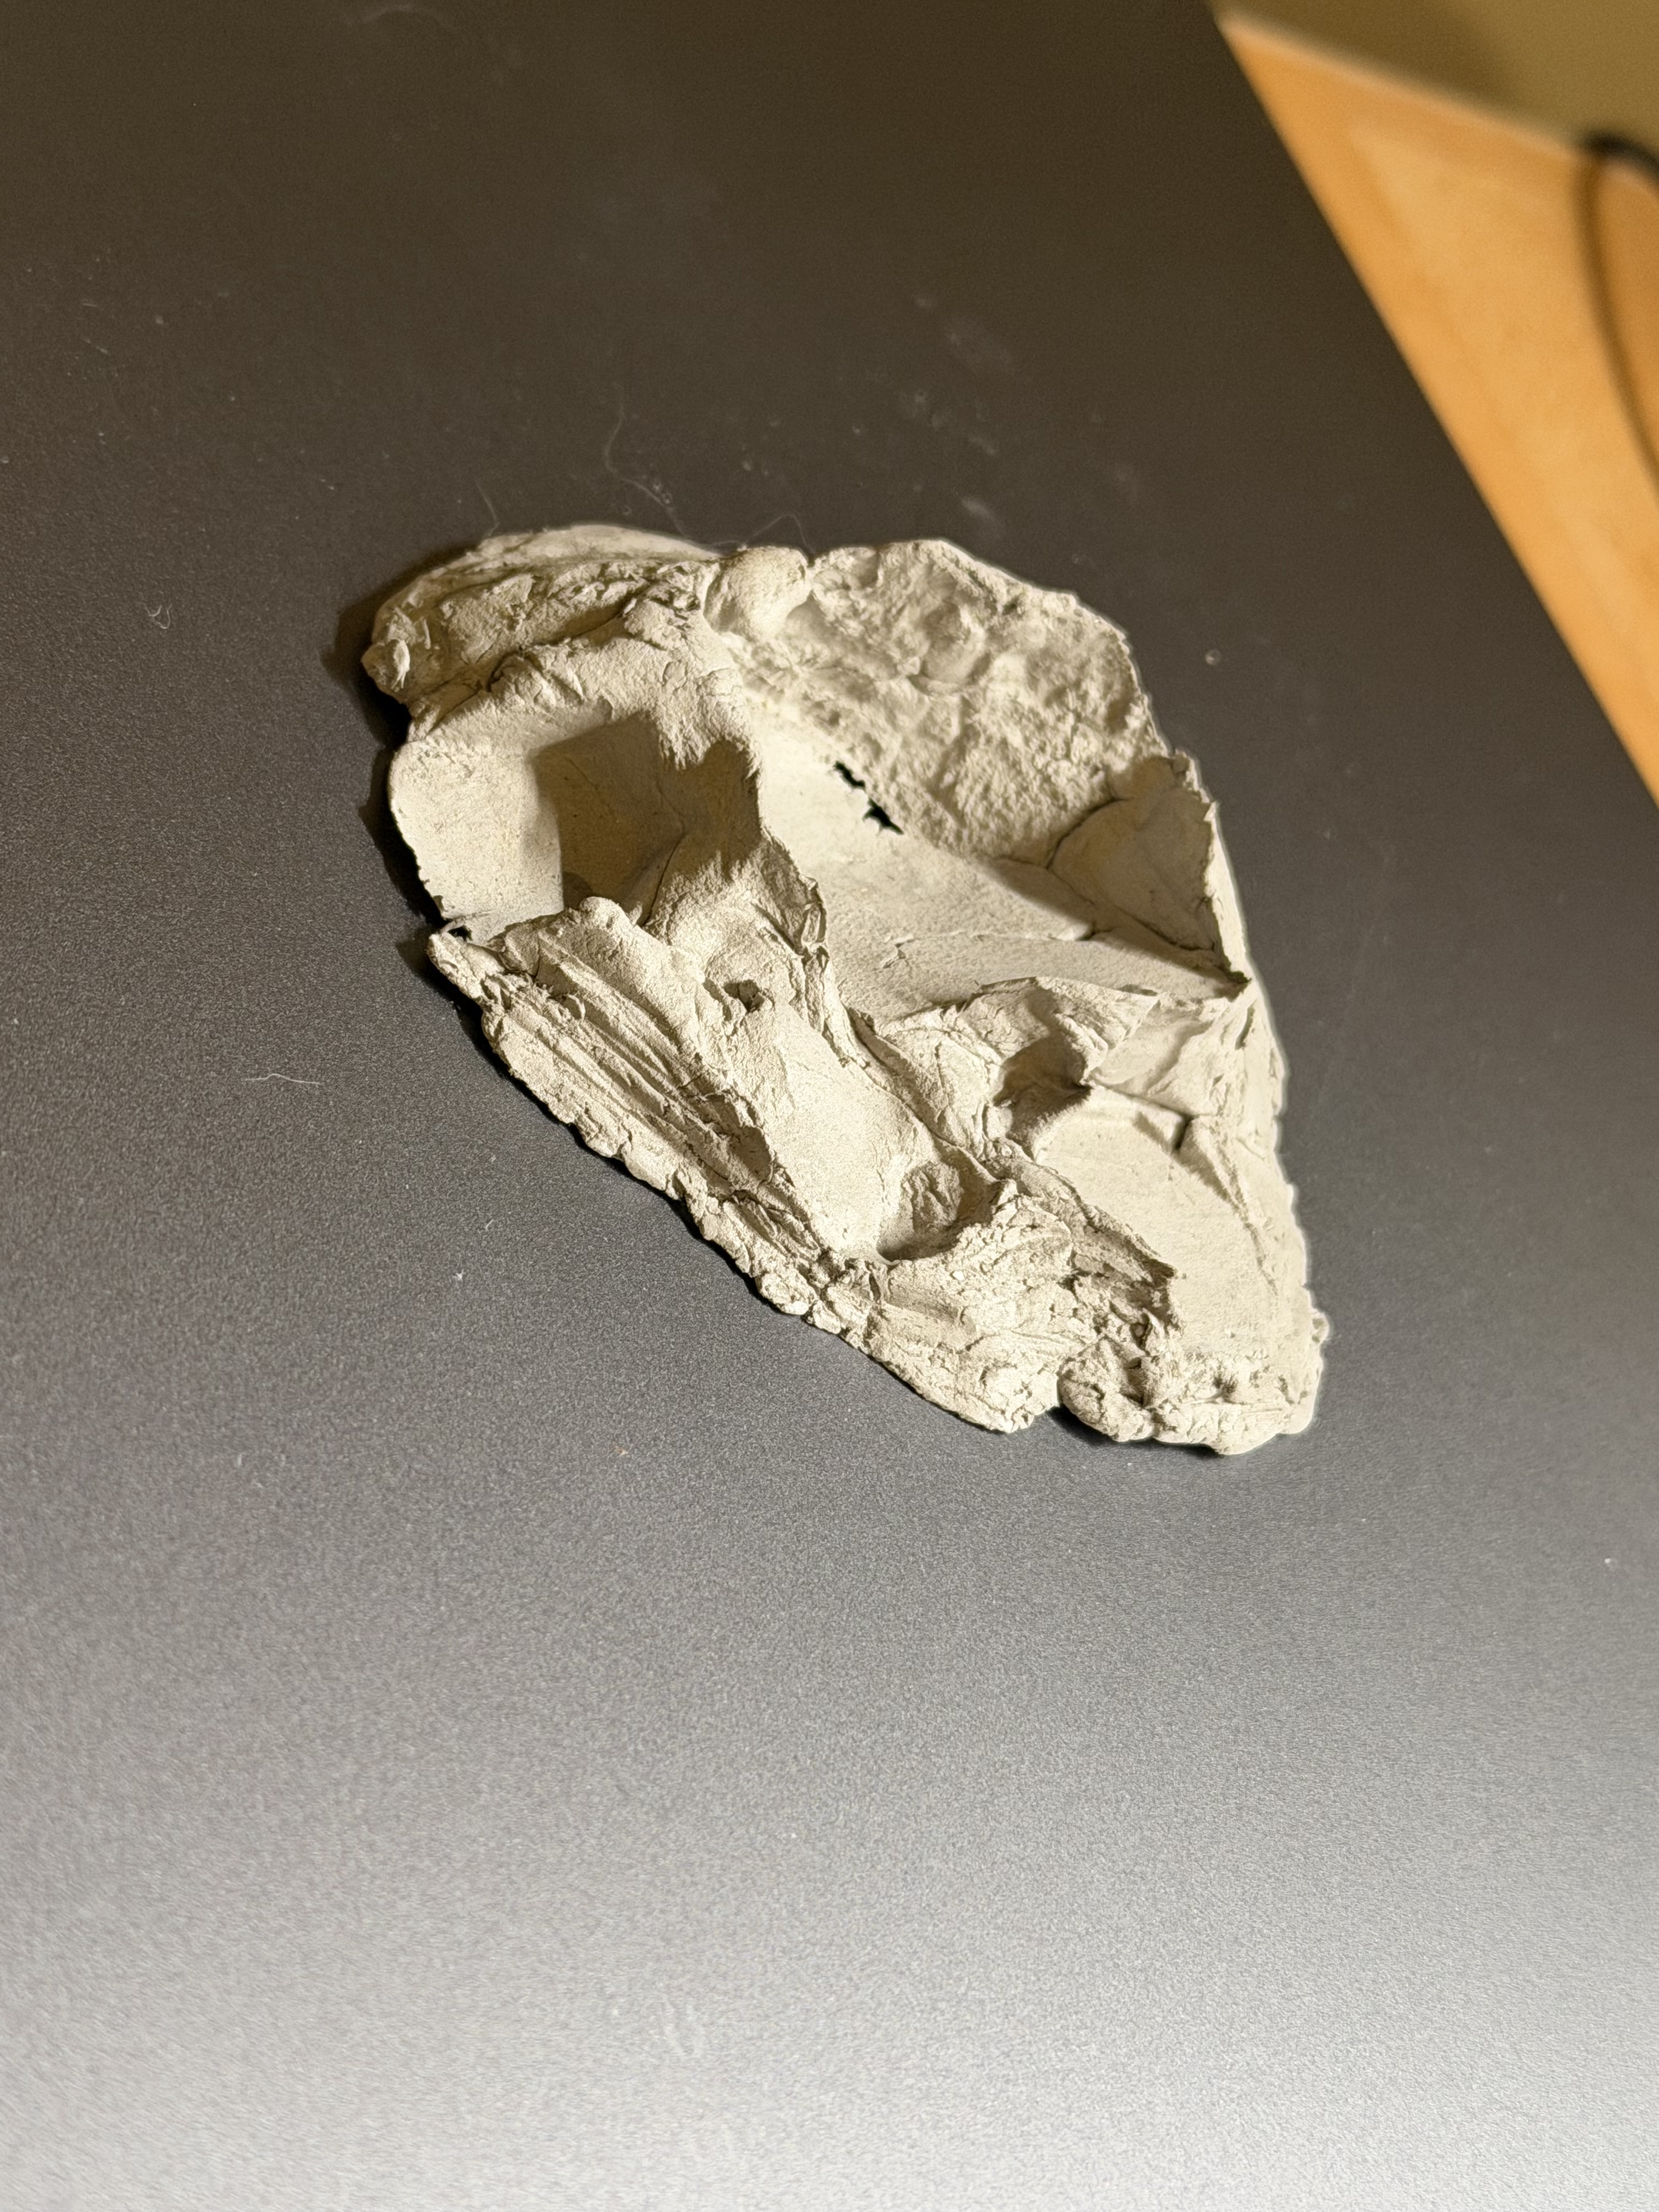
I’ve had good results with das stone modeling clay for small sculpted stonework so I’ll probably use that wherever it’s necessary. Here’s a photo that doesn’t do the product justice but it still gives an idea:
For the glass tubes, I’ll probably go with 1” diameter and 6” long.
Over lunch I tried to flare the top of a tube to give it sort of flower petals. It went OK for having no idea what I’m doing.
A friend and I going to take some glass working classes in the new year so this will probably become a thing I integrate more often
PSA: I’ll say that hot glass is an awful lot like hot plastic when working with injection molds. It looks like a lot of things that you might be used to handling. The comparison most folks use is hot glue.
Hot glue is plenty hot but it’s still somewhat workable by hand…who here can say they haven’t shaped cooling hot melt glue with their bare hands
The danger is that glass and plastics look and to some extent behave similarly to hot melt. The real difference being that glass and plastics burn you instantly and can stick to you while continuing to burn.
In playing with this flower tube, I cracked a piece of the glass while forming it. The small shard bounced off my hand leaving two instant blisters. (Again, full face shield and apron, I just don’t like gloves if I can avoid them)
I’m not trying to scare anyone away from exploring. Just know what the hazards are before firing up a torch
Thanks to everyone for the suggestions on wood and materials. I’ll try to remember to update this thread as the project progresses
Sounds like you have a pretty solid idea of what you want. I like to throw wrenches around now and again to spice things up a bit, so here is one for you to ponder.
Take a look at the Japanese fire-proofing method for wood that is called Shou Sugi Ban, which involves charring the wood’s surface with fire, then brushing off the soot, and sometimes oiling it, to create a durable, weather-resistant, insect-proof, and fire-retardant finish that seals out moisture and rot, preserving the wood naturally for decades.
How it works:
Charring: The wood (usually cedar) is burned using a blowtorch or a traditional flue method, creating a layer of carbon.
Brushing: A wire brush is used to remove the loose, flaky charcoal, revealing the textured grain beneath.
Finishing (Optional): The wood can then be sealed with natural oils like linseed oil to enhance its color and provide extra protection, though it’s naturally durable without it.
Benefits:
Waterproof & Rot Resistant: The carbon layer repels water and prevents mold and rot.
Insect Repellent: It deters pests like termites.
Fire Retardant: The charred surface lacks the oils needed to ignite easily.
Durable: Can last 30-40 years or even longer with proper care.
Aesthetic: Creates a unique, beautiful dark finish that highlights the wood grain.
I have used this for outdoor projects and siding on sheds up here in the PNW. The oldest project is 8 years old and has zero signs of wear or water damage. Just my two Pennie’s to throw out there.