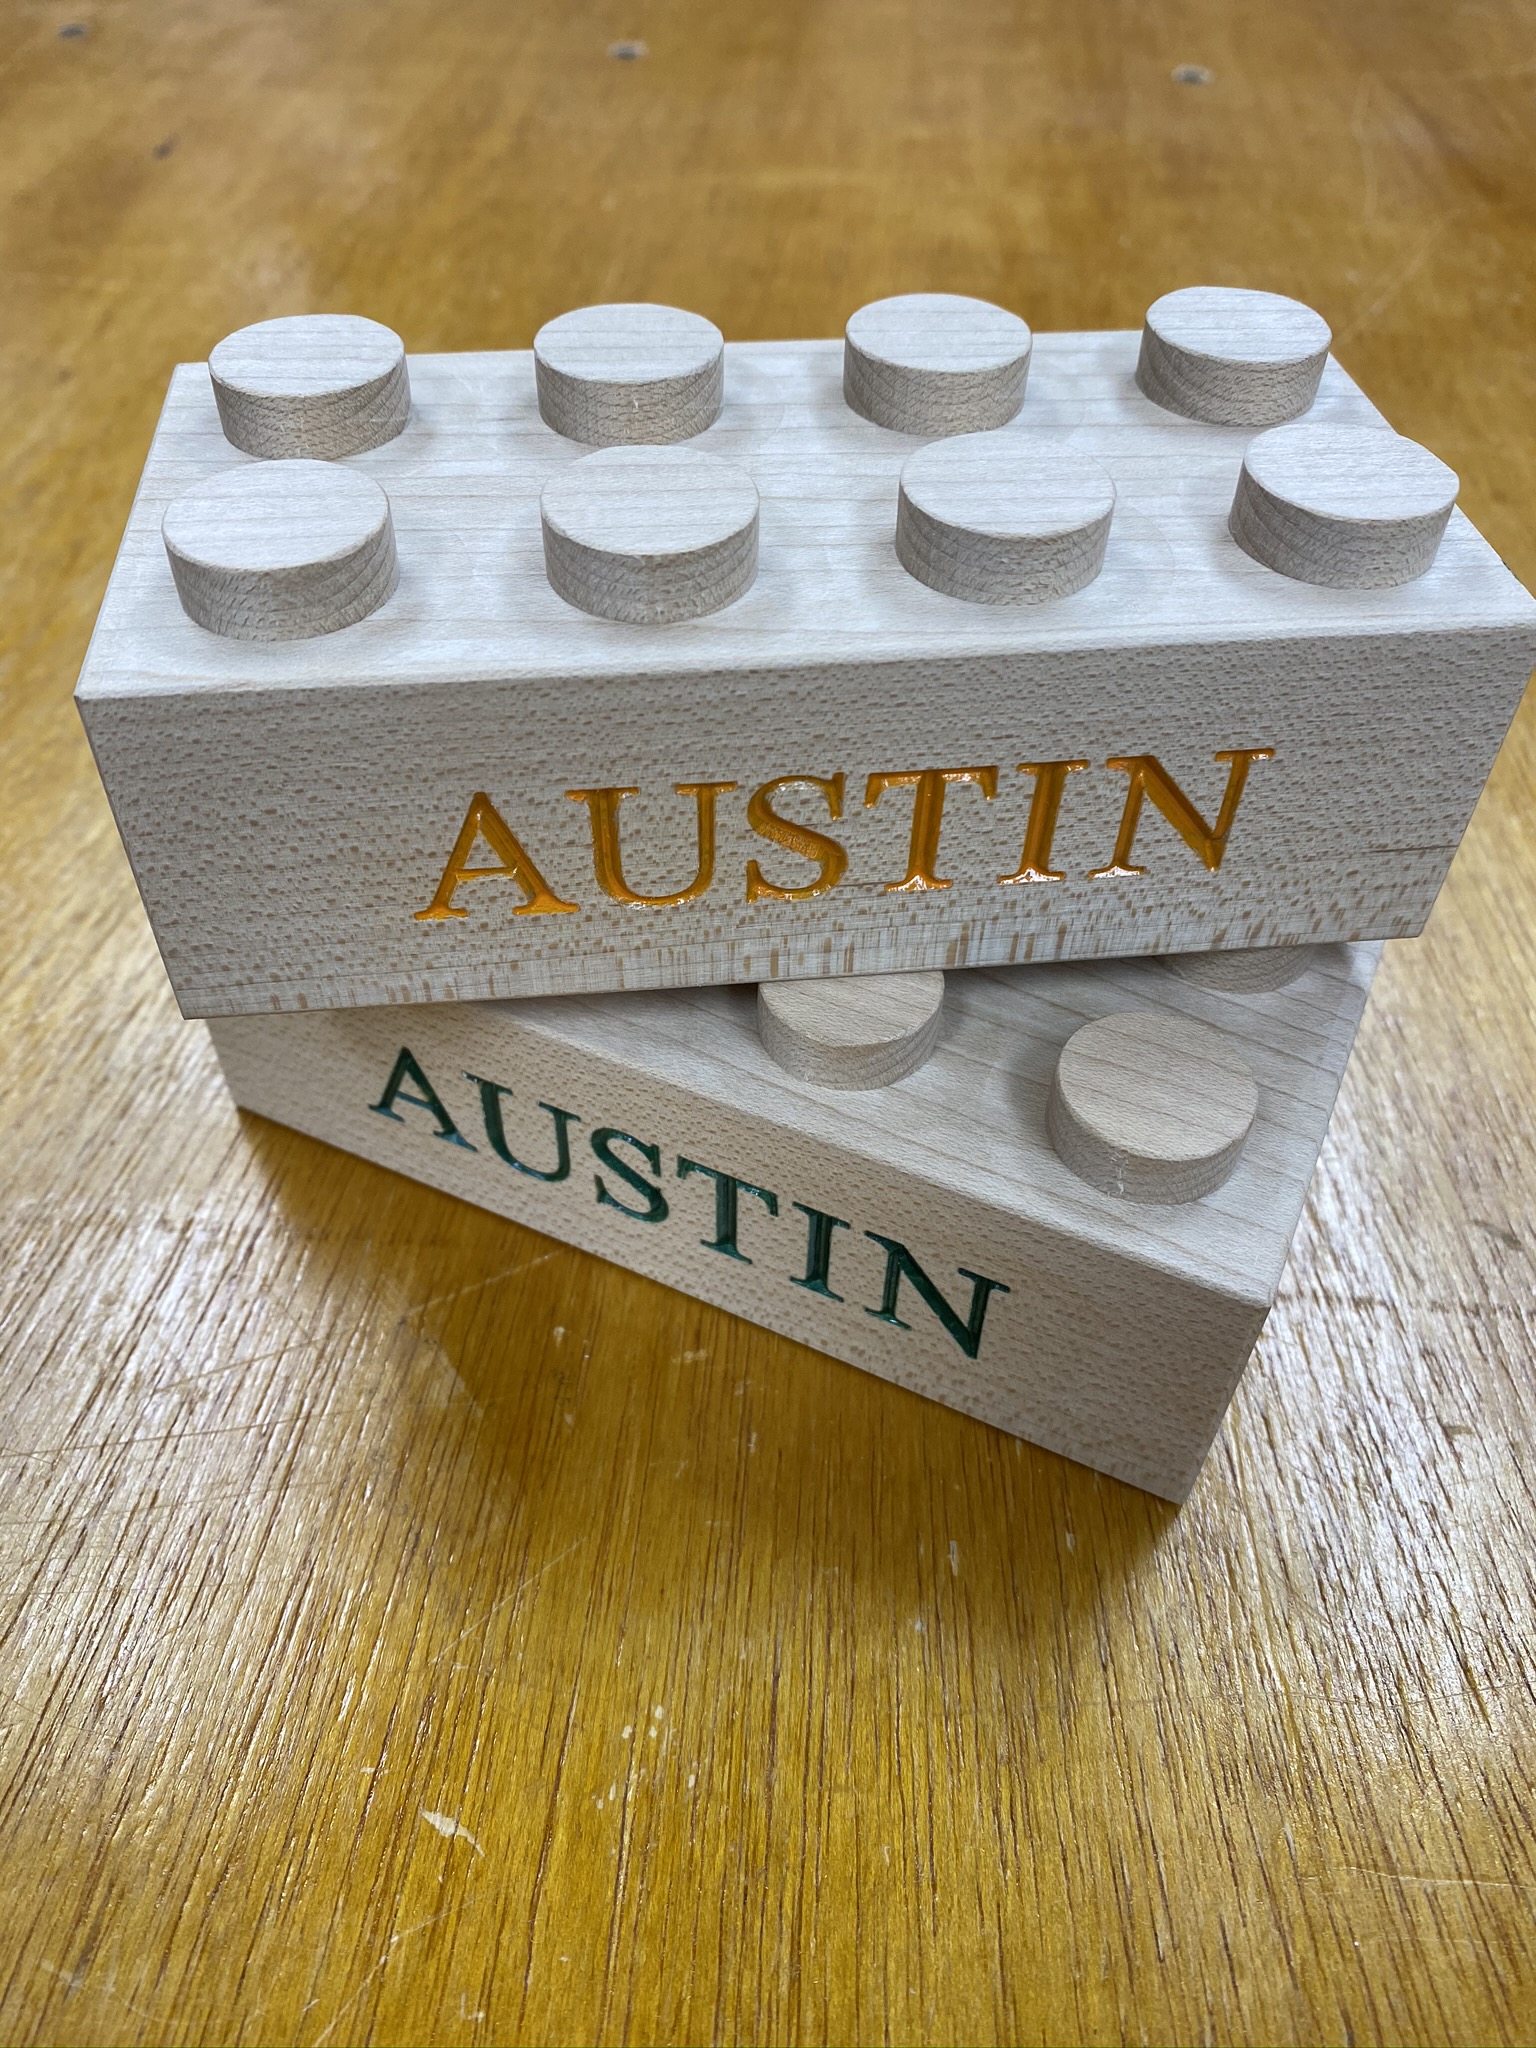
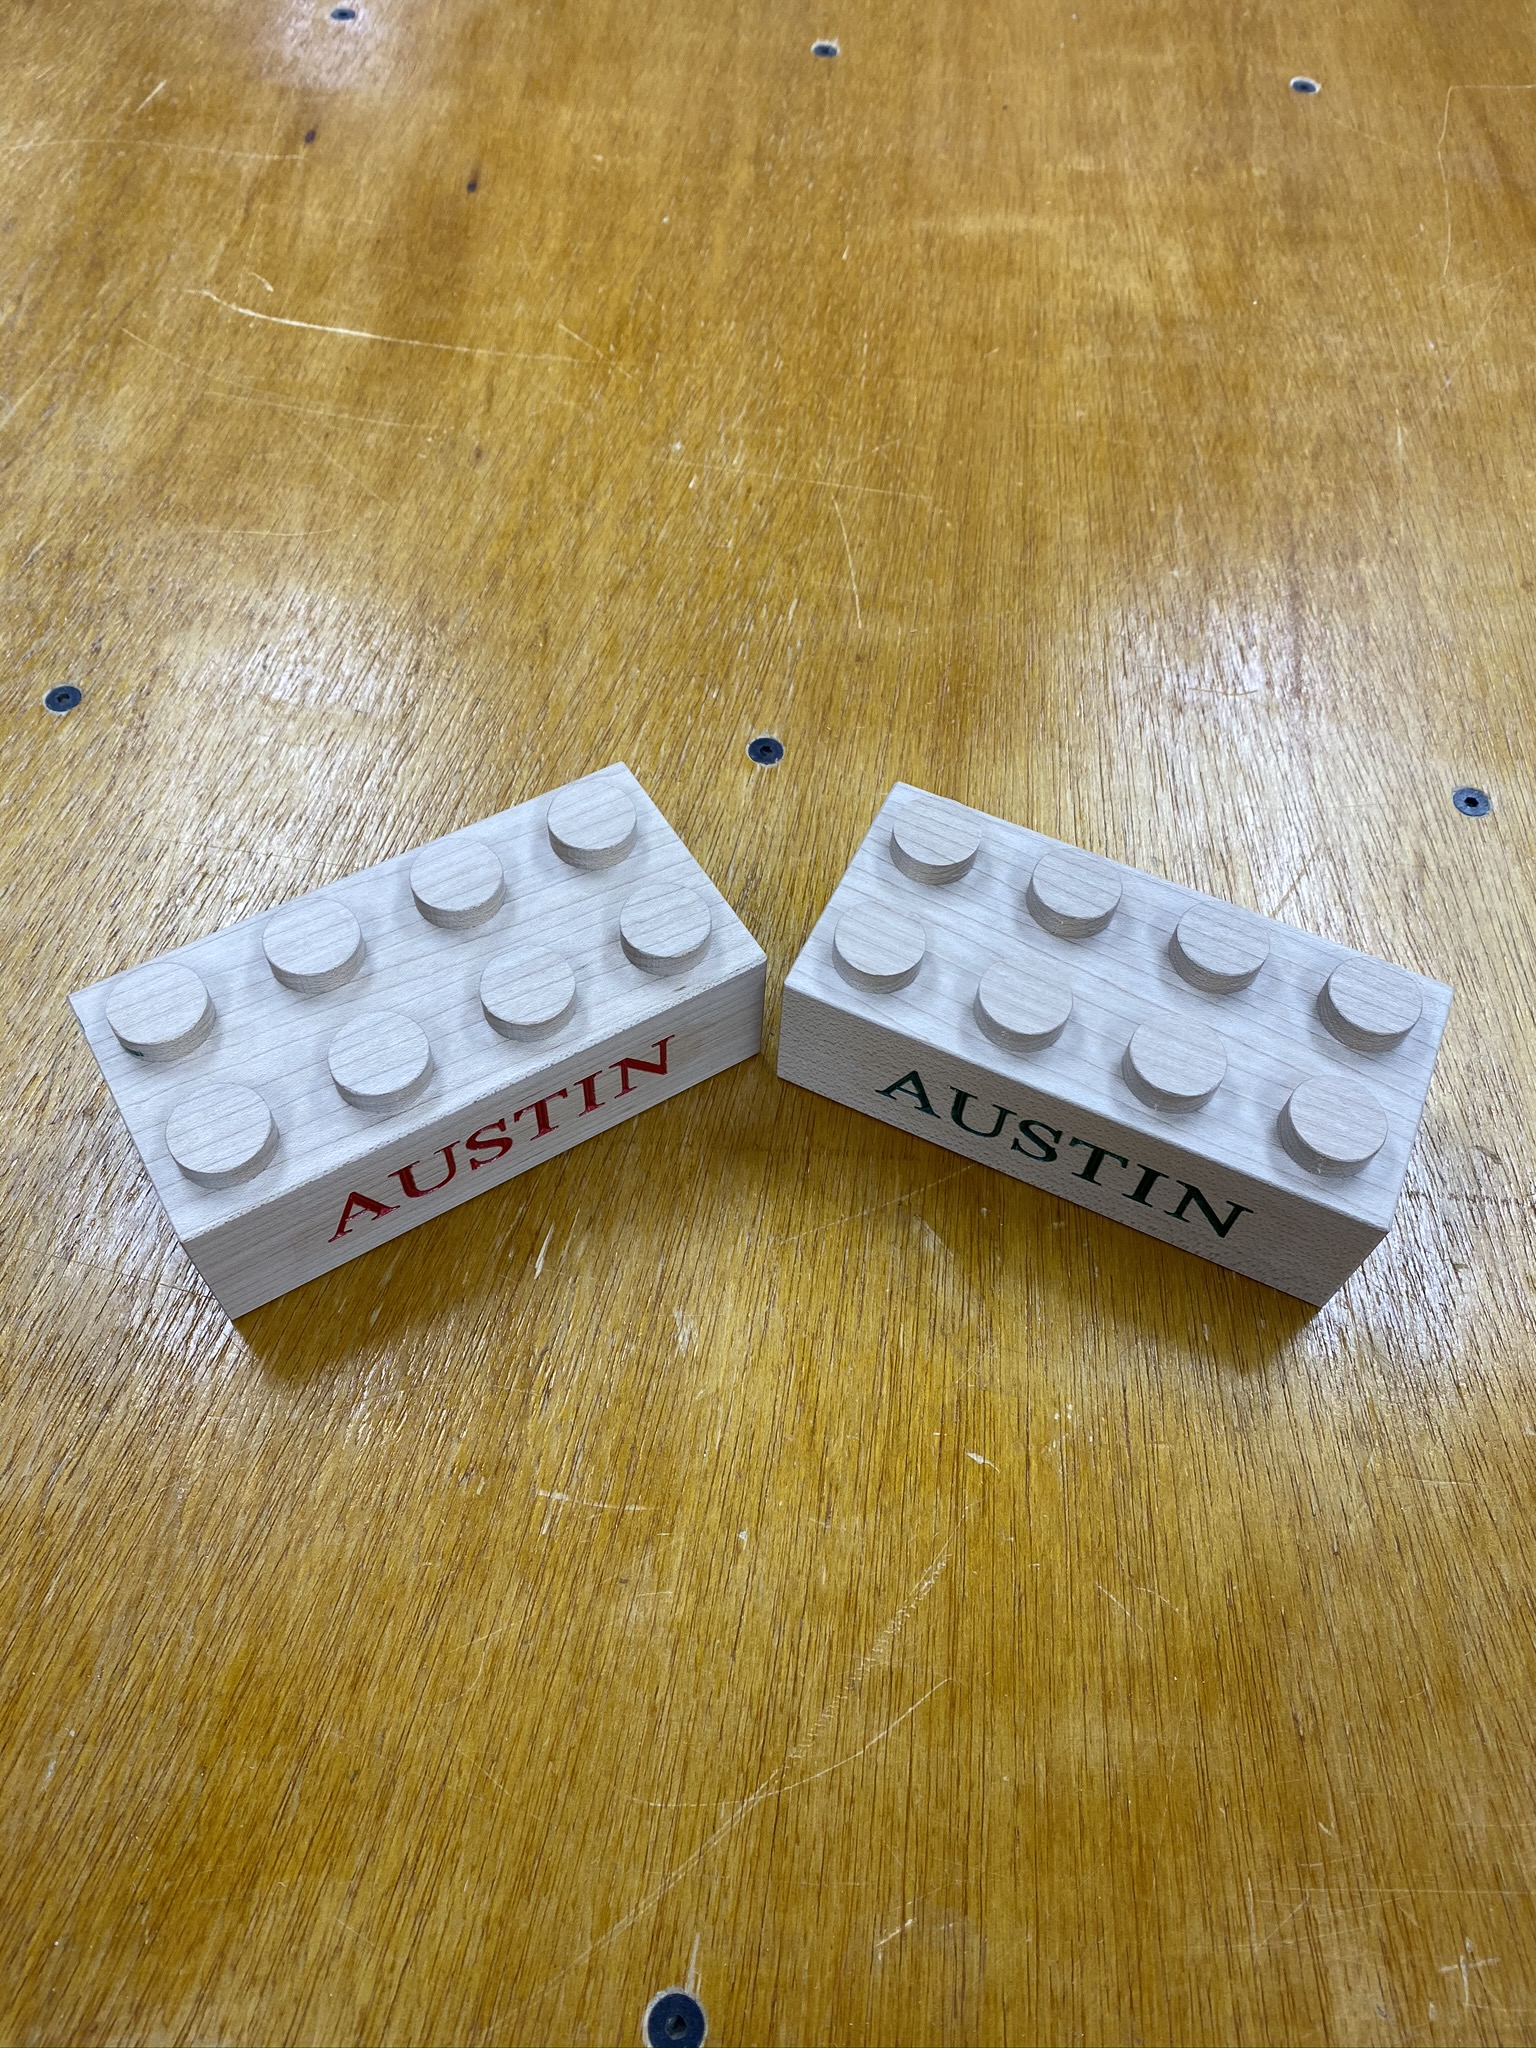
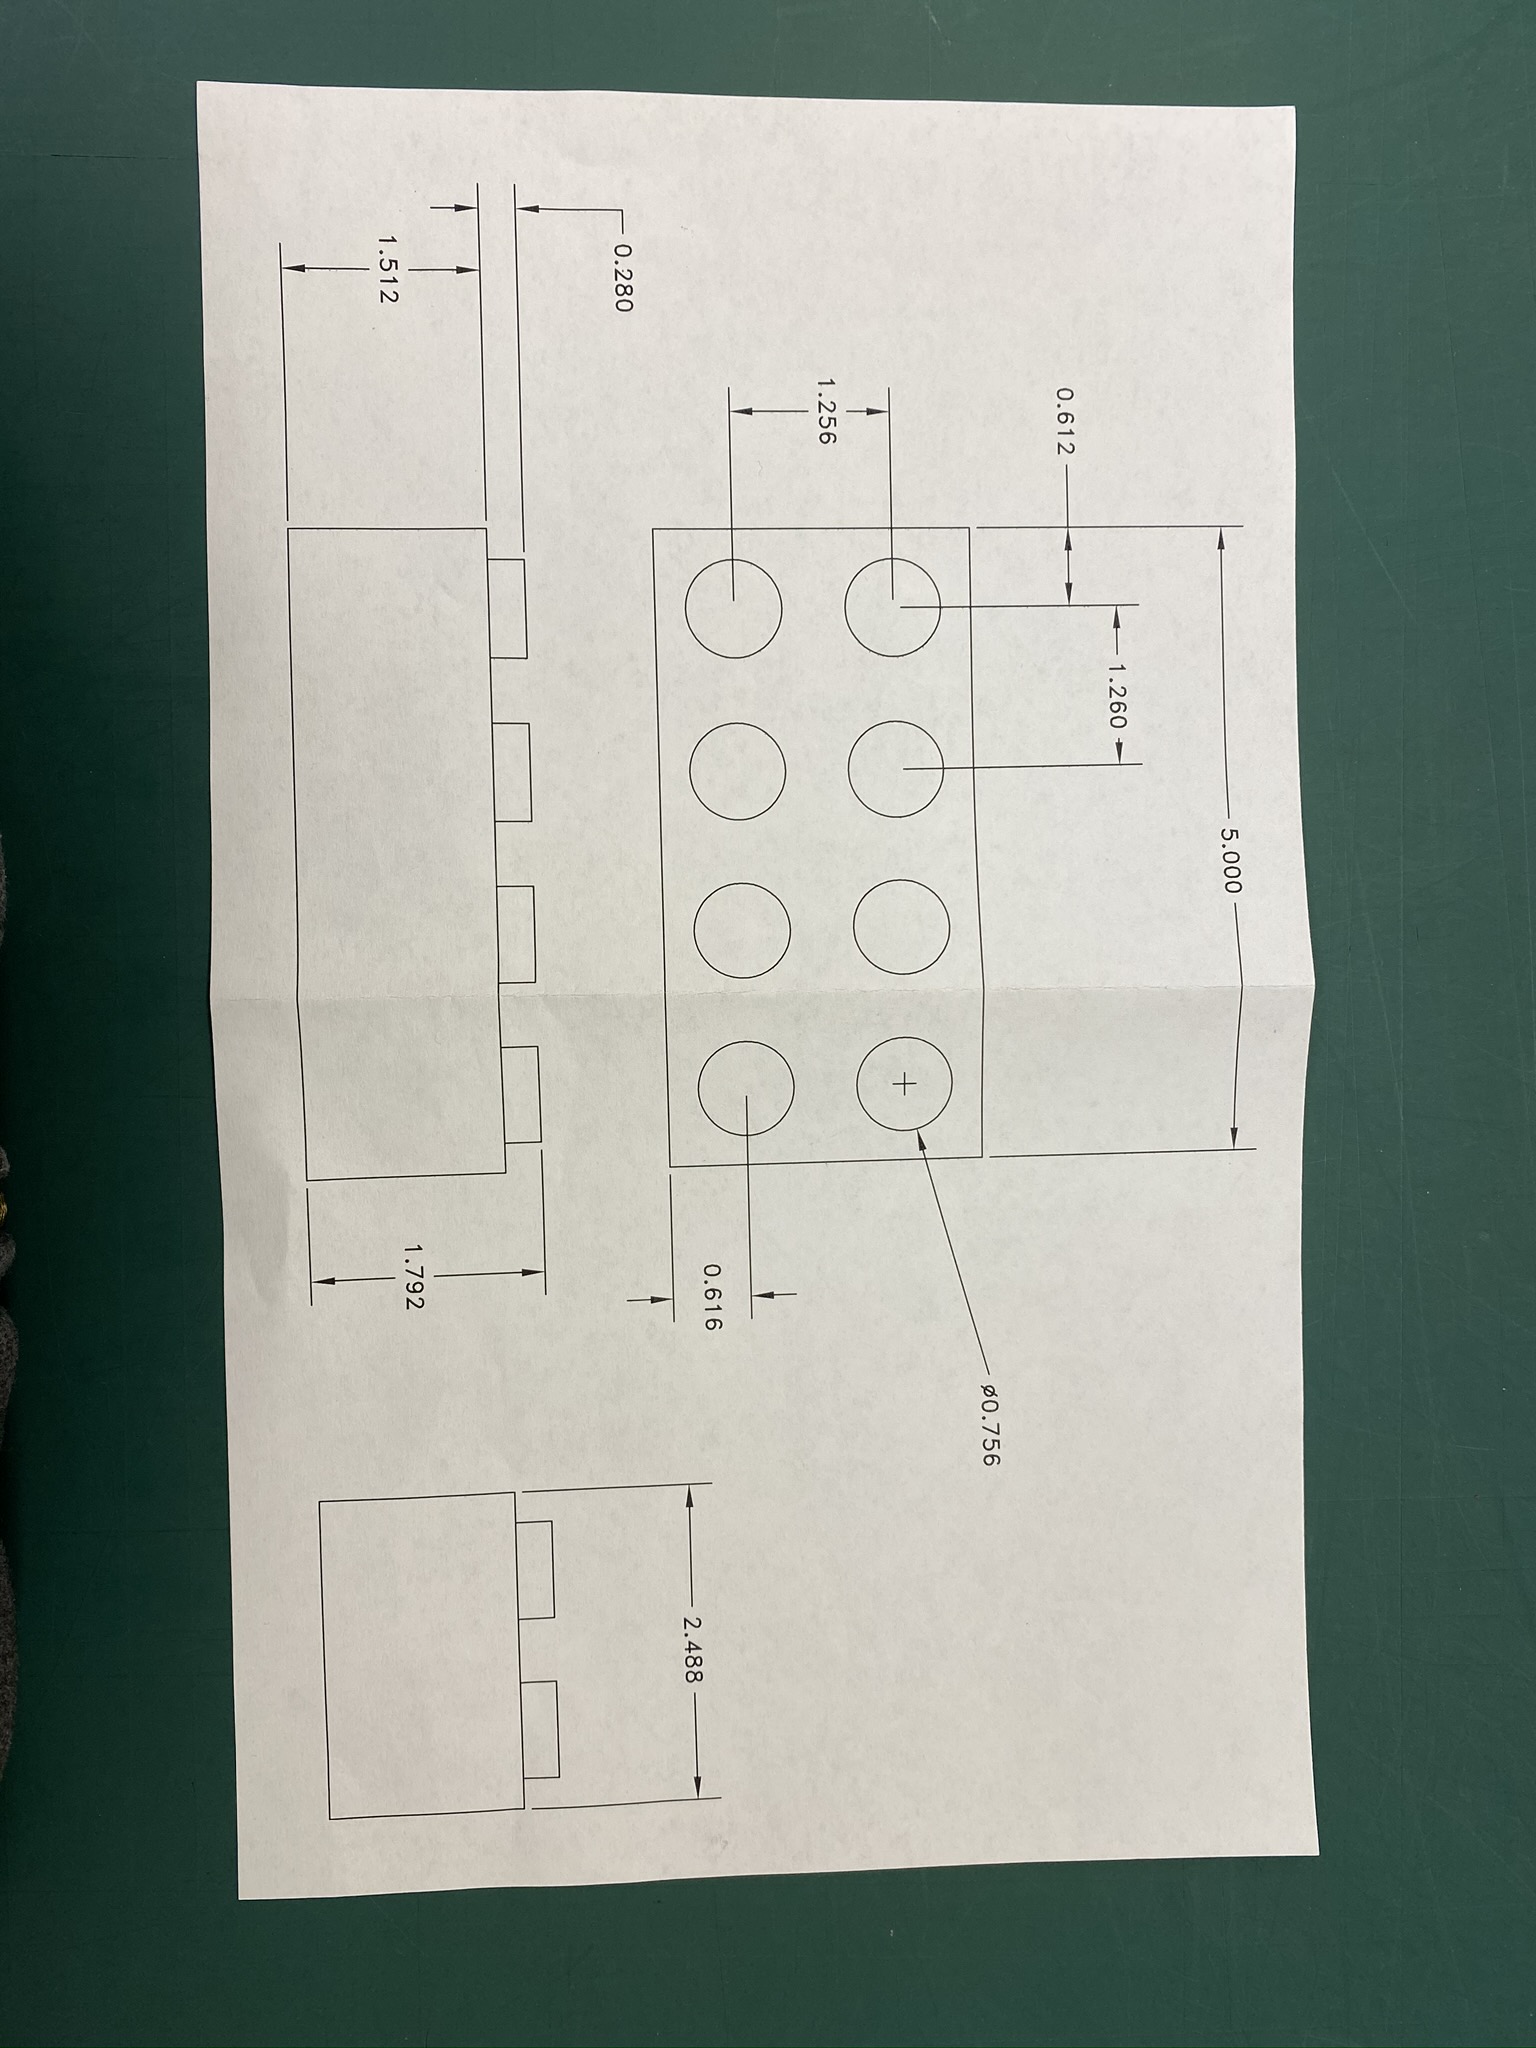
Made some exact 4X scale maple wood blocks for my grandson on my S3.
Original block sizes from Google search and drawn in AutoCad LT and scaled up.
VcarvePro learning exercise, too.
15 Likes
Nice, I know you say 4X but what are the approximate dimensions?
Hello,
Length 5.000"
Width 2.488"
Height 1.792"
1 Like
@TOOLZ
Brian, how did you match the positions of the recessed holes (not shown) in the bottom?
I imagine a fixture with 8 holes to match the top when you invert the block to cut the bottom.
Those look awesome. I guess I know what I’m making my nephew for his birthday!
You could set up a 2 sided cut in VCarve for that.
Or, cut the bottom out, first. 
If you cut the holes into the wasteboard then the pegs, it would align the piece perfectly for the bottom side cut.
2 Likes
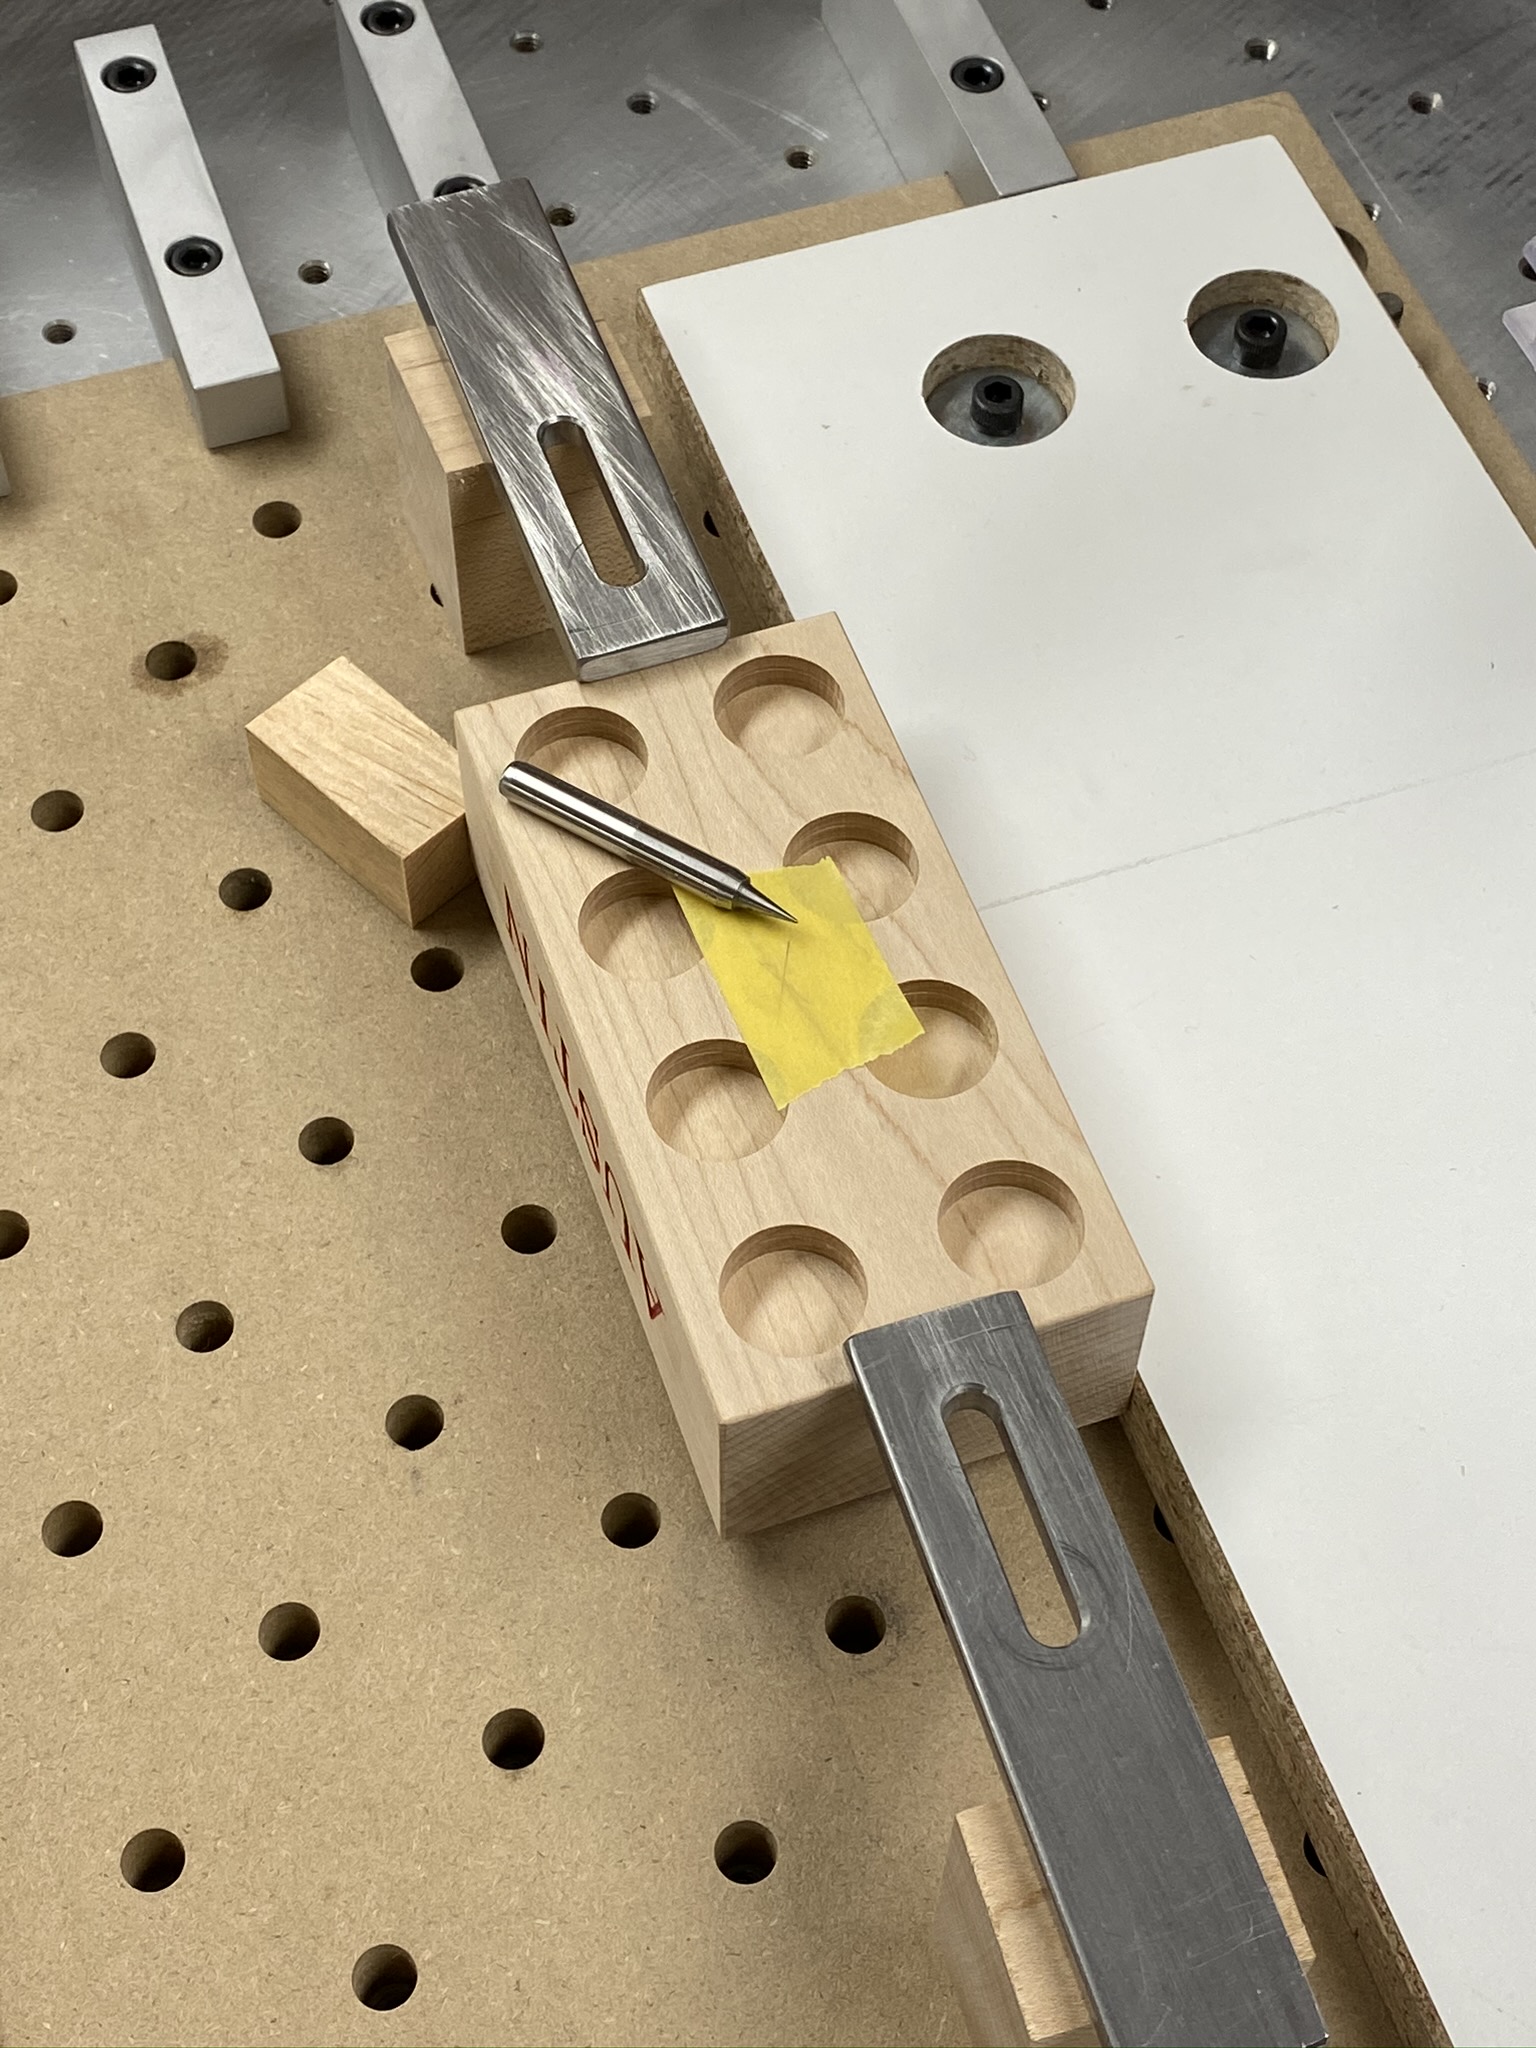
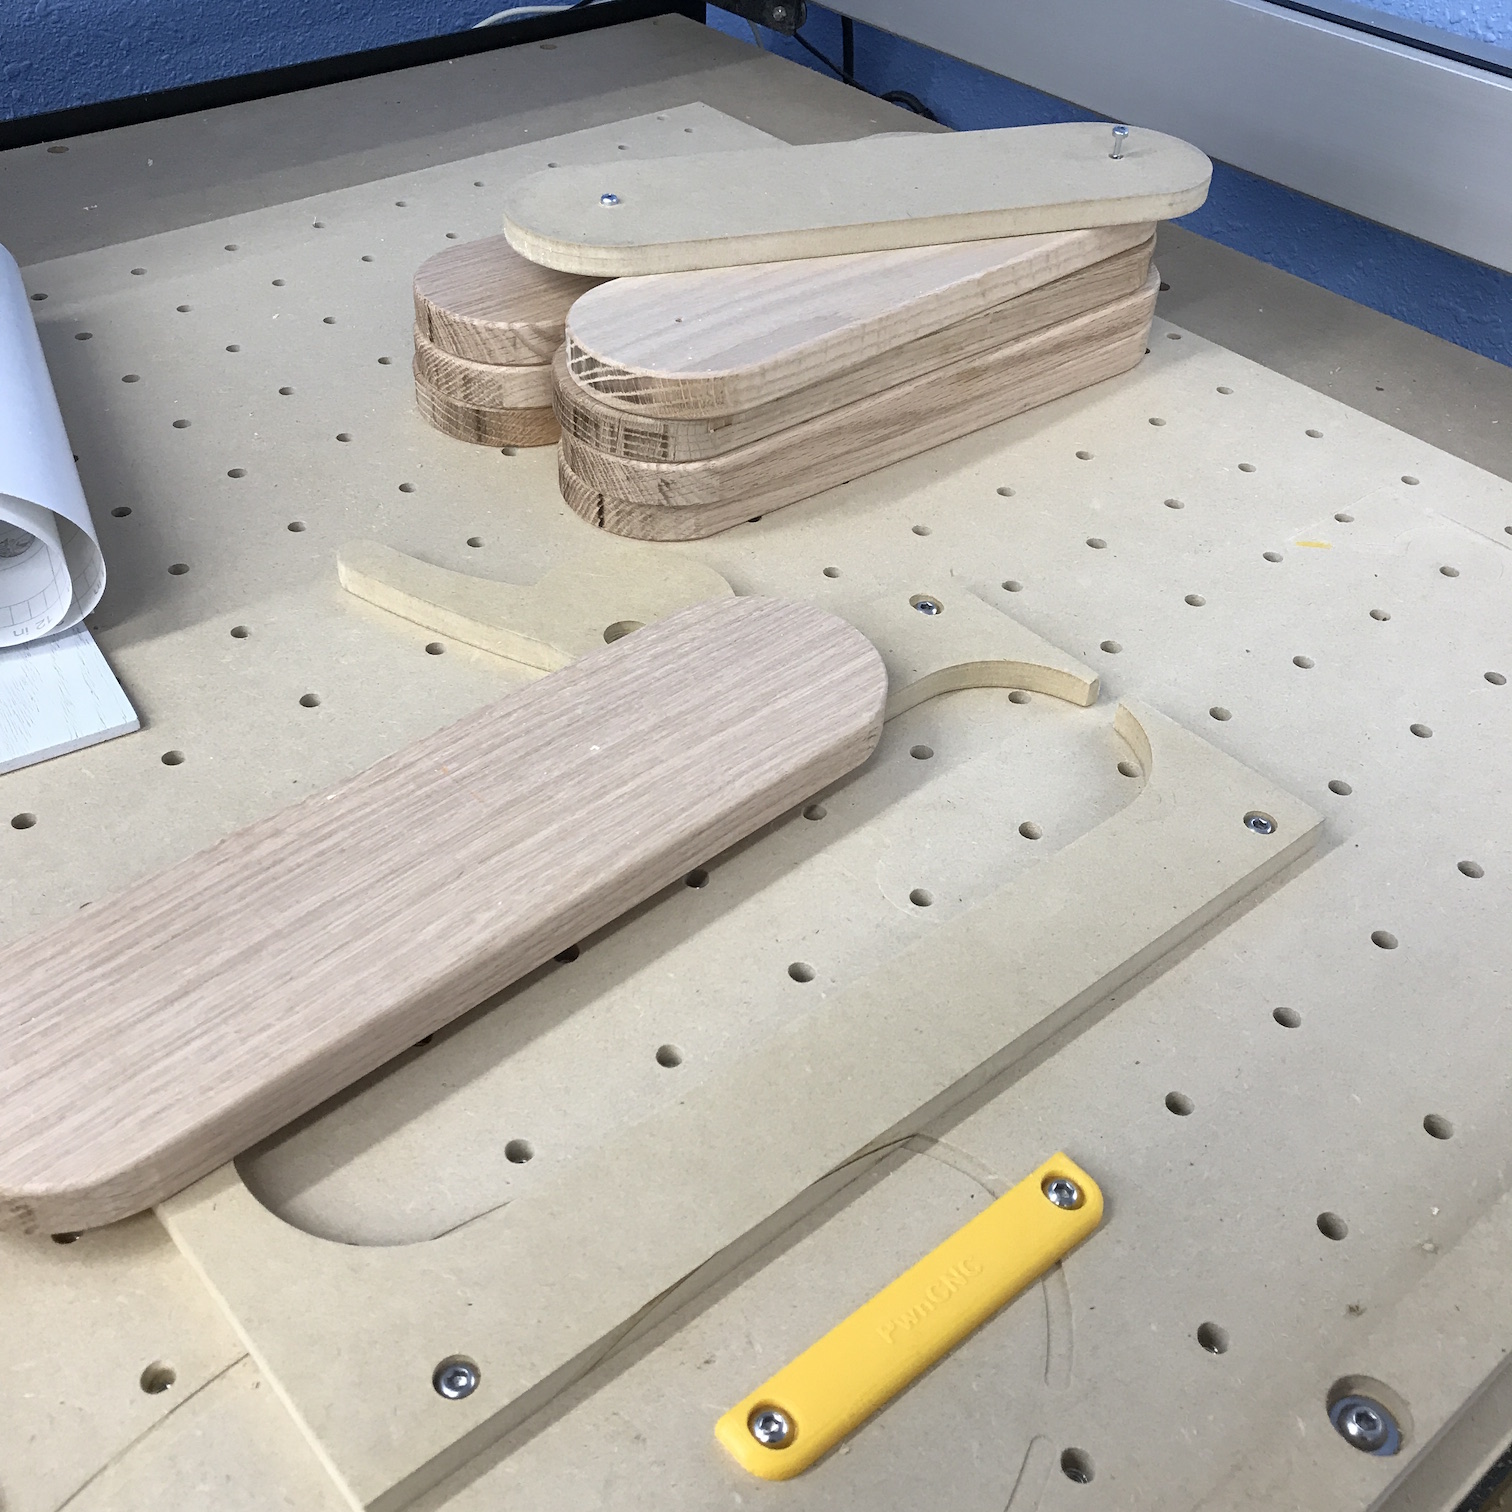
Here is a mock up view of how I did the blocks. Very simple set ups.
After sizing the stock I cut the bottom cavities first. I use a piece of painters tape on the block so as not to leave pencil marks on the wood. Draw diagonal lines and mark the tape for center. I pick up that mark with a pointer I made to set x & y zero. Set a stop at the end of the block. Clamped as shown.
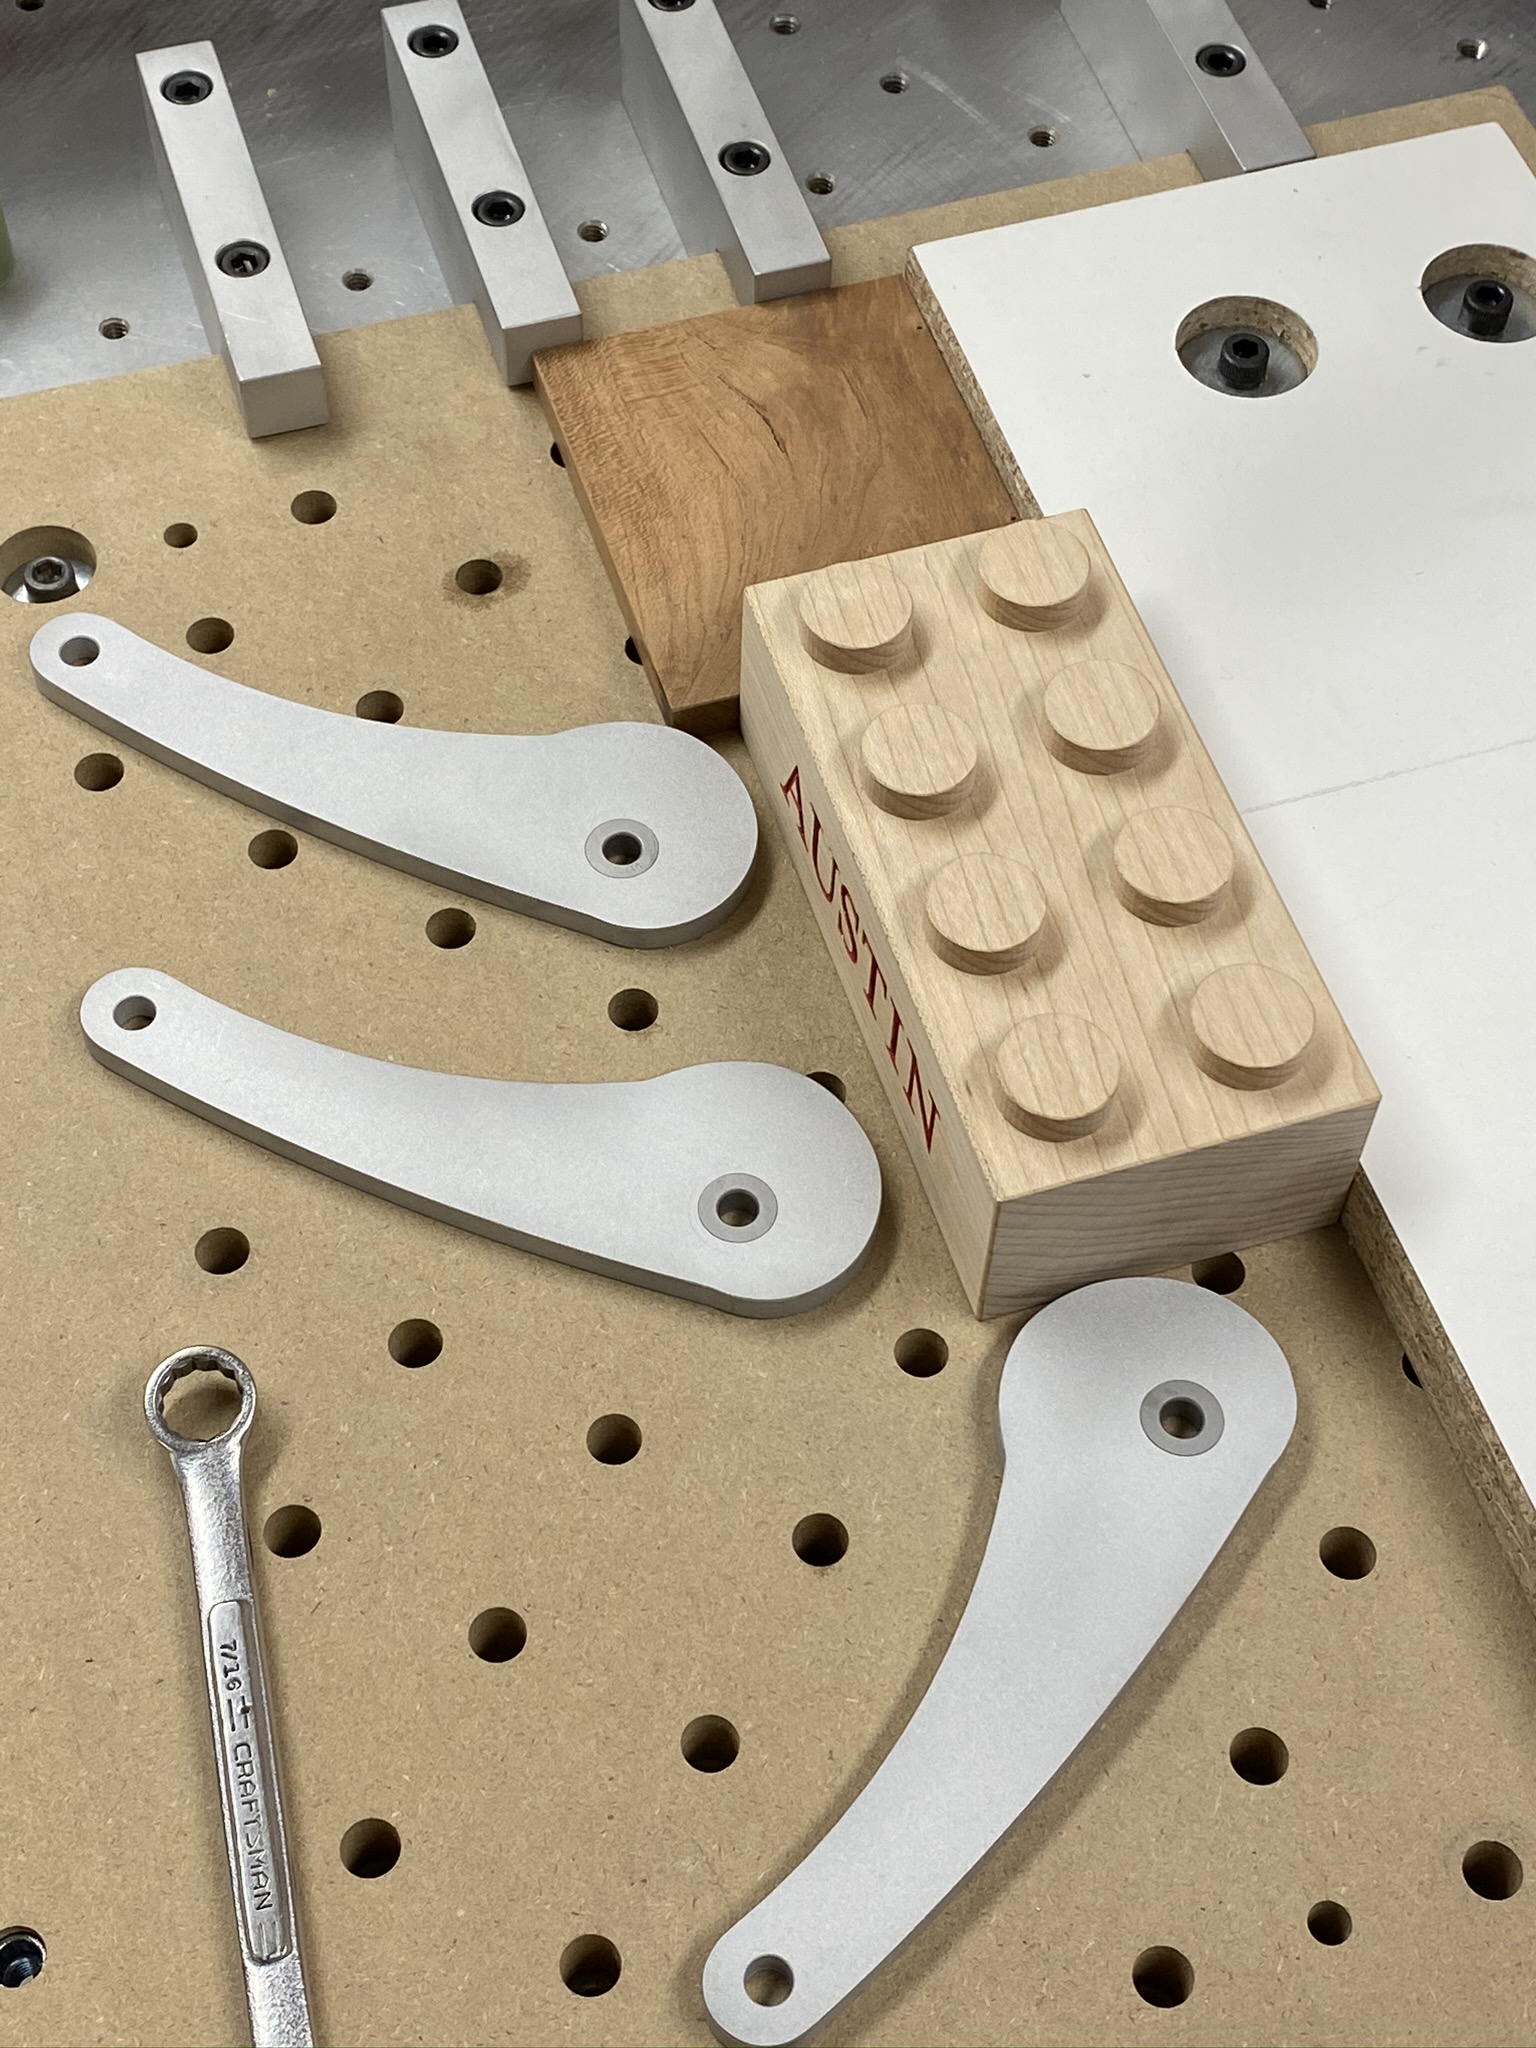
Flip block and do the same x & y pick up to be sure of position. Clamped with cams.
I over sized the pockets in the first operation by .020". Careful " eye balling " the center marks is all that’s needed.
Thanks for the replies !
4 Likes
Oh, ok. You aren’t going to make a whole set and create a whole 'nother giant world with robots and animation and buildings and bridges and bad guys that fly wierdly and make smoke and burn marks on the table. Oh, ok. 
One thing you could explore is to make a jig bolted to your wasteboard to hold the blocks in position. Take a 3/4 in piece of plywood, place it on your Shapeoko, use the Shapeoko to make 4 holes based on your wasteboard hole pattern, on the perimeter of the plywood; bolt the piece of plywood on the wasteboard so the middle is at the Center rapid position; mill a pocket of the same size as your block; install your blank in the jig for milling with tape and glue method; mill the under part of the block, the center rapid position is constant and used for zeroing. When you are finished the first side remove the block and turn over to mill the other side. You will no longer to need to use tape and pencil to place and find your center.
2 Likes
Just in case you’re wanting to reproduce these blocks in enough quantity to build a castle for Zelda, Princess of Hyrule …
@TOOLZ Brian, I tend to make my part holders with a gap and slotted screws so I can use a cam clamp to tighten the part up in the holder.
These blocks would be easy with a holder like @luc.onthego has described, but I would probably do it with 3/4" MDF. I’ve started carving the name of the file on the holder/fixture now, too. They all start looking the same after a while.
8 Likes
What a great idea. Soft jaws without a vise.
3 Likes