Need some opinions from woodworking folks more experienced than I.
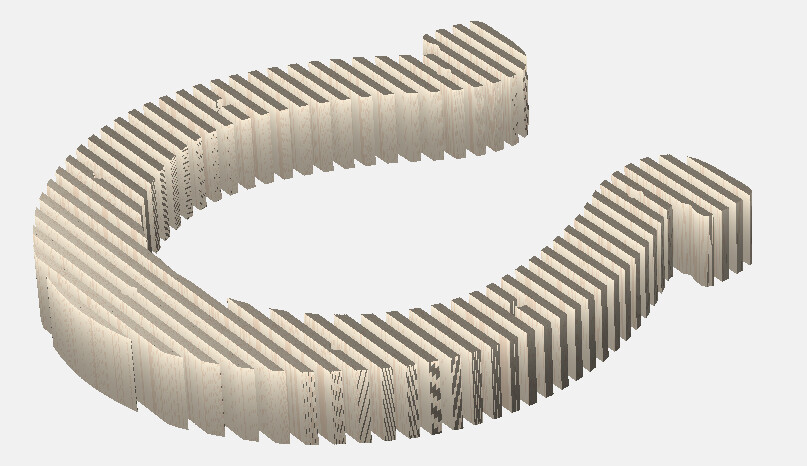
I’m working on a project for an event my company will be supporting for a local sports team. I have suggested a “parametric” style piece of their logo as a bit of visual interest. See this for visual reference. It would be their logo, about 6" thick and maybe 4’ tall. I’ve already sliced it digitally into 3/4" layers with 3/4" gaps in between each layer.
My questions are these:
What wood?
What surfacing endmill/speeds and feeds?
How to finish?
I was going to get wood at Menards, because of ease of availability. I figure I’ll get 5/4 boards or something at least thicker than 3/4" so I can surface to remove warps. They’ve got Red Cedar at 13/16" thick, Rough Sawn Pine at 13/16", and Select Pine 5/4. Rough Sawn Pine is the cheapest. But I’m a little leery of only having 1/16" worth of waste to remove to flatten.
I’ll want to flatten these boards, and I don’t think I have access to a planer or drum sander, so I was going to use a surfacing bit. I have the Whiteside 6210, but would move to something comparable to the McFly if it meant a better finish. Anyone have a recommended endmill for use with any of the woods listed above?
I figure one everything is cut on the mitre/chop saw, and ripped with the table/track saw, I’ll use the CNC to plane to my final thickness and cut the hole for the all-thread. After that, I’ll sand with an orbital sander. Should I then seal/stain it? What’s a good option for any of those three woods?
Pine is obviously cheap, cedar is good for something outdoor as it has good rot resistance. I stopped buying lumber there awhile ago and I get rough sawn stuff from local places and finish it. Cheaper and you can get thick enough usually to get down to the thickness you need. Never knew they had rough sawn pine, i’ll have to check on that, curious on the prices.
Menards, so you are here in the midwest, chances are most likely also Wisconsin
Indiana, actually.
I could pursue an actual lumber yard, but for this project I only need seven 8’ boards. In my experience looking, local places want more than the box stores for an order that small. Truthfully, this project hasn’t even been greenlit so our client might not even want to pay for it regardless.
I’m looking at 1x8 red cedar and rough sawn pine at 1x8, $28.32 and $15.94 respectively; select pine is 5/4x8 at $36.19.
I don’t know if I should stain/seal it or not. I was hoping for that kind of expert opinion. It would be indoors, more than likely. We always try to reuse projects like this, so it would be nice to store it. If we needed to disassemble and rebuild later, we might do that, so sealing would probably be nice for longevity. Initially, I was looking at thick, high grade, zero cavity plywood, but it occurred to me that just getting boards closer to my end size might look better and be cheaper ultimately. Plus, I would have less waste and a more straightforward path to sizing them to final dimension.
Ok, looks like maybe I should revisit searching for an independent sawmill nearby!
OK, so say you’re building a big team logo, and you want it to be a focal point on a stage or maybe in a foyer. What woods would be your top choices, strictly for cost-effective beauty?
Well you need to finish/seal it with something. If you want easy, use a danish oil or like a oil plus 2 c, those are one step coatings that are super easy to do and will provide a really nice durable finish. A lot of them have stains/colors, so you are staining and finishing in one shot. Which one you use will depend on the final wood choice (in terms of the stain).
Walnut everyone loves, but that’s expensive to do, so i’d opt for something cheaper, some of the pricing is dependent upon what is abundant in your area. A good local place doesn’t have a minimum, you can buy one board if that’s all you need. If they are doing bulk orders only, that’s not really a “local” place, that’s more of a commercial local place. Yes, alot of guys will give you a discount the more you buy.
Ash or Cherry are usually cheap, cherry always finishes very well, ash is similar to oak in hardness but has a much lighter color and takes stain very well. Oak is actually usually cheap too, or at least around here. I tend to prefer cherry because it’s super easy to work with and looks beautiful once finished. Can’t say i’ve seen any pine at a local place, that’s more of a construction lumber than a nice product lumber.
This definitely helps, thank you. I’ve reached out to a local mill to ask for a quote and get some direction with what they recommend or have available.
I think the “commercial” local place is probably what I’ve experienced. I tried 84 Lumber and a couple others when I was building some deck chairs a few years ago and they never even responded to my info on their own request forms, or quoted me more than I could get at Menards.
Are you using cherry in your Shapeoko? Any surfacing/flattening endmills you’re using that you recommend?
It’s hard to imagine what this thing will look like. A sports logo is a 2D, and usually multi color image.
While the example you posted is a 3D contoured shape.
Will the viewer be looking at the face of 1 layer, with the other layers for depth?
Or looking at the edges of multiple layers? And if so, how will you show the details within the logo?
Plywood with adhesive edge veneer might do the trick? Or the laminated plywood edge might look pleasing as well. You may have to fill some voids on the edges before final sanding or finish cuts.
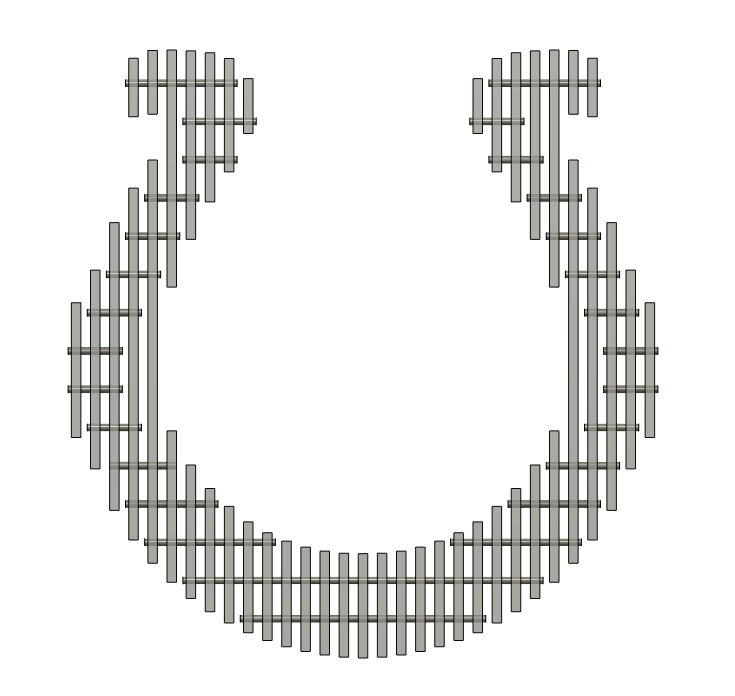
Could you get away with making it hollow? i.e. only the face & the edges being immediately visible, you could piece together the layers & save a lot of wood, and weight.
Among others. I have a Amana 45525 1-1/8 surfacing bit, I haven’t used it a ton to date, so not sure i have any recommendations on the settings. it was a heck of a lot cheaper than a carbide tipped one, at least until i get some more experience with it. I have a few larger slabs i need to surface here in the next few weeks.
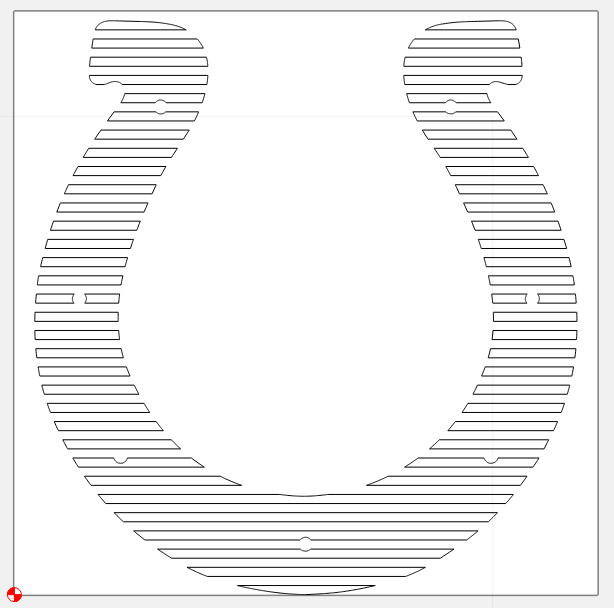
So, something like this? The curved cuts on the edges might preclude plywood. Unless you want to do a lot of filling. If this is 6" thick, will you be able to cut the outside shape on your machine?
You’ll also be cutting across endgrain on the ends of each piece so you’ll want to watch for split out, chipping.
Any solid wood, I think will look nice. You could even get away with MDF or PVC, depending on the look you’re going for. It’s gonna be heavy!!
Unfinished cherry, or cherry with just a poly isn’t that red actually, people usually stain it redder than it is naturally. Ash is pretty white if you want a white wood.
Can I ask, separately of the rest of the questions, what you used to design this? You seemed to whip it up really quickly. Took me ages in Fusion to find the center, construct offset planes one after another, slice it, delete what I didn’t need…
I’m trying to learn to use components, but it seems to add limitations I don’t like. I’m used to just using bodies because that’s what I learned before I realized components were “rule #1”.
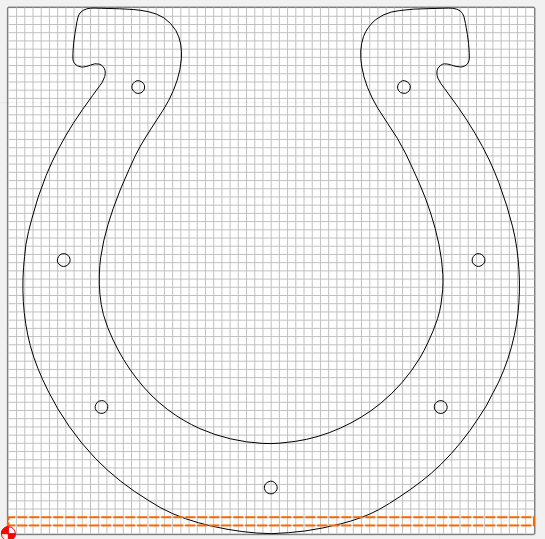
I just whipped it up in CC. Imported/Traced the Colts logo. Scaled it to 47.25 tall (To make the 3/4 slices work. Created a rectangle for the first slice.
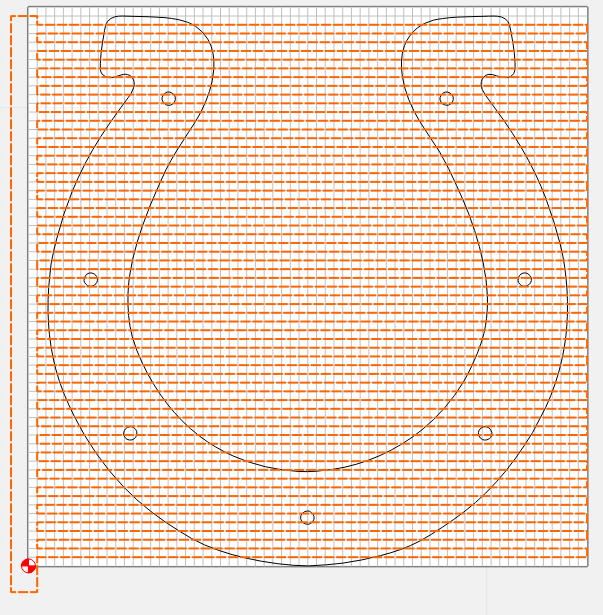
To machine it just for display purposes, I added a rectangle around the outside, selected all & used a 1/2" tool to machine it 6" deep, 3" cut depth (CC wouldn’t let me go 6")