I wanted to add a couple of tabs to hold my SCD test that I am trying to setup in Fusion 360. It appears as if the tabs must be created in the model itself. Is that correct?
I do not have that option (I am using a 3D Contour if that makes any difference)
I am totally new to the CAM side of Fusion so everything seems to take forever (and I am getting impatient!!!) lol
No, 3D contour doesn’t have the capability to do tabs. What design features does you part have requiring a 3D Contour op? A picture of your part could be helpful, if possible.
I’m still learning the differences between the CAM operations, as some can overlap in milling specific features and providing variables and differences in functionality, machining time, finishes, etc. I typically do a 2D contour with tabs as my last operation to cut out the part from my stock.
1 Like
Here is some references, that might explain their differences and intended purposes:
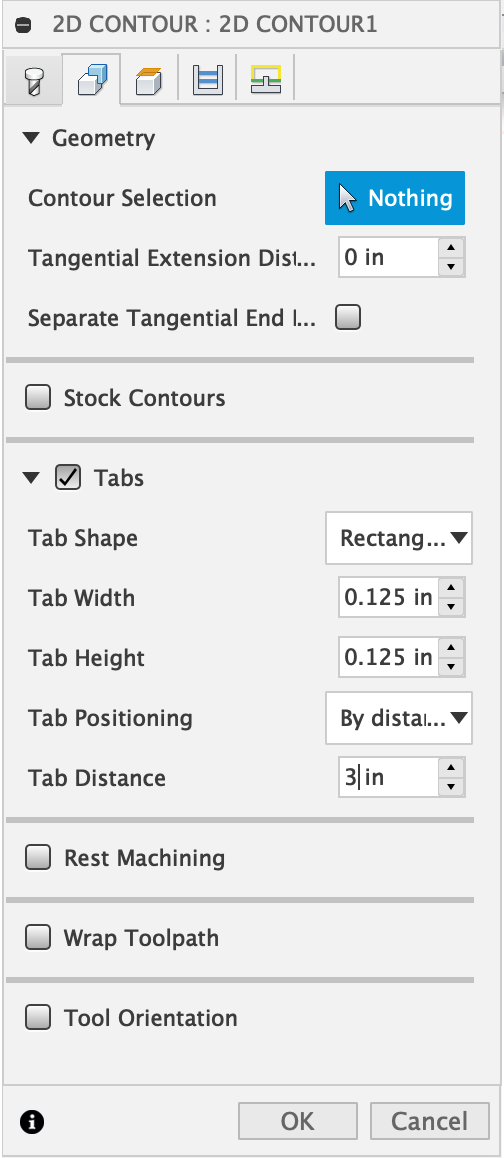
Fusion 360 - 2D Contour
Fusion 360 - 3D Contour (aka Contour Finishing)
2D contour has the option, as the 2D contour can be used to, and is in part intended to, plow a uniform depth groove in your stock. Strategies that would not generally be used for, essentially, cutting a part free of surrounding stock do not have the option.
If you want to use 3d contour and have tabs or support, there are three easy options:
-
add tabs to the model. They are not critical, as they just need to extend far enough into the unmachined base stock that the part remains attached.
-
set your bottom for the 3D contour to be your tab thickness above the material bottom, then run a 2D contour with tabs to finish the cut
-
set your bottom height for the 3D contour a small bit above the material bottom and leave the part attached by a skin, maybe 0.2 to1.0mm thick (depending on the material and what you are machining)
In a case where I want to leave tabs (or a support skin), I will sometimes do the profile cut in stages, or do the upper portion with a different strategy, early in the machining process, so there is clearance for tool entry and chips to get out. Then, the last operation is the final depth on the profile cut.
Profile cuts can be hard on the tool, as the tool is likely to be buried and cutting full width, but you can plan to minimize the risk of failure much more easily than in a slotting operation (similar logistics, but no practical way to open a side up for clearance, as both sides of the slot are finish faces… I hate slotting)
2 Likes
nailed it.
i’d opt for number 2 typically.
also keep in mind you can utilize stock to leave on 2d contour to rough slot. (leaving clearance)
then, you can duplicate the toolpath and clean up the part to size without bouncing off both sides.
This topic was automatically closed 30 days after the last reply. New replies are no longer allowed.