I have a standard size Shapeoko 3 and am running into missed steps on my belt z looking to upgrade to the Z-Plus as Carbide does sell it anymore I am hoping a member has one they are willing to sell. The HDZ is overkill for me as the price is out of range of what i want to put into my S3. Otherwise a great machine for what i need as is.
I just looked on the carbide3d.com shop page and they list the Z-Plus for SO3. The Standard and XL are out of stock but they do have the XXL. The only difference would be the wiring length. If I remember the controller is in the middle of the gantry on an SO3 standard. Why not talk to support about using the XXL one on your Standard.
Of course someone may have one to sell in the community but you may have the same problem about the wiring length so at least talk to support about your situation.
You could also email sales@carbide3d.com to ask about the out of stock for the Z-Plus and your SO3 Standard.
@robgrz says they will be supporting the SO3 for some time so maybe he can pipe in about the future support for the SO3.
Thanks. I emailed support to see what they say. Another bummer is i have board version 2.3 of which does not support prox limits. Hoping the Z-Plus can use a mecahnical limiti switch as i already have the limit switch kit.
The Z-Plus only supports (and includes) proximity switches.
The HDZ initially supported mechanical switches (and an adapter plate is pretty easily drawn up/fabricated for them if need be), but also now ships with proximity switches.
Thanks, Will. I see in your reply to my ticket you added Sales so hopefully they can steer me properly. In the meantime i am trying a different bit, smaller. I did check the Belt and it is taught. I have a 3d printer so i think i could fab an adapter plate for a mechanical endstop to work on the Z-Plus.
1 Like
So turns out i need a board as well. I dont have the funds to buy all this new so hoping someone has Z-Plus from and upgrade to an HDZ or something. Right now to buy board and Z-Plus new from Carbide is $400. OUCH! Even the $250 for the Z-plus alone is pushing it for what i want to put into this machine. Trying to save money to get a whole new machine. But need to get this project done. I am making flush floor vents out of my lamnate flooring. That top layer is some tough stuff. Right now i am using a SPE 1/4 bit with 200 in/min and 13 in/min plunge Using Fusion 360 Slot and Contour. I ordered a 1/8 bit and will try that to see if it helps.
Is it that the Z-Plus wont work at all with a mechinical switch? Or can i buy the Z-plus and fab up a mount for a mechanical switch myself? I dont have the funds to get a Z-Plus and board so trying to figure out my options.
The Z-Plus has a pair of holes which hold a proximity switch in a position that a metal post will activate it — it would be a tricky thing to activate with a mechanical switch if it were possible at all.
Is the metal post removable to where i could fab up a small block that would mount on the 2 holes of the prox sensor location? I am very handy at CAD and designing so as long Carbide Motion can still use the Z-Plus and Mechanical Switches i am confident i could make it work.
Pretty sure it’s threadlocked in place.
Okay if there is clearance i could 3d print a block to go around the post to creata flat spot to trigger the mechanical switch.
I have a z-plus from a hdz upgrade that’s just sitting in a box. If still interested.
3 Likes
I sent you a message. Thanks for the reply.
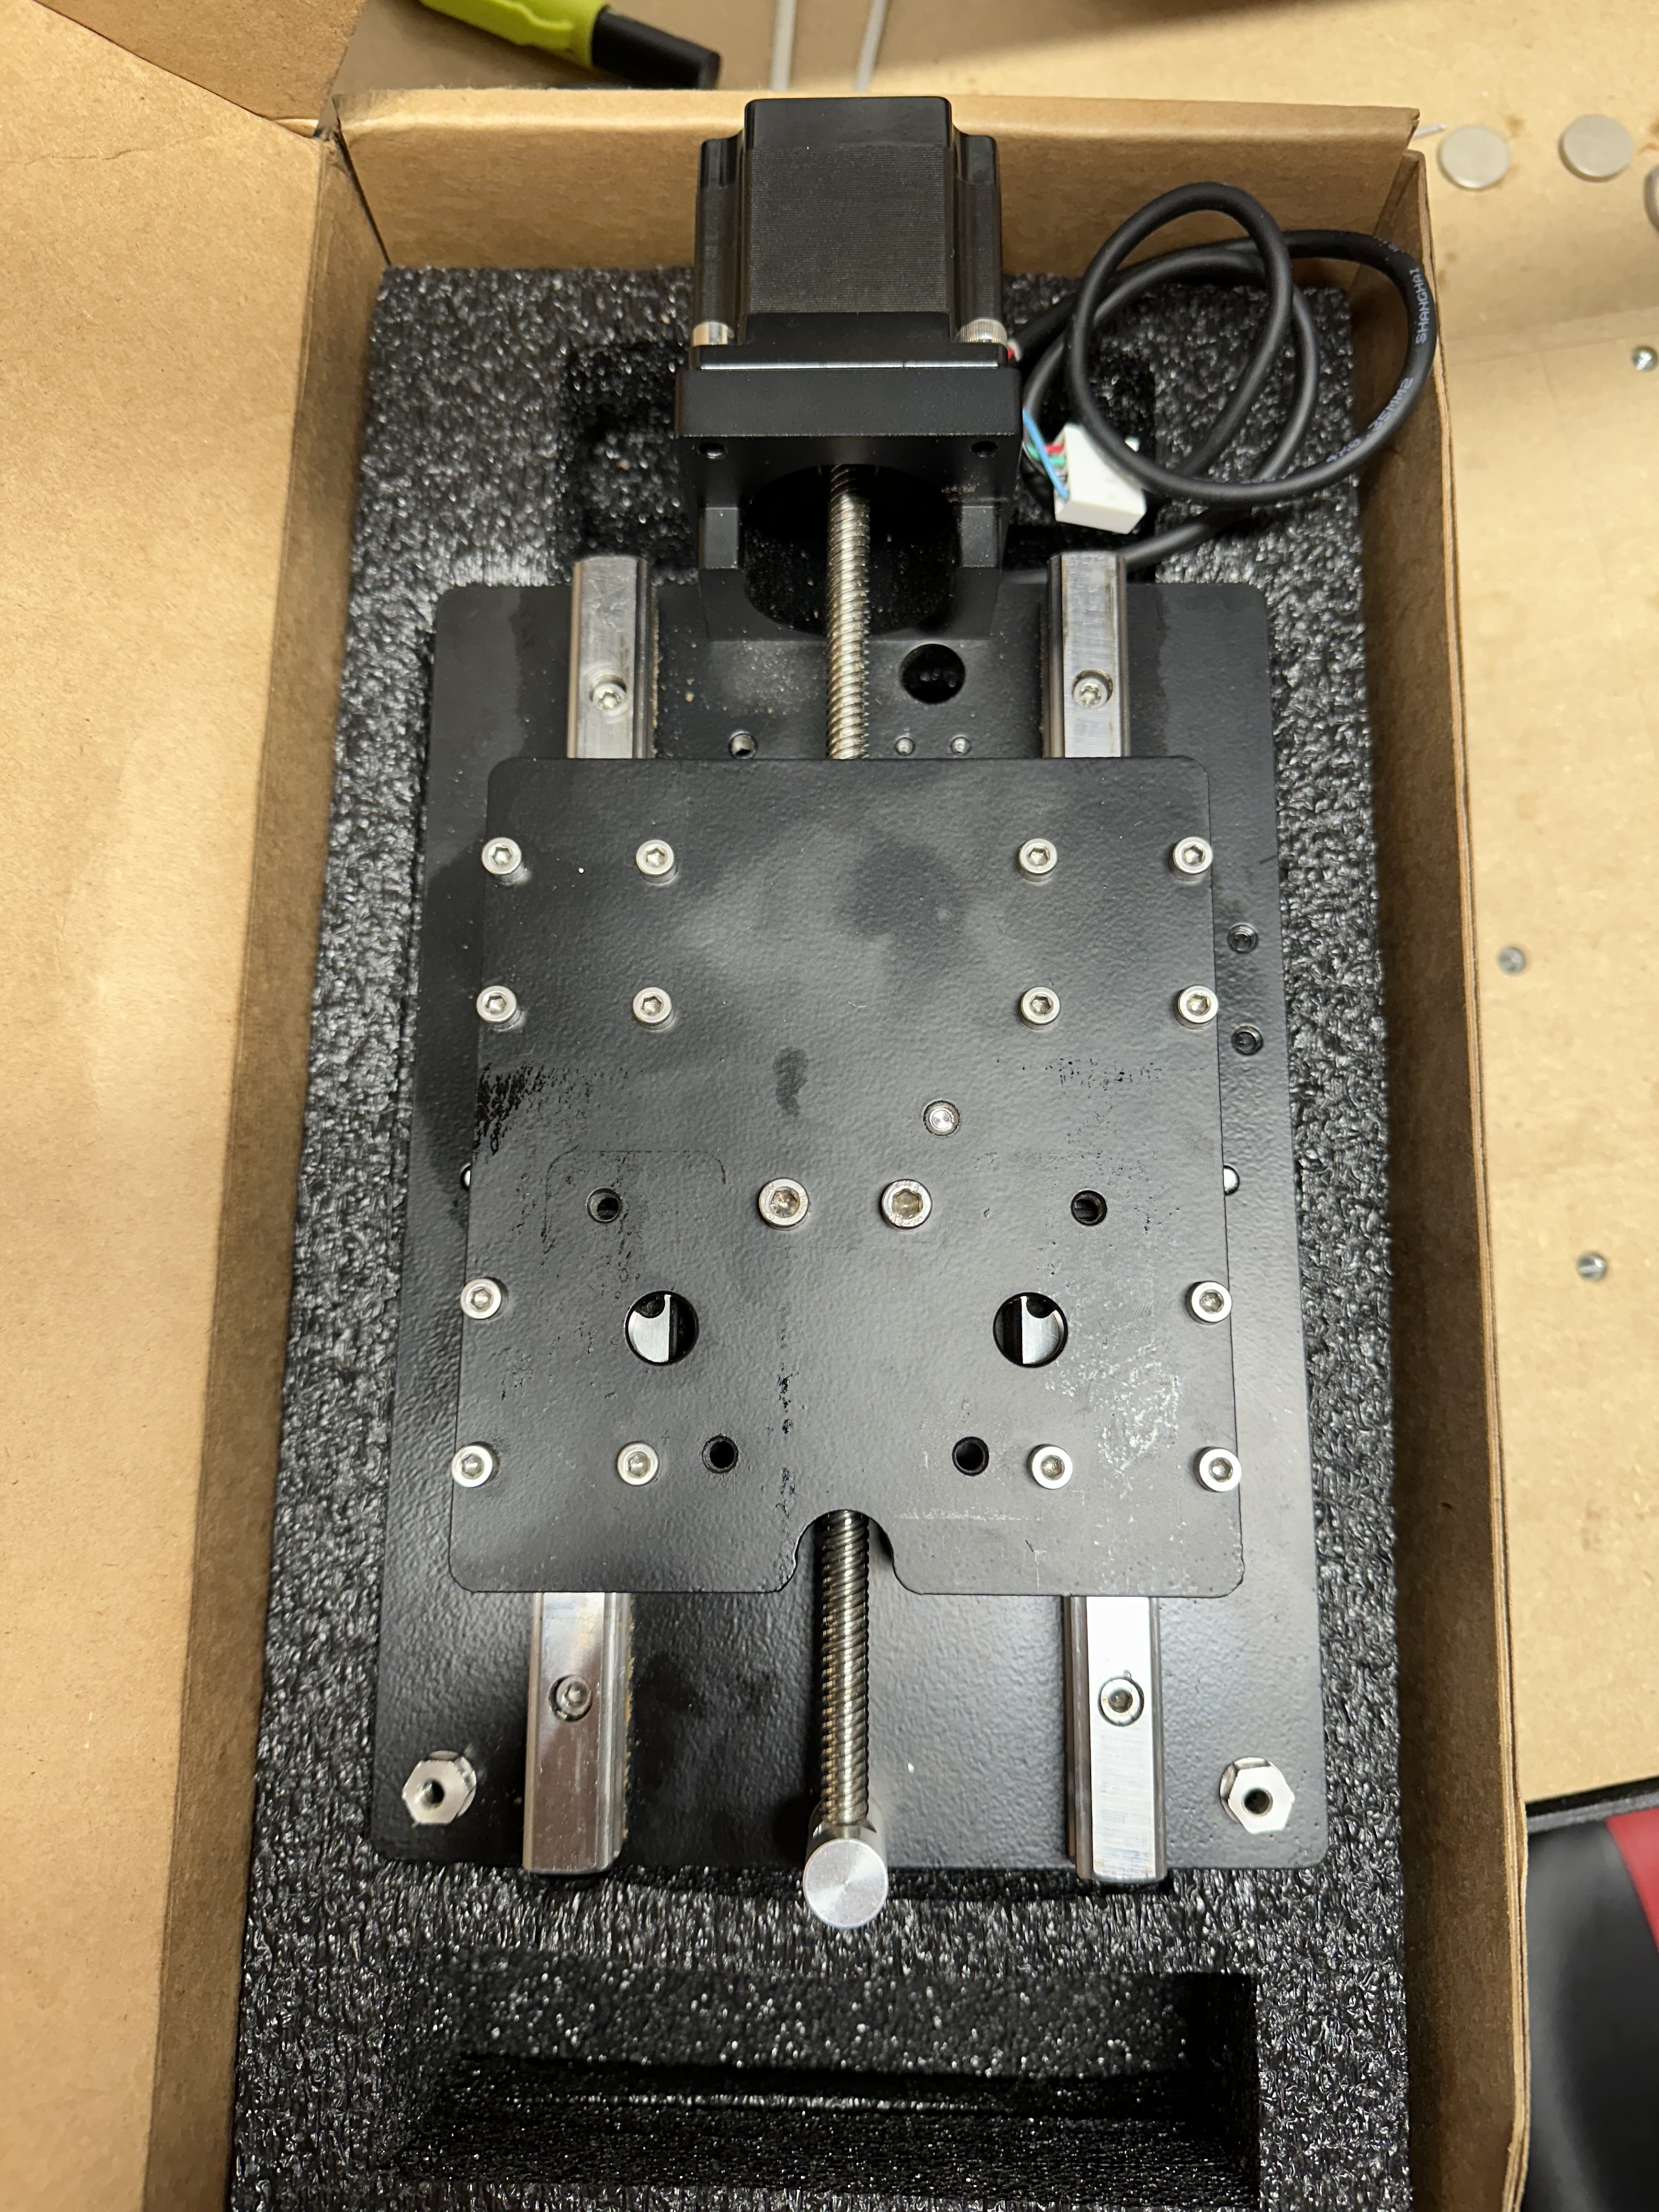

I wanted to update anybody following this. I was able to get a Z-Plus from Krupp. Thank a ton Krupp. Once i recieved the Z-Plus i did some experiments. I unhooked the belt of my old z and sent the configuration for the Z-Plus. Why woudl i do this you may ask, well to test if the configuration still allowed for mechanical endstop trigggers. The answer is YES it does. So the next step was to design and 3 print a mount for my existing SS-01GPT endstop. I decided to utilize 2 bolt mounts on the Z-Stepper. This aligns the endstop so the top rail of the Z-Plus will trigger it. It is a very basic design but works well. No new board or prox kit needed. No more skipped steps on my Z and machine working as inteneded in all other areas. Thanks so much to this group for the help to get me this far and to completion in my eyes.
1 Like
Here is a couple photos of how I made the Z mount. The existing X mounts worked with the Z Plus with out modification.


1 Like
This topic was automatically closed after 30 days. New replies are no longer allowed.