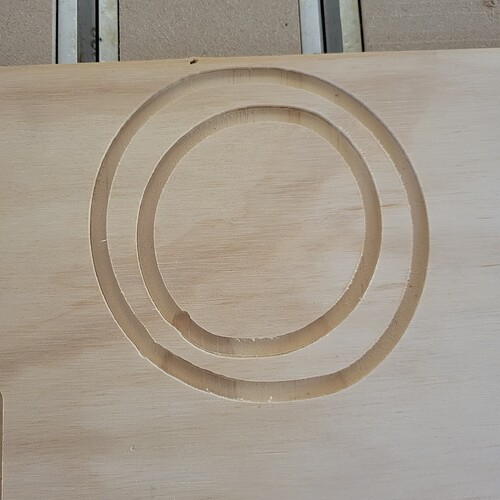
Getting really discouraged here. I have spend HOURS over many days trying to calibrate for belt stretch. I have retightened belts and made adjustments to grbl. After getting X and Y to measure out, I tried two circles centered on each other. This is the result. Any suggestions ?
What machine do you have?
That looks like more than belt calibration will make up for.
Which machine do you have?
Is it mechanically sound?
If it has belts, are they well-tensioned with the pulleys securely in place?
Thanks for the quick response.
Shapeoko Pro xxl
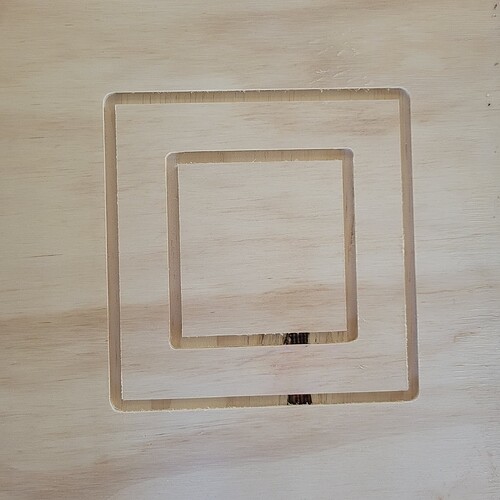
The machine seems to be ok mechanically. Here are some squares that look ok.
With the power off, slowly/gently move the machine to the center of motion for each axis, install a probing pin, then power up and grab the tip of the pin and try shifting it — investigate each aspect of the machine which allows movement in any direction.
Power down and remove both Y-axis belts and put a bit of tape on the pulleys so as to more easily see their rotation, then power up, connect, and try initializing — the machine should home Z-axis as normal, then try homing X- and Y-axes, and the X-axis should also home normally while the Y-axis motors should turn until they time out — do they turn evenly and in synch?
Once the machine times out, leave it on for 10–15 minutes or so, then check each wiring connector — are any abnormally warm? If so, that indicates a poor connection.
i may have found the issue. When doing the first test of trying to shift the position with the power on, I noticed that the Left Y motor had a lot of movement while the X and Right Y were rigid. That would explain the wonky circles. Now, how do I correct for that?
Possible causes:
- bad stepper driver
- bad wiring
- loose pulley
- worn/failing belt
The above trouble-shooting steps should allow determining which — check in at support@carbide3d.com
Update-- Issue resolved!
Turned out to be a loose connection to the YL stepper motor.
Thanks to the support team for helping me through the troubleshooting process.
Lesson learned-- I will be less prideful in the future and ask for help sooner.
Cheers!
I took some small zip ties, put them on the wire connections to insure they stay together. Leaving the cover on my board helps to keep pressure on the wires
Good luck
This topic was automatically closed 30 days after the last reply. New replies are no longer allowed.

