I’m a new Shapeoko owner - I bought an XXL with the Black Friday deal. It delivered yesterday. I’ve been waiting for the machine to figure out a table & had plans today to build something similar to the tables that so many of you here have built.
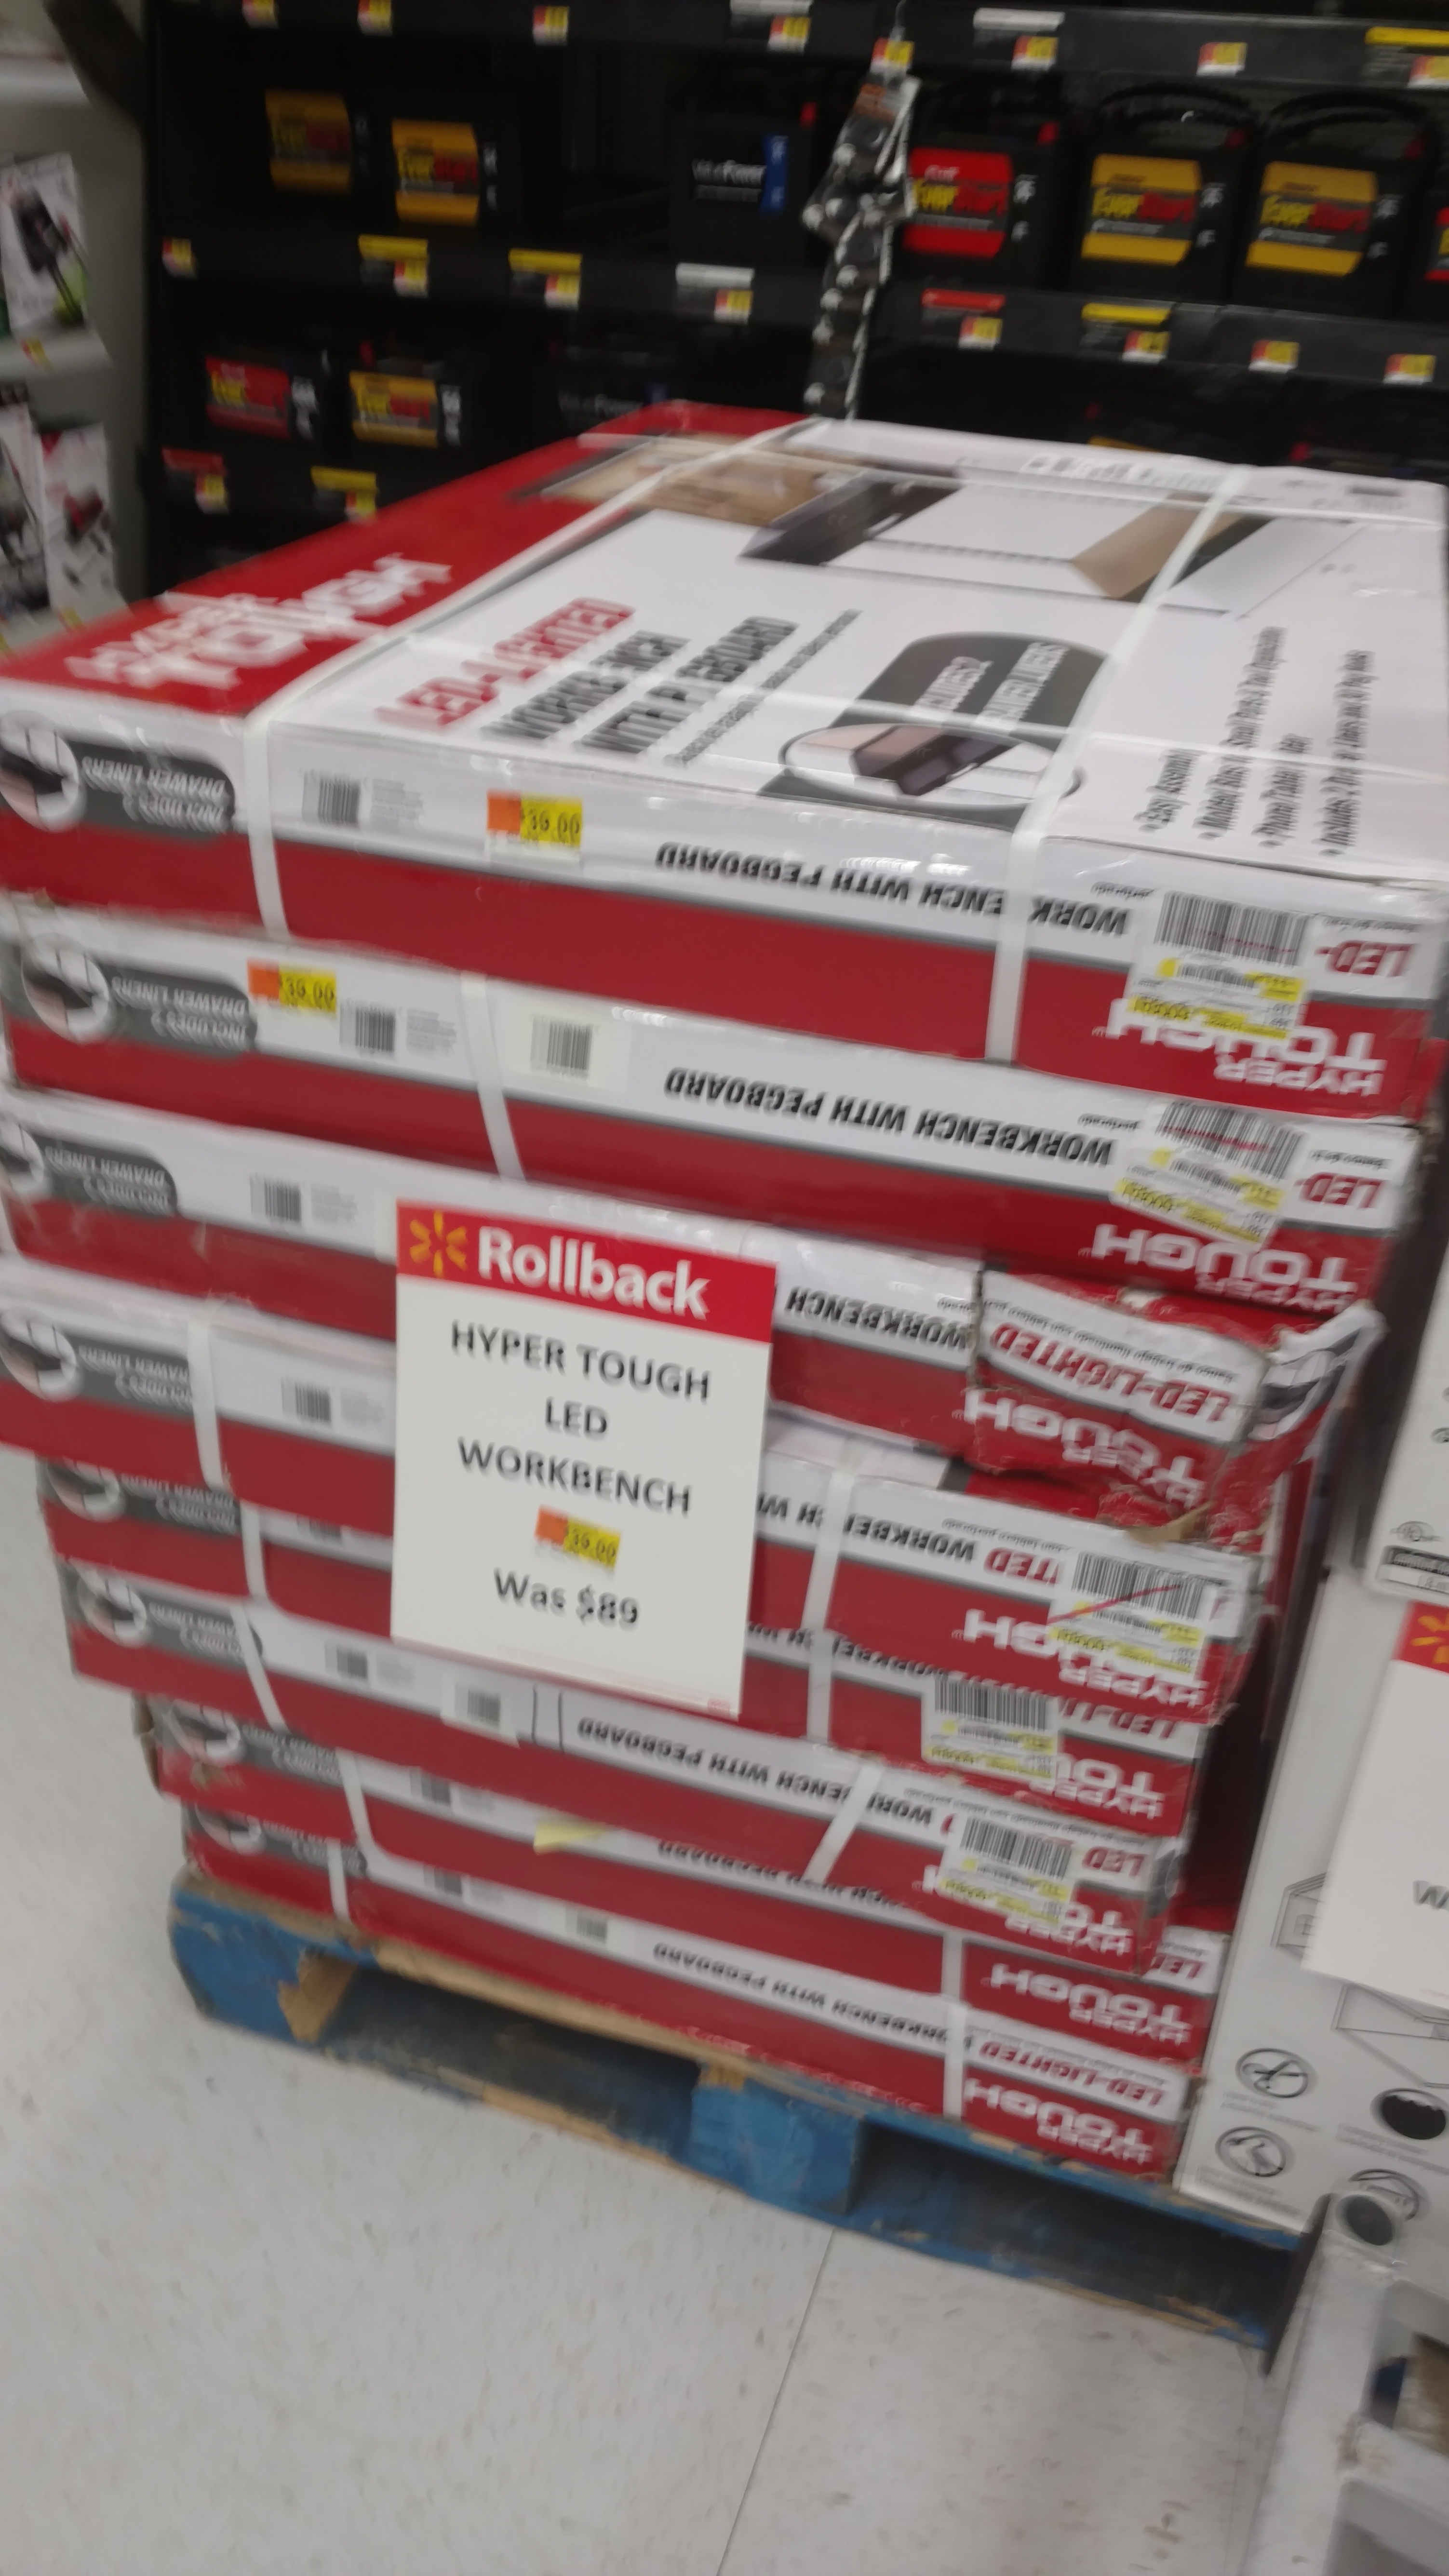
This morning I dropped my car off at Walmart for an oil change, and in a corner of the automotive department is a stack of clearance stuff. In the stack are these Hypertough workbenches:
For $39! They were $89 I think for Black Friday & show up as $49 online… still a good deal. I bought one just to use as a cheap workbench next to the machine, but halfway into assembly I realized that two of these together can work as a table for the XXL. Yes, they’re cheap, but once assembled they’re pretty rigid (i know because I just did it).
I’ll build them up to the work surface… wont use the pegboard back. I’ll double up the drawers on one side (what will be the front). I need to come up with a way to join the two tables, which won’t be hard. I might need to come up with a way to screw the work surface down (haven’t gotten there yet), or I may add a full top onto both tables so I have a single flat surface. It needs levelers and/or wheels… I’ll figure that out too.
Each table comes with two LED light strips, which will be useful. The metal that makes up the pegboard frame might be able to be reused as part of an enclosure.
Long story short - if you think these have potential (as I do), get out to your local Walmart QUICK and get two before they’re gone or full price. Worst case is that you decide you don’t like them & you can take them back.
I too just got my xxl in the mail and this box is pretty damn heavy. Have you set yours on top of these benches back to back yet? Tempted to run to walmart.
I’m not sure about XL fitting - I’m too new to this to know.
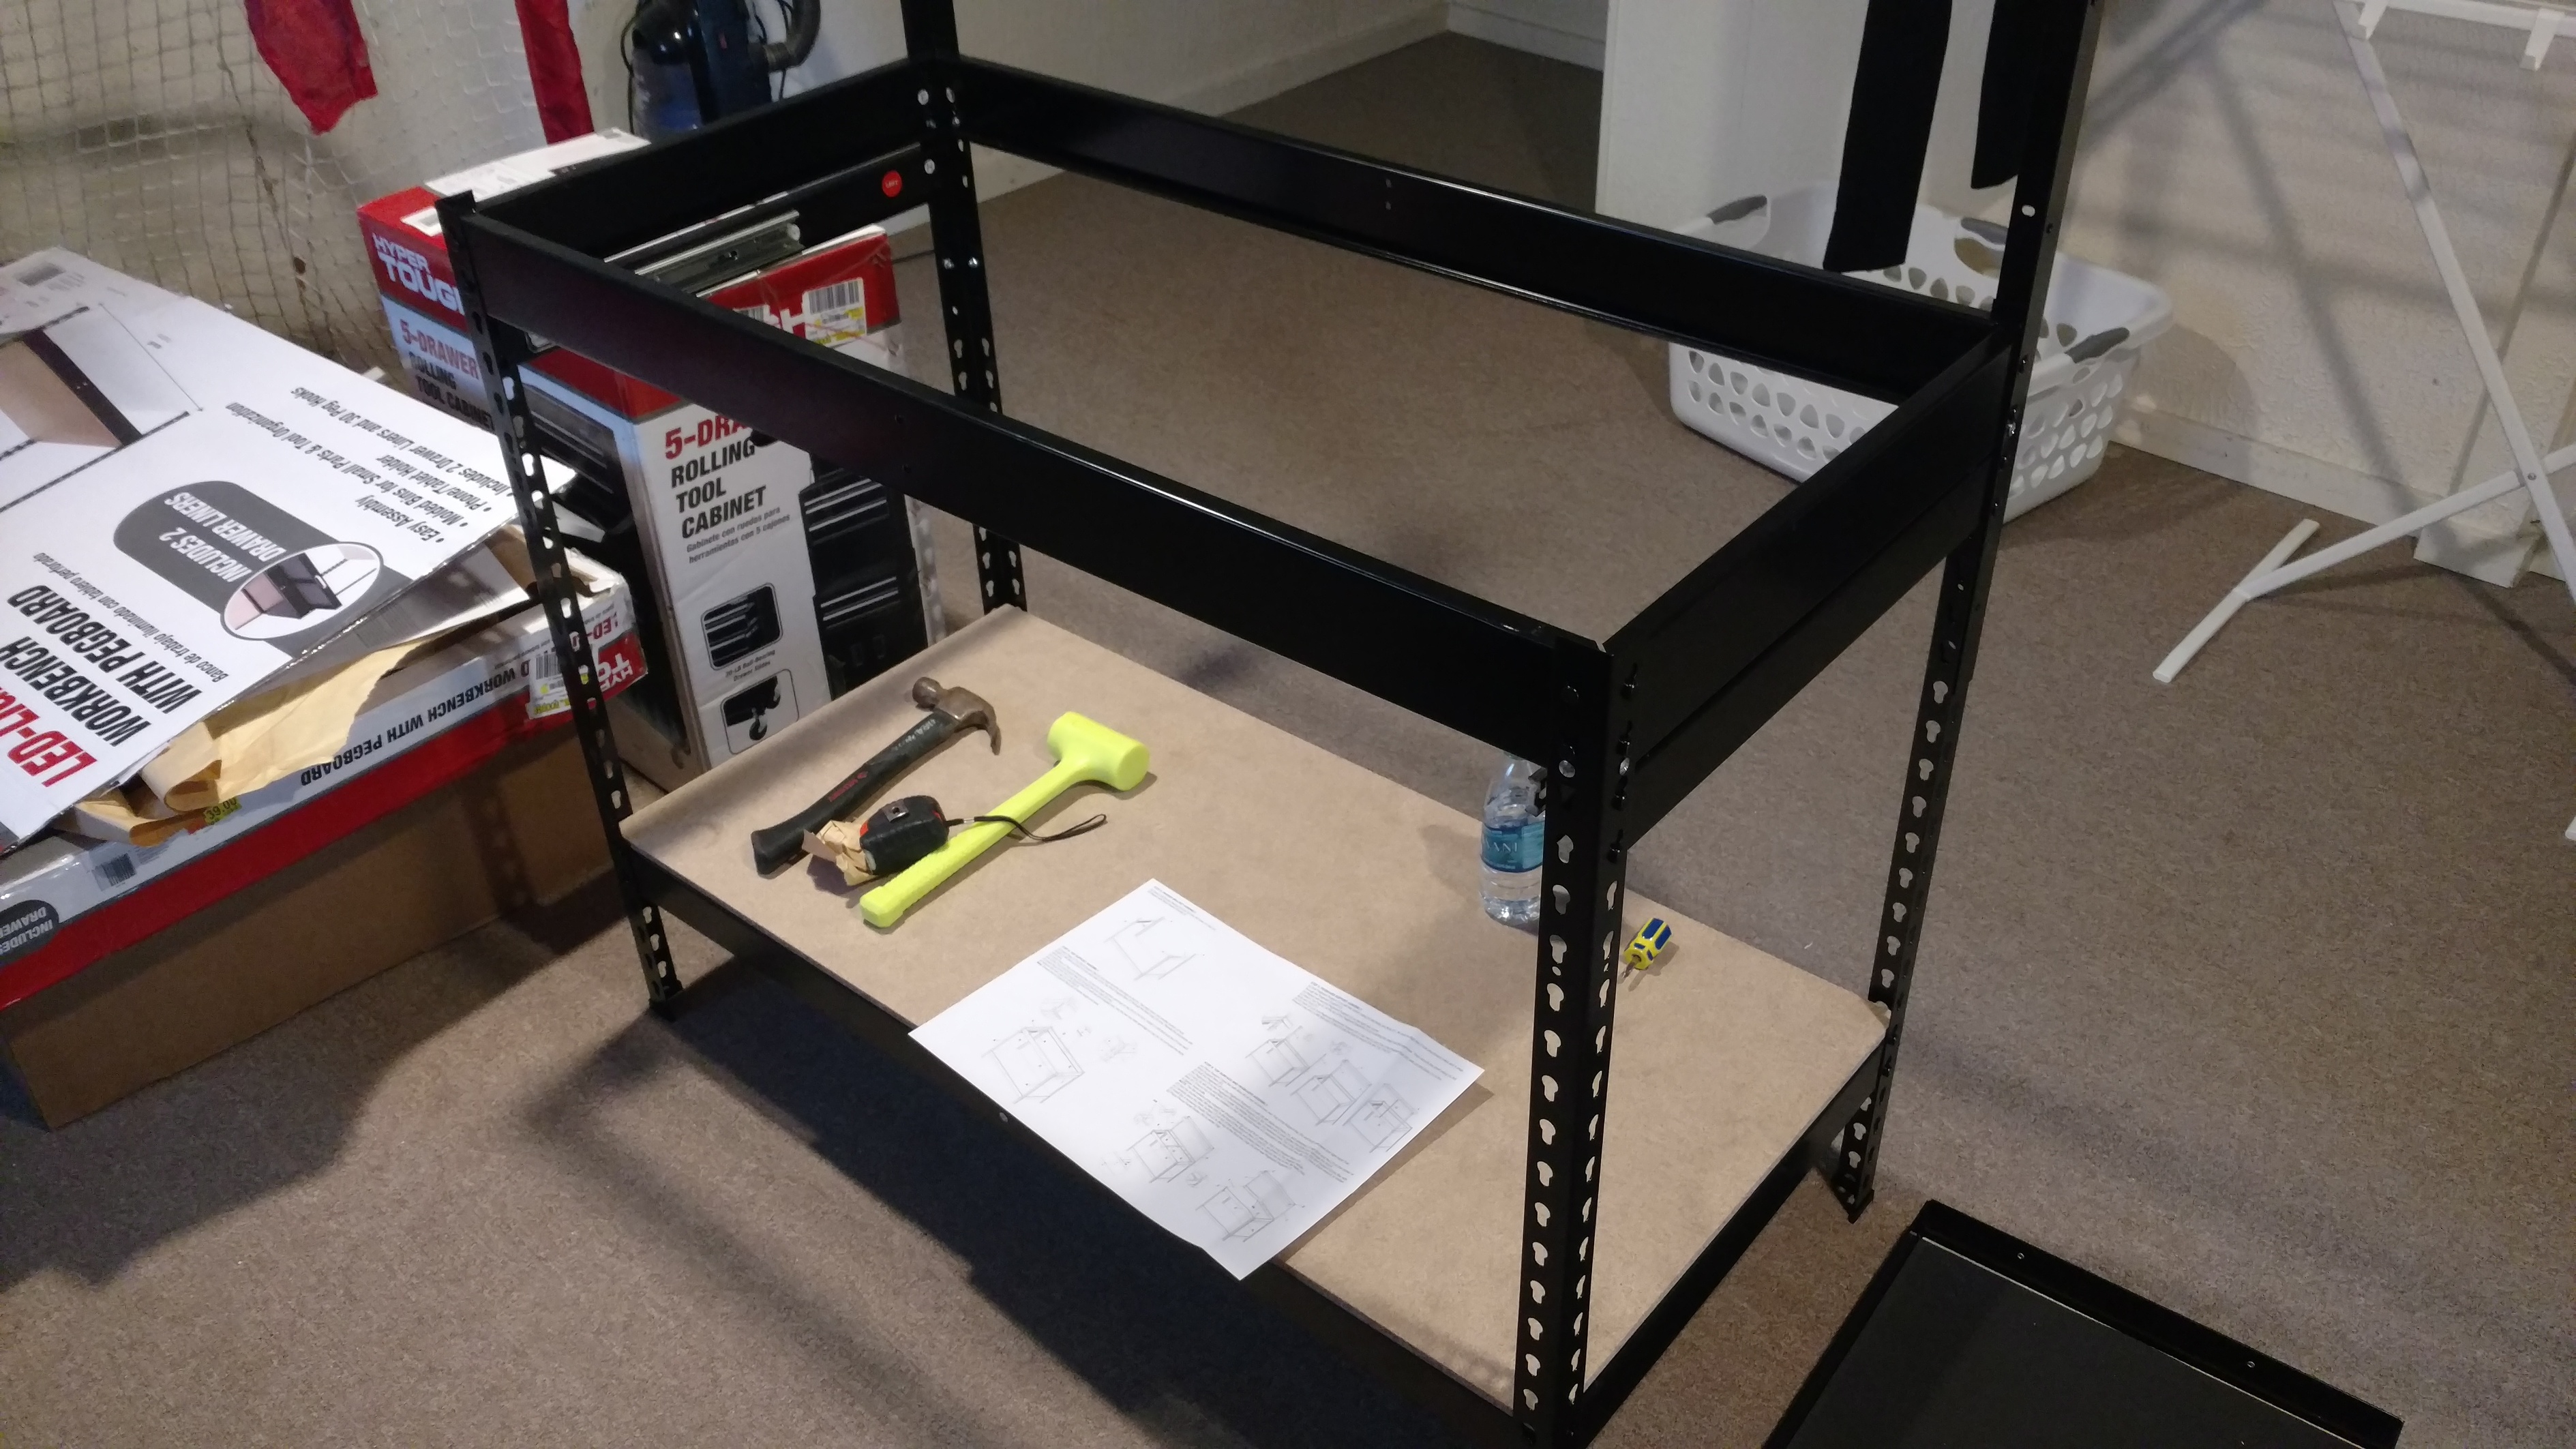
I have mine built & back to back, but don’t have the machine on it yet. I’m positive that they’ll support the weight, but i’m definitely going to need to make some modifications. The work surfaces simply sit on top of the frame & that won’t do - I’ll need a full top that’s mechanically attached to the frame. I also plan to make & attach some cross bracing to stiffen it further, and I need to join the two tables (I’ll get the hardware I need for that tomorrow, at work).
My rush to post was because of price & availability. At $89 each I don’t know that this is the best option, but at $39 each & with a little work, it’s viable. I need to work out the details now.
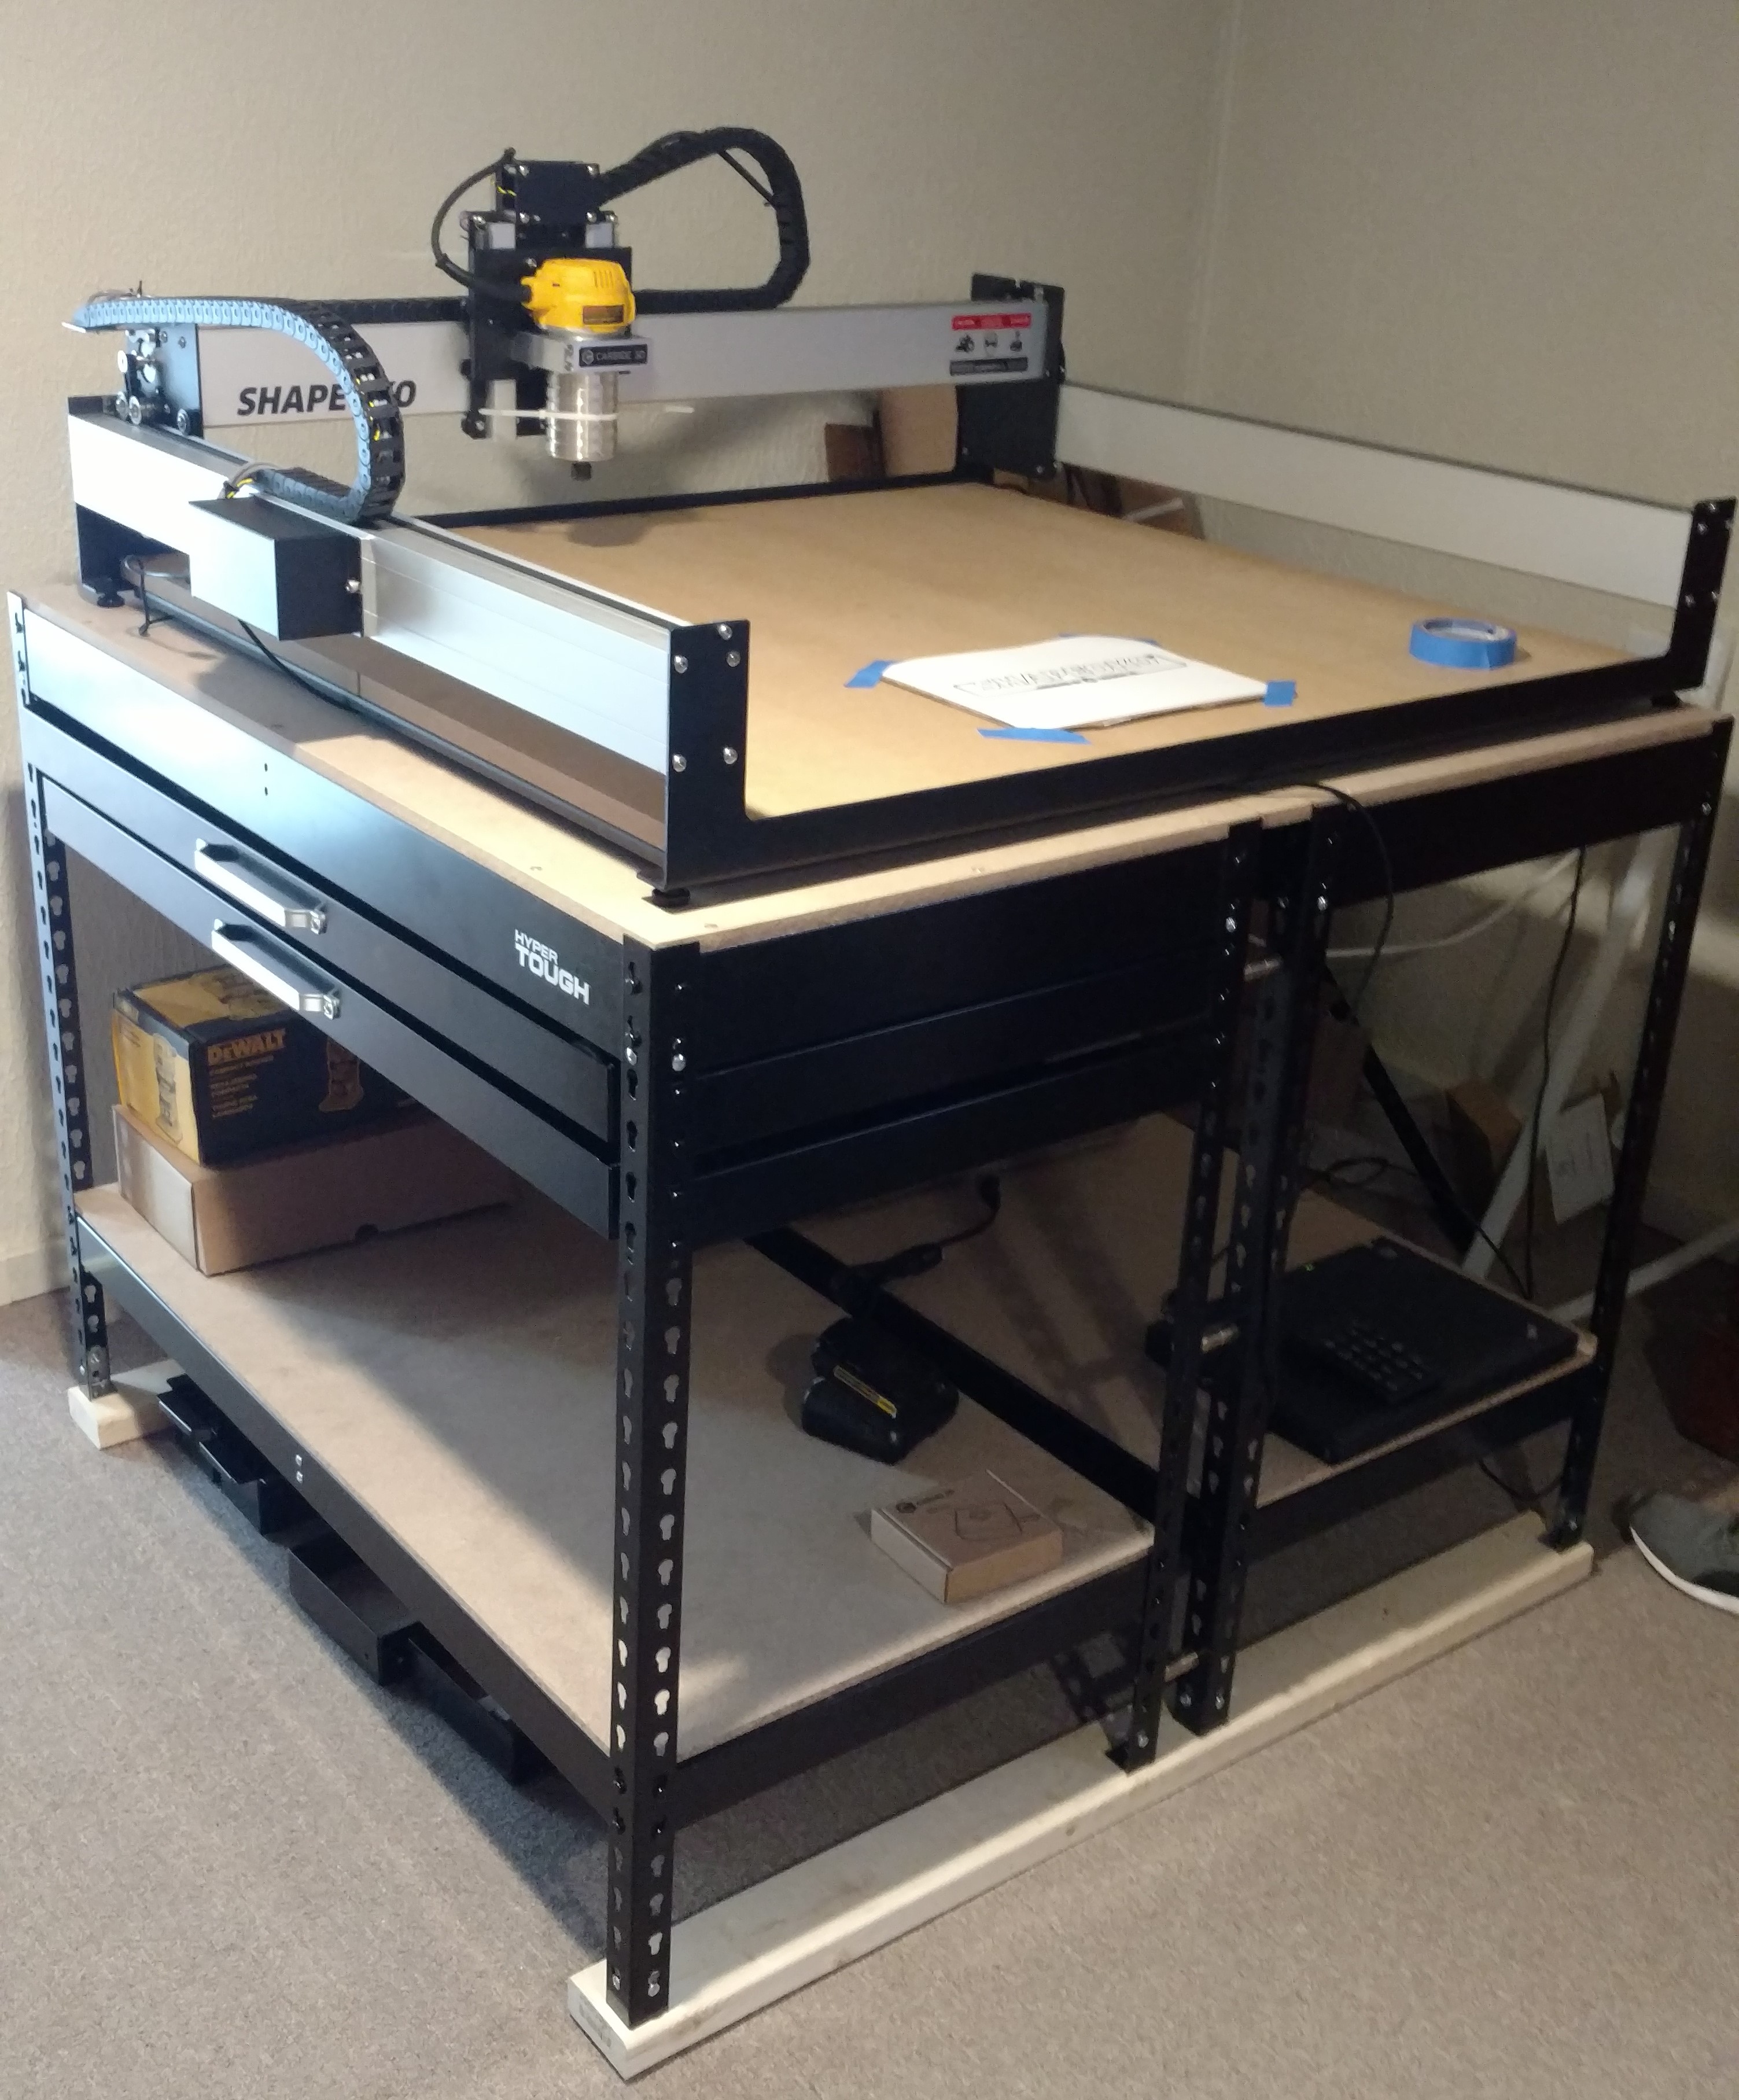
I finished building the machine last night. Here’s the table so far. I:
added spacers to widen the overall footprint (they also help to stiffen the table a bit).
added a single 1/2" MDF top that’s tek-screwed into the top table rails
made a base frame from 1" x 2" aluminum tubing, with brackets for the table legs to mount to. I have temporary 2x4 ‘rails’ there now. The base will have levelers that are top-adjustable & that spin up into the tubing so the whole thing can slide
As-is, it’s fairly solid, but I’ll probably add at least two lower side panels that take out any remaining flex. I may try to use the top uprights (meant for the pegboard back) as corners for an upper enclosure.
Looks Awesome, so far I have mine on those cheap plastic tables, 2 of them… and they shake a bit but not to bad for accuracy of my XXL, so this should be better either way, so don’t worry…use those LED lights if you can…I needed a lot of light on mine, and shop lights suck…
Nope, they shake a bit here and there but no noticeable difference in my projects…, worked great since I had my Machine this August, i will build this new table when i have the time…
Local walmart had a couple in stock, and been looking for something that would be about right for holding and maybe even enclosing the XL. Thanks for the recommendation! I plan on using the back as is, and eventually enclosing the top. I can add on some cross bracing out of steel, just got to hit the chop saw first (Im thinking welding it on is overkill).
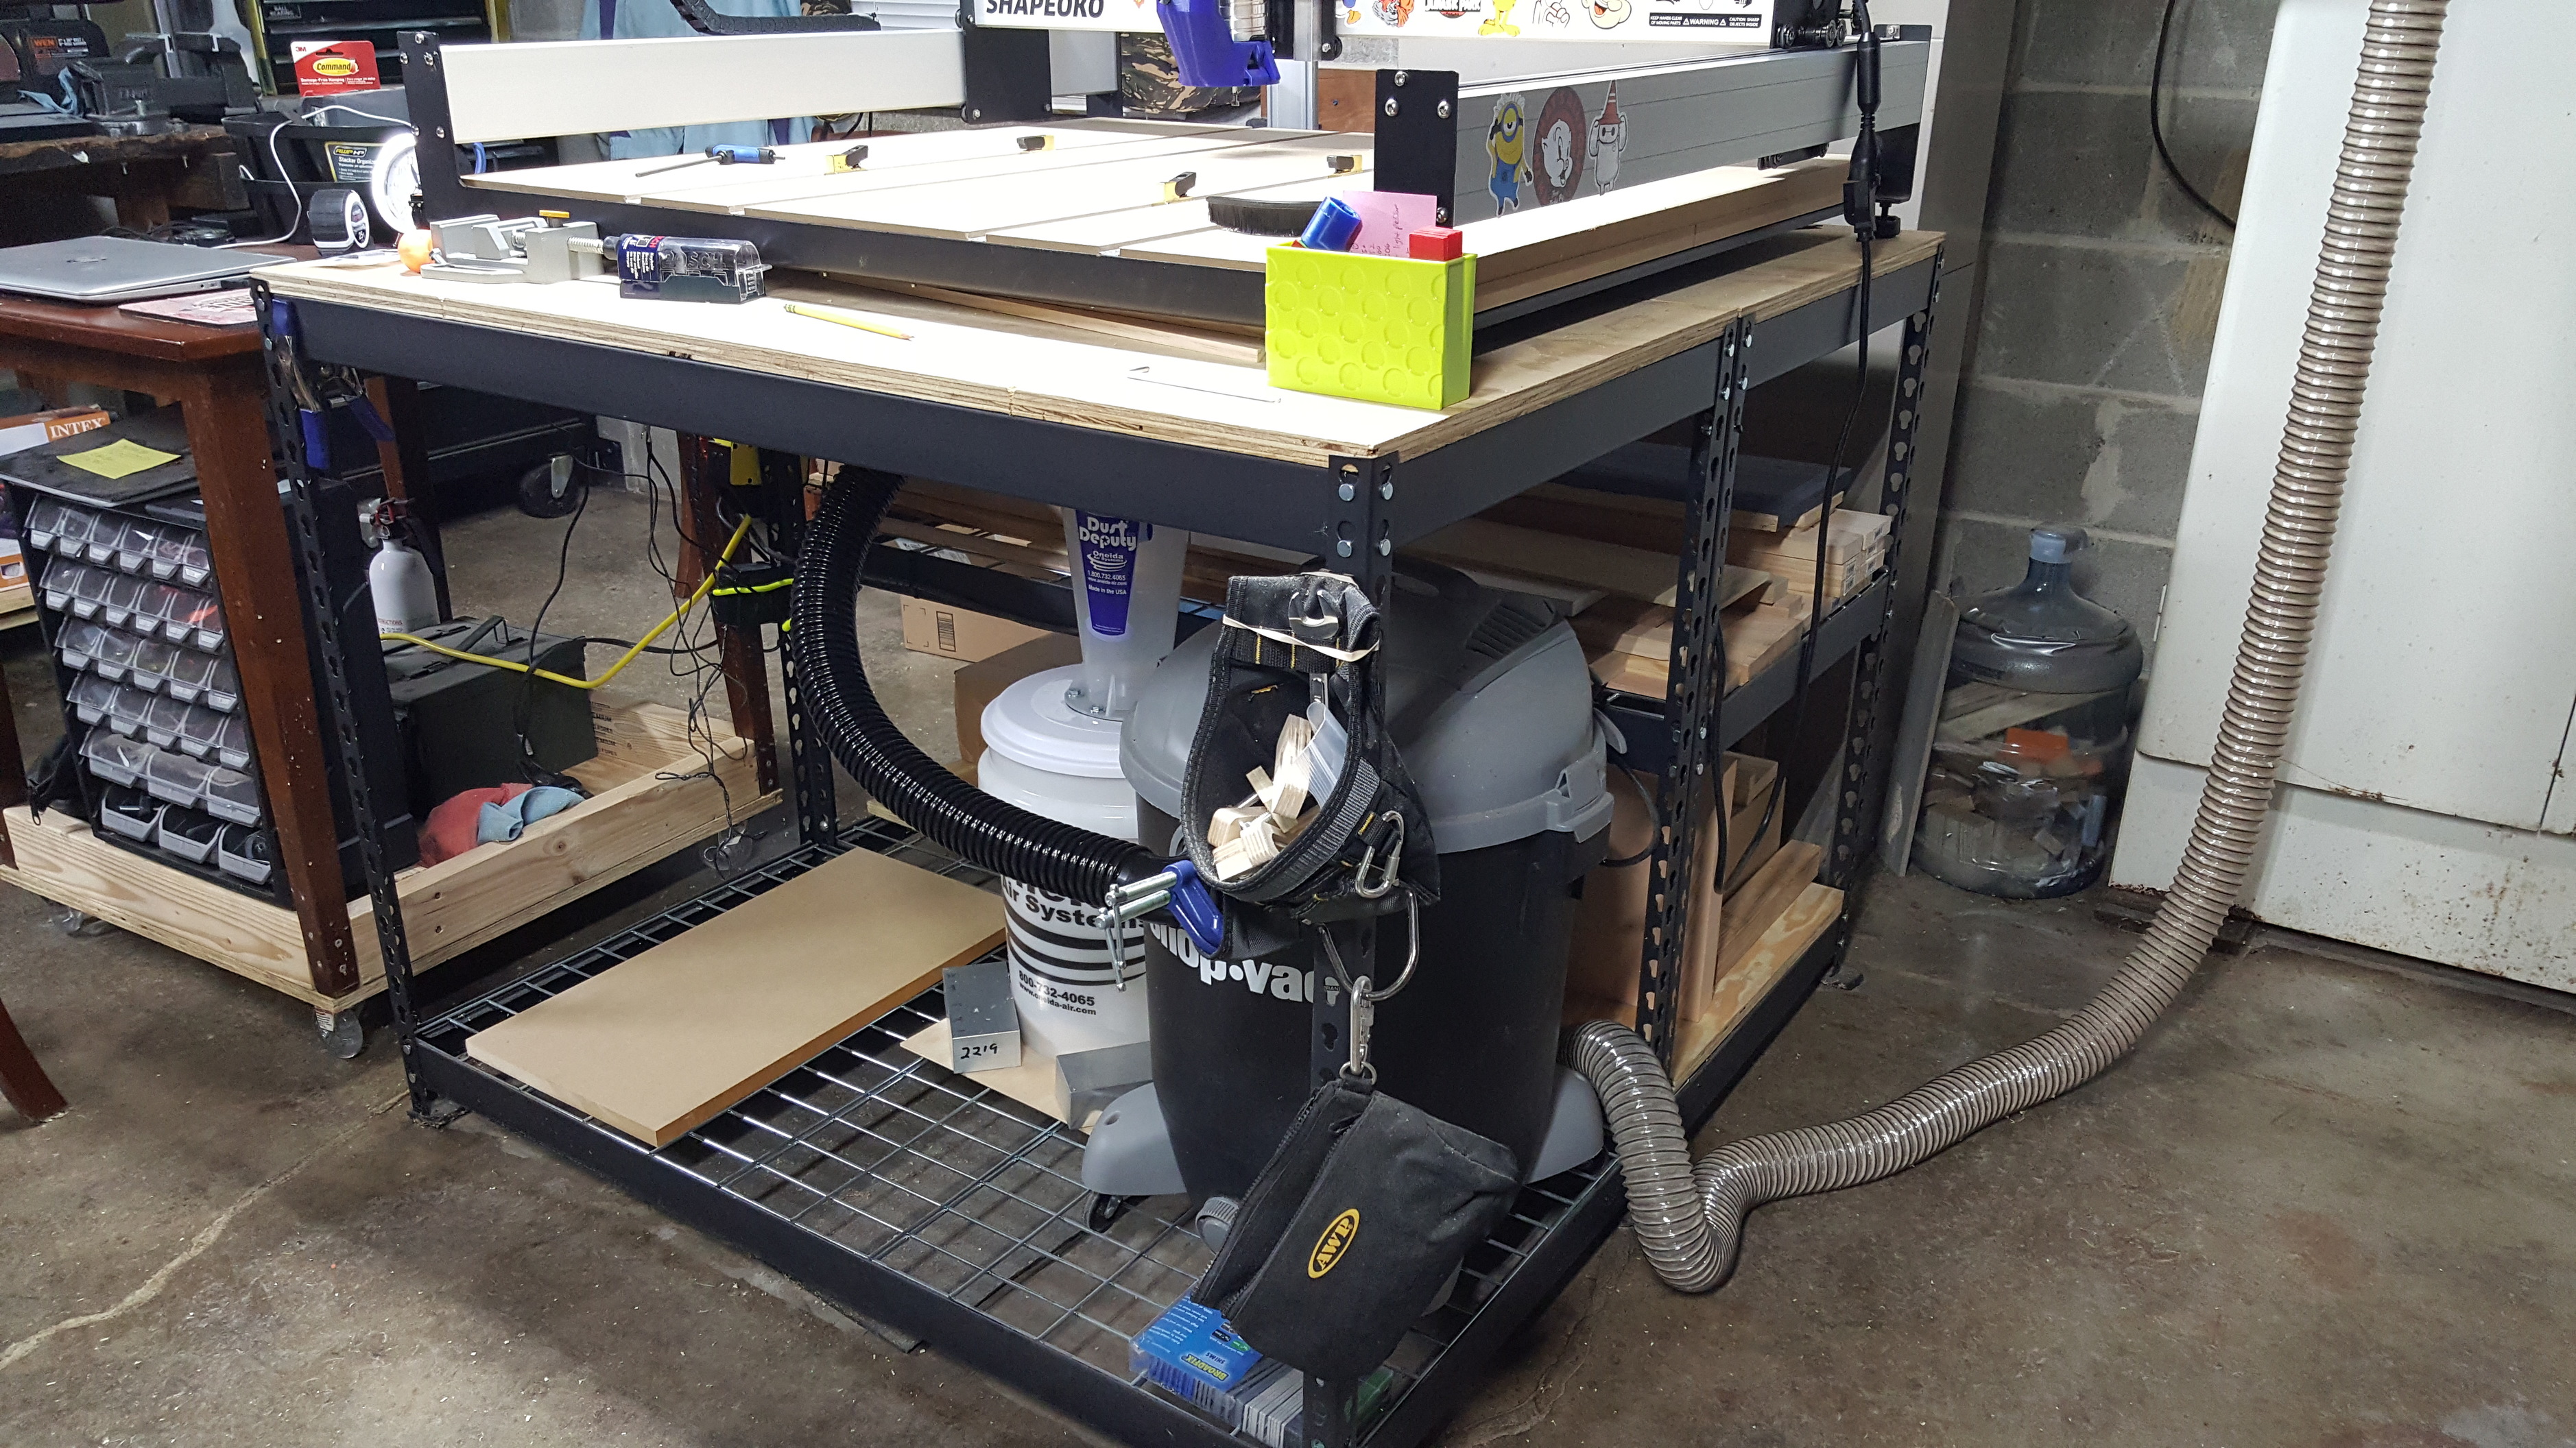
I might add some casters to make it a bit easier to move in the shop, and plan on mounting the vac and tornado underneath.
I got 4 Big Caster i have been hangin onto, trying to figure the best way to mount them, made using the 2x4 idea on the bottoms then mount the casters to them… like a 2x4 frame…