Yet another toolpath error I can't explain

I swear my machine is possessed. It’s getting to the point that I don’t trust it with a file, a these things are happening more and more.

This was the very first path. Should have been pretty simple.
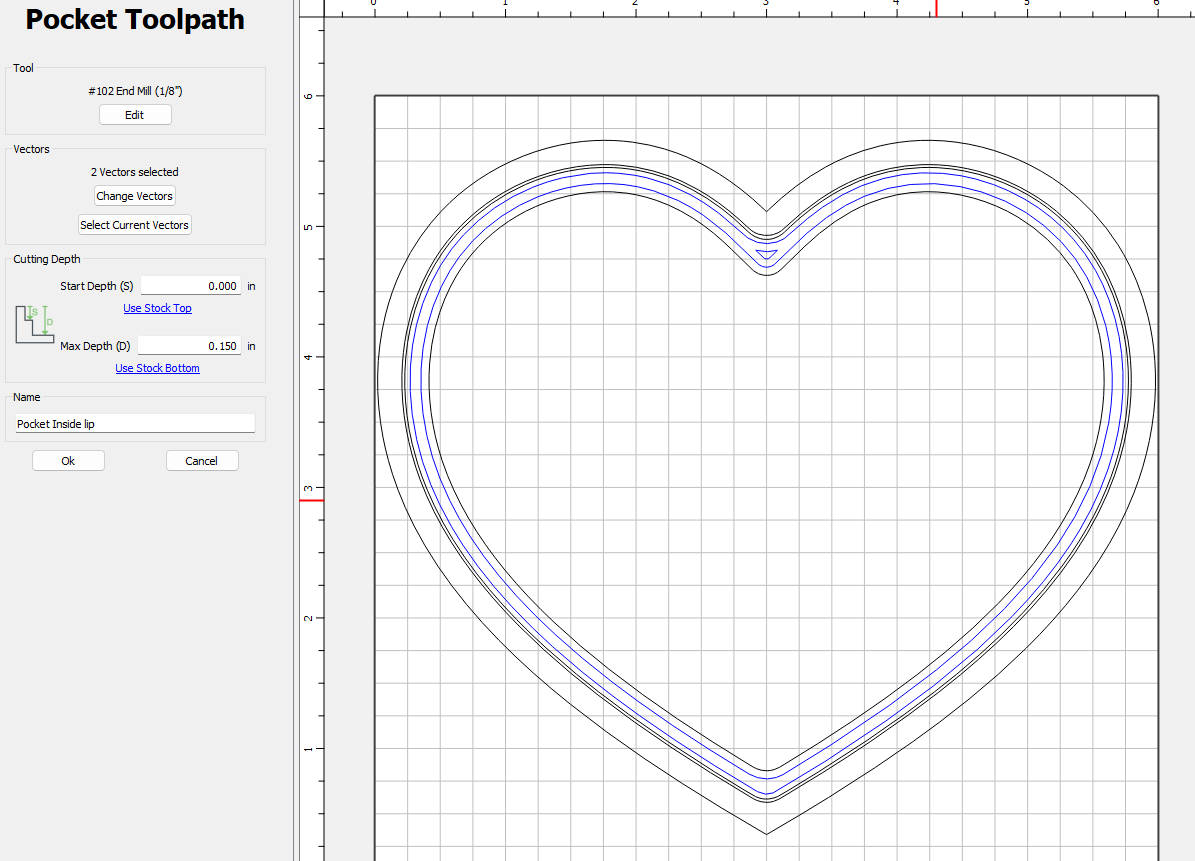


image
image

The file uploaded:
Step 1 - Lid Underside.c2d (480 KB)

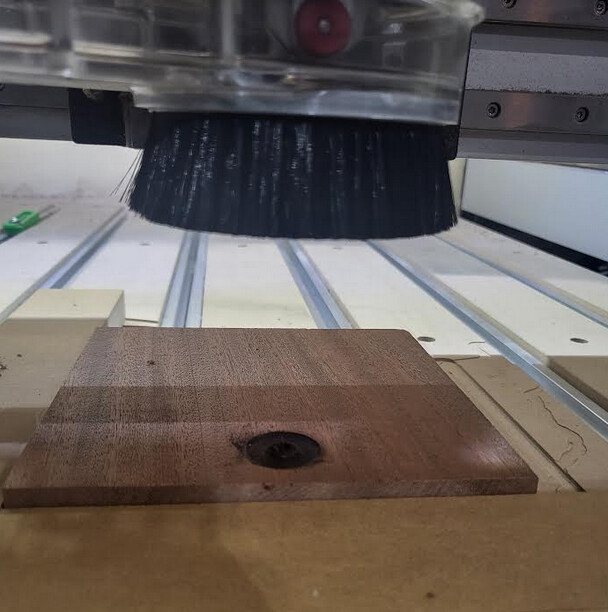
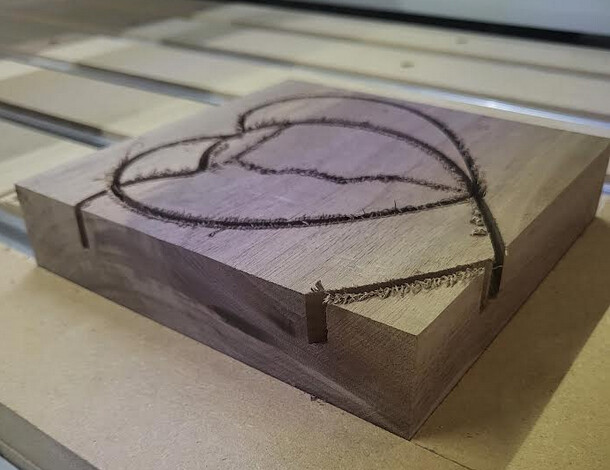
The piece was attached to the surface with tape/superglue and blocked on 2 sides, so it didn’t move. Initialized at the beginning of this job, and zero’ed. Stock is 1.98" thick.

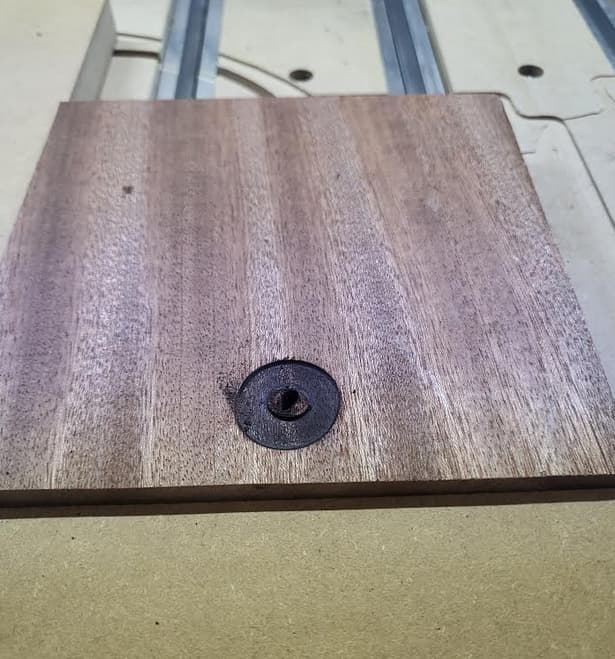
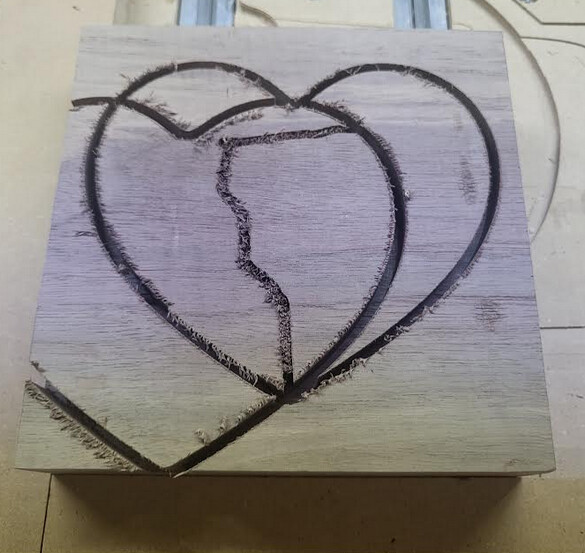
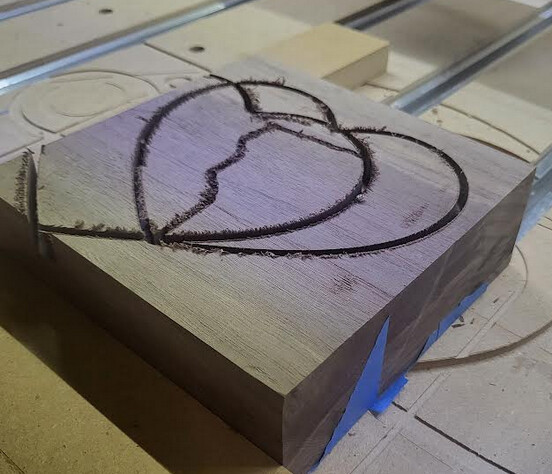
Not only did the pocket go wonky compared to the file, it also plunged way too deep.

So there’s two issues:

  1. Plunging too deep. I had just swapped out my old Carbide router for a new Makita router. I initialized after installing the Makita. Is there something else I should have done that might have thrown the depth off?

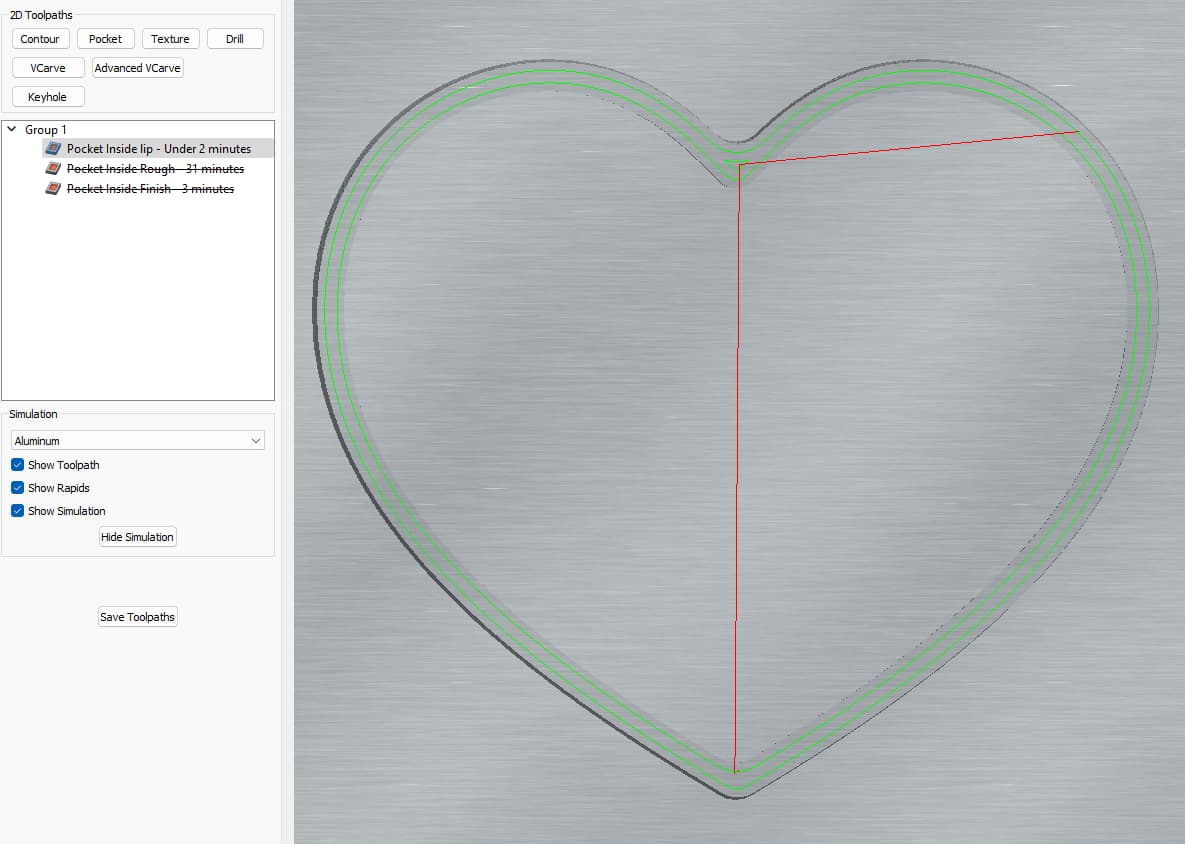
  2. Strange toolpath - …I’ve got nothing. No idea. Can someone else shed some light on this? Maybe the deep plunge caused it to skip on the belt?

This is getting beyond frustrating. I would say 1 our of ever 10 of my projects, something like this happens that can’t be explained.

Thanks for reading.

1 Like

d.o.c. too much
feed rate with 1/4 too fast

4 Likes

It looks like you (actually) cut about 1 inch into the wood, however the c2d file says to only cut 0.15 in down. Just on that information I can make a guess at what happened, the bit “slipped”.

When the bit slipped it didn’t slip in the direction you think it would slip, it was pulled DOWN. This is (my guess) at why the cut was so deep into the wood. Once the bit started slipping things just got worse. Eventually the tool engagement was so deep the force being applied back to the Shapeoko caused the Shapeoko to “lose steps” which is why you see the 2nd heart shape.

Suggested Corrections:

  • Using the #102 bit I would suggest reducing your depth per pass to (at most) 0.0625.
  • Click the “Ramping” option, it reduces the “drama” at the beginning of the slot cutting.
  • When tightning the #102 in the collet, make it a little tighter. If you think you were already making it tight enough then inspect the collet as you may need a new one. Pay extra for a good one.

I just checked the bit. I always set it even with the bottom of the sweepy brushes. It didn’t slip, unless sweepy slipped too. Even so, the difference between 0.15 and 1" would have been obvious when looking at the bit if it had slipped.

It also started the initial plunge at the same depth that it carved, so the bit didn’t slip during the carve. It started at that depth.

This is now multiple times that it has plunged deeper on a project than the toolpath was written. The first couple of times I chalked them up to imagining that I had zero’ed all but didn’t. However, the last few times I know for a fact that I zero’ed before I started, yet this keeps happening.

How did you set zero?

Did you try verifying where zero was set using the Z+6mm Rapid Position?

Your file specifies Top:

Were there any tool changes? How were they handled?

Zero’ed to the top of the lower left corner, using the 1/8" bit that was used for the first tool path (so no tool change between zeroing and the first plunge). Always set the tool above the lower left corner, then Z down until a piece of paper between the bit and the stock just starts to snag. Then click “zero all.” Then run the job.

1 Like

Could something have mechanically interfered with retracting before the job?

Try making a video capturing all of what you do and what the machine does?

Like I said, I had just installed the new Makita router and this was my first use with it. Now that I think about it, I seem to remember the power cable tightening a bit as moved to the bitsetter before the job but didn’t think too much of it. I wonder if I didn’t have enough slack in the power cable and that interfered. I’ll go inspect/test that.

The Makita has a shorter cord, which isn’t suited to being placed in the drag chain on larger machines — best to run it up to the ceiling along the vacuum hose and run an extension cord up as well and plug them in somewhere that the connection can be made securely so that it doesn’t move.

What I described above was exactly the problem. I ran the bit setter again, and the power cable pulled too tight against the HDZ. I assume that didn’t allow for the depth to be set correctly.

I fed about 3" more slack through the drag chains, re-initialized and started over, and the job started running fine.

Thanks for the problem solving help.

3 Likes

Another great example of this forum and its supporters.

So I’ve actually been having an issue. When I click “zero all” I’ve noticed that CM doesn’t actually zero the z axis as it says it does. I’ve ruined a couple projects and really discouraged myself.

If I click “zero all” now, I re-zero the z axis by itself.
This has solved my issues of my bit going entirely way too deep.

Hope this helps!!

Which version of Carbide Motion are you using?

On what platform?

I have had this occur.

CM 617
Windows

It feels like there is absolutely something wrong with the Z.

After last night’s discussion, I was able to run the job successfully.

Today, I wanted to run the exact same job. The only thing I did was chance the stock depth in Carbide Create (from 1.98 to 0.96), then saved and loaded the file to Motion. The steps I took:

1 Loaded the stock
2 Disconnected the vacuum hose and sweepy so there’s no reason to think it was the problem
3 Initialized the machine
4 Zero XYZ on top of stock, bottom left corner
5 Rapid jog to front center
6 Rapid to XY Zero to confirm zero (all good)
7 Rapid to Z + 6mm to confirm zero (all good)
8 Confirmed all my settings in Carbide Create just to confirm depths, etc
9 Run, run
10 Confirmed that I already had the 1/8" bit in
11 Watched it move to the bitsetter, all looked good
12 Attached sweepy, attached, vacuum, turned on the spindle after confirming RPM, then continue

…and this immediately happened…


Immediately went straight through my stock stopping when it hit the collet.

So I paused, stopped the job, re-initialized, and did the above steps all over. This time it worked.

So, first attempt failed, second attempt, exact same procedure, succeeded.

Then I tried a third job. Exact same file. Exact same steps above. This time it plunged about .5" too deep.

So, 1 for 3 today, or 2 for 5 counting last night.

I can’t keep wasting stock like this, and I can’t keep feeling like I cannot trust this machine/software. If I was doing something new every time, I’d chalk it up to me messing something up. But to do the exact same job and exact same steps 5 times in a row and only getting a 2:5 success rate, that’s concerning.

Do you hear an odd noise from the Z-axis after starting the job before it plunges?

Let us know about this at support@carbide3d.com — ideally create a video which shows what you are doing and captures what the machine deos.

No noises.

I created a very poor recording, but it happened to be one of the times it worked. But I assure you I’m taking the exact same steps, and I’ve been trying to problem solve this issue.

This topic was automatically closed after 30 days. New replies are no longer allowed.