Z axis belt tension

Hey guys. I’m having some problems with z axis problems and could use your help. Need to get this figured out as I have a few orders to fill and until I can get an hdz ordered up I need to make this stock z axis perform as it should.

I was working on a badge earlier in Walnut. Using a touch probe, I cut the roughing pass with my .25 endmill. Followed this up with my .25 ballnose, and this is what I was left with:

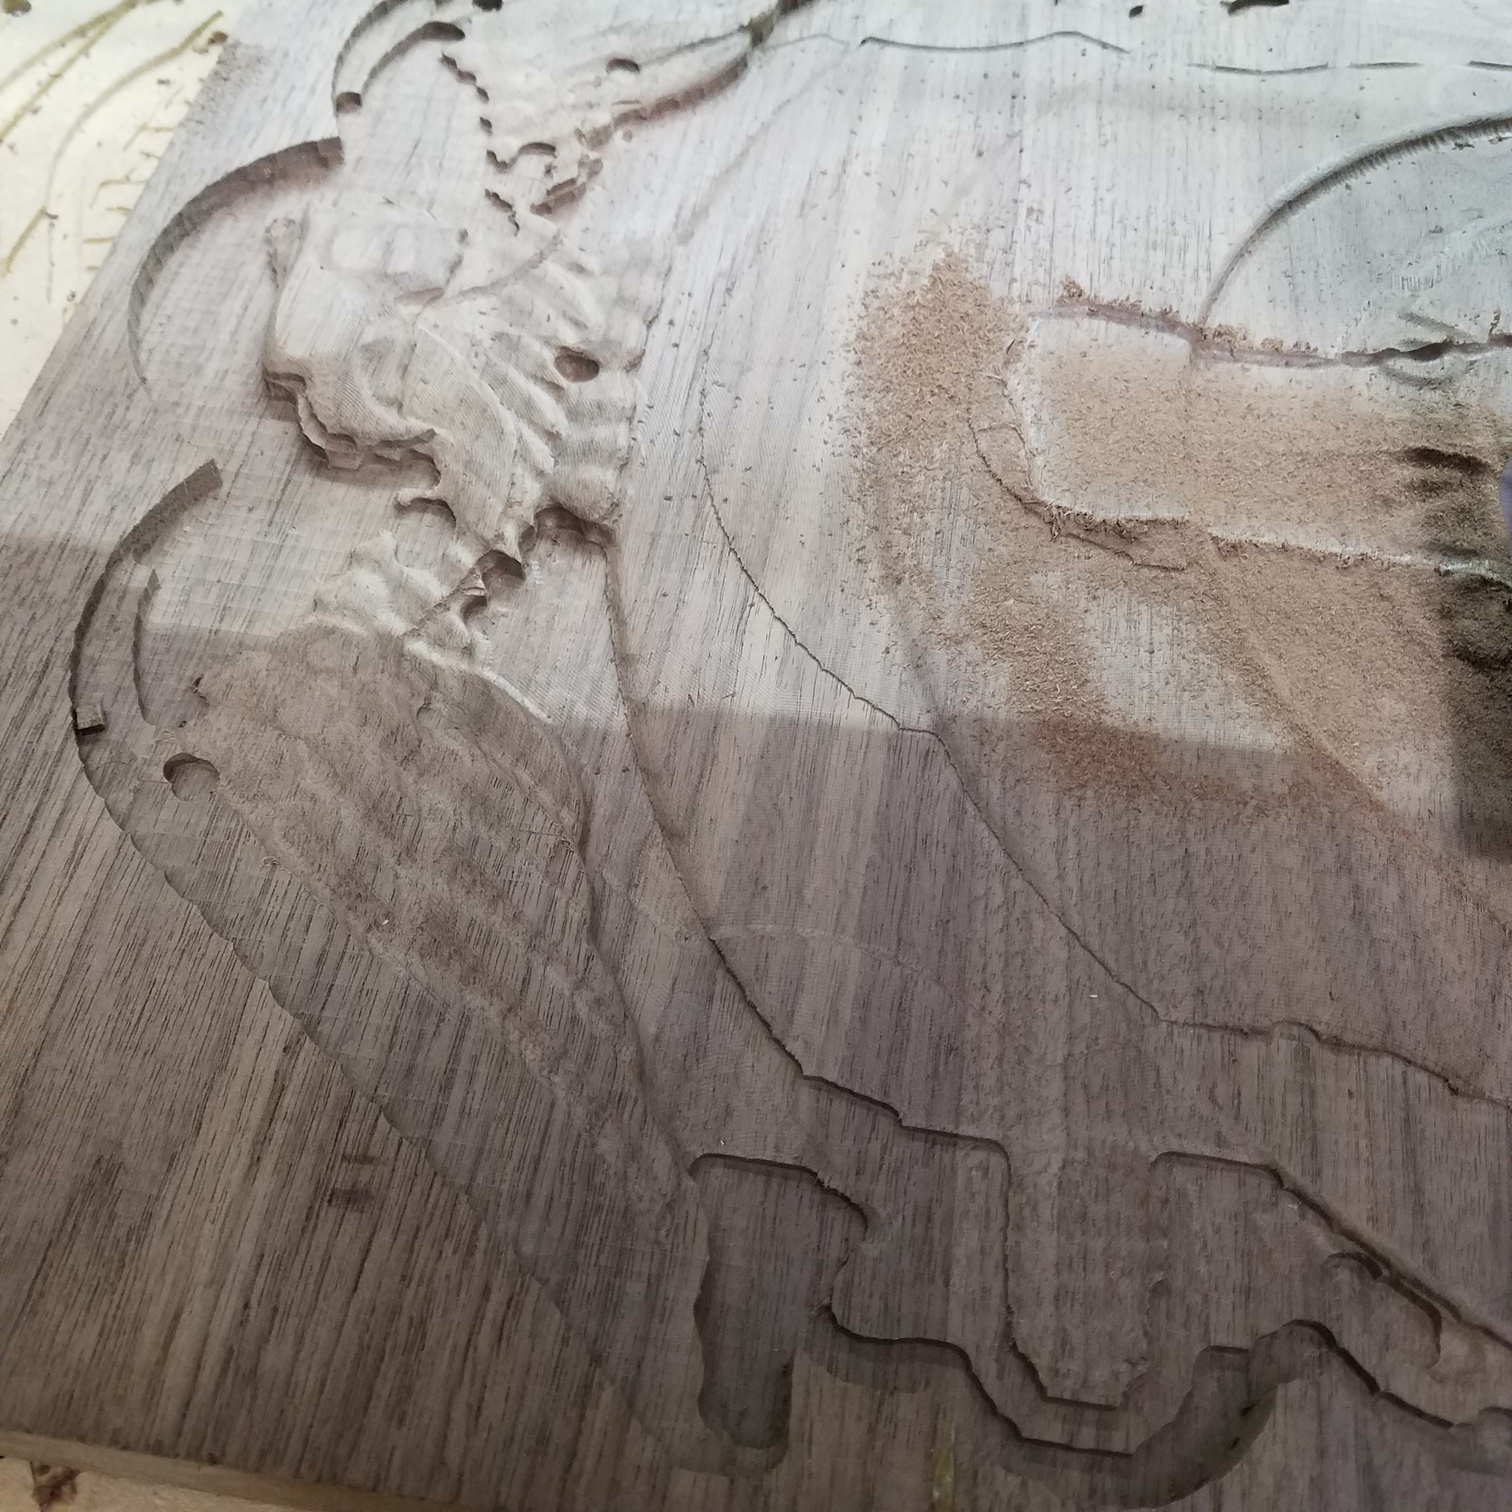
(Please disregard the right portion with the dust, I am in the process of trying to recarve the middle at 2mm deeper to see if I can salvage this current piece)

Some areas were either cut too deep with the roughing pass, or too shallow with the ballnose. I’m not really sure which. Checked the bit was tight in the router and the z zero was correct with the touch probe.

Disassembled my z axis, eccentrics were tight & rails clean. Belt looks to be in good shape. It appears where the belt is positioned between the two rollers (backside of z) that the teeth were not aligned, not sure if this was an issue. Also I was missing a grub screw on the top z carriage connected to the motor, however the grub screw sitting on the shaft was present and tight. I replaced the missing grub screw. I will note that I know I’ve been missing this screw for over a year and I’ve never had this issue.

Id like to mention there’s a slight possibility my flexible vac hose coming down interfered with the z carriage, but I have had this hose in the same position for over a year without known issues.

Last thing to note is I recently tightened my belt on my z axis, (couple weeks ago). I’ve run other projects without this problem since tightening it
Any chance it was too tight? Here’s a video showing what I consider to be “guitar string tight”:

Finally, after rebuilding and reassembling, I went to use my touch probe and noticed this clicking after probing. Replicated it 3 times after rehoming the machine. I did look closely at the suckit ears and they are spread out where it should not be interfering. The z axis was as high as I could take it to be able to squeeze the touch probe in below. Perhaps I need to place the bit deeper into the collet? I usually have Al little more wiggle room between the bit and the probe, but I didn’t want to take any chances of the router crashing into the dust boot while cutting. Here’s a video showing this clicking.

Sorry to take up your time and thanks for any tips or help!

The Z belt looks tight but here are a few comments on your issue.

First, it is possible that the little set screws of the gear driving the belt may be loose. You can replace those with 3mm cap screws that hold better.

Second, you mention that your Z lifts close to the maximum. If the Z reaches the limit switch, it can mess your steps.

1 Like

That’s the motor skipping steps at the top of your Z range. You could try sliding the router up in the mount to give you more clearance.

1 Like

Hey Luc, thanks for replying.

I know those set screws can come loose, but the one on the shaft was tight when I checkled, so I don’t think that was the issue.

The z was at max height when starting to probe. But I dont see why after contacting the probe it would try to go higher than it should

Gotcha thanks neil. I normally have the bit set deeper into the router so not usually an issue. But in this instance I had the bit sticking down further.

1 Like

There’s a built in retract distance. You don’t have the room for it.

3 Likes

Curious if others have similar belt tension! Neil?

To be honest, I didn’t look at that video because I found that my stock Z liked to have those belts pretty tight. I used shims to help me tighten it. No sledge or anything, but it was TIGHT.

EDIT: Watched…looks good.

This might also be a good chance to do a “manual” probe.

Set your probe out of the way of the endmill on top of a piece of aluminum foil. Probe (using the MDI) to the foil.

These screws can appear to be tight but can still slip, it does not take much movement to mess-up your height settings.

1 Like

Got you. Thanks for the tip on the cap screws. You wouldn’t happen to have the m # on them would you? M2.5 m3 etc. I’m assuming 3mm is the length

The thread is M3 the length would probably be 5 or 8mm

1 Like

It looks like your 2nd video shows the router mounting plate hitting the standoff as it did in the 1st video. That shouldn’t happen in the 2nd video if the Z-axis limit switch and software are working properly - right @WillAdams?

The switches, by default, are homing switches only. They don’t stop motion or trigger alarms. They can be set as true limit switches, but it’s advised against with the standard electronics.
Also by default, soft limits are disabled.
Carbide Motion does prevent overtravel on $J jog moves. The retract in this case, and most others, will not be prevented by the software.

2 Likes

So CM4 only fixed the problem for jogging?!!!

Just wanted to comment I ran a badge today and it cut absolutely perfect. So I’m not sure where I went wrong yesterday. Seems the tightness on the z belt is working well if anyone new wanted to use the video as a reference But thanks for your guys help!

2 Likes

The old advise of doctors “Take 2 Asprin and call in the morning if not better” is good advise. It is funny how a good nights sleep fixes so many problems. Sometimes we are so sure of something only to find out it is something we are doing wrong. Sometimes just starting over fixes a lot of problems. Do not make assumptions and verify the basics. I have seen people spend hours troubleshooting a problem with power on a computer to discover that it was not plugged in. In the power problem by verifying the outlet has power and the machine is plugged in first would save a lot of time. So the moral of the story is when faced with an intractable problem, start over and cover the basics and many problems just disappear.

3 Likes

This topic was automatically closed 30 days after the last reply. New replies are no longer allowed.