I’d hate to throw away our suck-it after upgrading to the Z-Plus. Anyone already made strategies for attaching?
Have you seen this link? Dustboot Mounting to Z Plus
I’m in the same boat and interested in additional ideas. Bonus points for pics of what you’ve done!
1 Like
No - thank you for that! Magnets - great idea! 
I did see the penance bracket, but would prefer something that doesn’t extend the carriage if possible.
I was surprised that there was all that space available for mounting and no holes drilled to do so…,
@BiologybenBen
Referring to my Z-Plus solution I did find that in some instances two magnets per side were insufficient, I fitted extra for 4 magnets per side this solved the problem. Still love this Suckit mounting.
3 Likes
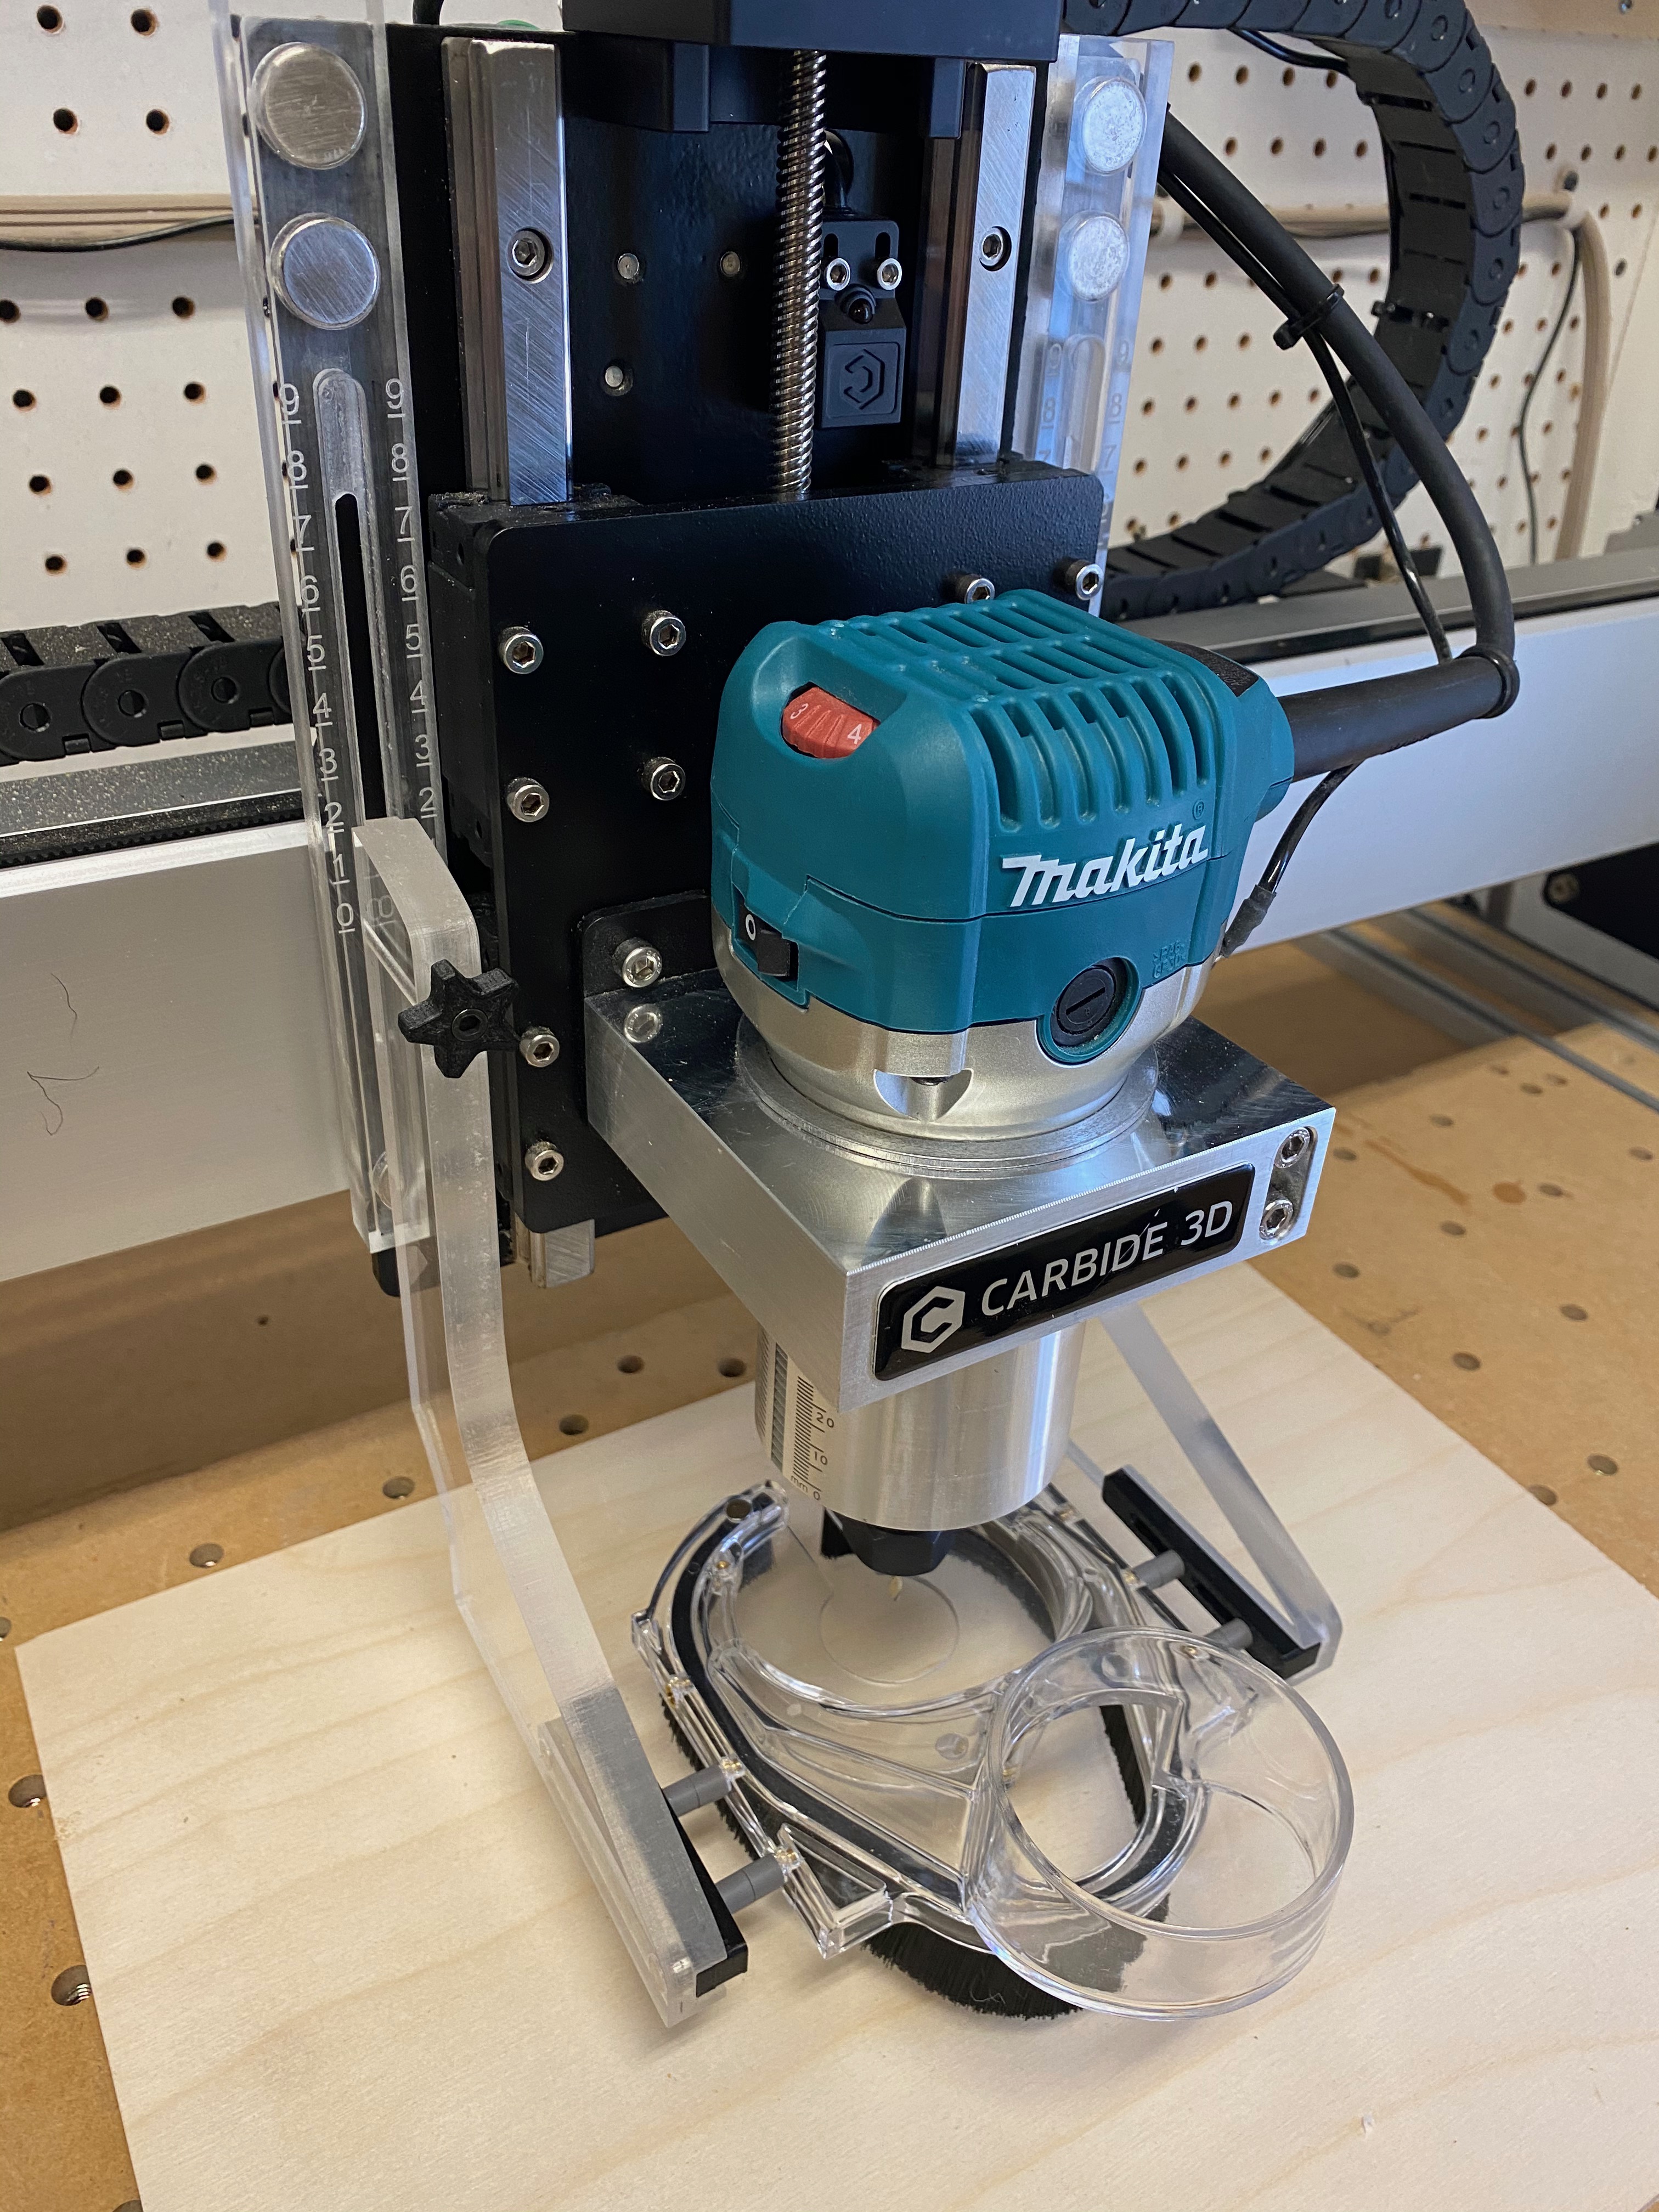
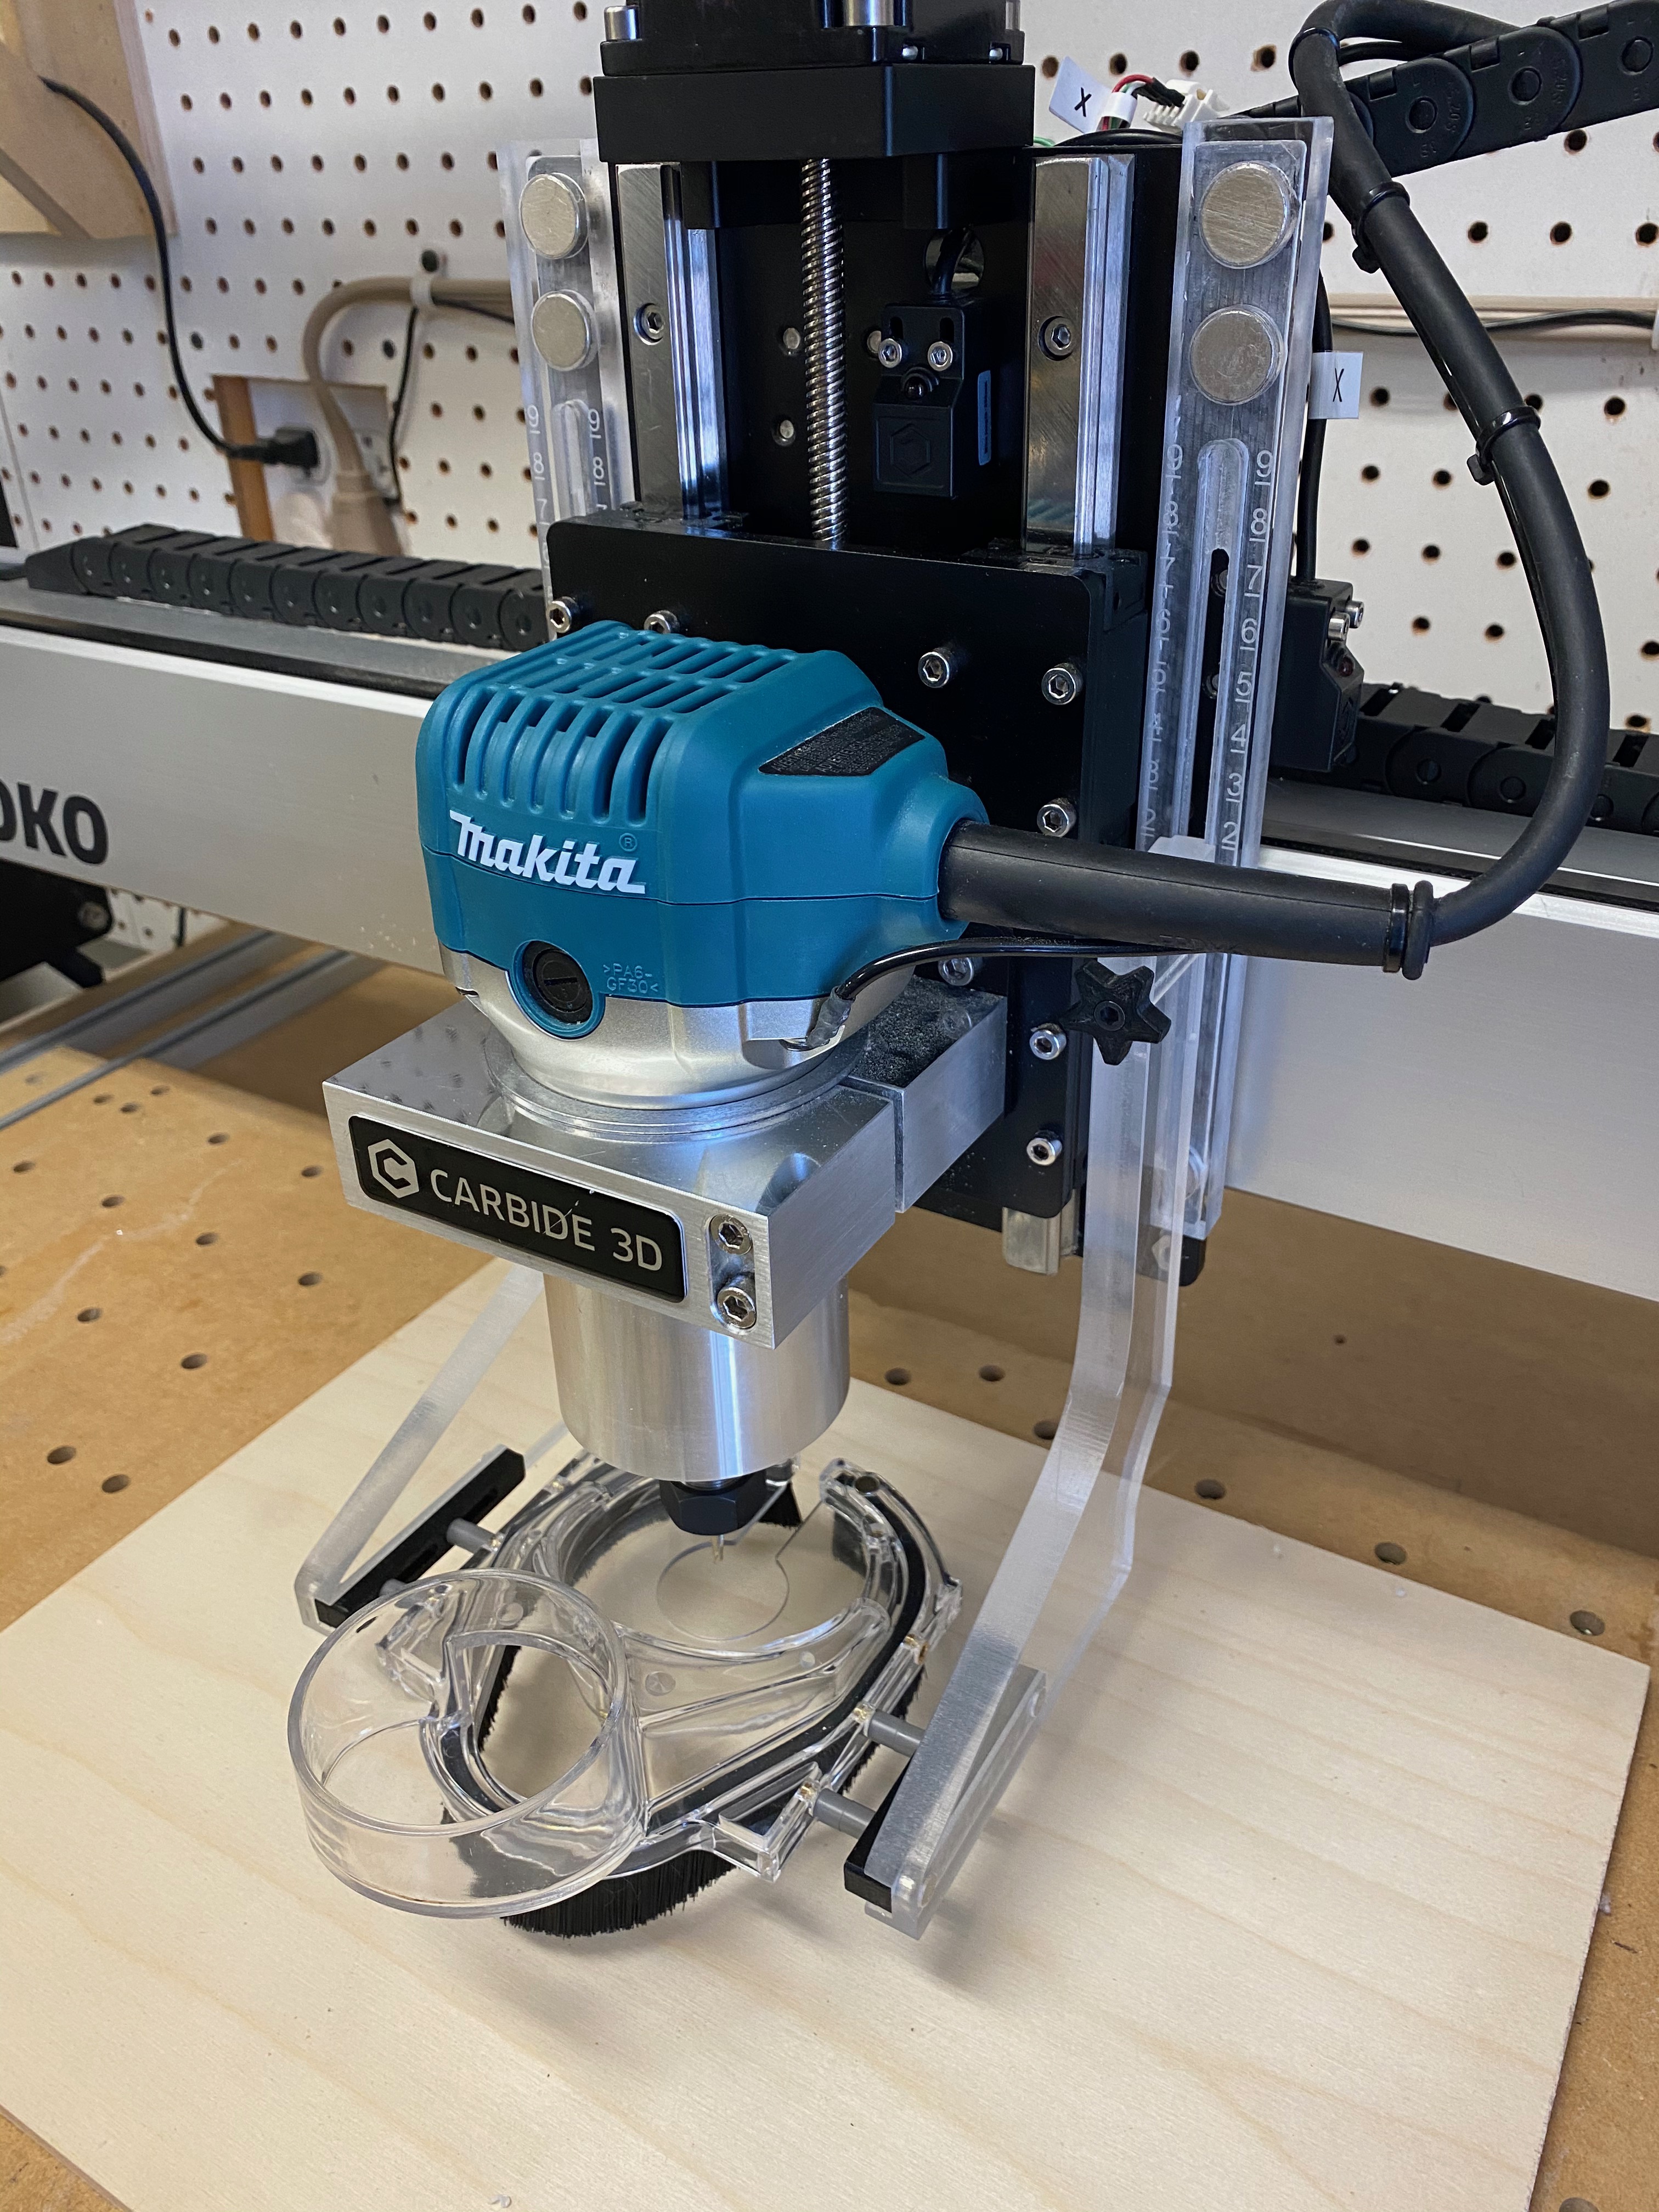
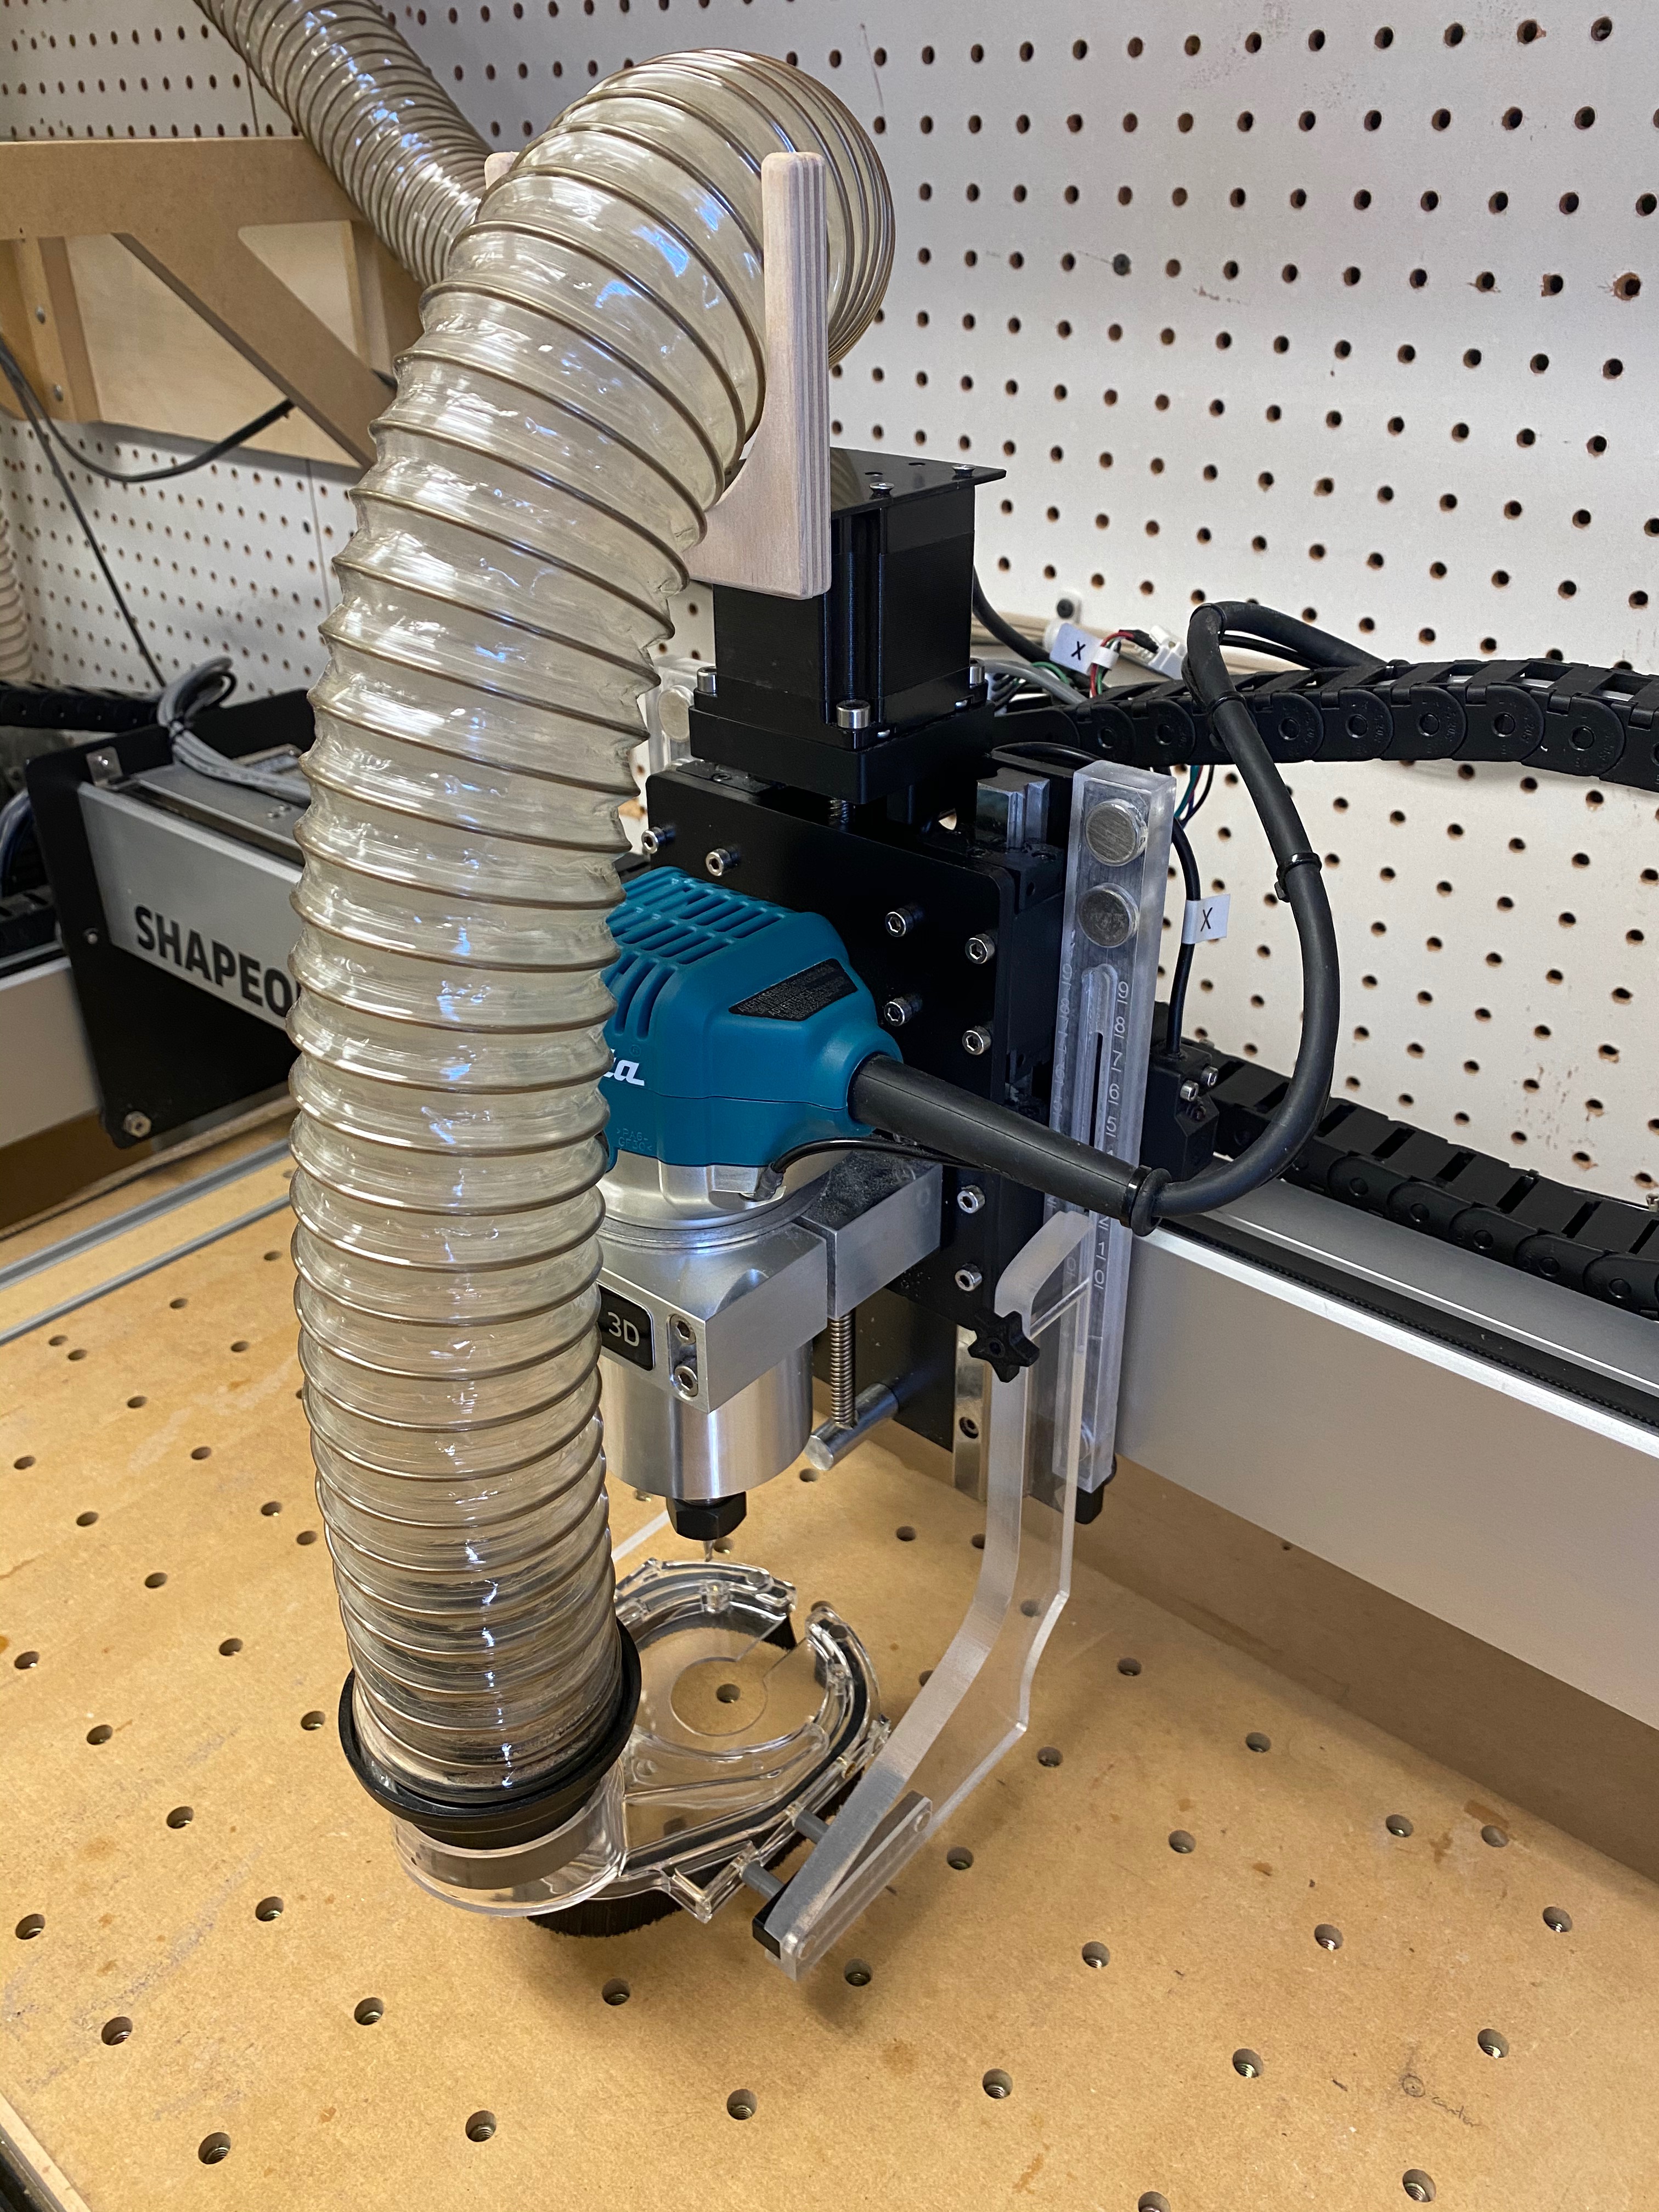
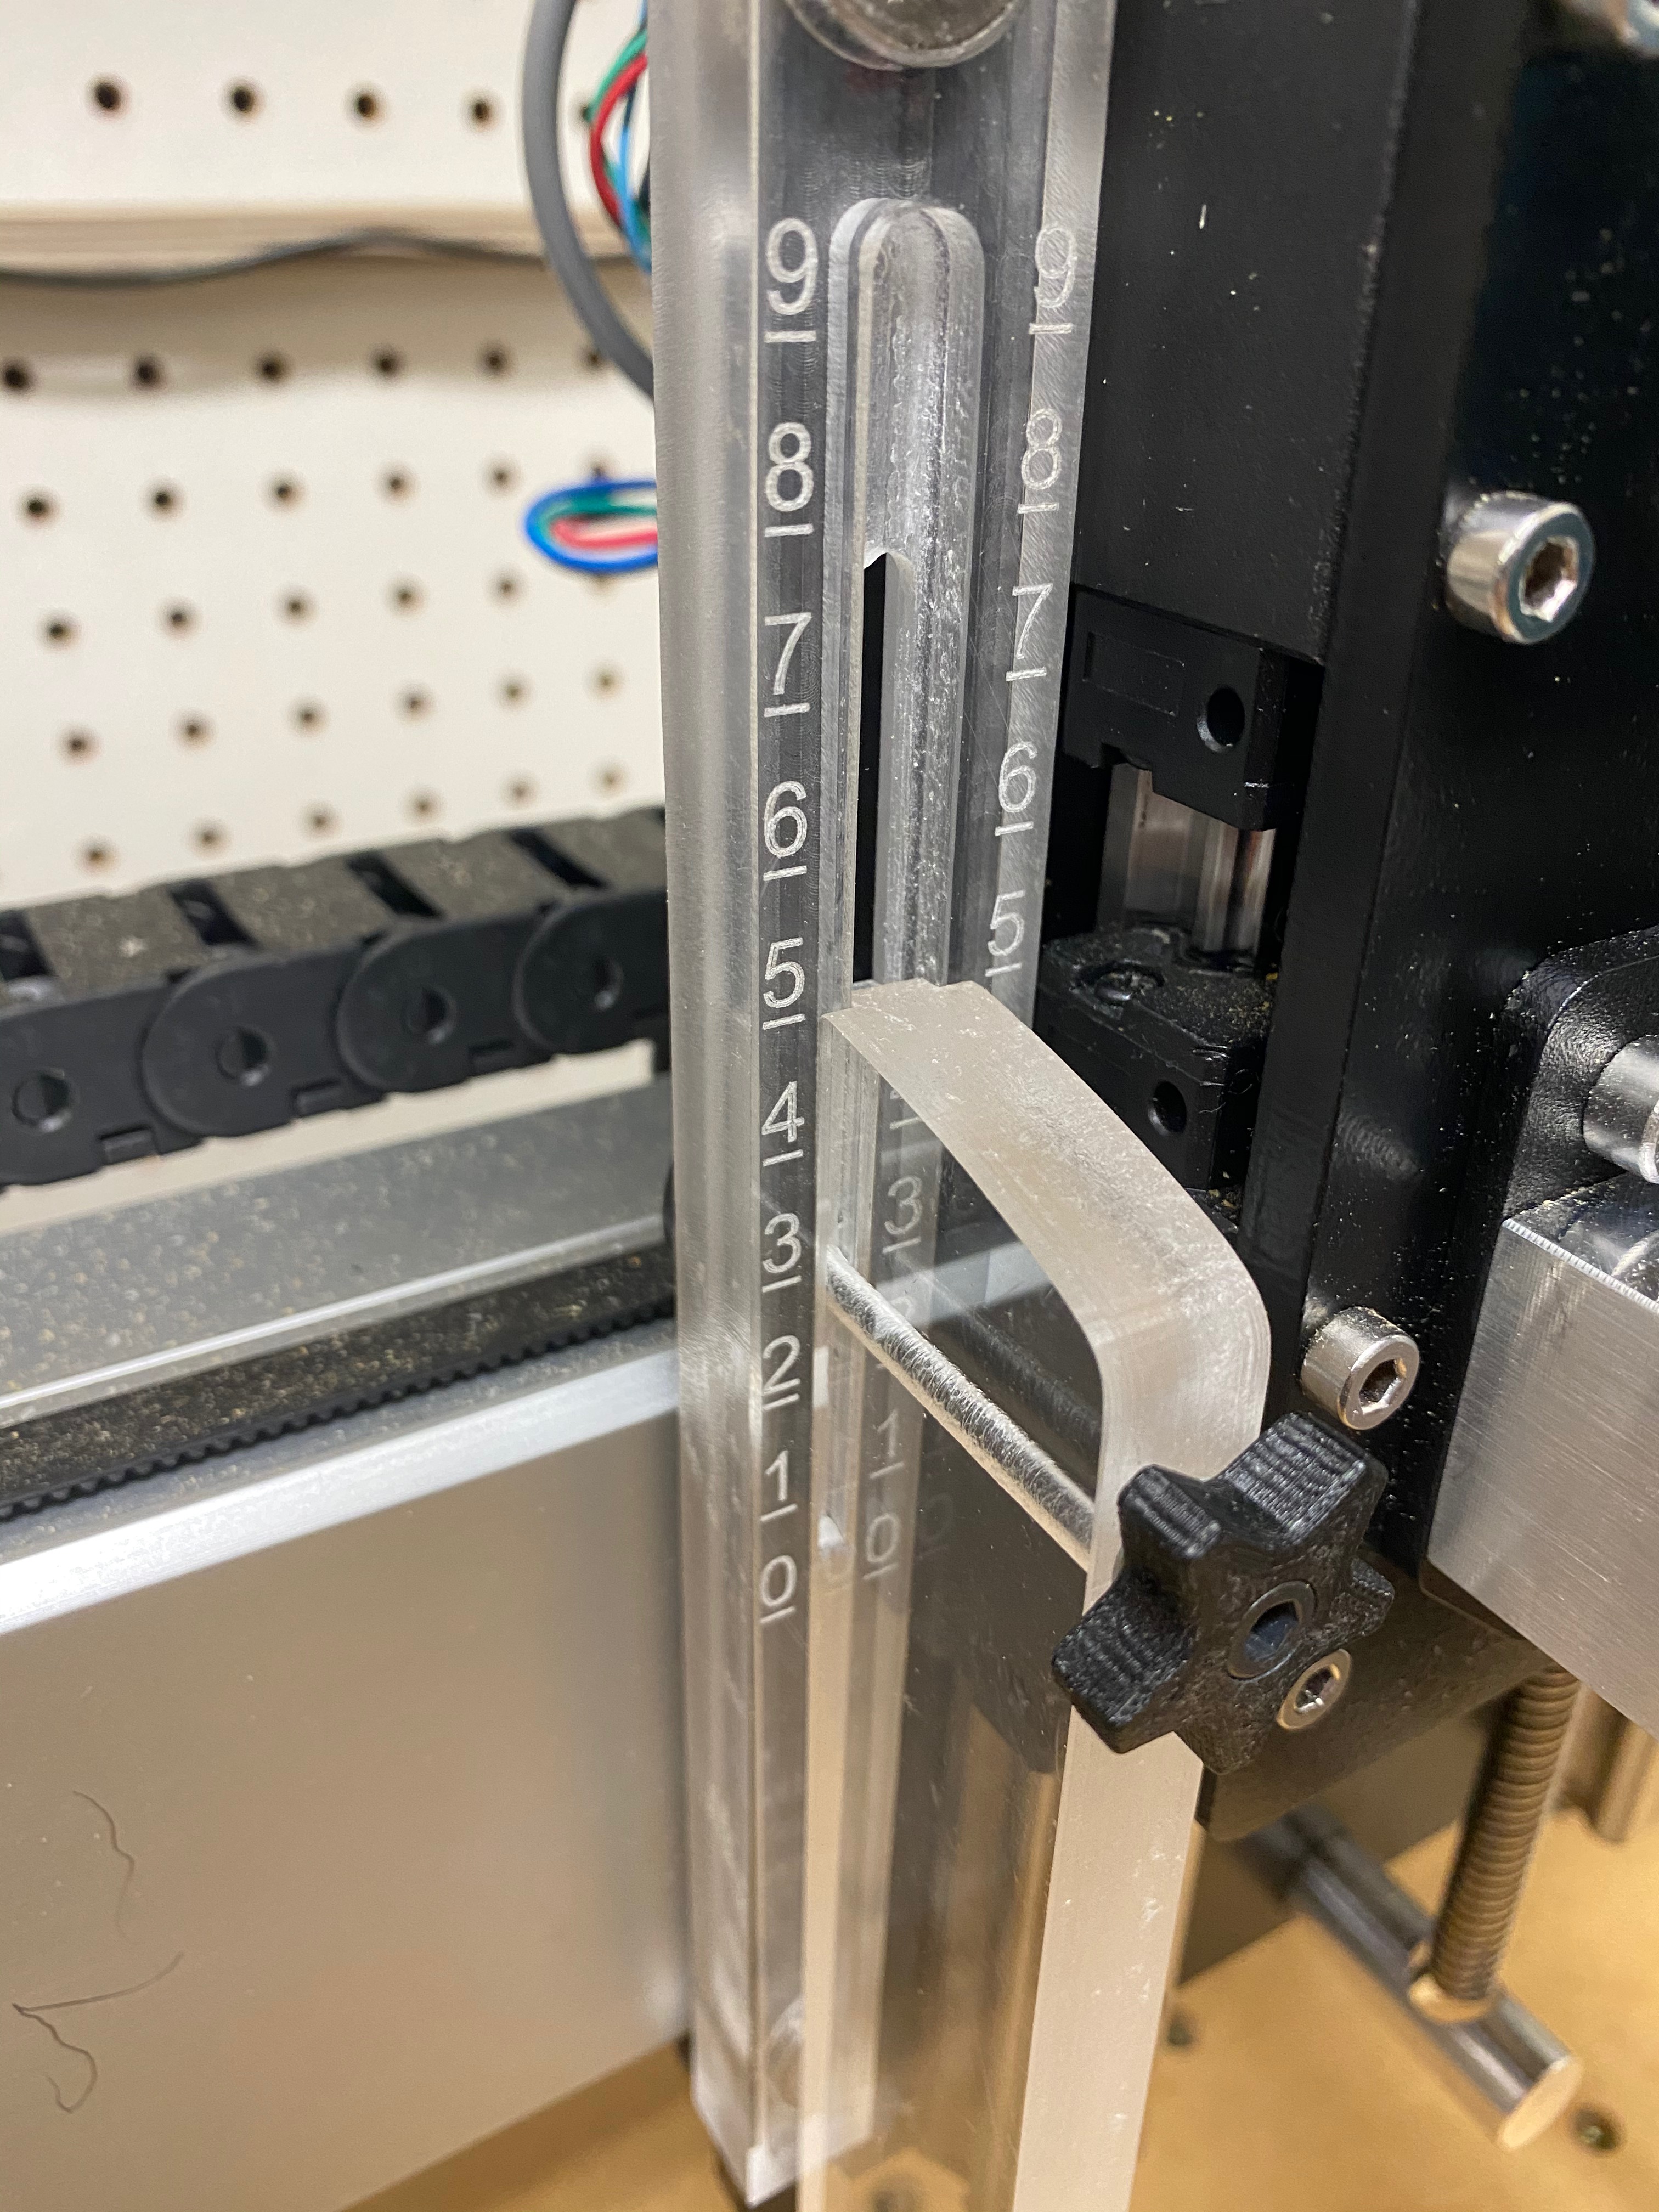
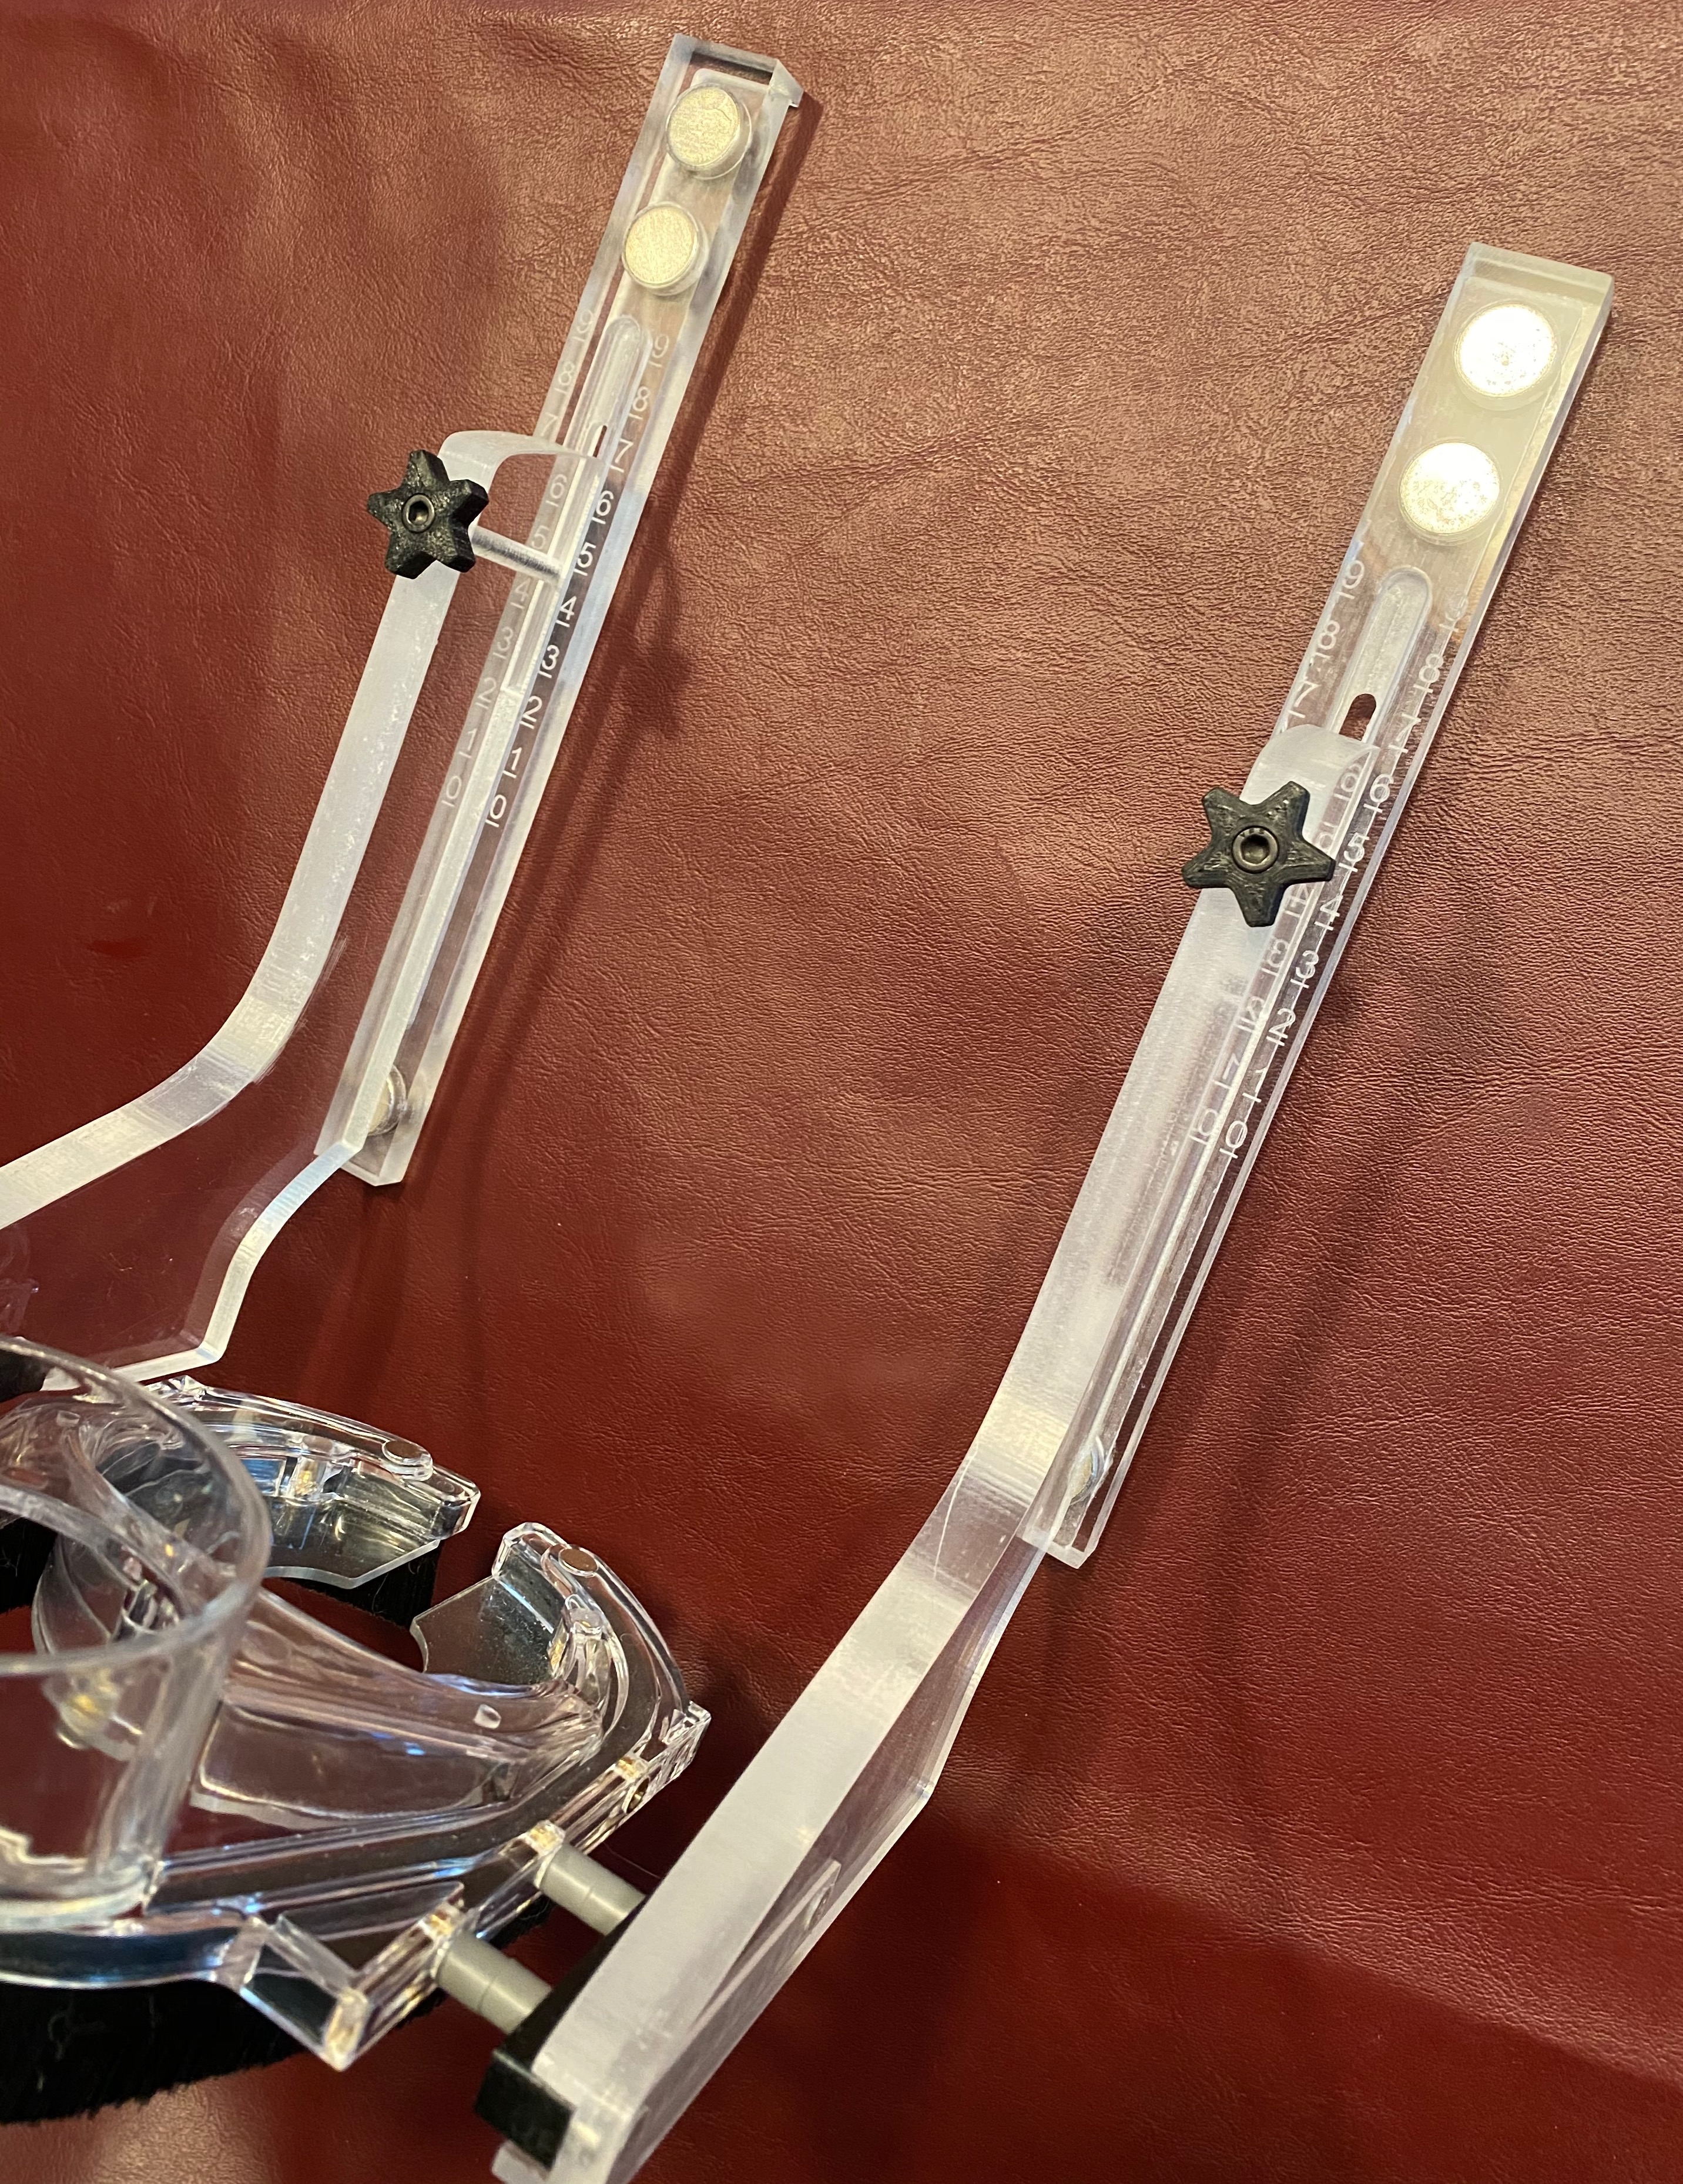
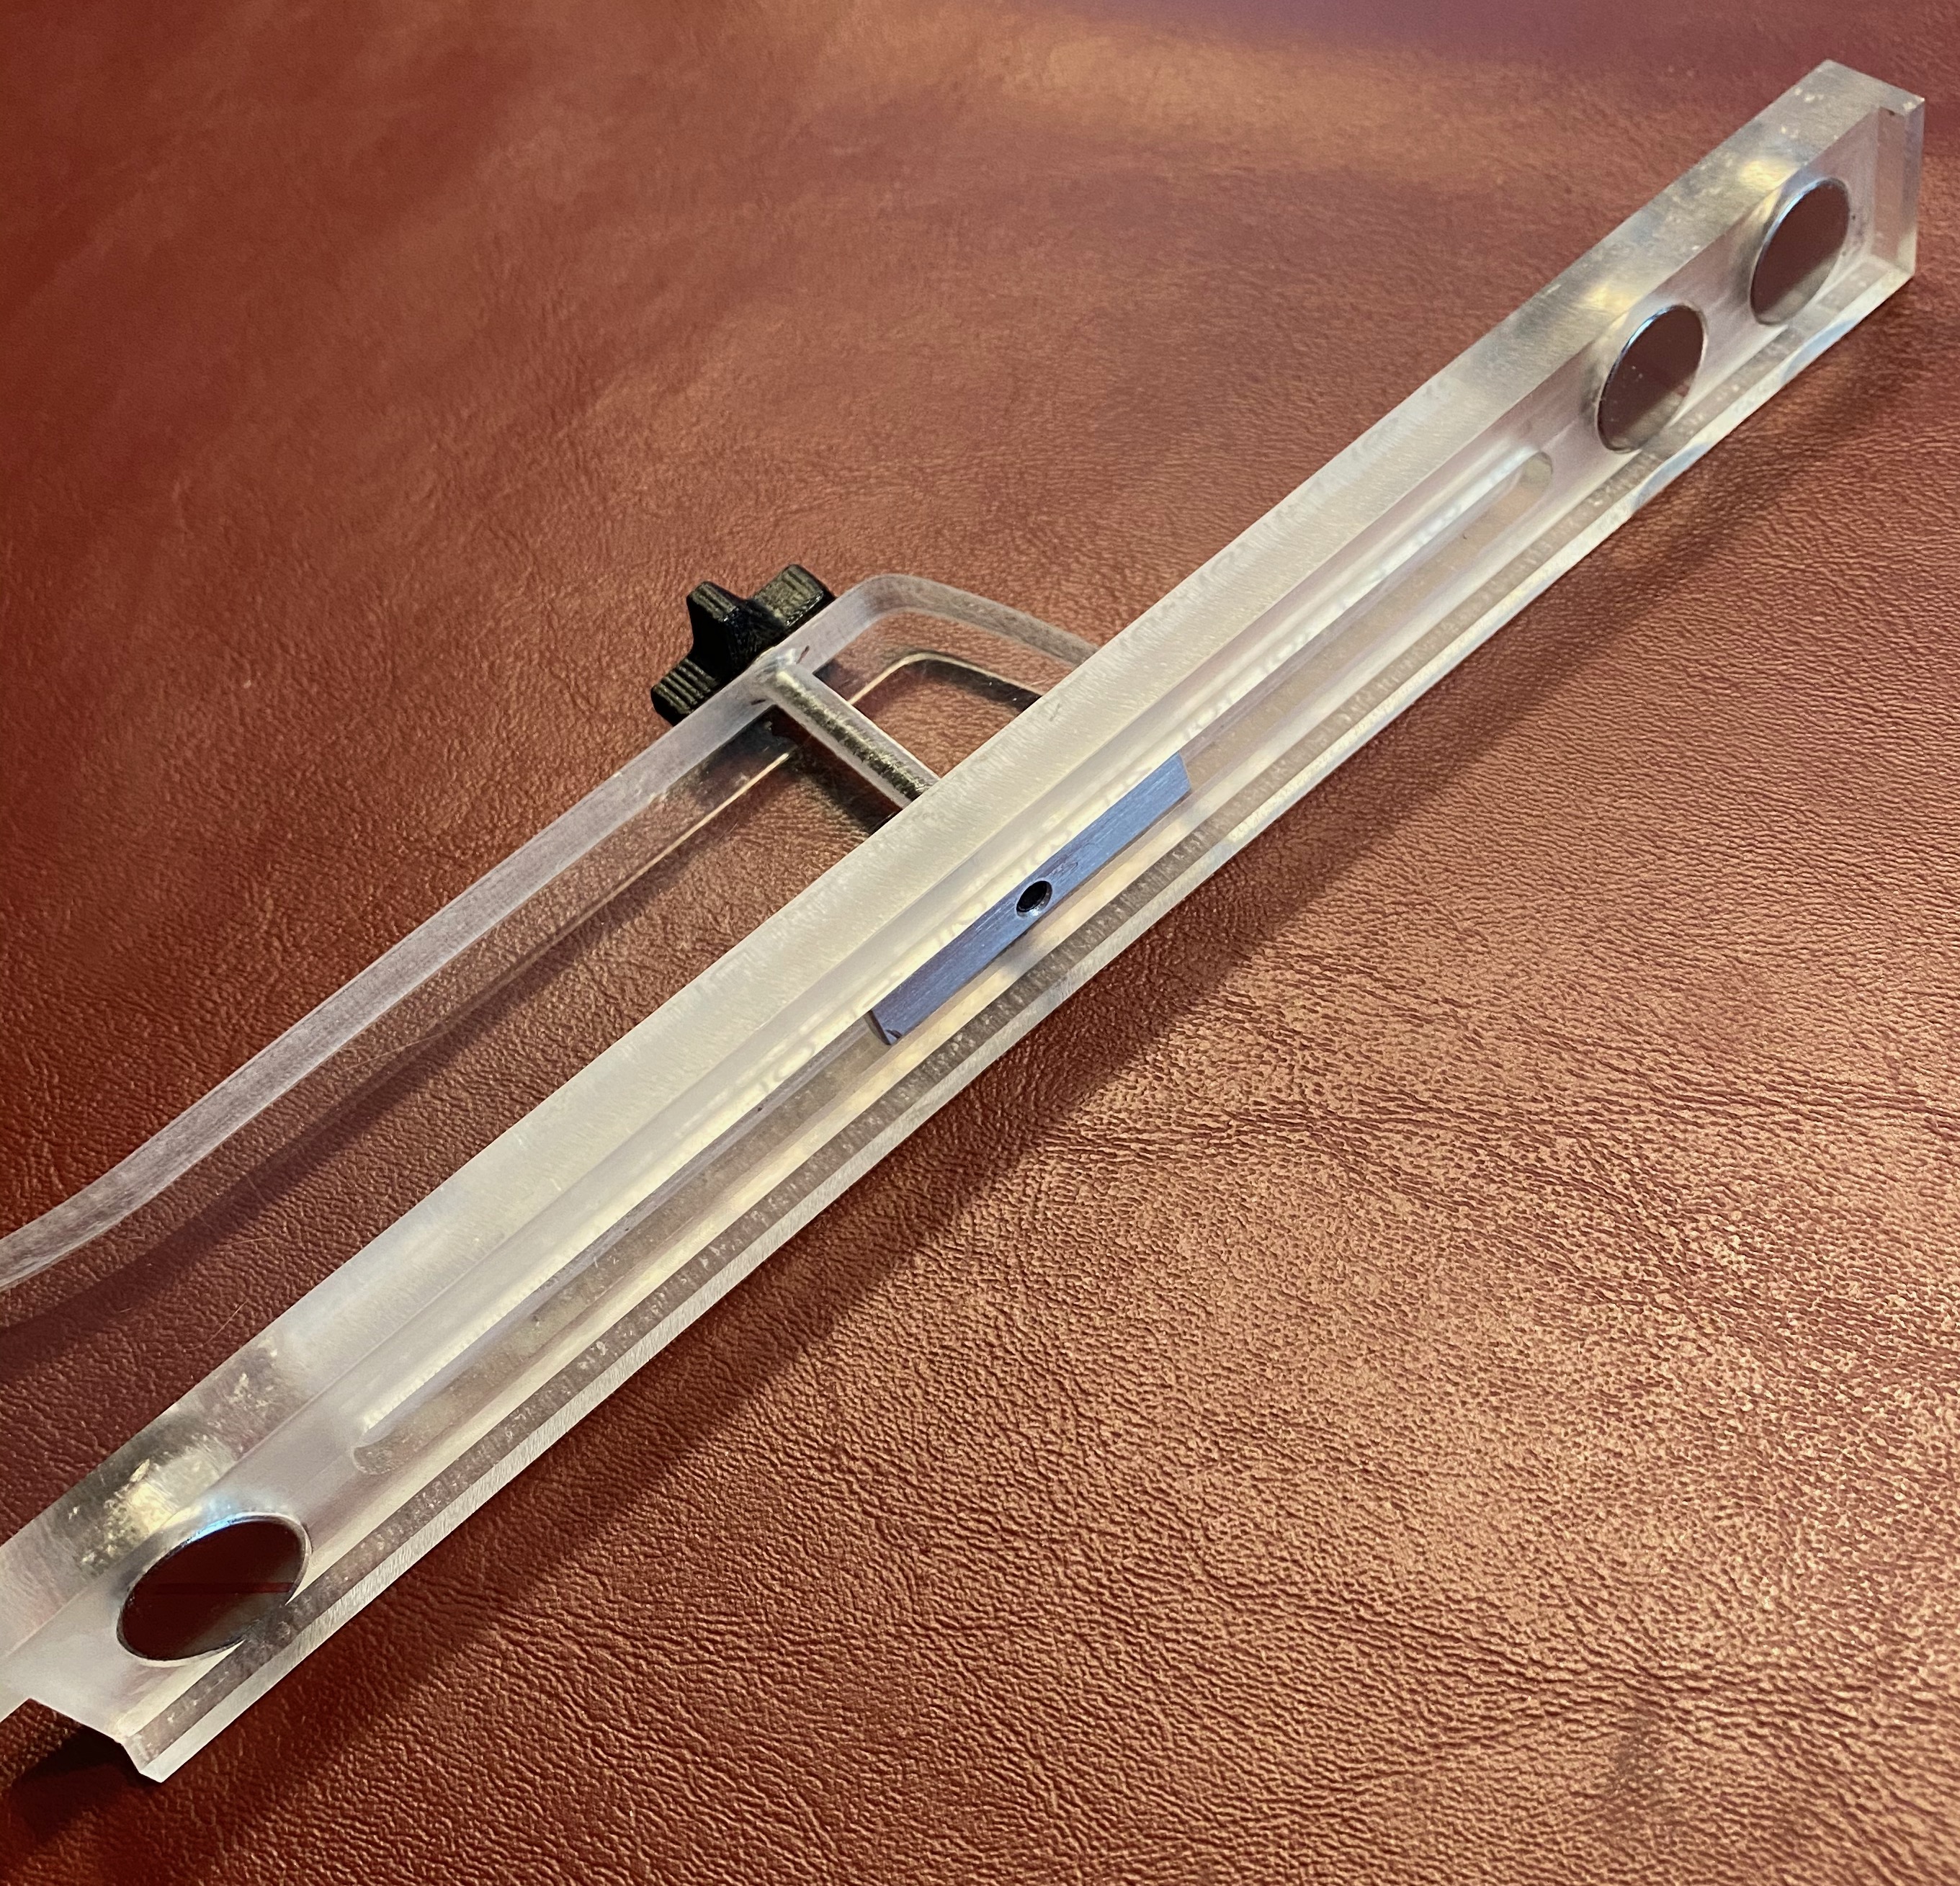
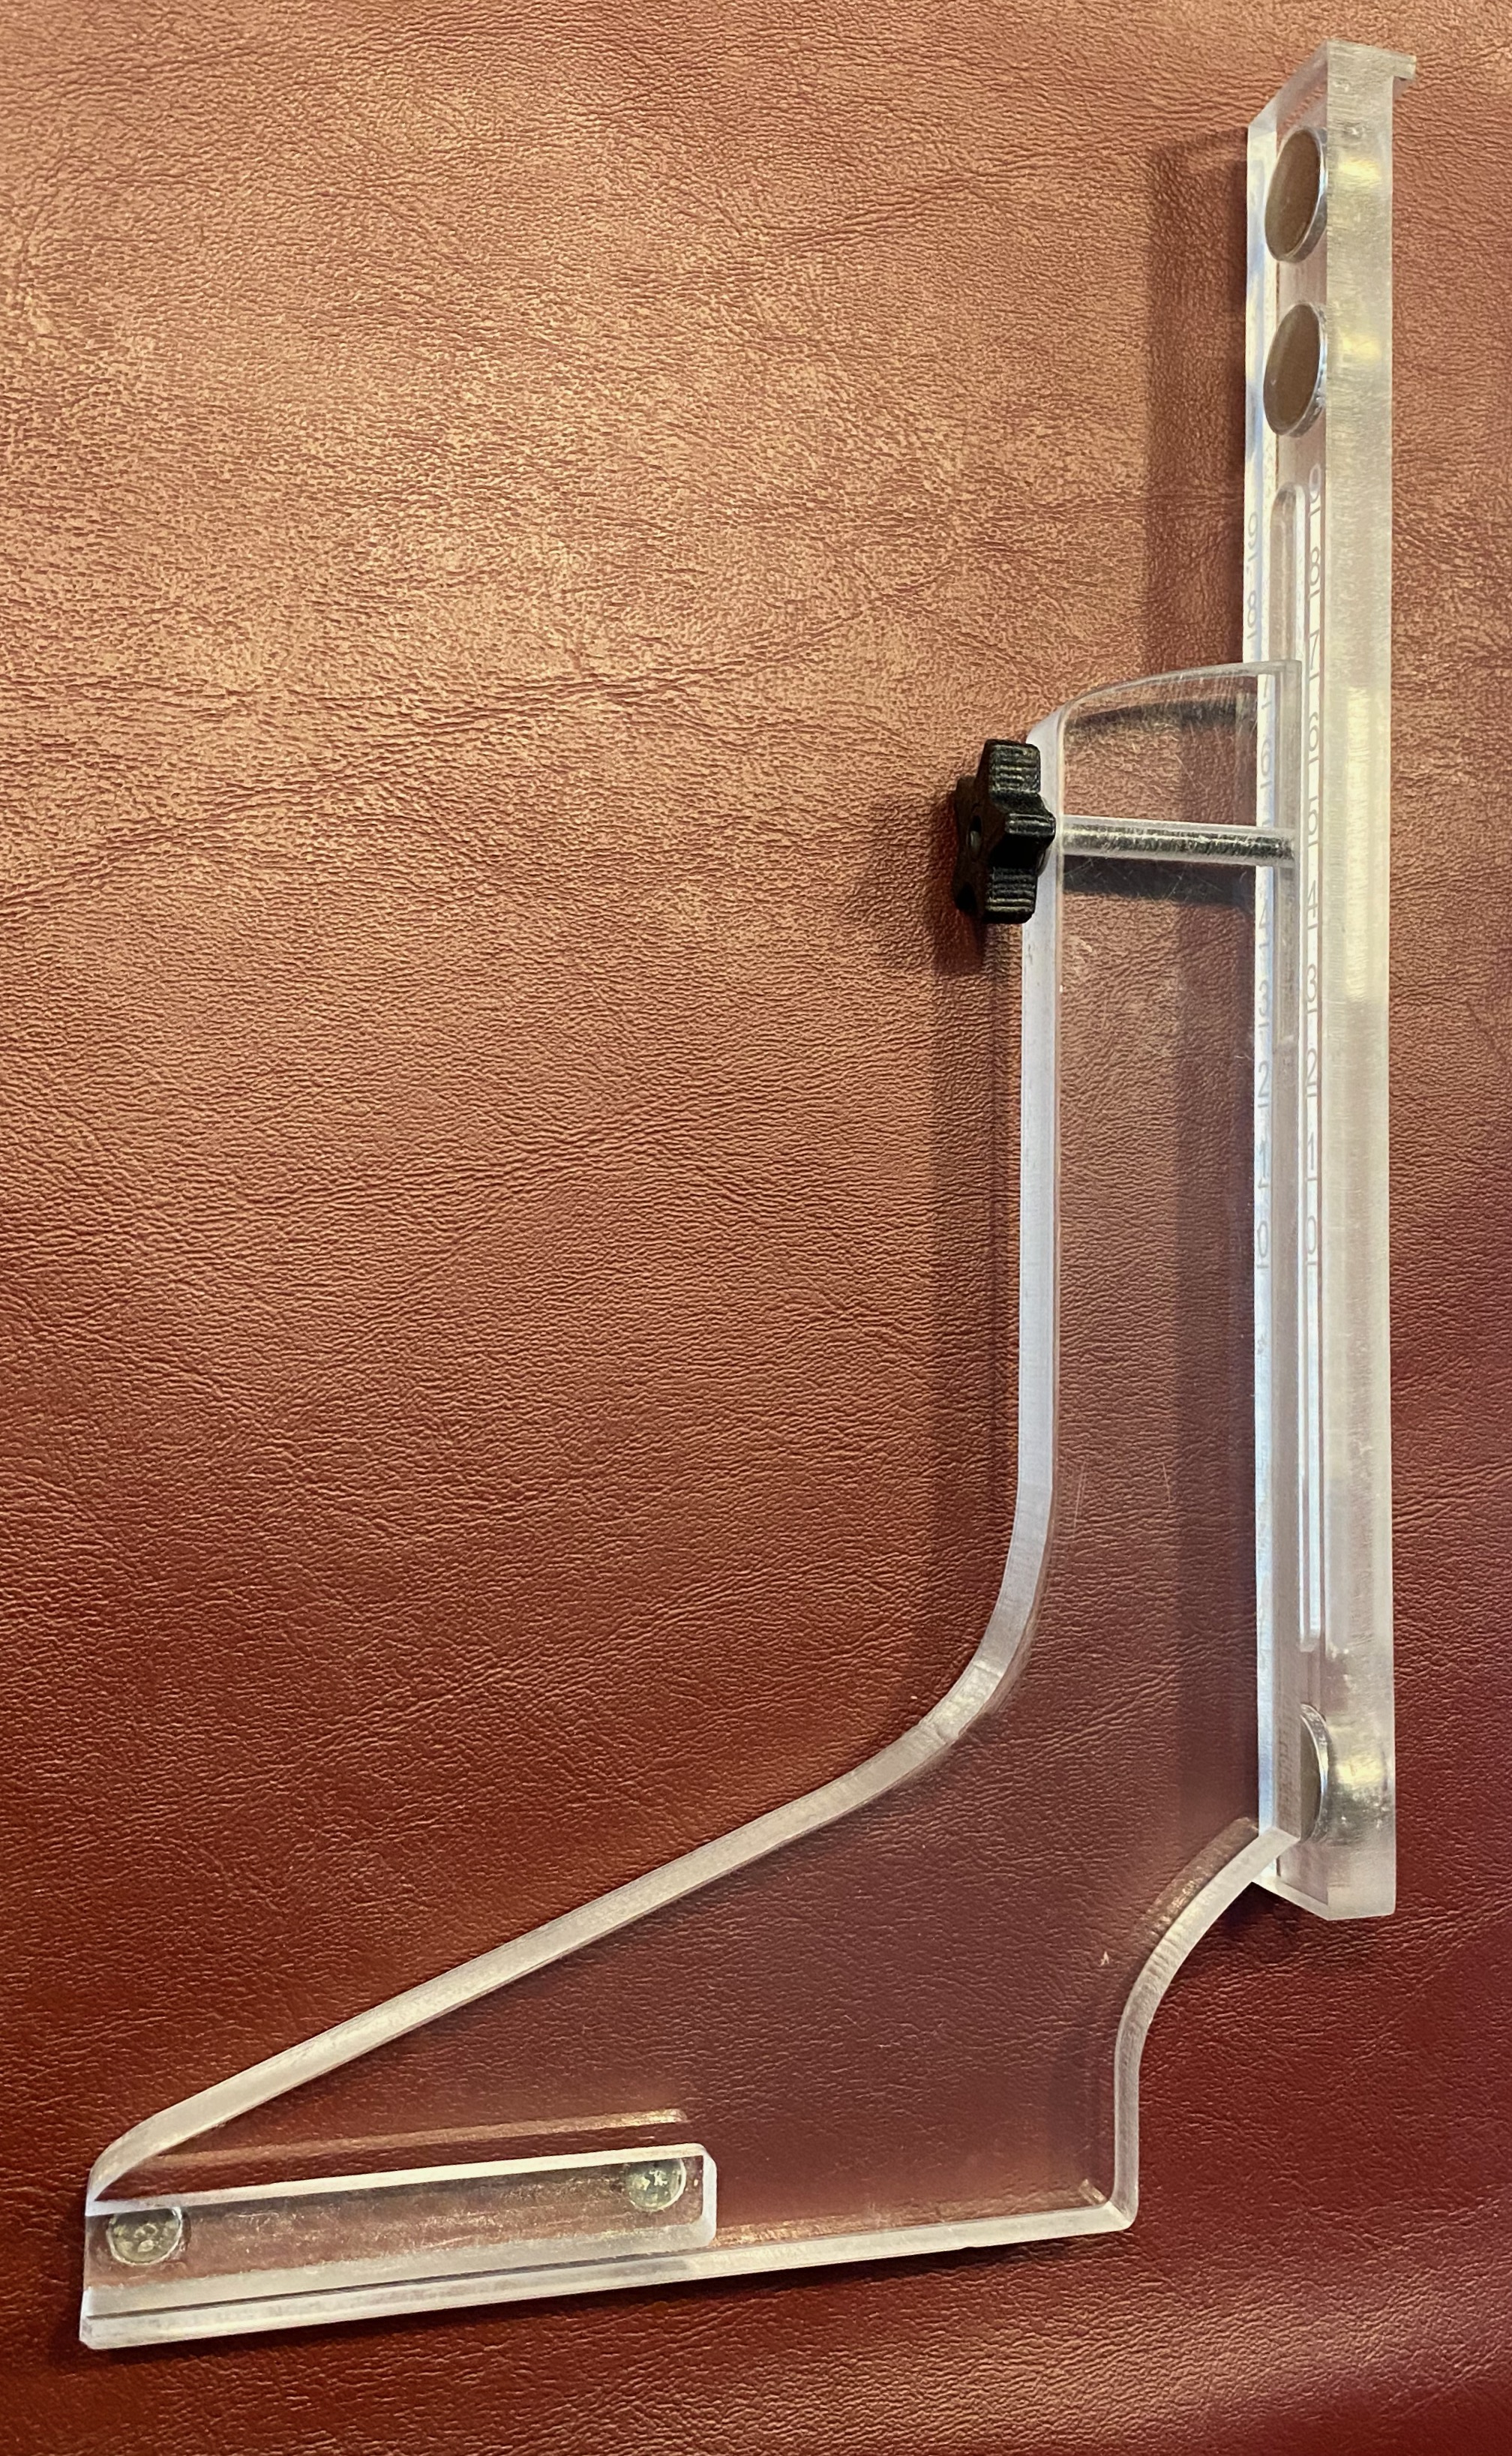
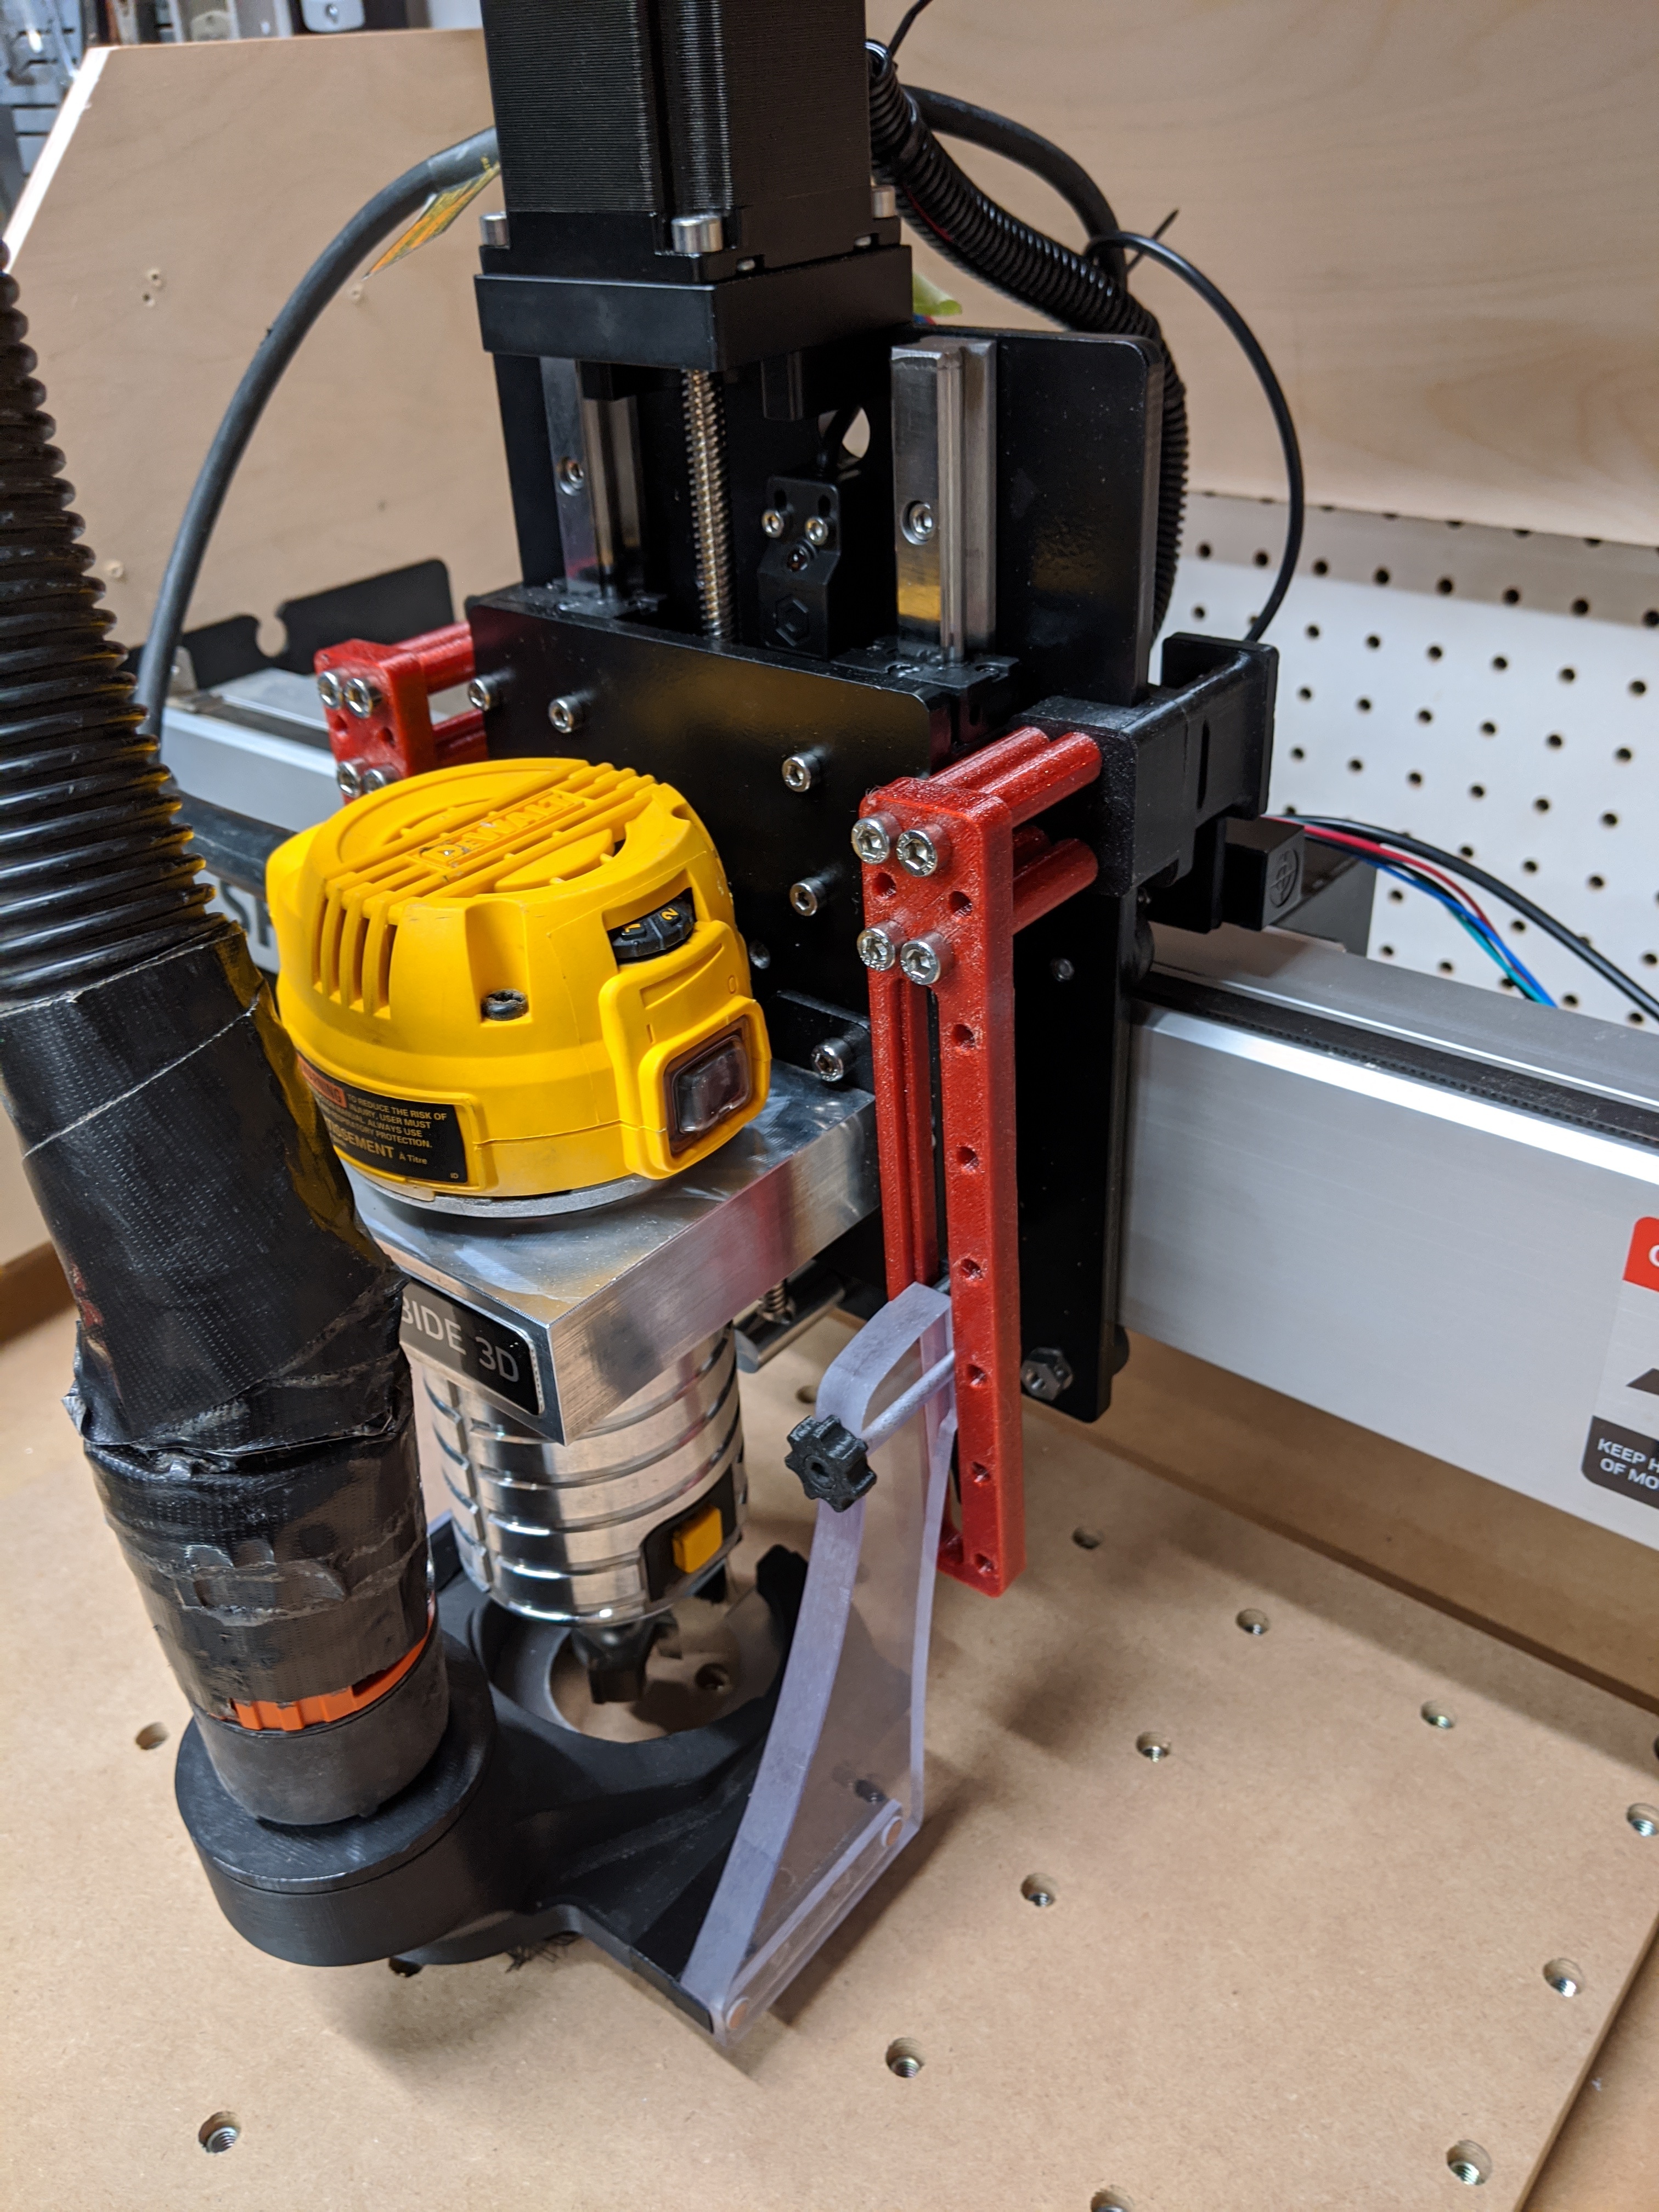
Here is my take on mounting my Suckit Pro dust shoe to my Z Plus upgrade. The magnet-based design was inspired by @patonclover. Made several prototypes in MDF to get the dimensions right before cutting the final parts in 1/2” acrylic. Three N45 Neodymium magnets on each side (5/8” by 1/4” - 15 pounds of pull force each) grab VERY tight - “gorilla” tight I would say. Used a diamond drag bit to mark alignment lines in 1CM increments like the original. In addition, there are four threaded holes on the top of the Z stepper that allow about 2mm of an M3 screw, so a dust hose bracket can be easily mounted to the top.
Acrylic (for me) was difficult. My first time with this unforgiving material, but I learned a lot, including how to register the vertical rails for 2-sided machining of the slots. Only wrecked one part but still fit it all in a 12”x12” piece I bought on Amazon. I could’ve used Baltic Birch but it wouldn’t have looked as good.
Fun project. Very time-consuming but I’m happy with the result.
Edited to include c2d file: Suckit Pro Z Plus Mount by SPE.c2d (2.3 MB)
7 Likes
Very nice @ScottsdaleSteve. A great refinement to my rather crude solution. Gives me a good reason to update.
4 Likes
Awesome job! I don’t suppose you’d be willing to share your vectors? I’ve got dust everywhere at this point and am desperate!
I edited my post to include the c2d file (design only - no toolpaths - I made dozens of toolpaths while experimenting and didn’t keep track of which was which).
5 Likes
Here’s how I tackled it. I used the free files from pwncnc, made a few mods in F360, and printed out some new spacers to bring the whole shoe out further. It’s not quite as stable so I’ll see how it holds up.
5 Likes
Great thinking Jacob… to add some stability, consider utilizing one or more of the “accessory” holes along the track. This is what i do whenever i find the tracks are not as stable as i’d like.

1 Like
This topic was automatically closed 30 days after the last reply. New replies are no longer allowed.