Hey Everyone,
Totally new noob here. I’ve been using my XL for a very short time. The few projects I’ve done I have always zeroed at the lower left corner. I’m wondering, does it matter where you zero at on the work surface? Meaning, would I get the same results if I zeroed at the center or the work surface?
I use the center a lot. Using the center is useful so vcarving is centered in case you have a variance in material measurement. It does not matter where your origin is as long as you zero at the origin. I find using a vee bit is useful even if you are not using it on the project. You can zero x and y and use change tool and zero z with the tool you are going to use like an end mill.
3 Likes
Thanks Guy,
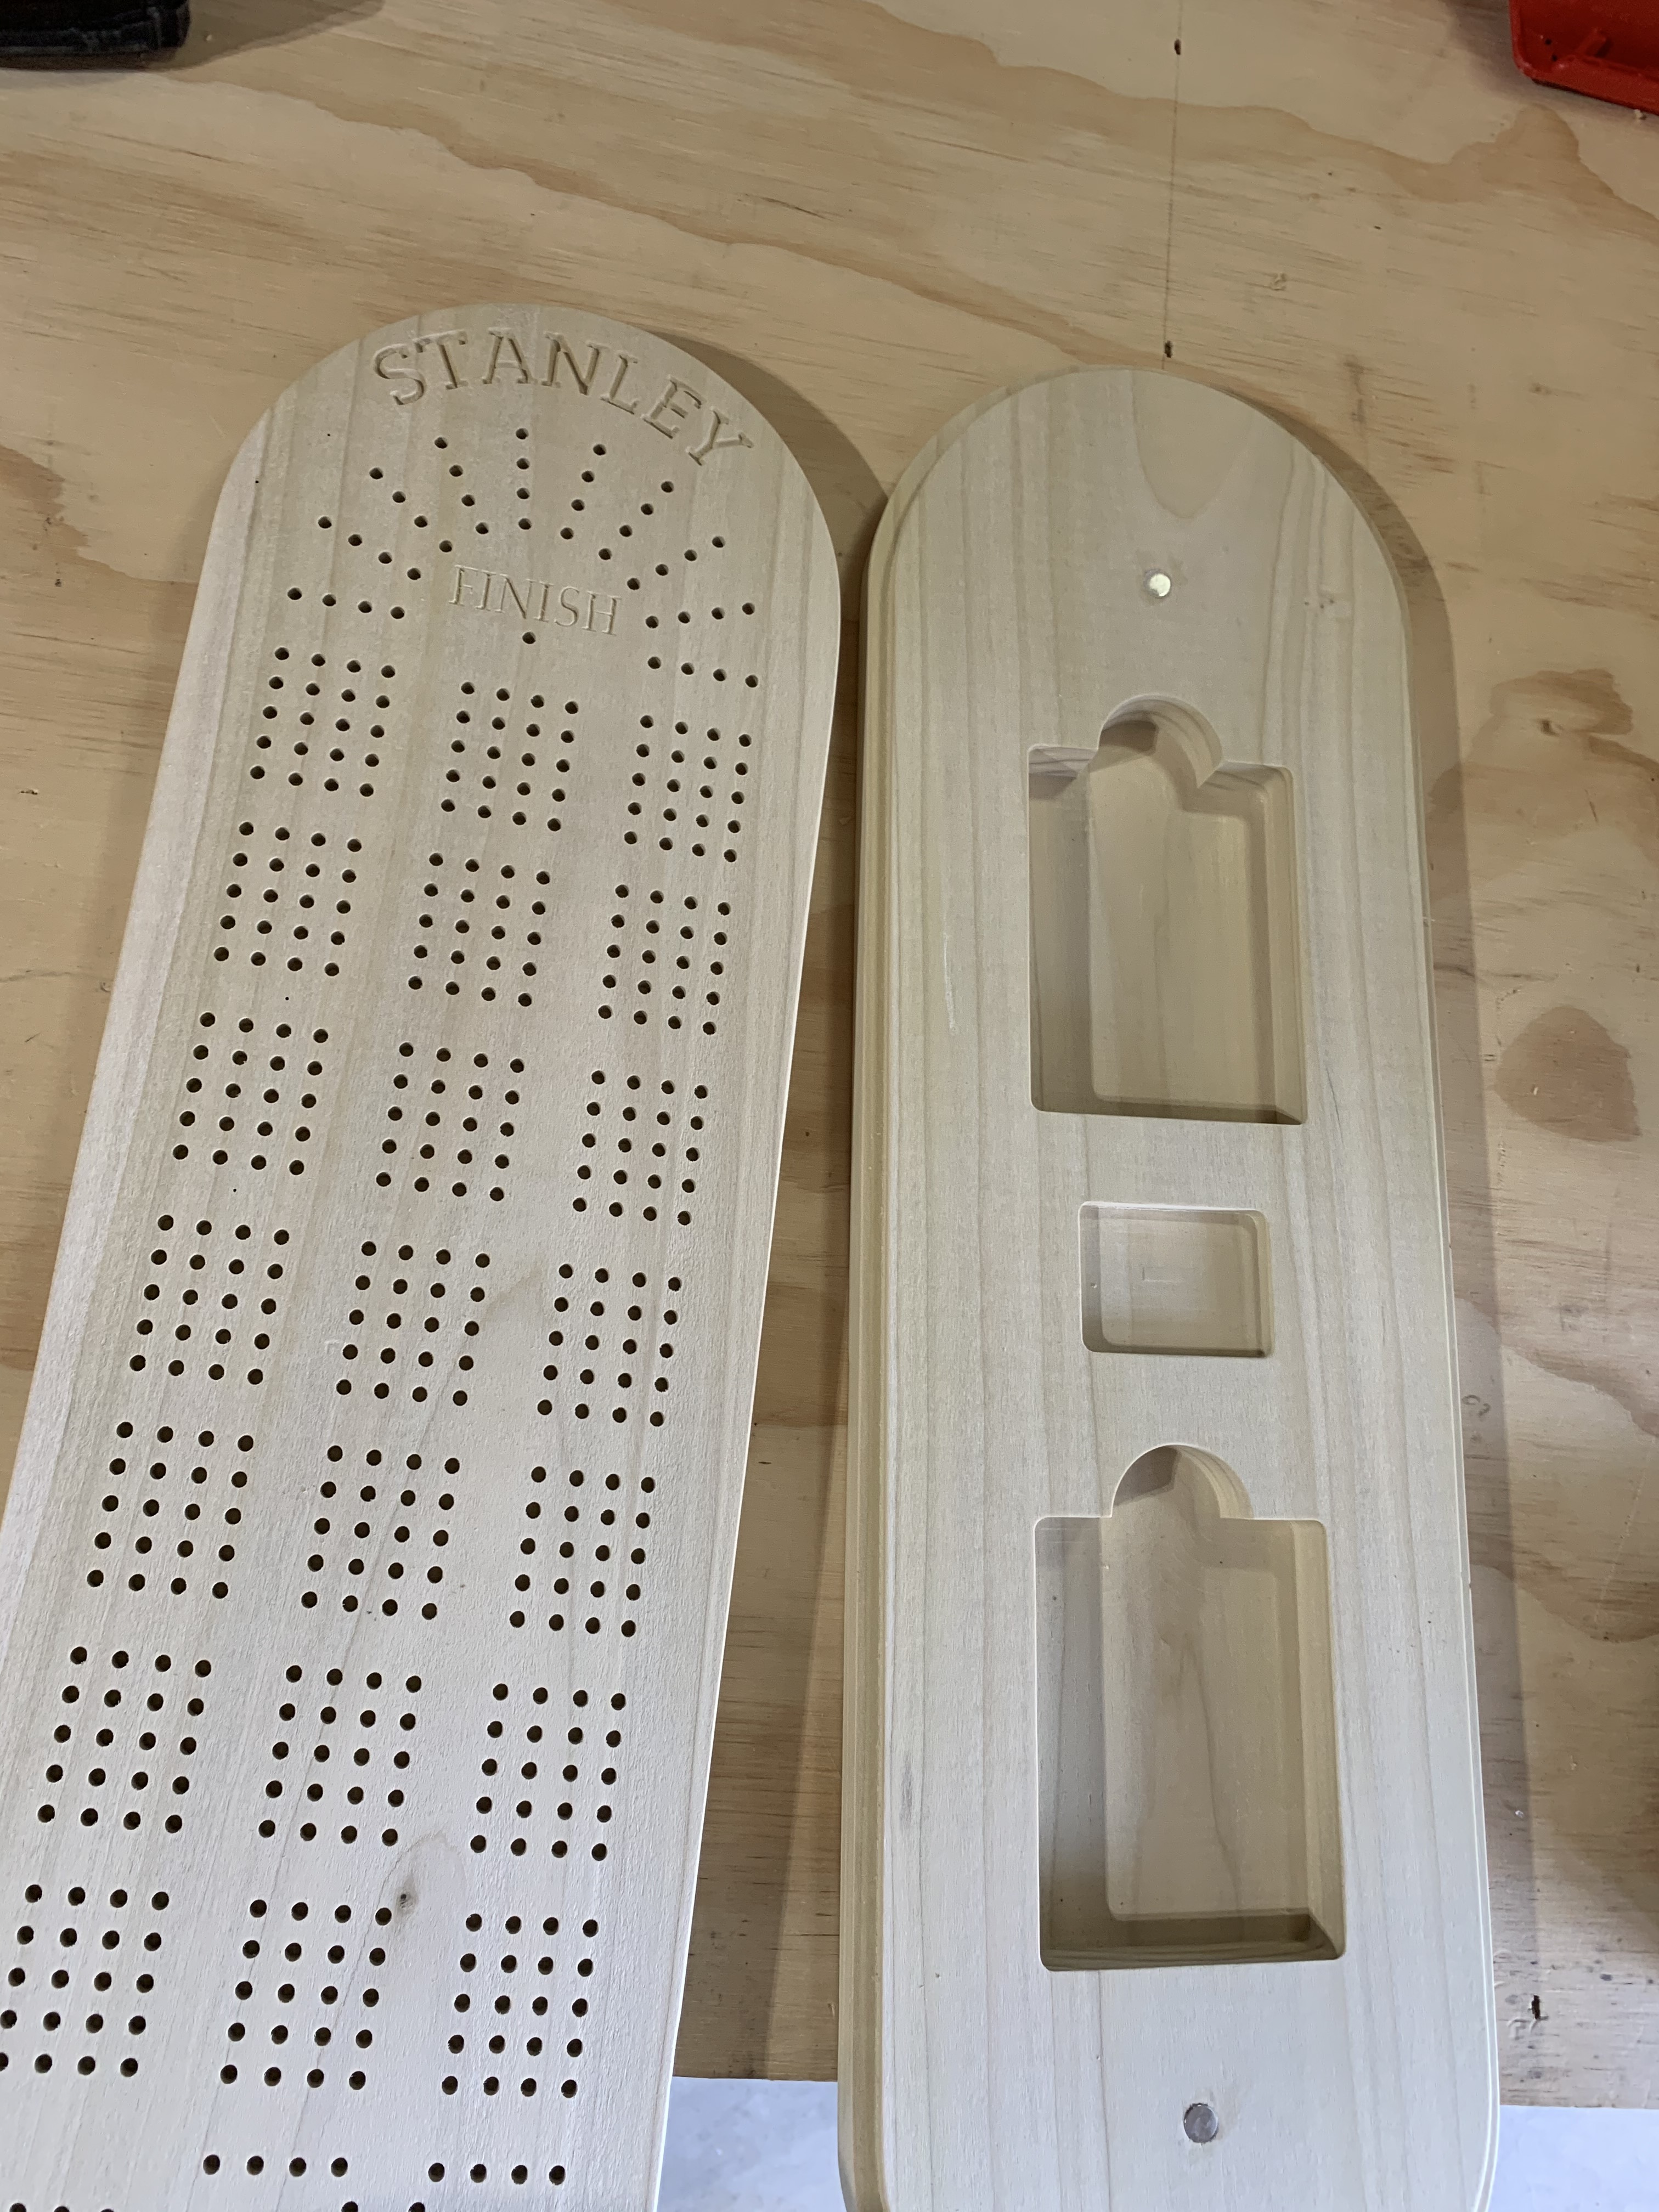
So picture the back of the cribbage board in the photo (the game surface board on left). It’s “pocketed” out to fit on top of the bottom portion. The issue I’m facing is when I turn the board over after the face of it is done to cut out the pocketed portion, it still has all the corners to the wood in place and I’ve been zeroing at the lower left again. I do the pocket then cut the whole thing out to get the rounded top and bottom of the board. No matter what I do I can not get it lined up perfectly like what is in the photo. It’s always off centered now. I was thinking if I do the face of the board and do the cutout (rounded top and bottom of the board) before I turn it over, then I could zero at center and do the pocket cut. I feel like that would be an easy way to do it.
Does any of that make any kind of sense…lol?
1 Like
as long as your work surface is flat… the Z side will be the same.
theres sometimes good reasons you want to zero at the center… for example if you want to make a design in something that is already a circle, or where you don’t know the exact dimensions accurately of something square.
(but with a ruler and pencil you can usually find the center of things very easily)
1 Like
Great! Thank you Arjan!
Maybe I missed something but why not mark the center on both sides before machining either side. Make two jobs and center on the first marked center, turn it over and center on the second side mark. If you mark the center and the design does not run off the material the machine does not know that part of the piece is missing. The cut is relative to the center/mark and not the dimensions of the actual work piece.
3 Likes
There are plenty of ways to get good results when doing 2 sided jobs, but if you’re using a pencil and rule then you are very unlikely to get a ‘perfect’ result.
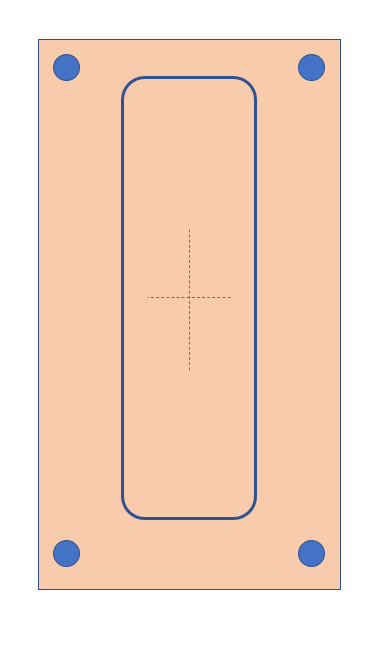
To get repeatable results, you need to register against something accurate. A common way is to use timber, plastic or metal dowel pins. I have used this very successfuly.
Basically you set your job up as per my (extremely crude) drawing. Have all your features as well as the dowel holes in the same job setup in CC/your design software
Zero must be set in the center.
Pocket the four outer dowel holes down into the wasteboard, ensuring a fairly tight fit (practice on some scrap to get the fit right)
Machine your top features
Flip the job and fit the dowels
machine bottom features
When you do it this way, you aren’t relying on measuring or marking, you are using the machine to accurately set the rotation and location of the work
3 Likes
Centering your orgin gives you less error on the flip when not using locating features or pins.
4 Likes
This topic was automatically closed after 30 days. New replies are no longer allowed.