Ran into an issue while painting a v-carved project so I figured I’d document a bit of my experience. I figure even if the result doesn’t help someone perhaps the process will.
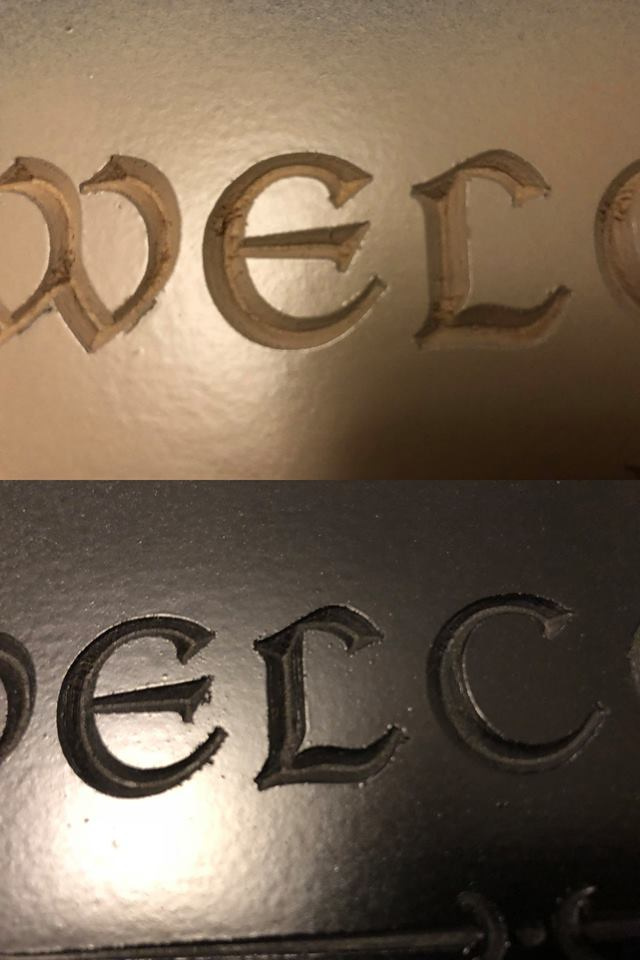
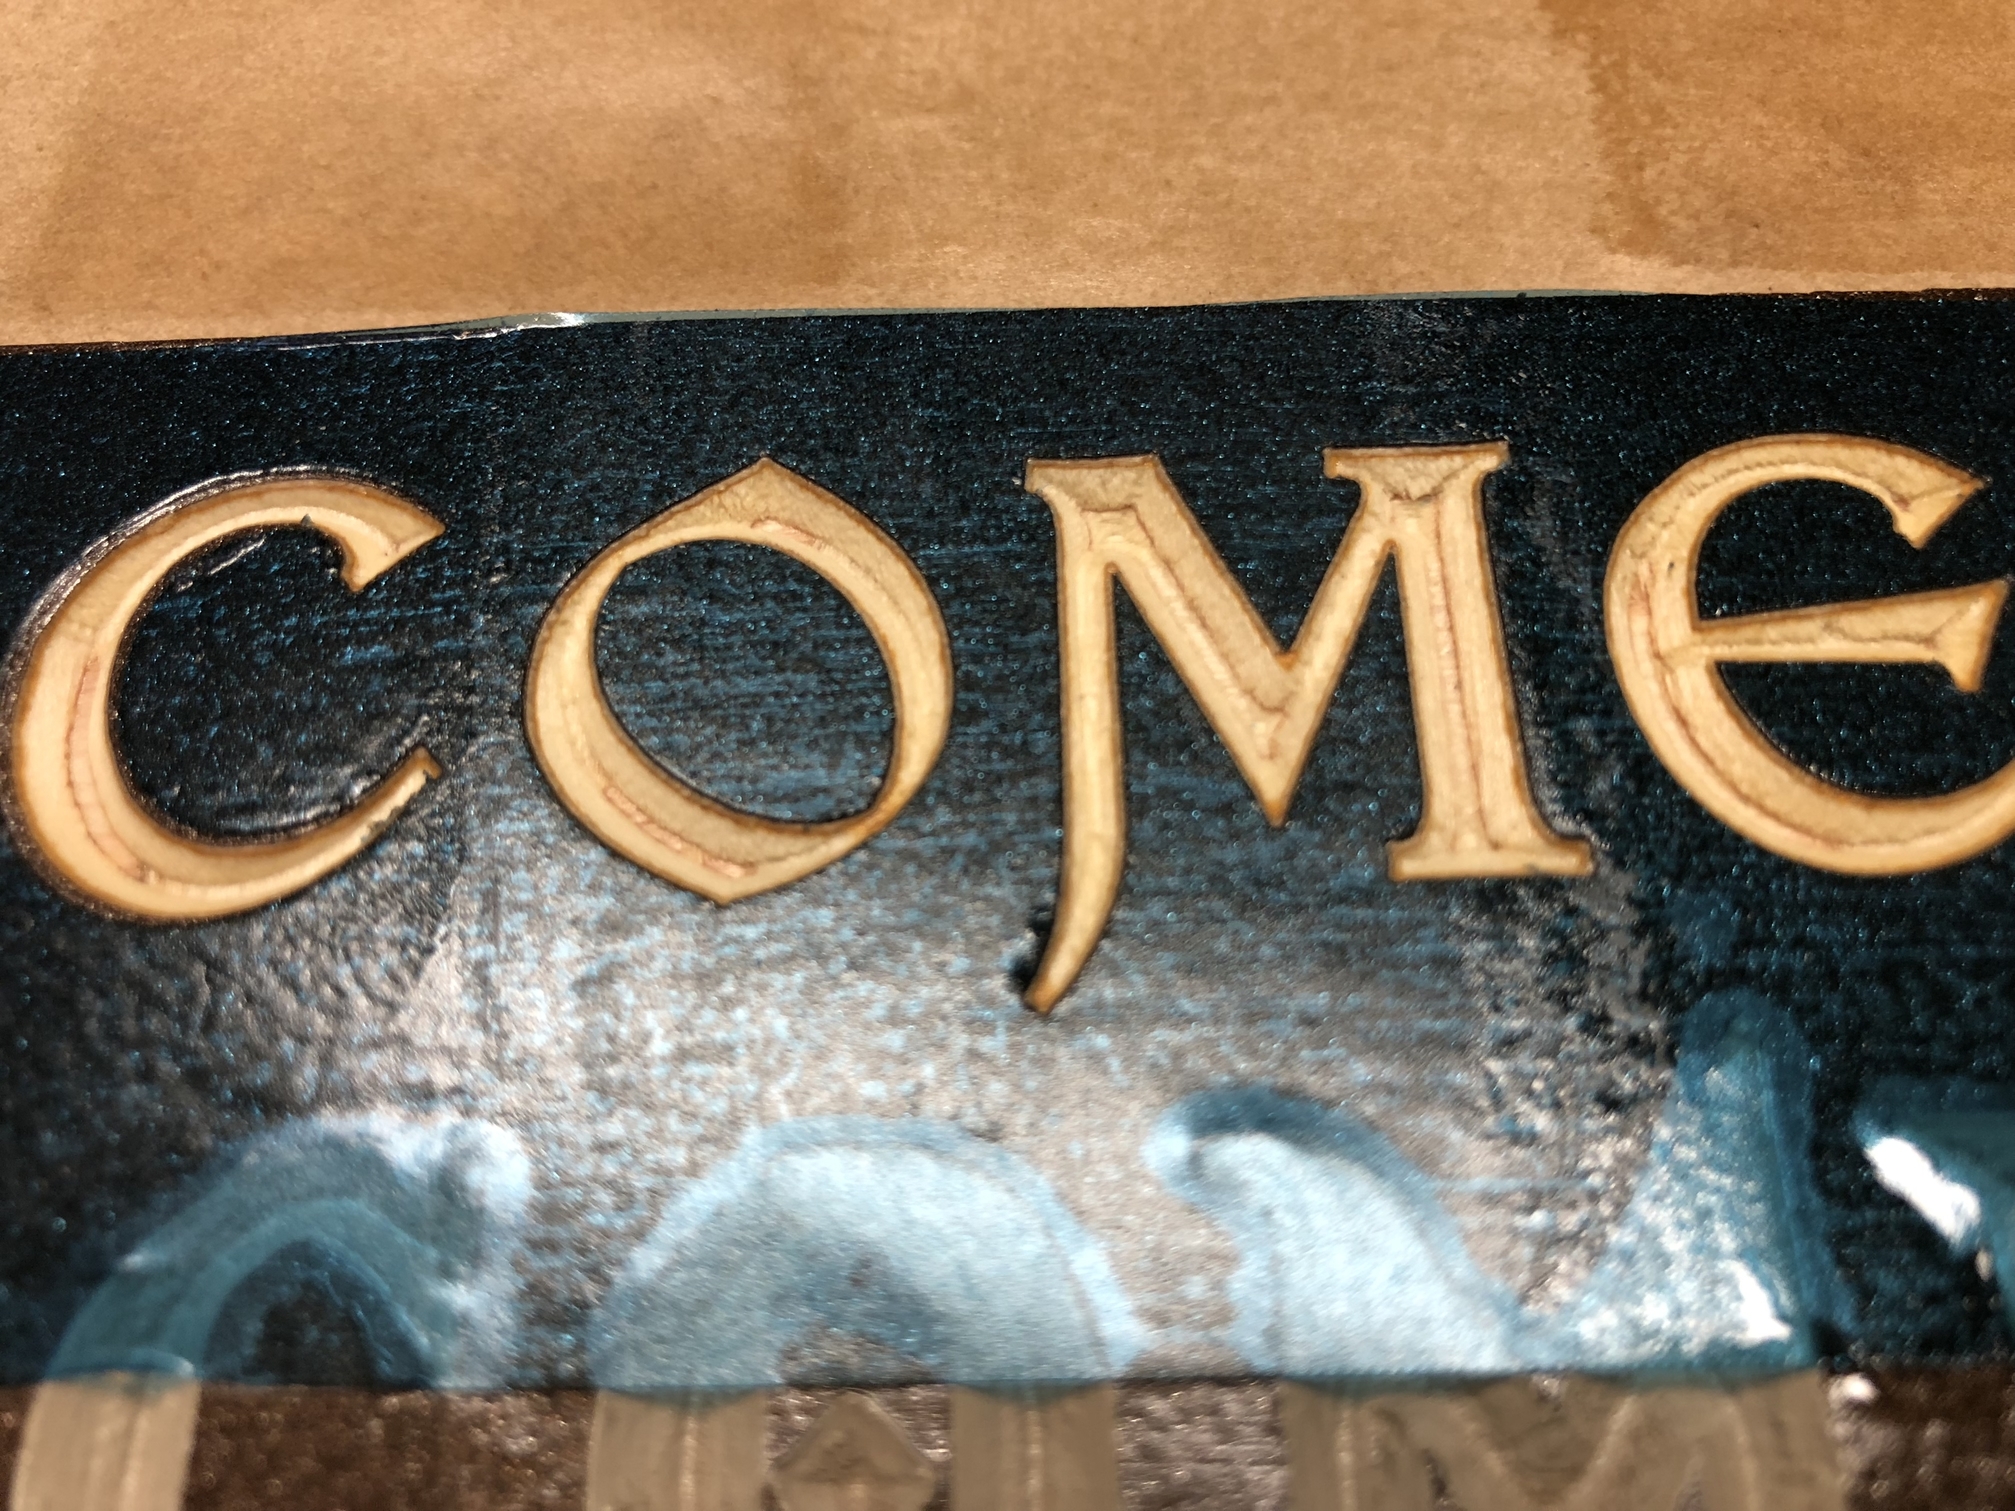
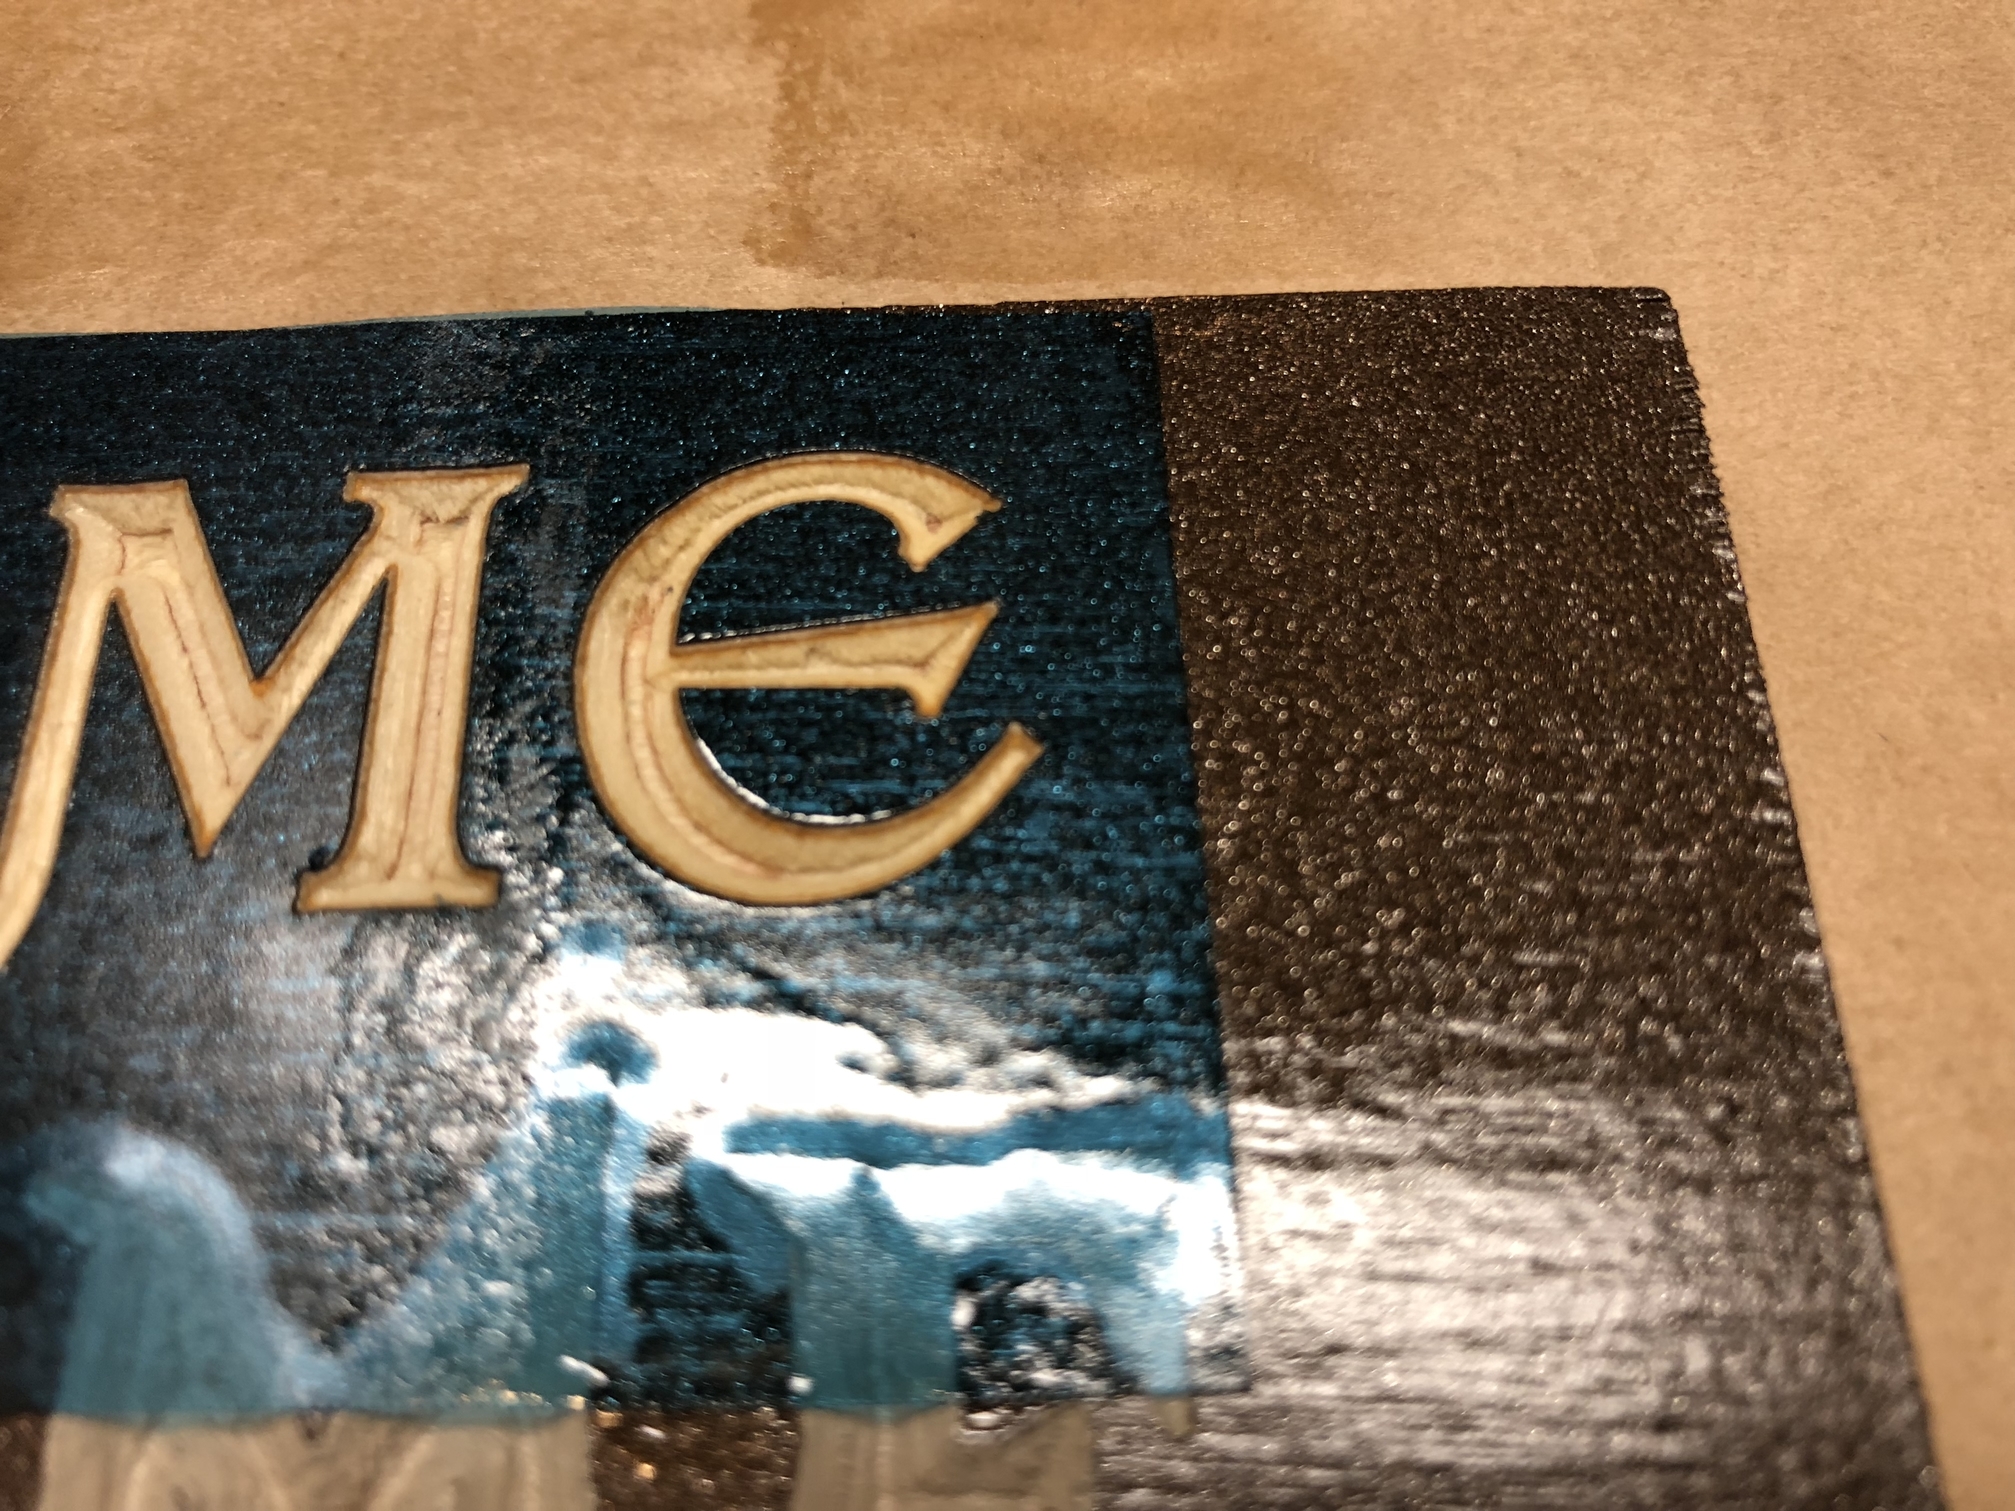
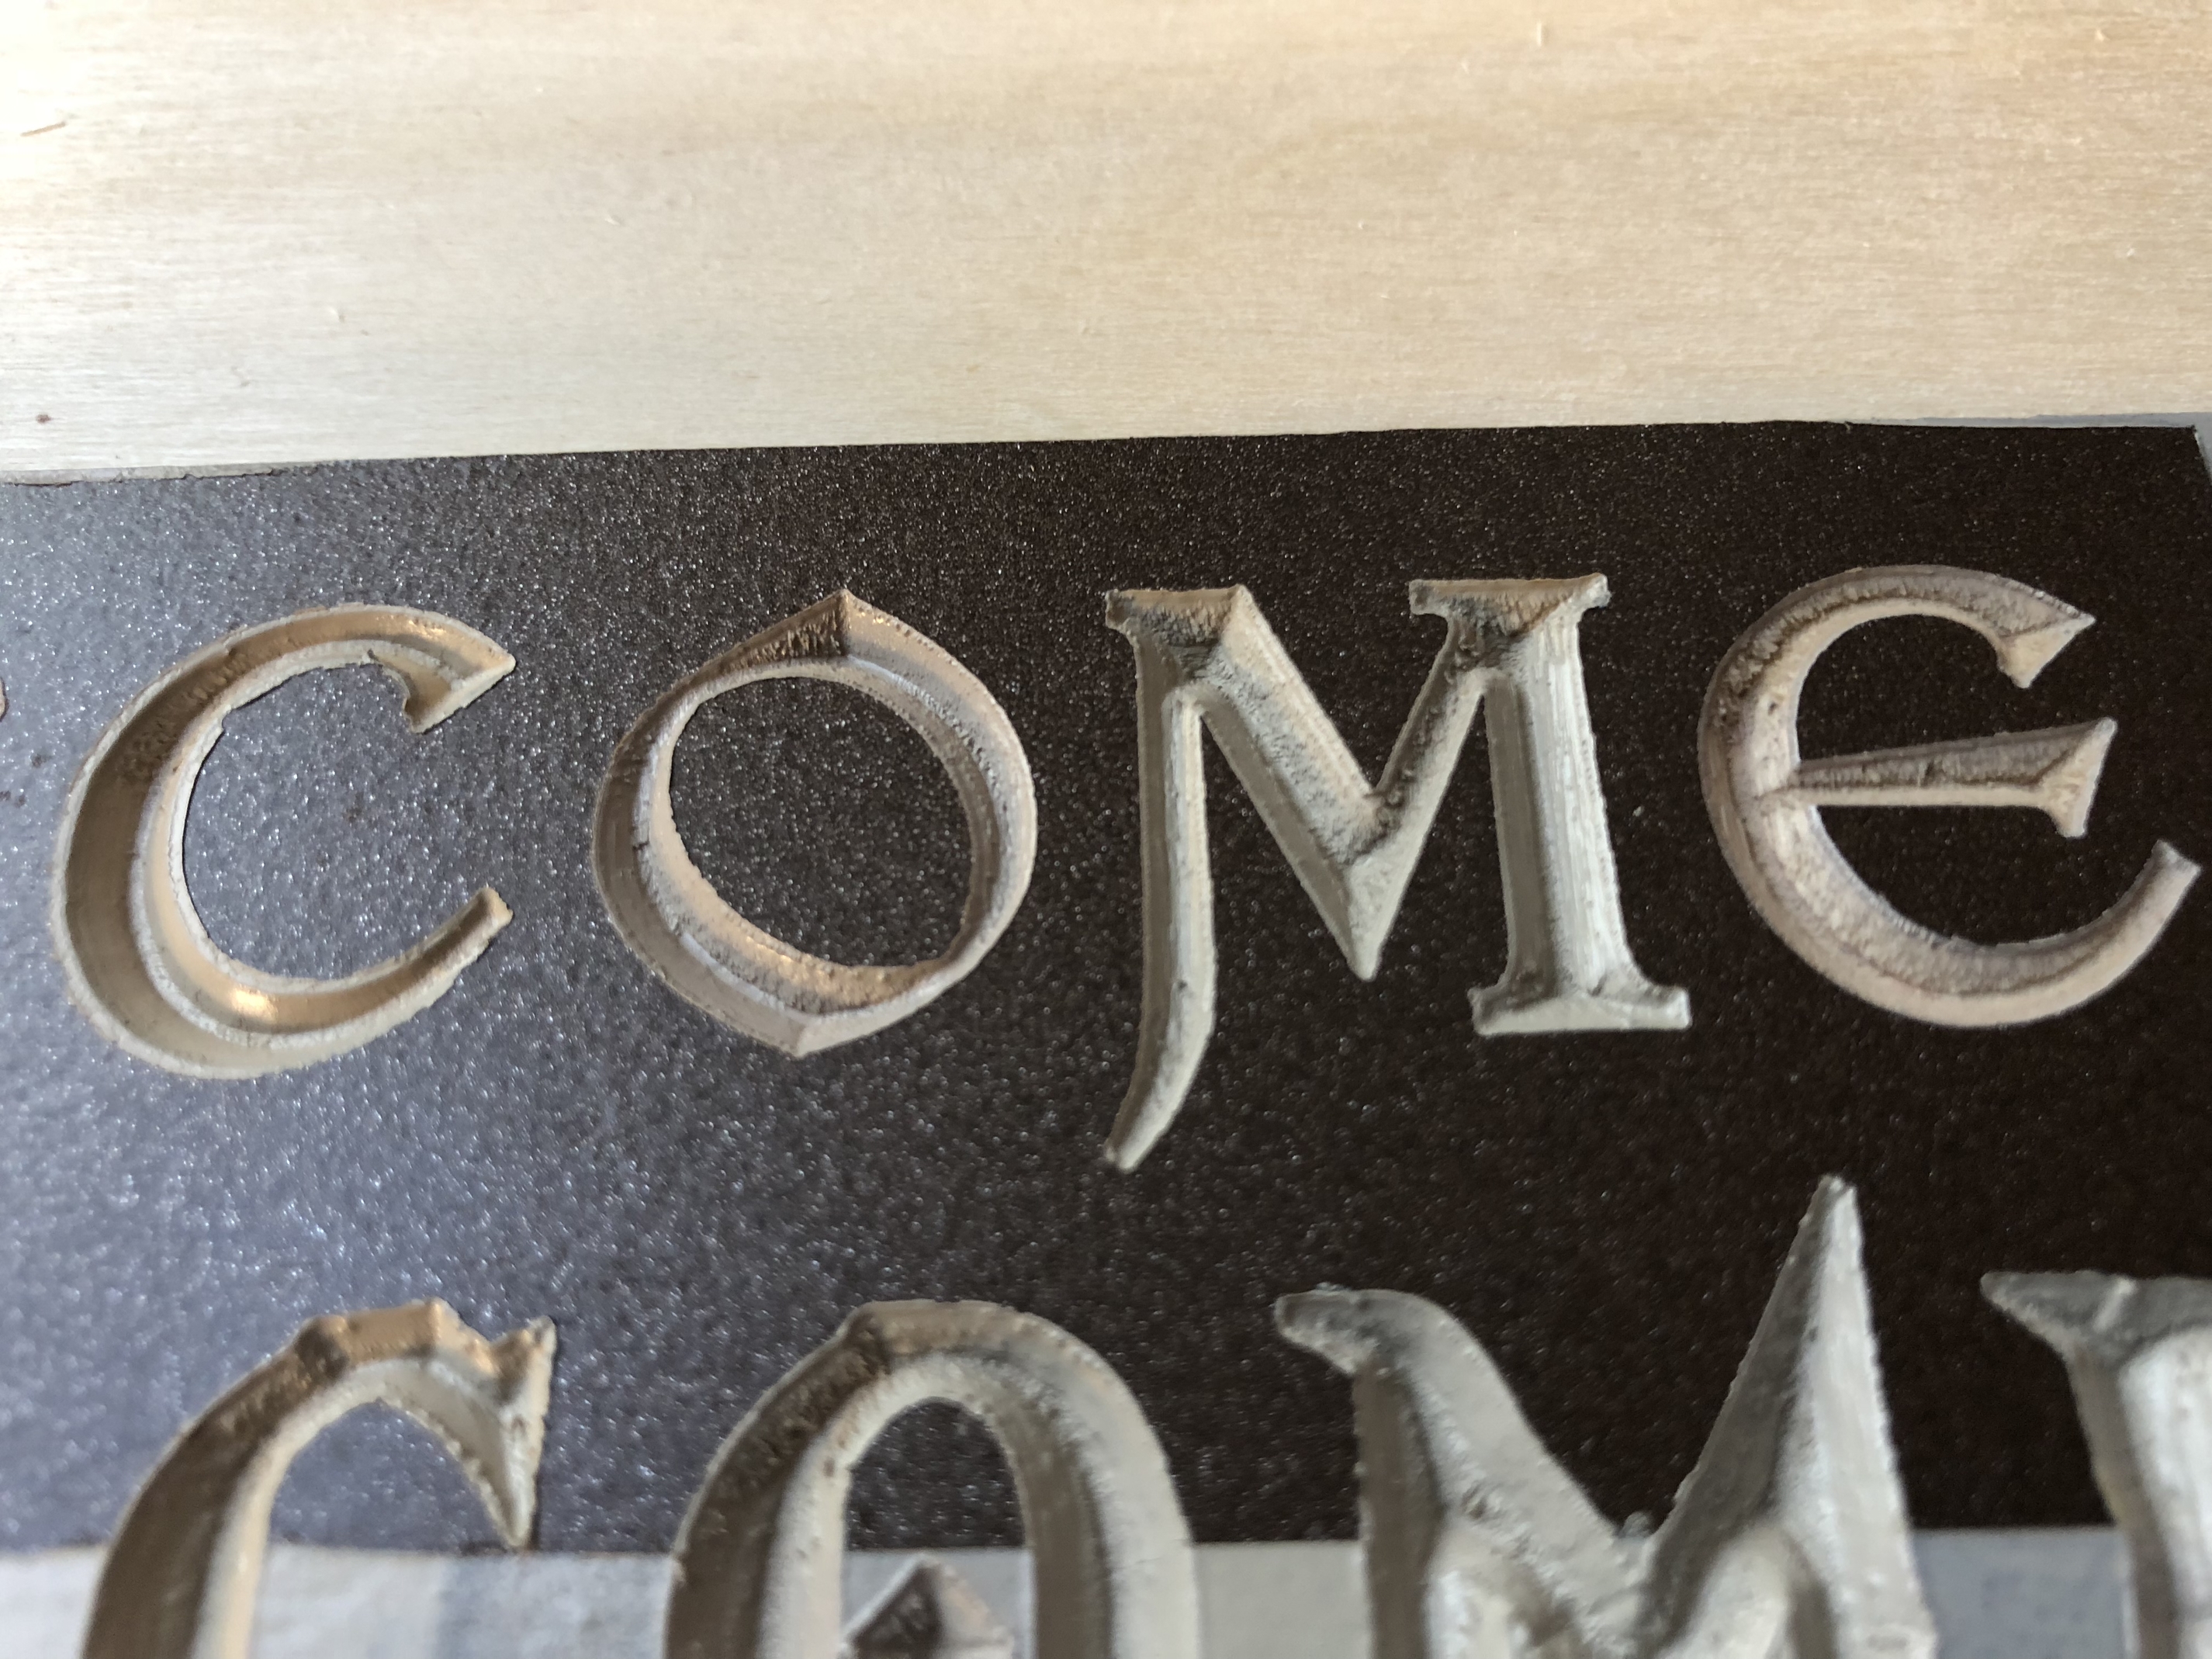
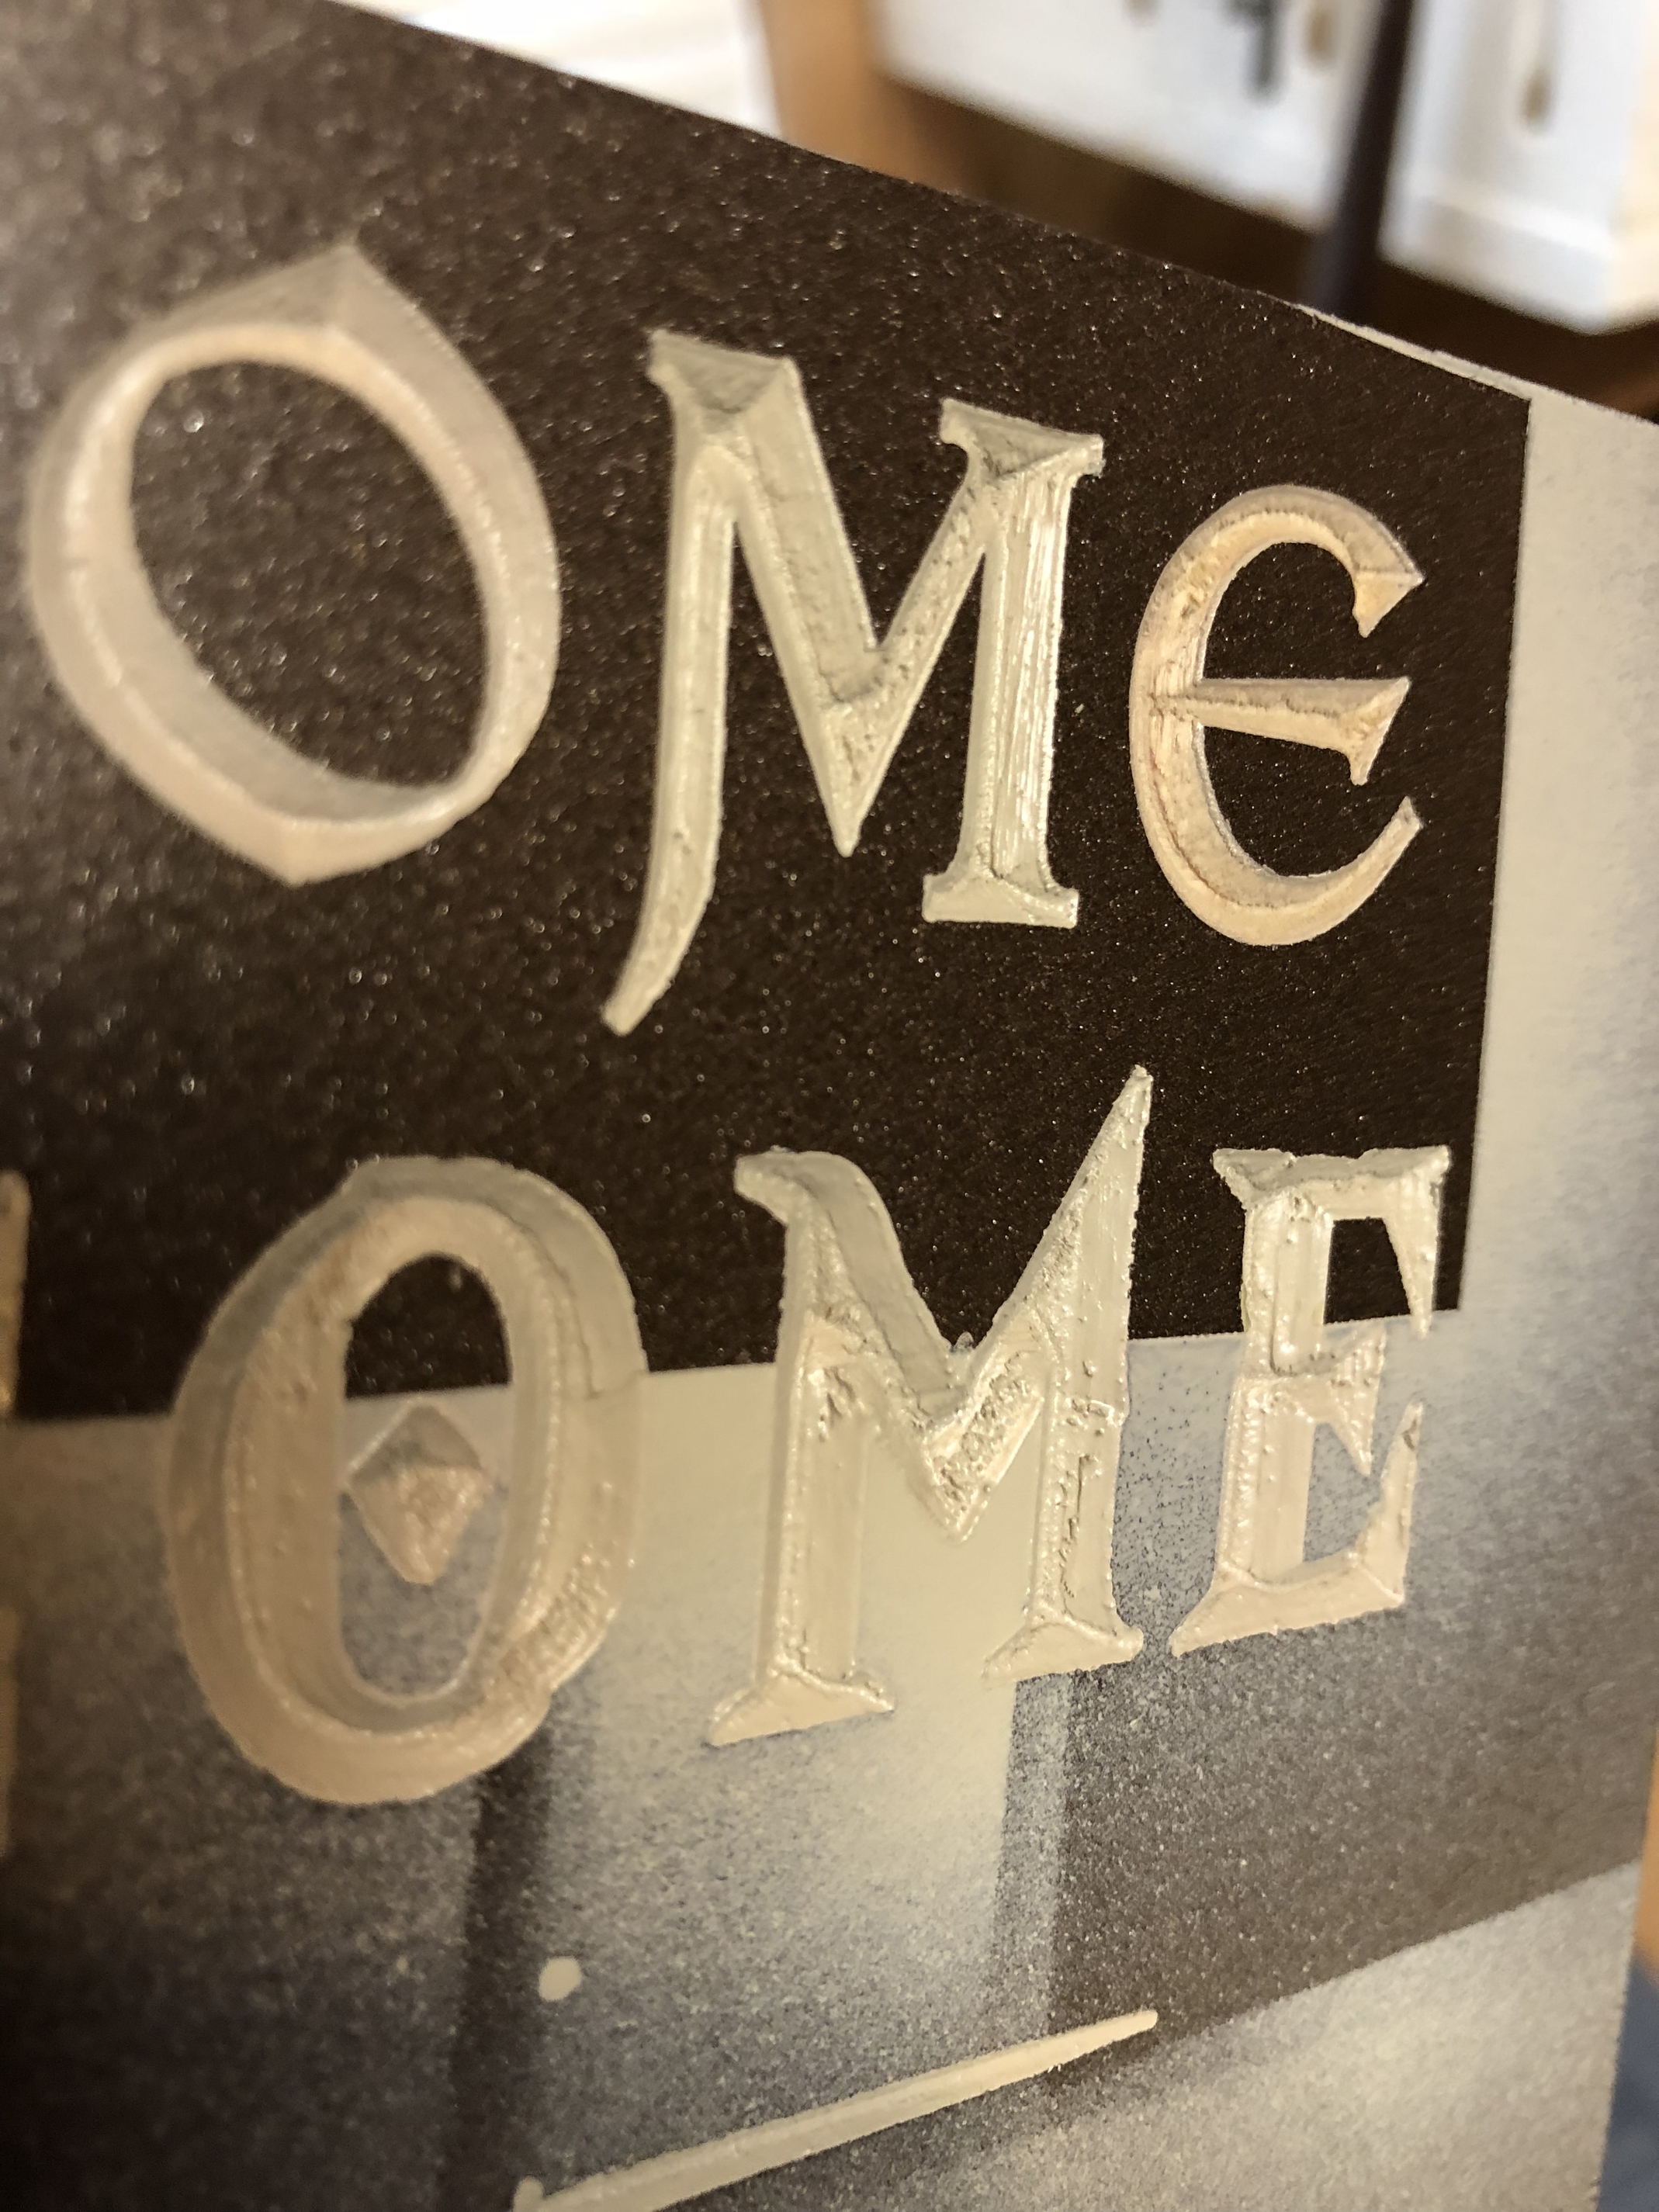
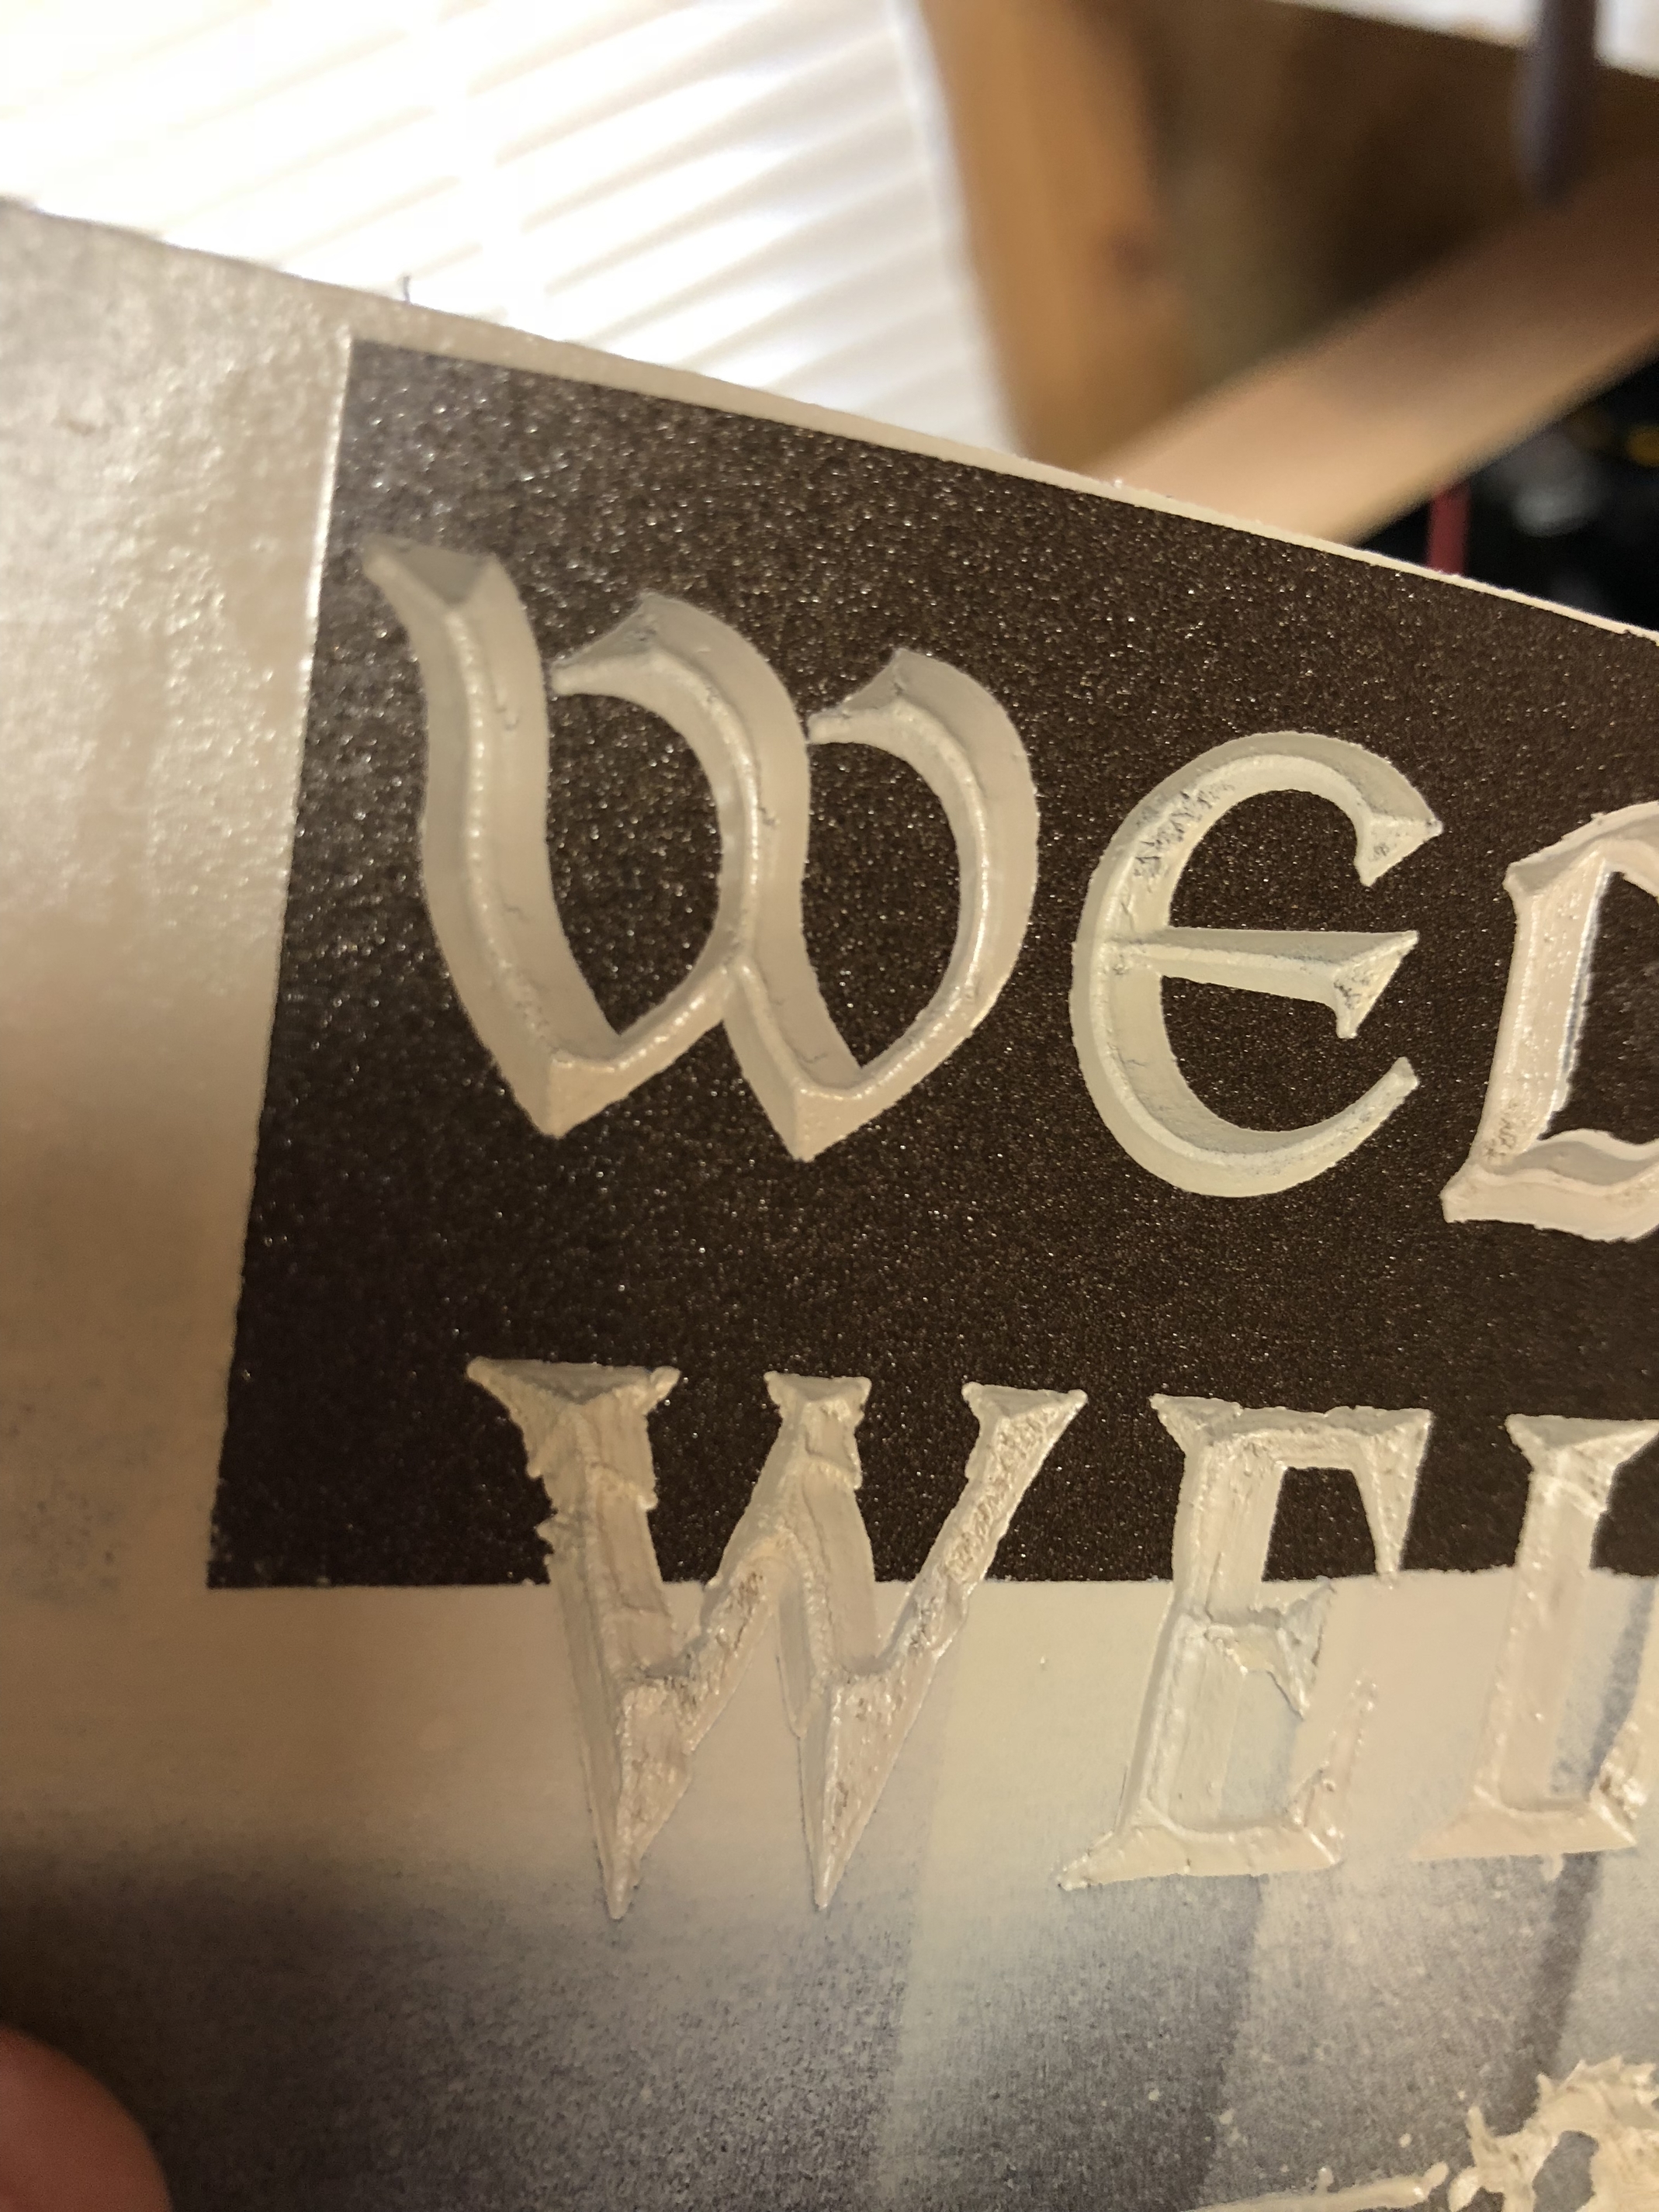
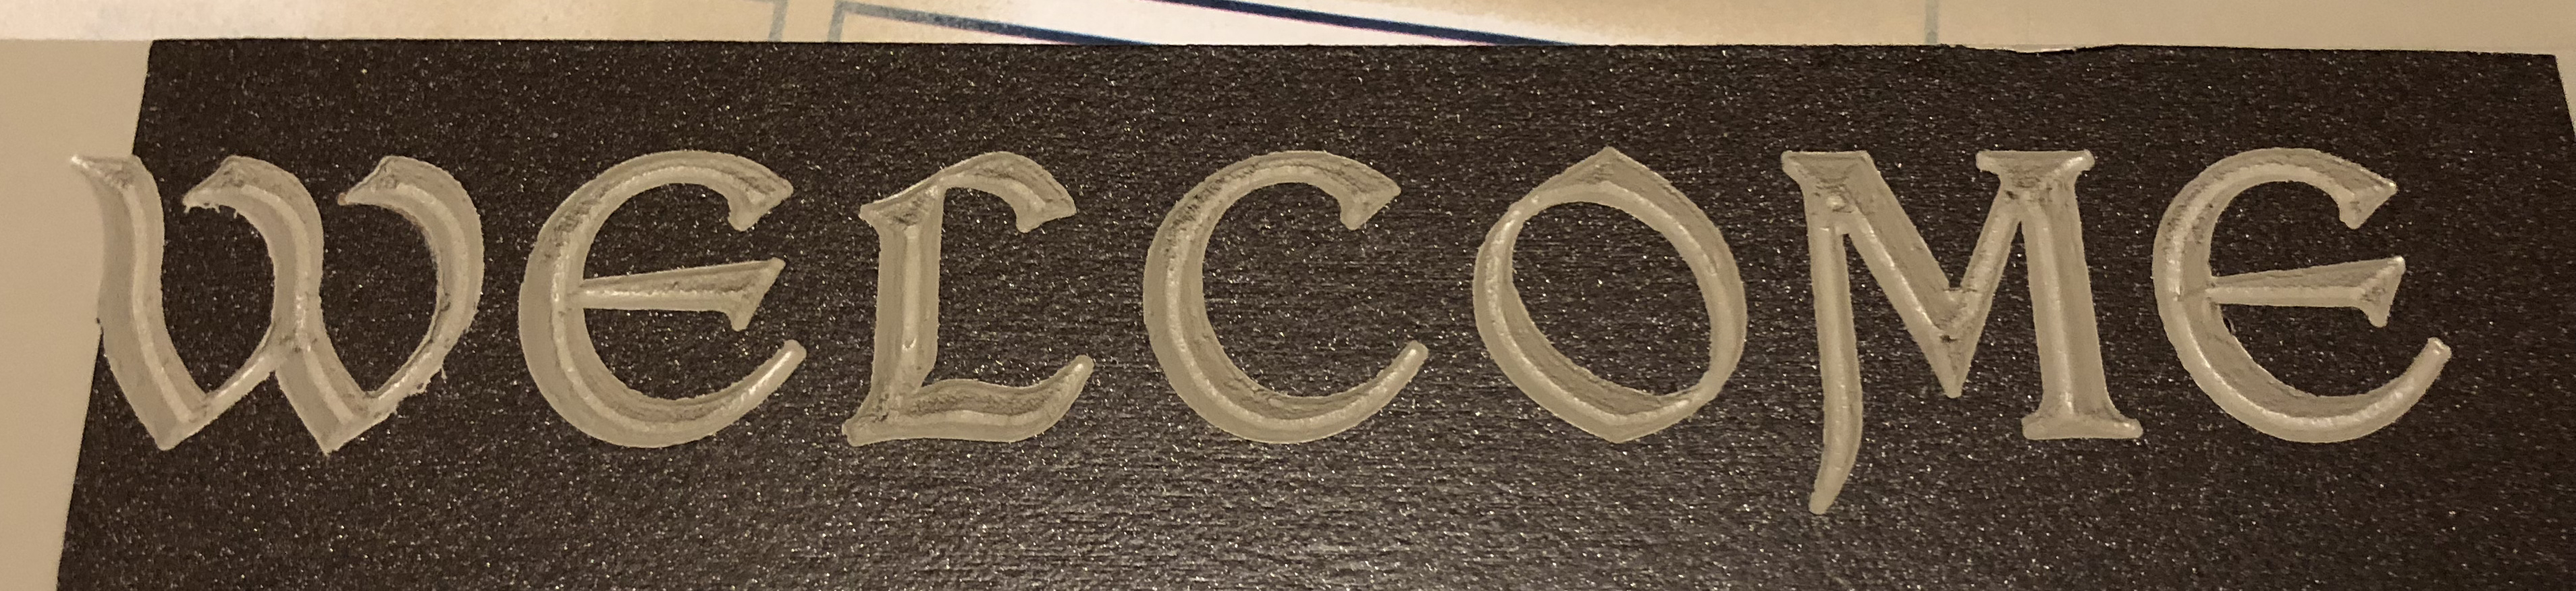
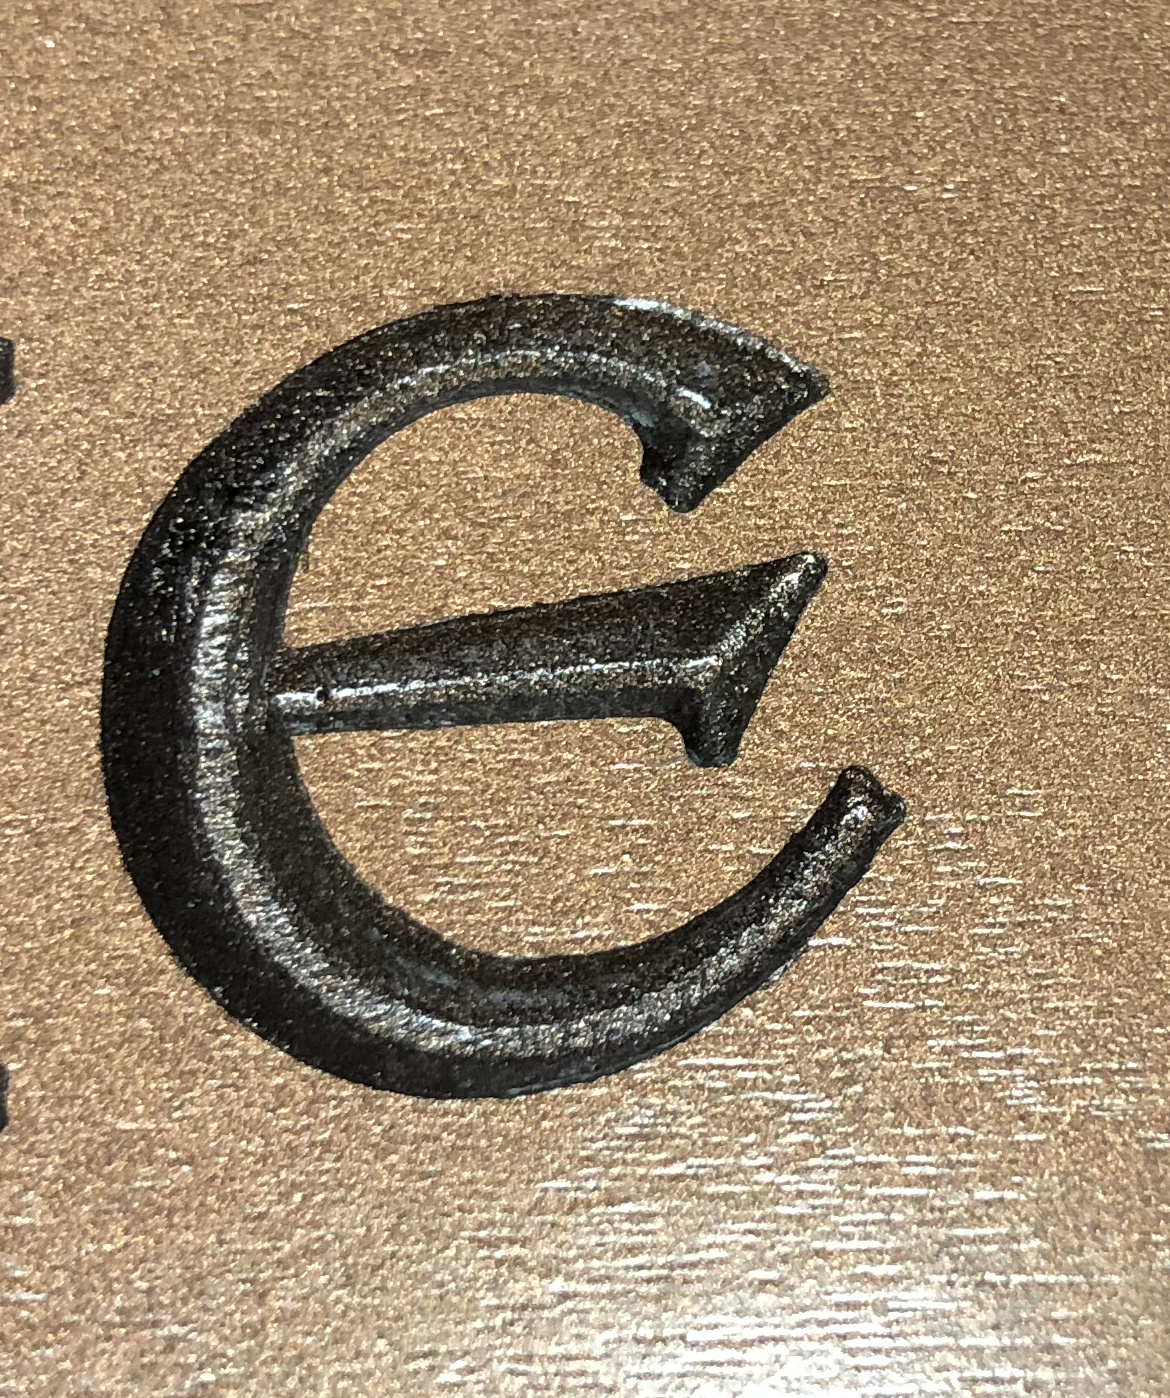
So first the problem. I was making some signs in two color schemes. One works really well the other not. One is dye-stained a golden brown and then flat black spray paint is sprayed through a mask into the carving. The other is painted a dark bronze color and then a lighter tan color is sprayed. The black flat looks great, the tan color ends up with a lot of raised grain issues which look bad:
In the followup replies I’ll document things I’m trying but some base info:
Material: 5mm luaun ply available at Lowe’s
Golden Brown/Black: 50/50 mix of General Finishes Dye stain amber and light brown, dried overnight, masked with Oramask 813, vcarved with a Freud 90 degree V-Bit at 60ipm and a clean up pass immediately at 100ipm. Shellac spray, 3 coats over ~90 minutes then given 90 minutes (or overnight) to dry. Sprayed with Valspar flat black spray paint.
Dark brown/tan: Sprayed with Krylon dark bronze spray paint, allowed to dry overnight, masked with Oramask 813, vcarved with a Freud 90 degree V-bit at 60ipm and a clean up pass immediately at 100ipm. Shellac spray, 3 coats over ~90 minutes then given 90 minutes (or overnight) to dry. Sprayed with Krylon Matte River Rock spray paint.
The vcarving almost always comes out very clean with very little raised grain being noticed, so something is happening during the subsequent steps to accentuate the issue
The black paint doesn’t seem to do this much at all so the process is sealing and painting is where I’ll focus first
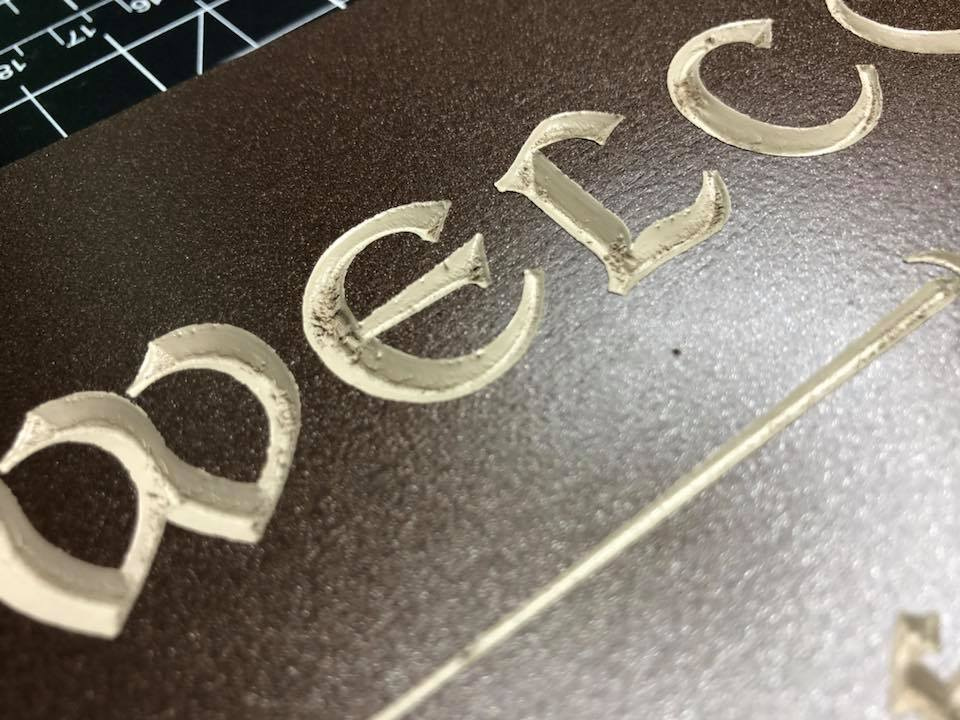
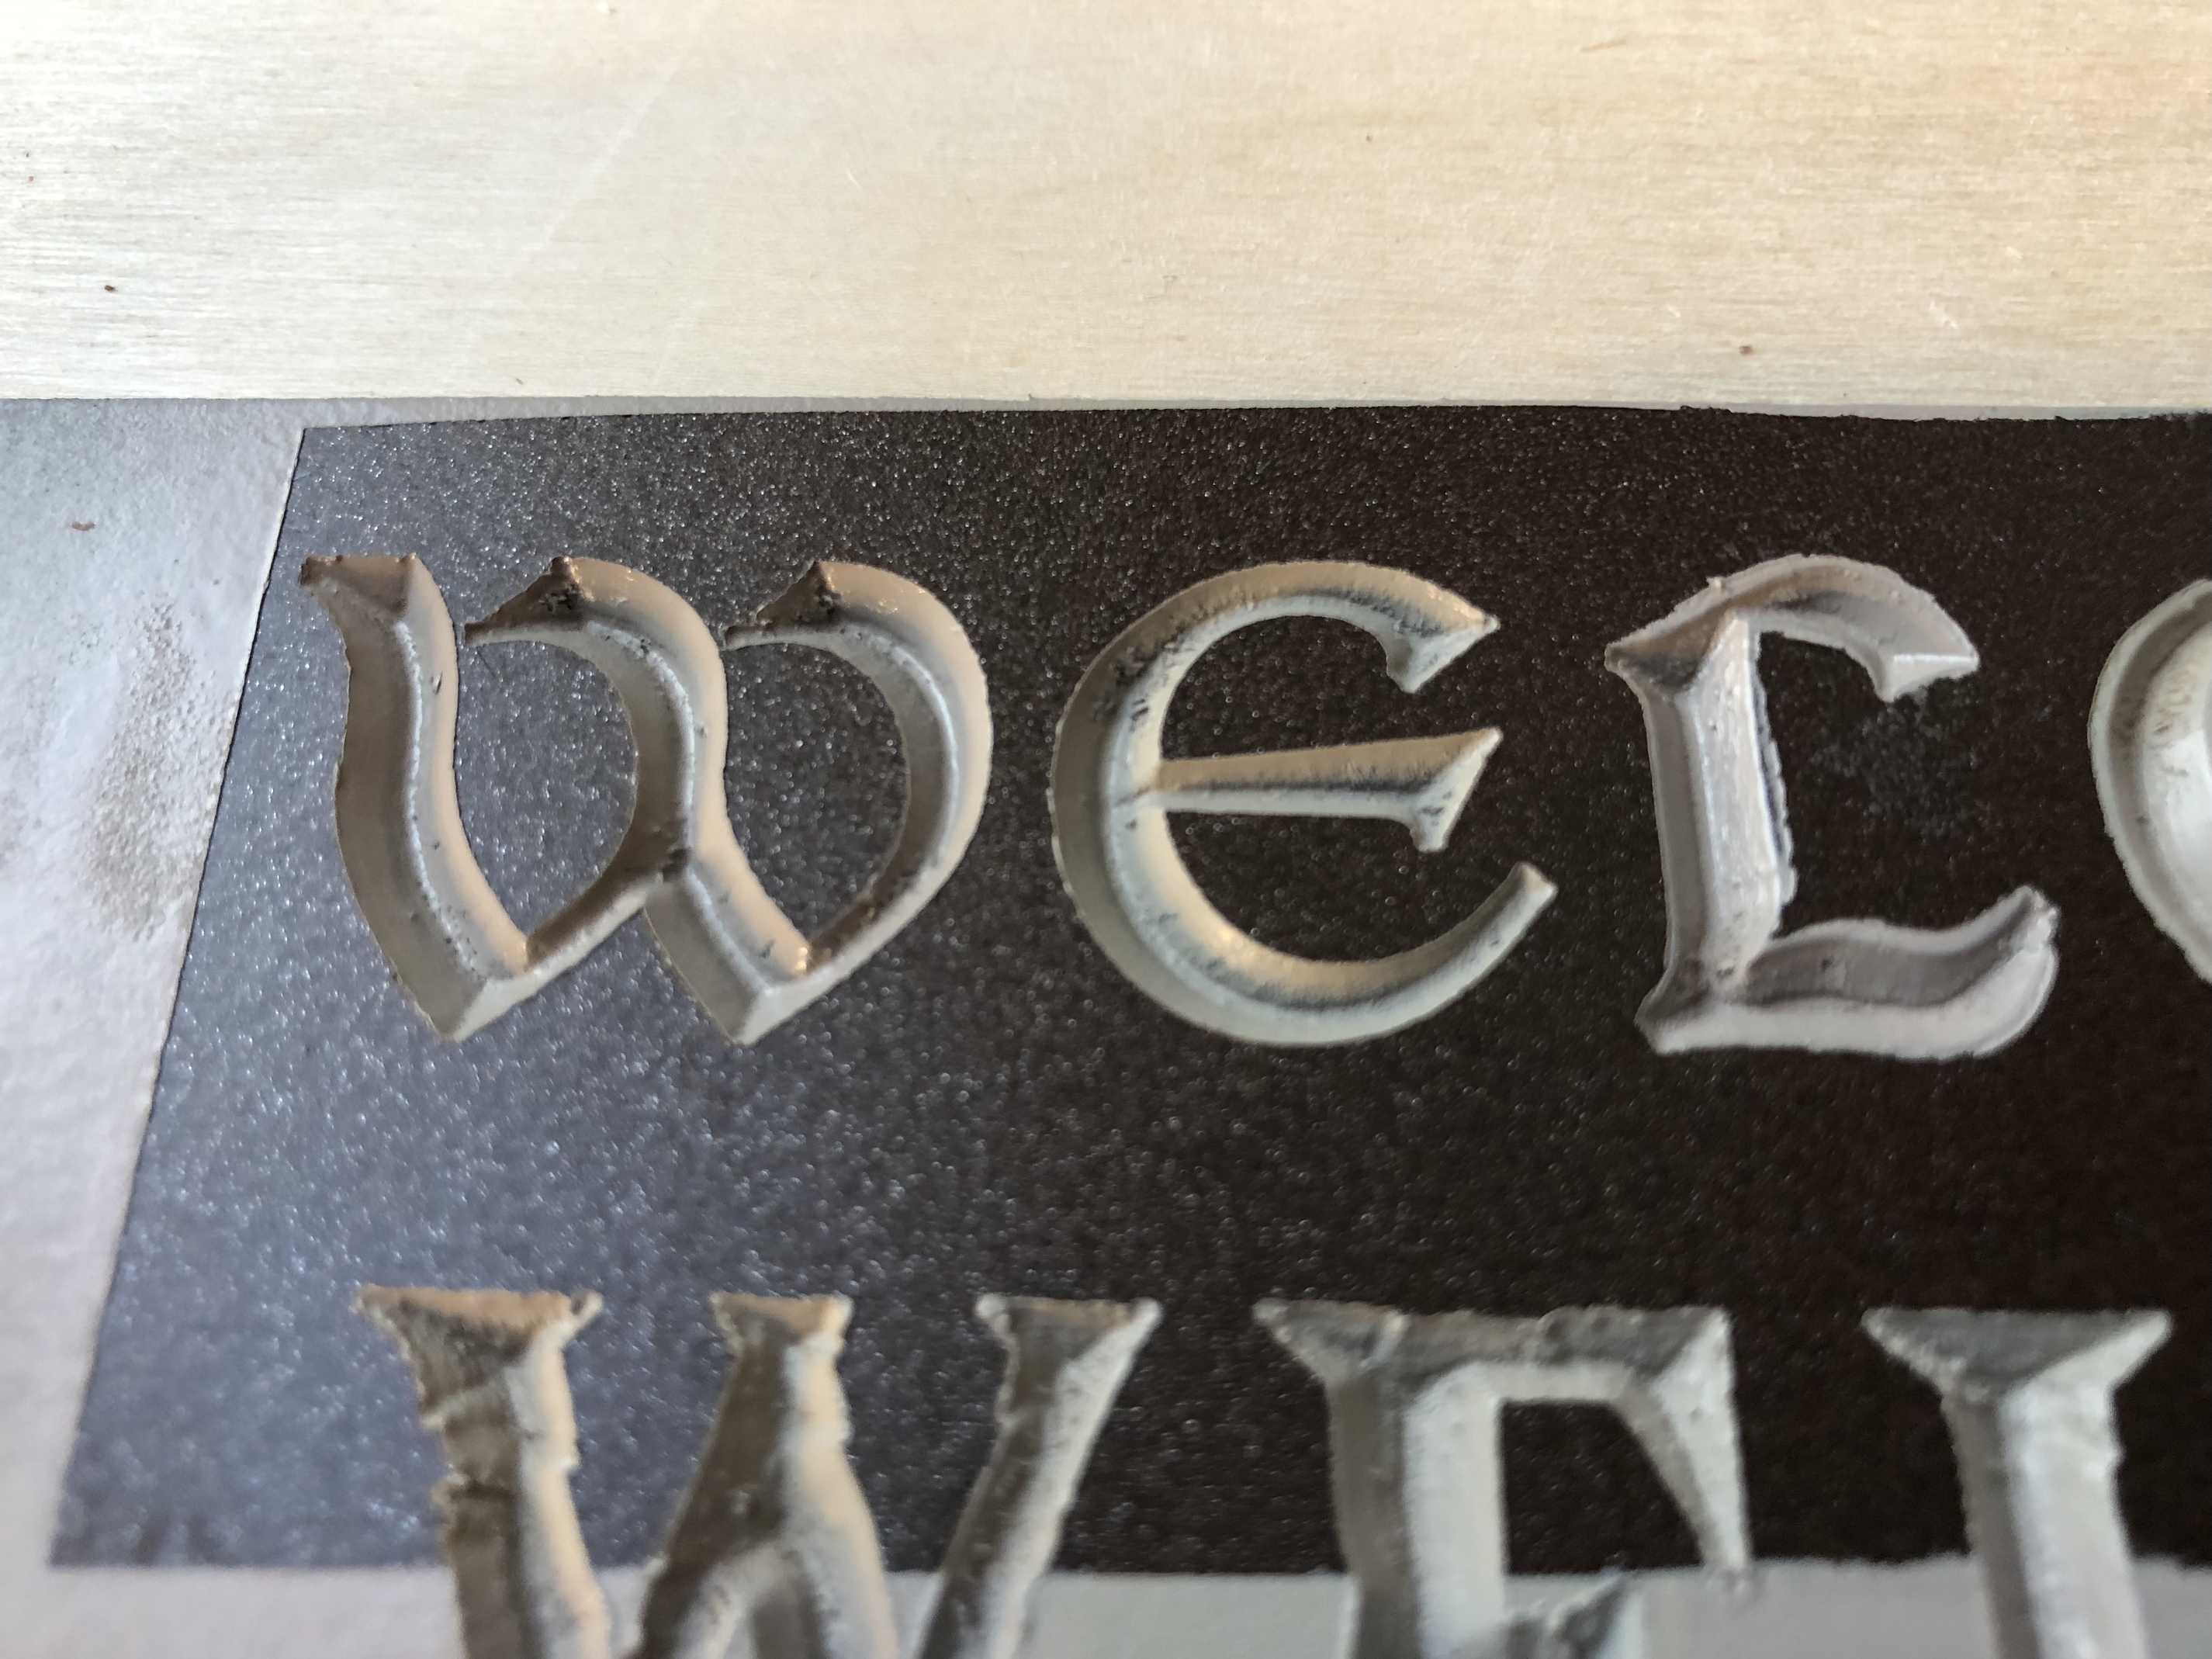
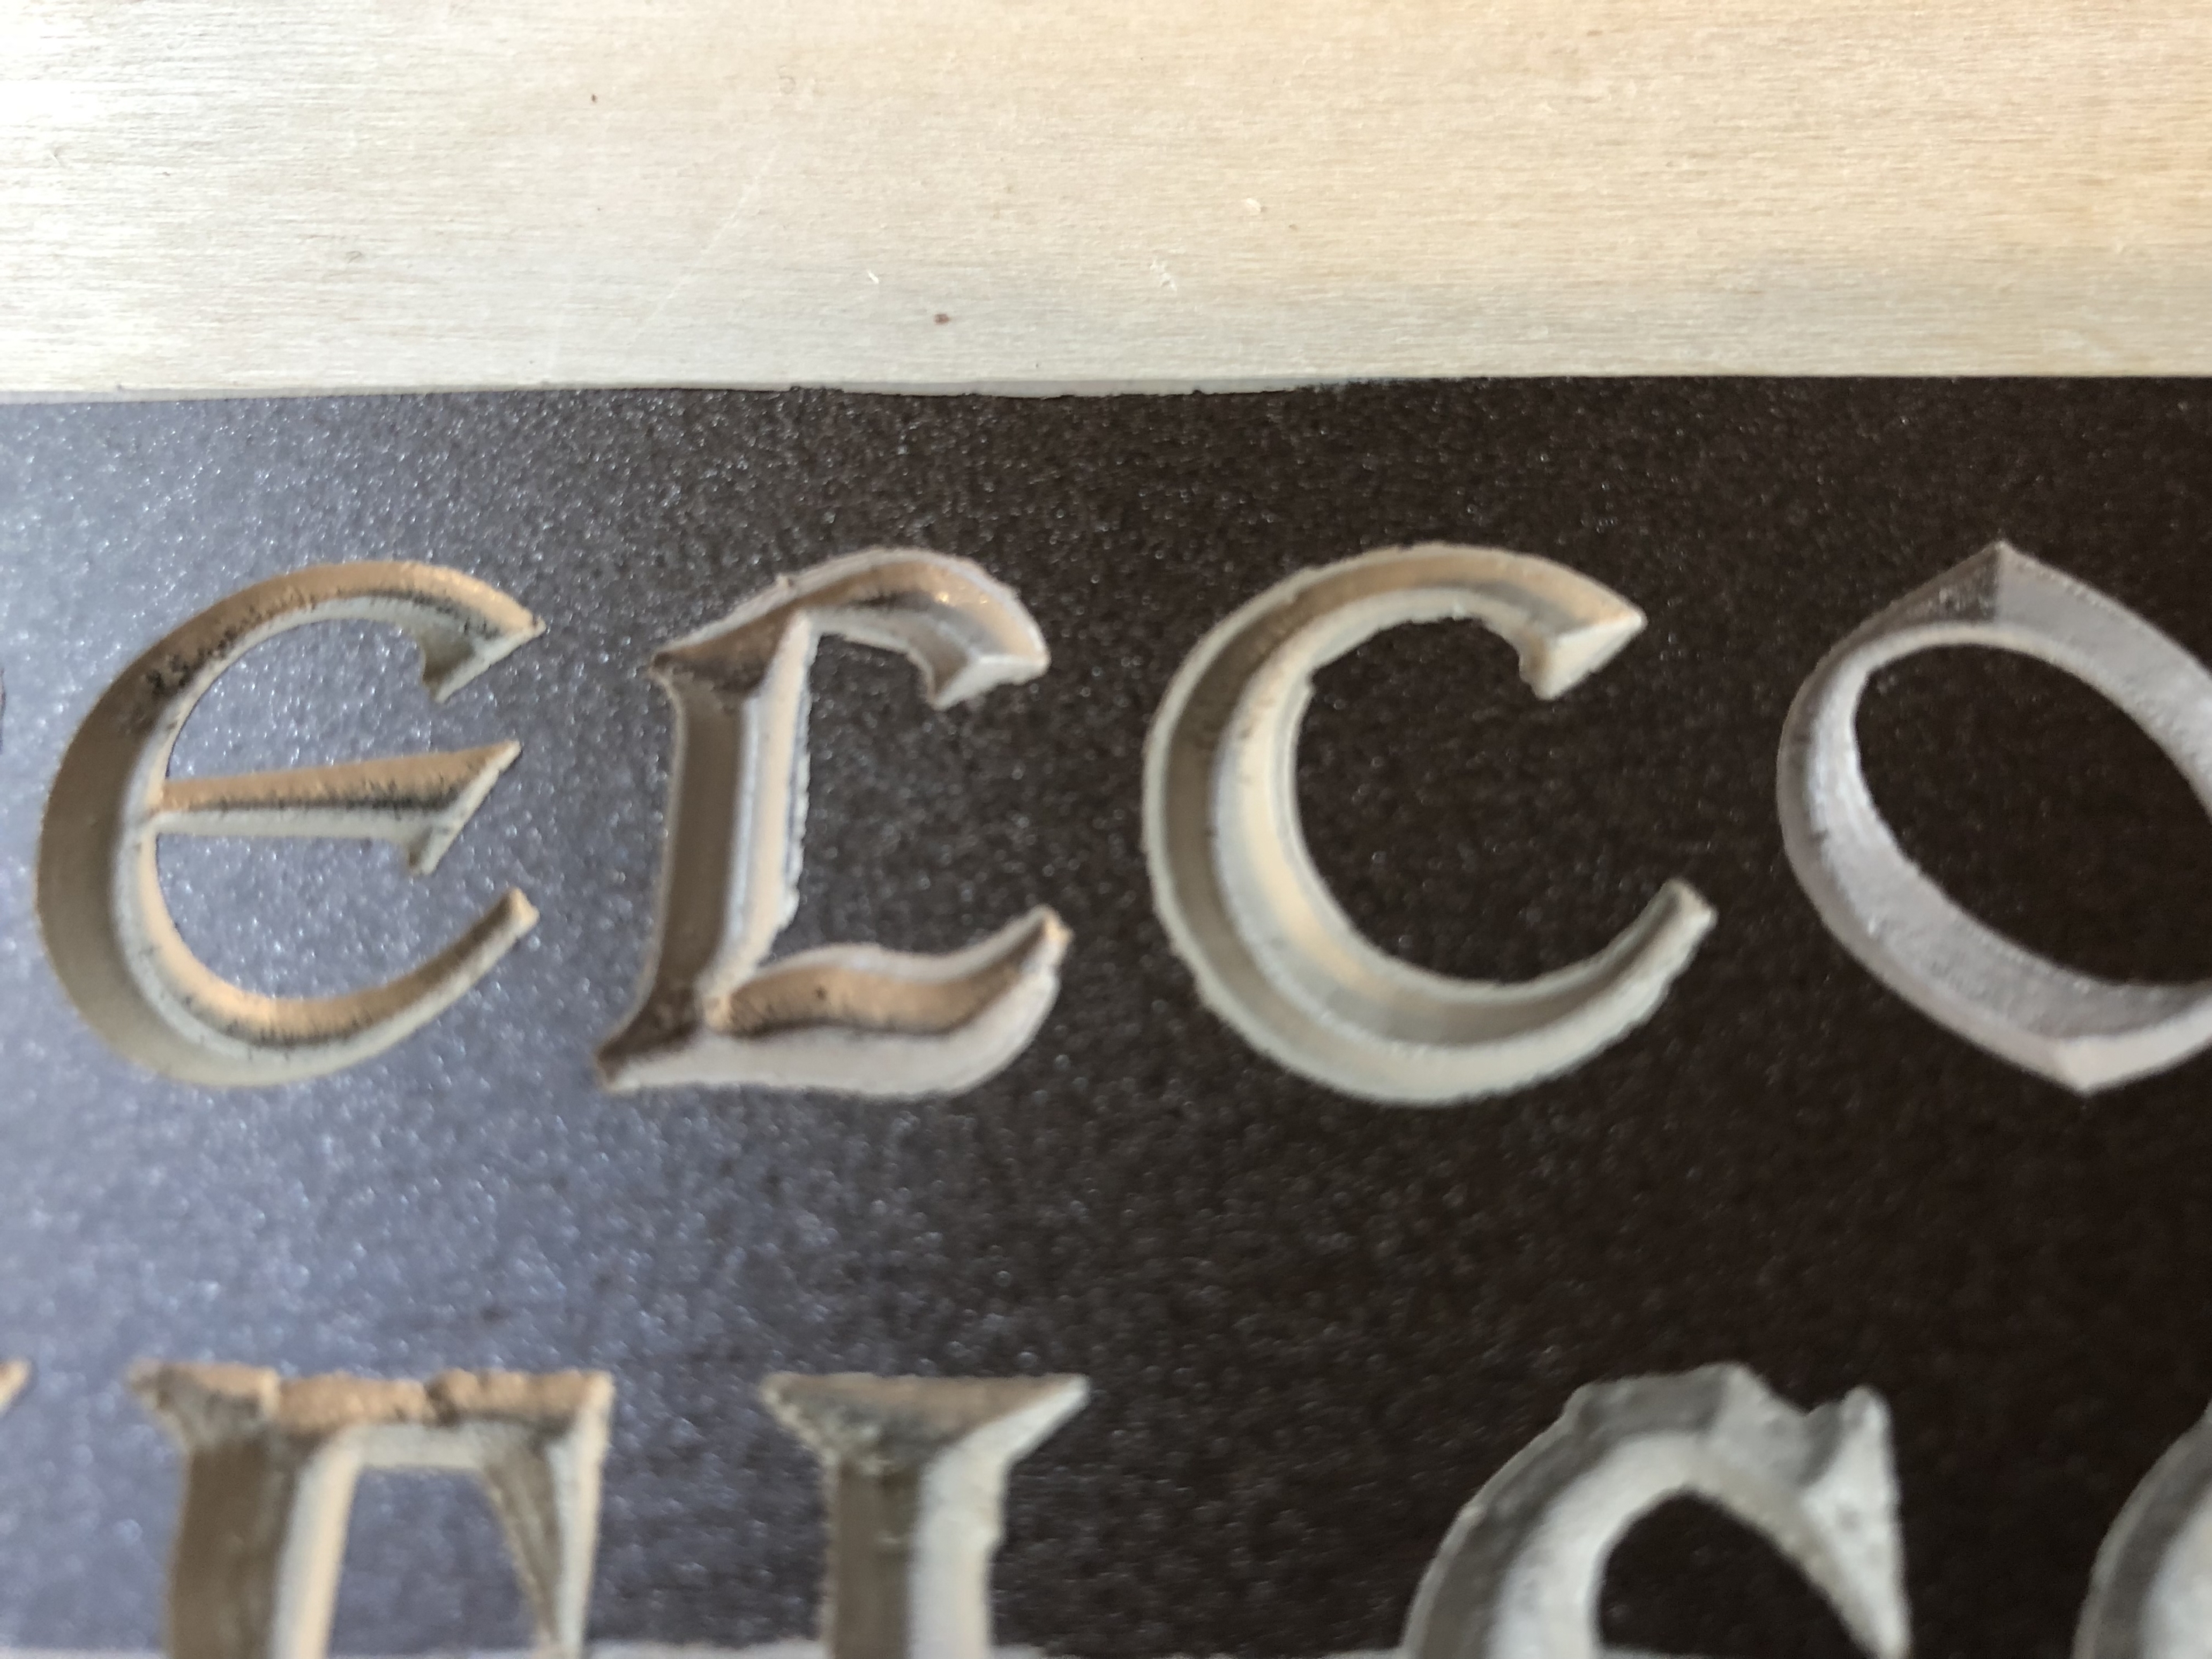
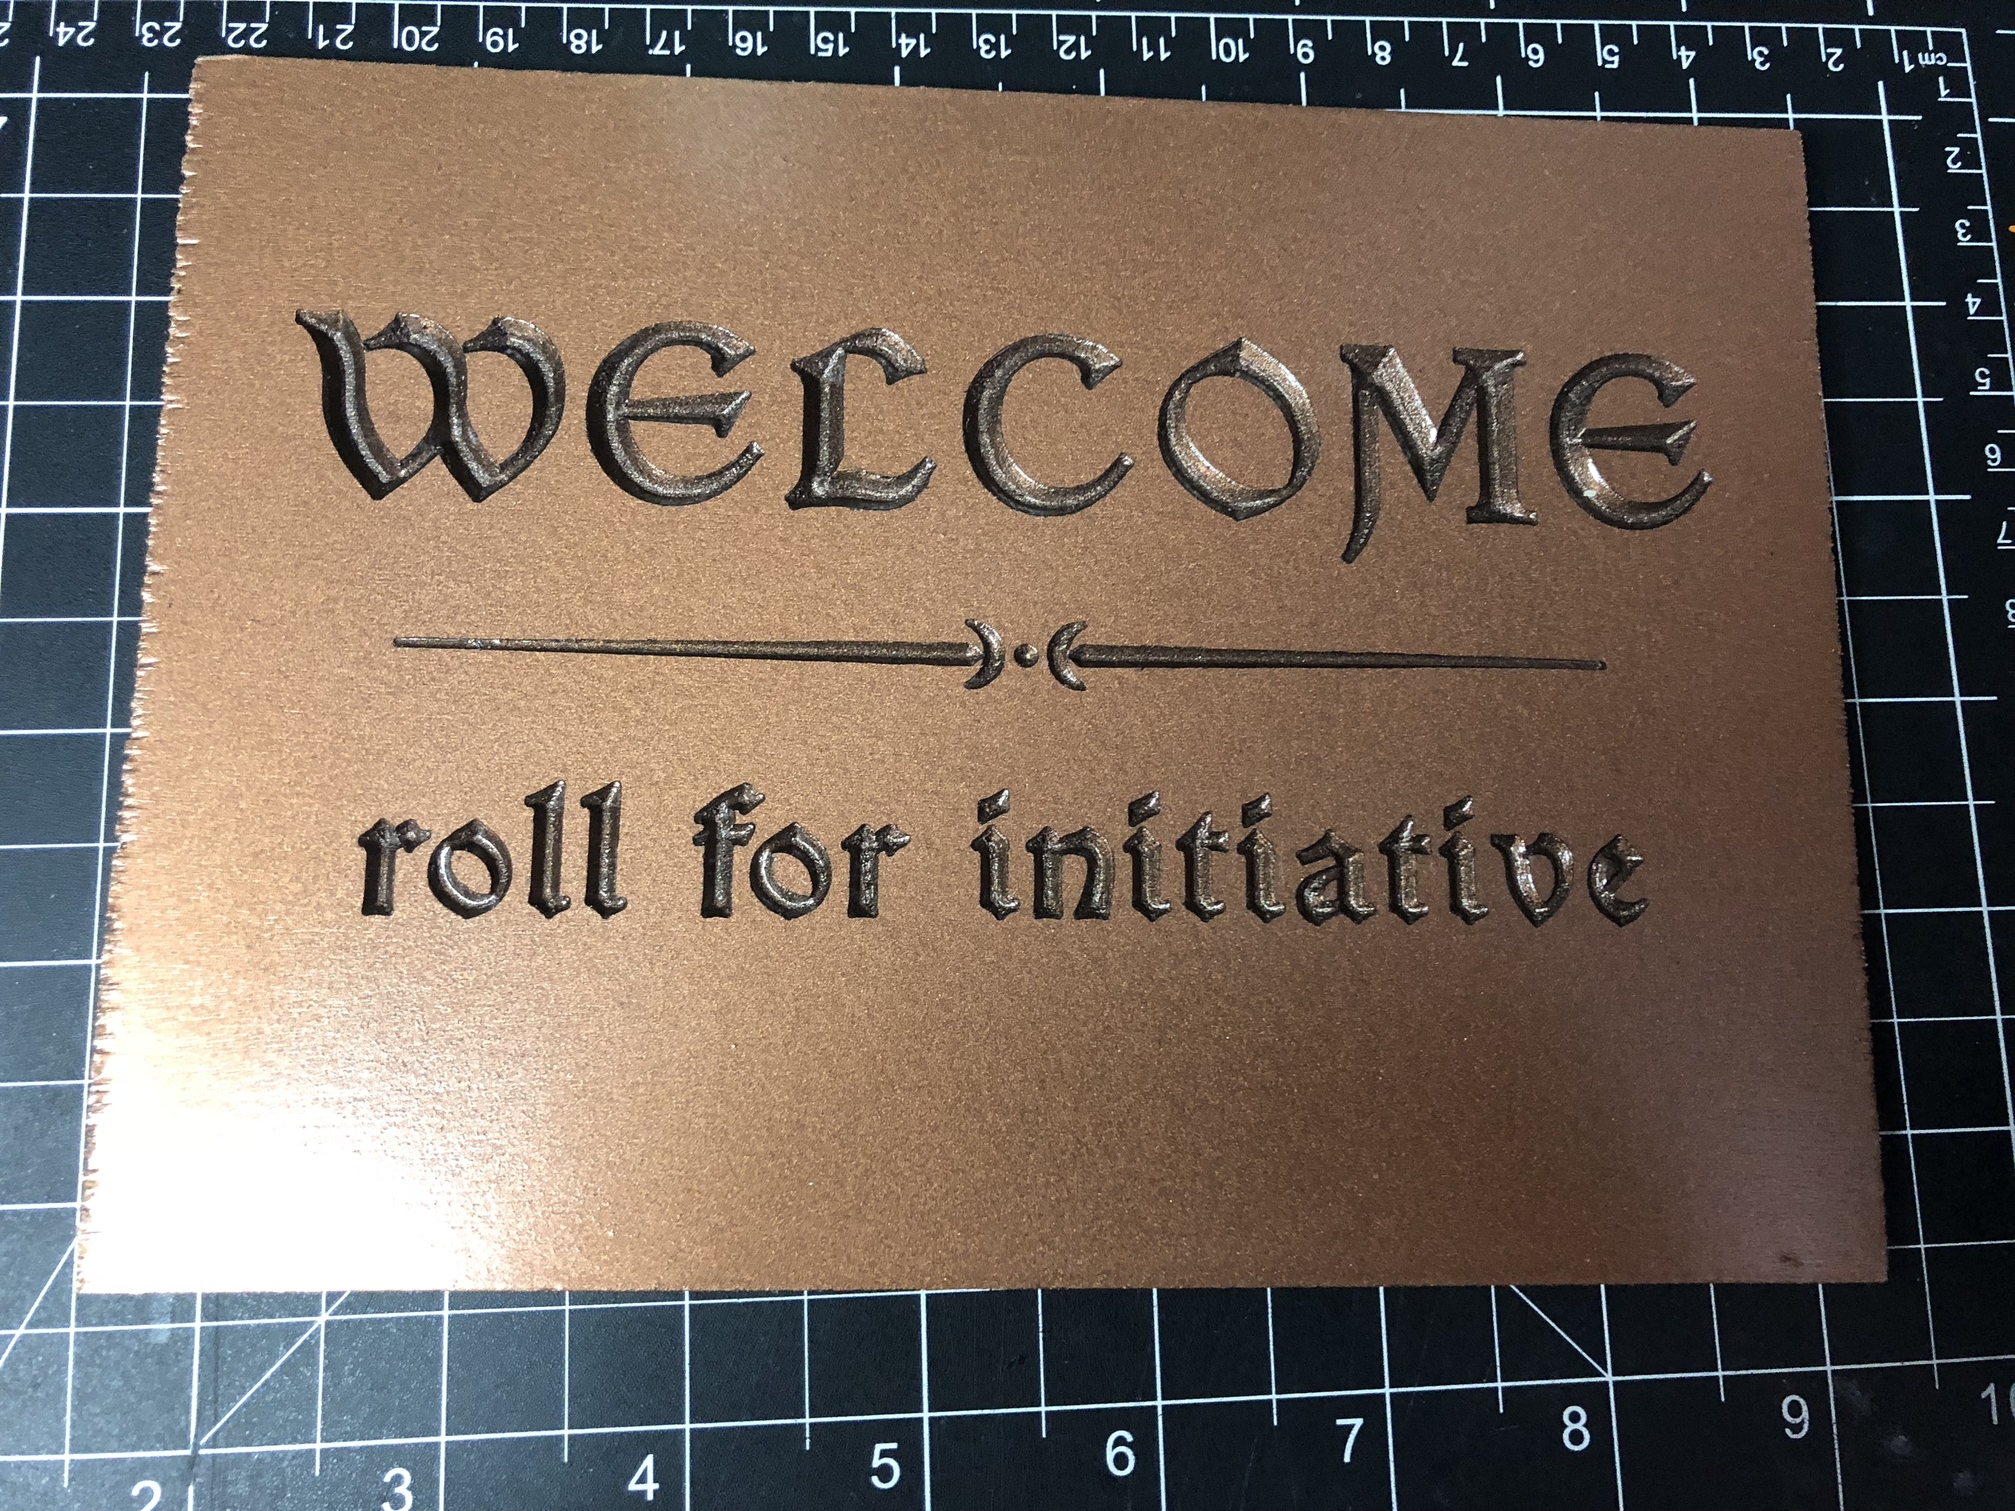
I started by creating a new test board using one of my previously poor-result cuts. I masked off the word “WELCOME” into 2 letter groups and sprayed to seal as follows:
W-E were sprayed with an automotive filler primer. This is thicker than normal primer and allows more sanding, and is better at filling gaps.
L-C were sprayed with satin Minwax spray Lacquer.
O-M were sprayed with Polycrylic water based finish
E was sprayed with Shellac as in the previous attempts as something of a control.
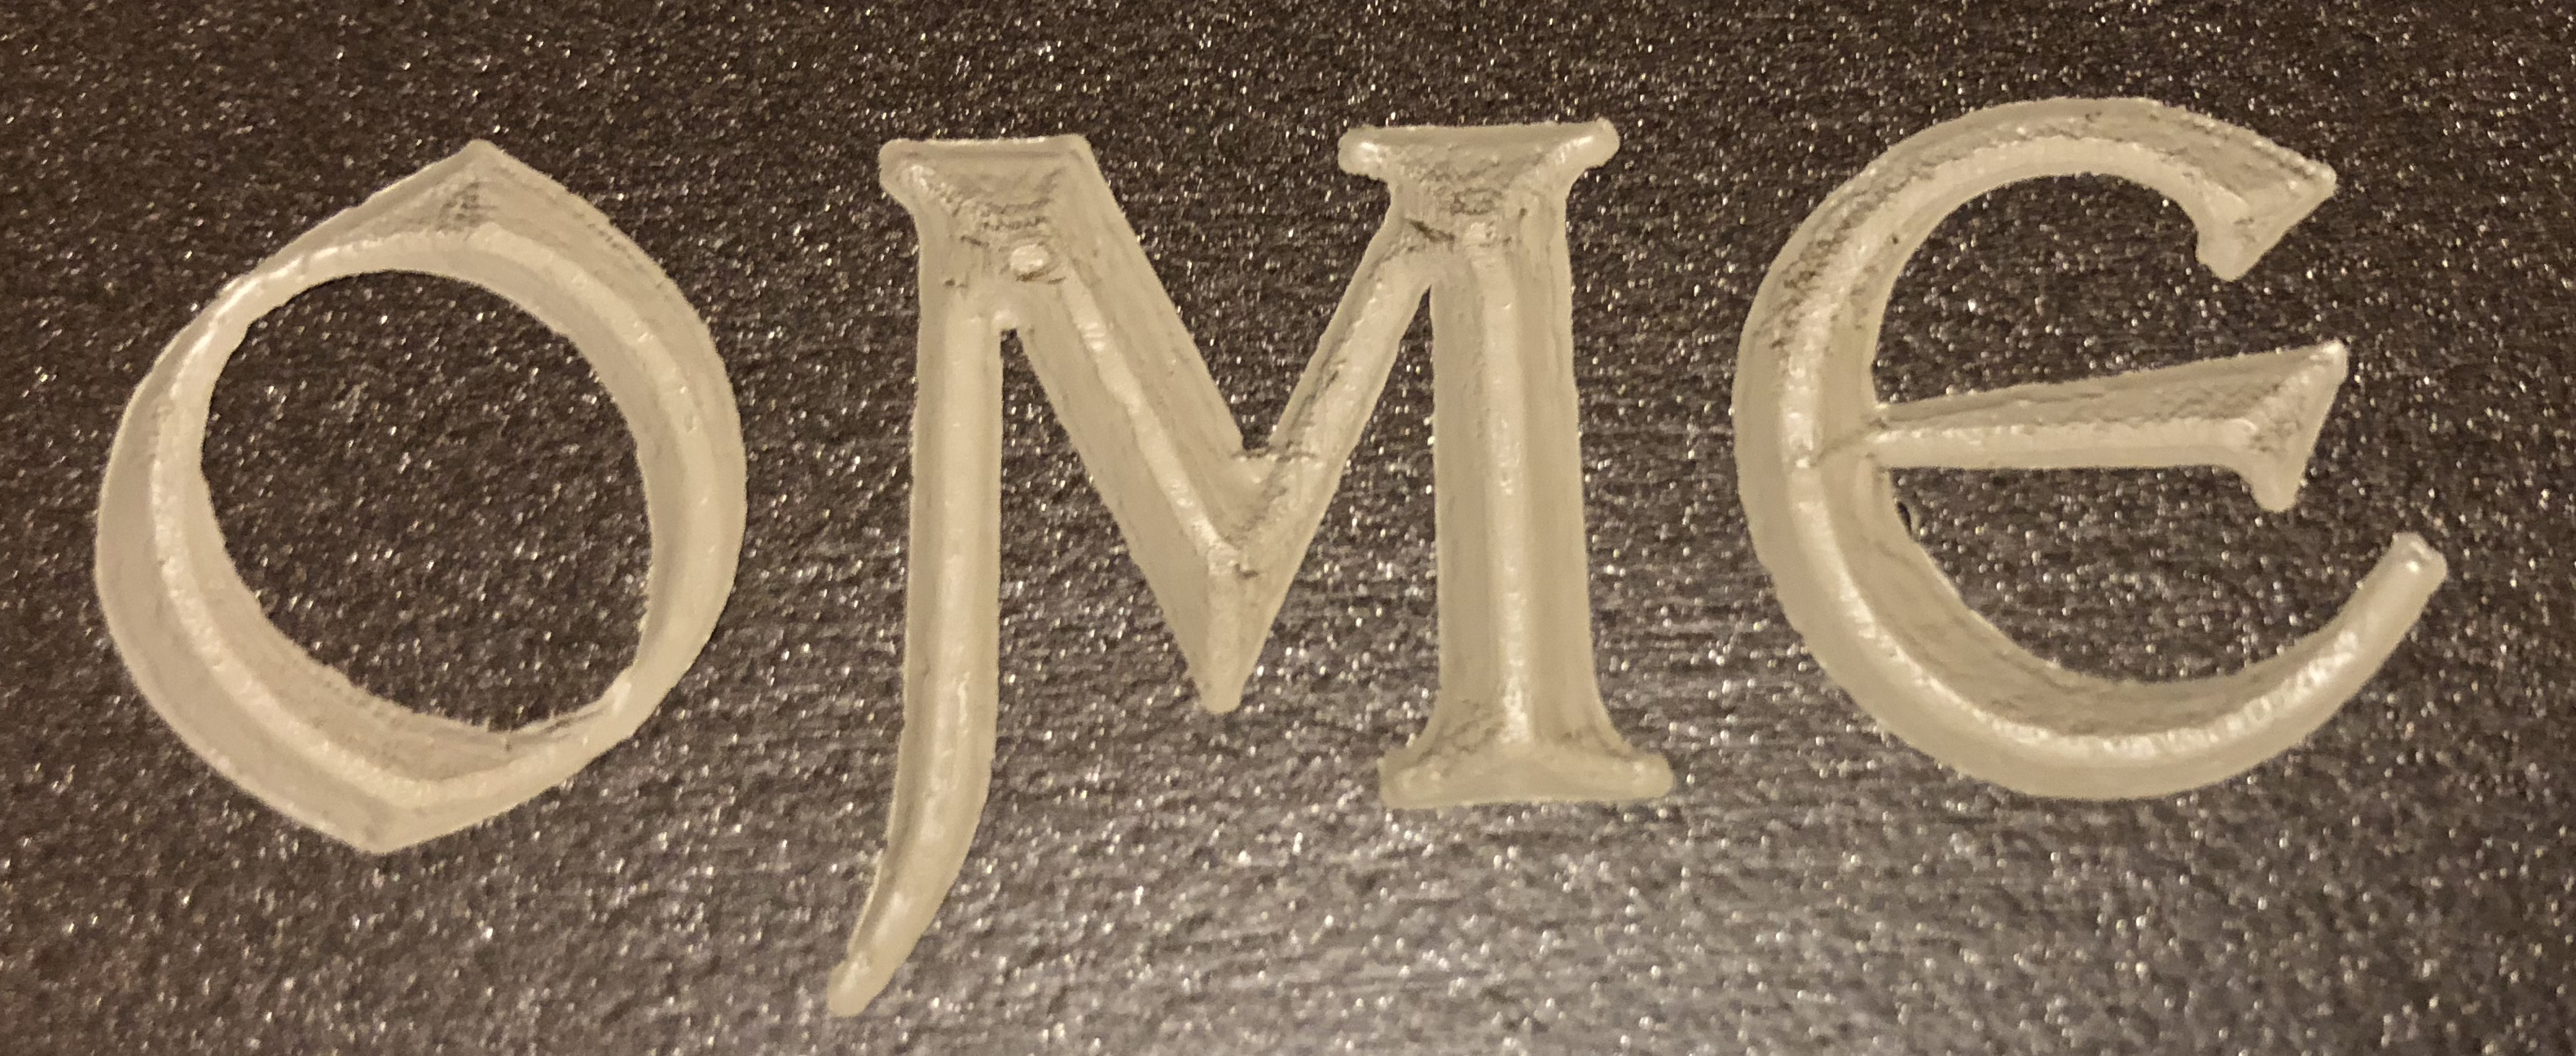
The automotive filler seemed to provide fairly comparable results to other attempts after painting. Grain was lightly raised at the tips of the W and slightly along the top left area of the e.
The polycrylic had issues in a few spots particularly the top right areaf ot the M and along the top edge of the O. It’s not super clear in the picture. I actually anticipated this as the water based nature of the product is more likely to raise grain in the first place.
The shellac performed in line with previous results with the top edge of the carving being significantly raised.
For the next update I’m going to paint each without any sanding or touchup to test an additional variable. I’ll be painting one from each set with the Matte River Rock paint used previously, as well as Krylon Satin Pebble spray paint, very similar in color to the River Rock paint but perhaps a different formulation.
From there I’ll narrow down the sealer-step, at the moment it looks like I’ll be excluding the polycrylic and possibly the shellac for the time being, but I’ll see how the paint step goes.
Other variables I’ll likely test are bit and material, I ordered an Amana 90 degree bit to try in place of the Freud, and I have some Baltic Birch plywood which is generally higher quality than Luaun, having additional plys and fewer voids.
Oh and as quick followup, the overall goal is to be able to batch these out fairly quickly which means while a lot of issues can be fixed with hand-sanding I’d like to minimize that as much as possible via material selection and cutting/finishing processes.
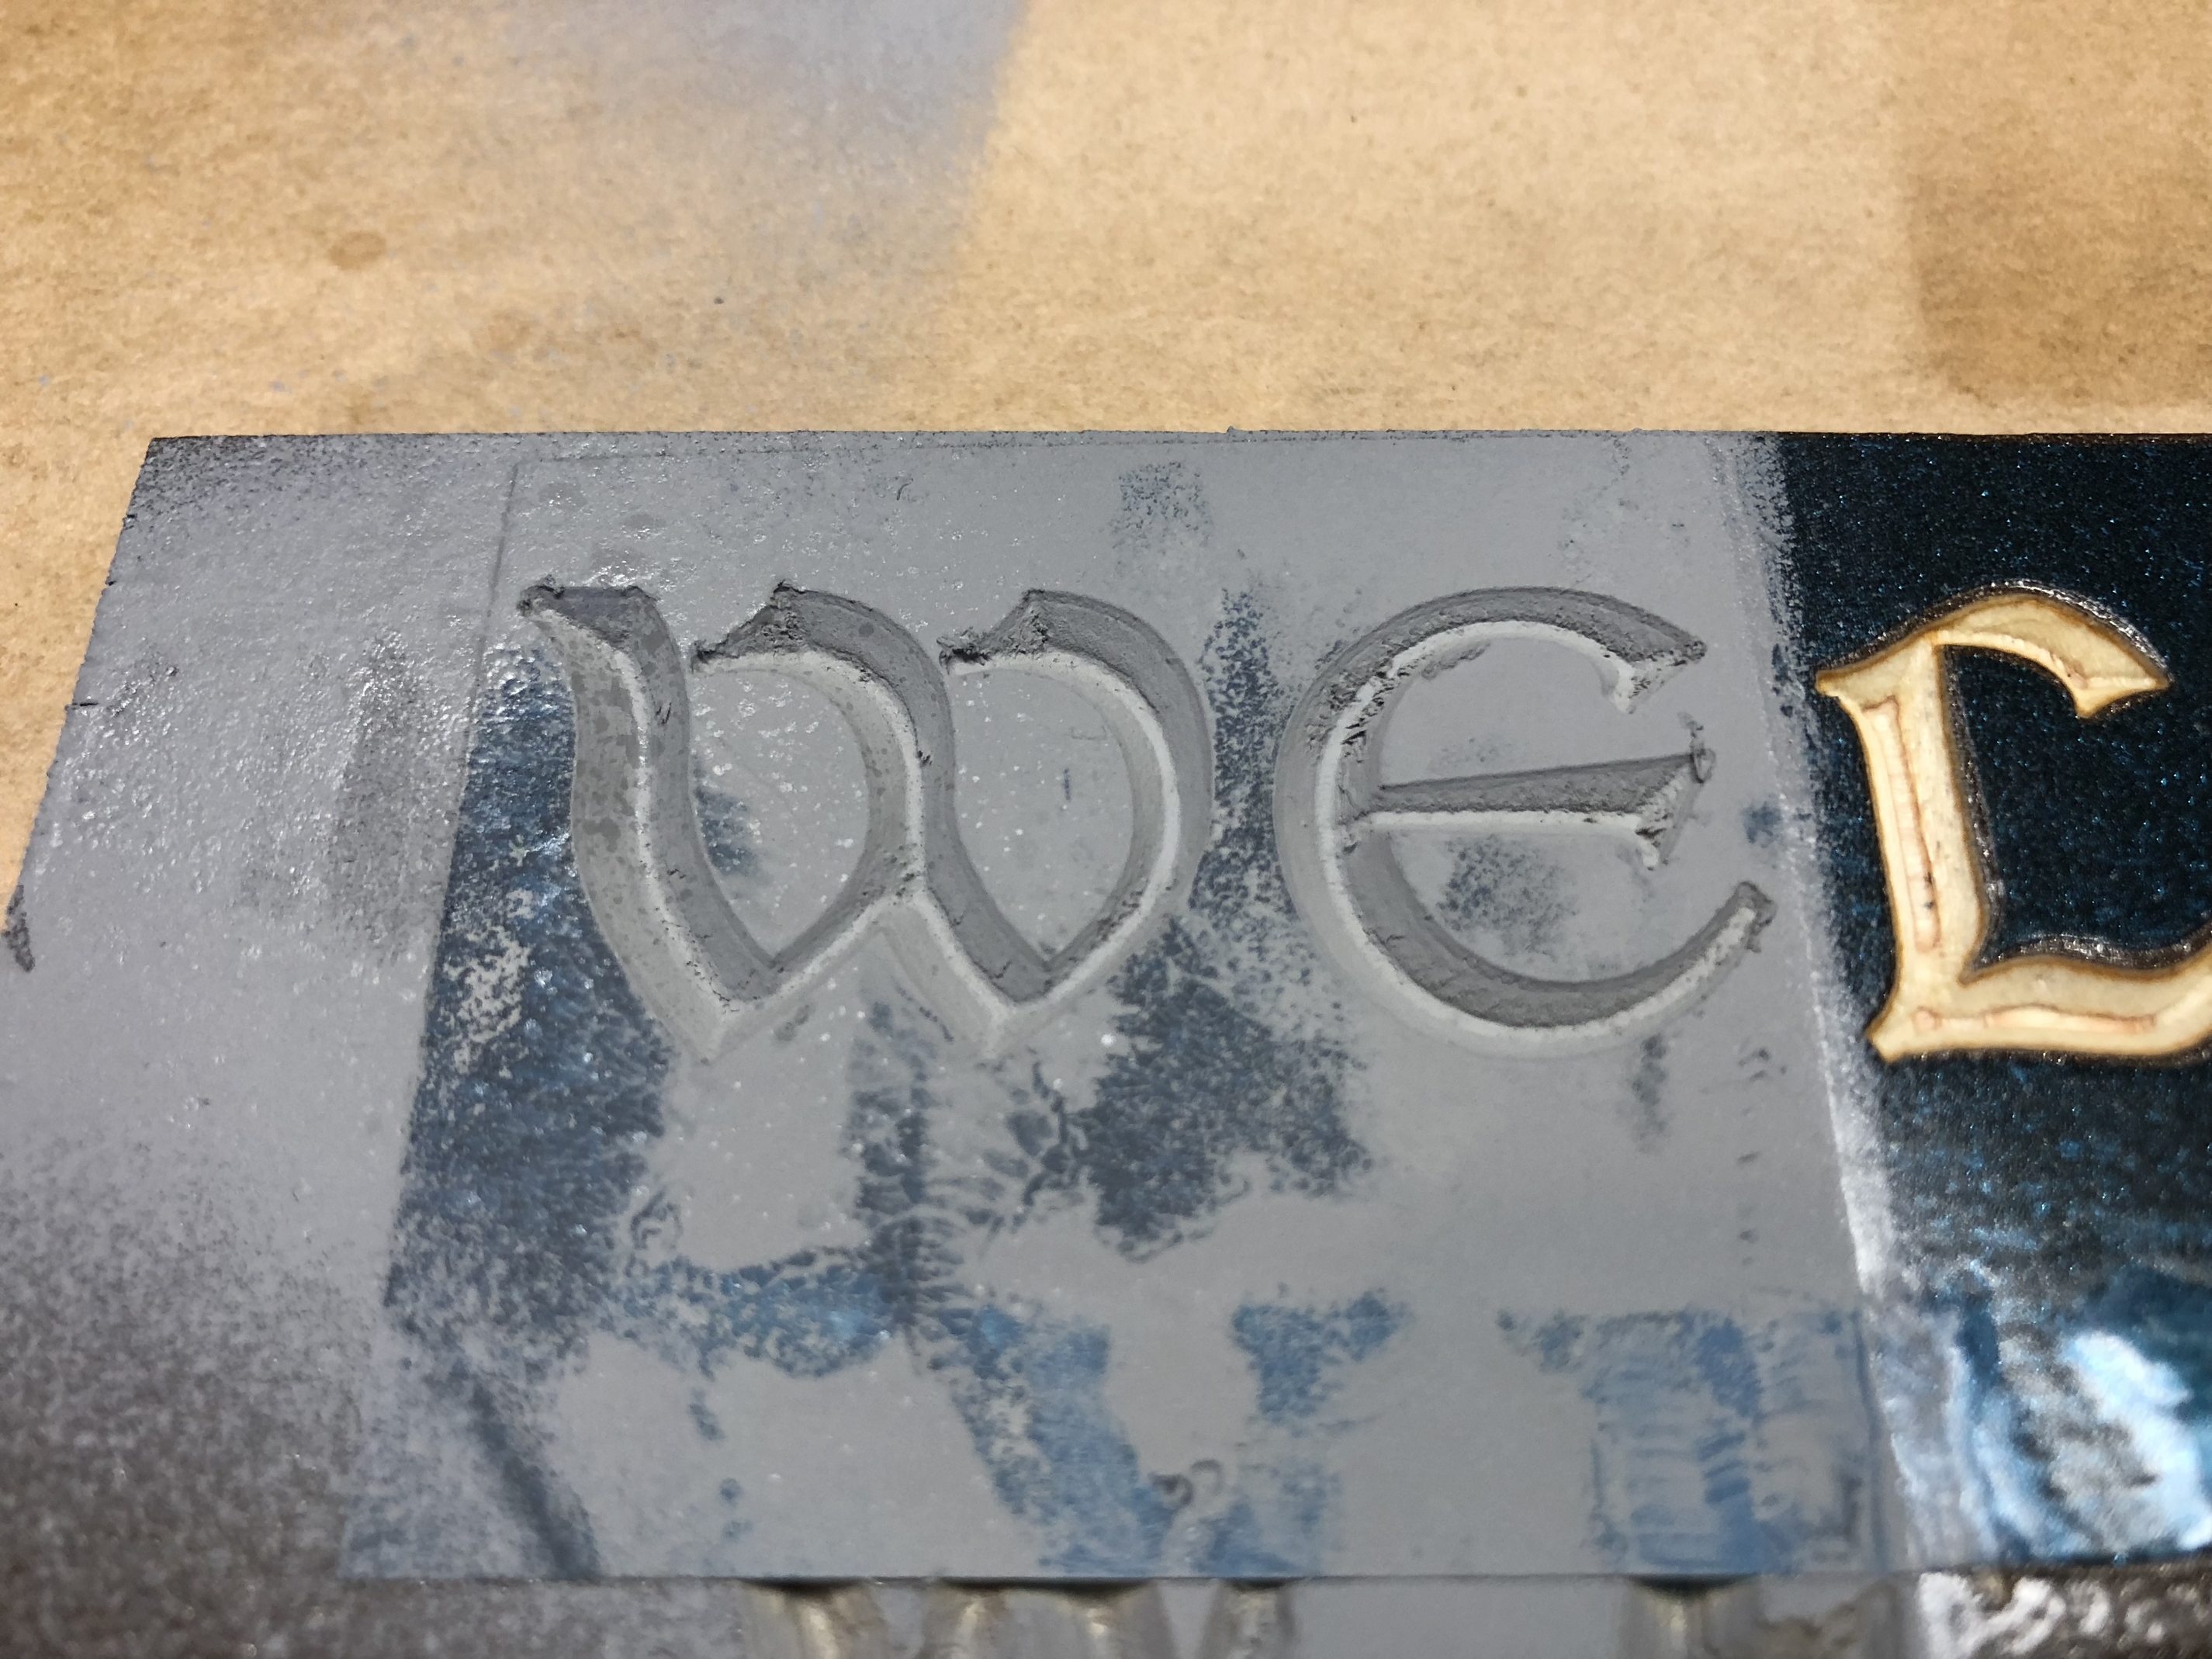
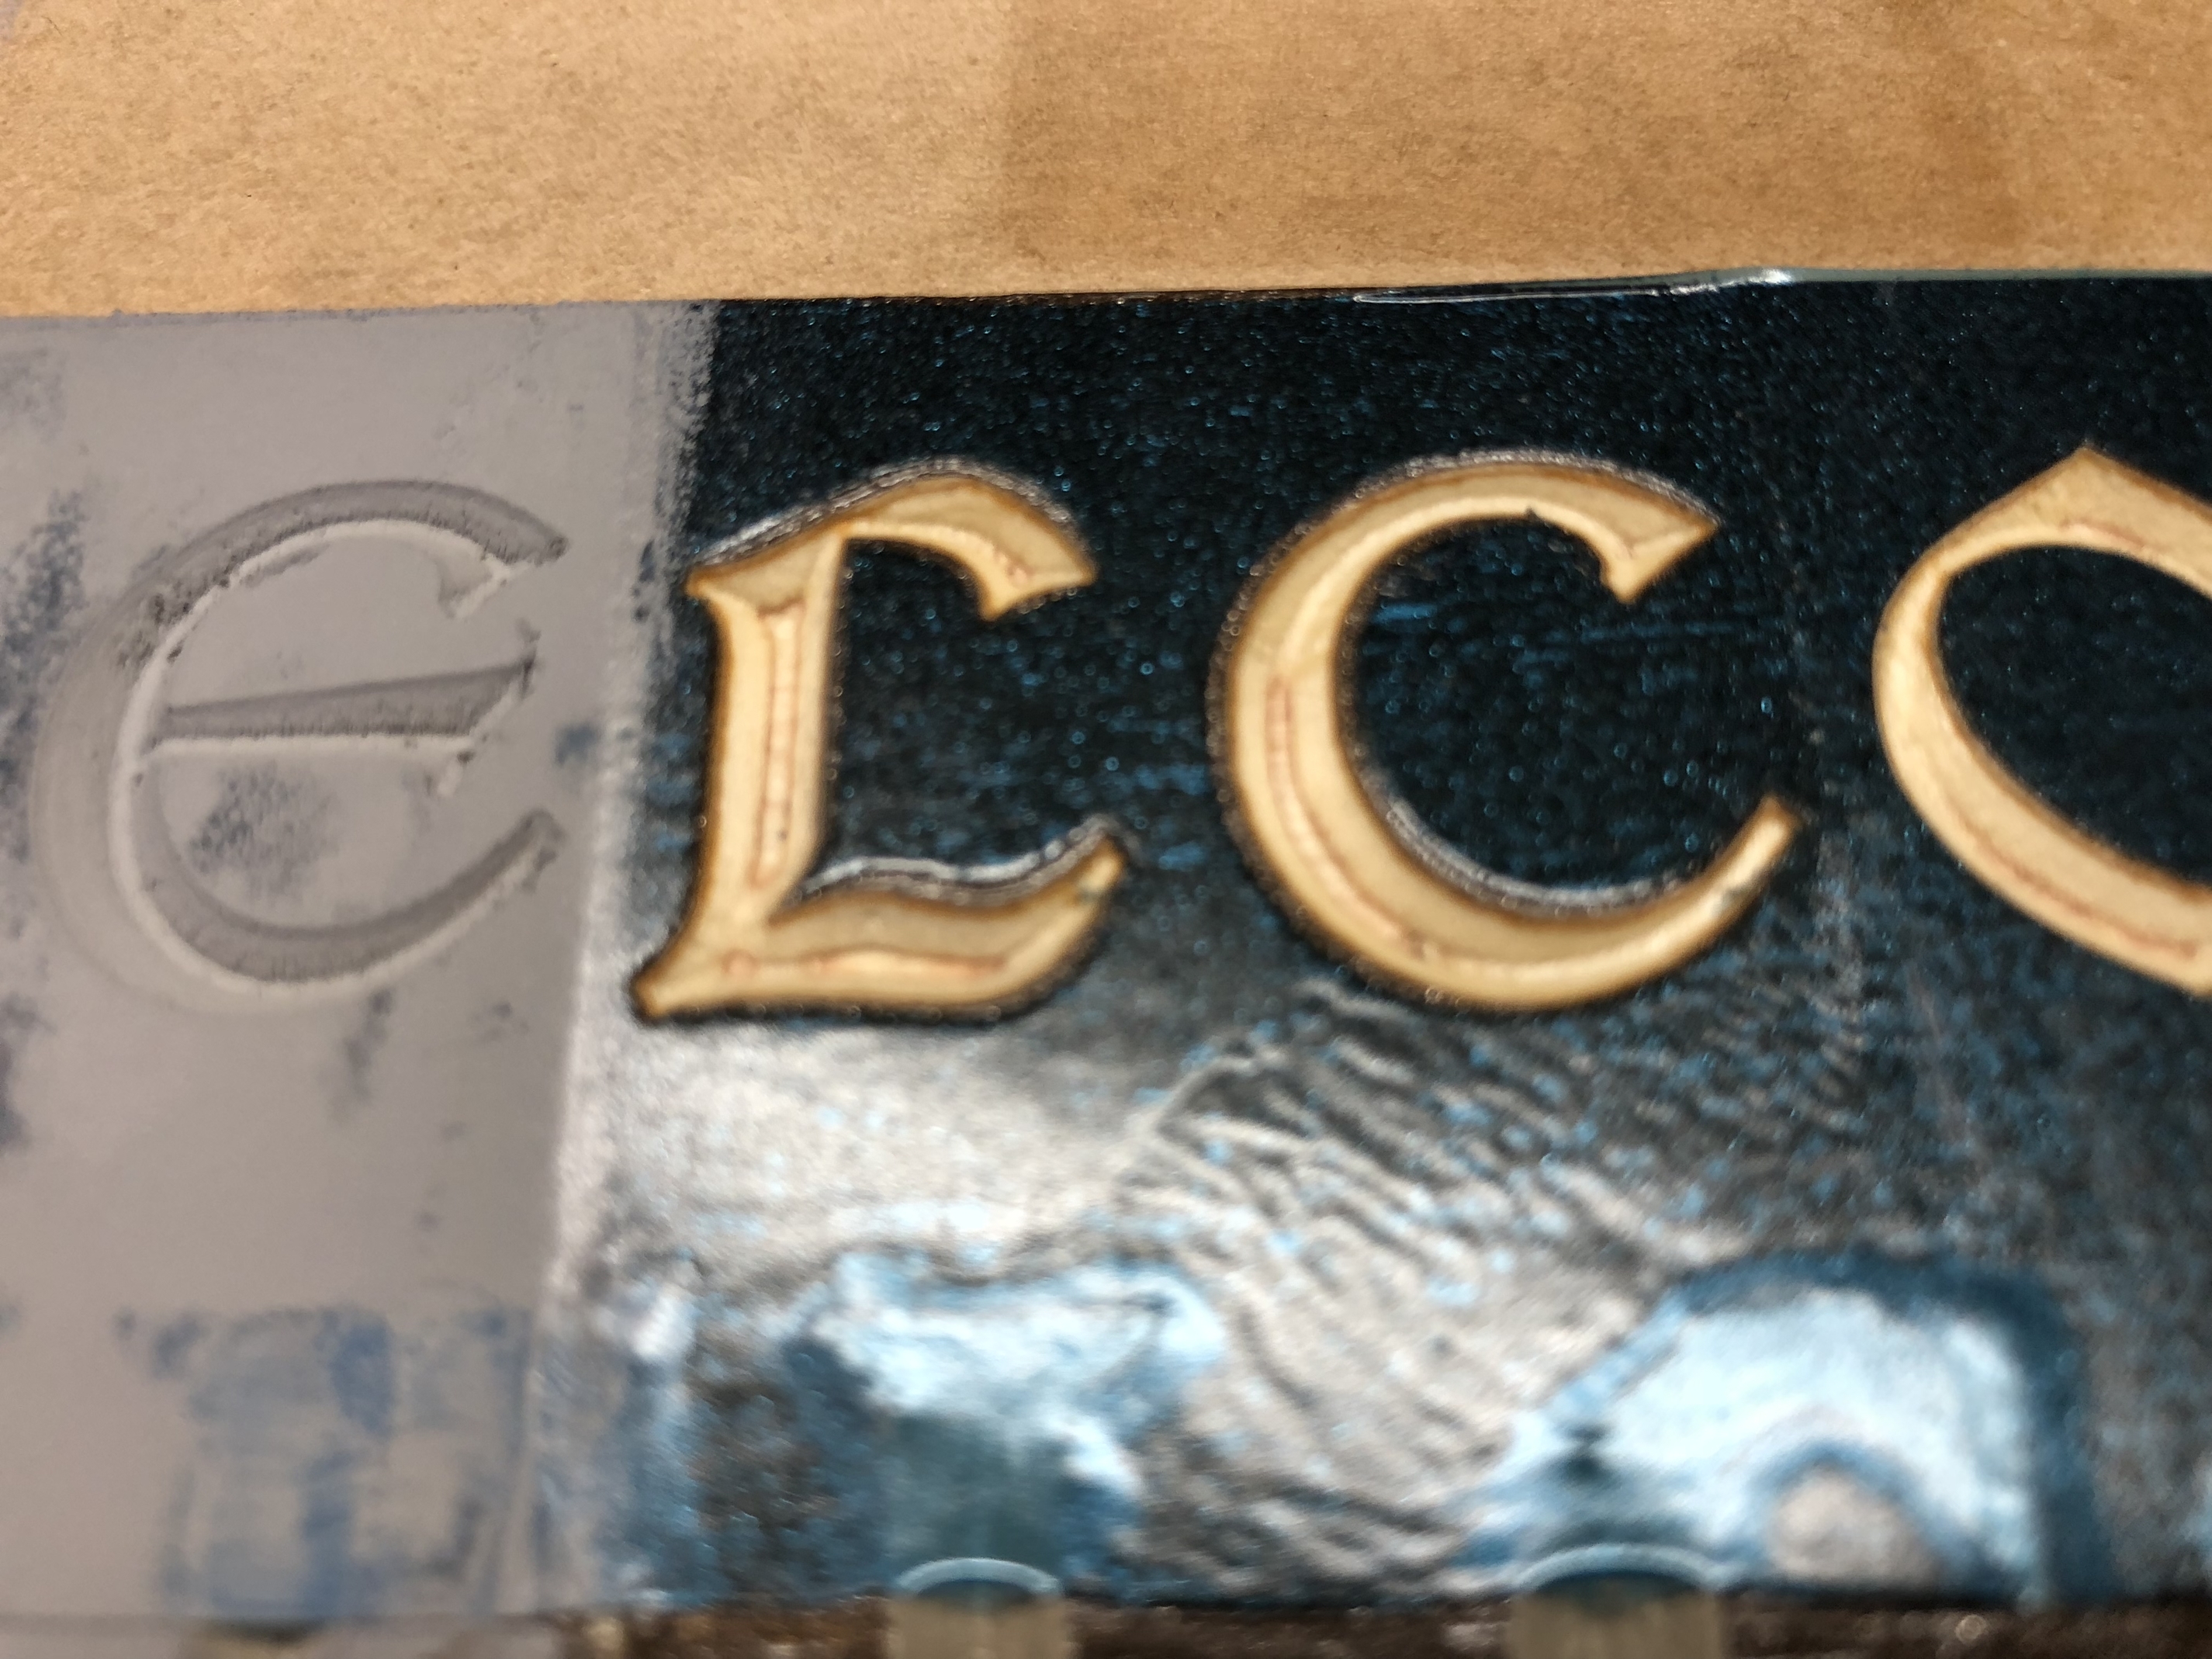
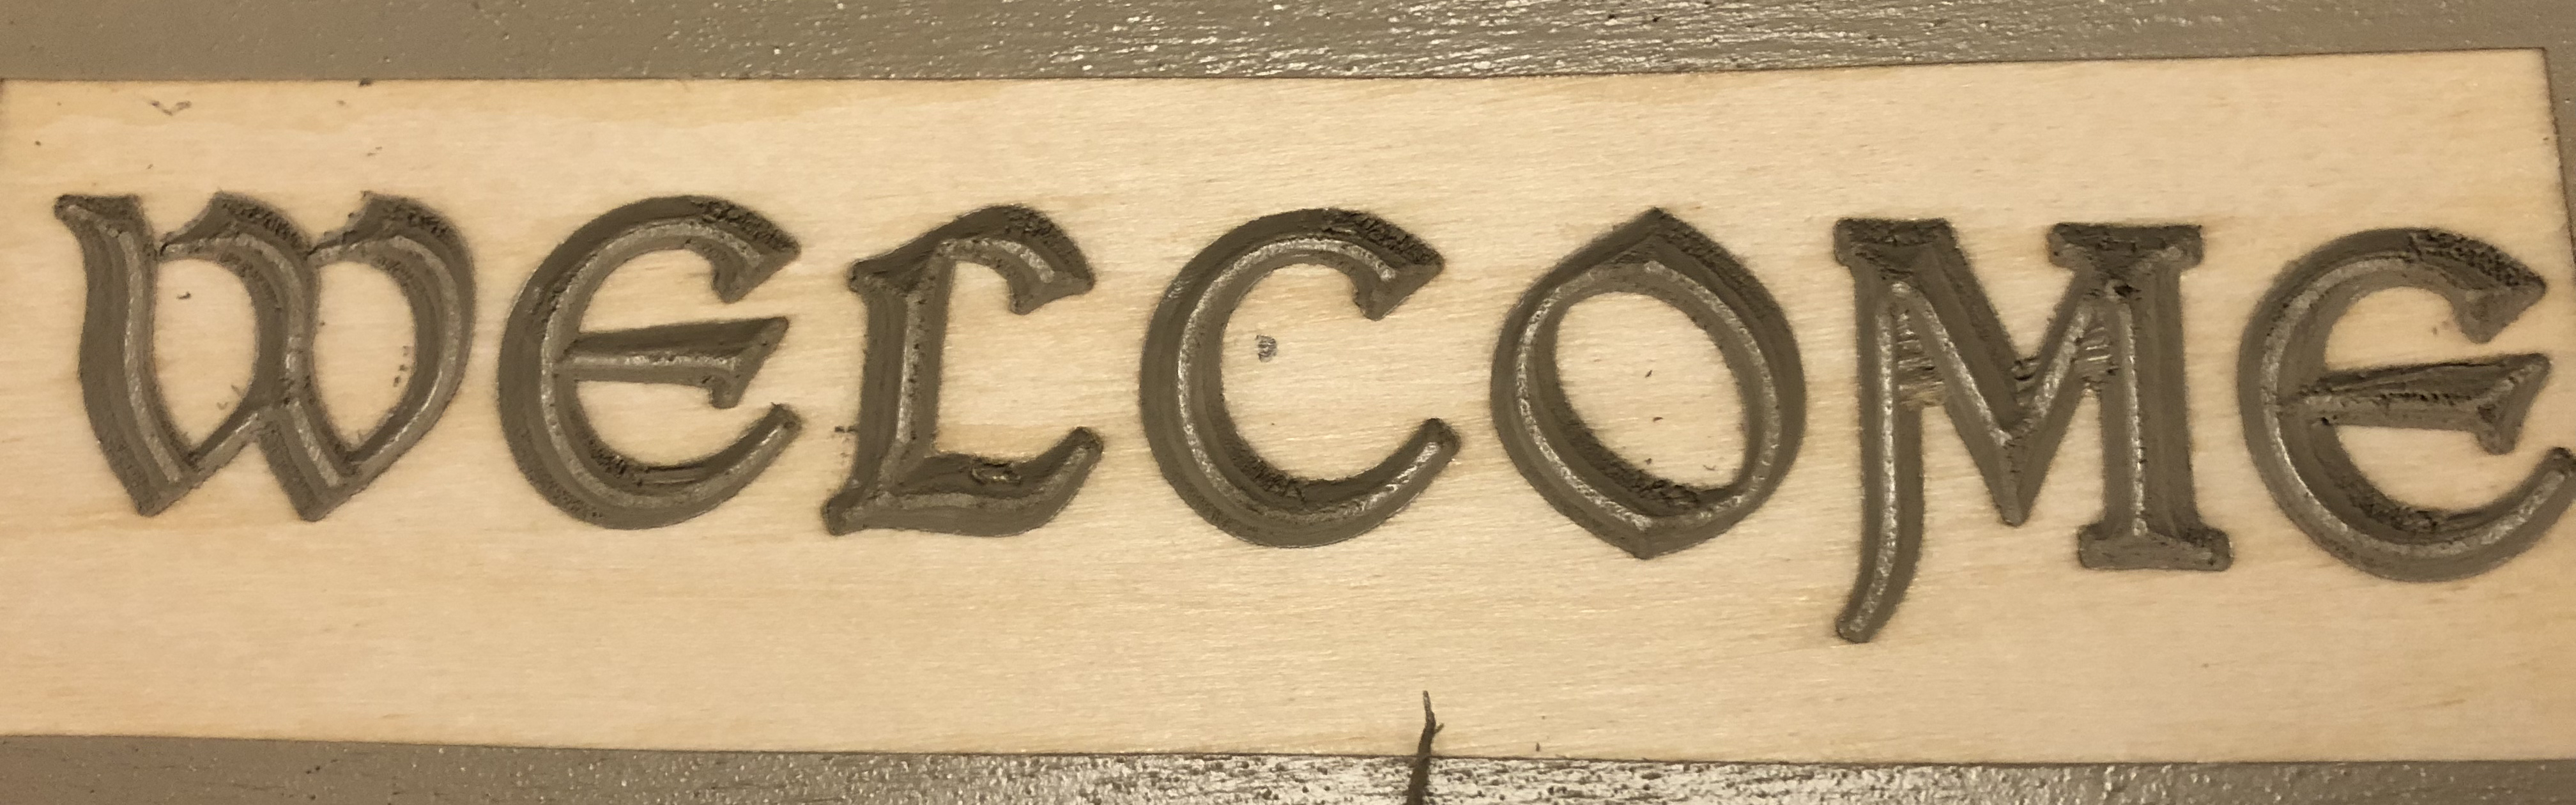
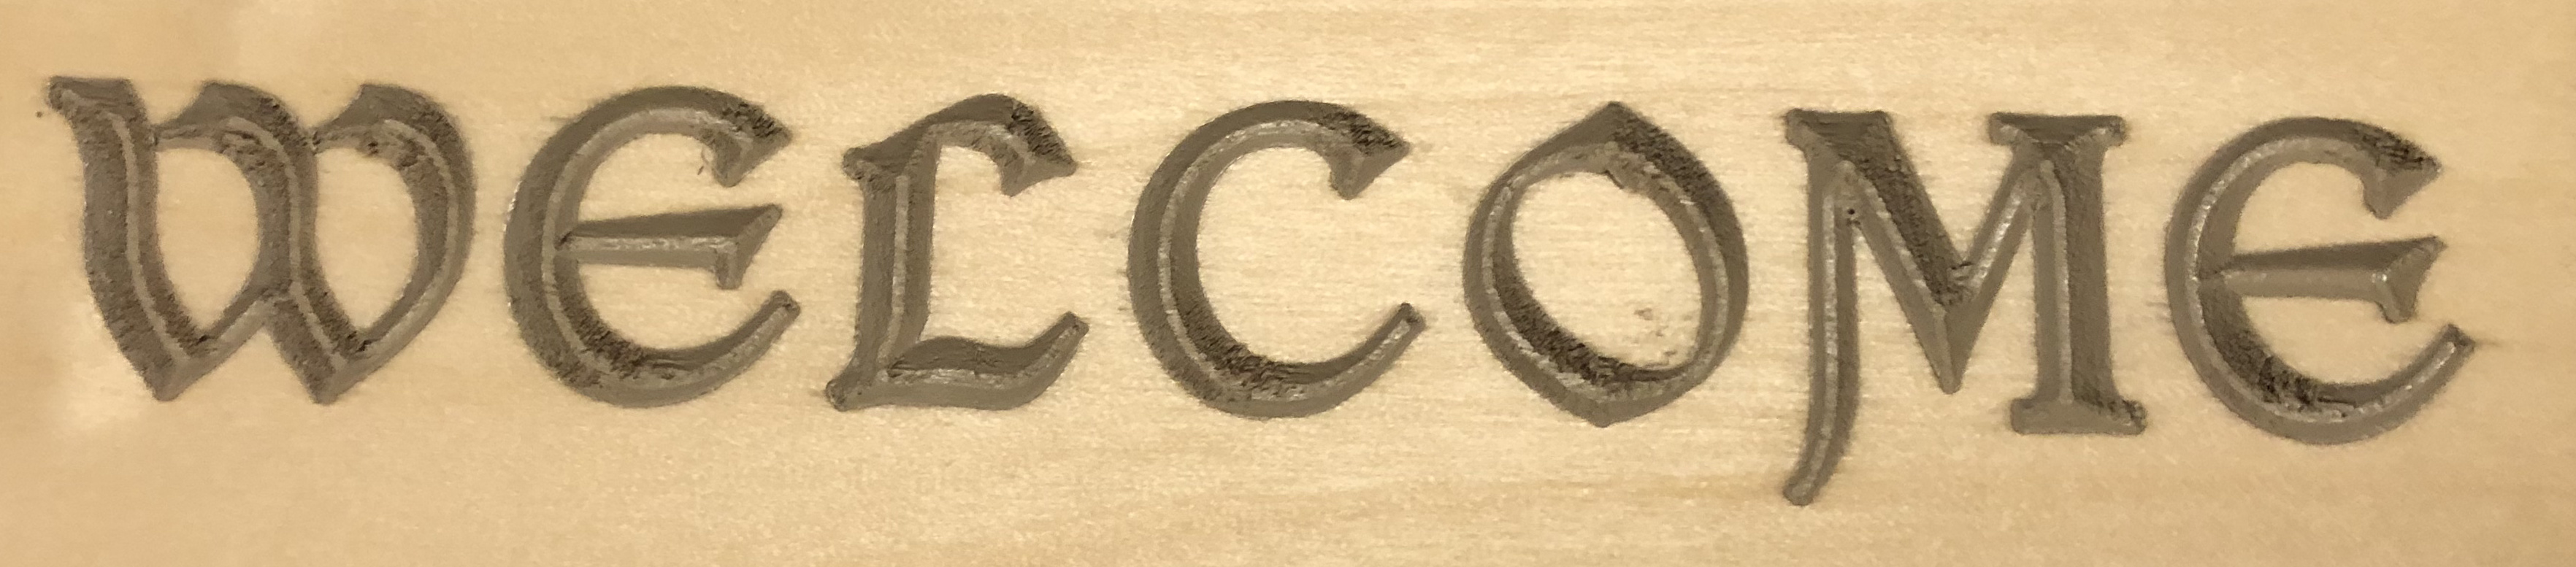
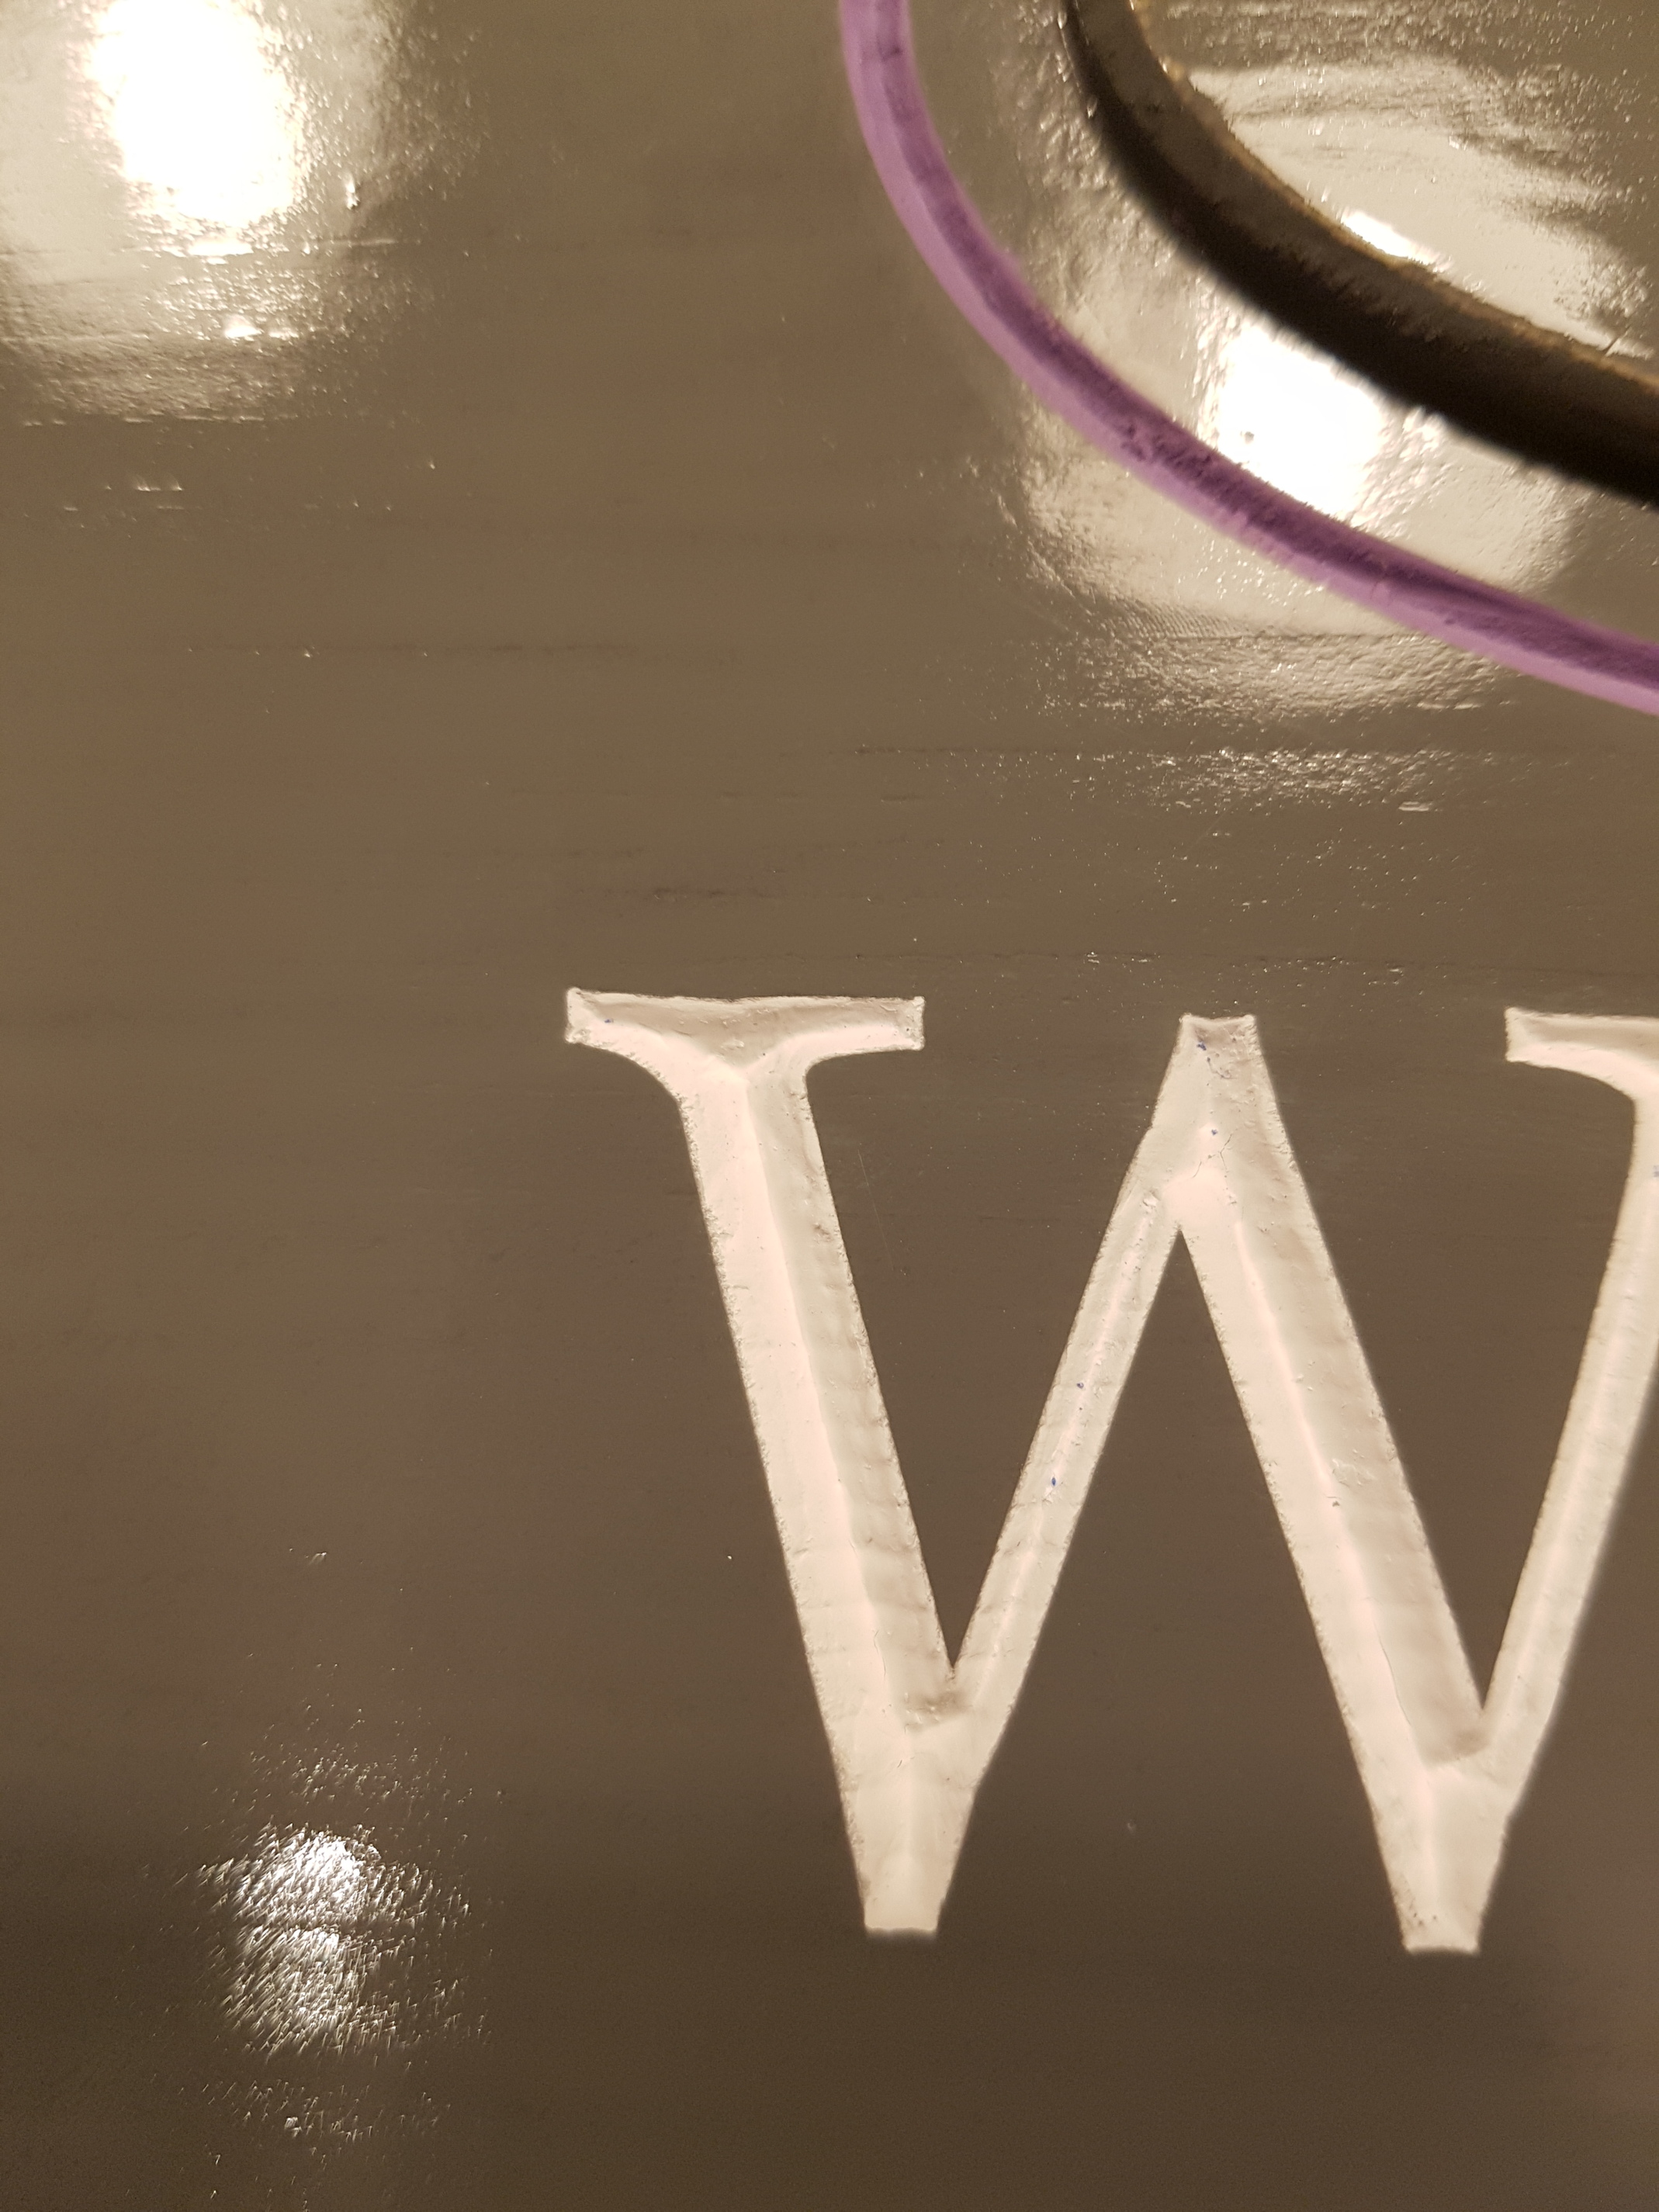
The W-E had the filler primer, that came out pretty good, if I’d bothered to sand the primer it likely would have come out the best. The gray primer also showed through more but that would easily be fixed with an extra coat or two.
The L-C had lacquer on it and previously looked the best, now the letters still look good but significant issue on both letters where the mask must have reacted with the spray and peeled up or shriveled or something as there’s a ridge of overspray all around the letters, so that’s out.
Alright so, no clear winner there. The lacquer is disqualified and the shellac and polycrylic behave about the same. With that in mind I’ll likely test the primer and shellac in the next round.
Next I’m going to look into bits and materials. I have an Amana 90 degree bit that just showed up, I’m going to see about comparing that to the freud, and I’ll run it in some other materials as well. I have some 5mm maple ply, some 1/4" baltic birch ply, and the previous material was 5mm luaun.
May I suggest another experiment? Take your raw stock and stain or paint it the background color you want. Then apply four coats of a topcoat (polycrylic is a good choice because it dries so quick). Now rout/carve the letters. They will now be raw wood on your background color. Slop paint or stain into the carved letters. Sand the whole surface flat taking off all the paint or stain that slopped out of the carving onto the background.This will give you the sharpest edges I believe you can achieve for a two-color carving.
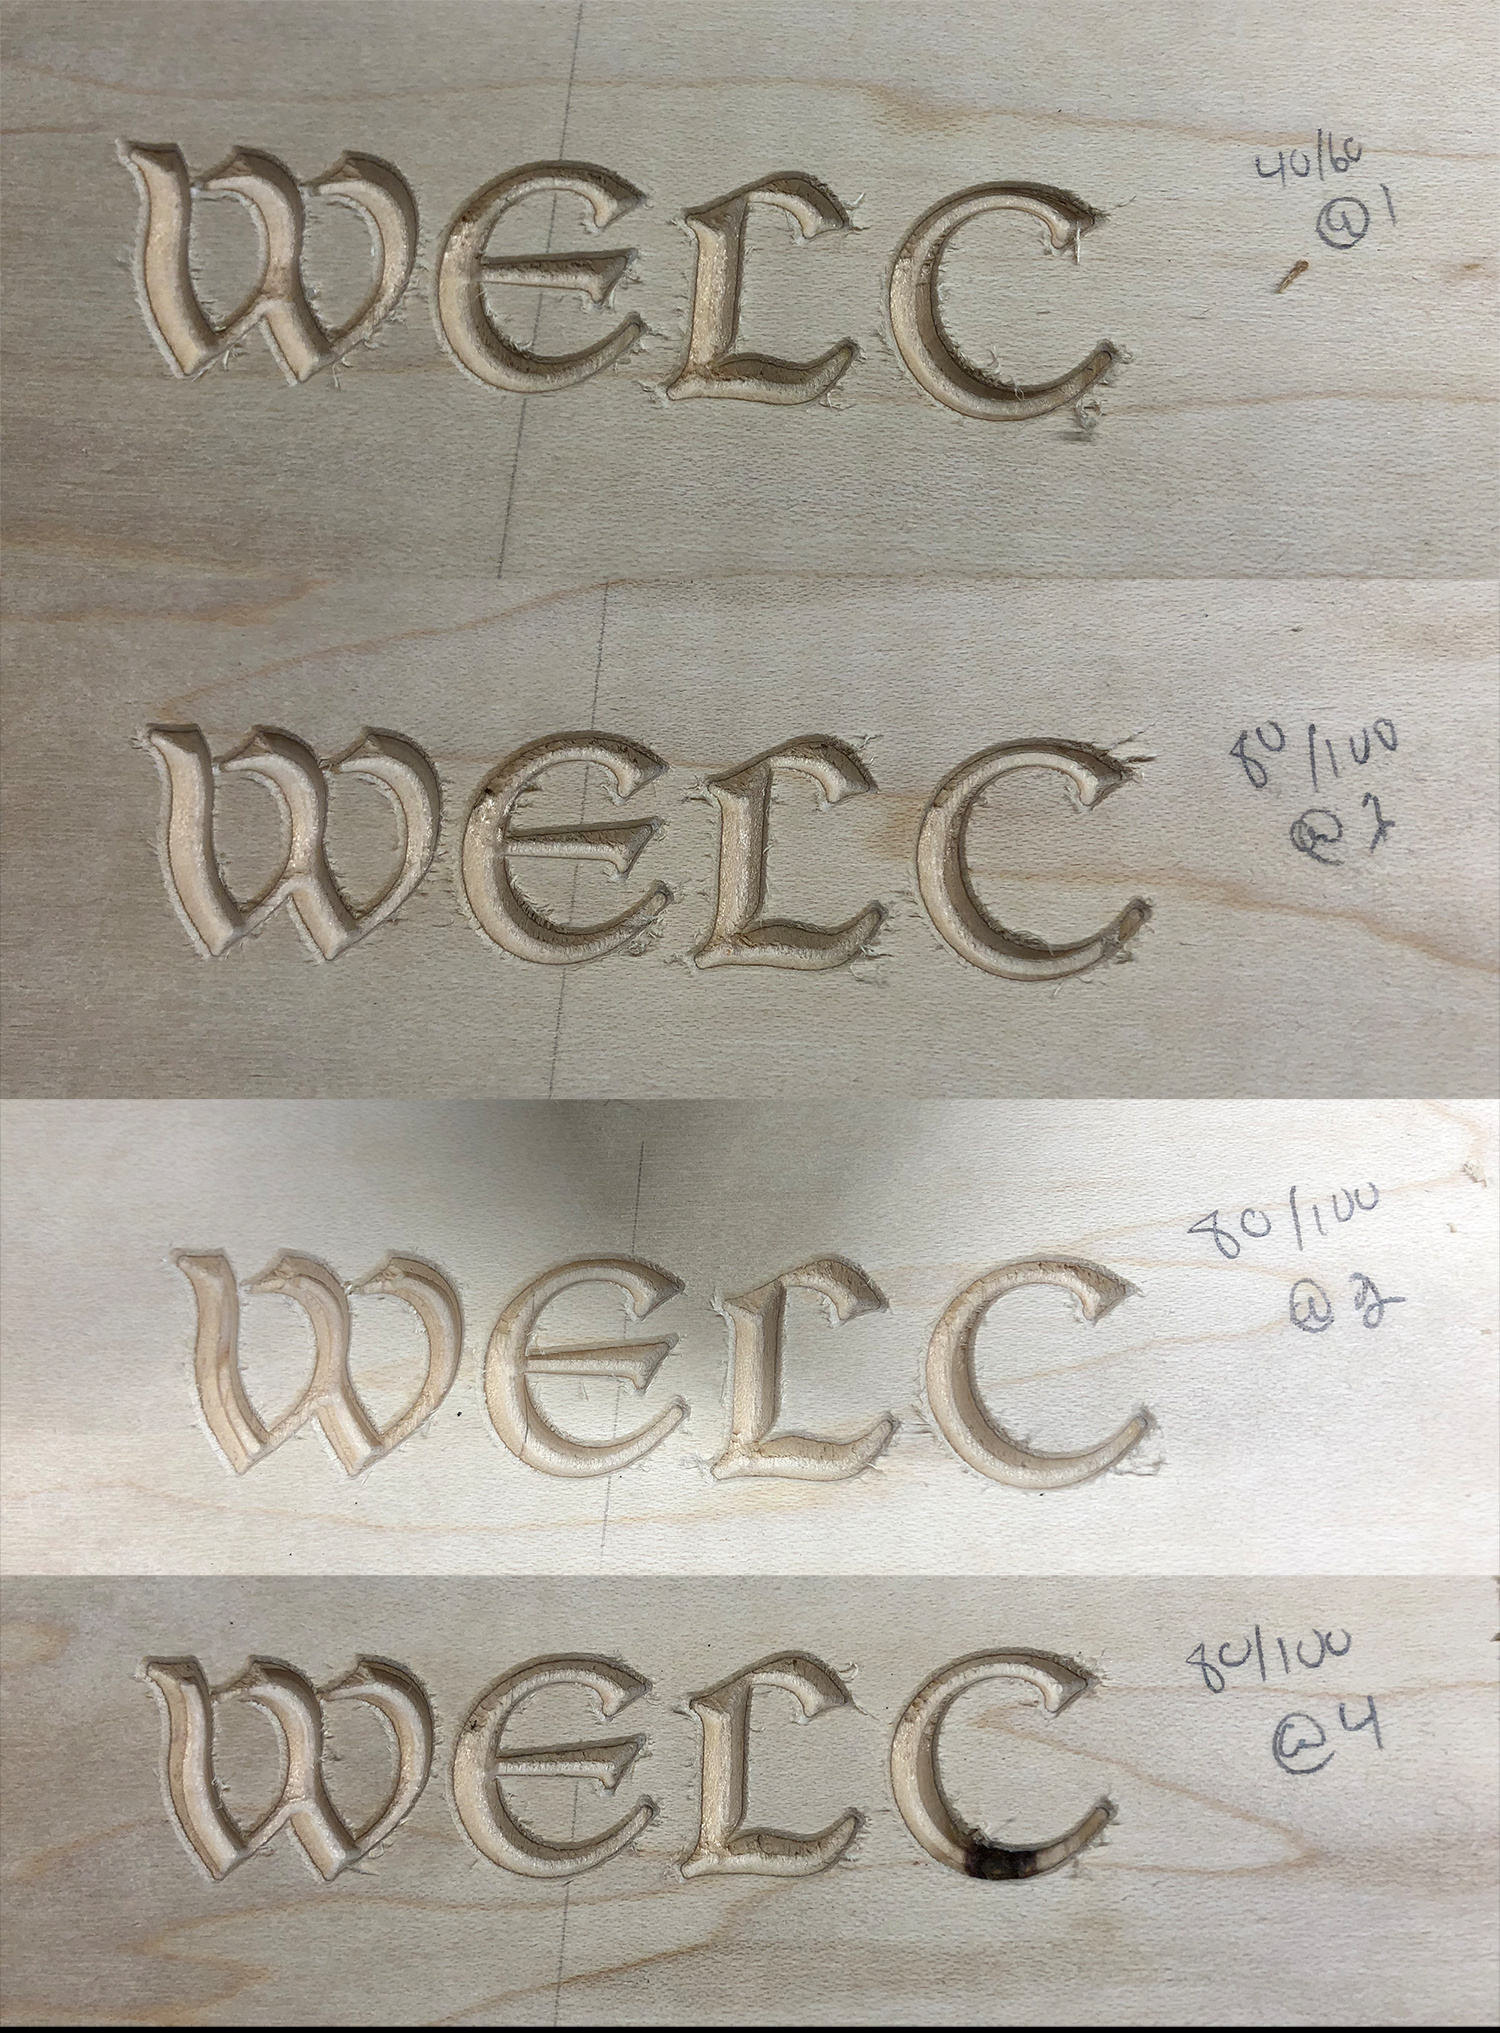
Well I messed up and may not have pictures of the materials until after the paint dries. They were cut, sealed and painted the same way so we’ll see. I also did this feed and speed test on maple ply. The speeds shown are the ipm of the normal pass, the finishing pass, at what speed on the dewalt.
the 80/100 @ 4 I think looked the best in person. A lot of this is in the material though. I may need to try with hardwood maple, but that would be more difficult to make signs with.
I’ll add that too the list. The crisp edges aren’t too hard to achieve with the oramask to be honest. For some reason the letter interior just look not so great.
Butternut is a hand-carver’s favorite, so it would be worth testing. I use acrylic paints, because I used to work with a professional artist and that’s what she used and recommended for sealed wood…
Yeah, in time I may make these in larger panels where it would be hard to find really wide boards and gluing up my own would add quite a bit of time to the process unfortunately.
Same board and process but with my new Amana 90 degree bit came out MUCH better, I think I’d be okay selling this especially with some light sanding on the worst spots:
And a few alternative boards, this is Baltic Birch plywood, came out okay not great, the M has some blowout but that’s just a material weakness that wouldn’t be expected to happen regularly.
So interestingly the original material and process worked best, other than using a different bit. Little annoying, as the freud bit is neither old nor cheap. Based on the F&S test I did I think I’ll test it tomorrow on a real cut using one of the better F&S and the amana bit. I’ll also begin sanding after cutting and probably again very lightly after the shellac has dried. Hoping with minimal sanding I can just get rid of the worst of it.
I’m adding paint to the maple ply F&S test board as another data point and will check that in the morning.
Just a couple of things I’ve noted in the past. First off Plywood today seem to be crap. I’m not sure if it’s the glues used or possibly thinner top layers or a combination of the two. Maybe they cut corners on the process to save money. Either way the don’t tend to route well. Also stay away from water base dyes, stains, paints and sealers. I mix my own shellac and use denatured alcohol that way I minimize the swelling of the wood grain. The ply has several layers of wood with grains in various direction which seems to be great at channeling moisture into the wood causing the grain to rise. Hope this helps.
Waterbased dyes, stains, paints etc. work great. You just have to know how to work with them. There’s no reason to say away from them at all. Because my shop is in a condo garage, I can’t used noxious chemicals or finishes with flammable bases, so I had to spend the time learning to work with waterbased stuff.
Yeah I use lots of water based products, deliberately didn’t use them in the carving hense my surprise. I actually got a custom request this morning for a larger sign, about 12" wide, which kind of illustrates my point about having issues using hardwood unless I want to get into gluing up my own 1/4" panels, plus the potential wood movement issues after that.
I’m trying a new technique this morning, after the shellac dried I did a very light primer coat using the black paint that I know isn’t causing an issue with the grain. I’ll top that with the color I want and see if the additional barrier between the wood and the paint helps. I’m also doing another color scheme with another color to help narrow down further if it’s the paint.
Interesting update, so I’m doing a new color scheme right now, a dark copper paint in the lettering with a normal copper paint as a background. Came out really good.
One thing I noticed is the coverage on that paint is much better, 2-3 light coats and you couldn’t see any background color. The lighter tan color on the other signs tends to take many more thicker coats and that’s likely contributing a lot of moisture. I’m going to a) try some white primer so the tan doesn’t have to cover so much, hoping flat white works as well as flat black for not raising the grain; and b) just try another few colors.
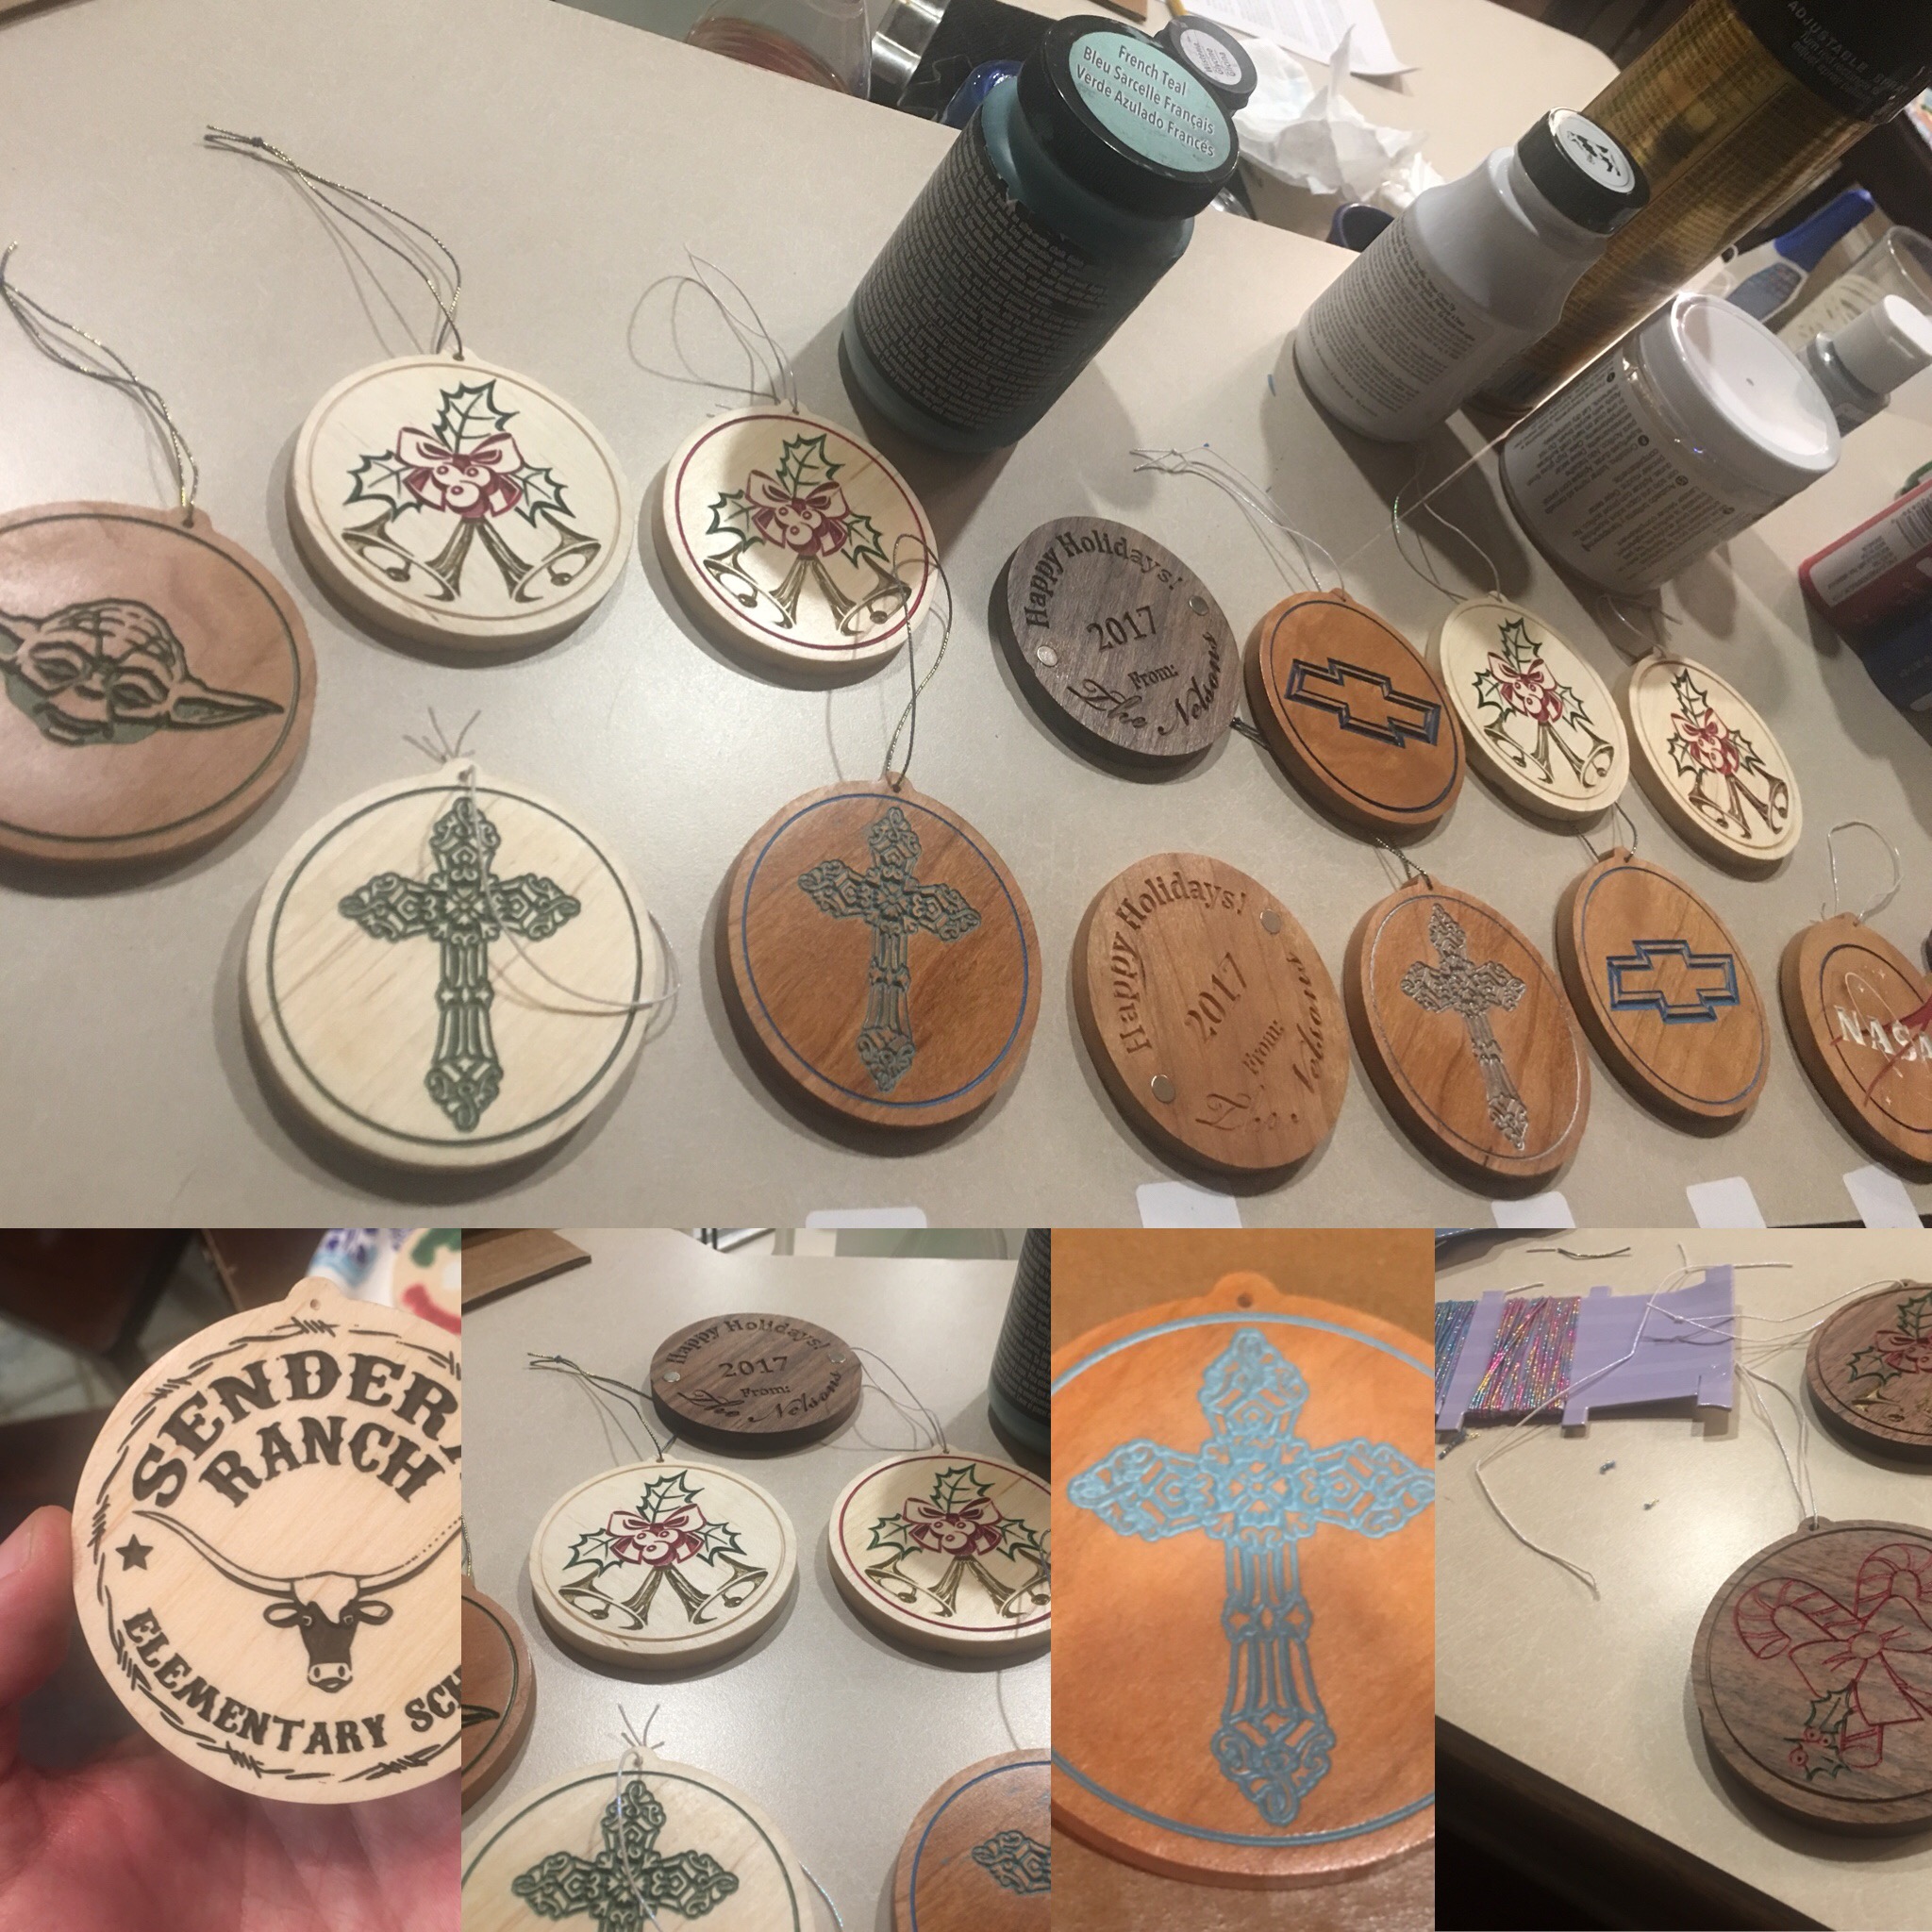
I just finished (mostly, still need a coat of clearcoat) a three color v-carve… Grey stain on laminated pine board, two coats of glossy spray polyurethane. Carved with a 1/4" 90 deg v-bit. 14krpm, 20ipm feed rate. Painted with acrylic craft paint, wipe off the excess with a damp cloth when it’s almost dry.
This is pretty much how I have done it myself. Seal really well, cut, paint, wipe, lightly sand anything left, then clear coat. Made several signs and about 50 Christmas ornaments last year for gifts this way.
Wow, those look fantastic! I’m still pretty new to detail carving…would you mind sharing your bells and holly ornament file? If not that is fine too. Just like to see toolpaths and all.
Thanks,
John
Another product that might work well here is the Minwax oil-modified, waterbased polyu. It will give a yellow caste, but it cleans up with water and doesn’t seem to raise the grain as signifcantly as polyc. N odor and it dries as quickly was polyc. It’s available at Lowe’s and (lately) Walmart.