This one turned out better than the last, found a nice backdrop too on the property.

38 Likes
Looks great, Awesome job!!! ![]()
Thanks, really like how these turn out.
Will have to work on my speeds, but right now i’m running 10 IPM for the 1/16th LR bit, think i can get it up to maybe 15-20, but any faster and it breaks, and right now it took me almost 12 hours to cut the female and male inlays out for the stars.
Looks great. I have doing a wavy flag on my short list but I don’t know if I am ready to try the star inlays.
I would think you could get a much higher IPM since they really are taking a lot less material than the roughing passes.
Are you using a tapered ball nose 1/16th? Maybe that would stand up to the punishment better.
What was your starting stock thickness? I am trying to figure out what I need for the glueup.
Oh, and you aren’t supposed to let it touch the ground ![]()
haha
For the female inlay, i use a 1/4" clearance bit, then 1/16th for the final details, otherwise the stars aren’t sharp enough. For the male insert i can just run the 1/16th and cut then out. I broke the bit within 10 minutes at 25 IPM. It’s a LONG and SKINNY bit.
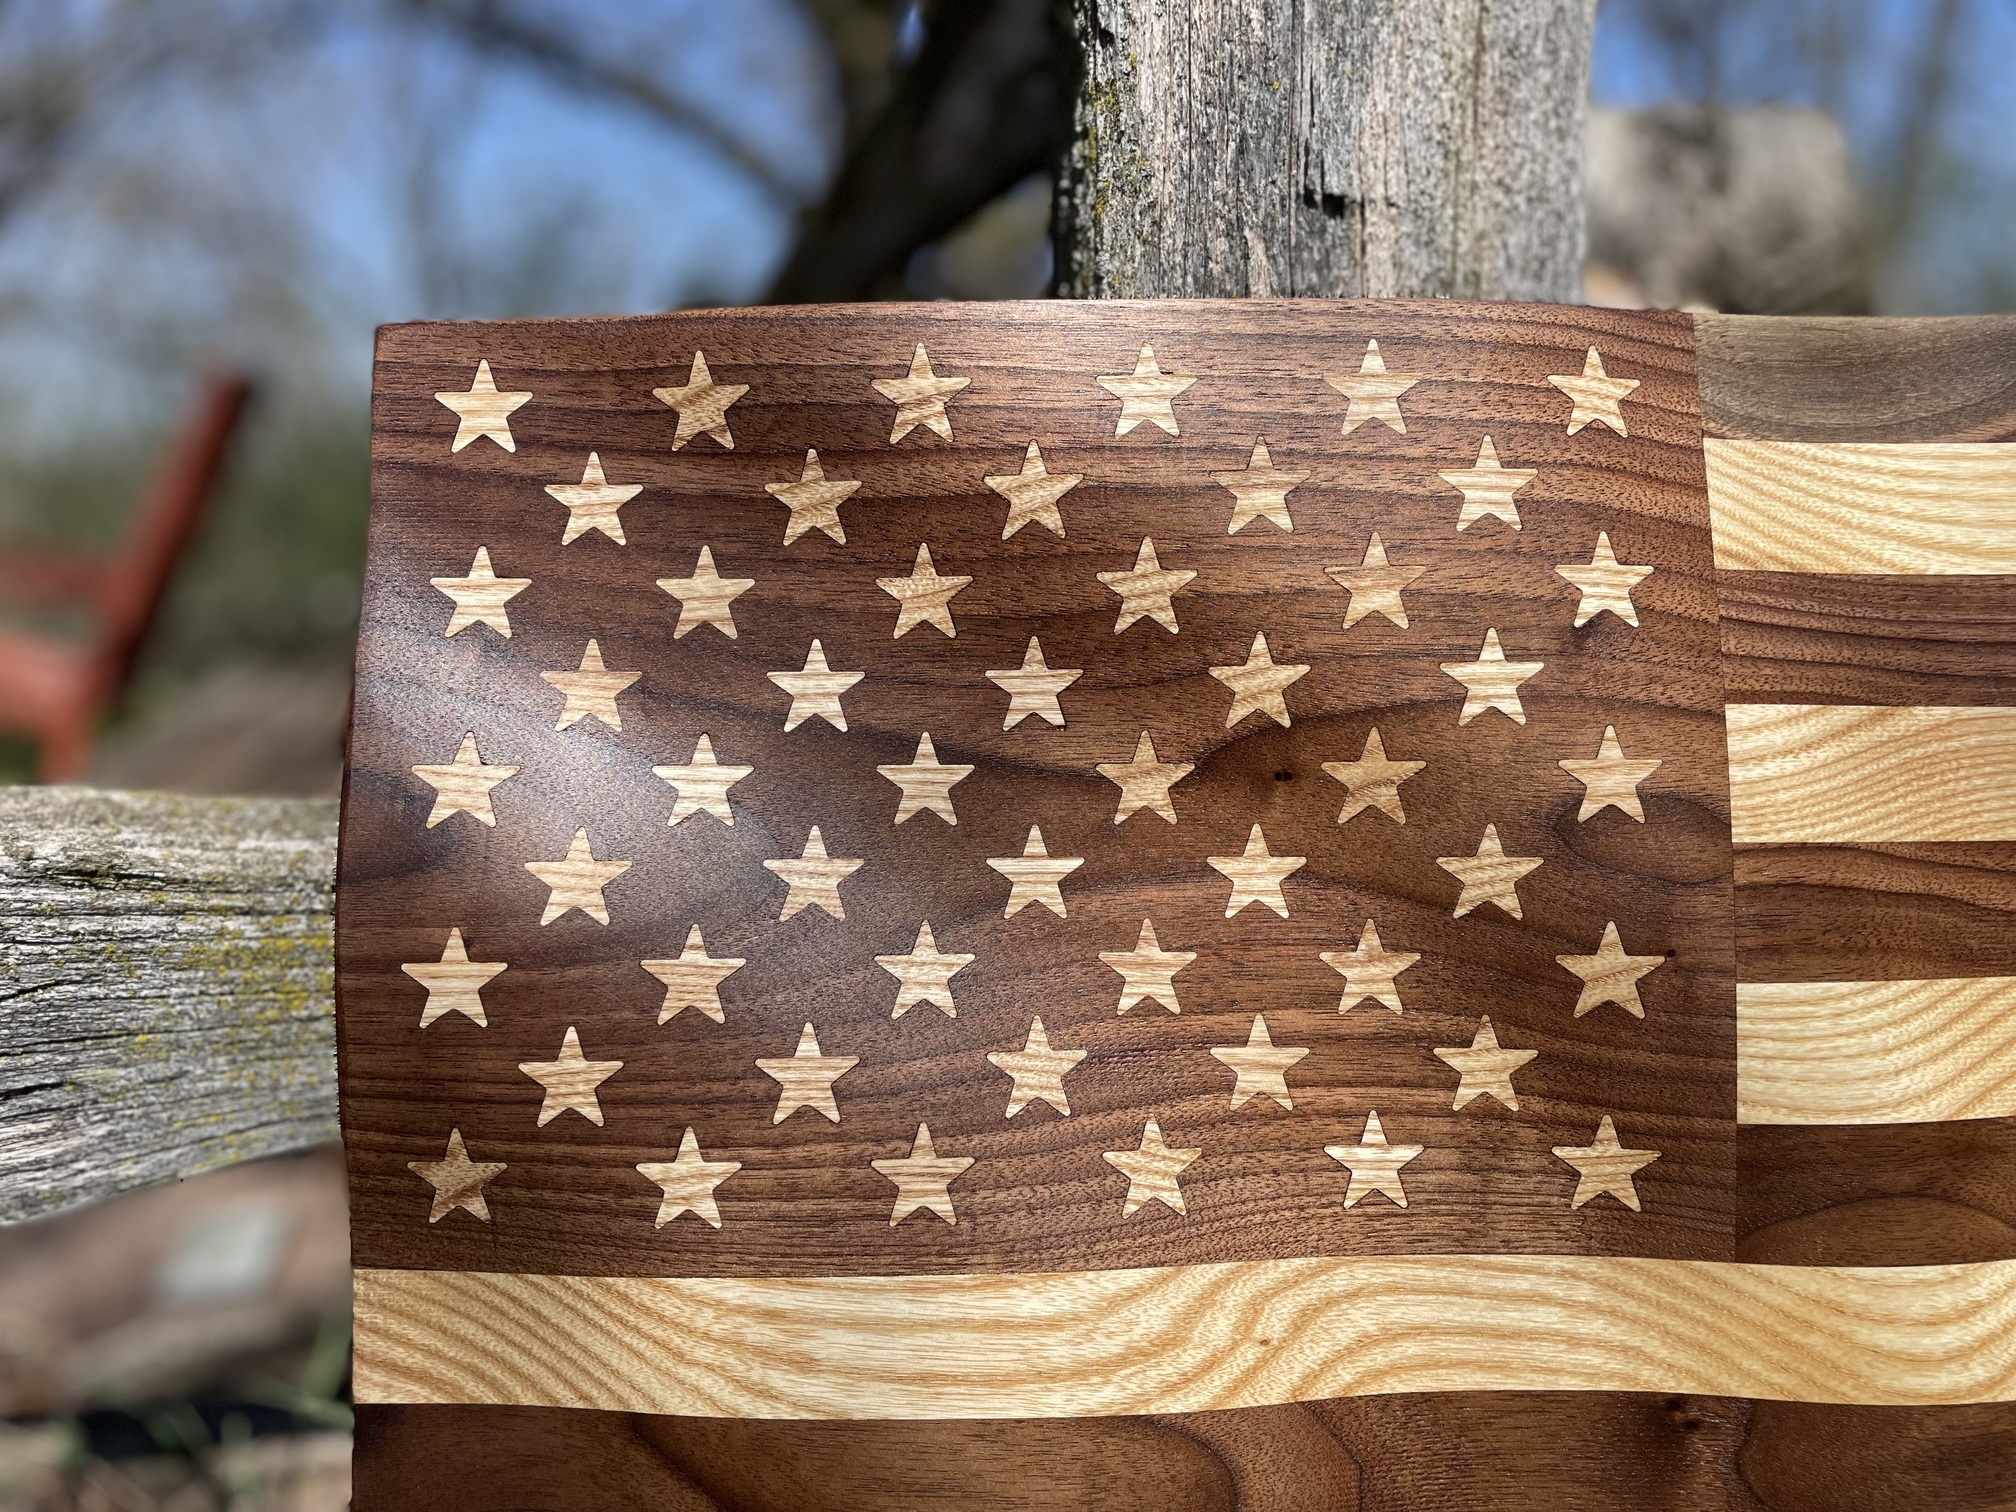
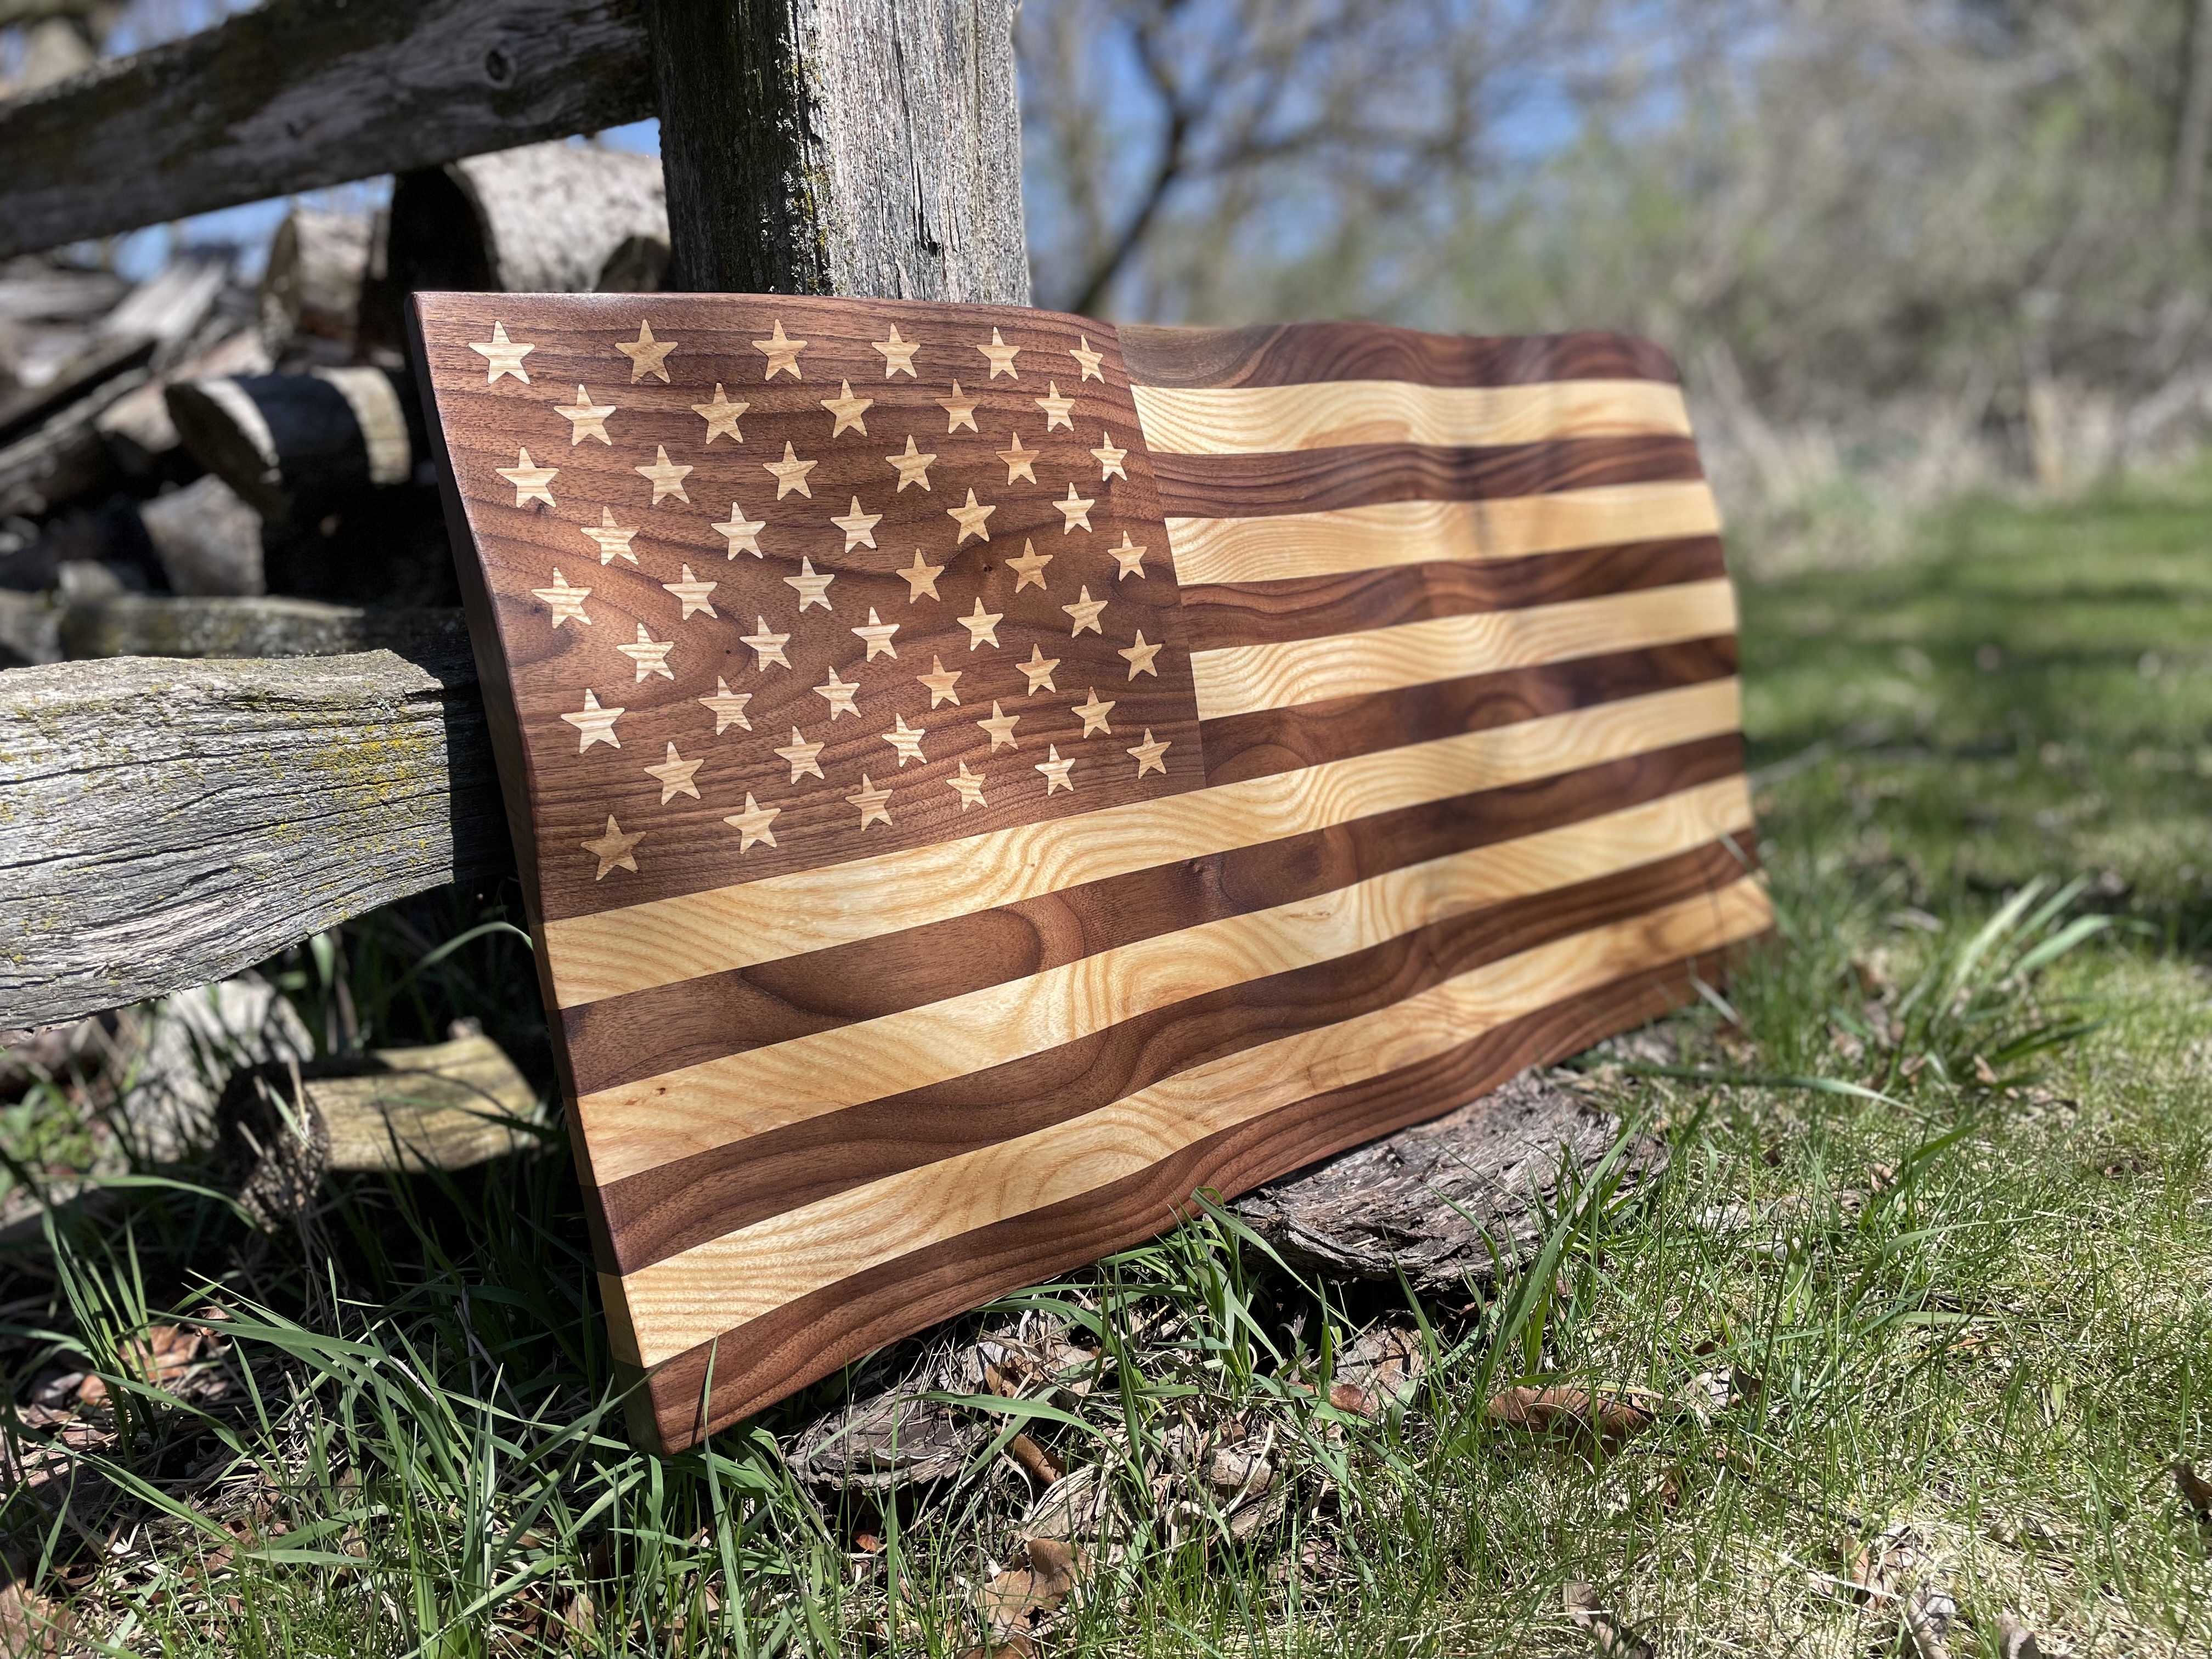
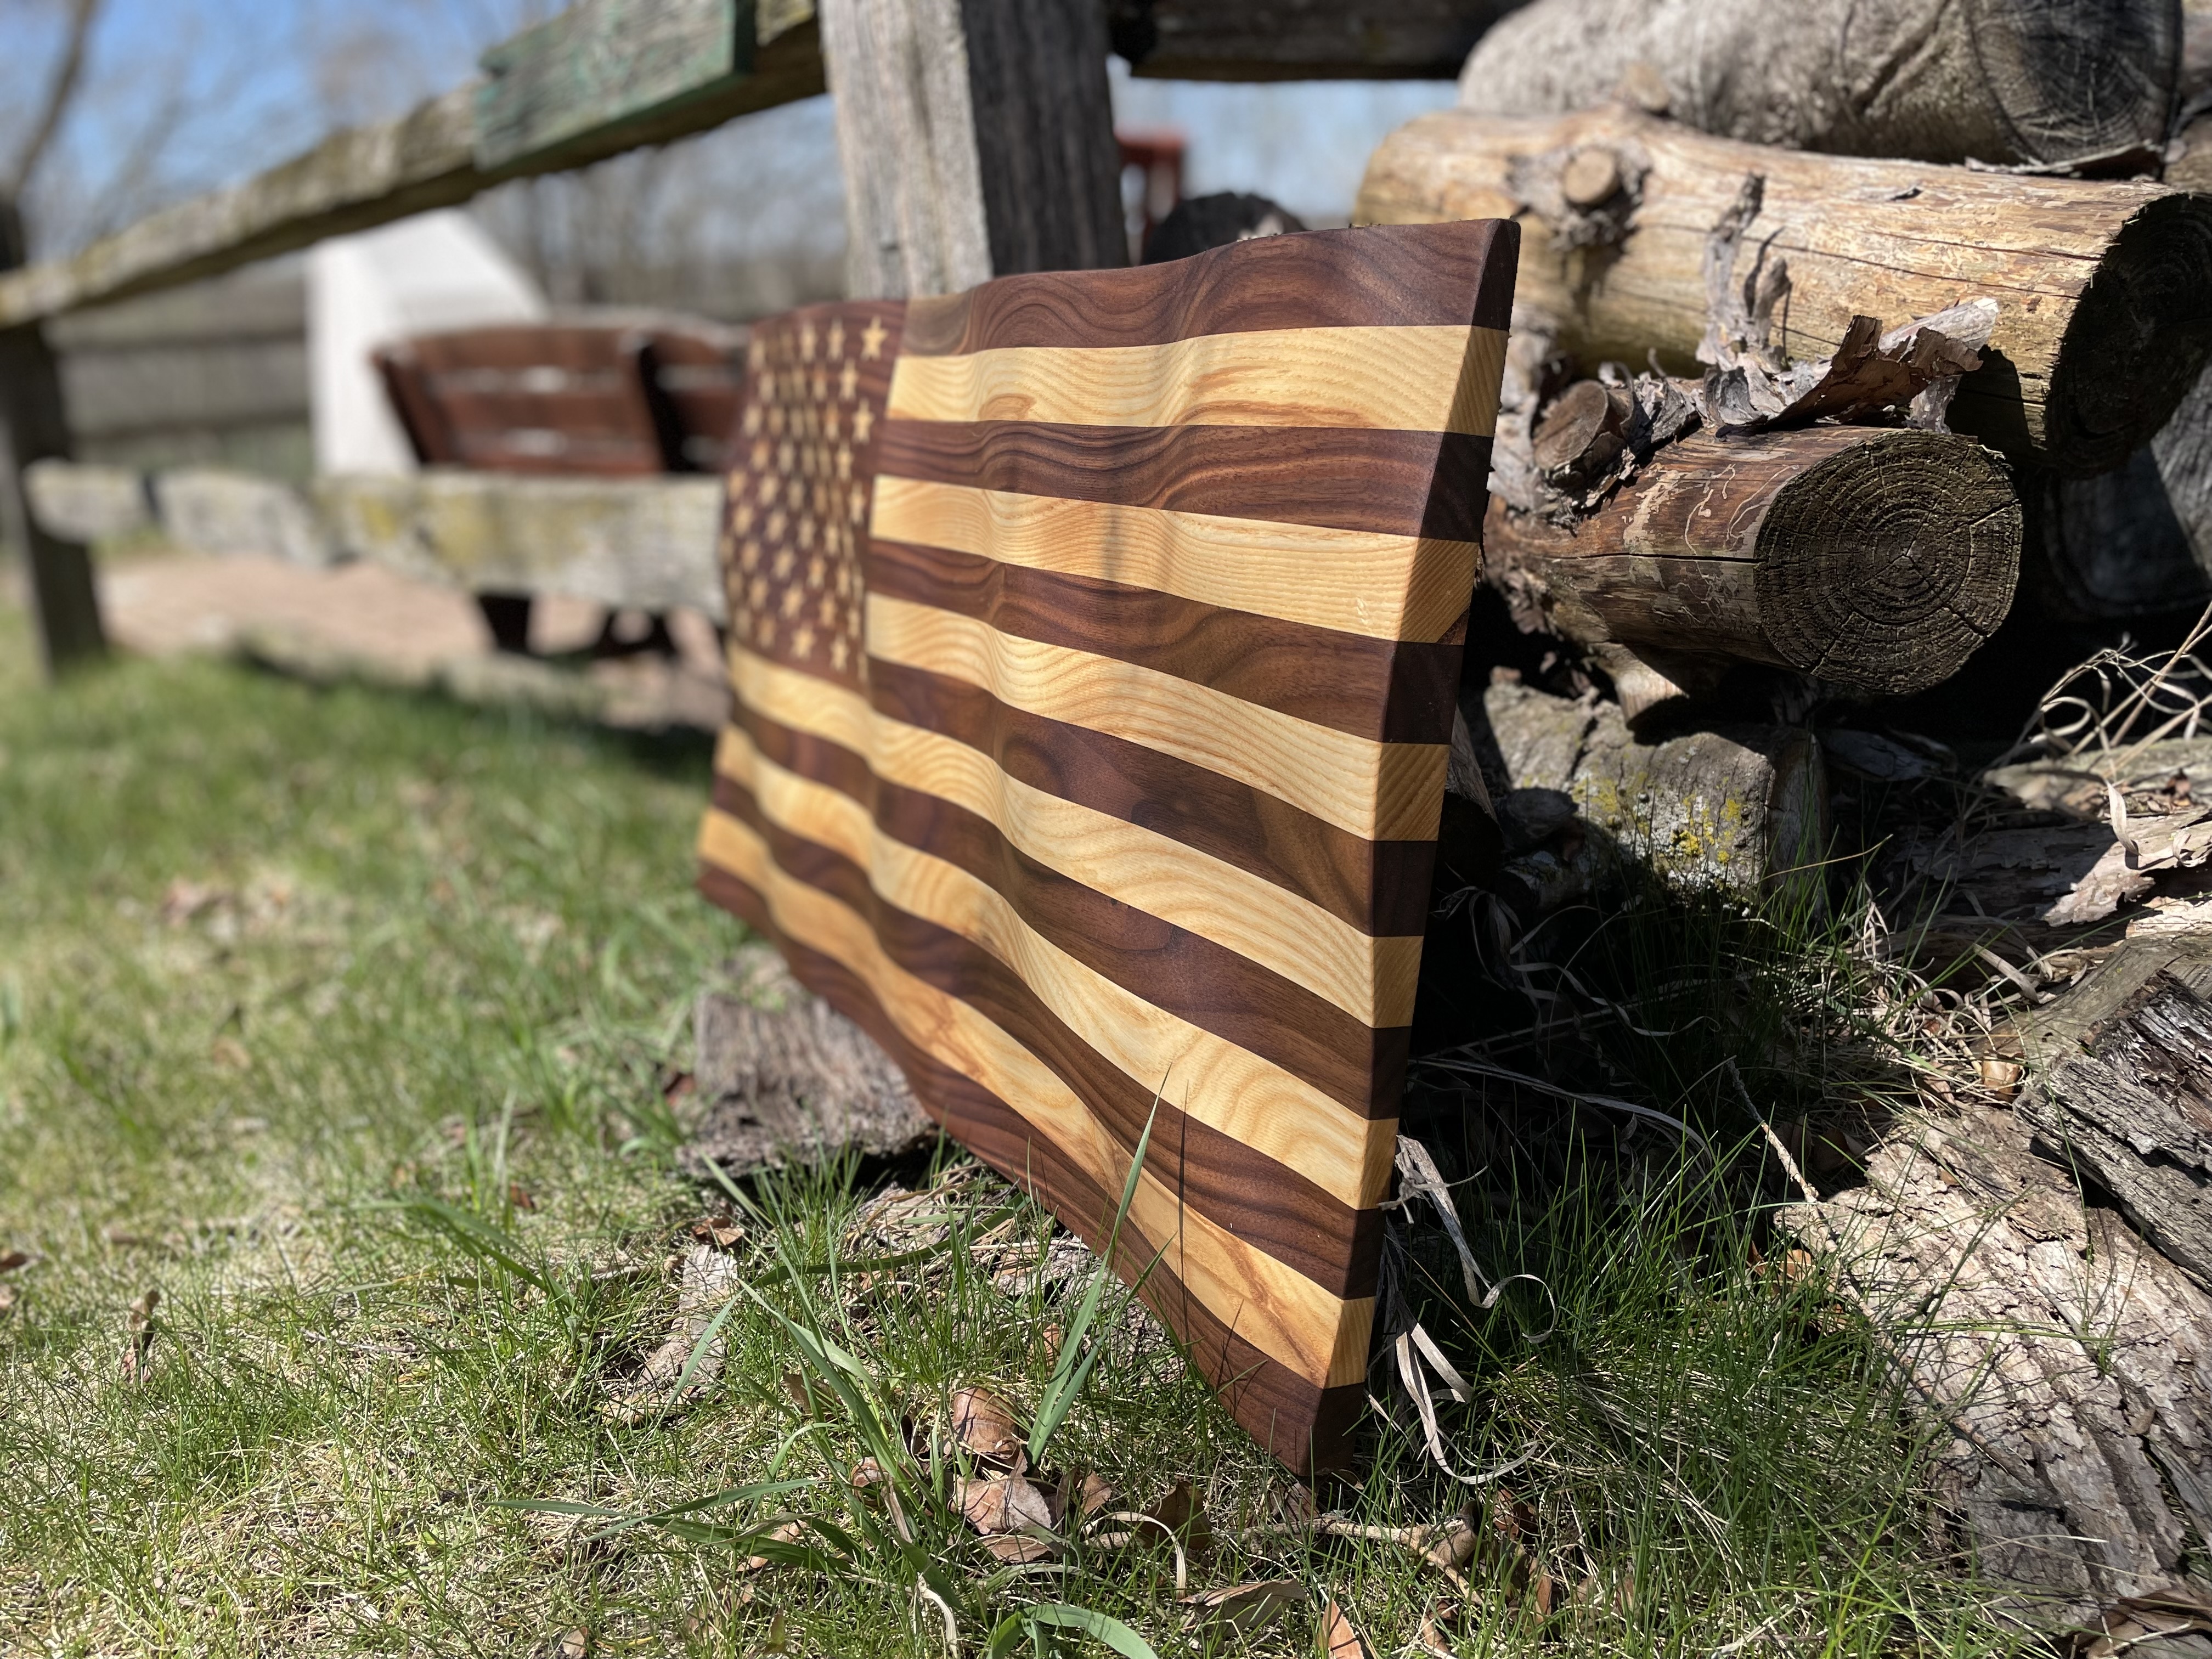
Started with 1.5" thick ash/walnut. For a 30" wide flag, the stripes are 1.25" tall and the stars are basically 1" tall, my final thickness before finishing was just over 1.25" if memory serves. I try to keep the stripes to a “easy” size and set the height/width of the overall flag based off that. I like easy math.
I can run my 1/4" ballnose at 200 IPM for the 3d finishing pass.
1 Like
I love to see Old Glory flying. Nothing more beautiful to me than seeing a waving flag against a brilliant blue sky.
Your flag is quite nice. What did you make it out of? Looks like walnut and something.
Tell us how you modeled it and how you cut it.
Thanks, i tried to make something a little different than all the pine/stained ones, i try to be a more high-end woodworker, my stuff isn’t cheap, but it looks nice ![]()
This is walnut and ash. Debated about doing the stars in maple, i might do a maple/walnut one yet. I have a lot of ash/walnut at moment and that’s what people are asking for at the moment after seeing it.
The waves are a F360 model. Stars etc are all proportioned to the US standard, i found the models you can get on etsy etc are not correct on the sizes, so i had to just do all that myself.
The simple process is:
- cut slabs into manageable sizes
- plane slab chunks down to desired thickness/remove defects
- cut strips to size, marked to reassemble grain patterns later
- run strips on jointer if needed, but my table saw is accurate enough i don’t need to do this
- glue bottom 6 stripes together
- glue top 7 stripes together
- cut out walnut piece for stars
- CNC cut out female stars in walnut
- CNC cut out male stars in ash
- plane male star ash (backside)
- hand plane male star ash (backside) to release stars
- hand assemble stars into female walnut piece, arrange grains
- assemble the stars/walnut, top and bottom stripes
- final sizing and remove defects
- 3d rough and finish cuts on CNC
- hand sand/machine sand
- final coating, i use Rubio
Something like that ![]()
3 Likes
Very nice!!! I love the inlayed stars!
1 Like
Great job! I really like the contrast
Nice job, I honestly have to say this is possibly the first of the ‘wavy’ flags I like. How long did it take you to cut this?
About 14 hours in total on the CNC
1 Like
Love that! Great job!
How deep are the stars before you do your cut?
I think you said in another thread you were machining them with a 1/16 straight bit?
Female cut is .7, male is .72
Yes 1/16th endmill.
Read this and went back holy inlays
1 Like
I think that is the best flag I’ve seen yet. Great job thanks for posting it.
1 Like
Thanks! I appreciate that.
1 Like
Super clean! I need to try this!
1 Like
this is a goal for me!!! ![]()
Good to have goals ![]()