Hello, would anyone happen to know what is the best way to 3d carve an image from a photograph (i.e. portrait, album cover e.t.c.)?
I’m planning to do these on to 18mm thick oak at roughly 400mm square but just would like some advice on tool settings and also cutter size choice which would be best to achieve these.
I’m not looking for a particularly deep cut, say around 3mm, just enough to get the effect.
Thankyou in advance.
There are a couple of possible approaches:
- eschew 3D and simply cut a halftone:
-
eschew 3D, re-draw, and cut as a V carving
-
re-draw, then use the drawn geometry as the basis for a 3D model
-
manually sculpt a 3D model using the the photograph as a guide
-
use a Large Language Model (what folks are passing off as “A.I.”) to create a height/depth map or 3D model — while not a photo, here was a recent discussion of doing this sort of thing from a pixel image:
It might be that there are specialty models for this sort of thing, but that’s not something which I have looked into.
1 Like
You can try this image to relief app that was posted by a forum member a while back. A few of us have had success with it
3 Likes
I actually just pushed some updates to it today. There’s a new curve tool, some performance improvements, better previews, and a bunch of bug fixes. Hope you all like it ![]()
5 Likes
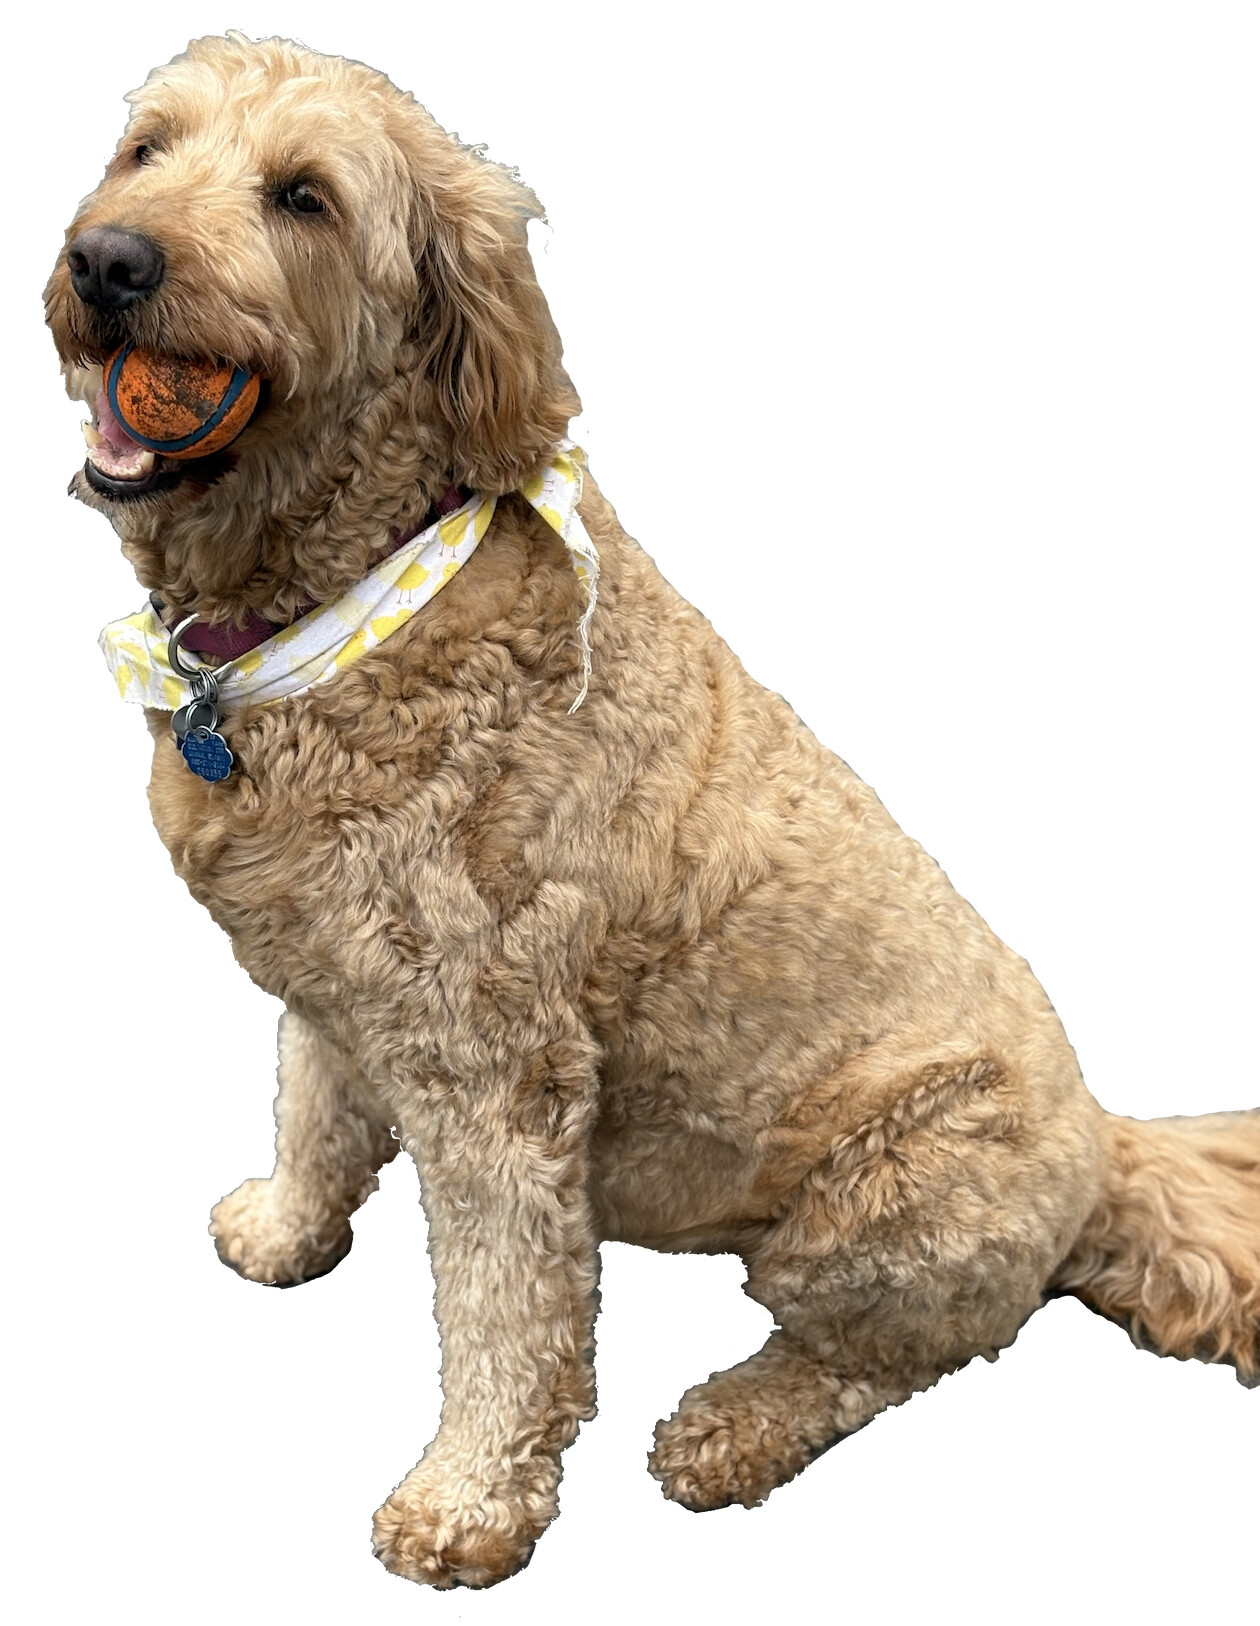
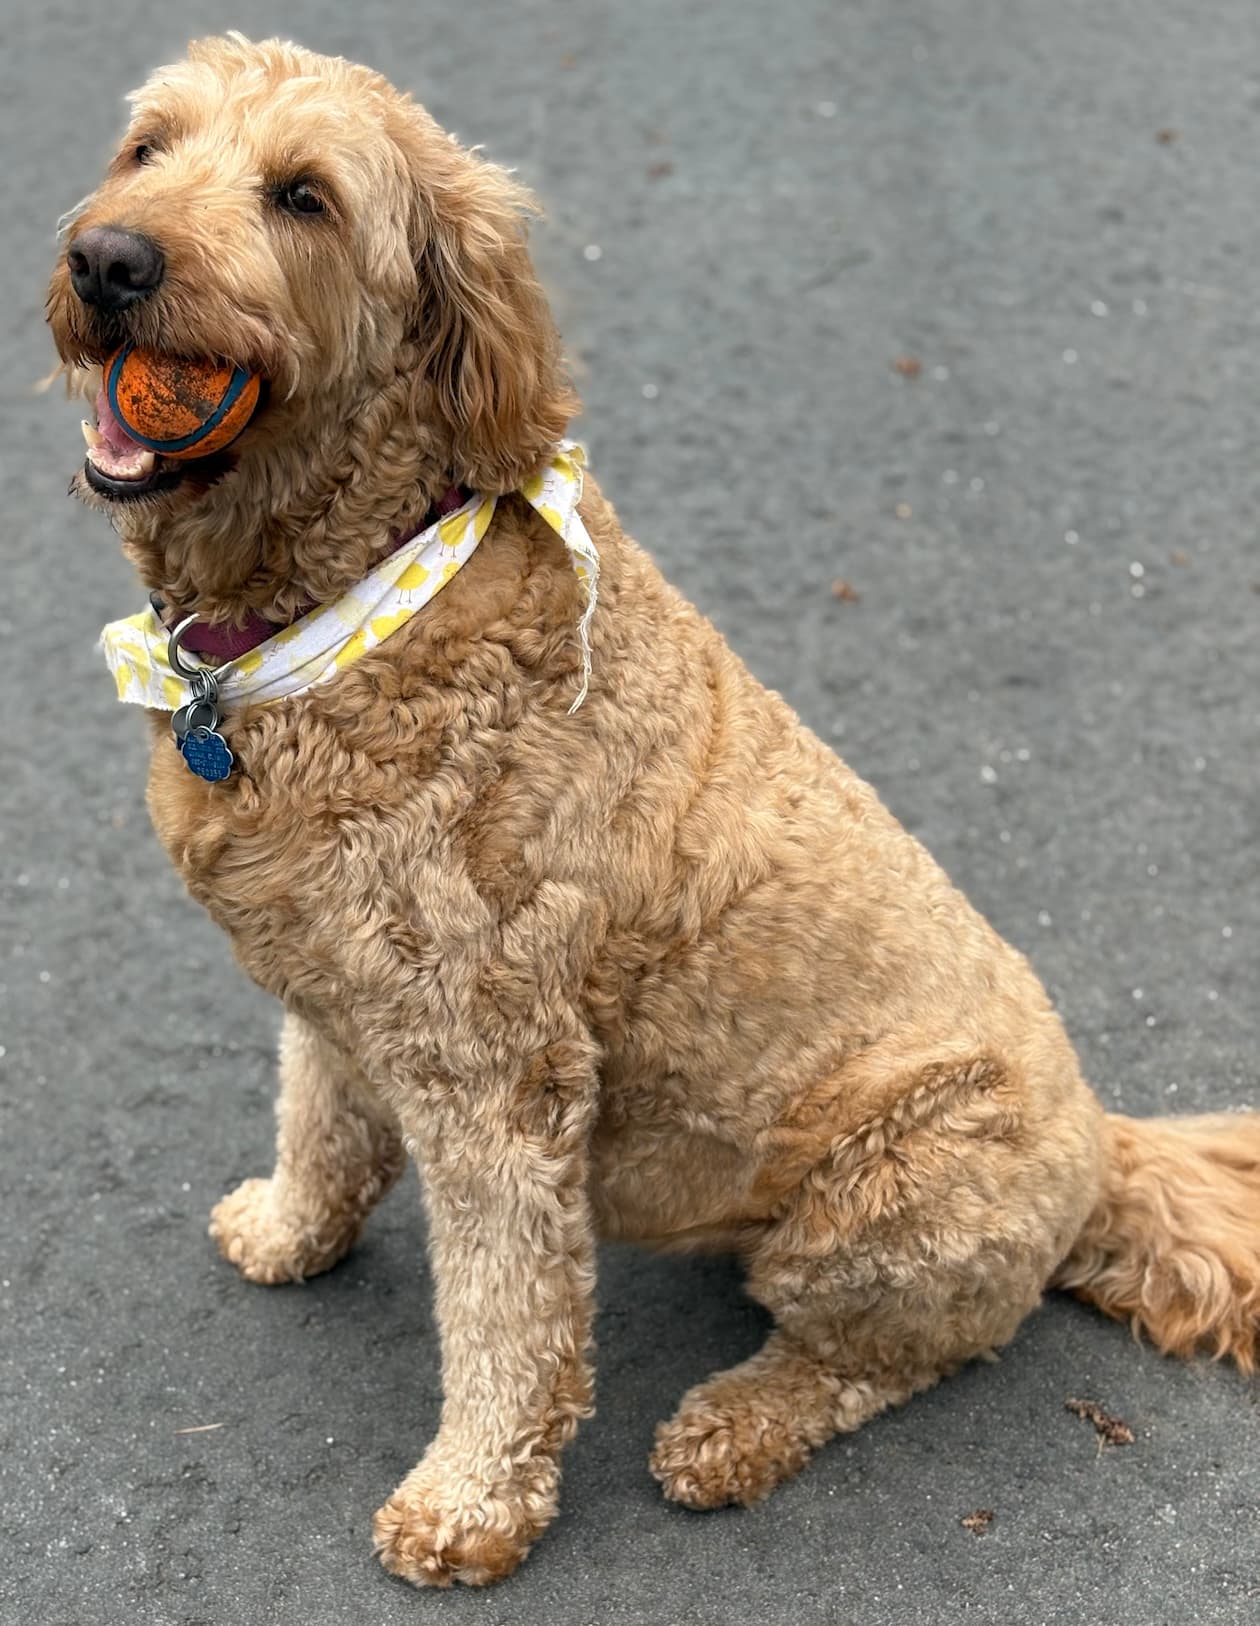
I was testing the new code for a carve of a golden doodle. Previously I could not get the face to “pop”. Per instructions I completely removed the background to get the maximum depth of the dog. Just starting the process to carve it now.
3 Likes
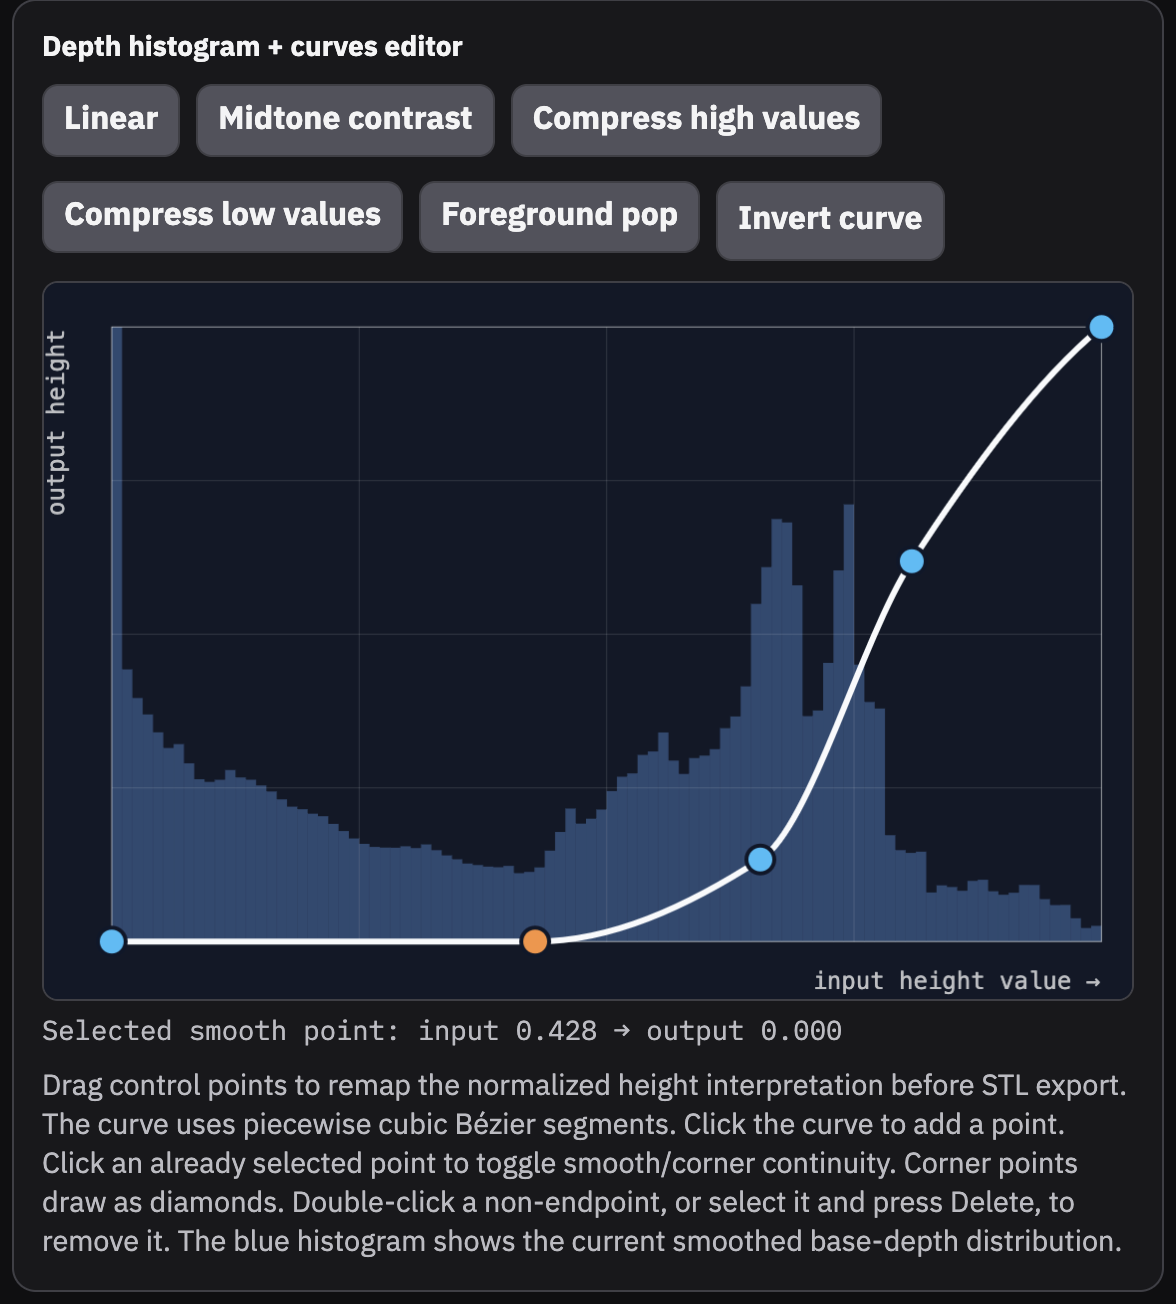
The curve tool should let you avoid needing to do any background subtraction. You can use it to clip the deep background and concentrate all the dynamic range on your subject.
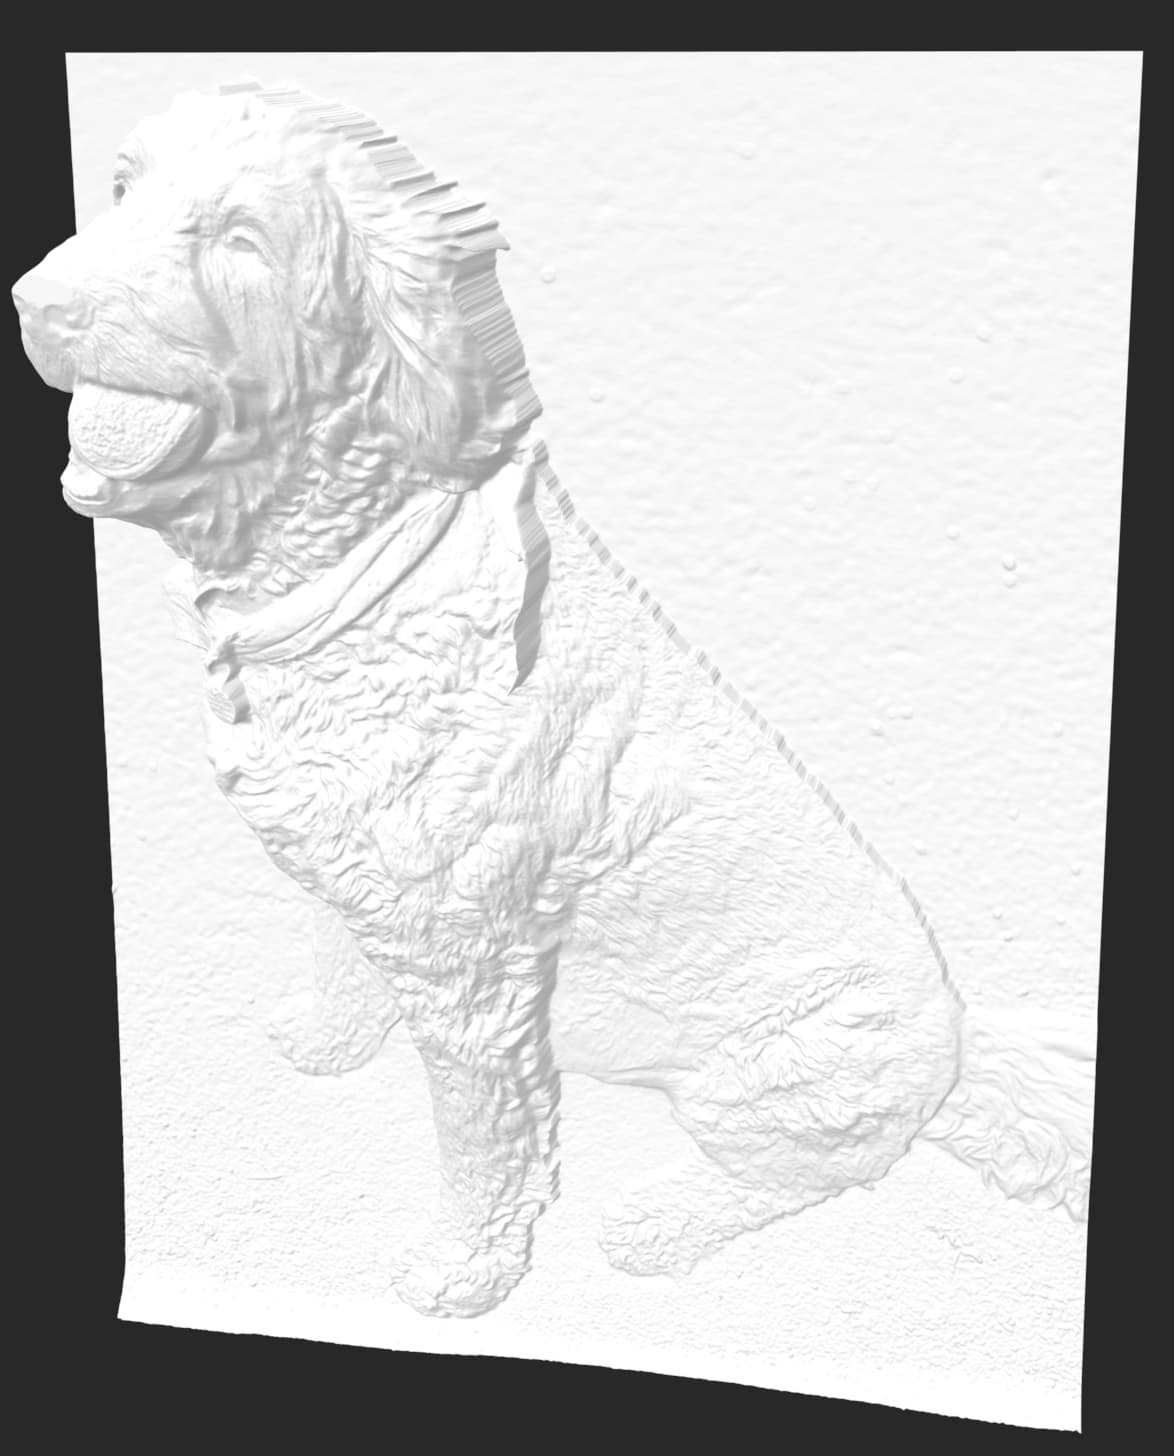
For example, this curve clips the background and adds some additional contrast to the dog’s body without needing to do any background subtraction before uploading your image.
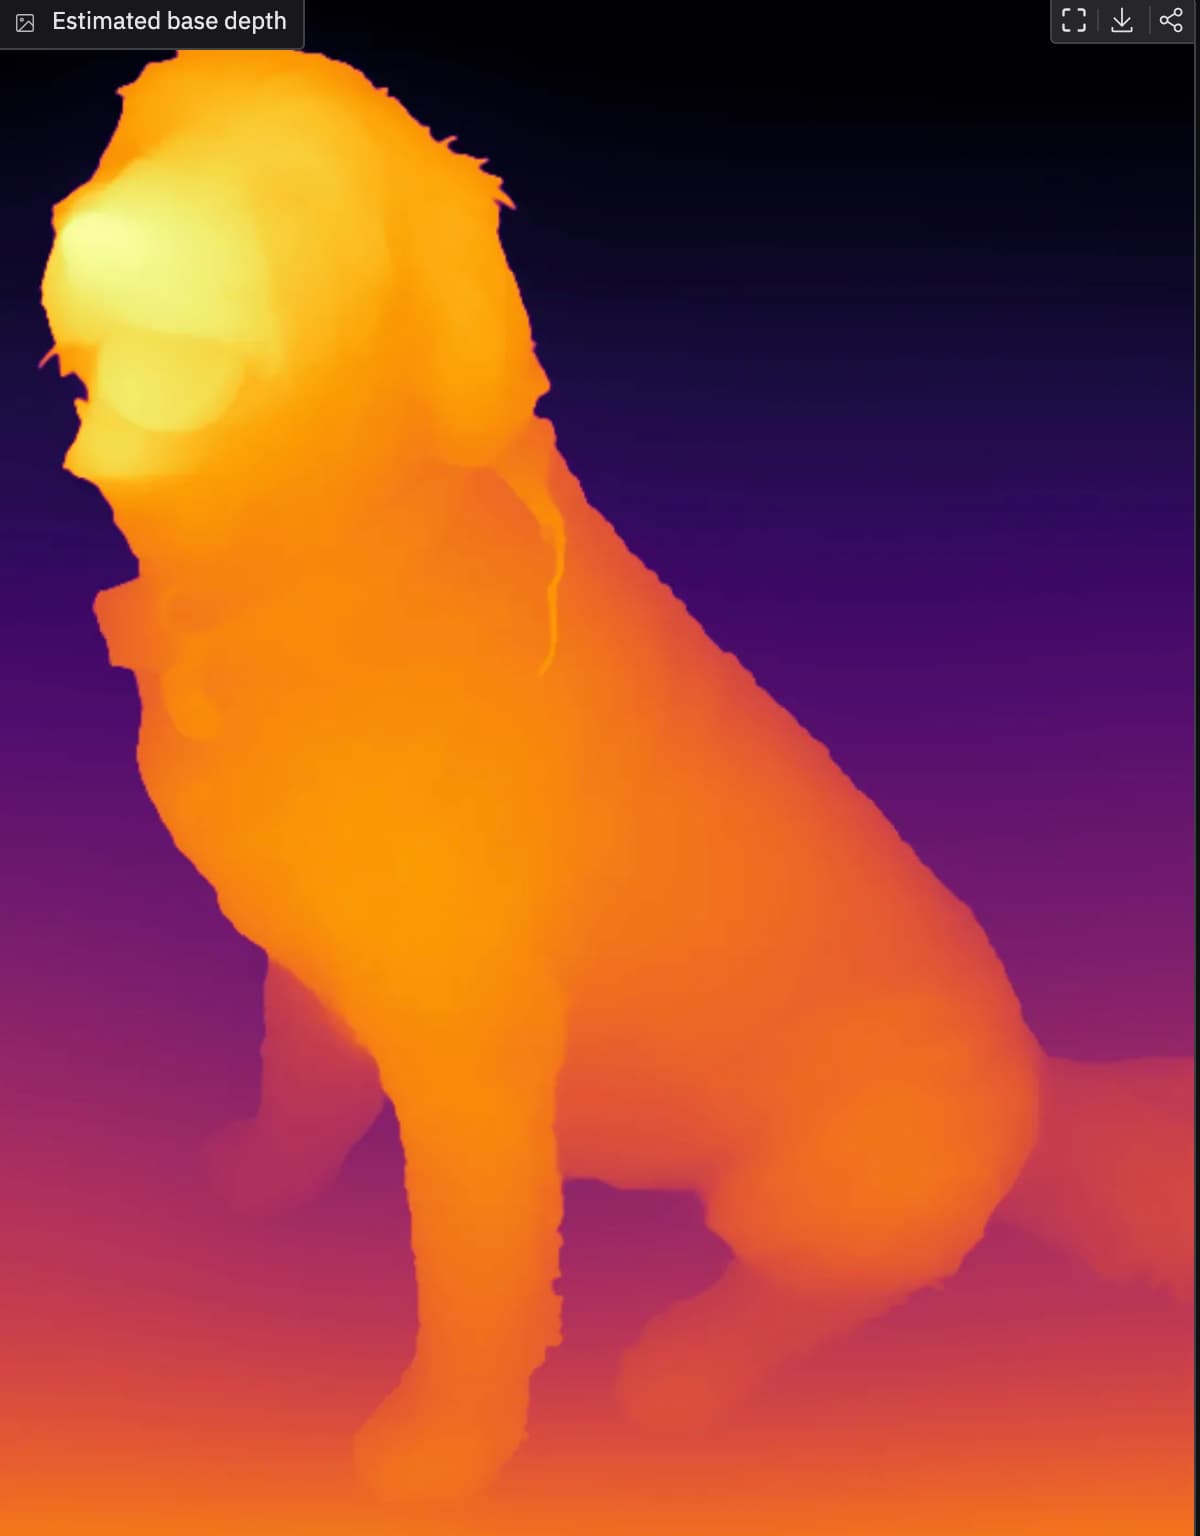
The base depth map has a large depth gradient fading off into the background of the image, so the dog itself looks flat in comparison.
After applying the curve, the background is clipped and all the range is spread between the deepest and shallowest parts of the dog itself.
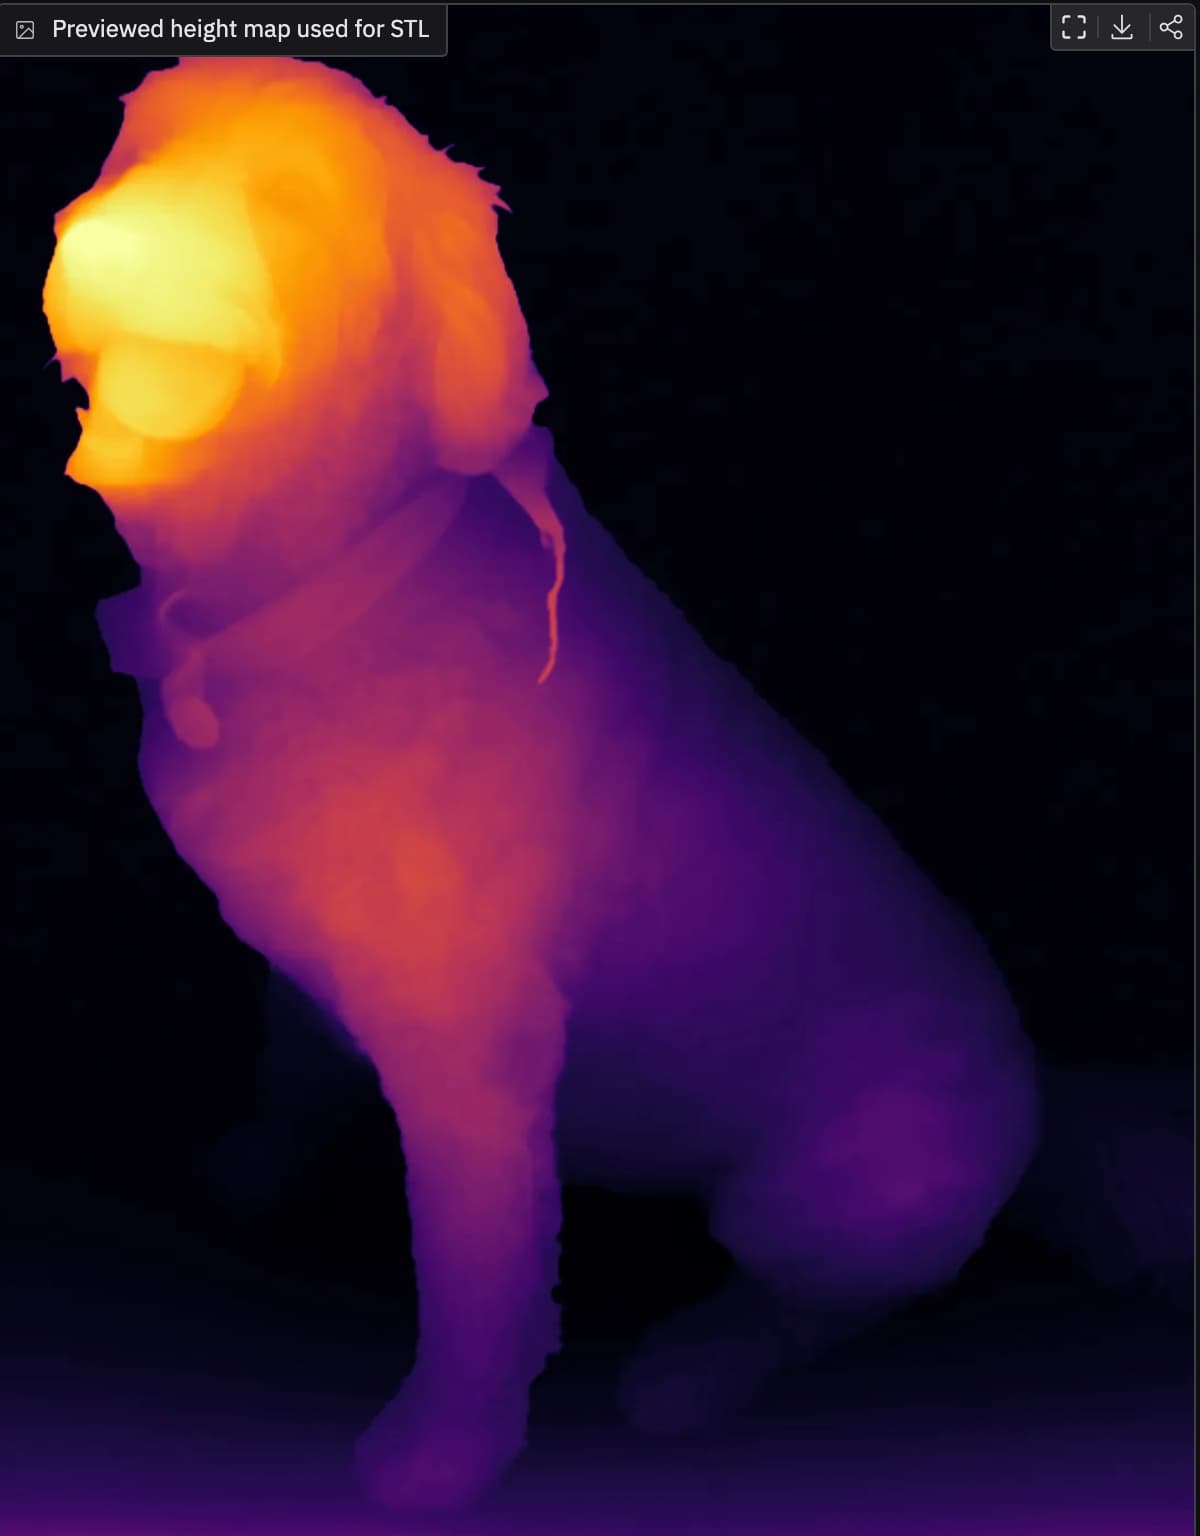
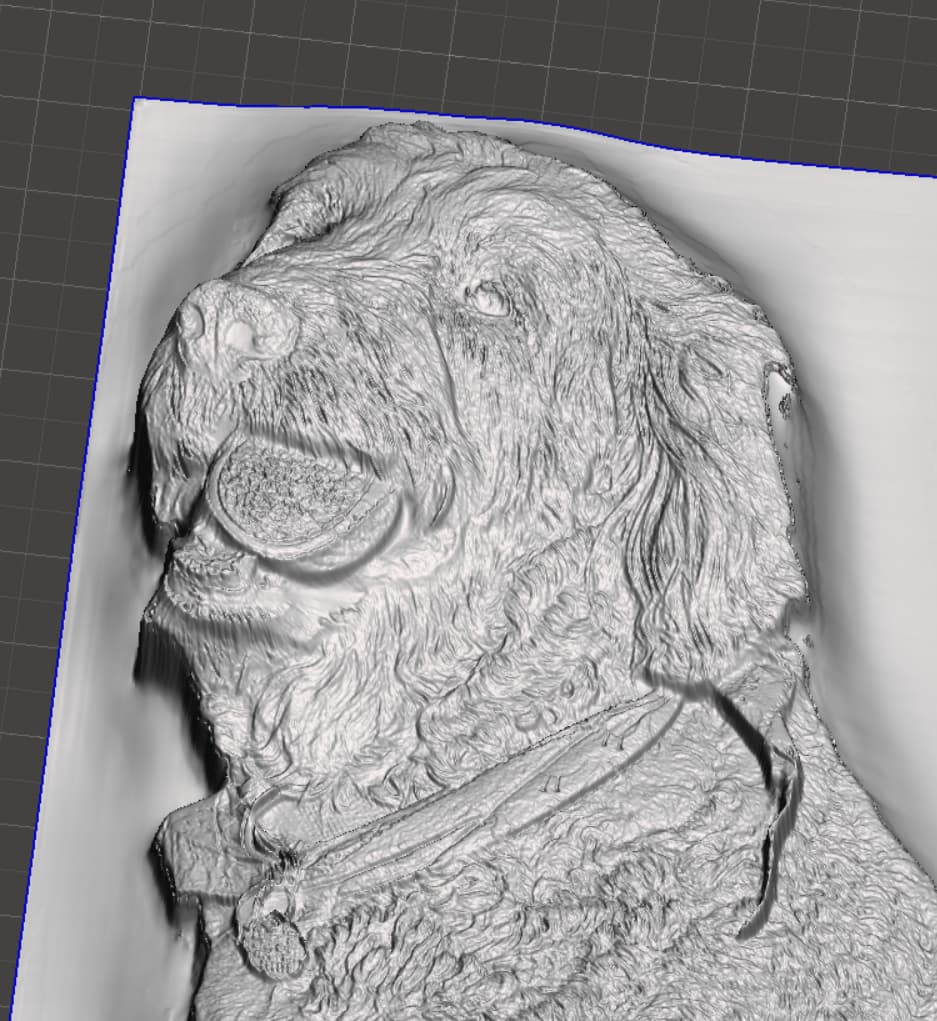
This lets us get a more natural looking and convex head/snout region without doing any image manipulation.
Original, no background subtraction:
5 Likes
I really like the addition of the curve tool. I’ve been paying a bit with it on an elephant image that I’ve been trying to perfect for 3d carve and it really helps to define the parts that I want to stand out. There’s still a couple areas of the image that I am trying to figure out but I’ll work on it later and see what I can do
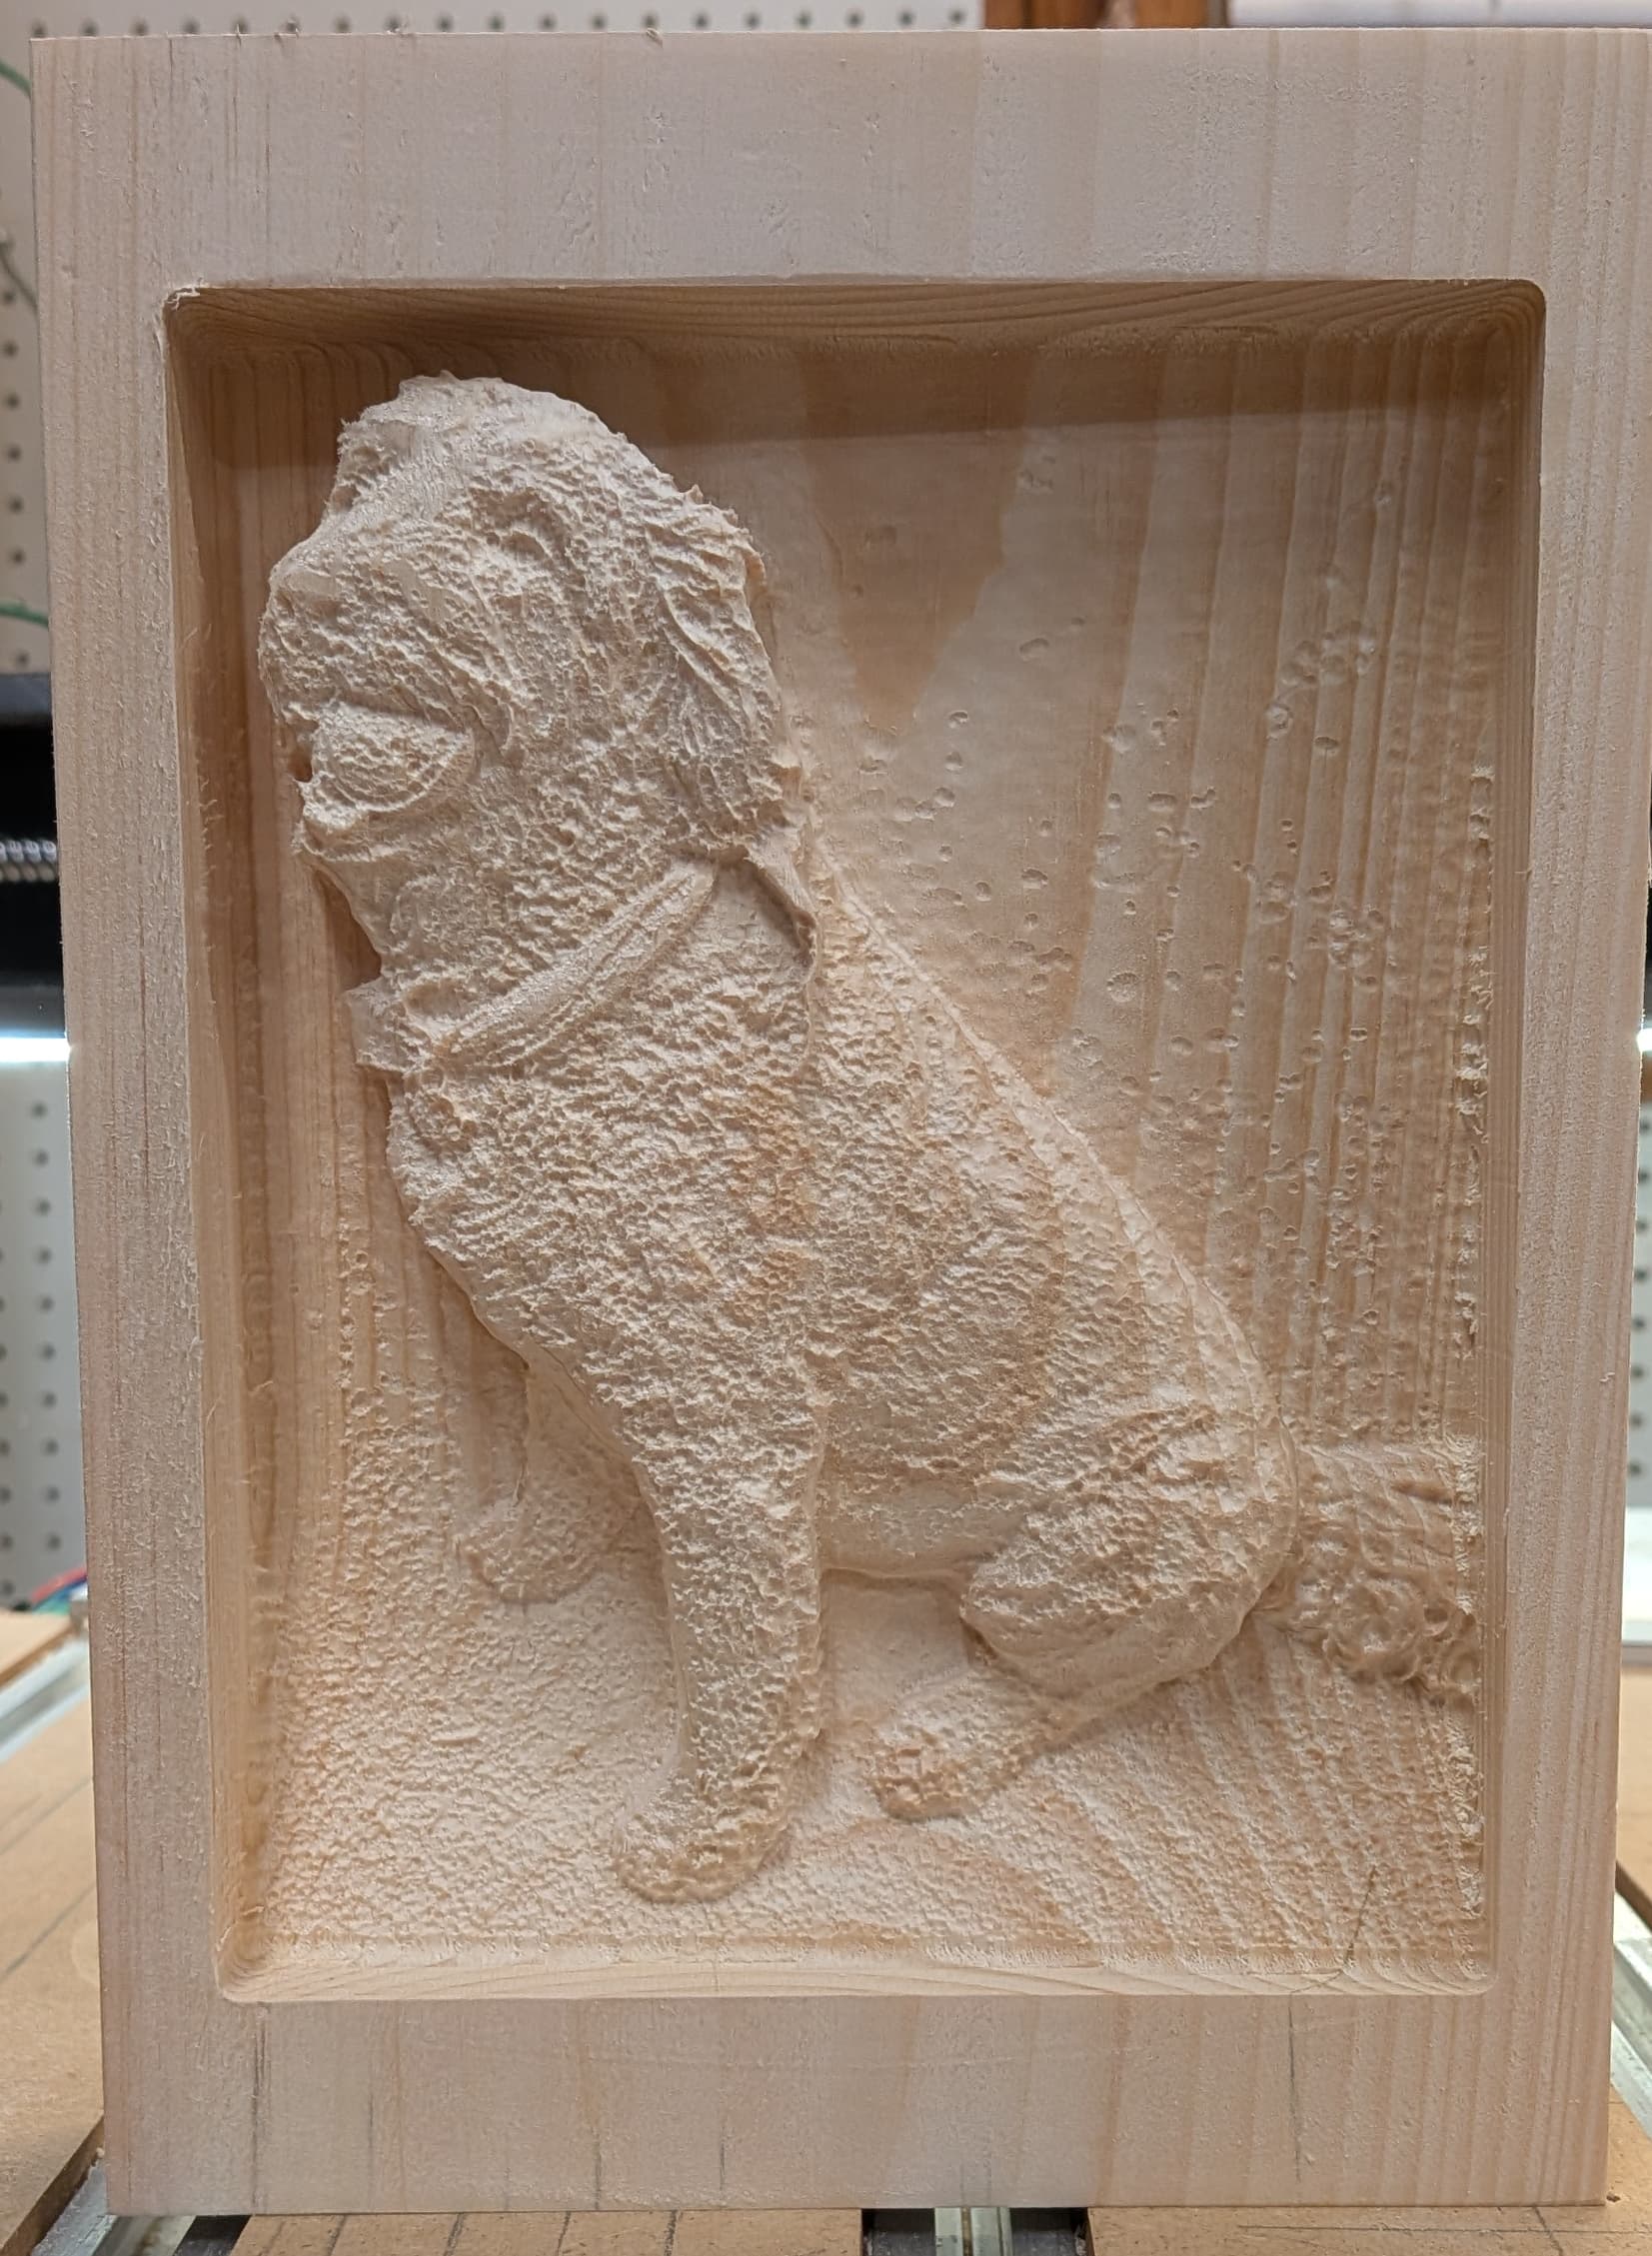
@jtclose Looks awesome Jim! How thick is the pine? The depth of the head and left side really looks good.
1.5" thick.
I had my son in-law rip 3.5 thick boards in half.
They clean up around 1.6 unless it had a lot of character.
I spend more brain space trying to clean up stock than carving.
Thankyou, could you tell me how do i get the stl file to be able to be put into carbide create?
On the model tab, select the icon that looks like the ball to import an stl file.
Thankyou, i seem to be having trouble saving the stl file from image to 3d relief generator, i just get the option to 3d print?
Scroll to the bottom and click the blue highlighted link.
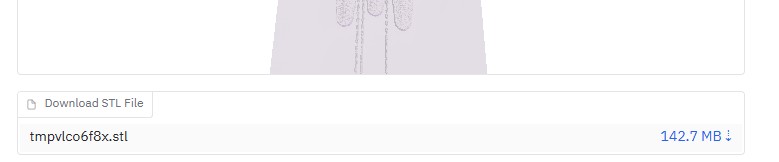
Due to file sizes it might take some time.
Thankyou, i will give it a go.
Great program, Blair! Thank you for making it! I am trying to create a bas-relief plaque that never existed other than as a flat concept drawing in the early 1930’s. On the Image To Relief website, the input image is limited to 1.5 megapixels but that could be changed by “local” installations. Is there a downloadable version of your app that I could use for larger images?
It is possible to run the app locally, but it requires a little bit of know-how or a willingness to learn. This isn’t packaged up nicely for an end-user. Huggingface spaces are just git repositories, and clicking the three dots in the top right will give you options for cloning the code to your local machine or example commands for running it with docker.
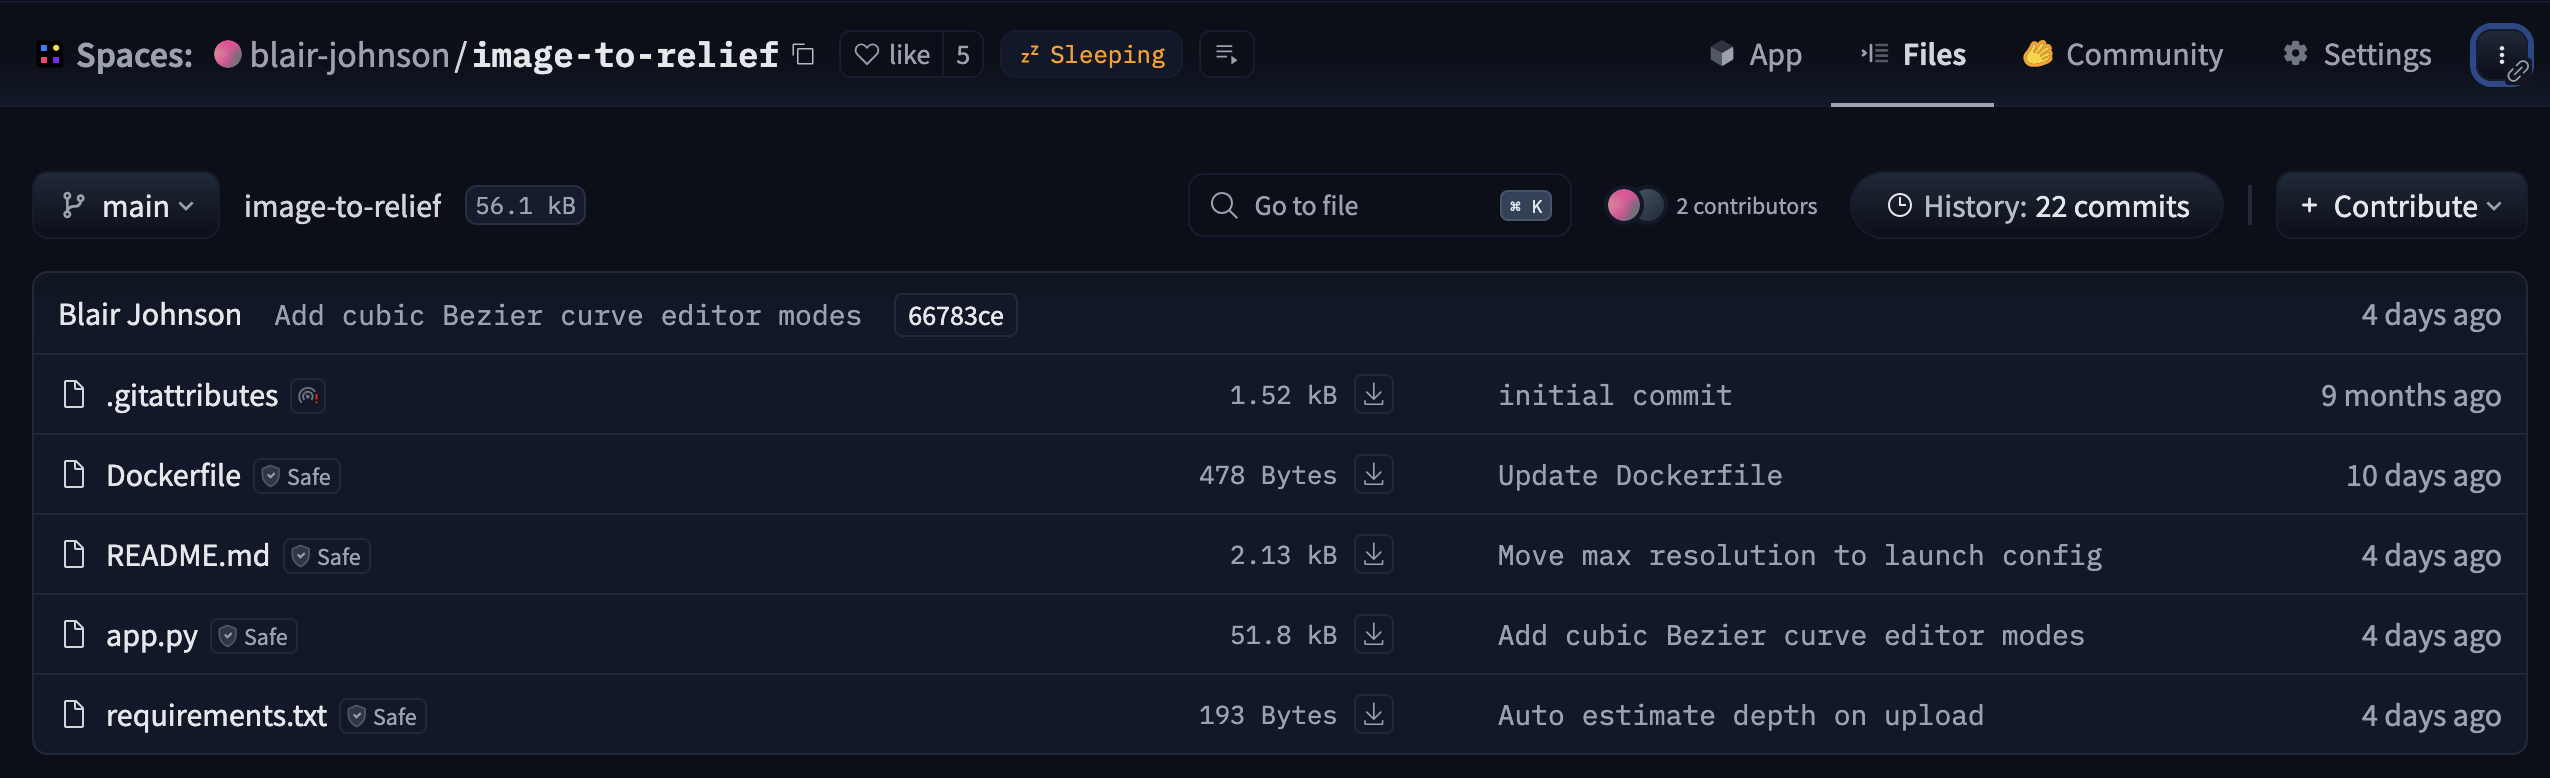
You could also download
app.py and requirements.txt directly (with the little download buttons) and use those to set up a python environment and run the app. The README has instructions for changing the max resolution.
Minimal instructions for installing:
- Install python from Download Python | Python.org. Make sure to select the “Add Python to PATH” option in the installer.
- Copy the project files to a directory on your computer. If you’re downloading files directly, then you just need
app.pyandrequirements.txt. - Open a terminal (“command prompt” on windows, or “terminal” on mac), and navigate to the directory where you saved the project files.
- Create a python virtual environment. Run
python -m venv venv. If you see an error about python not being found, trypython3instead ofpython. - Activate the virtual environment. On windows run
venv\Scripts\activate. On mac runsource venv/bin/activate. - Install project dependencies into your venv. Run
pip install -r requirements.txt. You should see a bunch of stuff flash by on the screen as packages that the app needs are installed. Also runpip install huggingface_hub. - Go make an account on huggingface.co. Log-in, click on your profile photo in the top right, then go down the list and click on
Access Tokens. This will take you to a page with a big “+ Create New Token” button. Select “read” for token type and then give it a name (like “my laptop”) and hit the “Create Token” button. It will display a long string of random text. This is your huggingface token, copy this into a text file on your computer and save it somewhere you’ll remember. You’ll use this token to download the weights for the computer vision model that predicts the base depth-map in the app. - Download the depth estimation model. From a terminal with your venv activated, run
hf download "depth-anything/Depth-Anything-V2-Large-hf" --token {paste your token here}. You should see some progress bars as the model gets downloaded.
Minimal instructions for launching the app:
Once you’ve installed the dependencies, you can launch the app like this in the future.
- Open a terminal and navigate to the directory with your venv and
app.py. - Activate the venv, see step 5 above. You should see
(venv)or whatever you named it appear in the terminal. - Launch the app. Run
python app.py --max-resolution-pixels 4000000(for a 4MP max resolution). You should see a url displayed in the terminal. By default, this should behttp://0.0.0.0/7860 - Open a browser and visit the url, you should see the app.
Hopefully this is helpful!
3 Likes
@Adamwoodward Sorry Adam I wasnt online all day. Ed’s answer is right and it usually doesnt take more than a few seconds to download… at least on my laptop ![]()
Wow, thank you for the extensive answer, Blair.
That pretty well sums up my Python status. ![]() Although I use Python on a Raspberry Pi at work and a PC at home, it is really basic programming with the Python interpreter, using the GPIO to run stepper motors and optosensors. I will review your guide and see if it is something I’ll want to attempt. thanks again!
Although I use Python on a Raspberry Pi at work and a PC at home, it is really basic programming with the Python interpreter, using the GPIO to run stepper motors and optosensors. I will review your guide and see if it is something I’ll want to attempt. thanks again!
1 Like
Thankyou Jeff, i have managed to download it, just trying now to figure out the toolpaths in carbide to get it machined, trying to bring down the cutting time a bit!
1 Like