3D Printed Nomad 3 Dust Boot w/ Brush

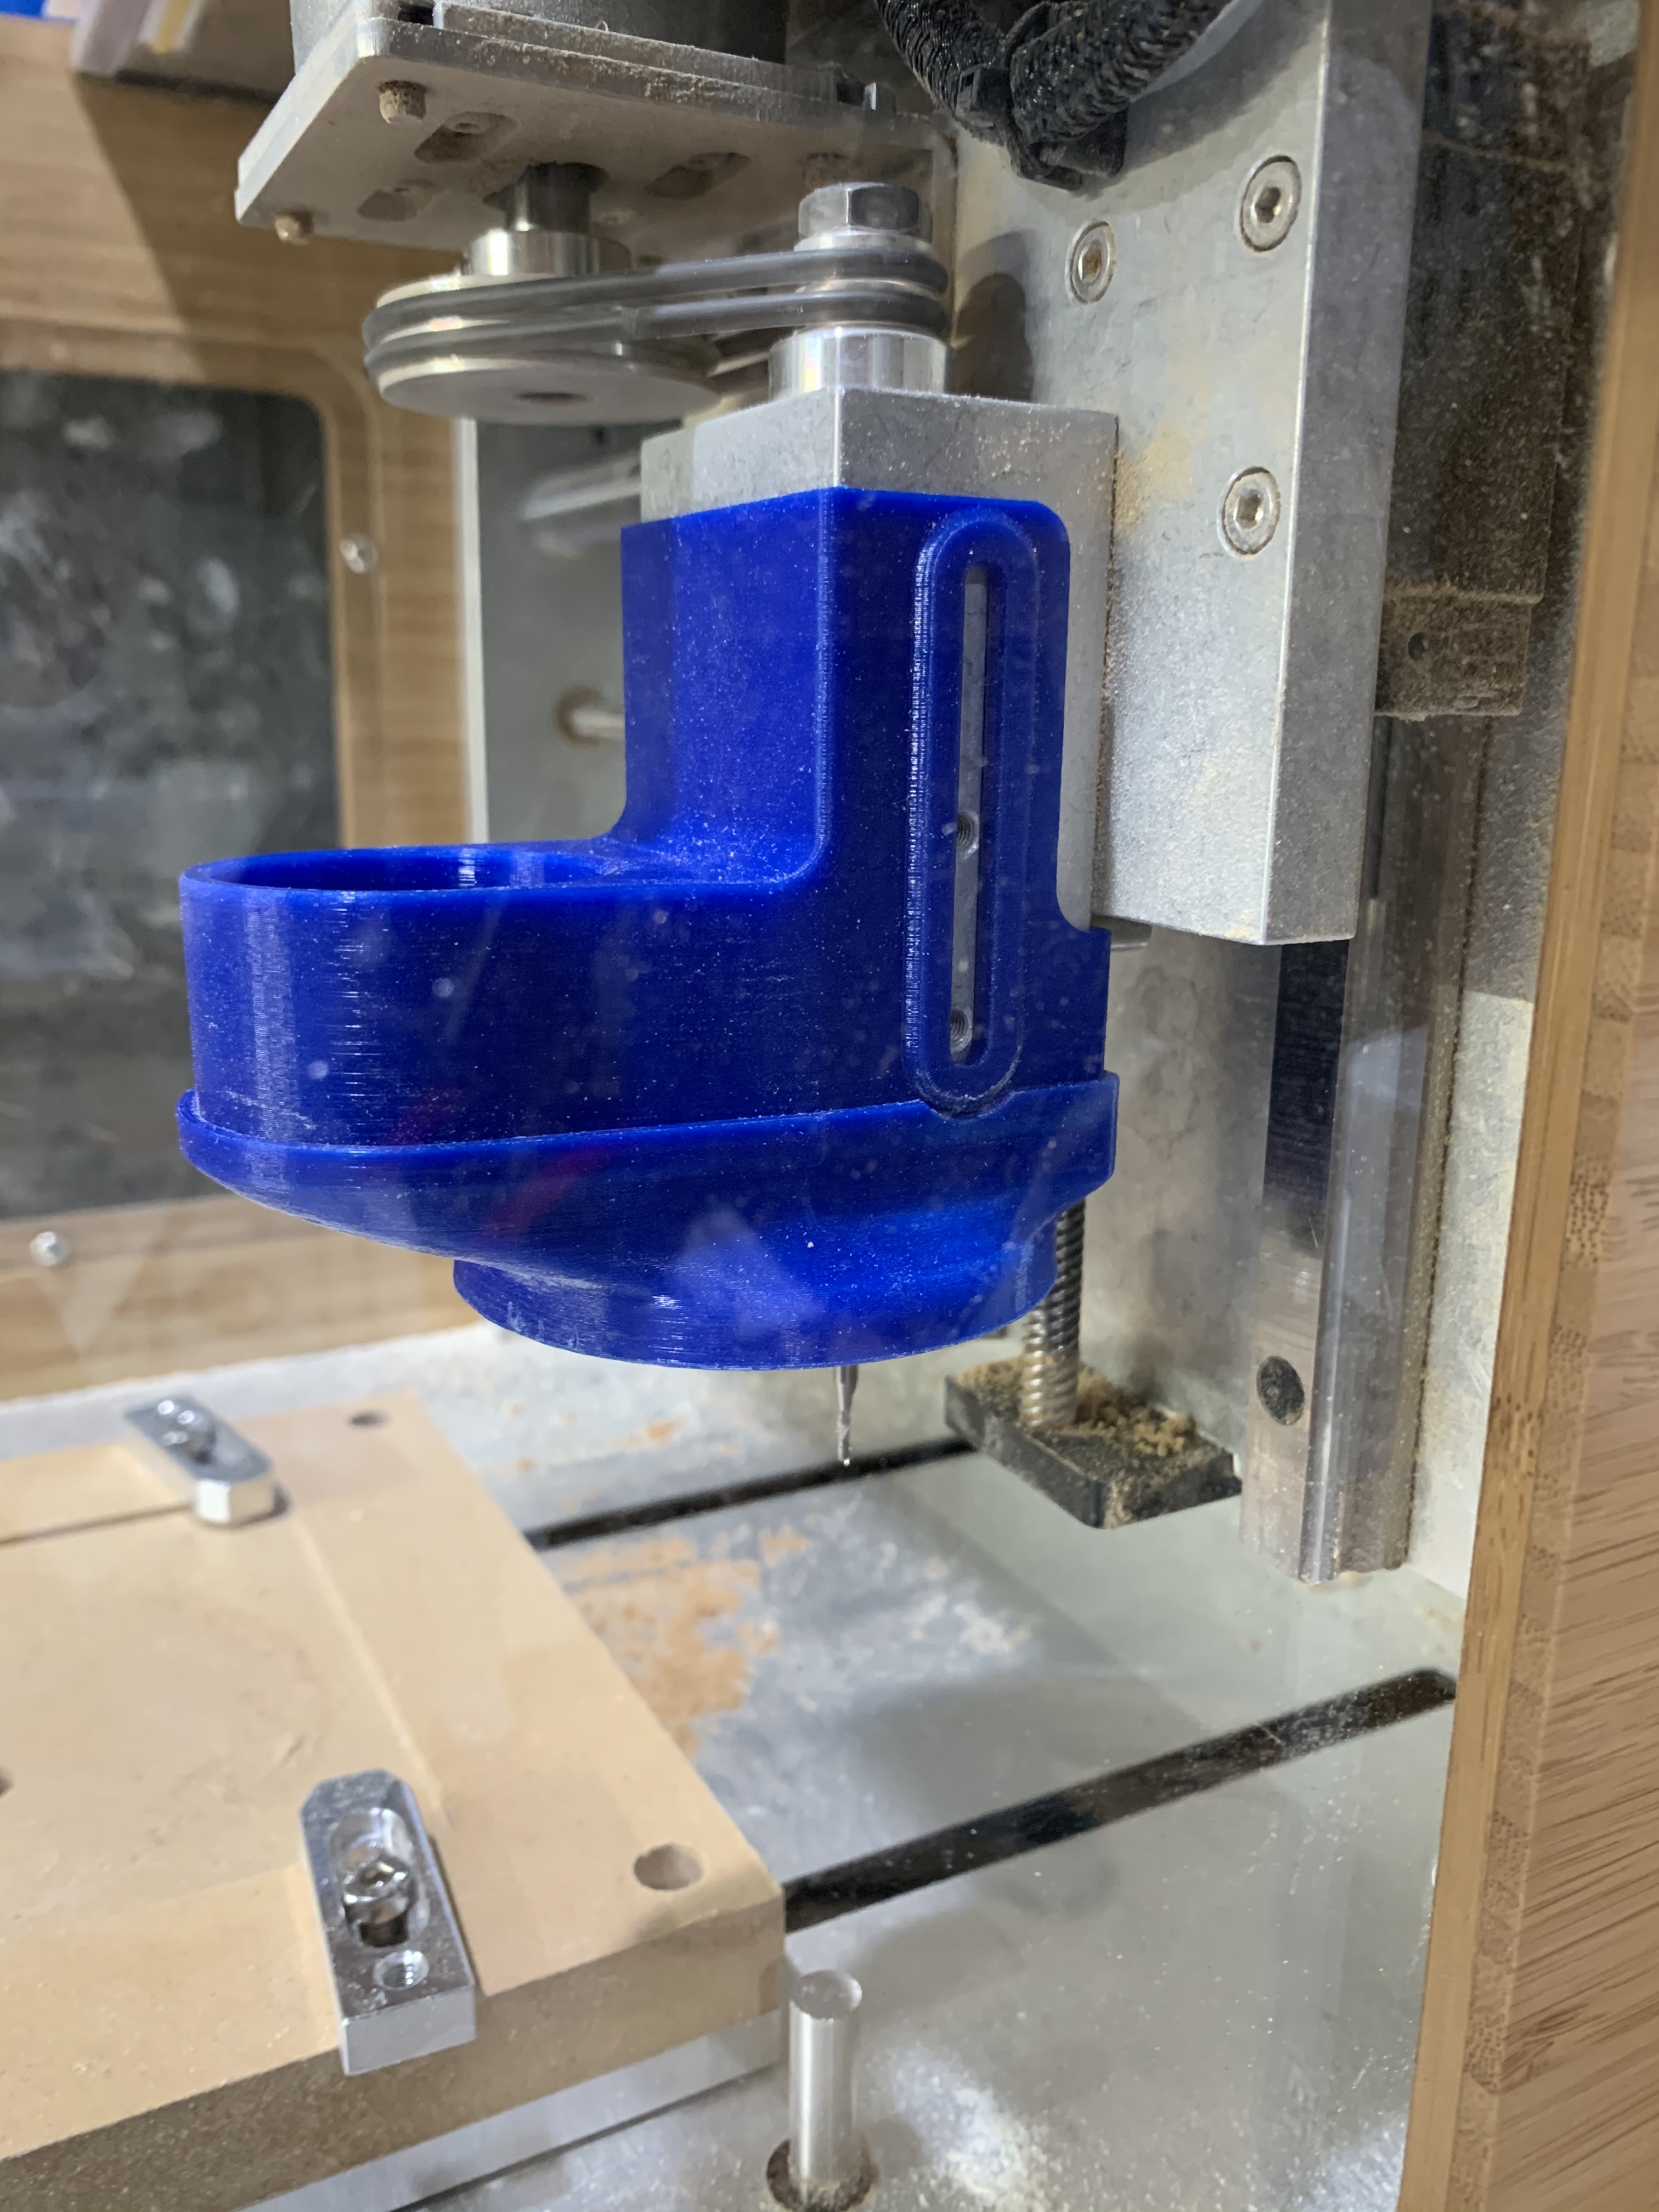
Hey guys, I’ve been working on an officially-sanctioned-but-still-unofficial dust management device for the Nomad. Previously I’d designed something that would take a vacuum hose and basically clamp it to the spindle, which was good enough to capture the airborne nasties that would escape from cutting MDF and stuff, but didn’t have a brush. Enough people sounded like they really wanted that extra option so I threw a concept together.

This is a two-part dust shoe that works just like Sweepy. On one side I use some oversize M4 hardware (anything longer than 1cm should be able to bottom out in the hole) for the base piece to slide on.

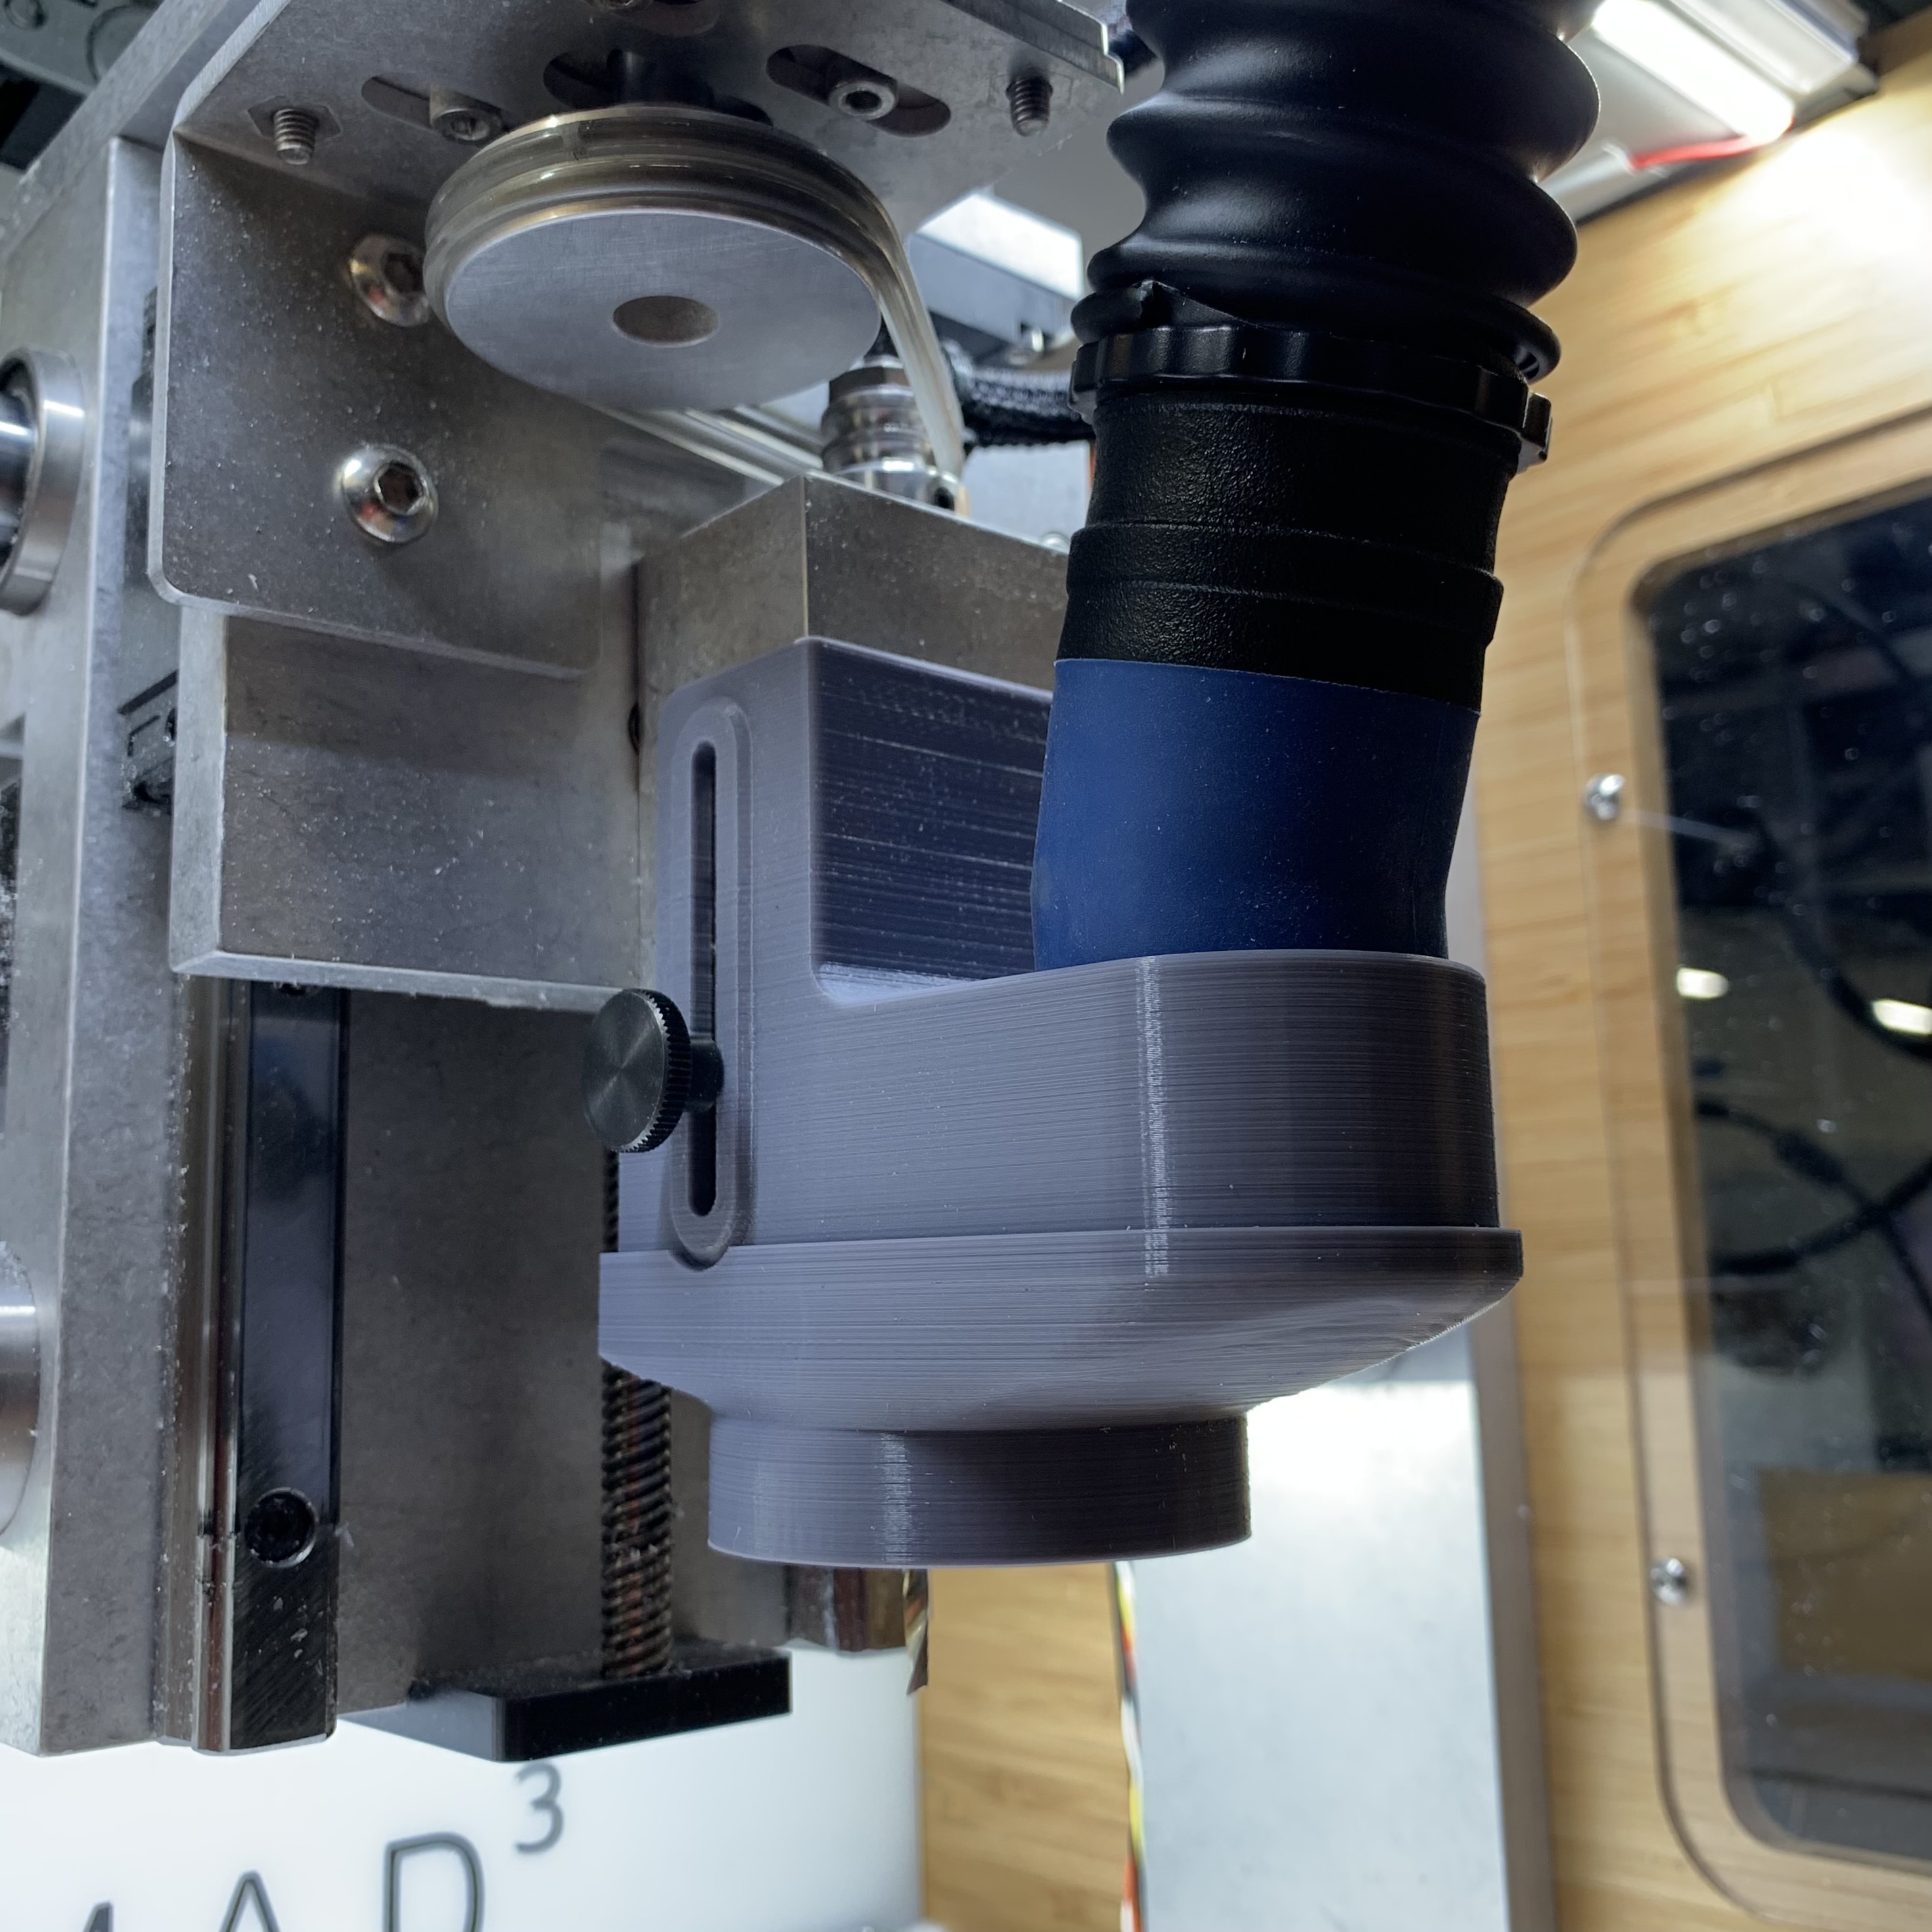
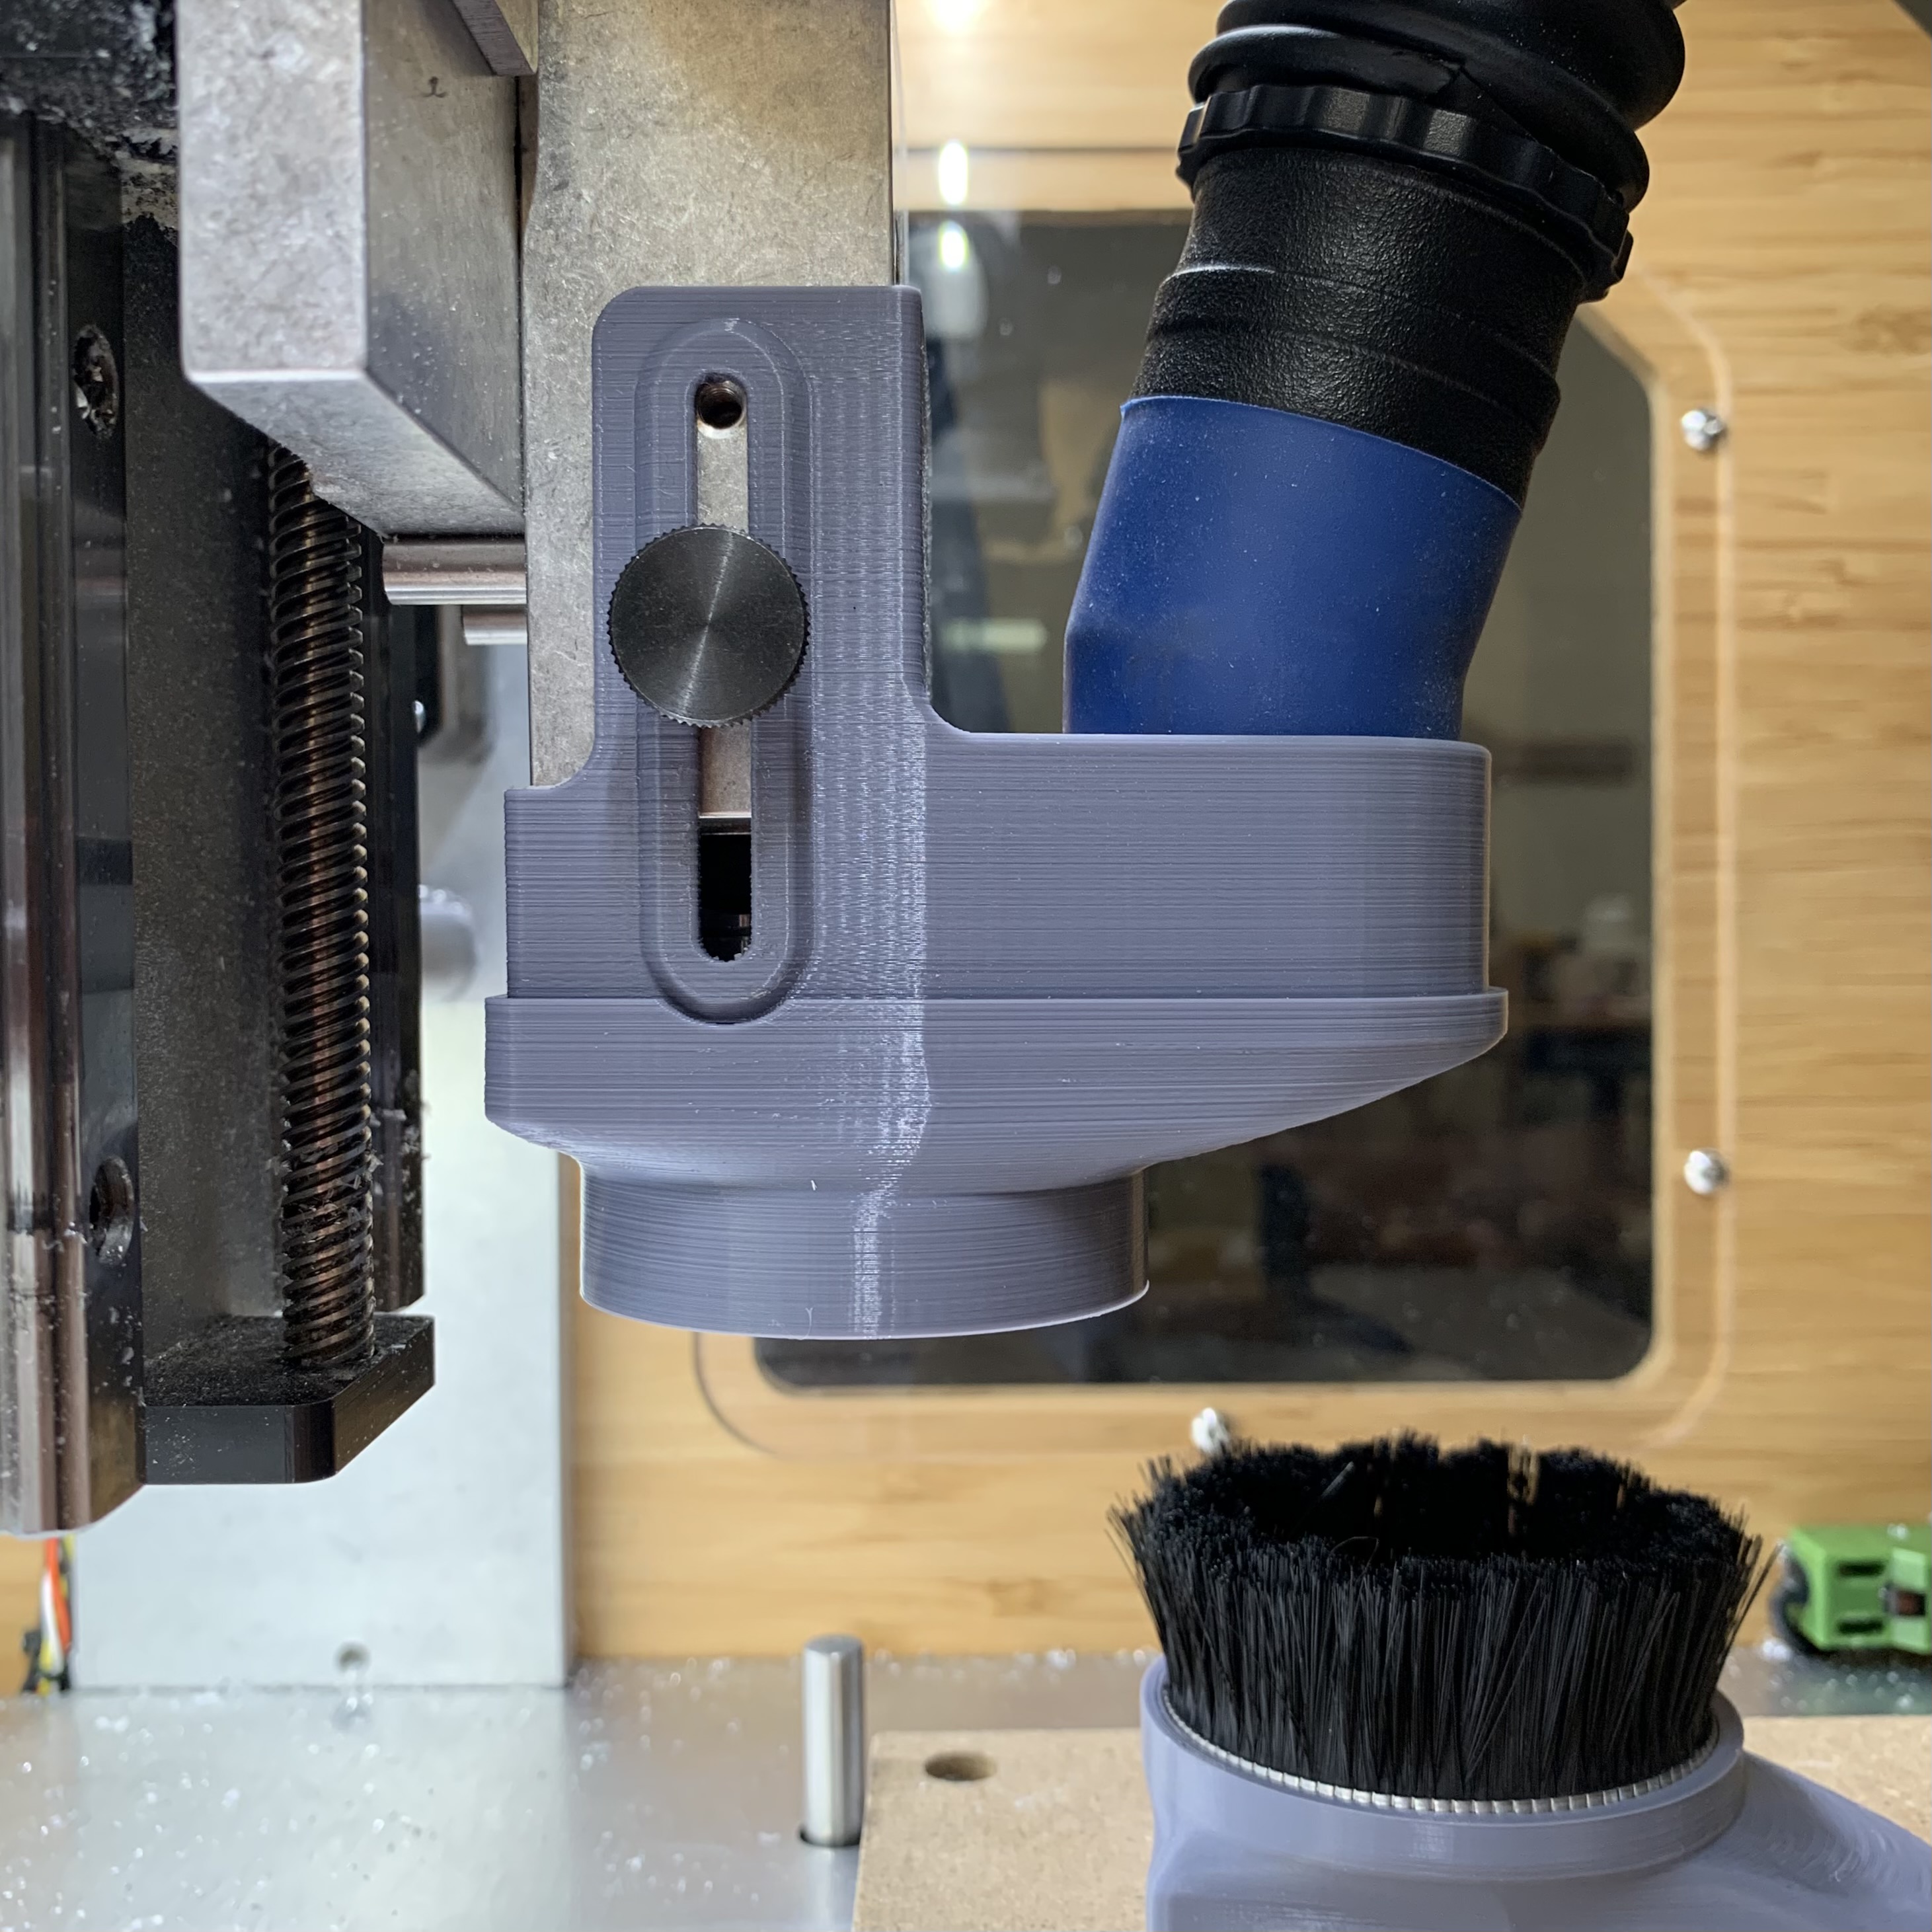
On the other side I use 1 or 2 M4 thumbscrews to lock the shoe at a fixed height.
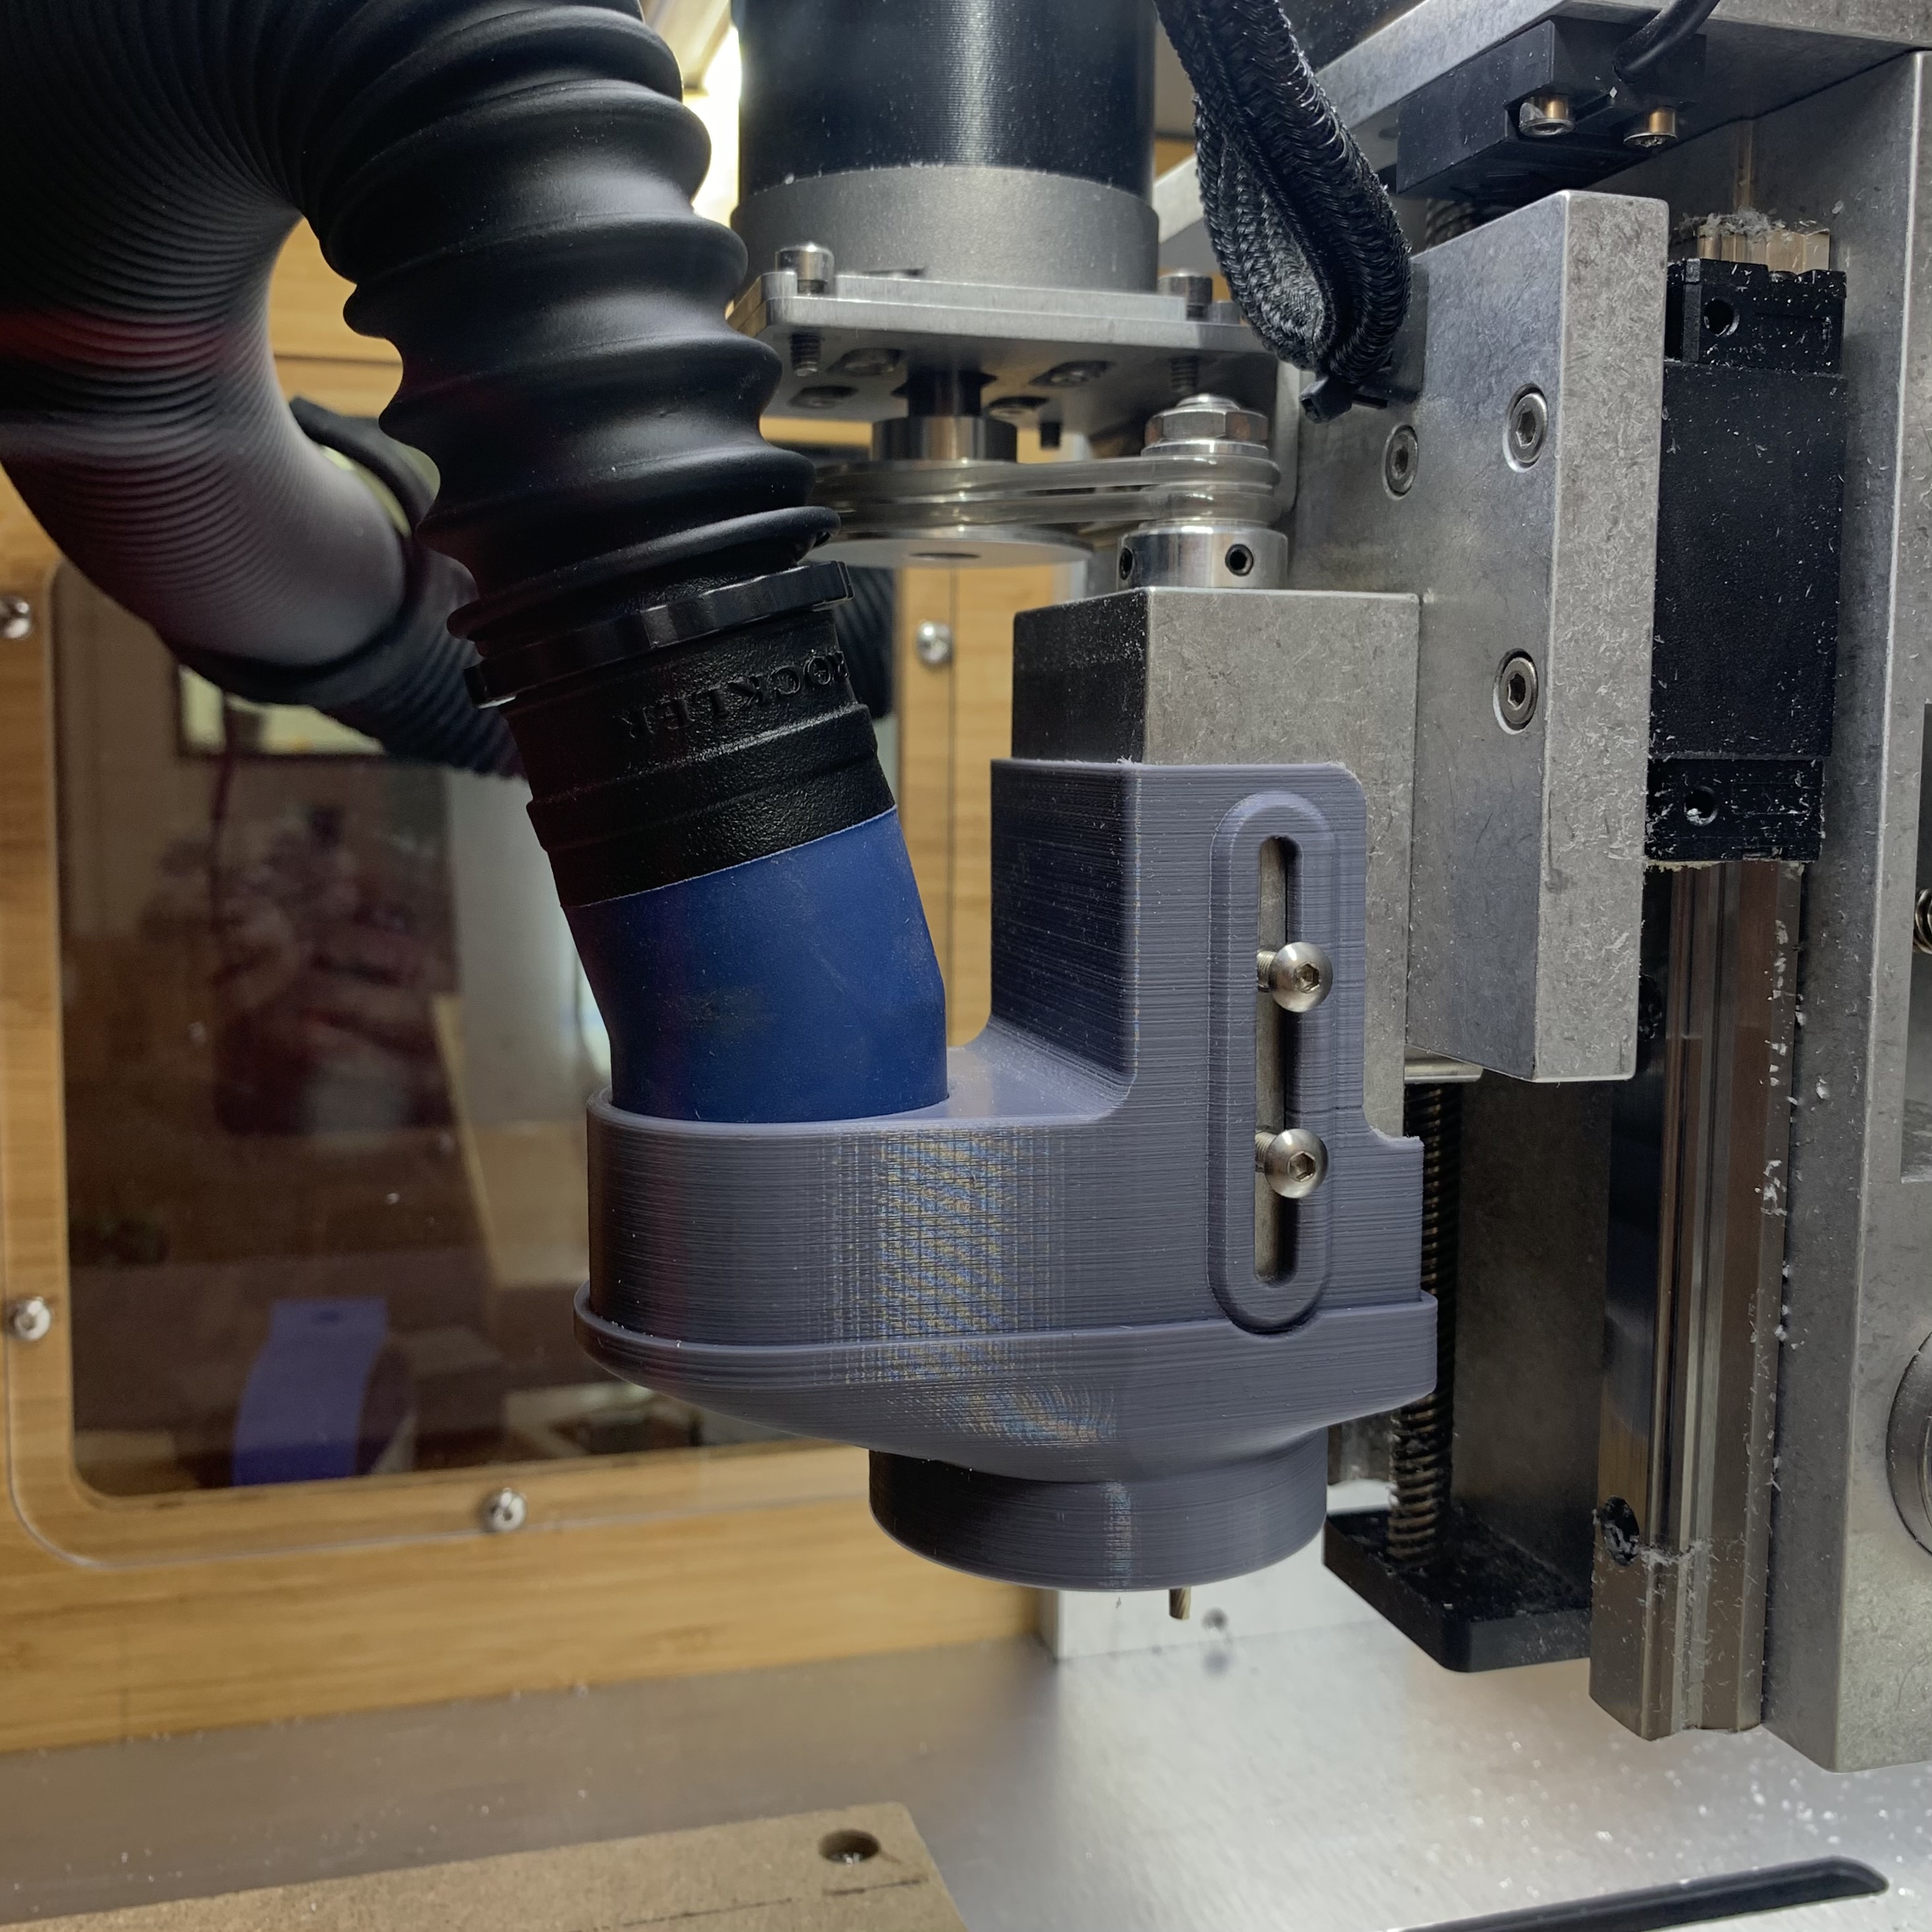
WARNING: Officially, I must dissuade you from adjusting the dust boot while the machine is in motion. If you put the thumbscrews on the left side like I have here, you can get a nasty friction burn if your fingers touch the spindle pulley… I have them on the left so I can easily access them while the spindle is in the “home” position to the right. It’s a personal choice.

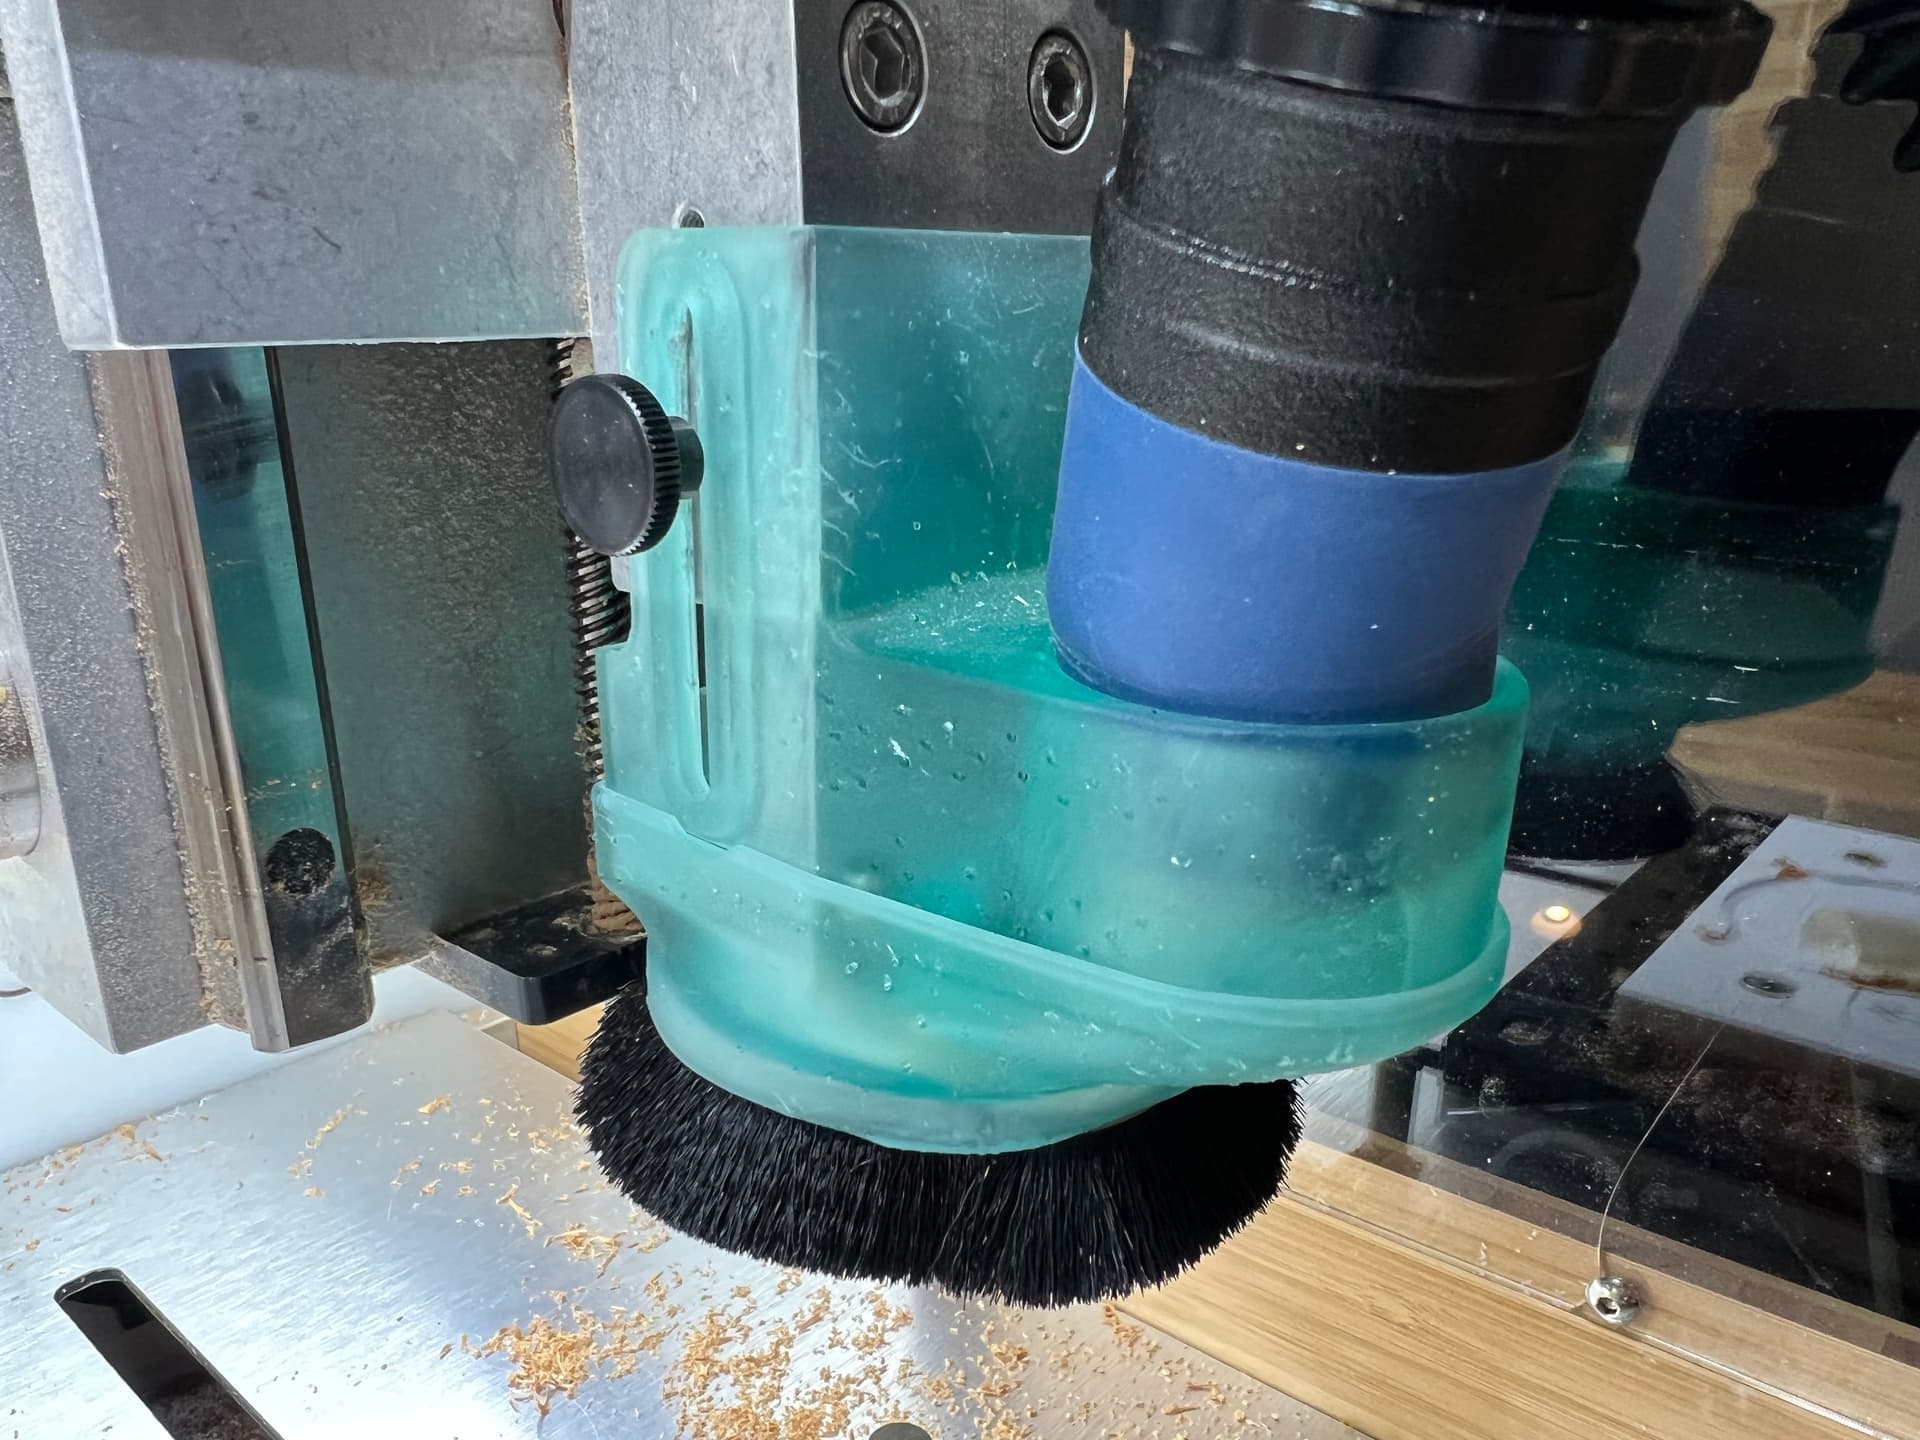
There are two variants of the shoe bottom, one with just a narrower ring when you don’t want a brush in the way. Should fit flexible strip brushes you can find on McMaster, or the brush rings in the Sweepy 65.

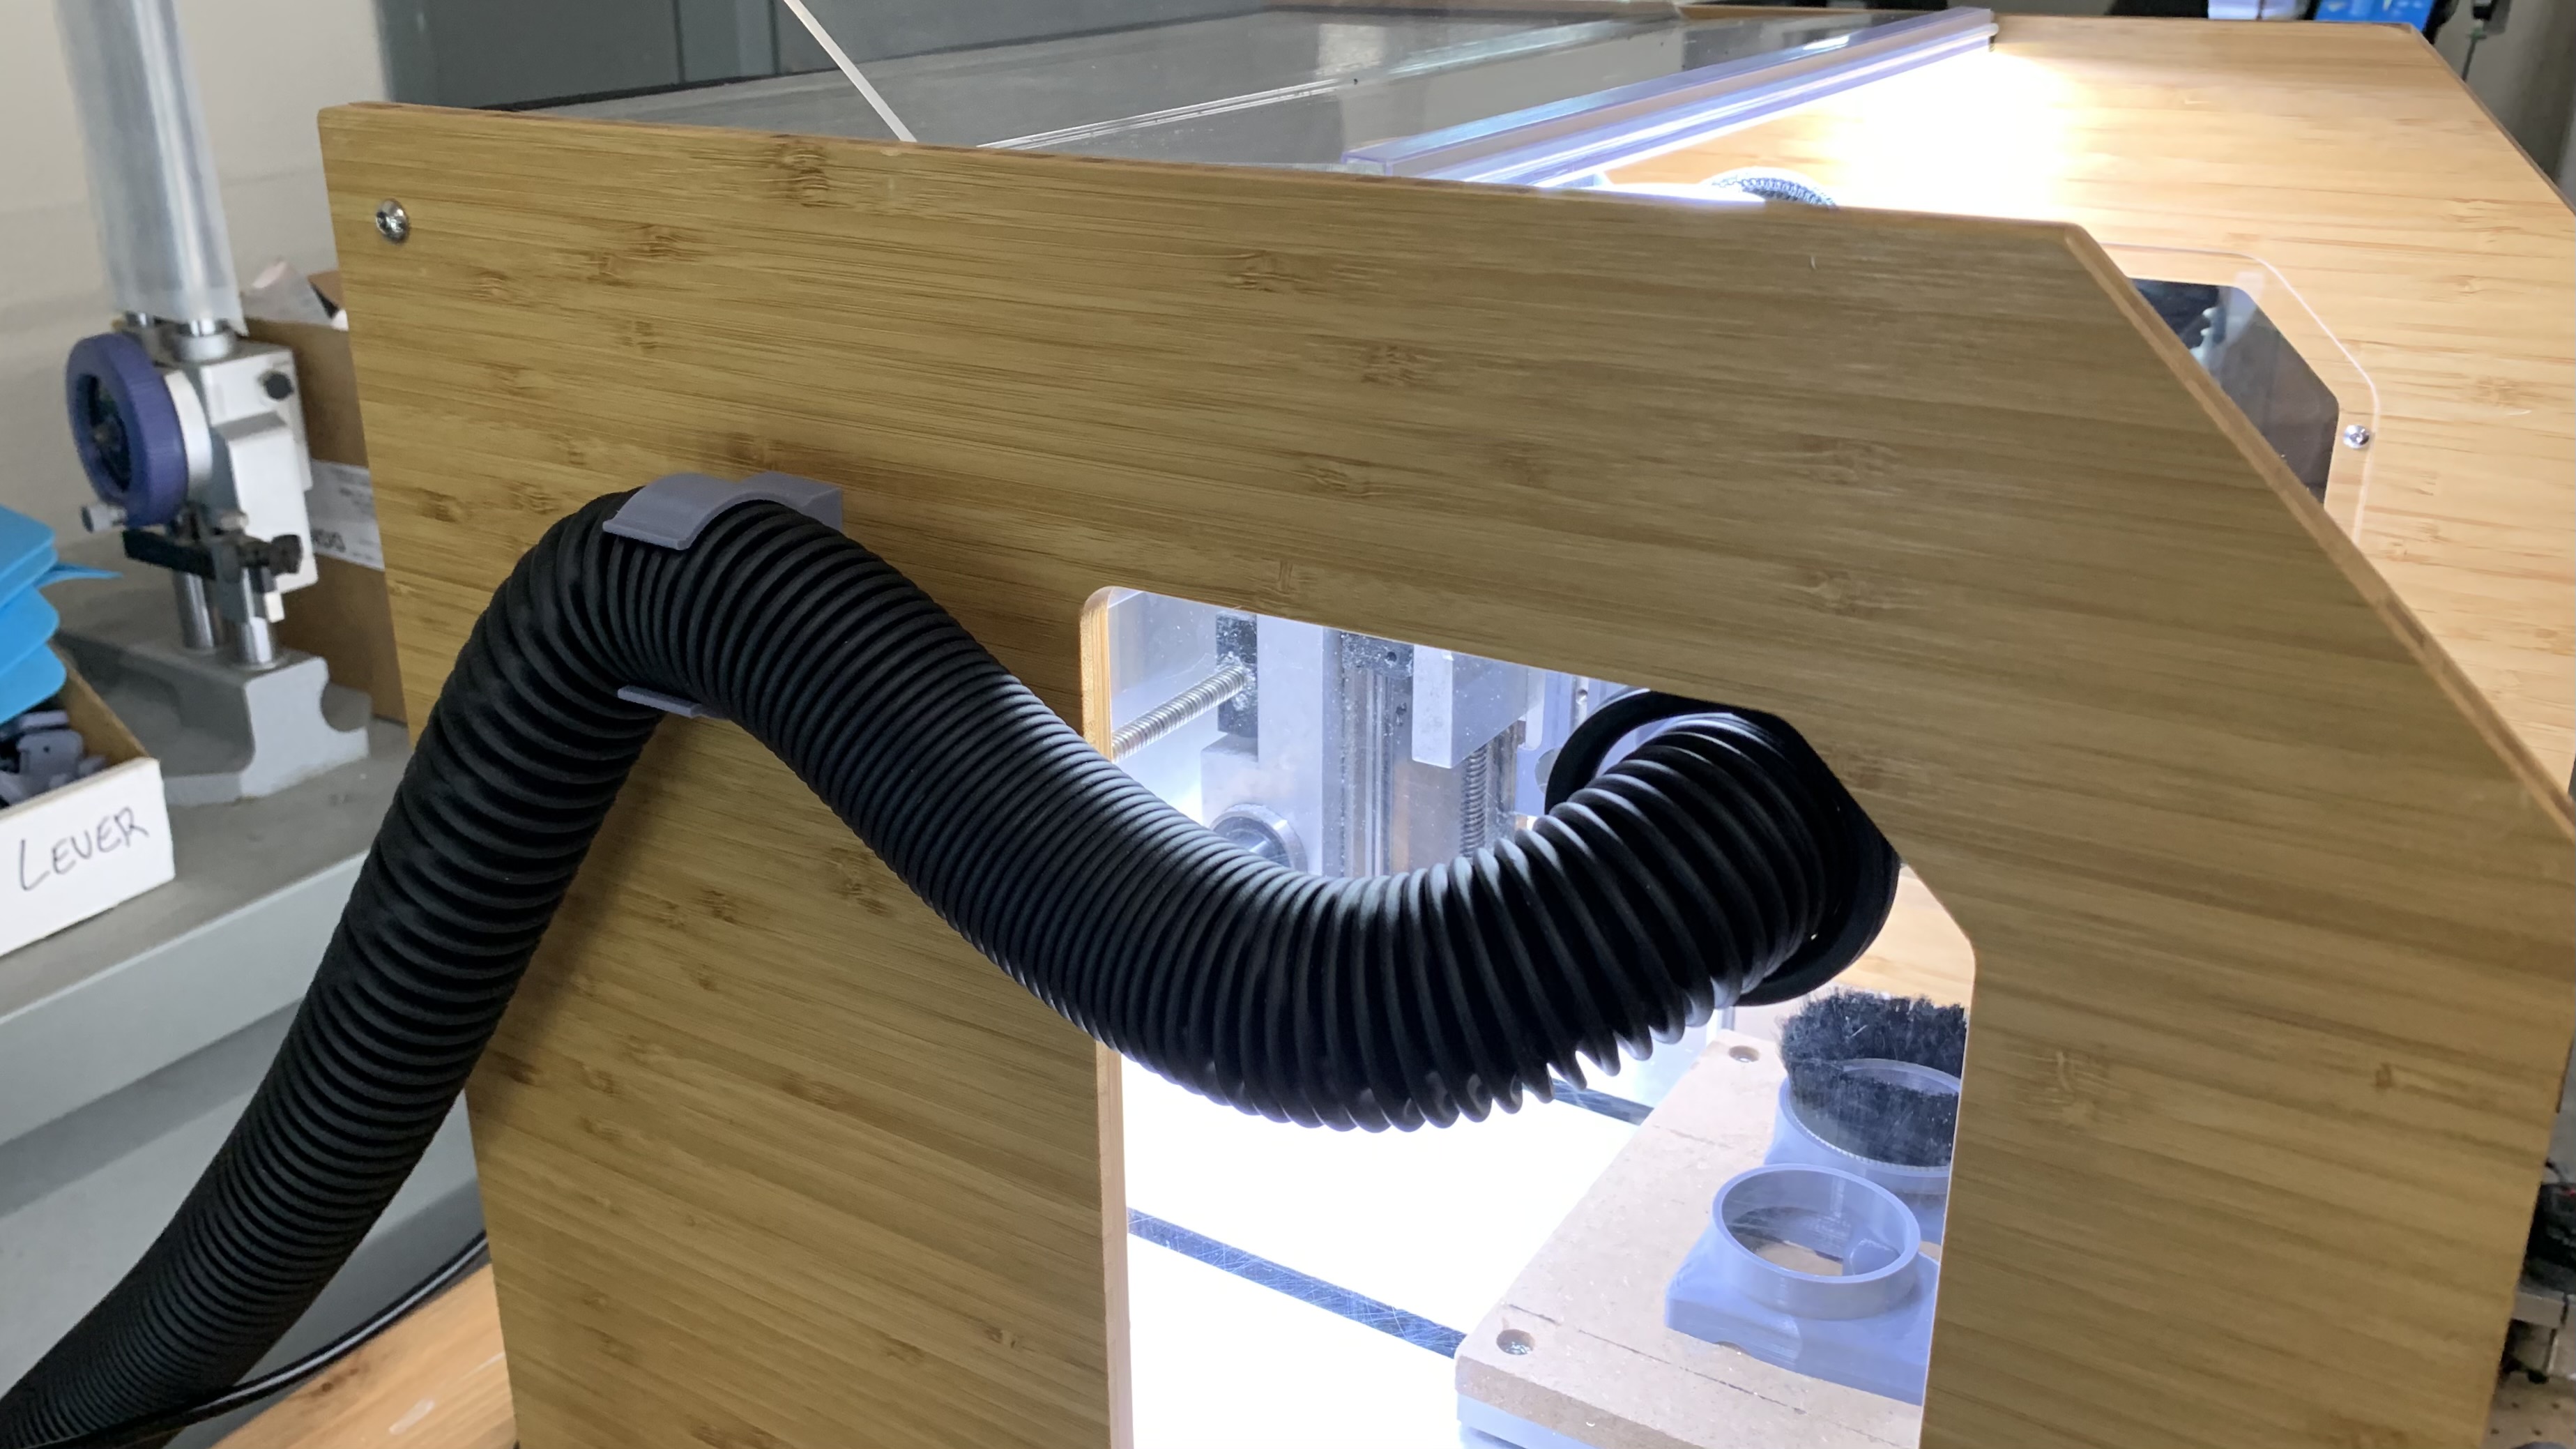
This is designed specifically for the Rockler Dust Right FlexiPort Power Tool Hose Kit, which is the softest, most flexible hose I have ever seen. I made a little printable clip you can use to route the hose out of the enclosure. Cutting a hole in the side window is optional. You could also use a Forstner bit to make a hole in the side panel.


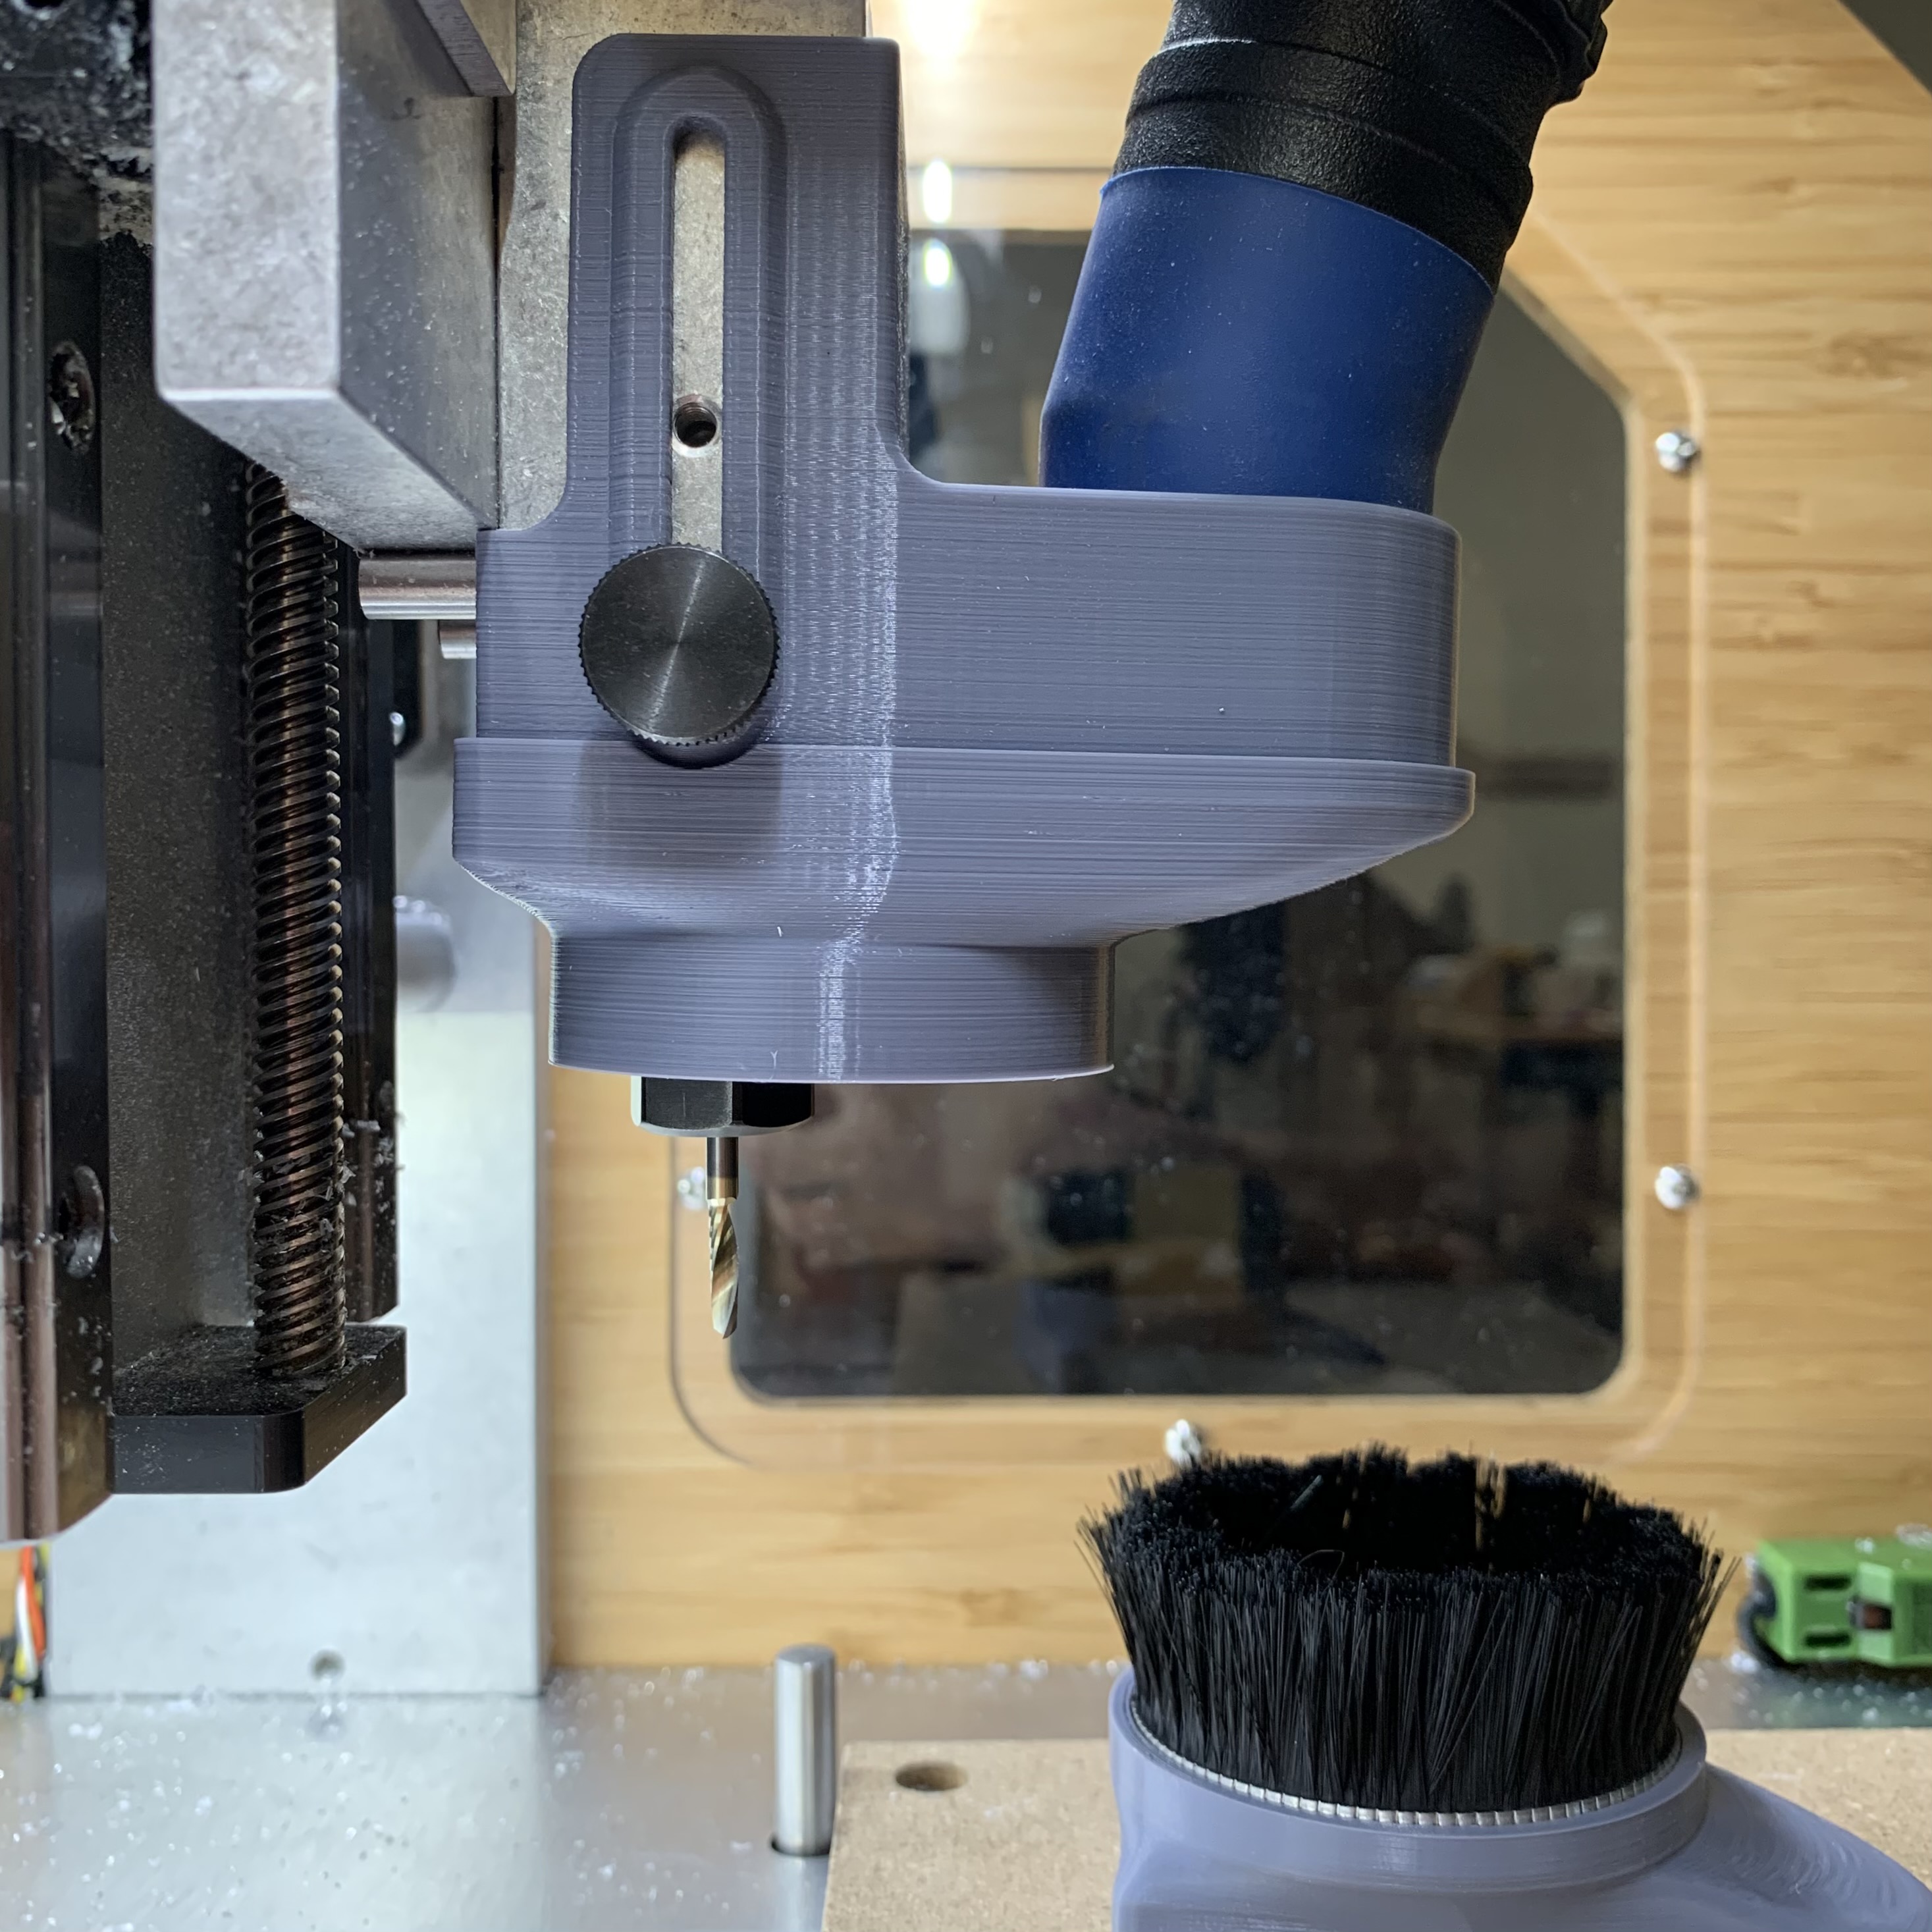
At the highest position, it should put the bottom of the dust shoe above the collet so you can mill with a fairly short tool without fear of collision.

Provided below are STL files for all components + Fusion file for the mounting base so you can tweak the vac port size (ex. shrinking to 35/36mm for Festool hose). Consider this shared under CC BY-NC-SA 4.0. Your mileage may vary, no support will be provided.

Files hosted on my site because forum limit is only 4 MB :frowning:

You will need to provide:
4 - 1/4" (6.35mm) x 1/16" round disc magnets
2 - M4 screws > 10mm in length
1 or 2 - M4 thumbscrews < 10mm in length (ex. https://www.mcmaster.com/92581A230/ )
1 - Brush strip

3D Printing Comments:
You may be able to get away without support if you’re smart about it. Otherwise I’d suggest limiting support to “Touching Buildplate Only” and for areas steeper than 80 degrees. I print all components in their normal orientation (on the dust boot, the bristled part faces downward) to minimize the need for support.

If your printer tends to over-extrude or have elephant foot-ing, you may need to lightly sand areas of interference with the spindle block.

You may also want to use a 1/4" endmill to ream the magnet pockets to ensure the press in smoothly. Use CA glue to lock them in, and a piece of plastic to press them flush.

Recommend a wall thickness of 3 layers (1.2mm w/ 0.4mm nozzle).

14 Likes

https://carbide3d.com/nomad/

Not sure it will fit, Winston :slight_smile:

Looks great for all the people who have the other one mentioned in the shop, though.

EDIT: ps - great work - looks terrific.

Updated the title to clarify. This is for the Nomad 3 specifically, which is much easier to design for since there are mounting holes that can be used to attach whatever you want. Those images on the site need to be updated as the Nomad 883 Pro has been discontinued for almost a year.

2 Likes

I figured that - I was just teasing… :slight_smile:

I do own a Nomad 883 Pro… which, since it’s mentioned on the web site’s front page, and called an “883 Pro”, sounds bigger and better than Nomad “3”…

Hopefully people aren’t waiting until there are Pro’s in stock after they sell out of the older, “less Pro” Nomad 3.

Love the design! Really wish that the stock Shapeoko router mount had some holes in it like this for mounting accessories. I have been designing a Dust Shoe mount for the Shapeoko for a while now and the toughest part has been figuring out a good way to mount it. Been debating making a 3d printed template for drilling and tapping my own.

Love it. Like I was saying on Instagram, I was just beginning to design my own.
This is a big time saver. I already printed one out on my new Flashforge. Here it is in my dirty Nomad 3!

Just waiting on the thumb screws from McMaster and the hose from Rockler now.
Thanks again, Winston.

3 Likes

@wmoy So I went out and bought a Rockler Flexiport Hose for my dust shoe. You were not kidding. This thing is super soft and flexible. However I could not hook it up to my dust extractor as is. I ended up 3D printing my own adapter. Modeling the threaded part was a pain so once I got it done I figured I should probably share so others can use it as well:

You can potentially model this directly onto your dust shoe and save some space.

4 Likes

This topic was automatically closed after 30 days. New replies are no longer allowed.

Please note that this hose set is on sale from Rockler now for 50% off:

I’m using this and wanted to share my experience.

I’m using the recommended hose kit with a RIDGID 50313 4000RV shop vac and these seem to work well together (though this shop vac is a little loud).

I printed the parts using a resin printer and this worked out ok using Siraya Tech Blu resin. The only issue I found is that the “hose bracket” wasn’t really thick enough for this resin and the part bent after a little bit of use since Siraya Tech Blu is a little flexible. The “Boot Bottom” and “Boot Base” seem to work fine as Siraya Tech Blue resin parts and it’s a nice bonus that you can see through this material.

I used this 3/4" brush strip from McMaster.com which was ok but I wish I tried something longer such as the 2" version. I found that the right length was about 185-190mm.

Finally, I used the Nomad to cut a hole in the acrylic side panel so that the hose could fit through it. The hole size that worked well for me was 44mm in diameter. I wish I had placed the hole closer to the front of the machine so that there was more clearance when the cutting head is in the home position.

7 Likes

This was super helpful as I have my hose and just got the boot printed. I don’t have the brush yet, trying to source as I’m in Canada. Your comment about the right length of brush is helpful, thank you! Just out of curiosity, where is your hole (and where do you think is the ideal spot to put it?). Also, do you have any kind of grommet or anything between the hole and the hose so no dust escapes there? Or is it a non-issue?
Thanks!