I’ve been working on a design for my wasteboard and wanted to get some opinions.
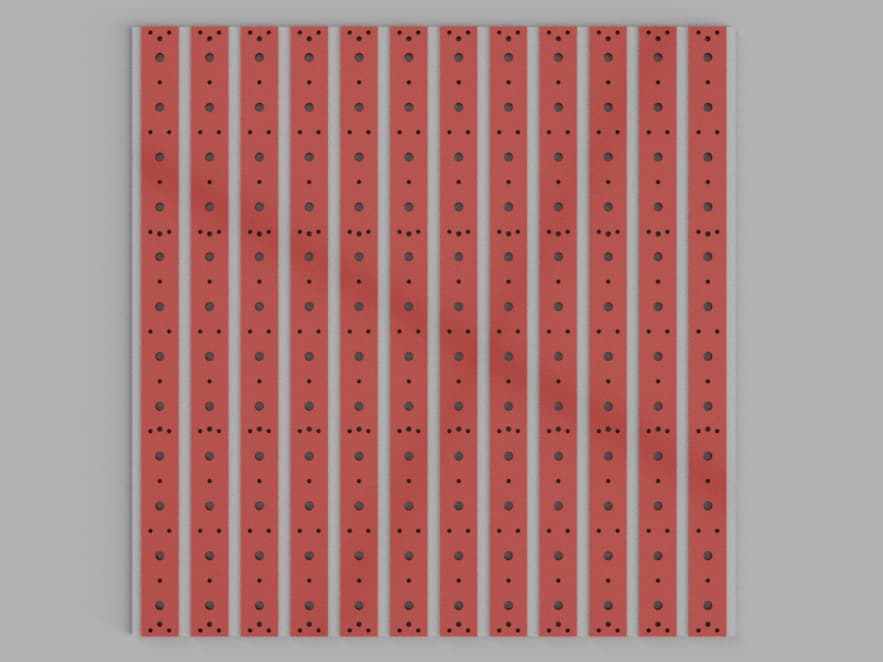
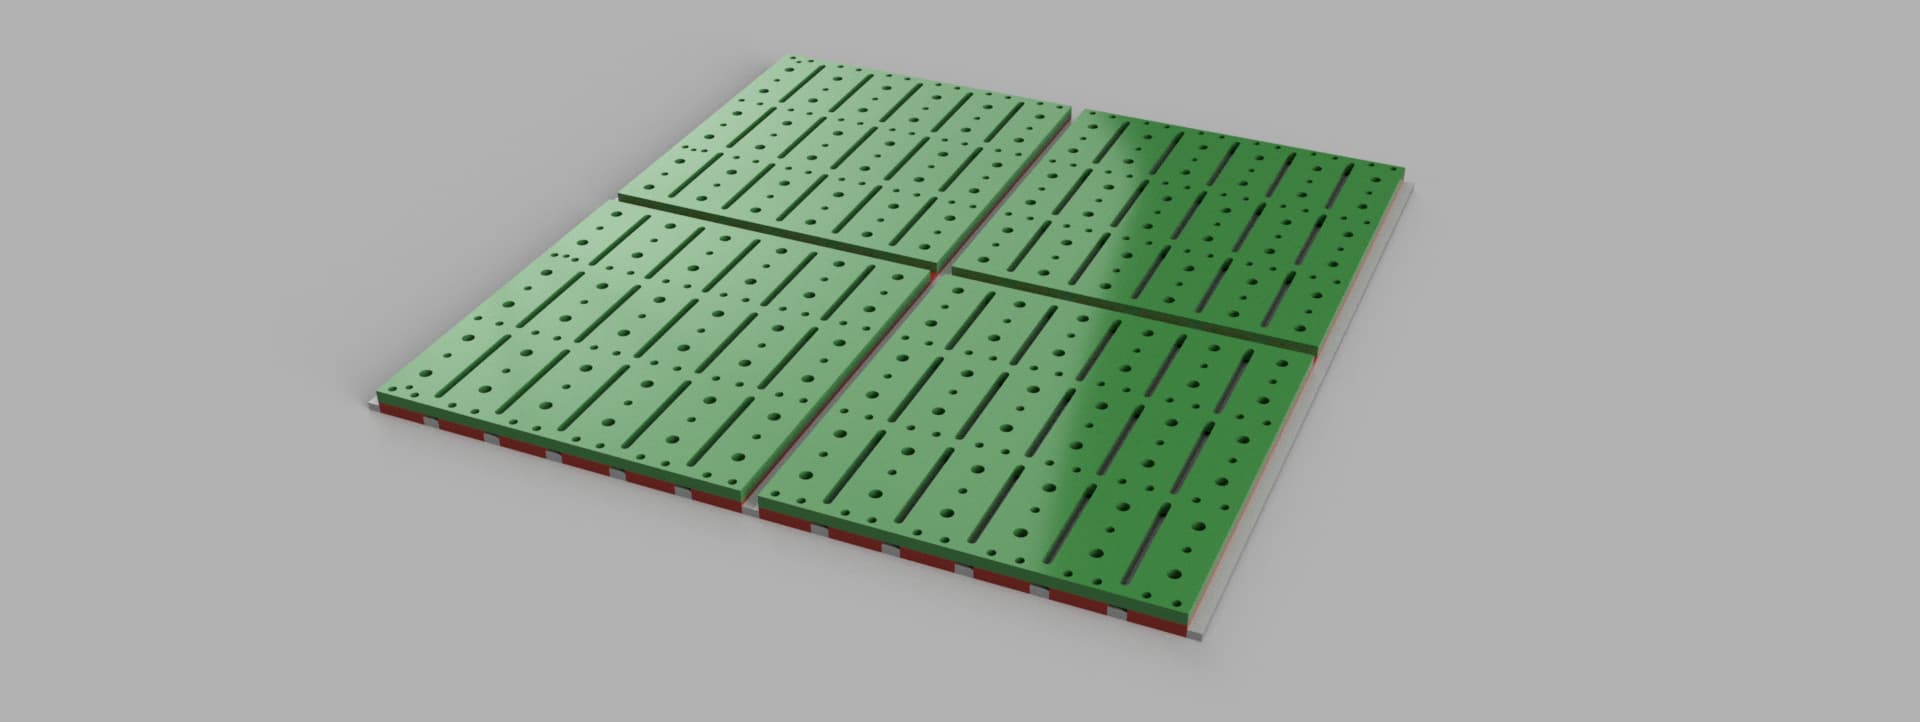
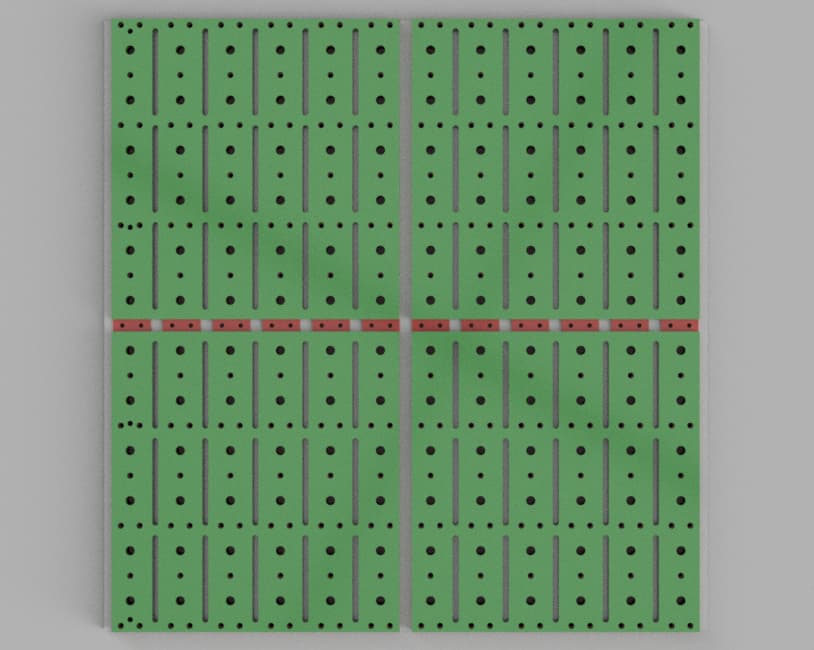
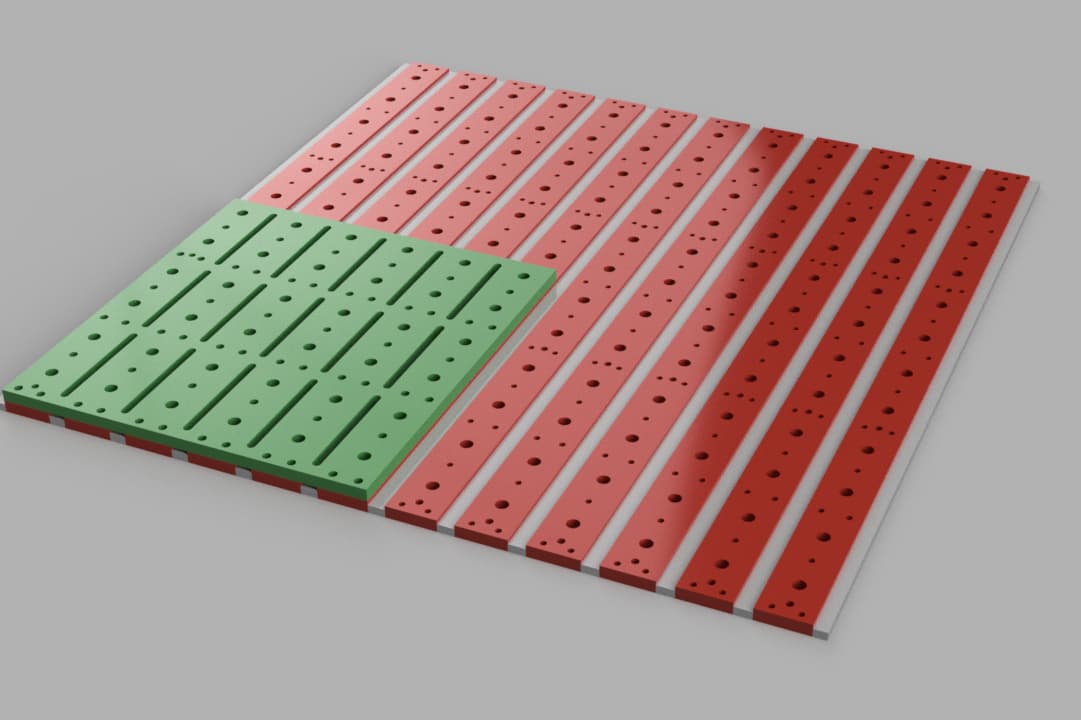
I’m going to have a pattern of 1/4-20 inserts and 3/4 dogholes in the mdf slats. Then I will have 4 sacrificial boards that bolt on for through cuts. The sacrificial boards will have the same dogholes for alignment and cobored holes to match the threaded inserts in the slats. As well as slots over the t track.
The idea is to never have to replace the slats or threaded inserts. And only replace the sacrificial tops which will have no inserts in them.
The only part I’m kind of stuck on now Is having to mount the inserts from the bottom of the slats. I would want to mill pin holes through each slat and into aluminum below to realign the slats after I install the inserts I guess. Is it necessary to install inserts from the bottom?
Oh yea there’s several low profile dog hole clamp options. I will use them for aligning the sacrificial boards to the machine table and for part alignment mostly.
It’s a slightly modified version of this design here if you want more details. I changed hole spacing and added slots to the sacrificial boards to be able to access the t slots.
I did install inserts into the slats from the back side. If you’ve seen my other cutrocket file to cut the slats, there is a step to flip the slat to cut the through hole and flange recess for the threaded insert on the bottom side. I like to know that when i tighten the fastener it is pulling the treaded insert tighter into the slat, not necessarily pulling the treaded insert out if it was installed from the top. Might be mute point, but my mind thinks its better. If I was to do it again, I would do more inserts along the front and left edges to allow better ability to fasten alignment fences for repeat set ups.
For the 4 I needed to make the wasteboard smaller footprint then the slats to allow the full aread to be surfacesld. I understand this isnt an issue for the 5 owners.
Looking forward to seeing how your designs turns out.
Yea I will definitely install the inserts from the bottom then. I’m milling everything with the slats in place then I will take each slat off and finish drilling through and install inserts from bottom. I’m going to make a jig with 4 dog holes and the same spacing so I can take each slat off individually and realign the slat with the one next to it after installing inserts.
I’ll be using the dog holes for alignment and movable fences so I want then perfectly aligned with tbe movement of the machine.
Finally had some time over the labor day weekend. Got the hybrid table layout cut and surfaced. 240 threaded inserts and 144 3/4" dogholes. Now to make the sacrificial tops.
Of course. I created my toolpaths in carveco maker. If you happen to use carevco for your cam software I can share that too. Here’s a carbide create file with layers for each DXF file I imported. You’ll have to create your own toolpaths. I went .700" deep for the dogholes and .650" for the inserts. I drilled the rest of the way through by hand for the inserts and countersunk from the bottom.
My pleasure. Let me know if you have any questions or anything. I’d recommend test cutting on a scrap piece for the inserts and practicing installing a few. I adjusted my toolpath to make the holes a little smaller.
Slats are the just the ones it came with. I milled them in place bolted to the aluminum extrusion. I made sure not to go through the mdf to not mill into the aluminum below. Then each slat was taken off individually to finish drill through, countersink, and install inserts from bottom. Then each slat realigned using jigs. The sacrificial tops will be 3/4" mdf.