A few days ago I went in the shop with the “let’s make something to beat procrastination” mindset, and thought I would try to customize some coasters I bought that were collecting dust. I also had about 200g of epoxy left (i.e. not much), so I ordered more and proceeded to make epoxy coasters with that leftover.
And then yesterday @MikeG posted about his great see-through epoxy coasters, and he could not have done a better job at documenting it for other people, so go read that thread if you haven’t already to know how to do this the right way, it happens to be EXACTLY what I wanted to try ![]()
https://community.carbide3d.com/t/epoxy-gift-coasters/27146
While my version did not go so well, I thought it would still be interesting to share the process and my mistakes (and maybe ask for tips from seasoned epoxy users)
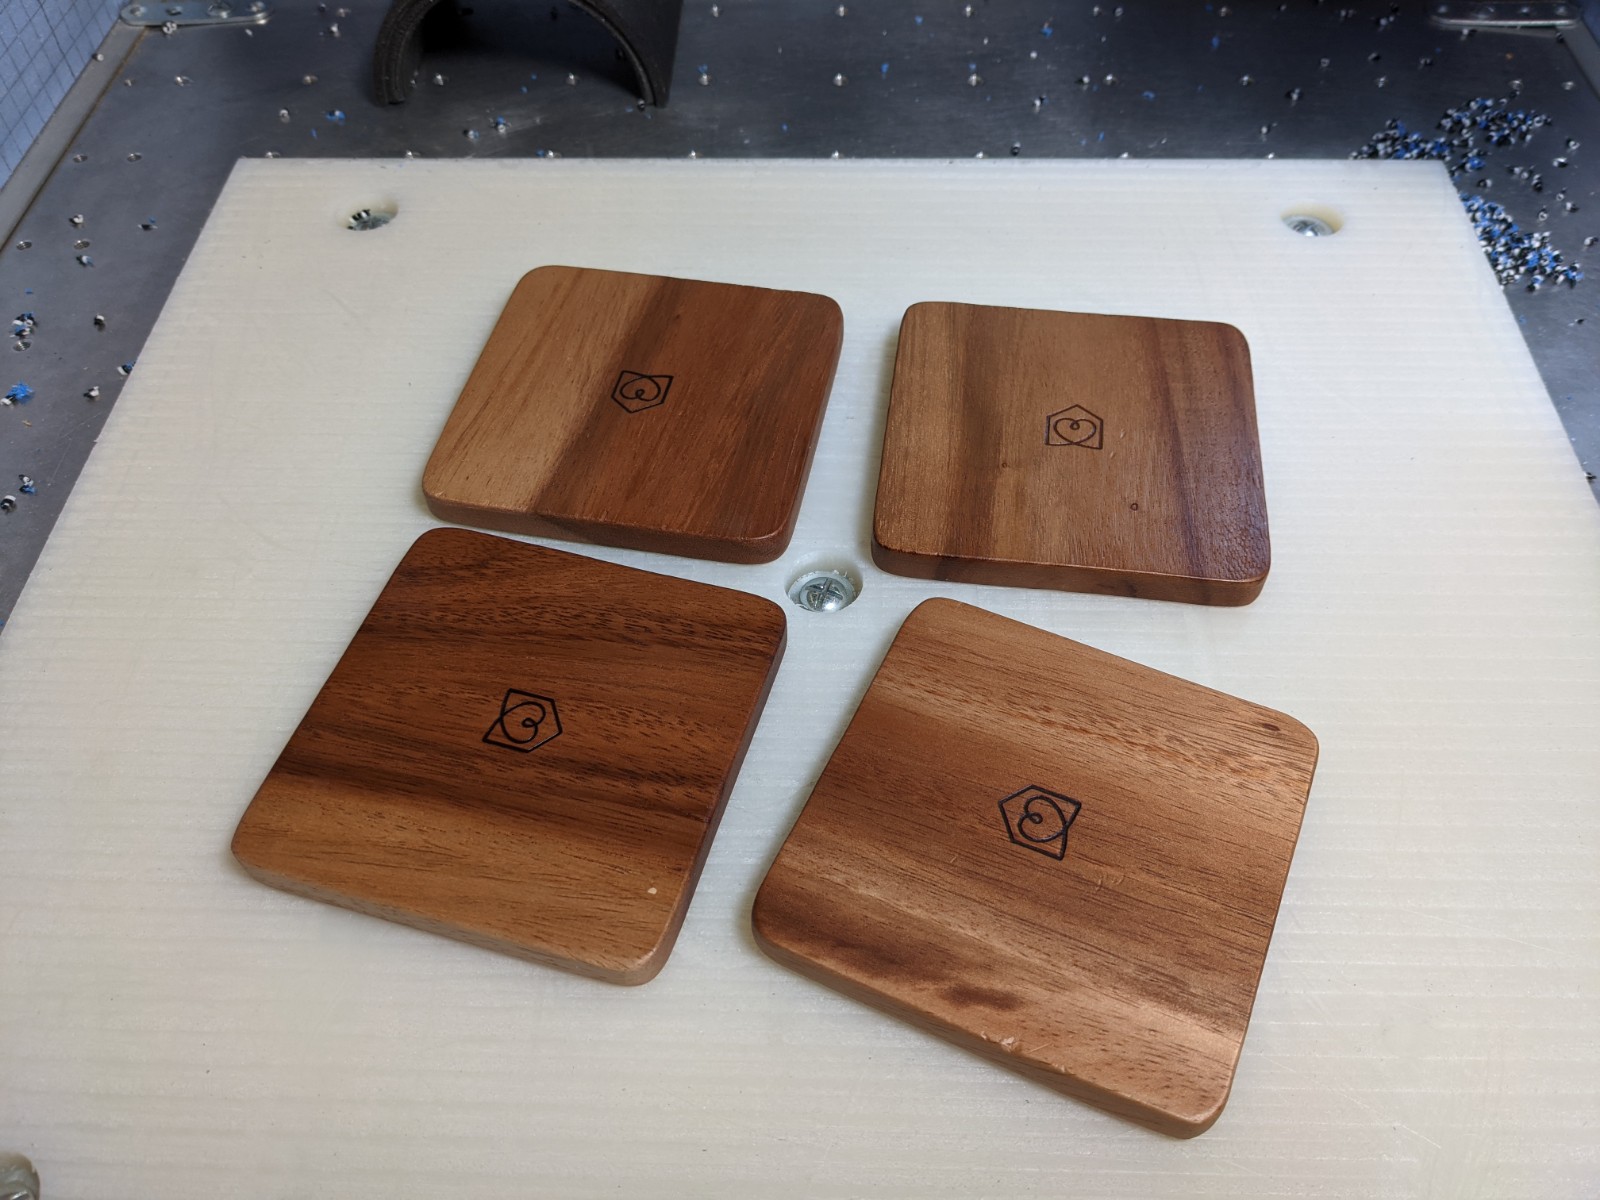
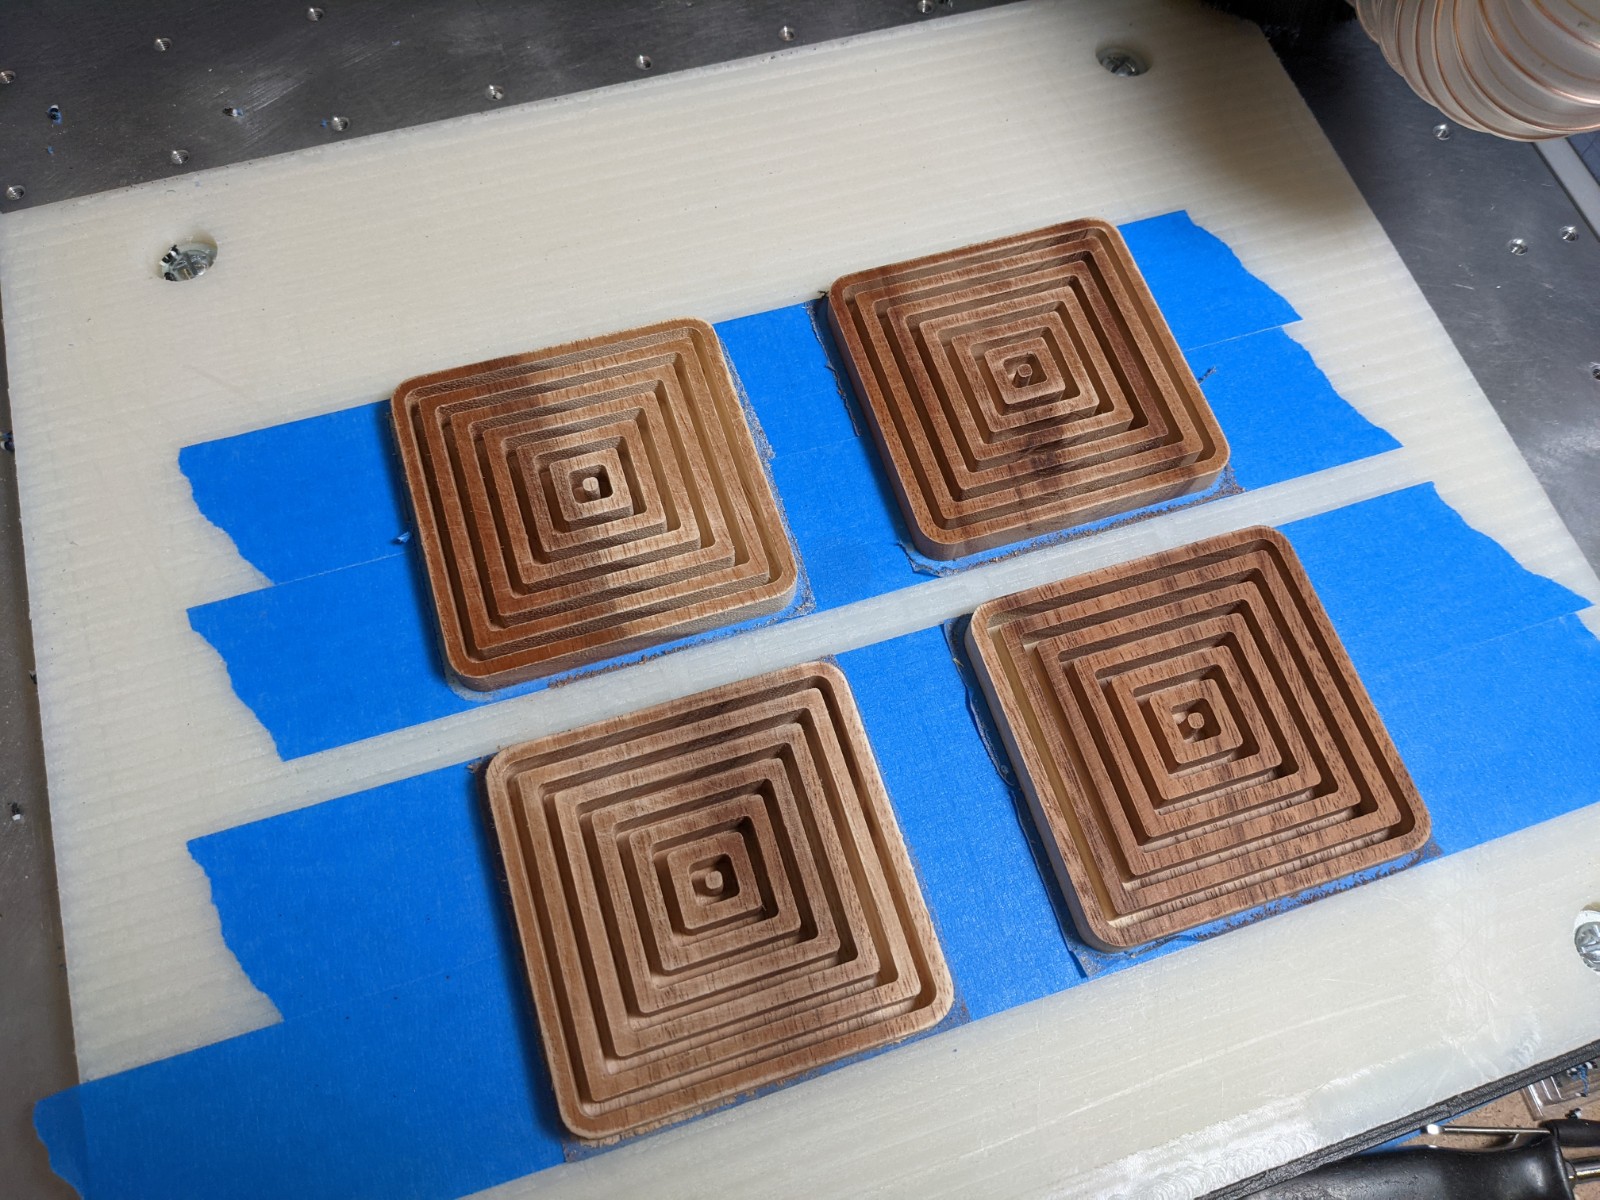
So, I started with this set of 4 coasters I had bought from a store, it’s Acacia wood.
Tape & glue for workholding as usual,
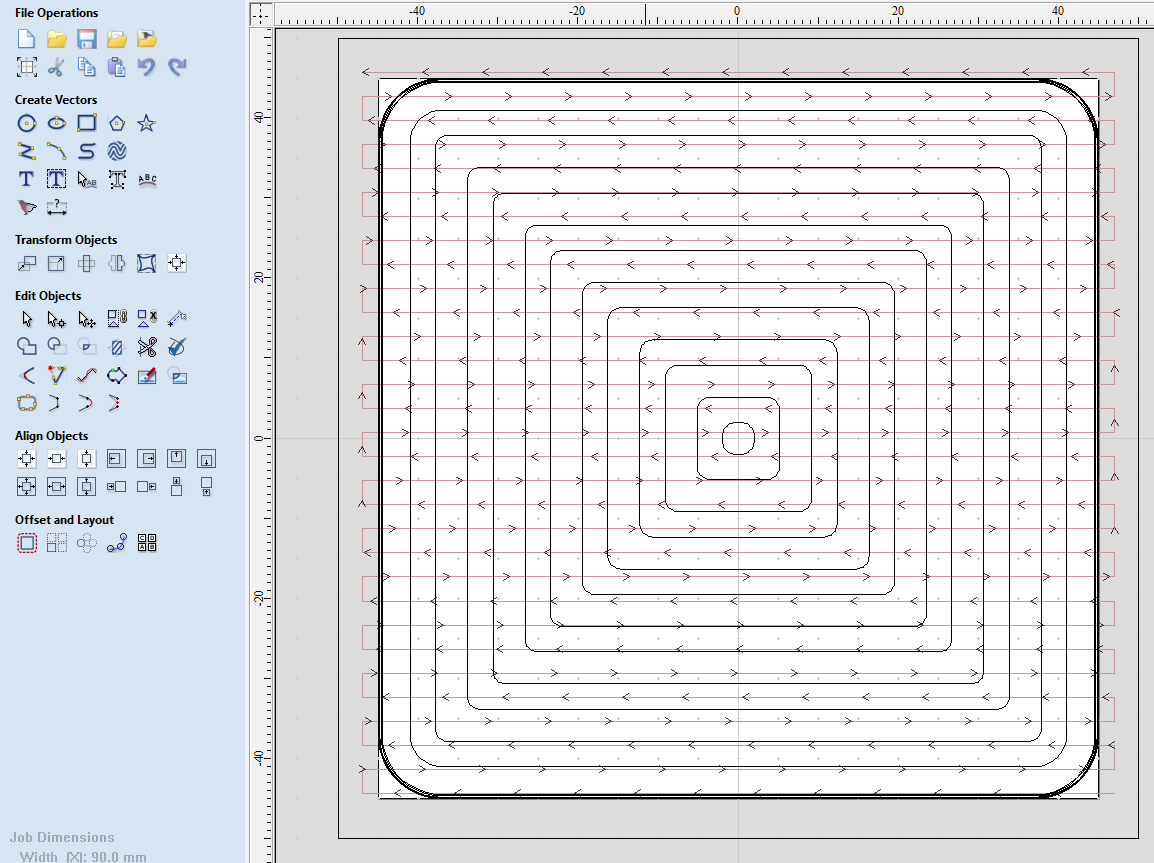
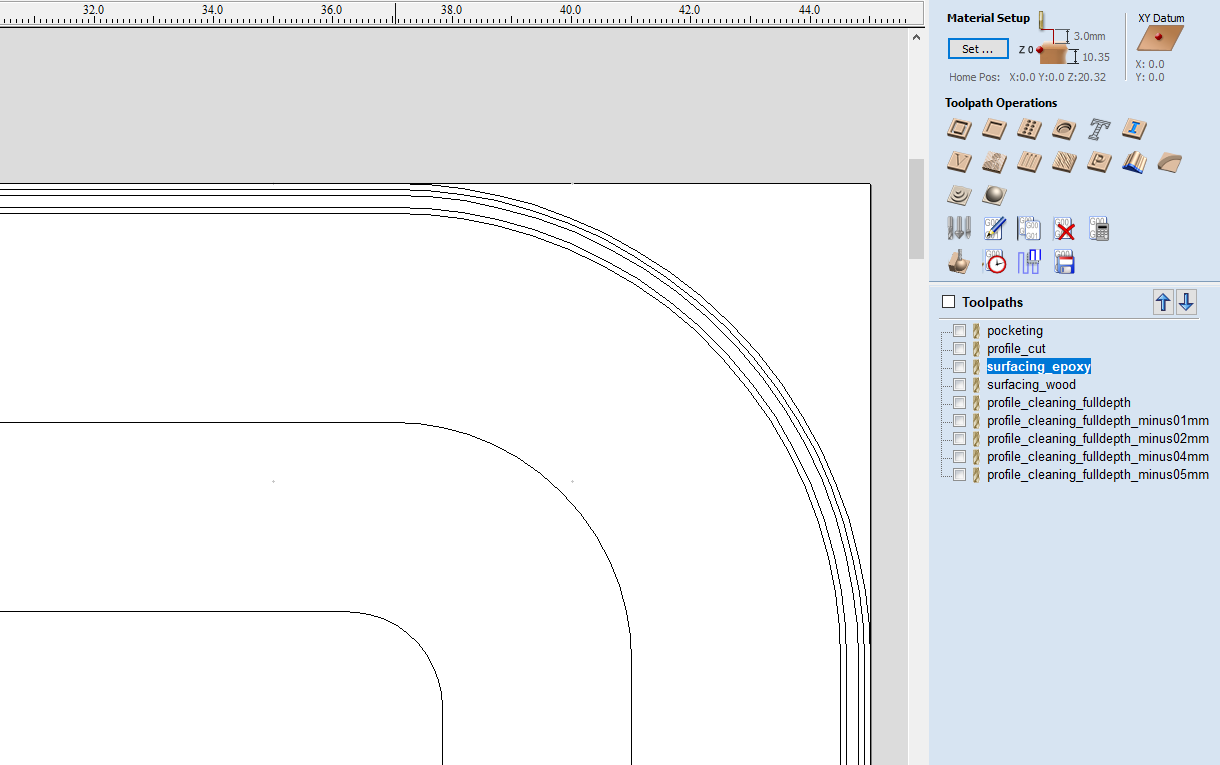
Since my main goal was to test the “epoxy all the way through” approach, I settled for the simplest pattern, concentric square slots, 1/8" wide, in an outer square matching the measured dimensions of the coasters:
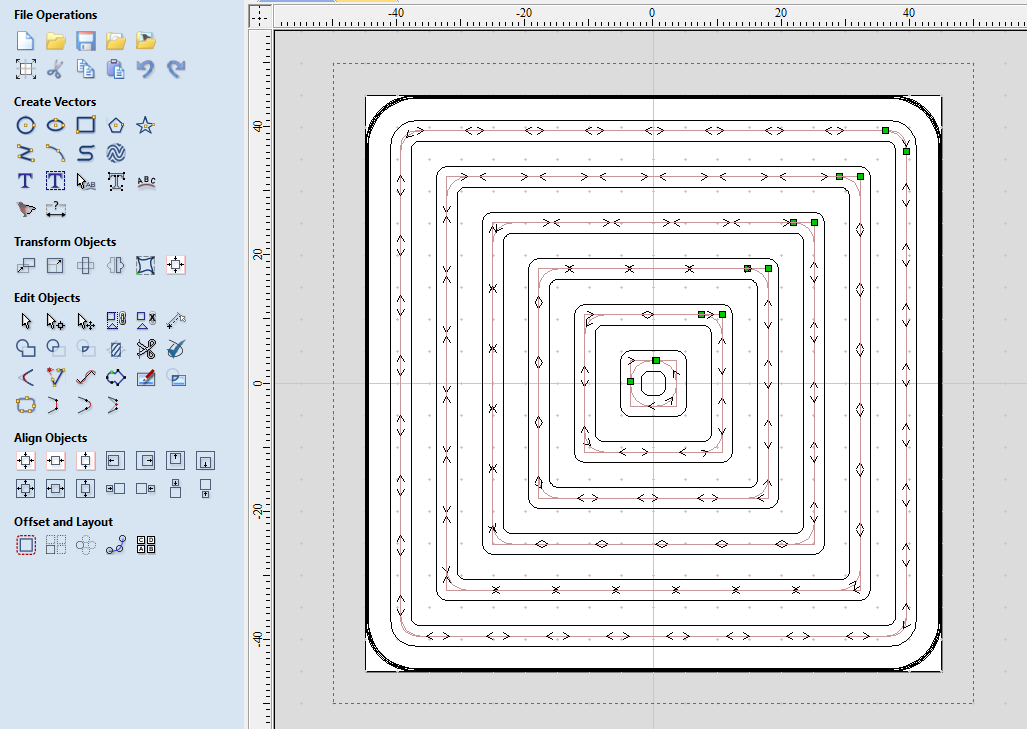
I measured the coasters to be 10.35mm thick, so I set the toolpath total depth to 9.5mm, leaving a bit less than 1mm of wood on the bottom, which I would later remove after flipping the pieces, to reveal the epoxy on the second side. Anyway, that part of the cut worked fine, 1/8" 2-flute endmill, 24000RPM, 80ipm, 0.03" per pass to be super cautious:

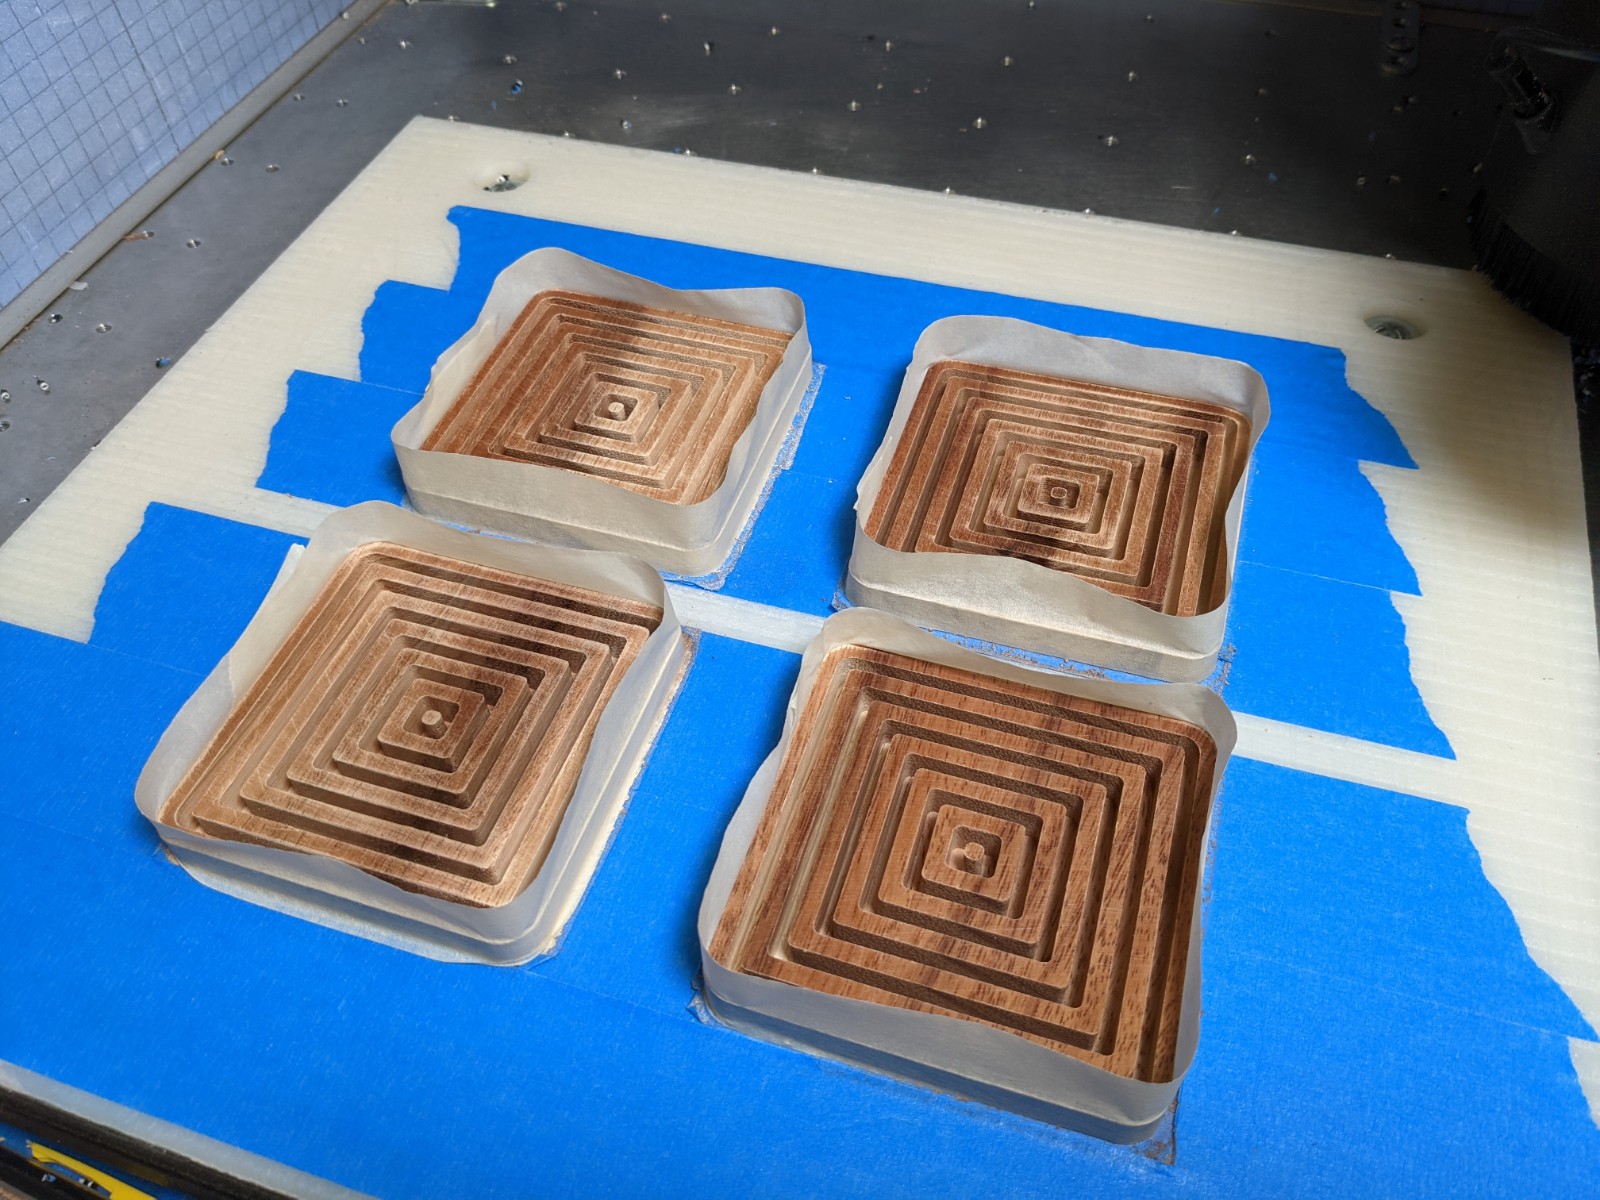
Light sanding on the top surfaces to clean the tearout here and there before pouring the epoxy:
Then I prepared little epoxy dams with the intent to not let the epoxy overflow and mess up the side walls (spoiler alert: it did not quite work):
For some reason my initial thought of going for translucent epoxy turned into “let’s make it pitch black for contrast”…which is really, really silly considering the whole point was showing that epoxy was going all the way through, and opaque epoxy is not a good way to convey that. ANYWAY…epoxy was poured:
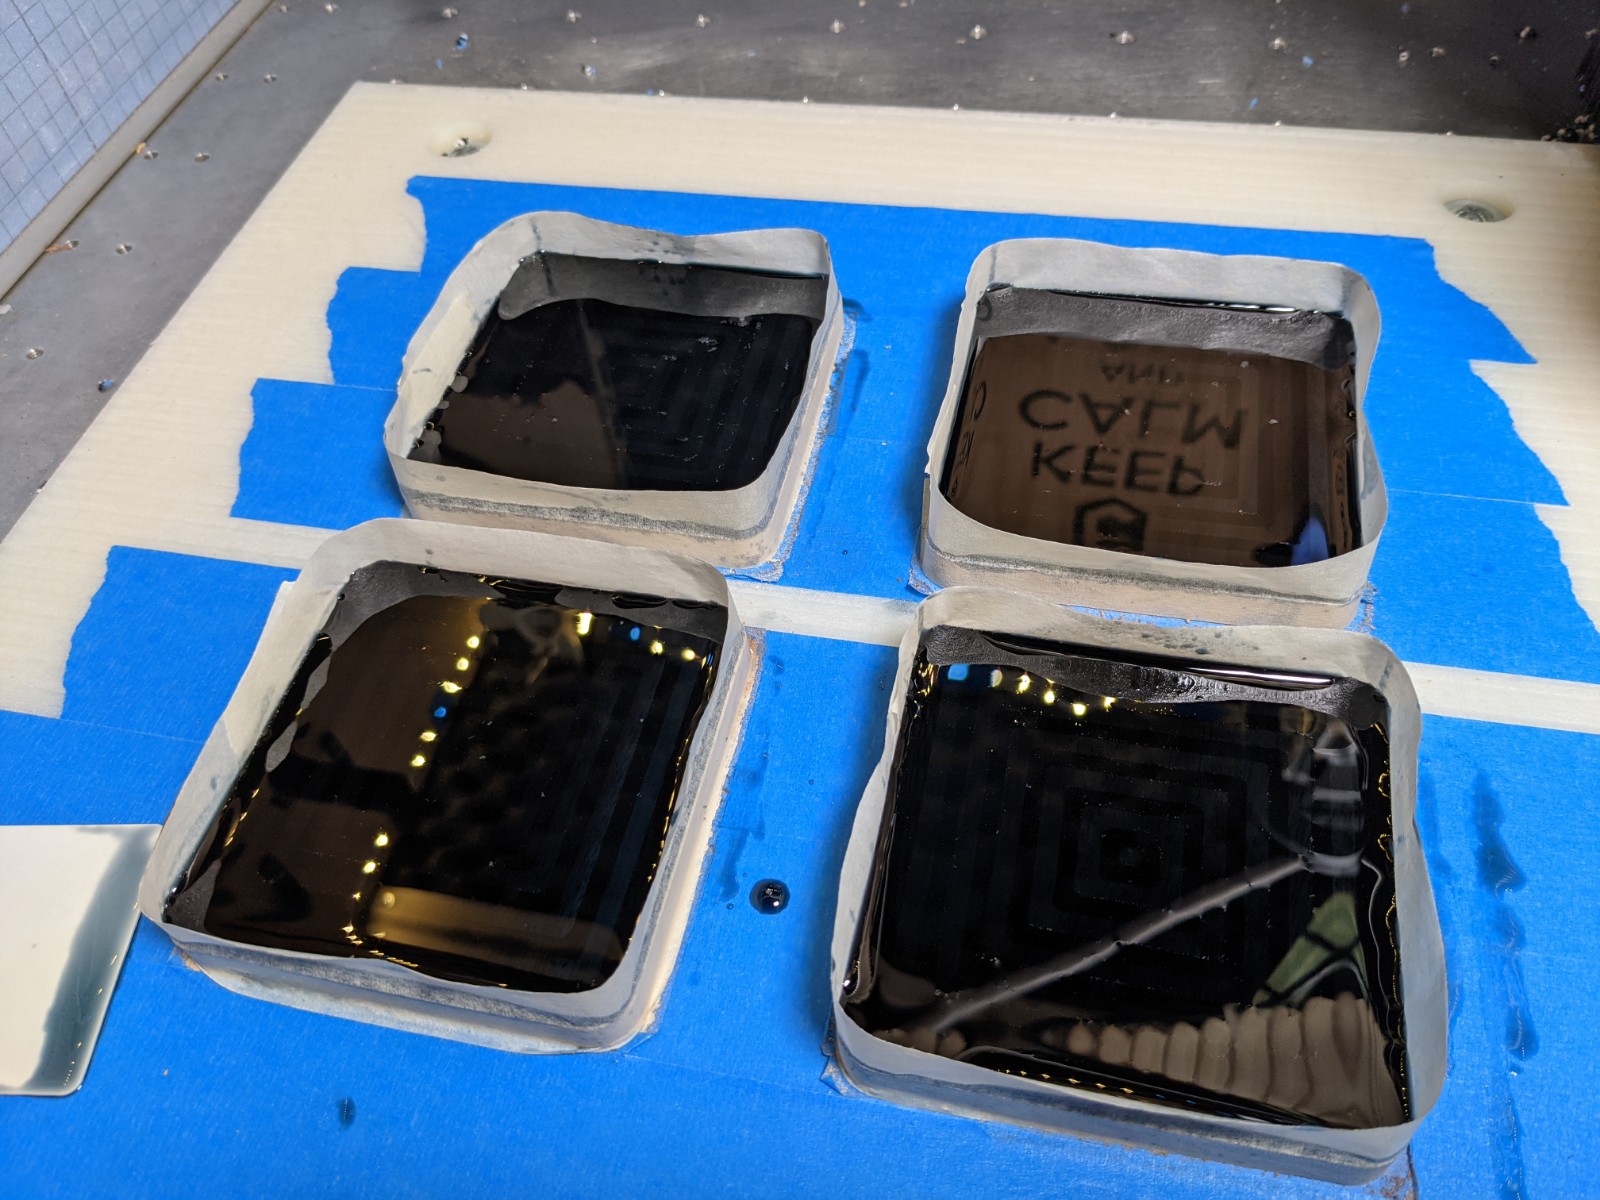
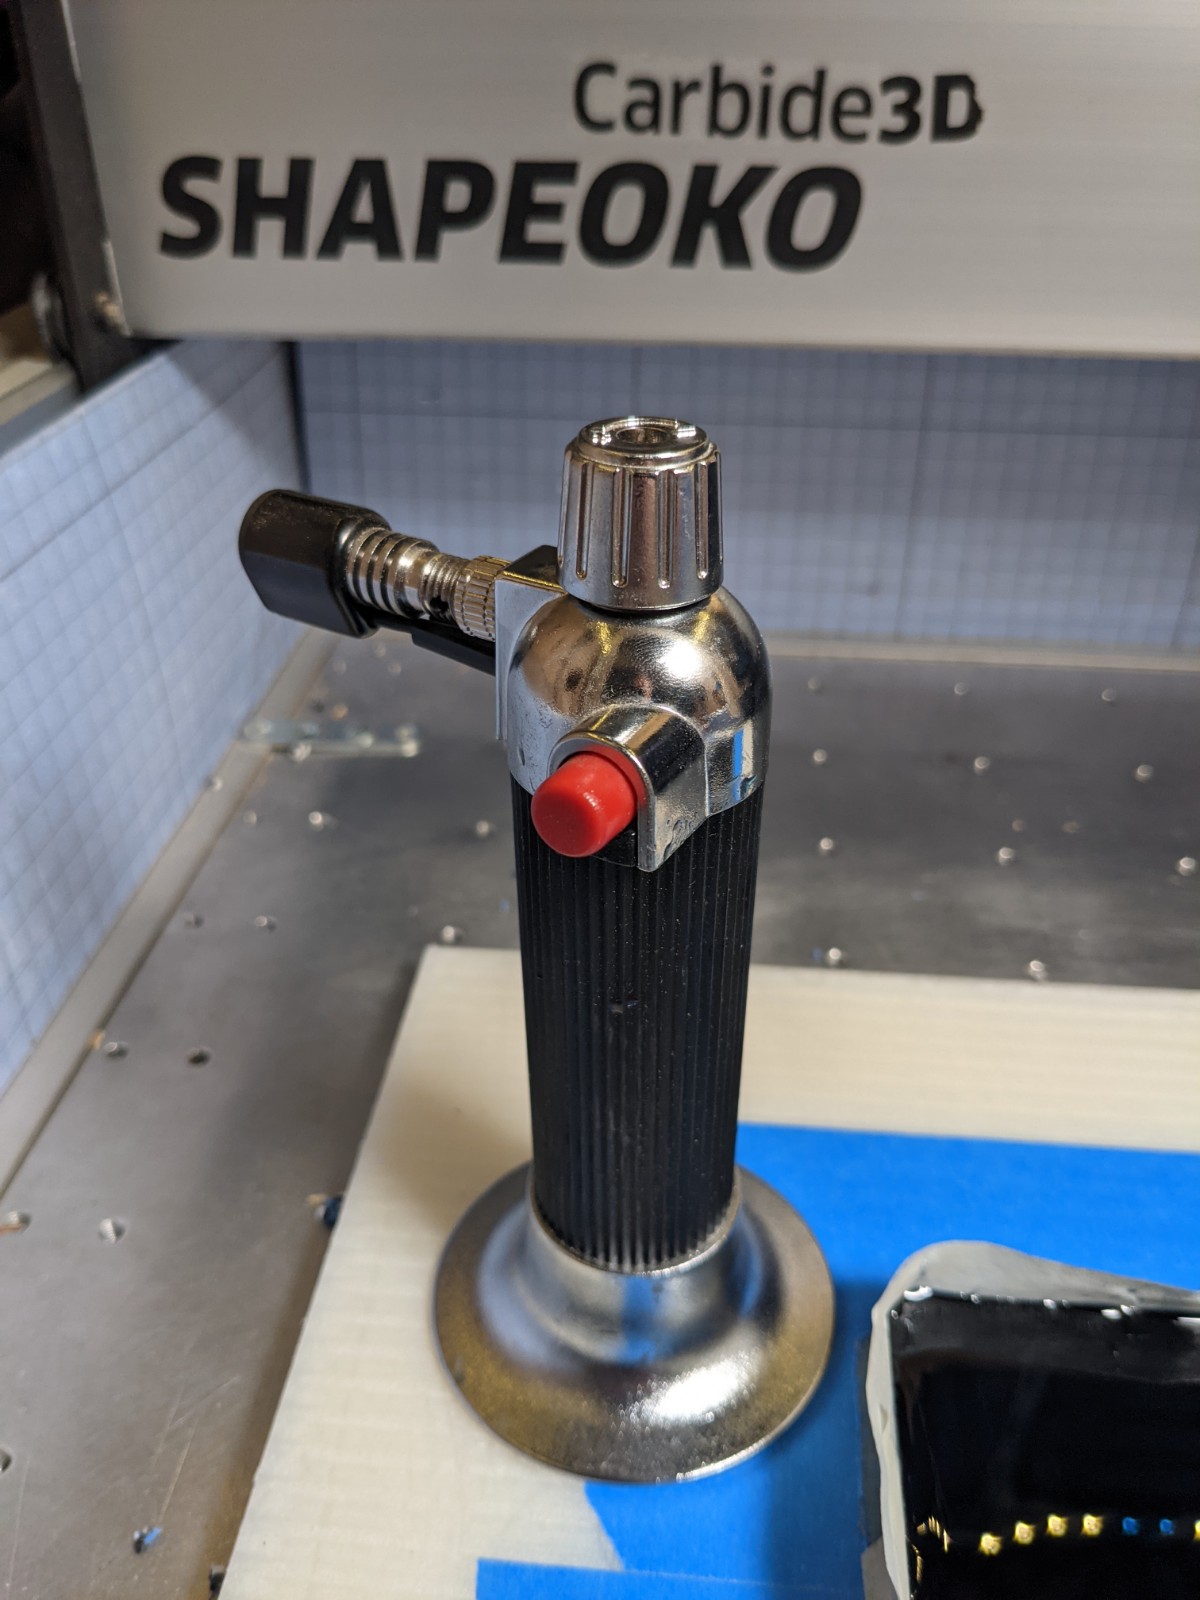
At least I remembered a tip from @fenrus to come back multiple times to pop air bubbles in the epoxy. In the “torch vs heatgun” debate I chose a side, and went to the kitchen to borrow the Creme Brulee torching device. I had to torch the epoxy surface 4 or 5 times, 5 minutes apart.
And now for the easy part: running a surfacing pass to remove the extra epoxy. 6mm 2-flute, 10k RPM, 70ipm (or faster), 1mm-deep pass, that I run as many times as required, each time lowering the Z zero by the required amount to shave off just enough material.
But you know what happens when you touch off to set Z0, but forget that ONE click to actually reset it in the G-code sender in the heat of things ? MAYHEM! ![]()
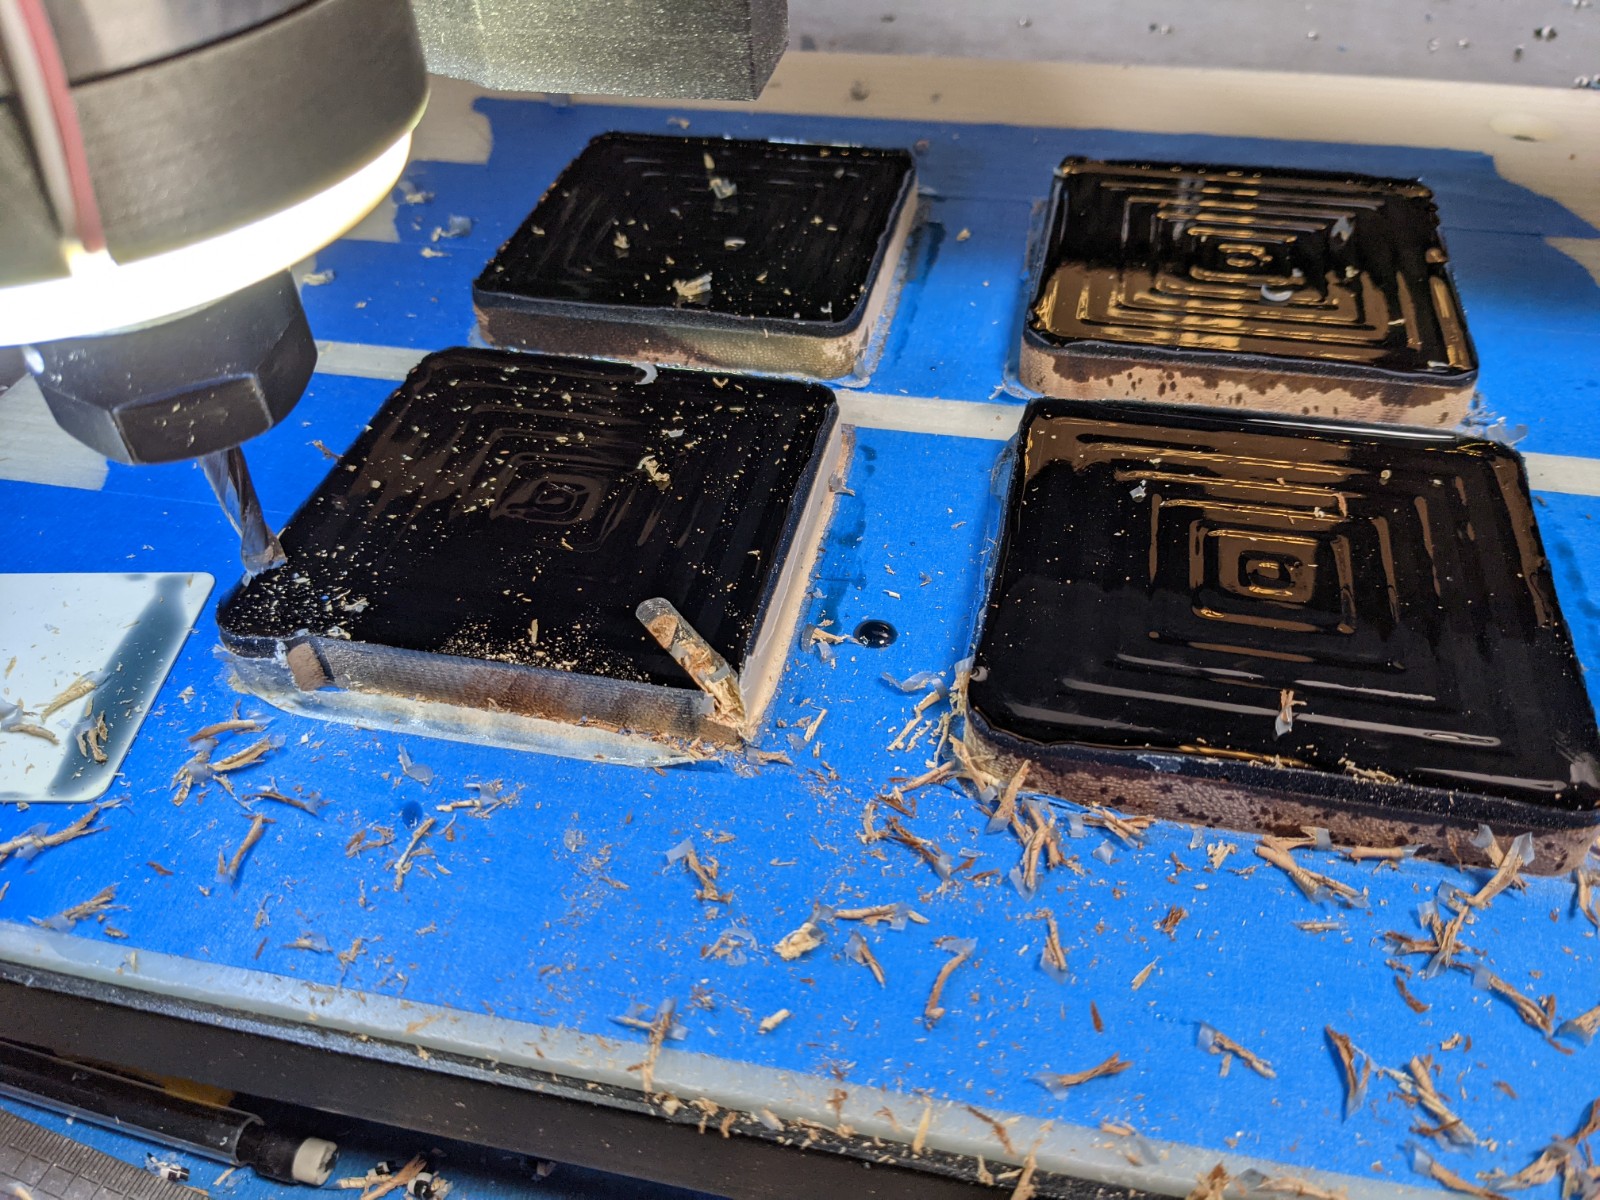
At least I know I can easily cut 10mm deep at 3mm stepover in acacia wood…the machine did not even flinch during the time it took me to hit the E-stop. But how good is a set of THREE coasters?..sigh…
I used that messed up coaster to at least check that my surfacing pass was correct (when I set zeroes correctly, that is):
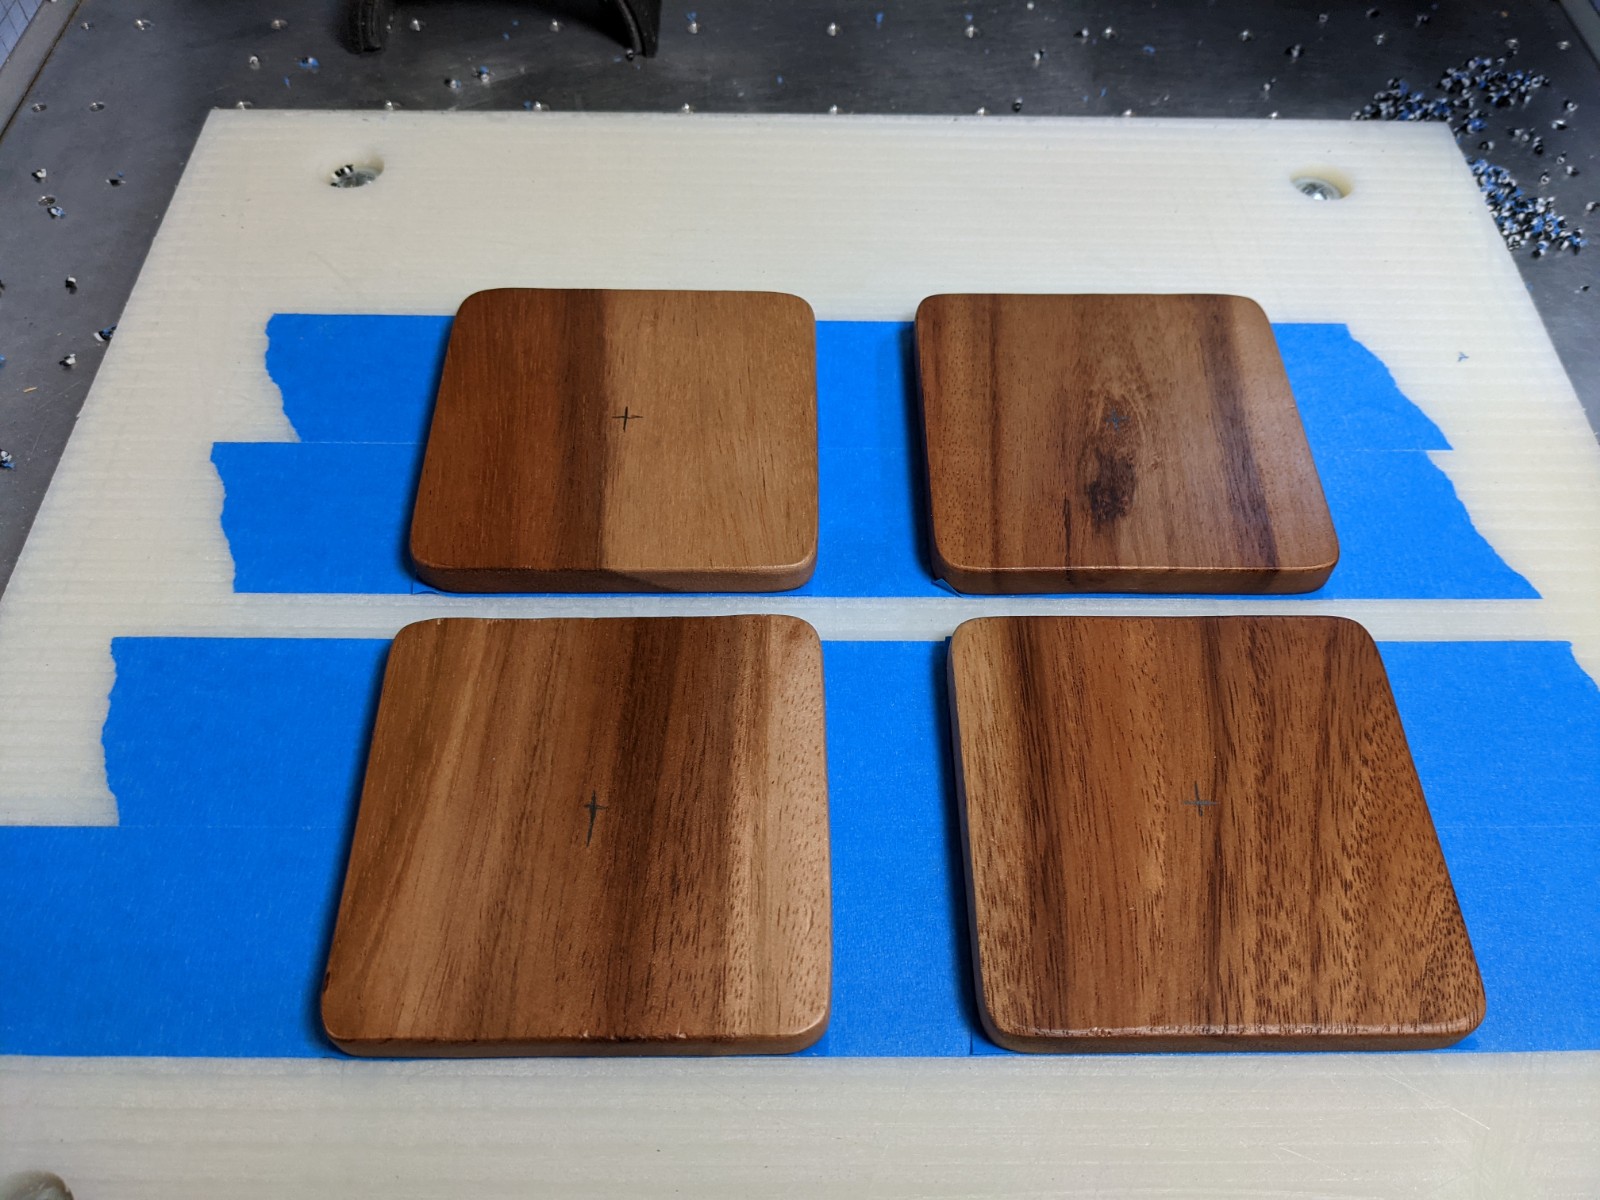
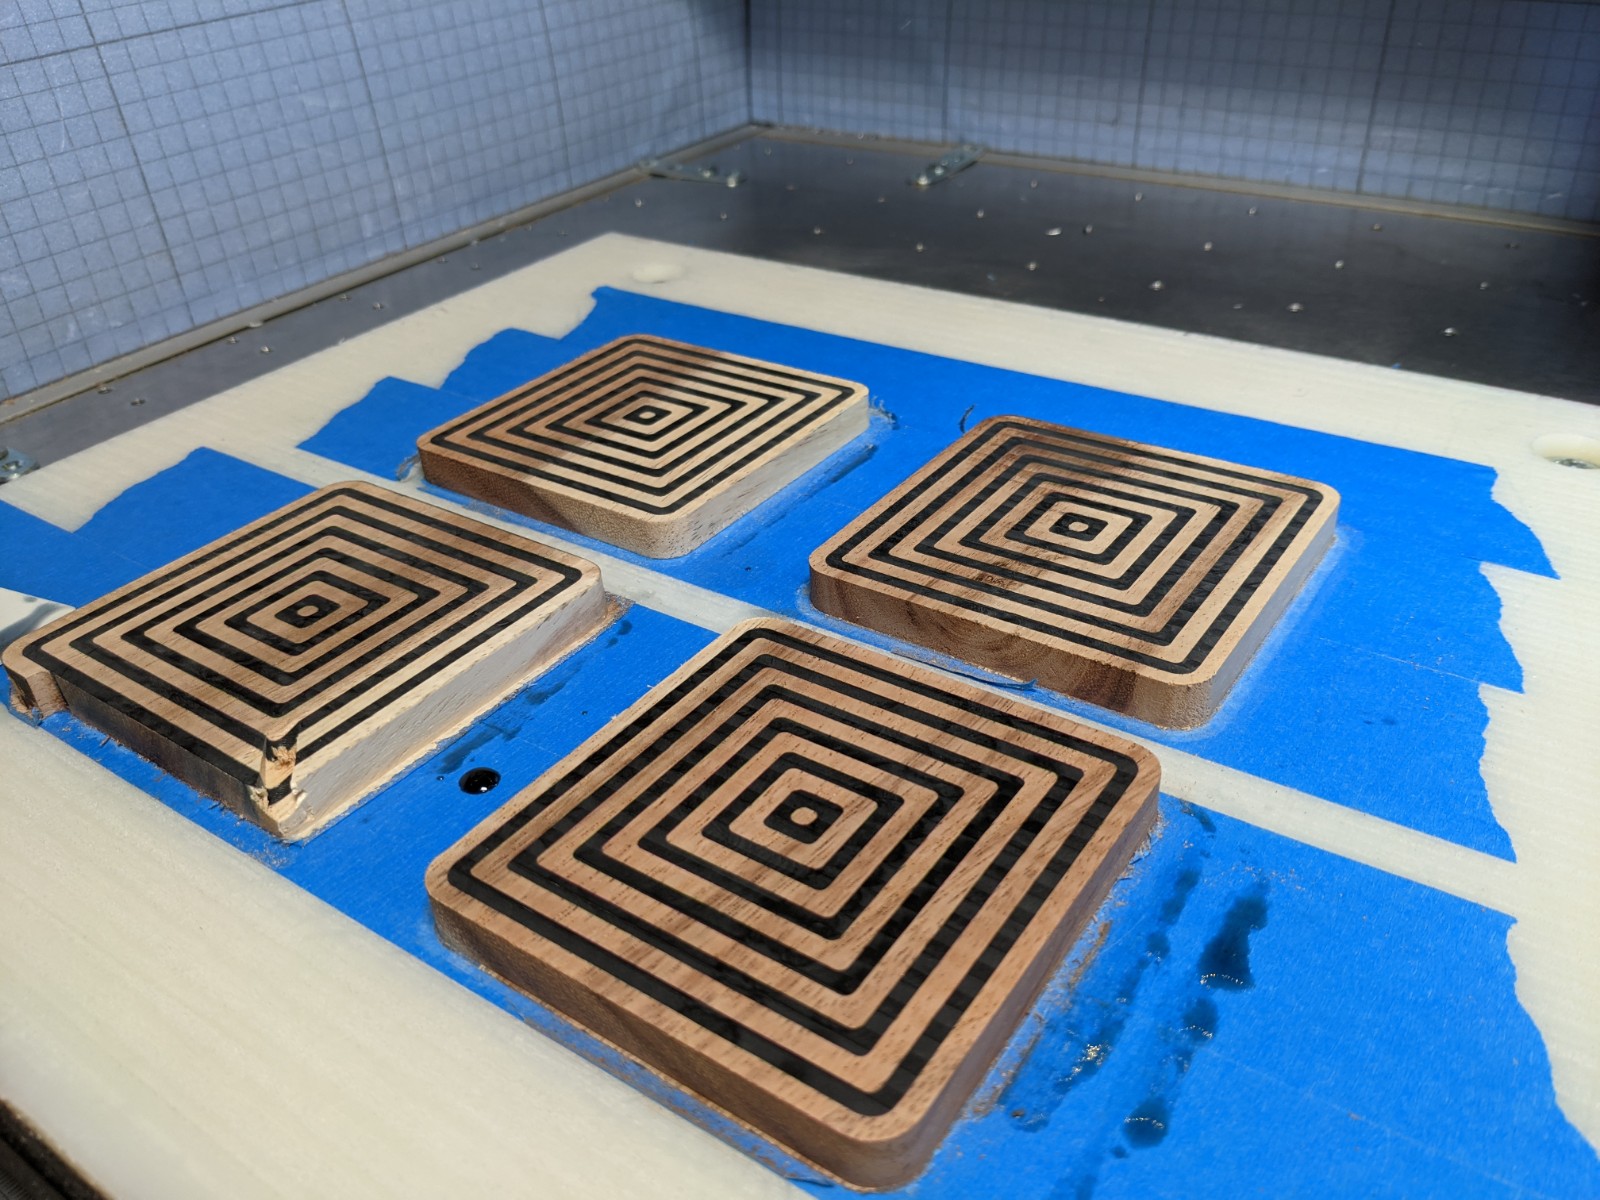
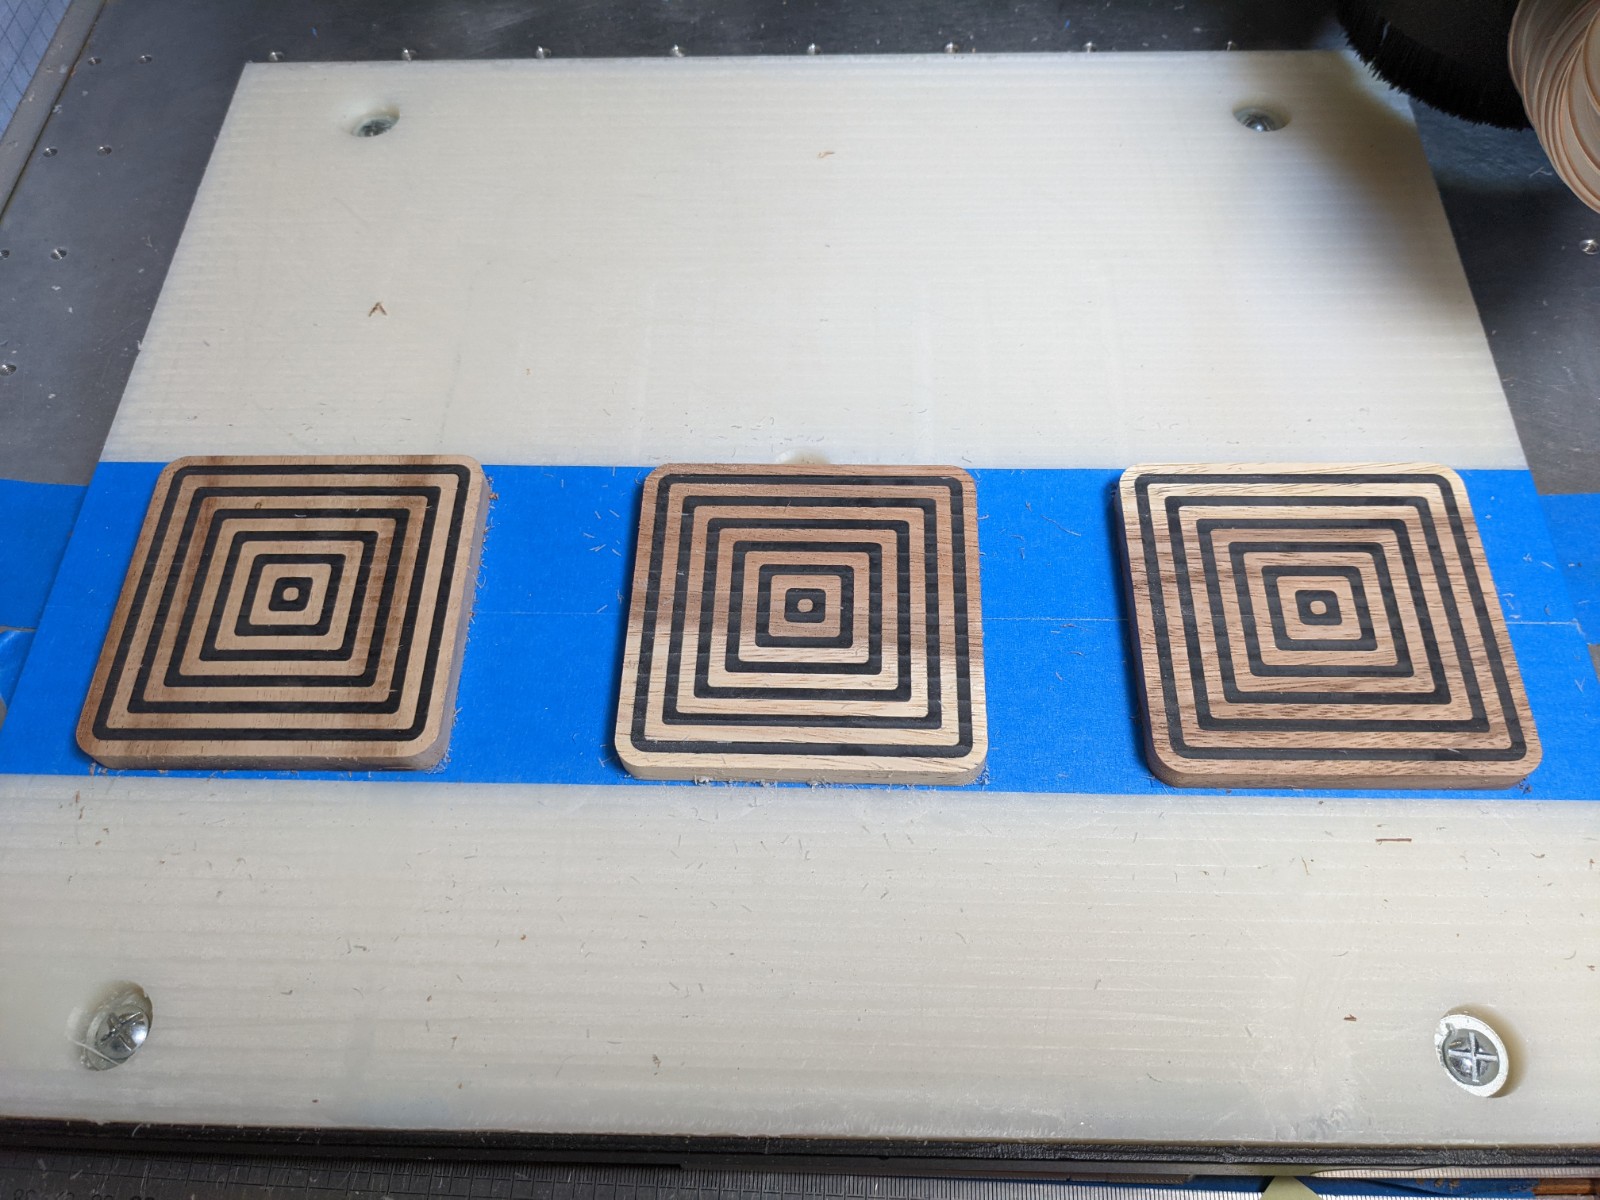
And proceeded to surface the three remaining ones with no additional drama.
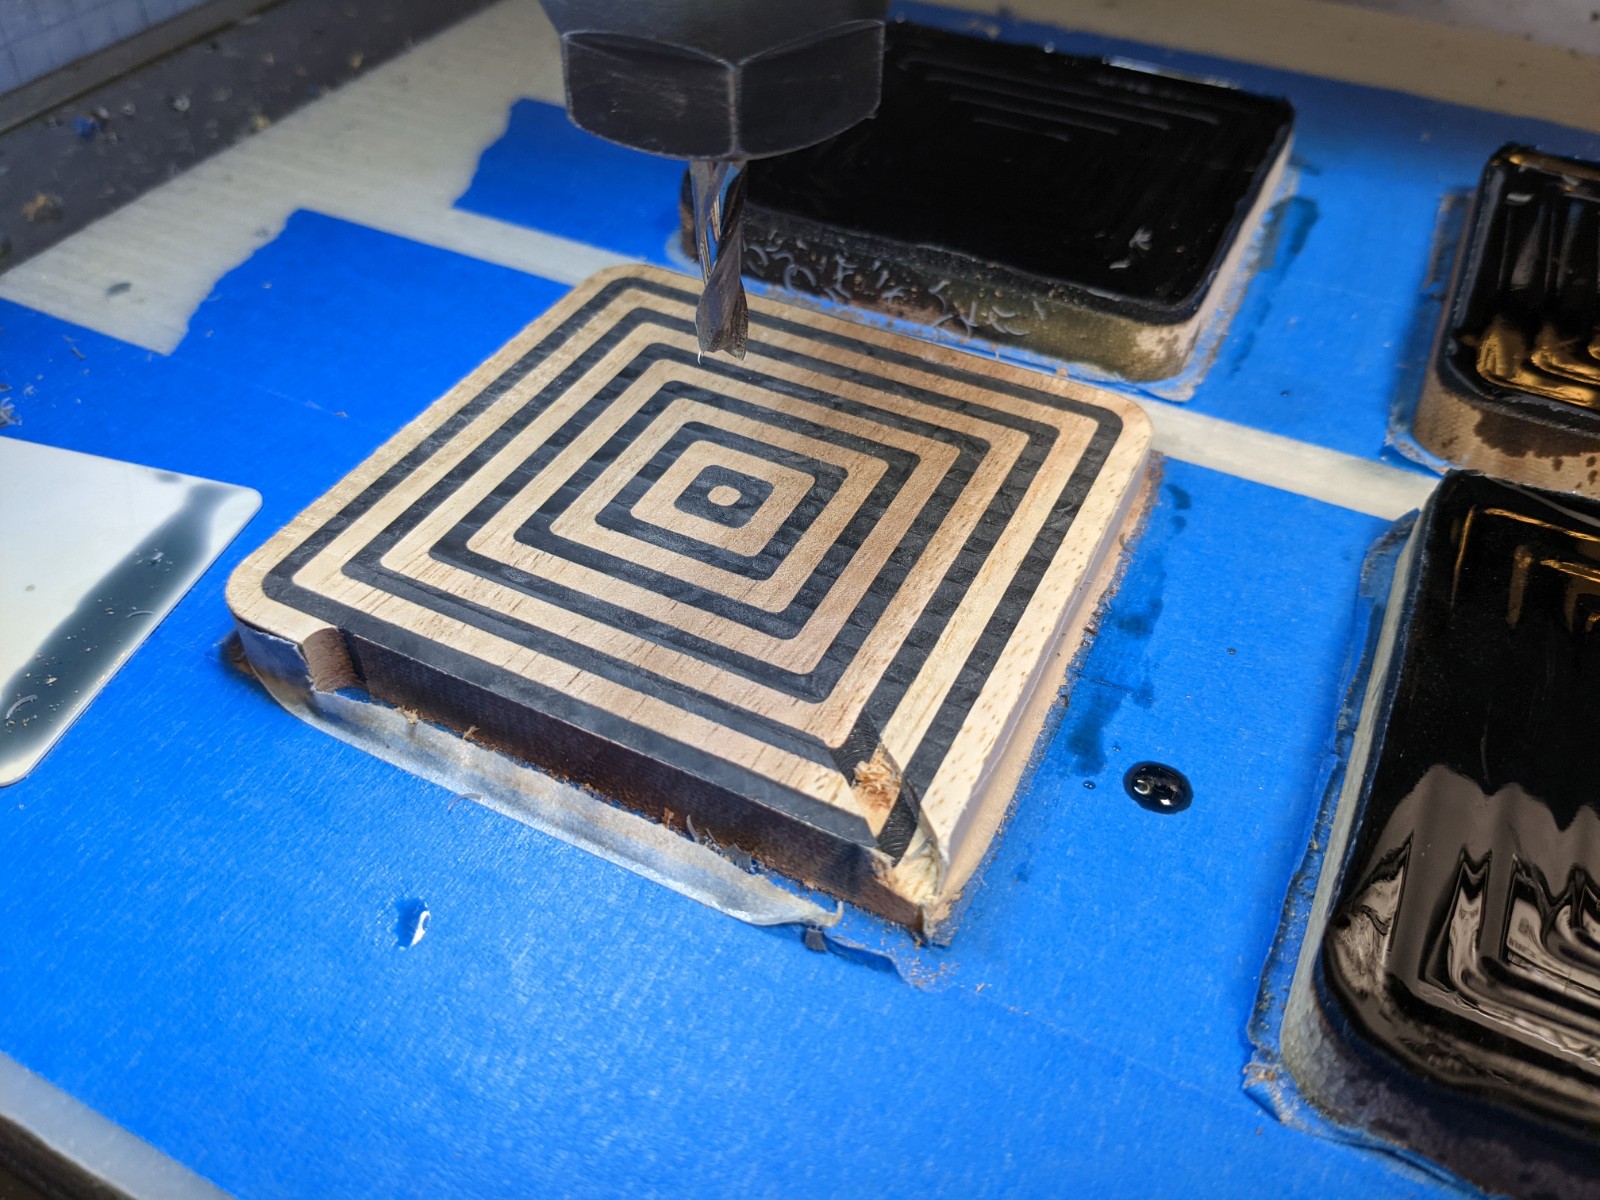
But there was the other issue that epoxy had found its way between the painter’s tape dams and the coaster walls, leaving epoxy stains around all edges. Now than I think about it, the heat from the torch as well as the heat generated by the epoxy when setting must have softened the glue on the painter’s tape, just enough to let the epoxy overflow a bit ![]()
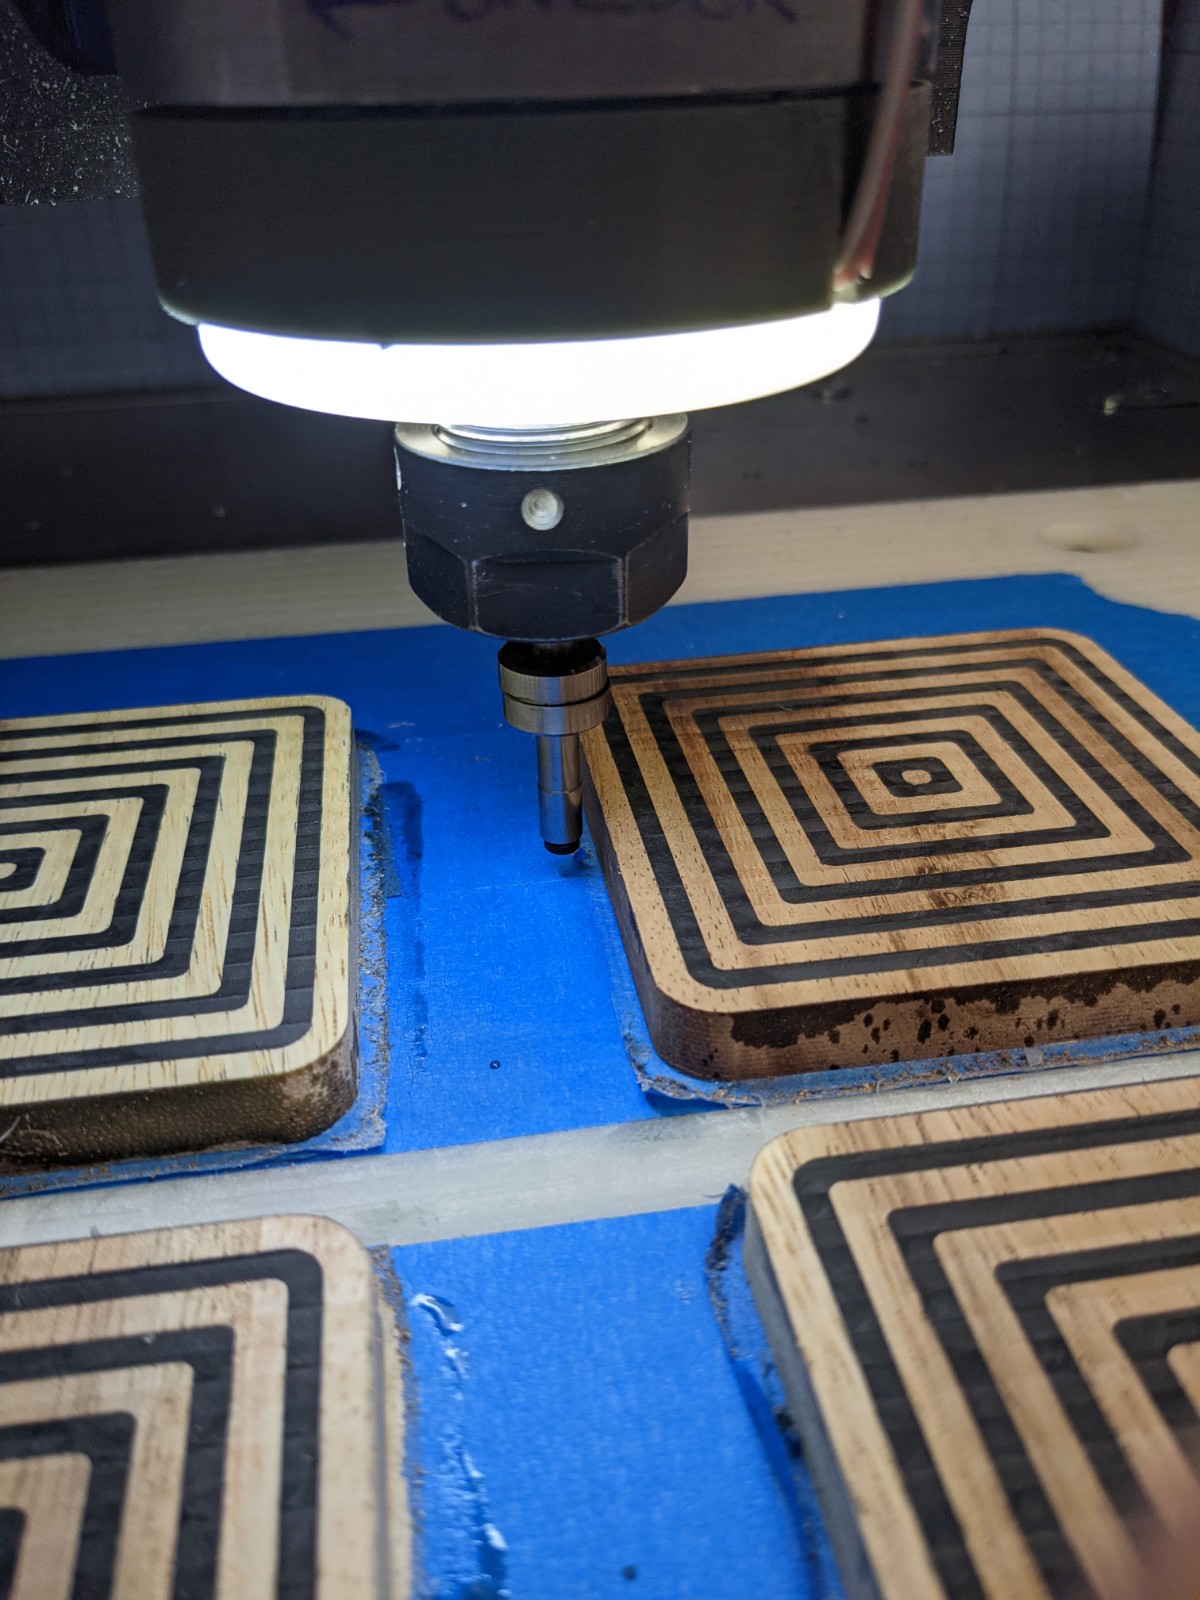
I really, really did not feel like manually sanding that off, so I went to create a contour cut to shave off material, but I had no precise reference for where the center of each piece was located. This was the perfect opportunity to finally test this edge finder I had bought a few months ago:
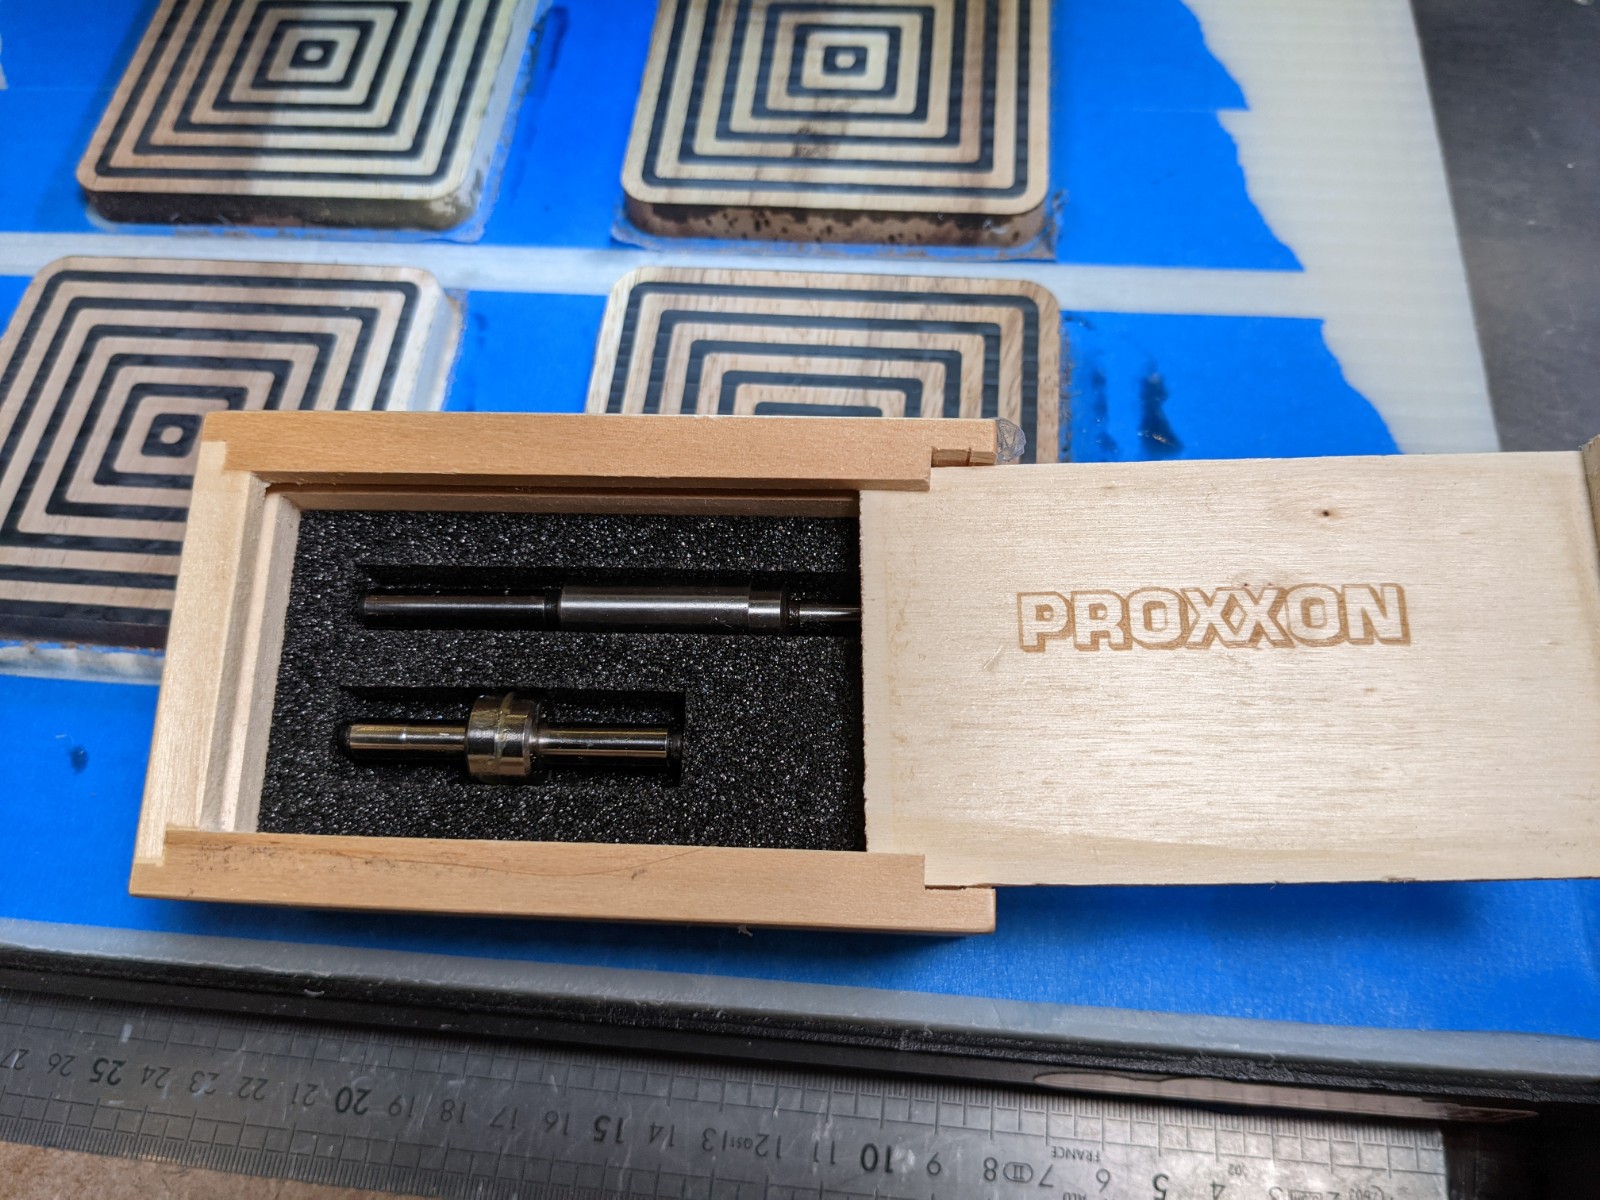
I’m an edge-finder newbie, but love them already. The way it works (well this type at least) is that when you spin it (slooowly) and it doesn’t touch anything, the bottom part of the edge finder will wobble (wiggle?), then when you move them (very carefully) against an edge, at some point the wobble will stop, and when moving a tiny bit further, there will be a sudden visible shift of the bottom part: that’s when the edge finder is exactly [half the diameter of the edge finder] from the edge, and one can then make a note of the absolute machine coordinate there.
Here’s a video from the side, during X-finding of a right edge. The final shift is not very visible as it is in the front/back direction:
Here’s another view while finding a Y edge, with a better view of the final shift to the left:
https://youtu.be/hgajMQ7M9Xg
In both videos I was making 0.1mm jog increments (I did not need more precision, and my edge surface was messy anyway). I will note that edge finders usually have a very low max RPM limit, this proxxon model is to be used at 500 RPM. I could not have pulled this off with a router, so I’m thankful I have a water-cooled spindle I can run at arbitrary slow RPM. A little M3S500 command in the console is all it took.
After (tediously) finding the left, right, top abd bottom edges of each coaster, I determined the coordinates of the center for each of them, and CAMed several profile cuts: a first one following the outer size of the coaster, and then smaller ones by 0.1mm increments, as I did not know exactly how much material would need to be removed to get rid of the epoxy stains.
I ended up requiring shaving off 0.5mm, and I got clean walls and no visible X/Y shift that could have made one side thinner that the others, a good sign that the center-finding exercize worked.
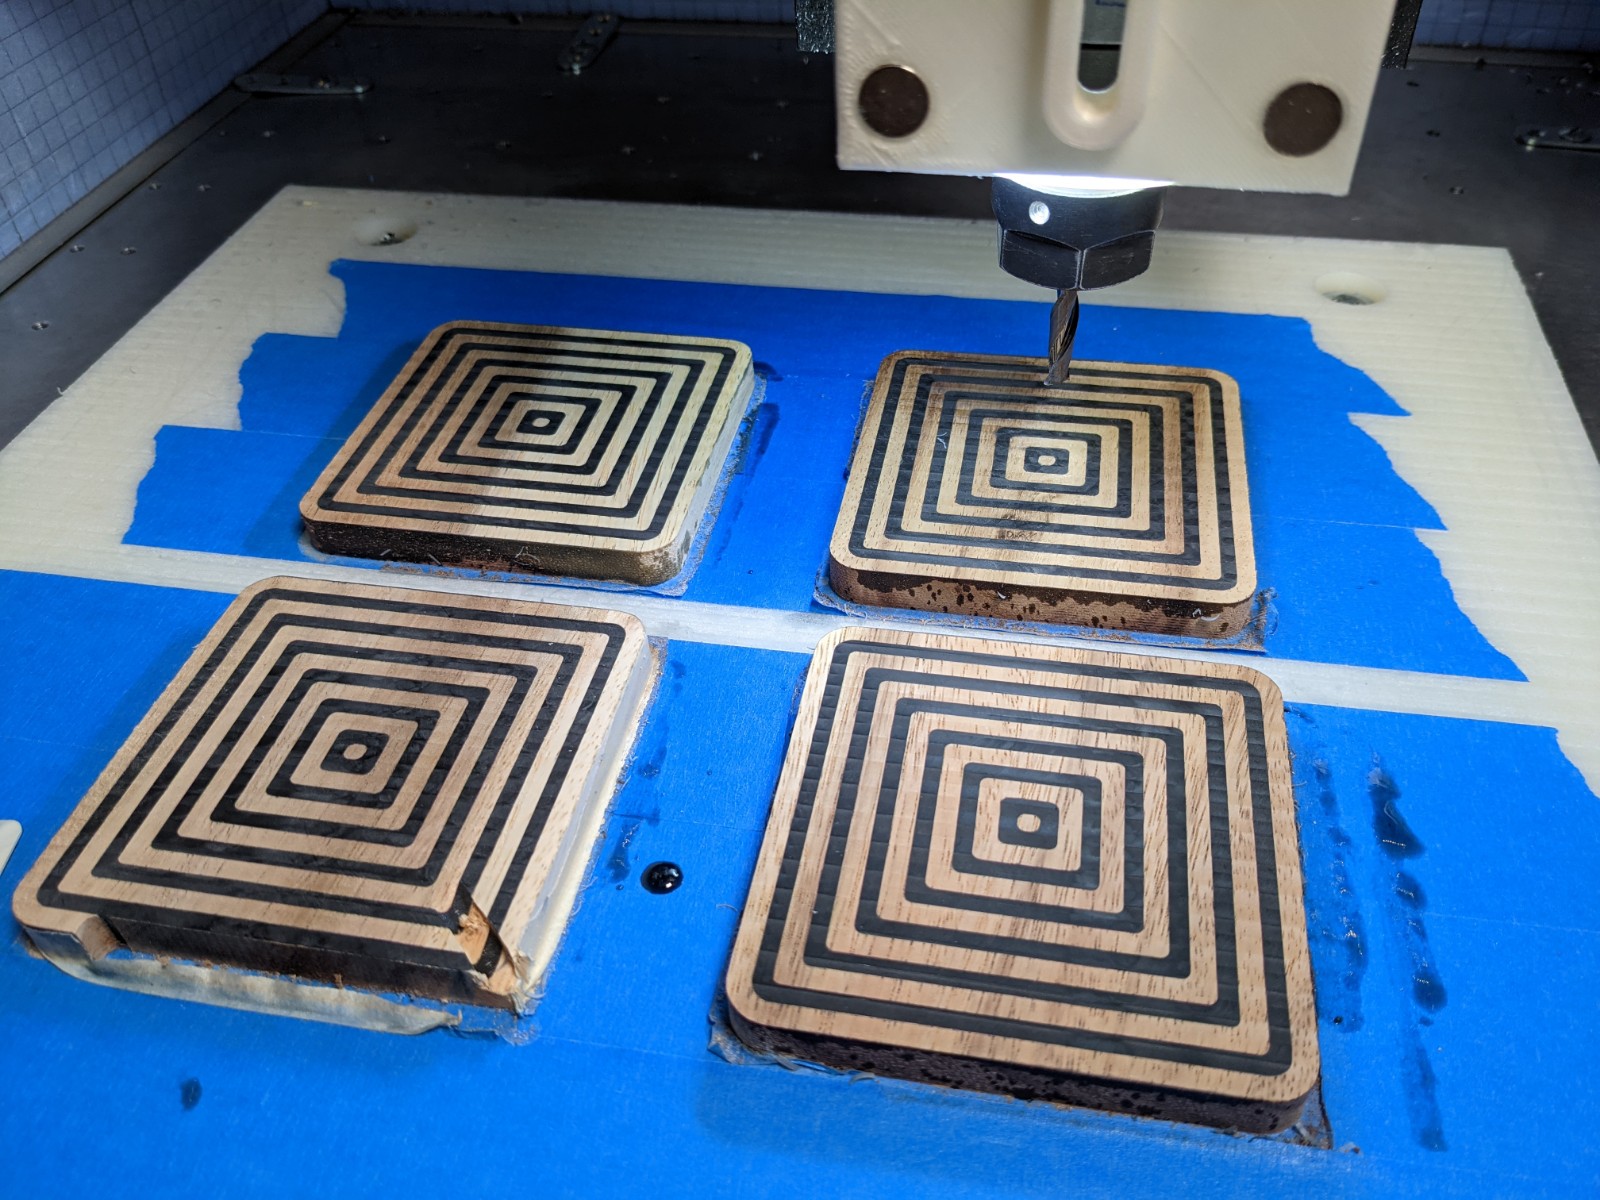
Time to flip the pieces, to remove 1mm of material (0.85mm of wood + margin) and reveal the epoxy from the other side:
Did I mention I had forgotten to seal the wood with clear epoxy before pouring the black epoxy ? Lucky for me that particular acacia wood does not seem to be prone to bleeding, so I dodged that bullet (which would have completely ruined the project and my mood)
Finally, some manual sanding down to 1000 grit, a little oiling, and I called it done.

While these won’t win any contest, I’m still happy I did it:
- I definitely want to make more of those pieces where the epoxy is visible on both sides. As @MikeG showed in his thread, this can be used to produce very cool looking objects with tiny wooden parts “floating” in the epoxy.
- @MikeG or others using masking tape to contain the epoxy: did you ever have that issue of epoxy still finding its way between the wood and the tape ? Masking works just fine when it’s done on a flat surface, but I have yet to find a method that works reliably when one needs to make a “vertical” dam as I tried to do here.
- I discovered the value of edge finders, to salvage a piece. That proxxon device was well worth the 35 euros it cost me.
Don’t hesitate to share your tips and tricks, and I’ll try to not make as many mistakes next time!