I’m trying to figure out what values to plug in for two new tools that I’ll be using on a project under Spindle Speed and Default Toolpath Settings.
Any assistance or resources for deciphering the documentation would be greatly appreciated. The stock being milled is aluminum.
There are several methods that one can use. I put “1.0” in for the feed rate, plunge rate, step over and depth per pass. I tend to use end mills for multiple materials so any data I put here is very often wrong - so I make sure the values are totally insane.
I do this because all of these values can be overridden in MeshCAM as part of the job.
My roughing speed will be quite different than my finishing speed. My pencil finish speed will be different than both of those.
There is no one number one can put here that will work in the general case. You can make a really long name to quality it’s use - 6061, [rough/finish/fine finish] - and have multiple entries of the same end mill differentiated by name.
My approach is to ignore all of that and deal with the setting on the job basis. YMMV.
The one thing I cannot - as yet - override (easily?) is the RPM. I adjust this for each job. A pain. I often set this to 10K RPM and hope that I have a good solution for the material in the job (and I do not have to change it).
Setting the Feeds and Speeds (F&S) for a material and end mill will require knowing what “aluminum” is? Are you talking about an alloy (which one?), pure Al… what? Is it 6061 or 6075?
Are you going to use some form of lubrication or mill it dry?
Next we need to know the machine - Nomad 883.
Next we need to know the tool - I see the link.
Now we’re ready to consider F&S tradeoffs.
It’s worth taking the time to read and learn about F&S and understand the concepts and formulas. It’s not THAT hard. Really.
Regardless, a good thing to do is purchase (or rent) G-Wizard, an awesome F&S calculator.
If you like, we can Skype or phone and I can help you (offline).
The Nomad 883 is an 0.07 HP mill. Be sure to set the derating for small mills/routers and don’t use any aggressive roughing (hogging).
I don’t have G-Wizard with me right now (I’m in court waiting to be interviewed as a juror!) but when I get the chance (and nobody else beats me!) I can come up with some numbers for you. For an uncoated end mill that small, the numbers are going to be pretty small (slow).
mark
P.S.
Please see:
and learn about end mills.
I strongly recommend that in the future you purchase coated end mills (e.g. ZrN, TiB2) for milling Al and Al alloy - less heat, less wear, faster machining.
I’m reading the CNC Cookbook link that you provided.
My concern about having this dialed in properly is that I mainly do not want to break a tool. I can focus on getting the finish dialed in later.
I do have lubricant available but I planned on milling dry as I’ve not had any problems with this yet (or enough info to know when I should and shouldn’t be).
I’m reading the CNC Cookbook link that you provided.
Excellent! Having a good understand really helps. F&S is not mysticism. You can do it!
Even so, do consider G-Wizard. It makes making trade-off quick.
My concern about having this dialed in properly is that I mainly do not want to break a tool. I can focus on getting the finish dialed in later.
As you should be! Those small end mills are really easy to break.
Voice of experience here…
I do have lubricant available but I planned on milling dry as I’ve not had any problems with this yet (or enough info to know when I should and shouldn’t be).
That tells me what we need to know. Now let’s see…
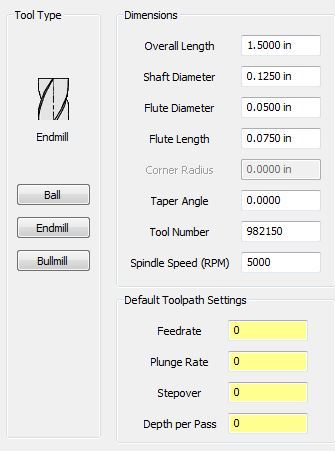
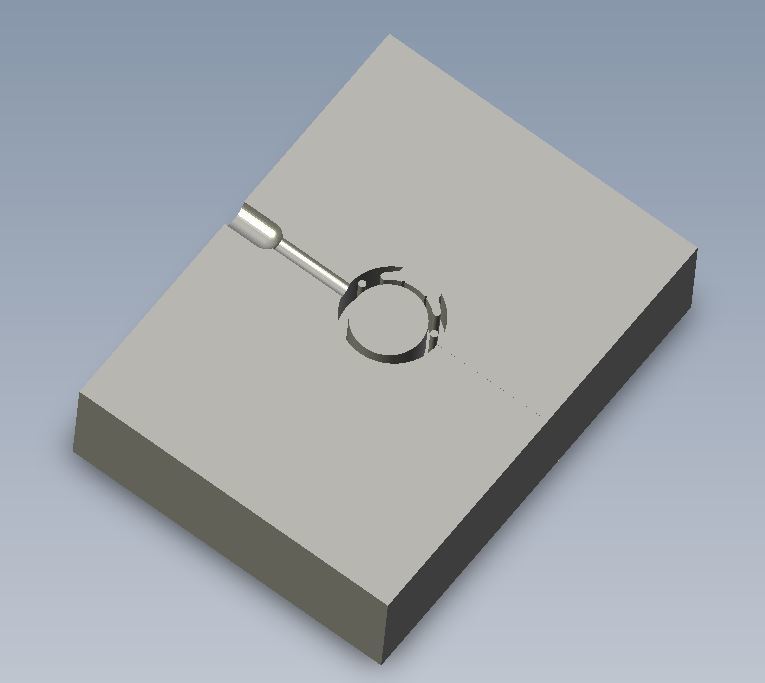
I’m creating a mold for a ring. The band is 1.3mm thick, hence the need for such a small tool that can hog out that space. I wanted to get something significantly smaller so that it is less likely to chip out in that space.
The .5" reach tool is to make sure there is clearance for the depth.
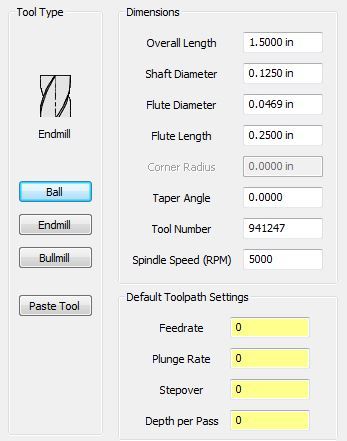
The other tool, the plastic one, came recommended for finishing / pencil clean up path.
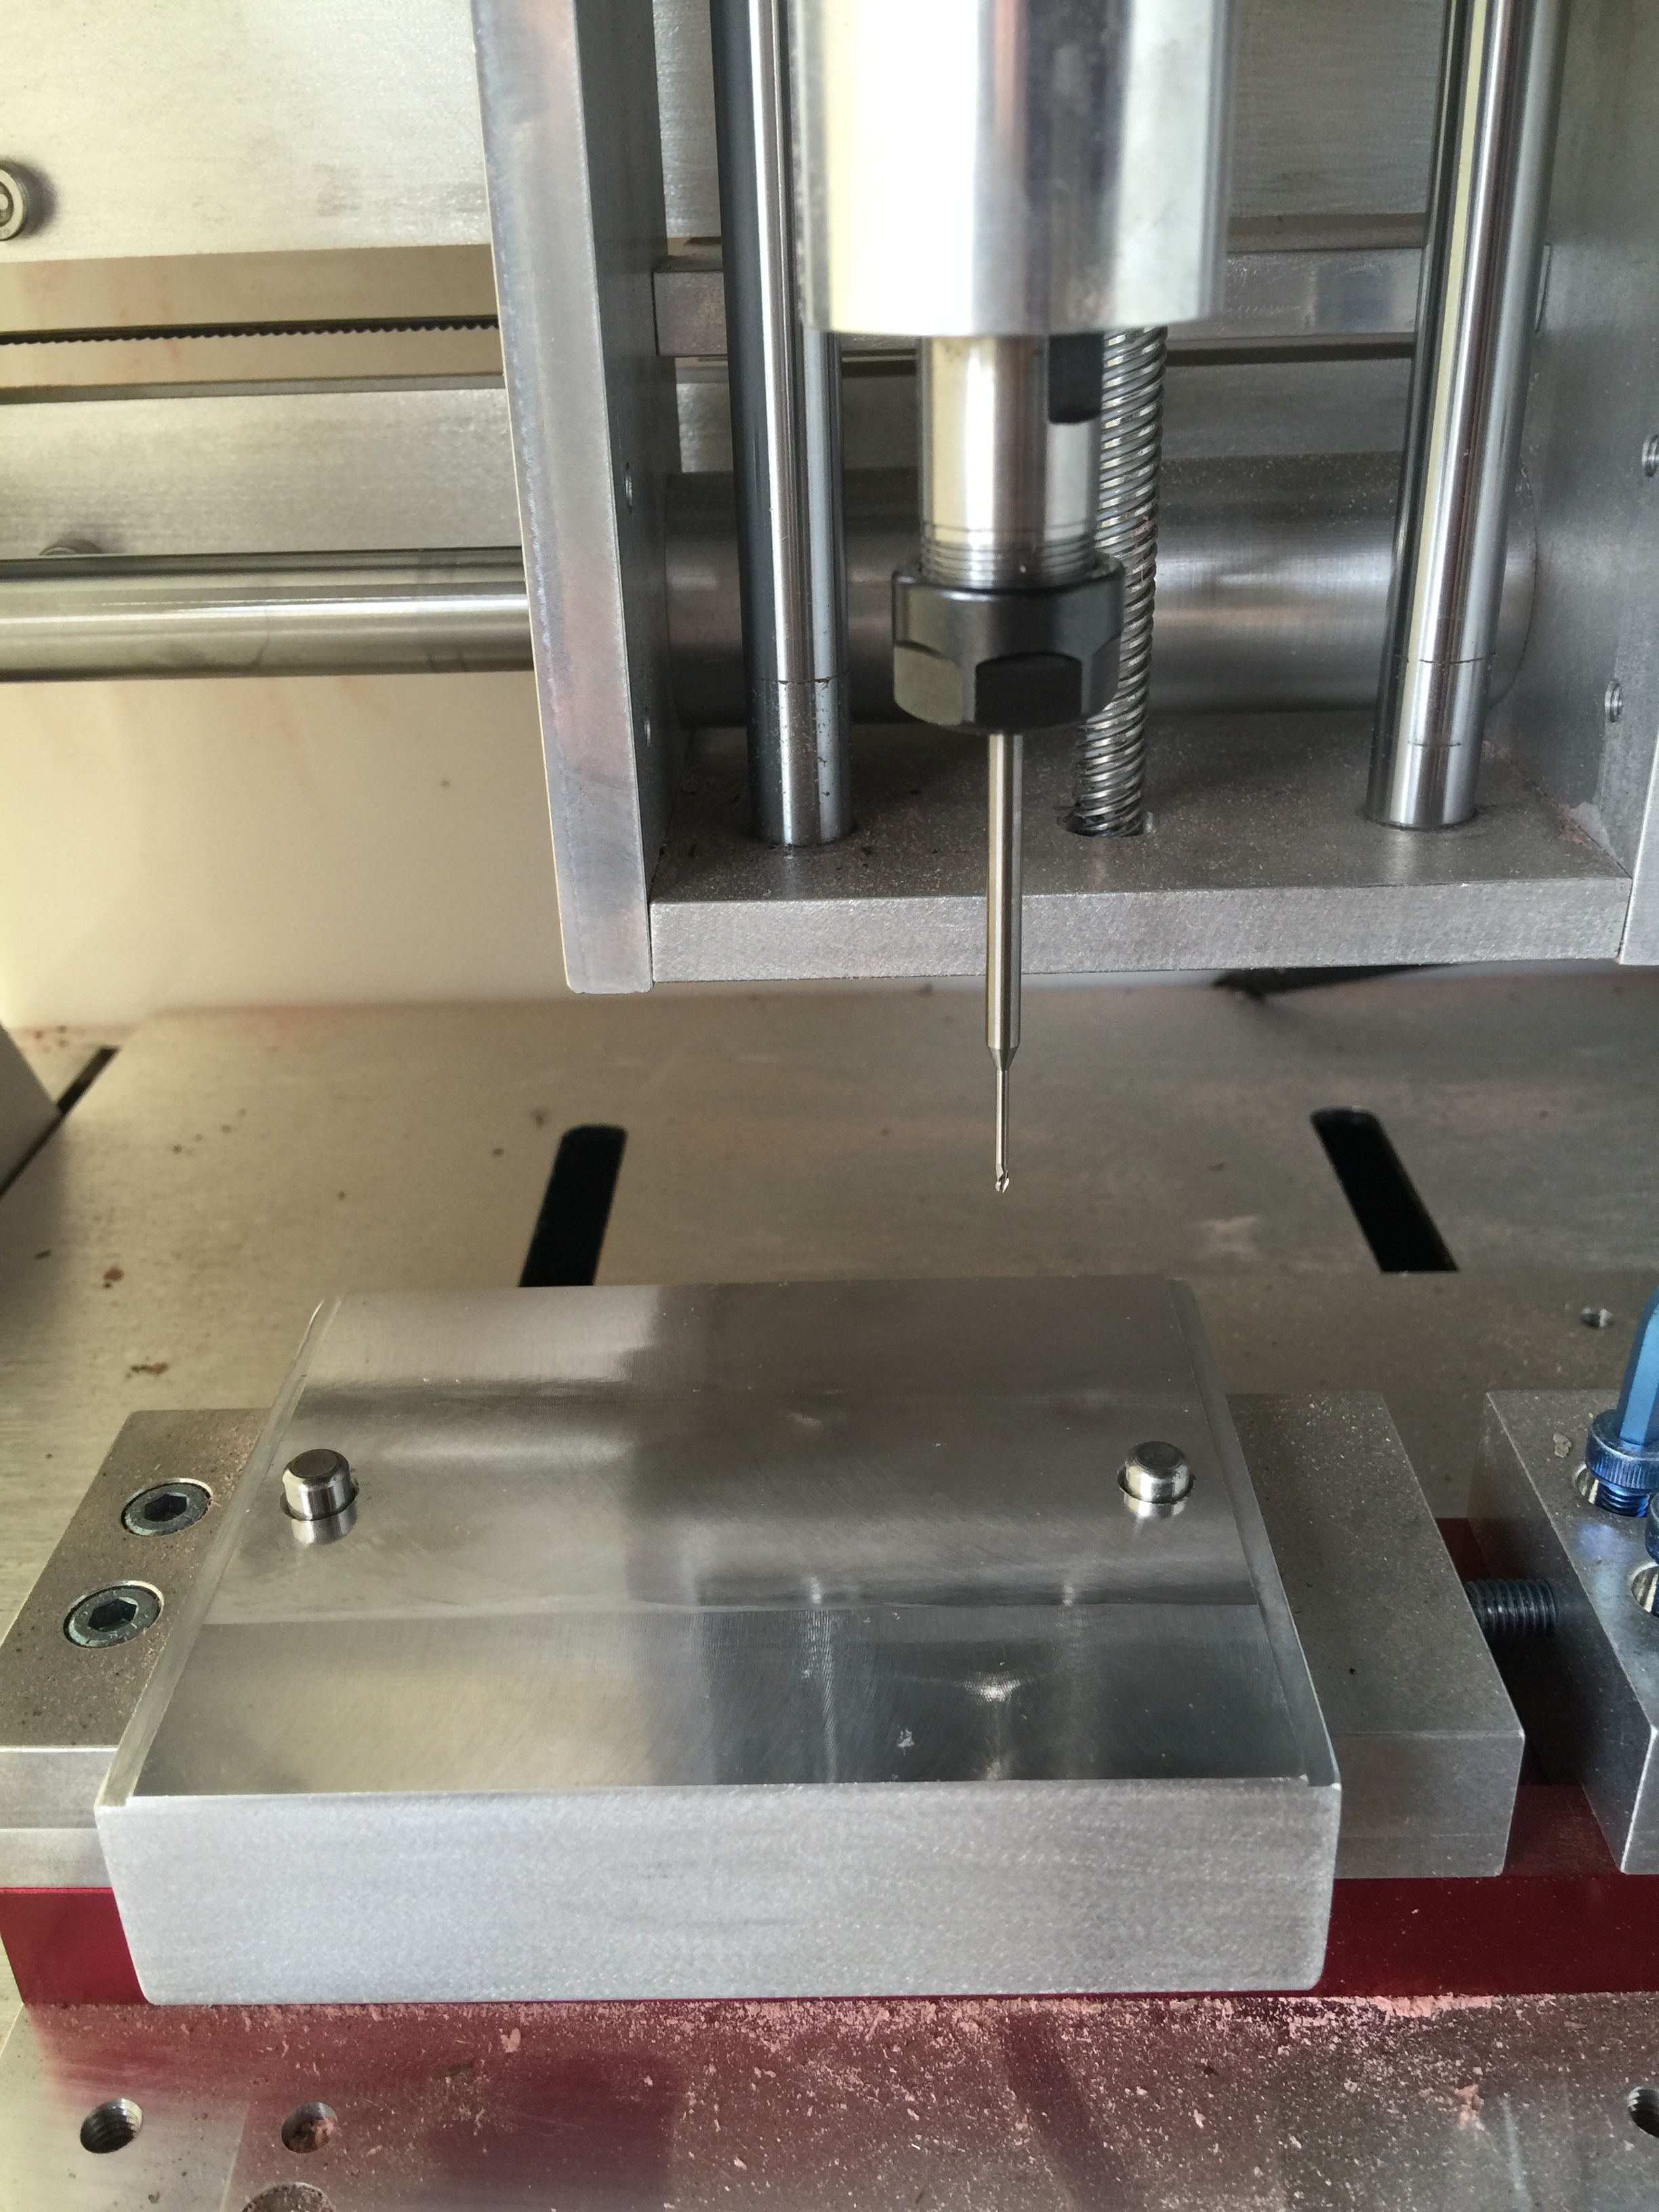
The flute length is tiny - 0.075 - and a standard end mill is 1.5" long. A long reach has to be able to go over the top of the stock and descend into the bowels of the part. The Nomad 883 (and Pro) only have 3" of Z. The stick out of these indicated end mills is ~2 inches.
If your stock is 1" thick or more, the end mill cannot enter the bowels of the part. If your stock is 1" thick or less, there is no need for a long reach end mill.
I’ll work on getting some screen shots of the mold file for a better representation. I should be back on this project tomorrow for remainder of the week.
1" inch thickness on the stock. I’m using 4x3 molds from techkits.com, although I also have a lathe to even up the aluminum stock if needed. I get blocks from a local supplier for about $4 each.
@dogguyjosh, if this is just for wax injection could you machine a rough mother mold from the aluminum, machine a positive pattern from wax, and then cast an epoxy insert in the mother mold using the pattern as a core?
Direcely machining the cavity, I’d still look for a tool with only enough reach to barely do the depth. I’ve machined nickel silver with a .010" endmill going .050" deep, but was using a stepdown of I think .002" Not a problem at all. I buy my small long reach tools from Bits & Bits and have had good results from their cutters.
OK, I see now. You’re making plastic rings directly. Do you have a Dremel? I’d take an abrasive cutoff wheel and lop off about an inch of the cutter’s shank. You only need enough to extend fully through the collet. The more overhang you have, the more flex to the cutter you’ll have (proportional to the 3d power of the extended length). You’ll gain rigidity by “choking up” on the cutter shank as much as possible.
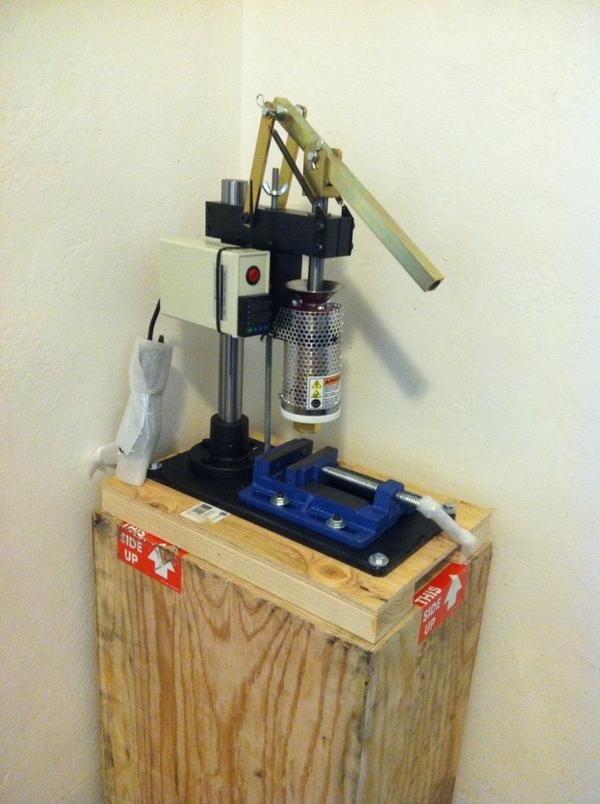
OT, but that’s a neat looking little machine. Have you used it yet? Is there a forum for users of the machine I could browse?
I’d take an abrasive cutoff wheel and lop off about an inch of the cutter’s shank. You only need enough to extend fully through the collet. The more overhang you have, the more flex to the cutter you’ll have (proportional to the 3d power of the extended length). You’ll gain rigidity by “choking up” on the cutter shank as much as possible.
That’s exactly where I was going @Randy! The F&S speeds for this end mill are tough for a Nomad doing 6061 and that was why asked for the use case. Removing as much “stick out” as possible will dramatically improve the F&S - the deflection was really ruining any chance at a decent cut speed.
Thank you, Randy. Makes sense. I will consider that. I do have a grinding wheel.
I have used the machine briefly so that I could learn to purge it properly but I haven’t done much pouring yet with it. It comes with a manual and I believe there is a pdf available too but the link seems to be broken at the moment.