Aluminium chips frenzy

This does not really belong in the “Gallery”, as it’s more about sharing the experience/process than the end result. I could not bare seeing that 4’'x4"x0.75" block of 6082 aluminium sitting on my shelf anymore, it kept screaming “do something with me, anything, please”!

So I thought I would use it for practice (take that, procrastination!). I stumbled upon @wmoy’s “Apple cheese grater” video, which inspired me to do a two-sided job in that thick block of aluminium.

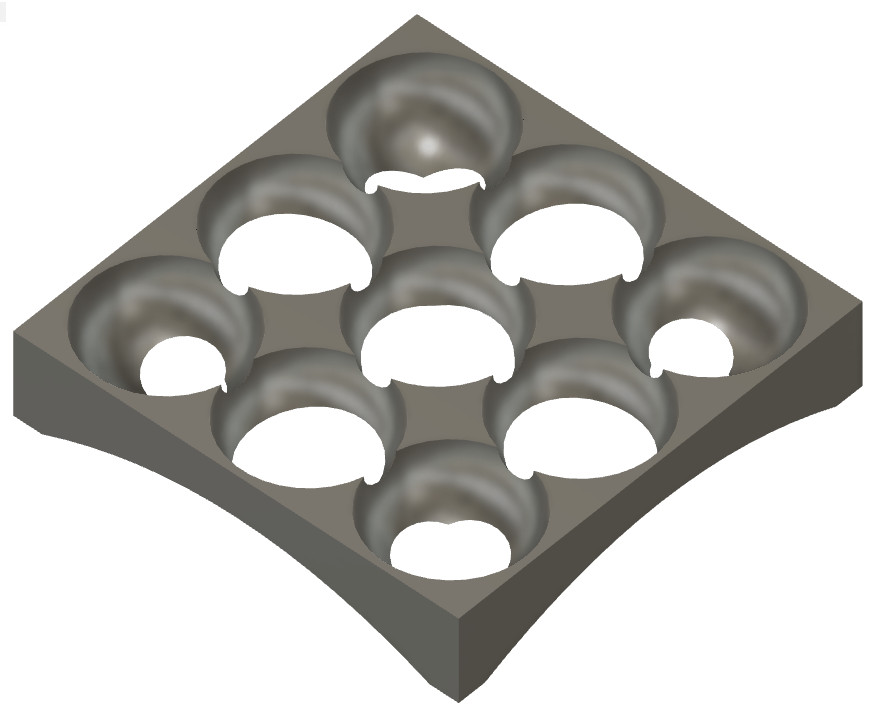
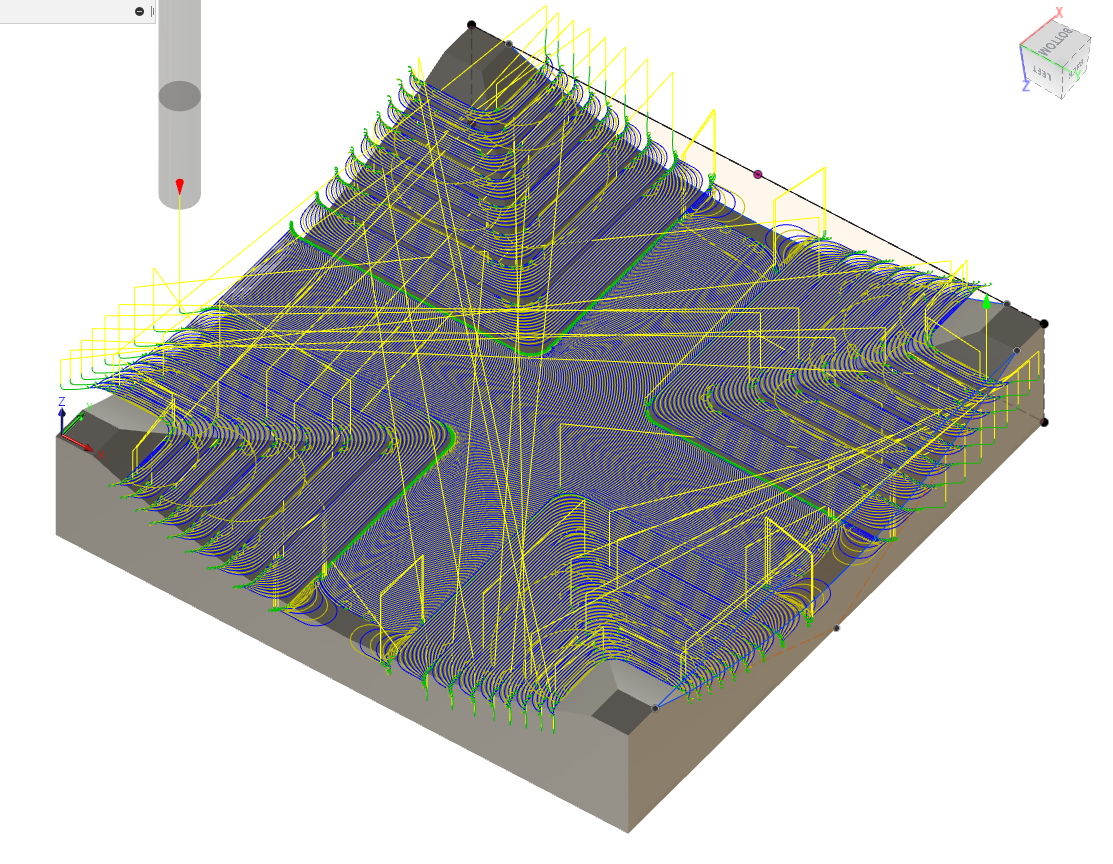
In Fusion360 I was not very inspired though, so I came up with something really simple:

I would use those endmills:

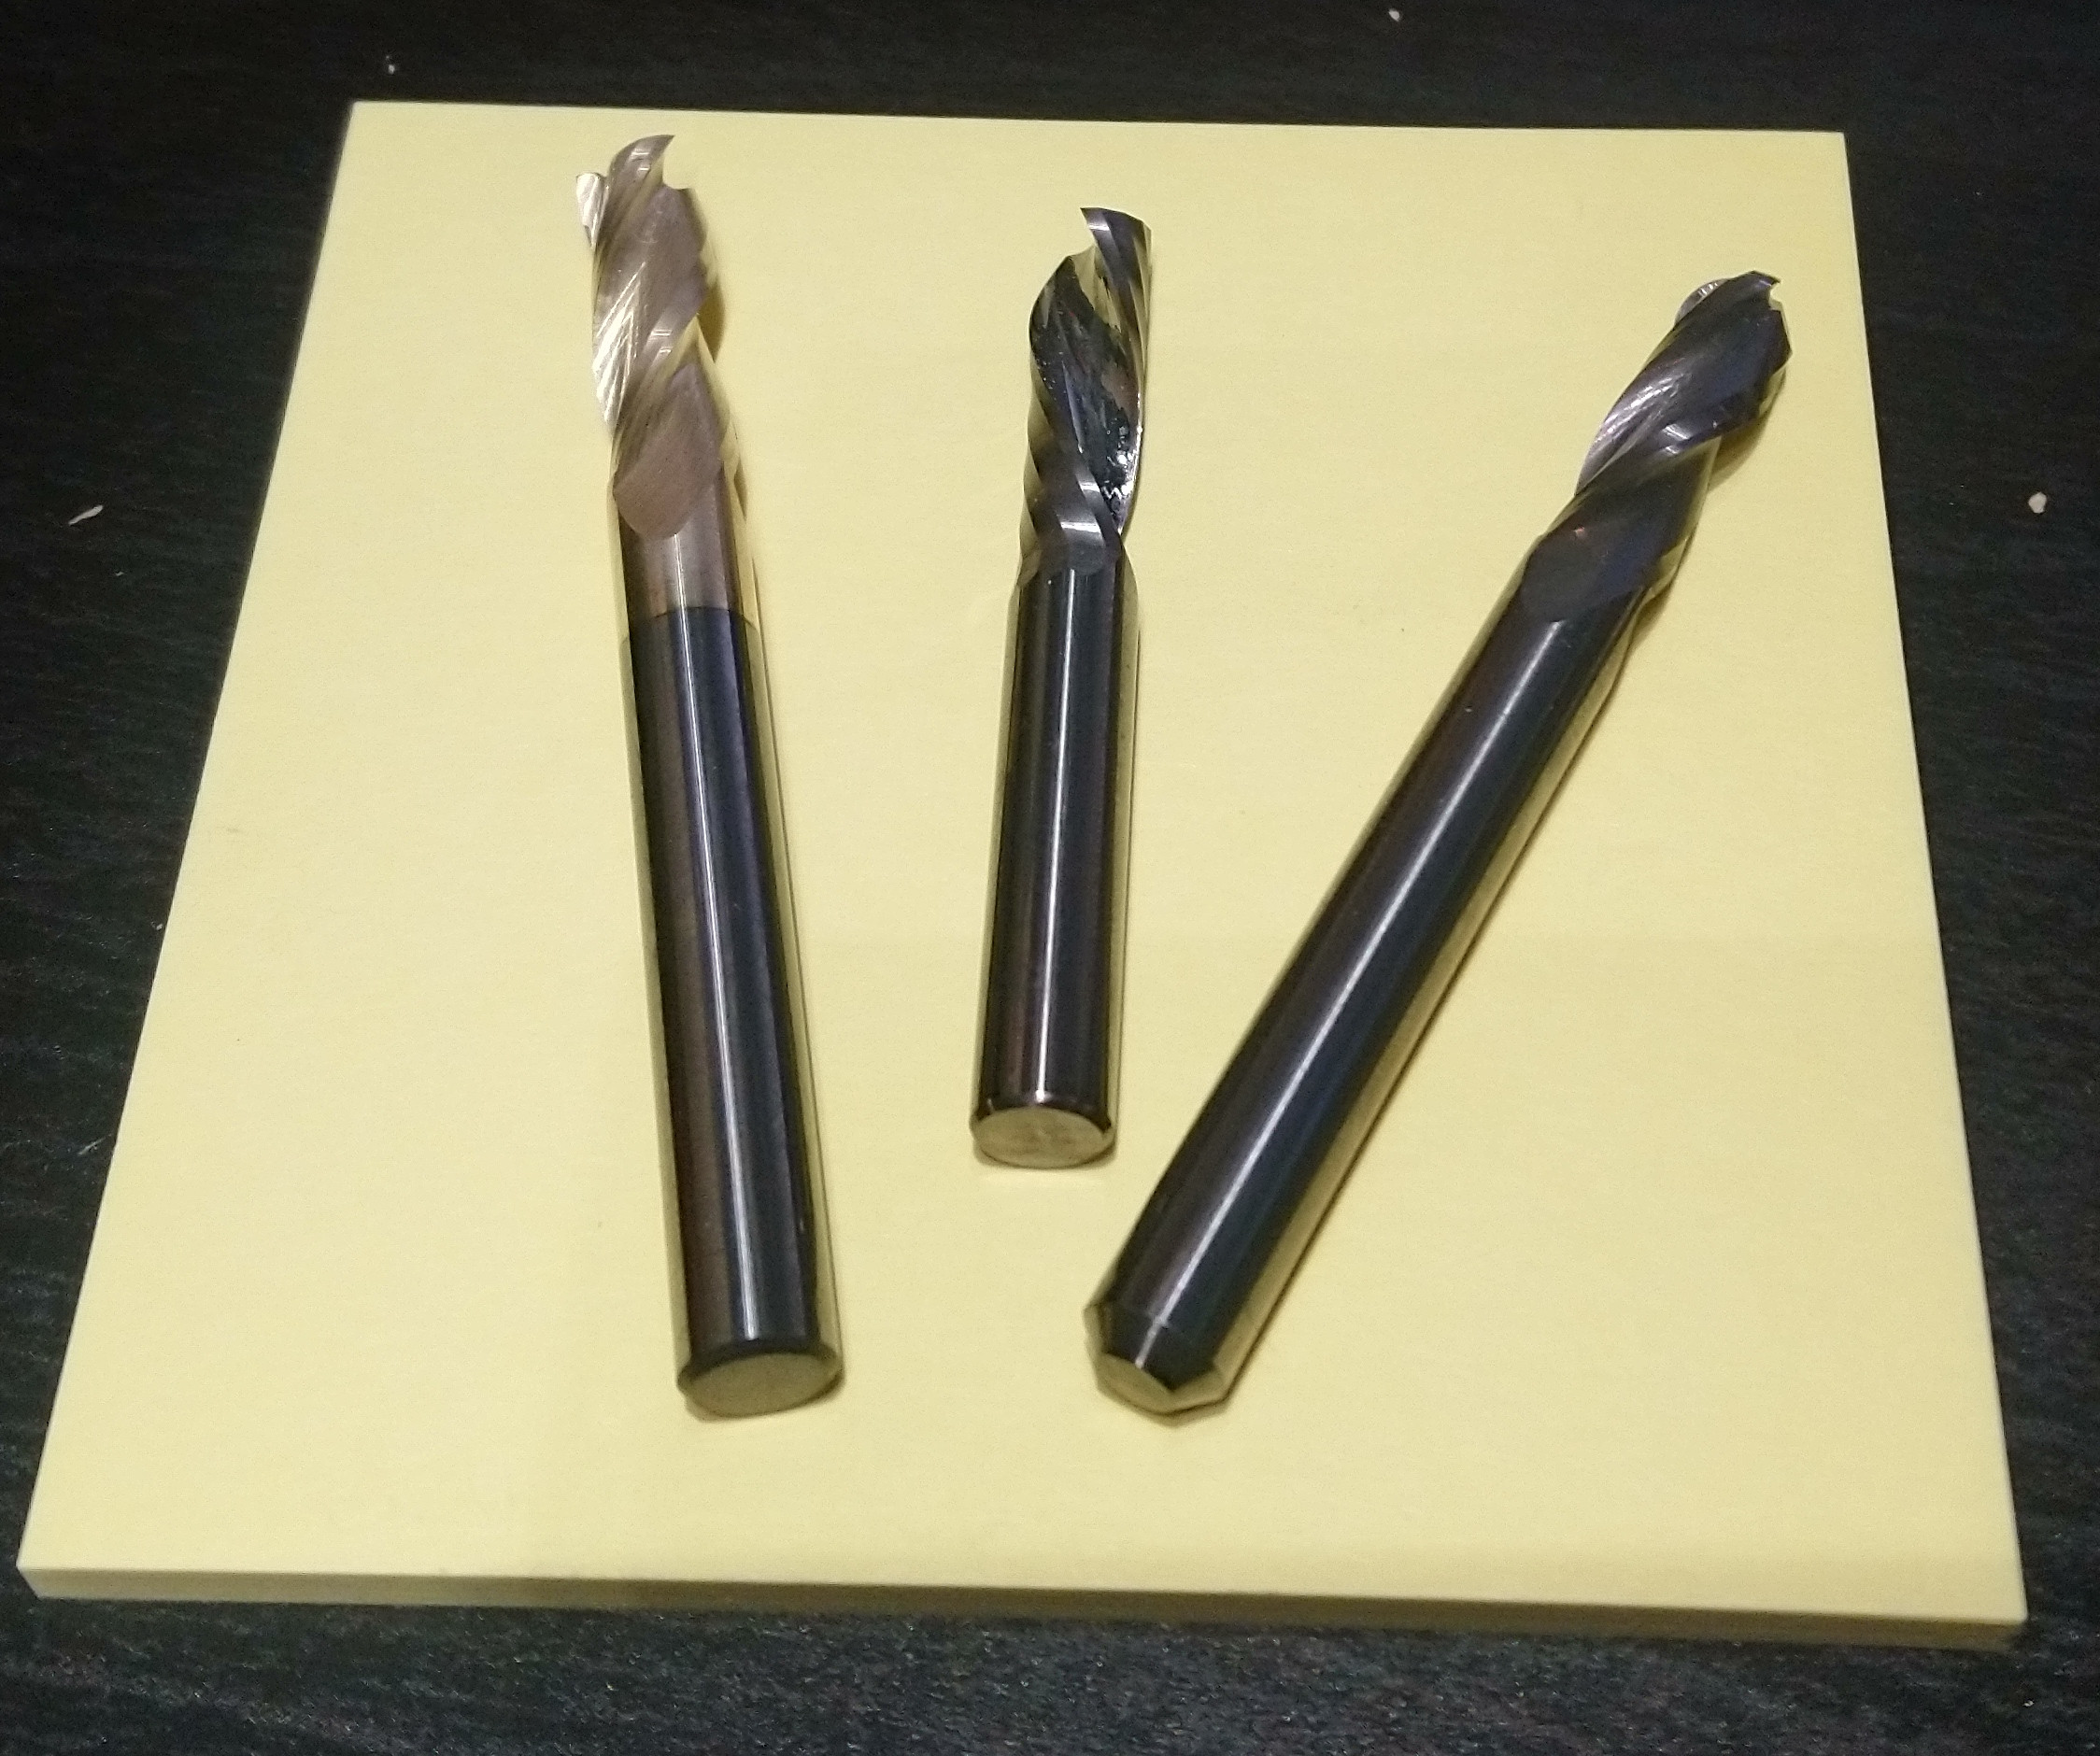
  • #201Z, Carbide 3D’s ZrN-coated 3 flute 1/4" square endmill
  • 6mm single flute
  • #202, Carbide 3D’s 1/4" 3 flute ball endmill (not a great idea for aluminium, but that’s the only ballnose I had on hand)

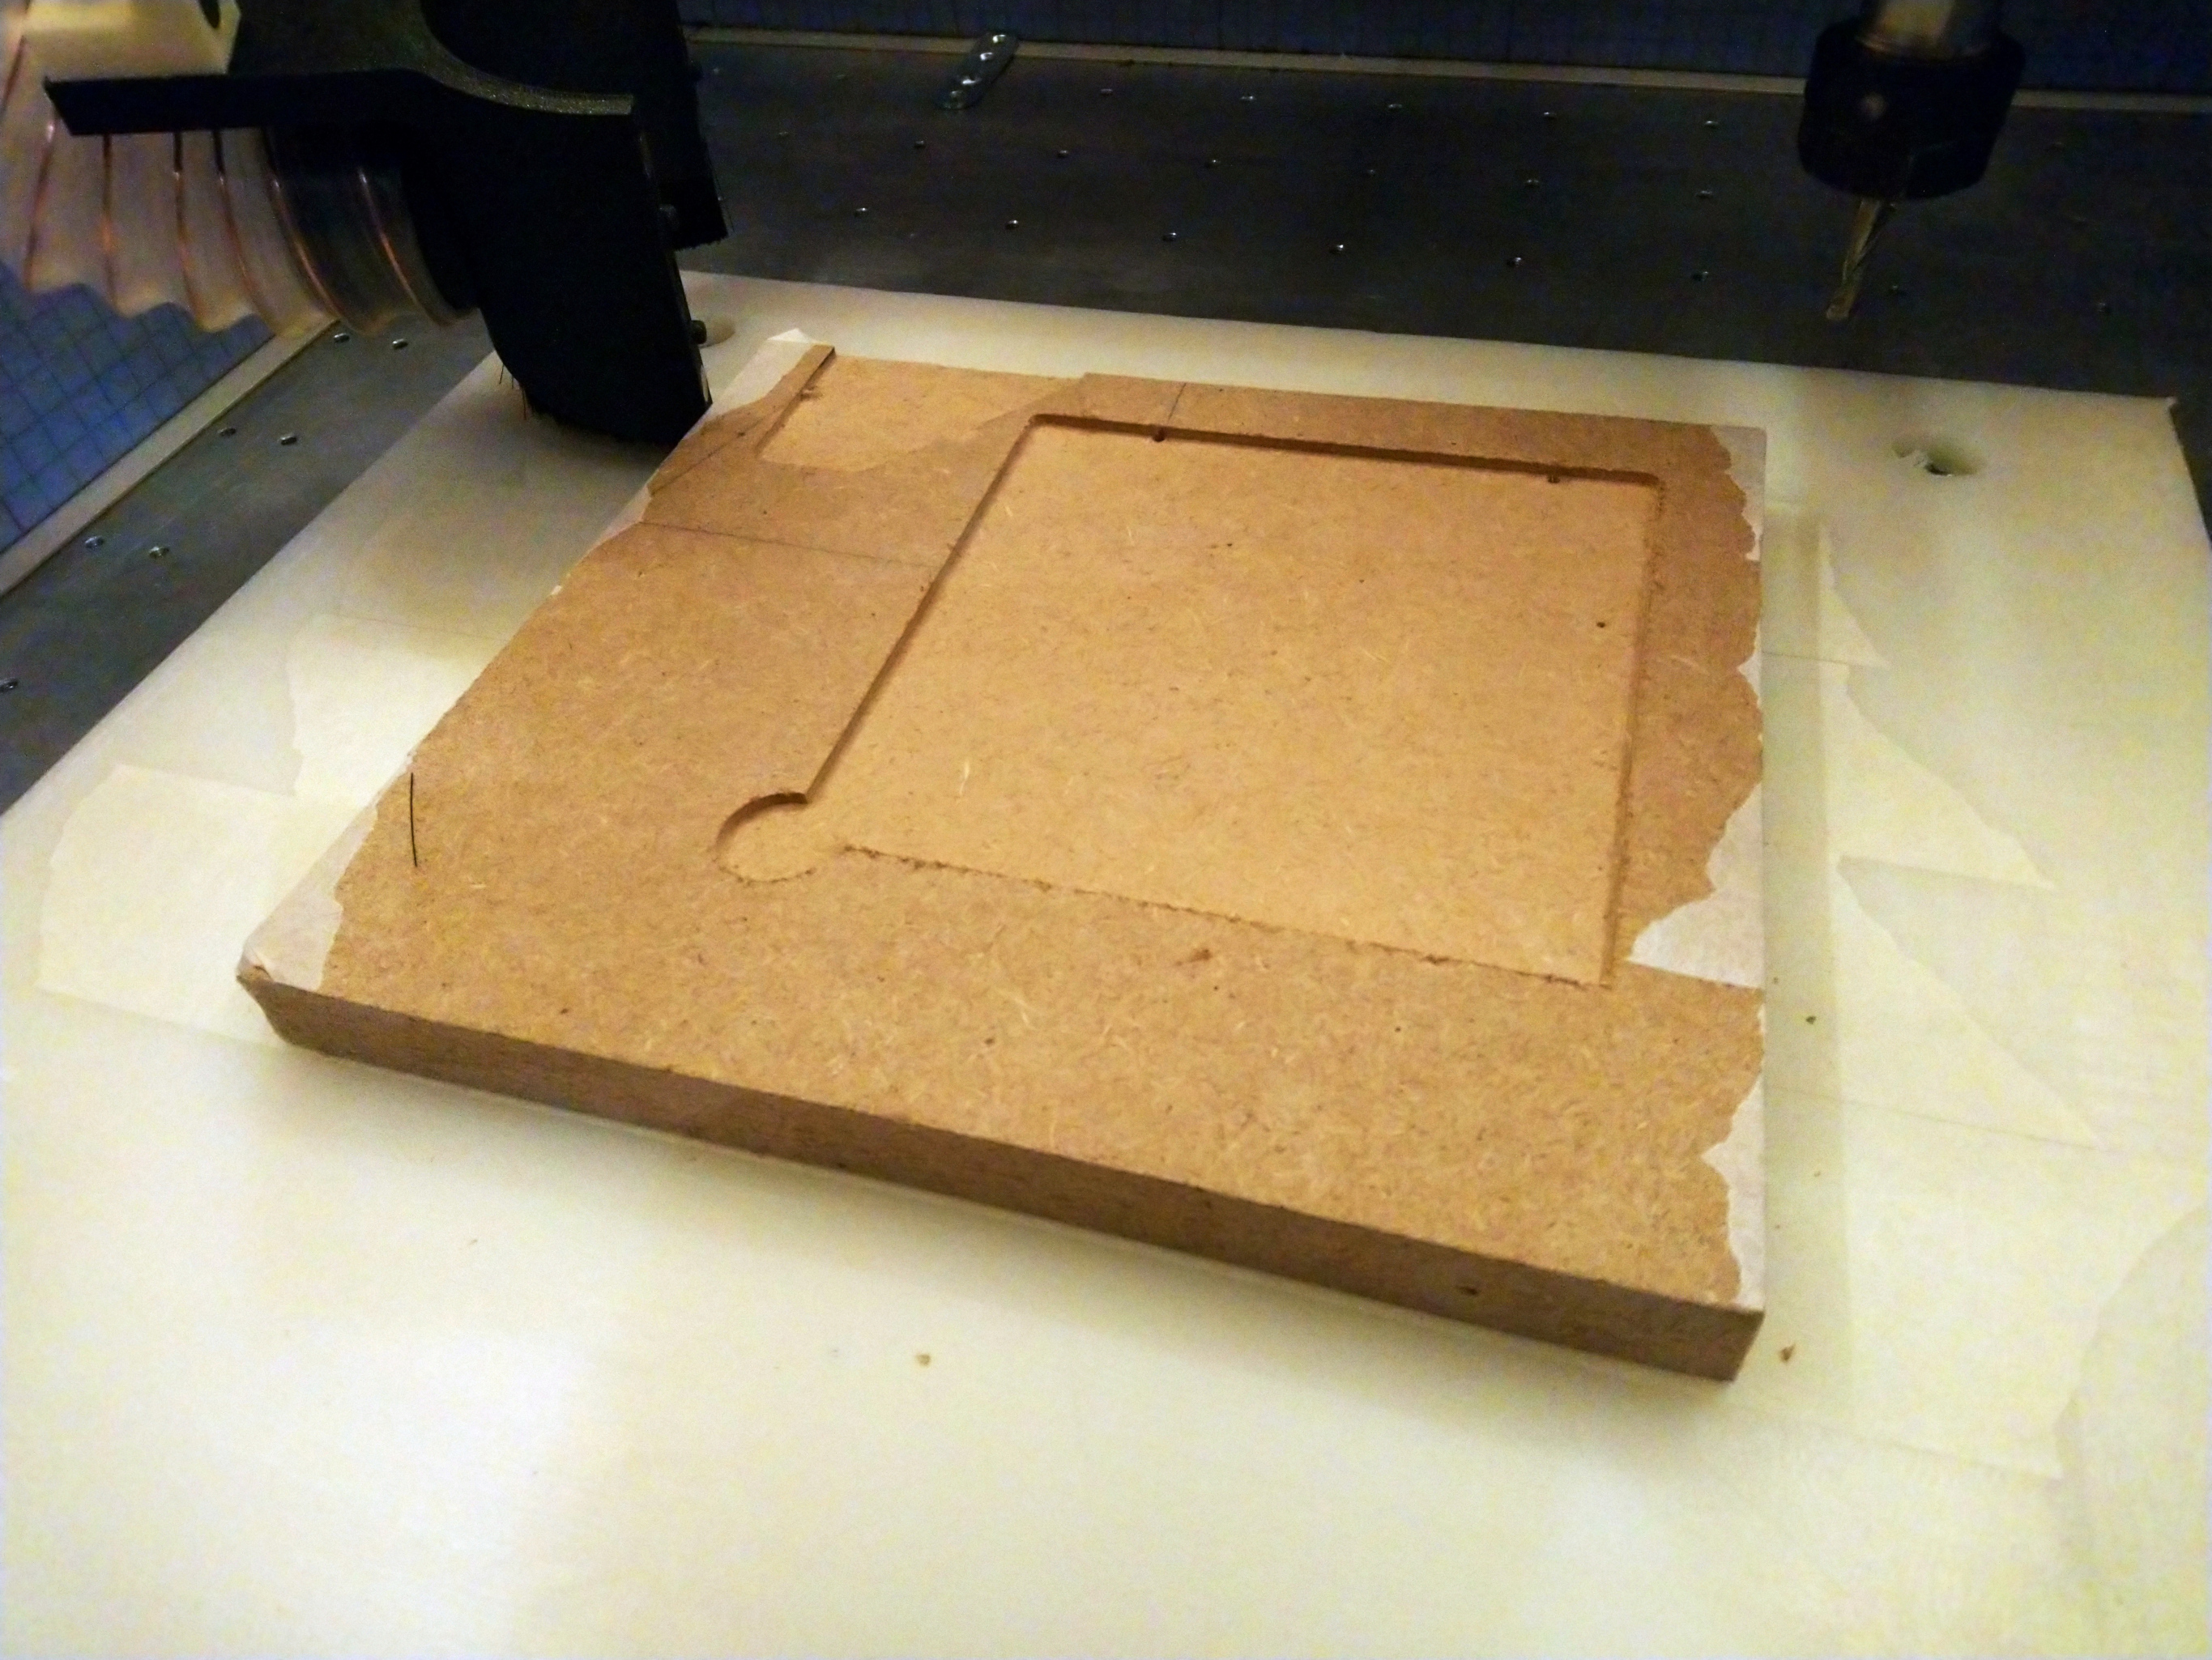
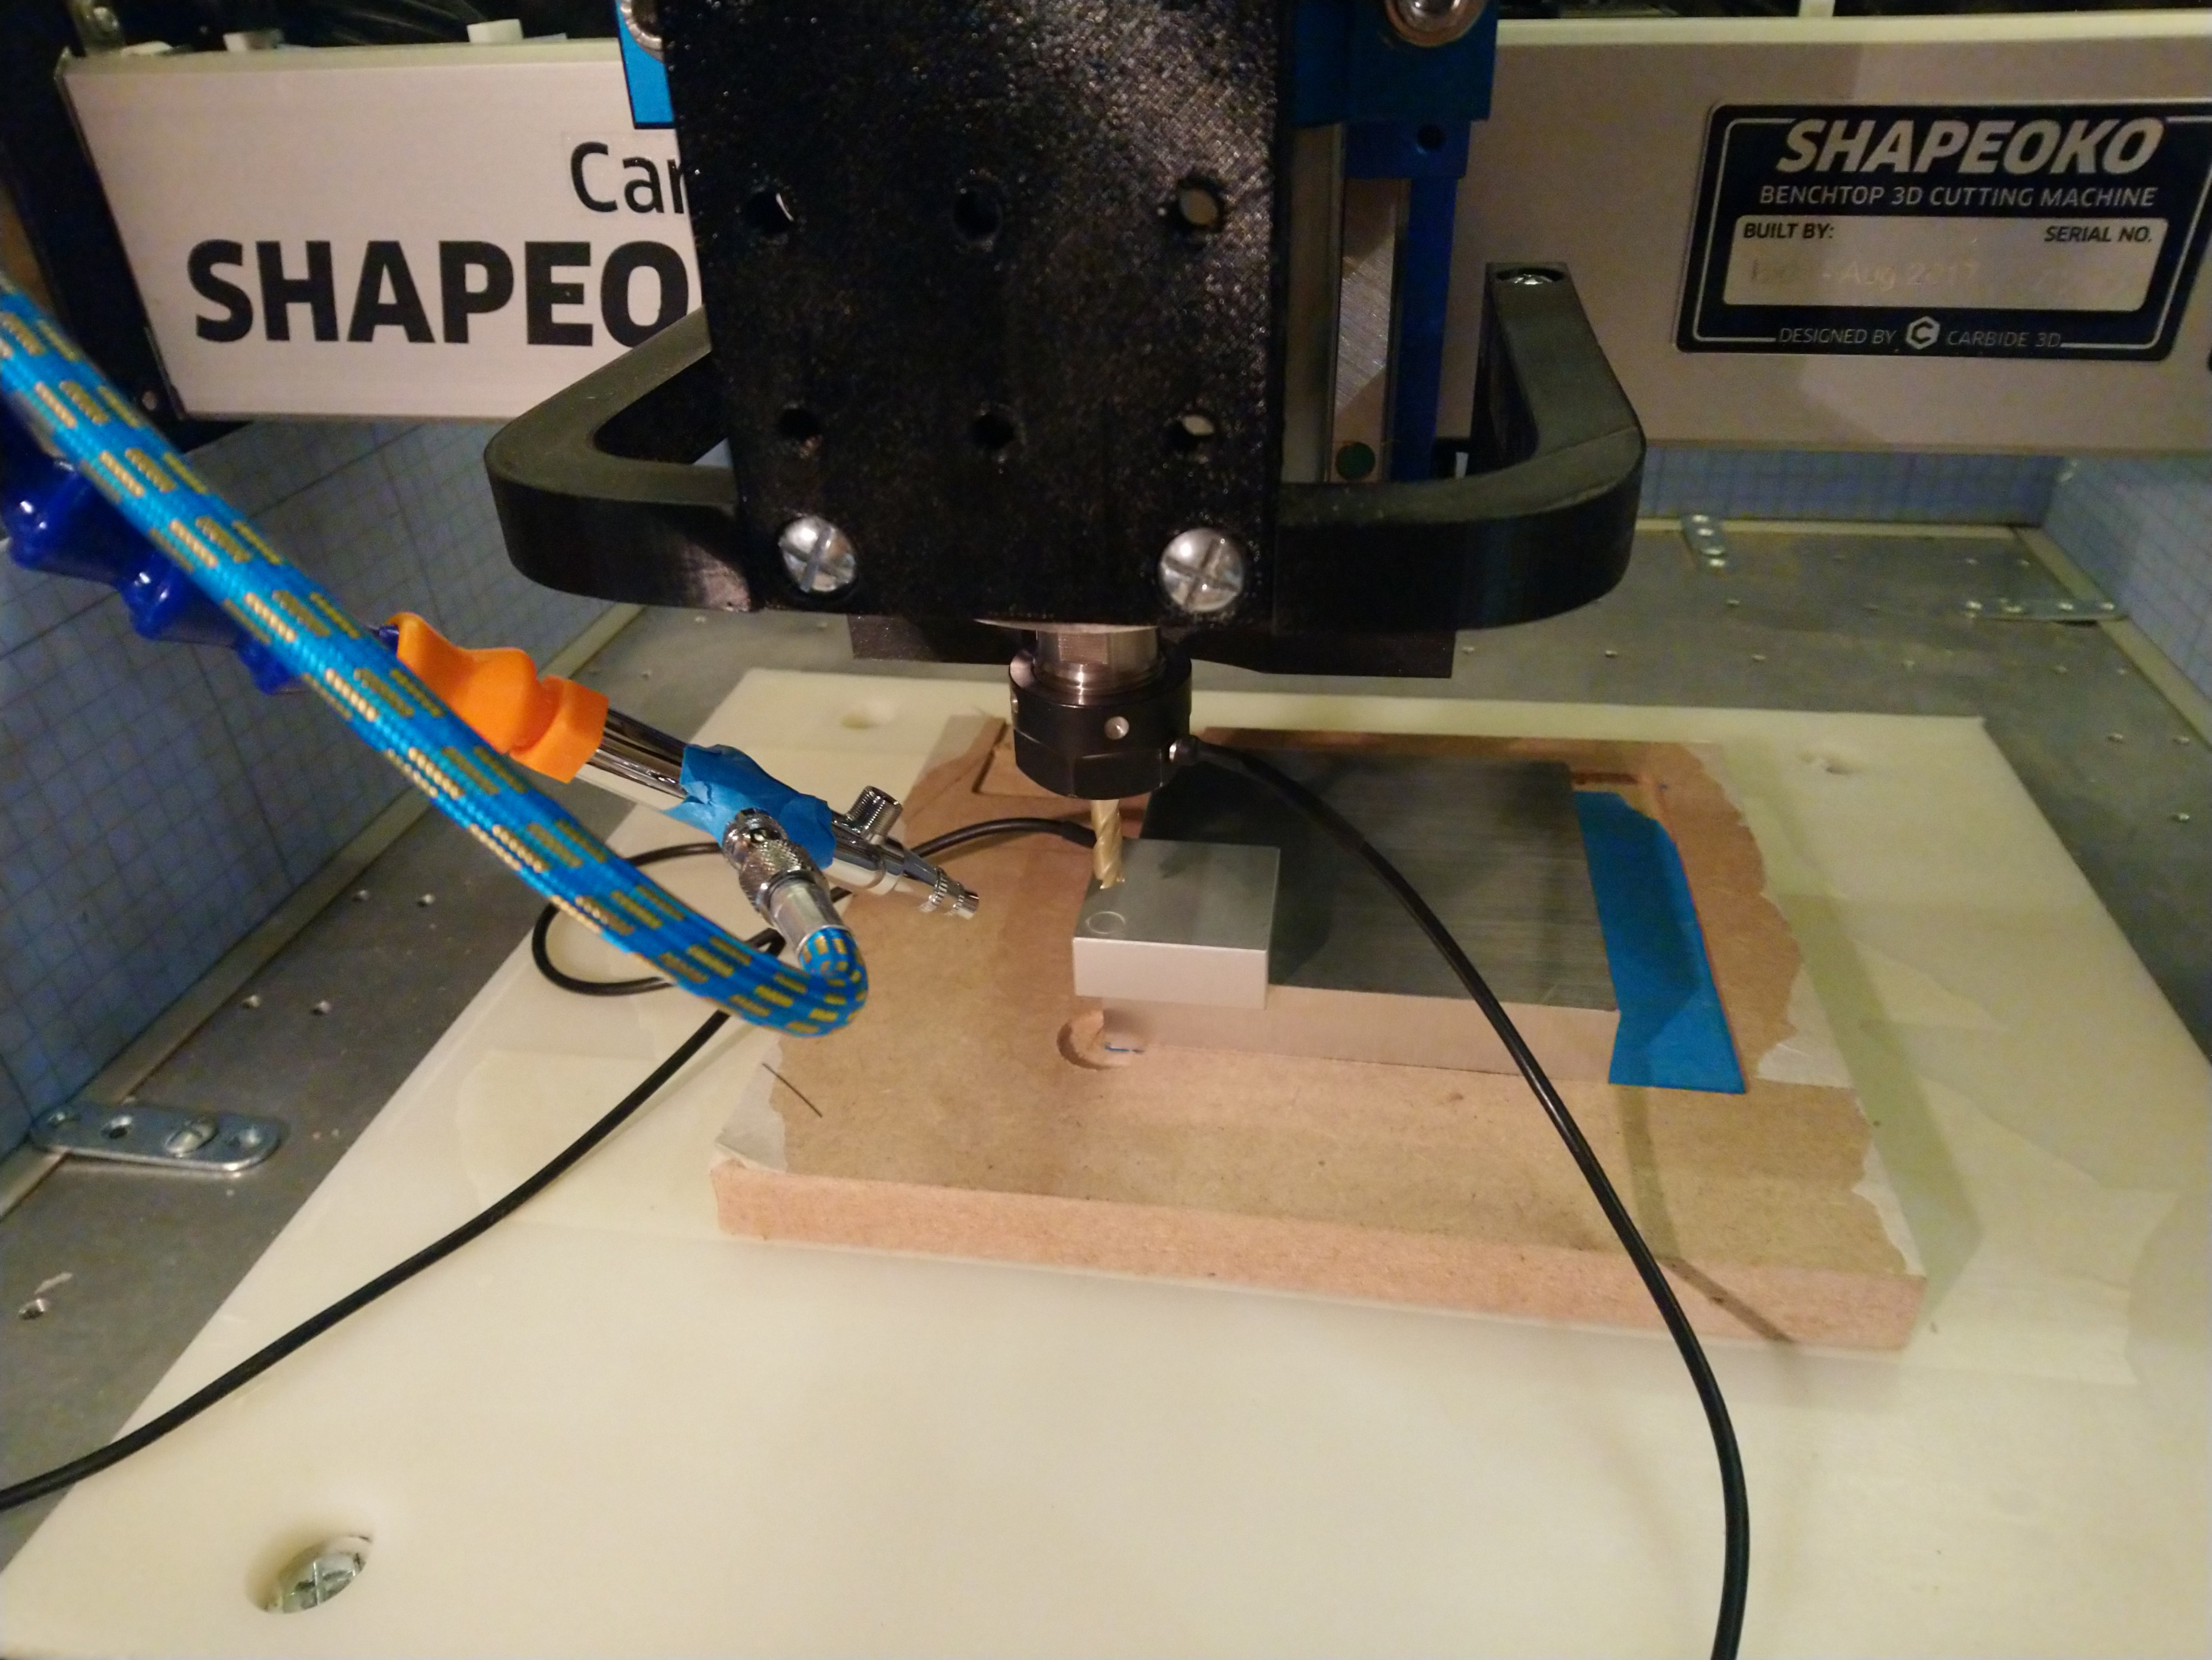
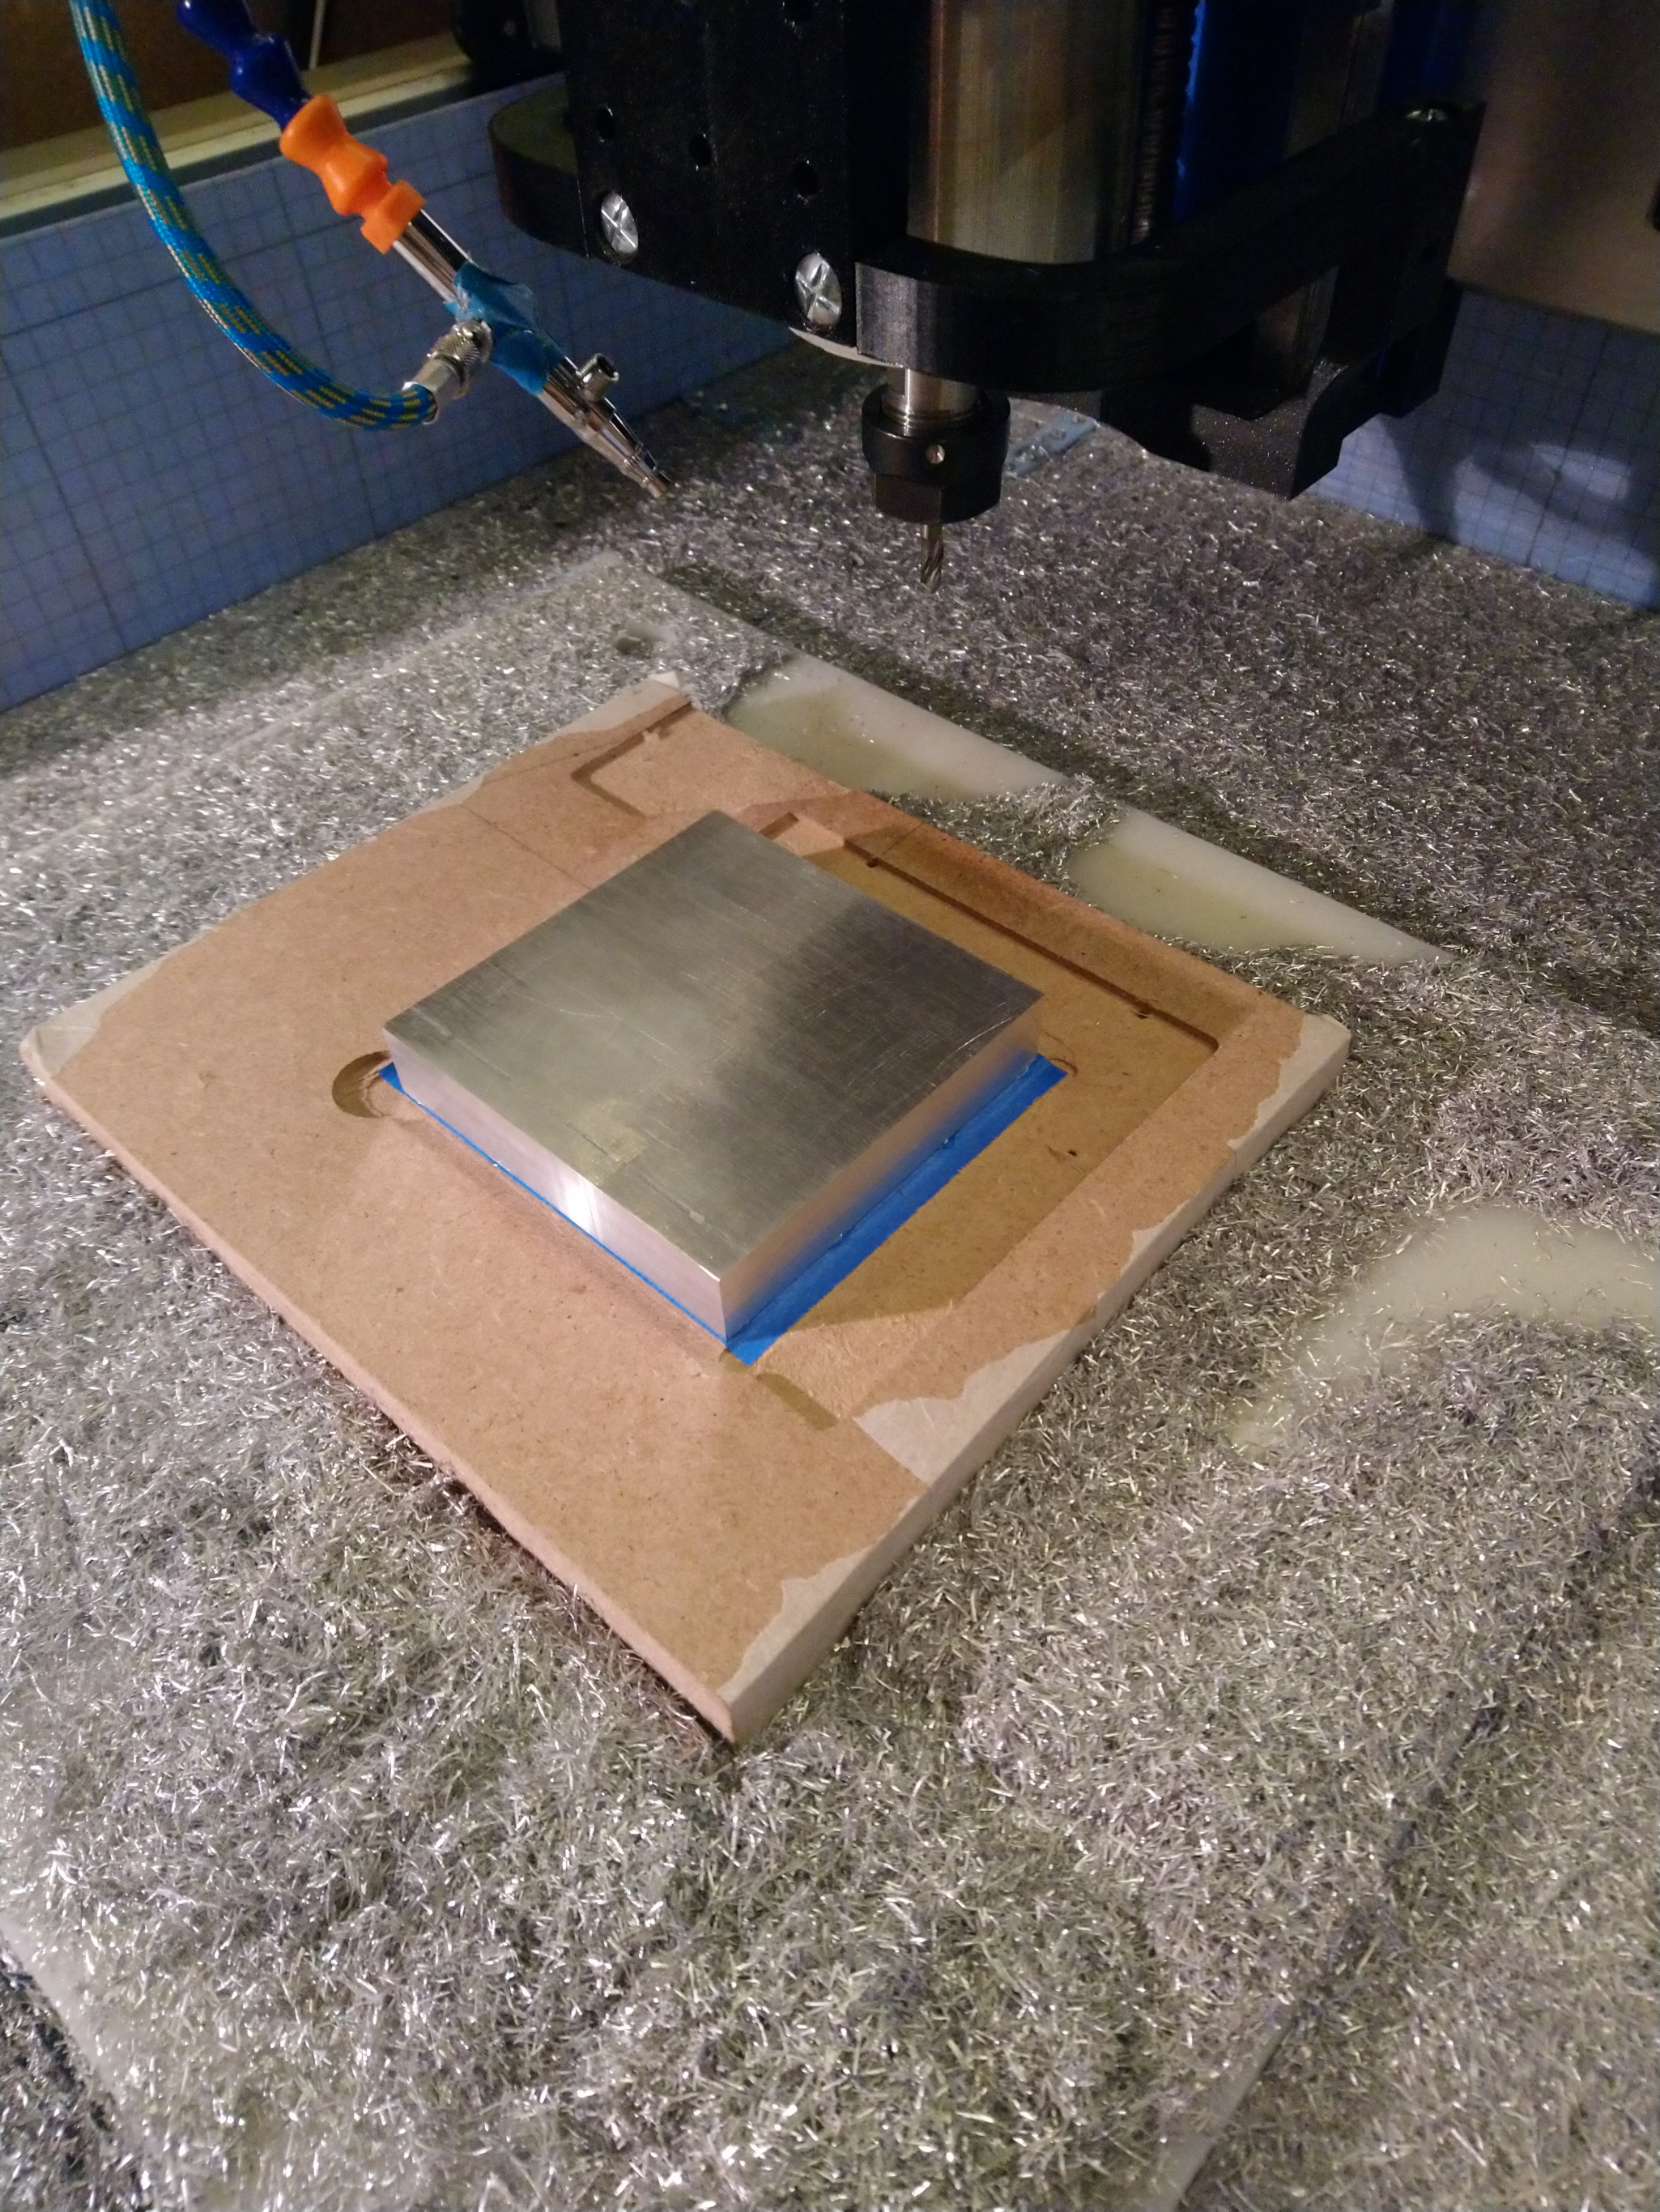
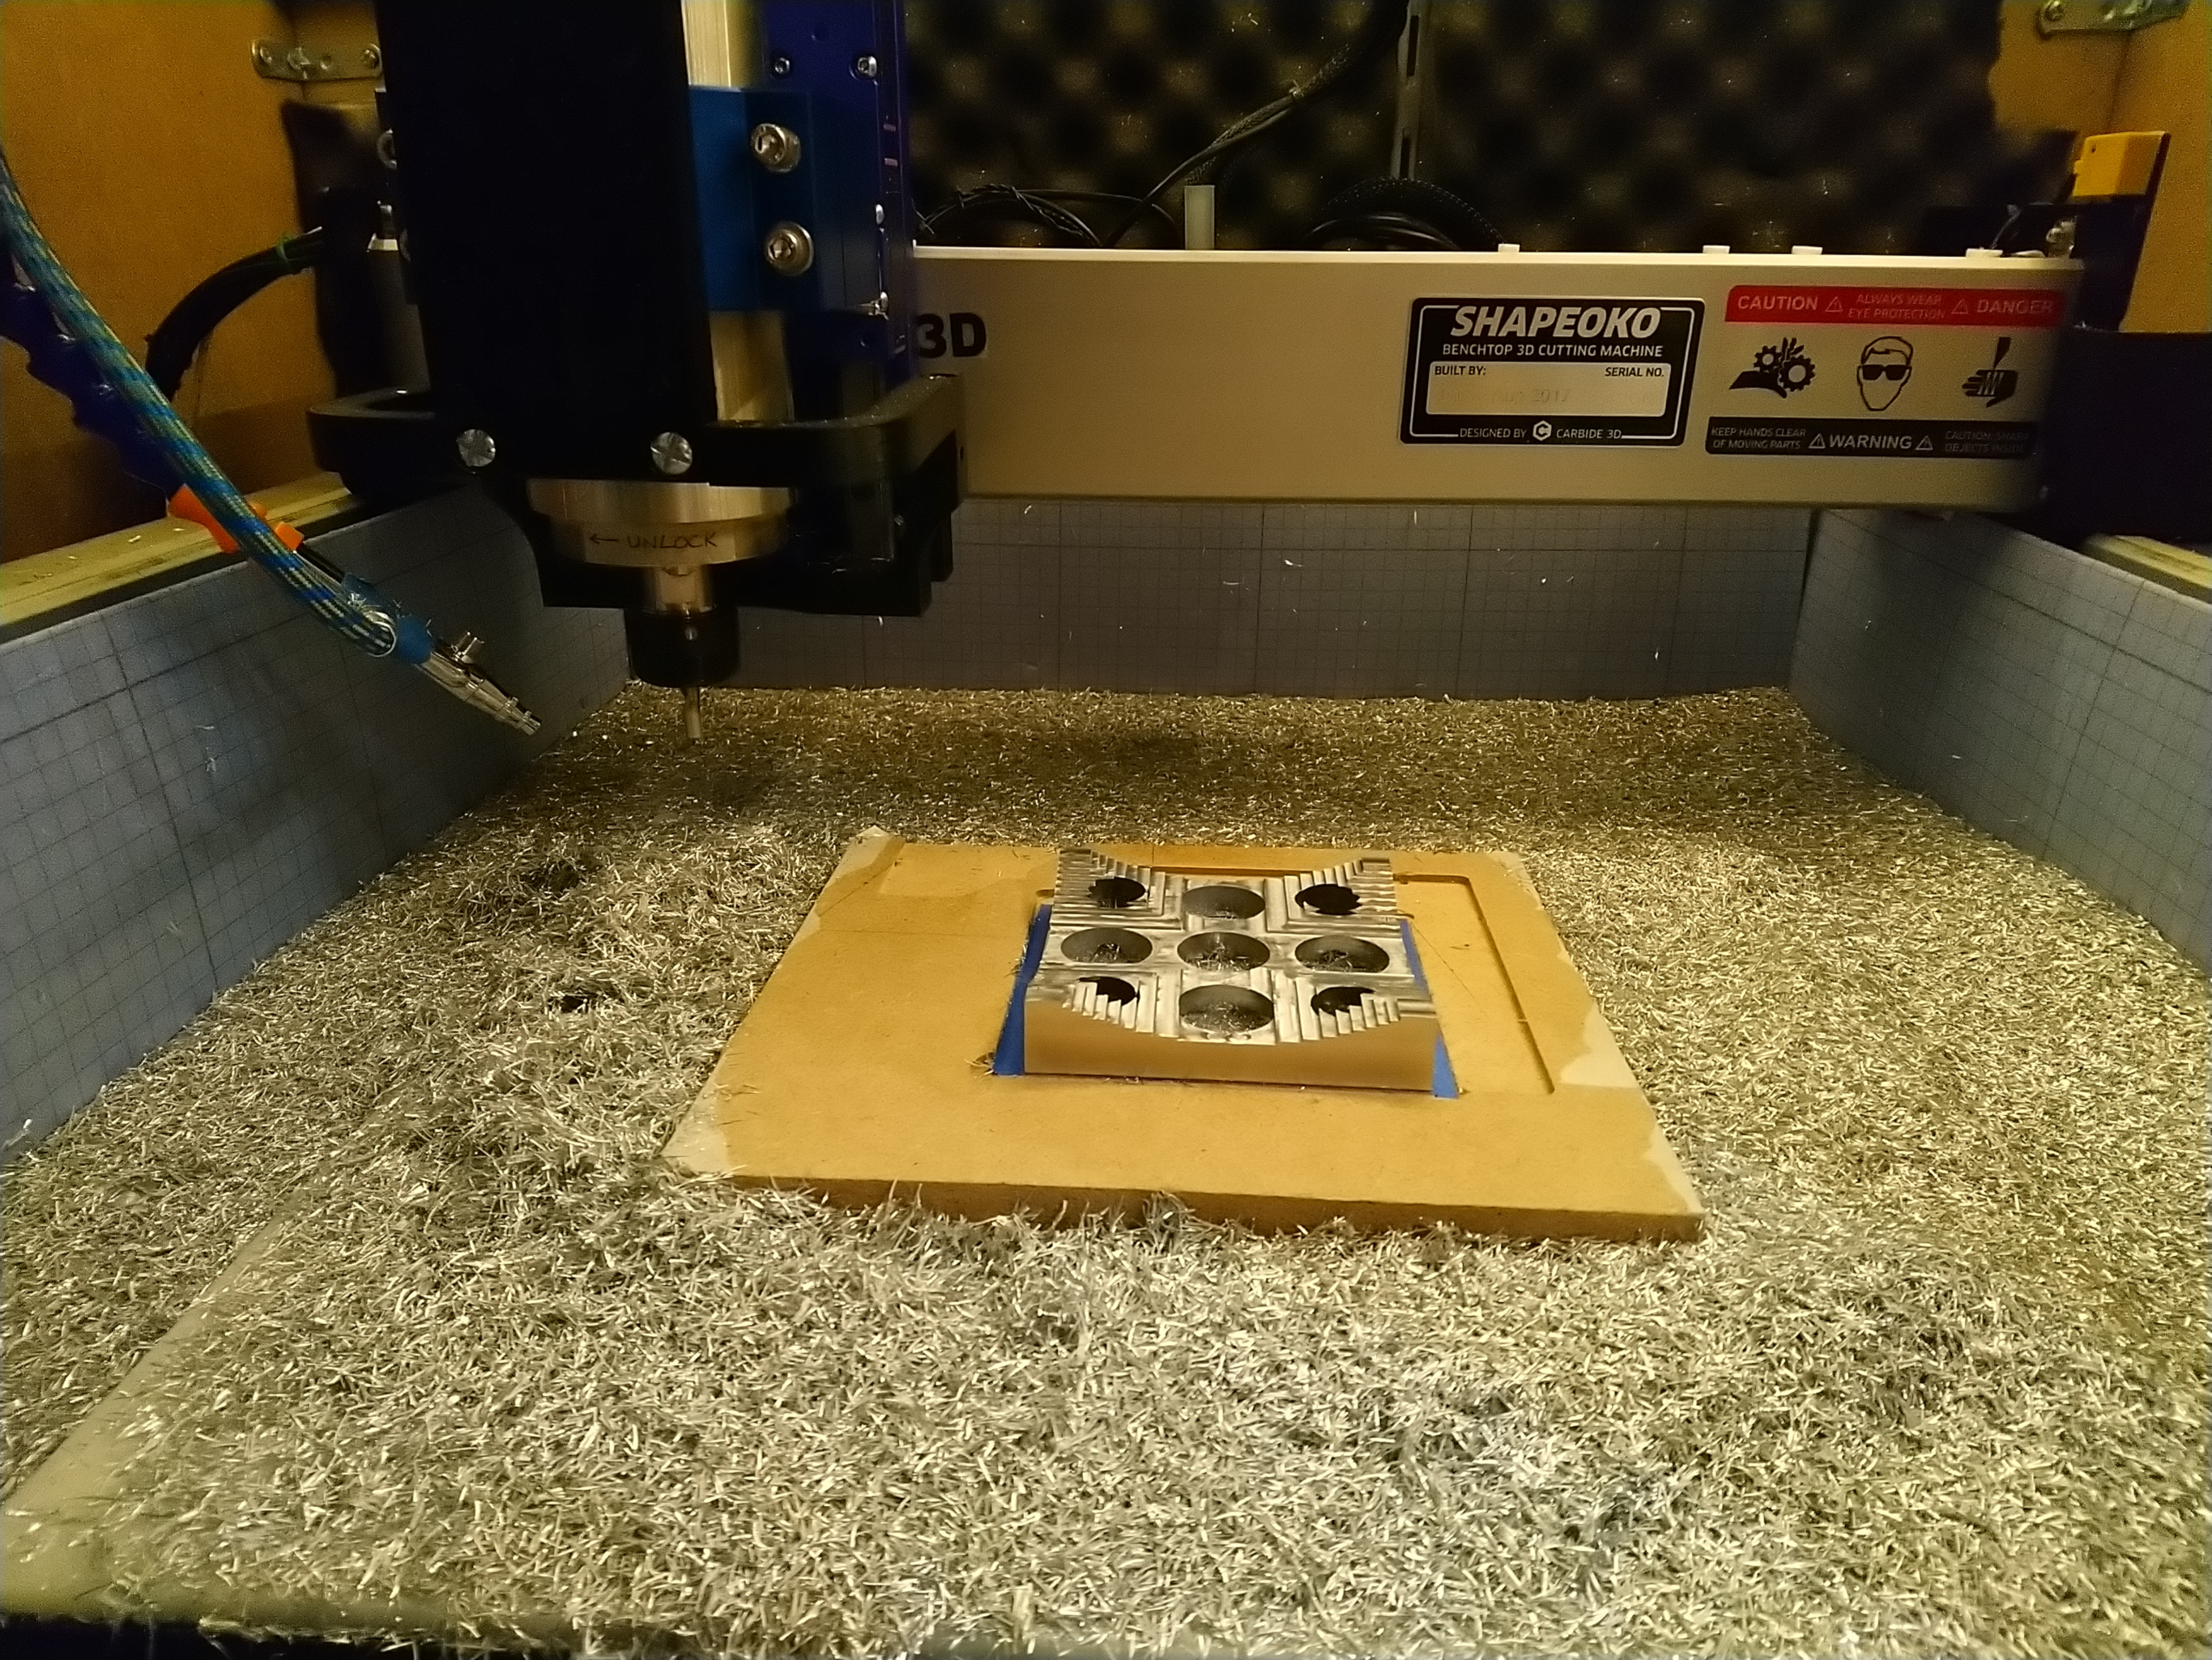
First things first, workholding. I used a piece of MDF, tape & glued it to my wasteboard, then cut a pocket to position the aluminium stock perfectly along the X and Y axis:

Tape & glue again to secure the stock:

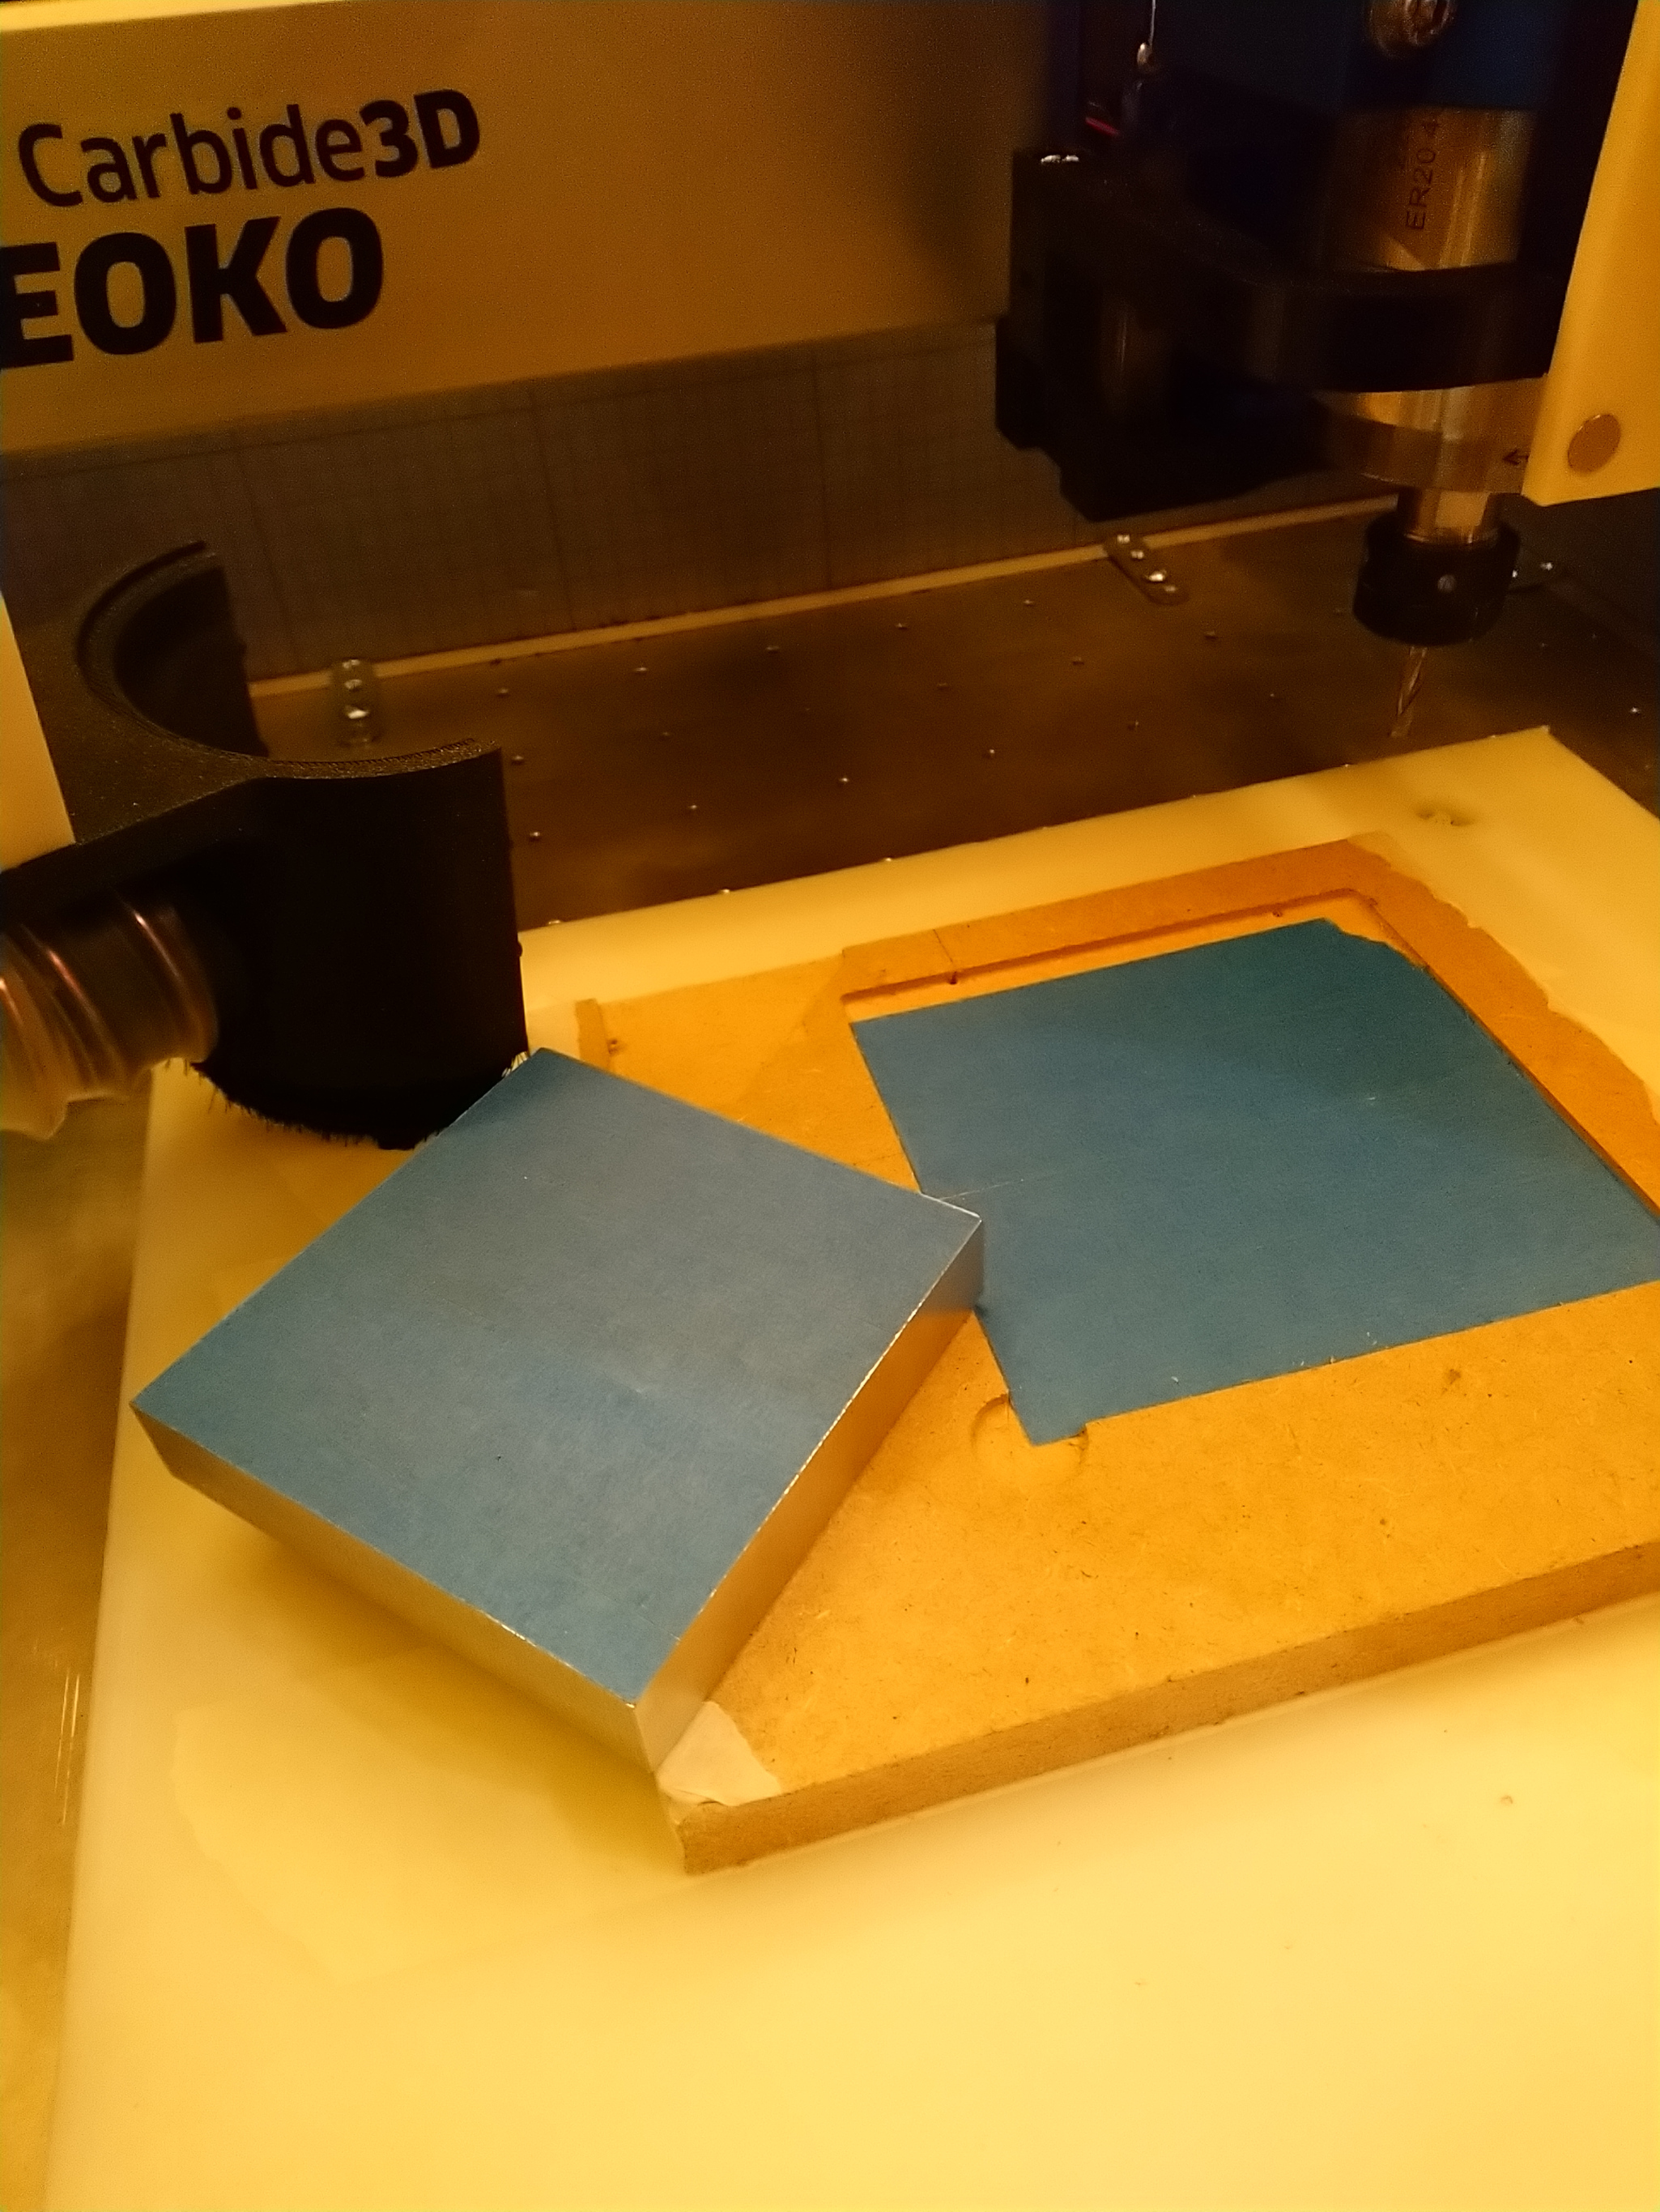
And I was ready to go:

I got to use my (old-ish) Beaver Zero probe:

and proceeded to do the facing operation on the top:
#201Z, 16000RPM,1500mm/min, DOC 0.17mm

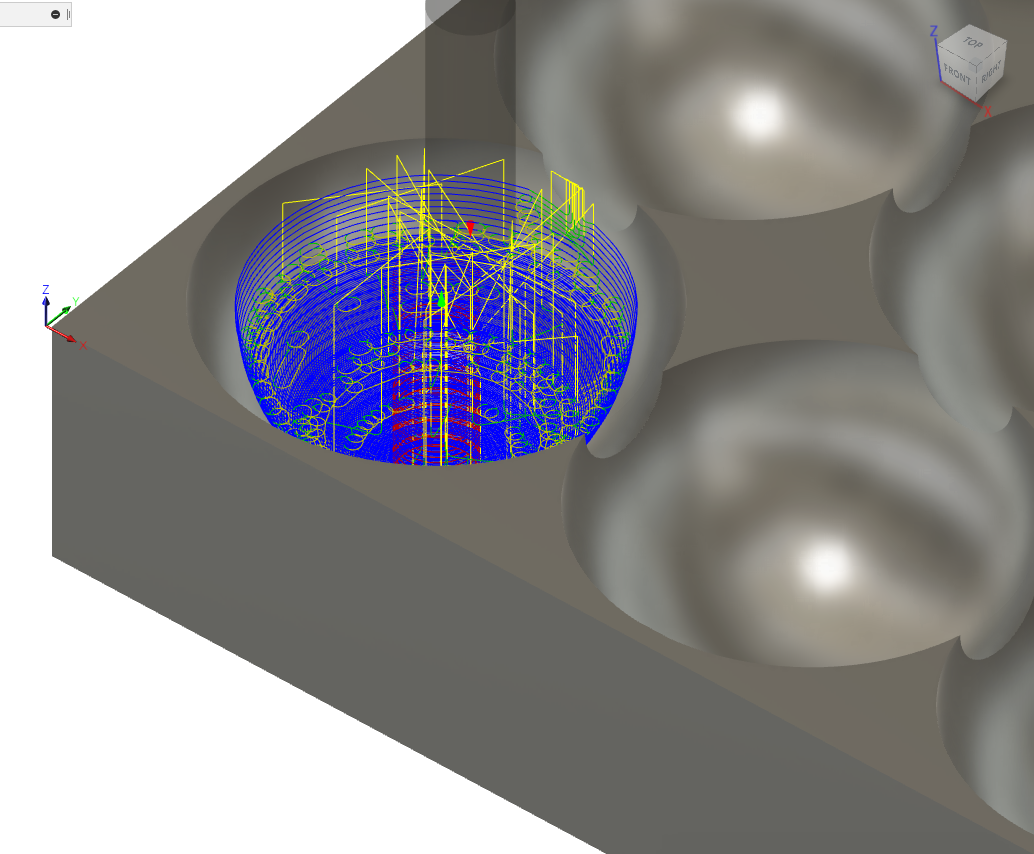
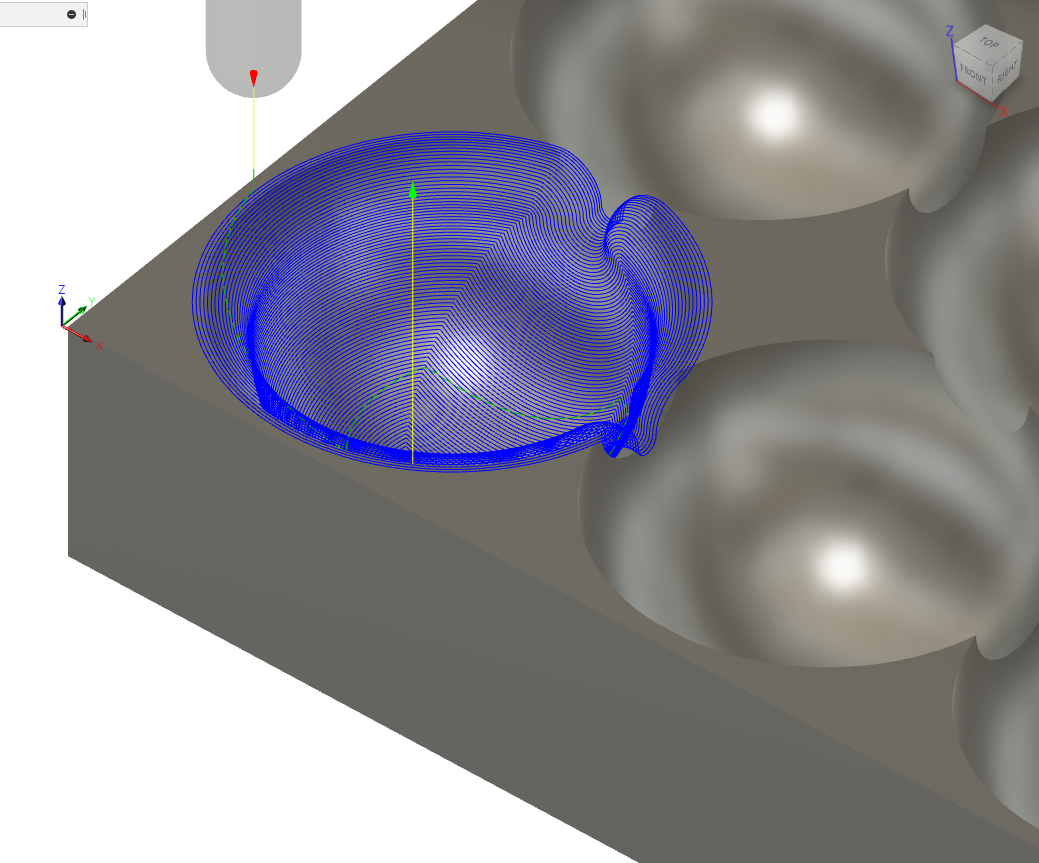
For roughing the first face, I created a separate 3D adaptive clearing toolpath for each half-sphere, just to break my cutting time into small manageable chunks (and let my compressor cooldown a bit between runs).

6mm single flute, 16000 RPM, 700mm/min, 0.2mm/min optimal load, 5mm stepdown, 0.2mm axial and radial stock to leave:

Of course I messed up some parameters initially, so it was a good thing I did one pocket at a time, to adjust & relaunch and hide my mistakes:
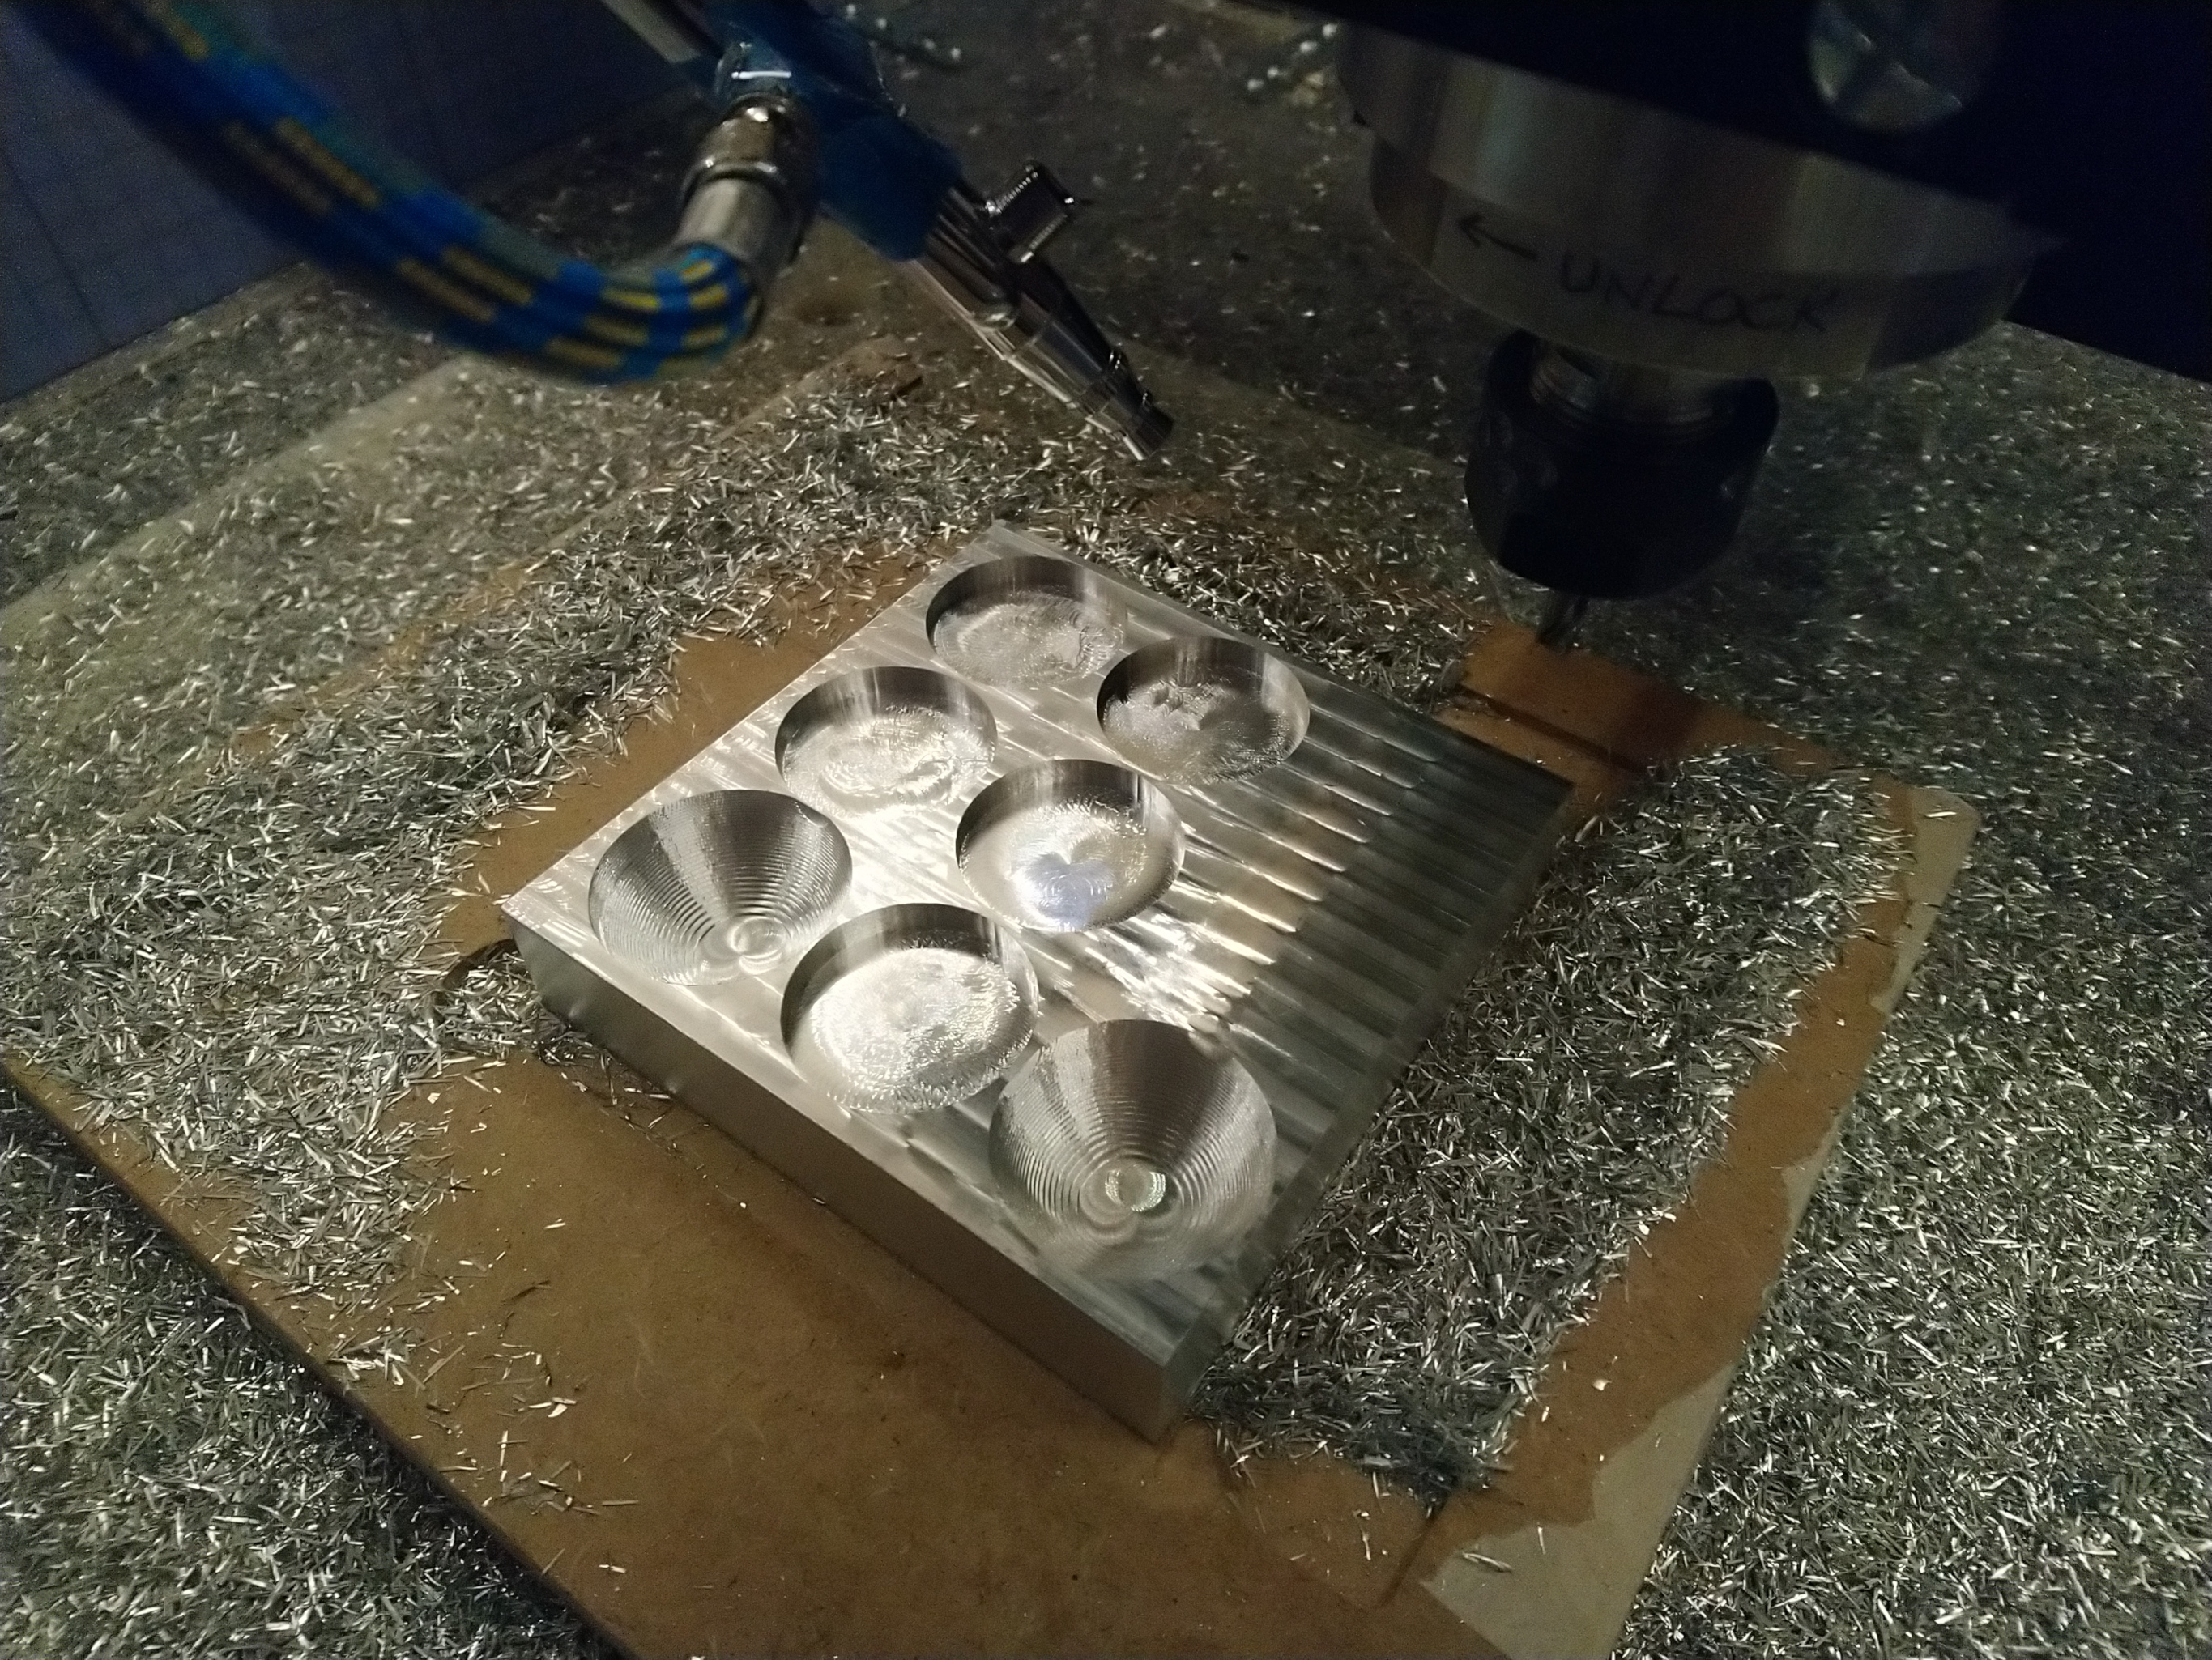
Anyway, I got this:

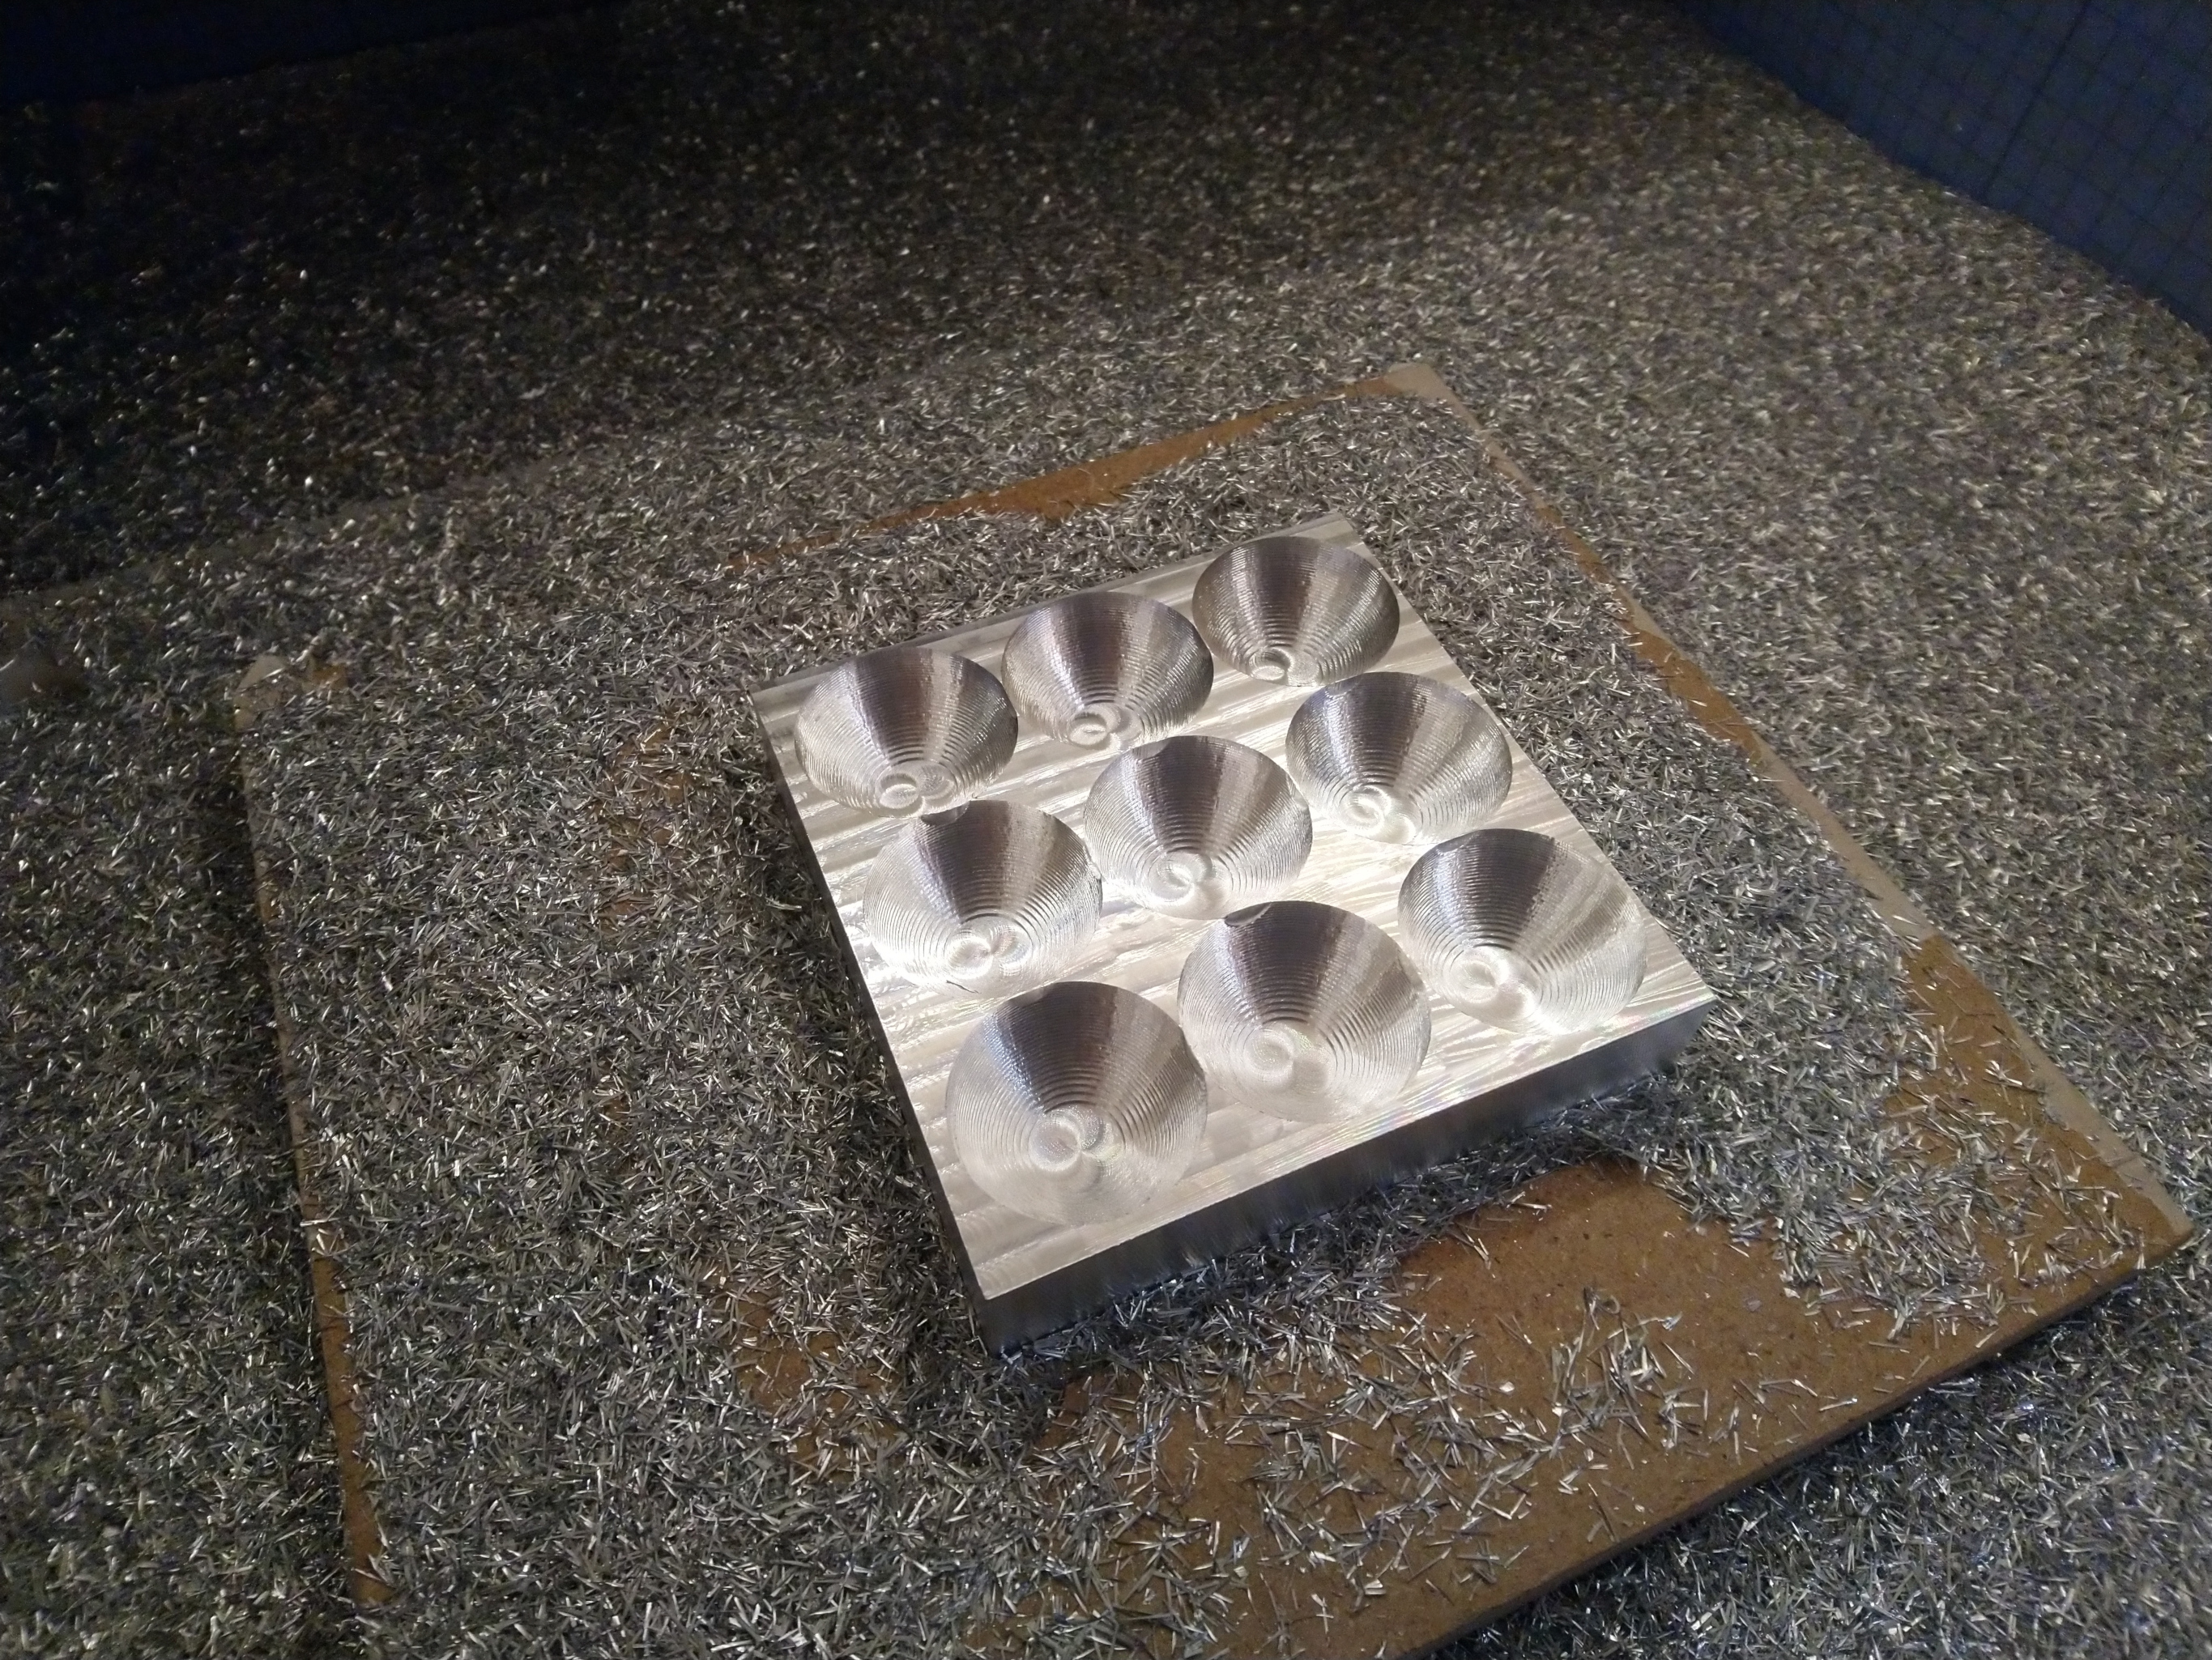
Then proceeded to the “finishing” pass using a Scallop toolpath, 1/4" ballnose, 16000RPM, 1200mm/min, rest machining from previous roughing op, 0.25mm stepover

Which gave me this:

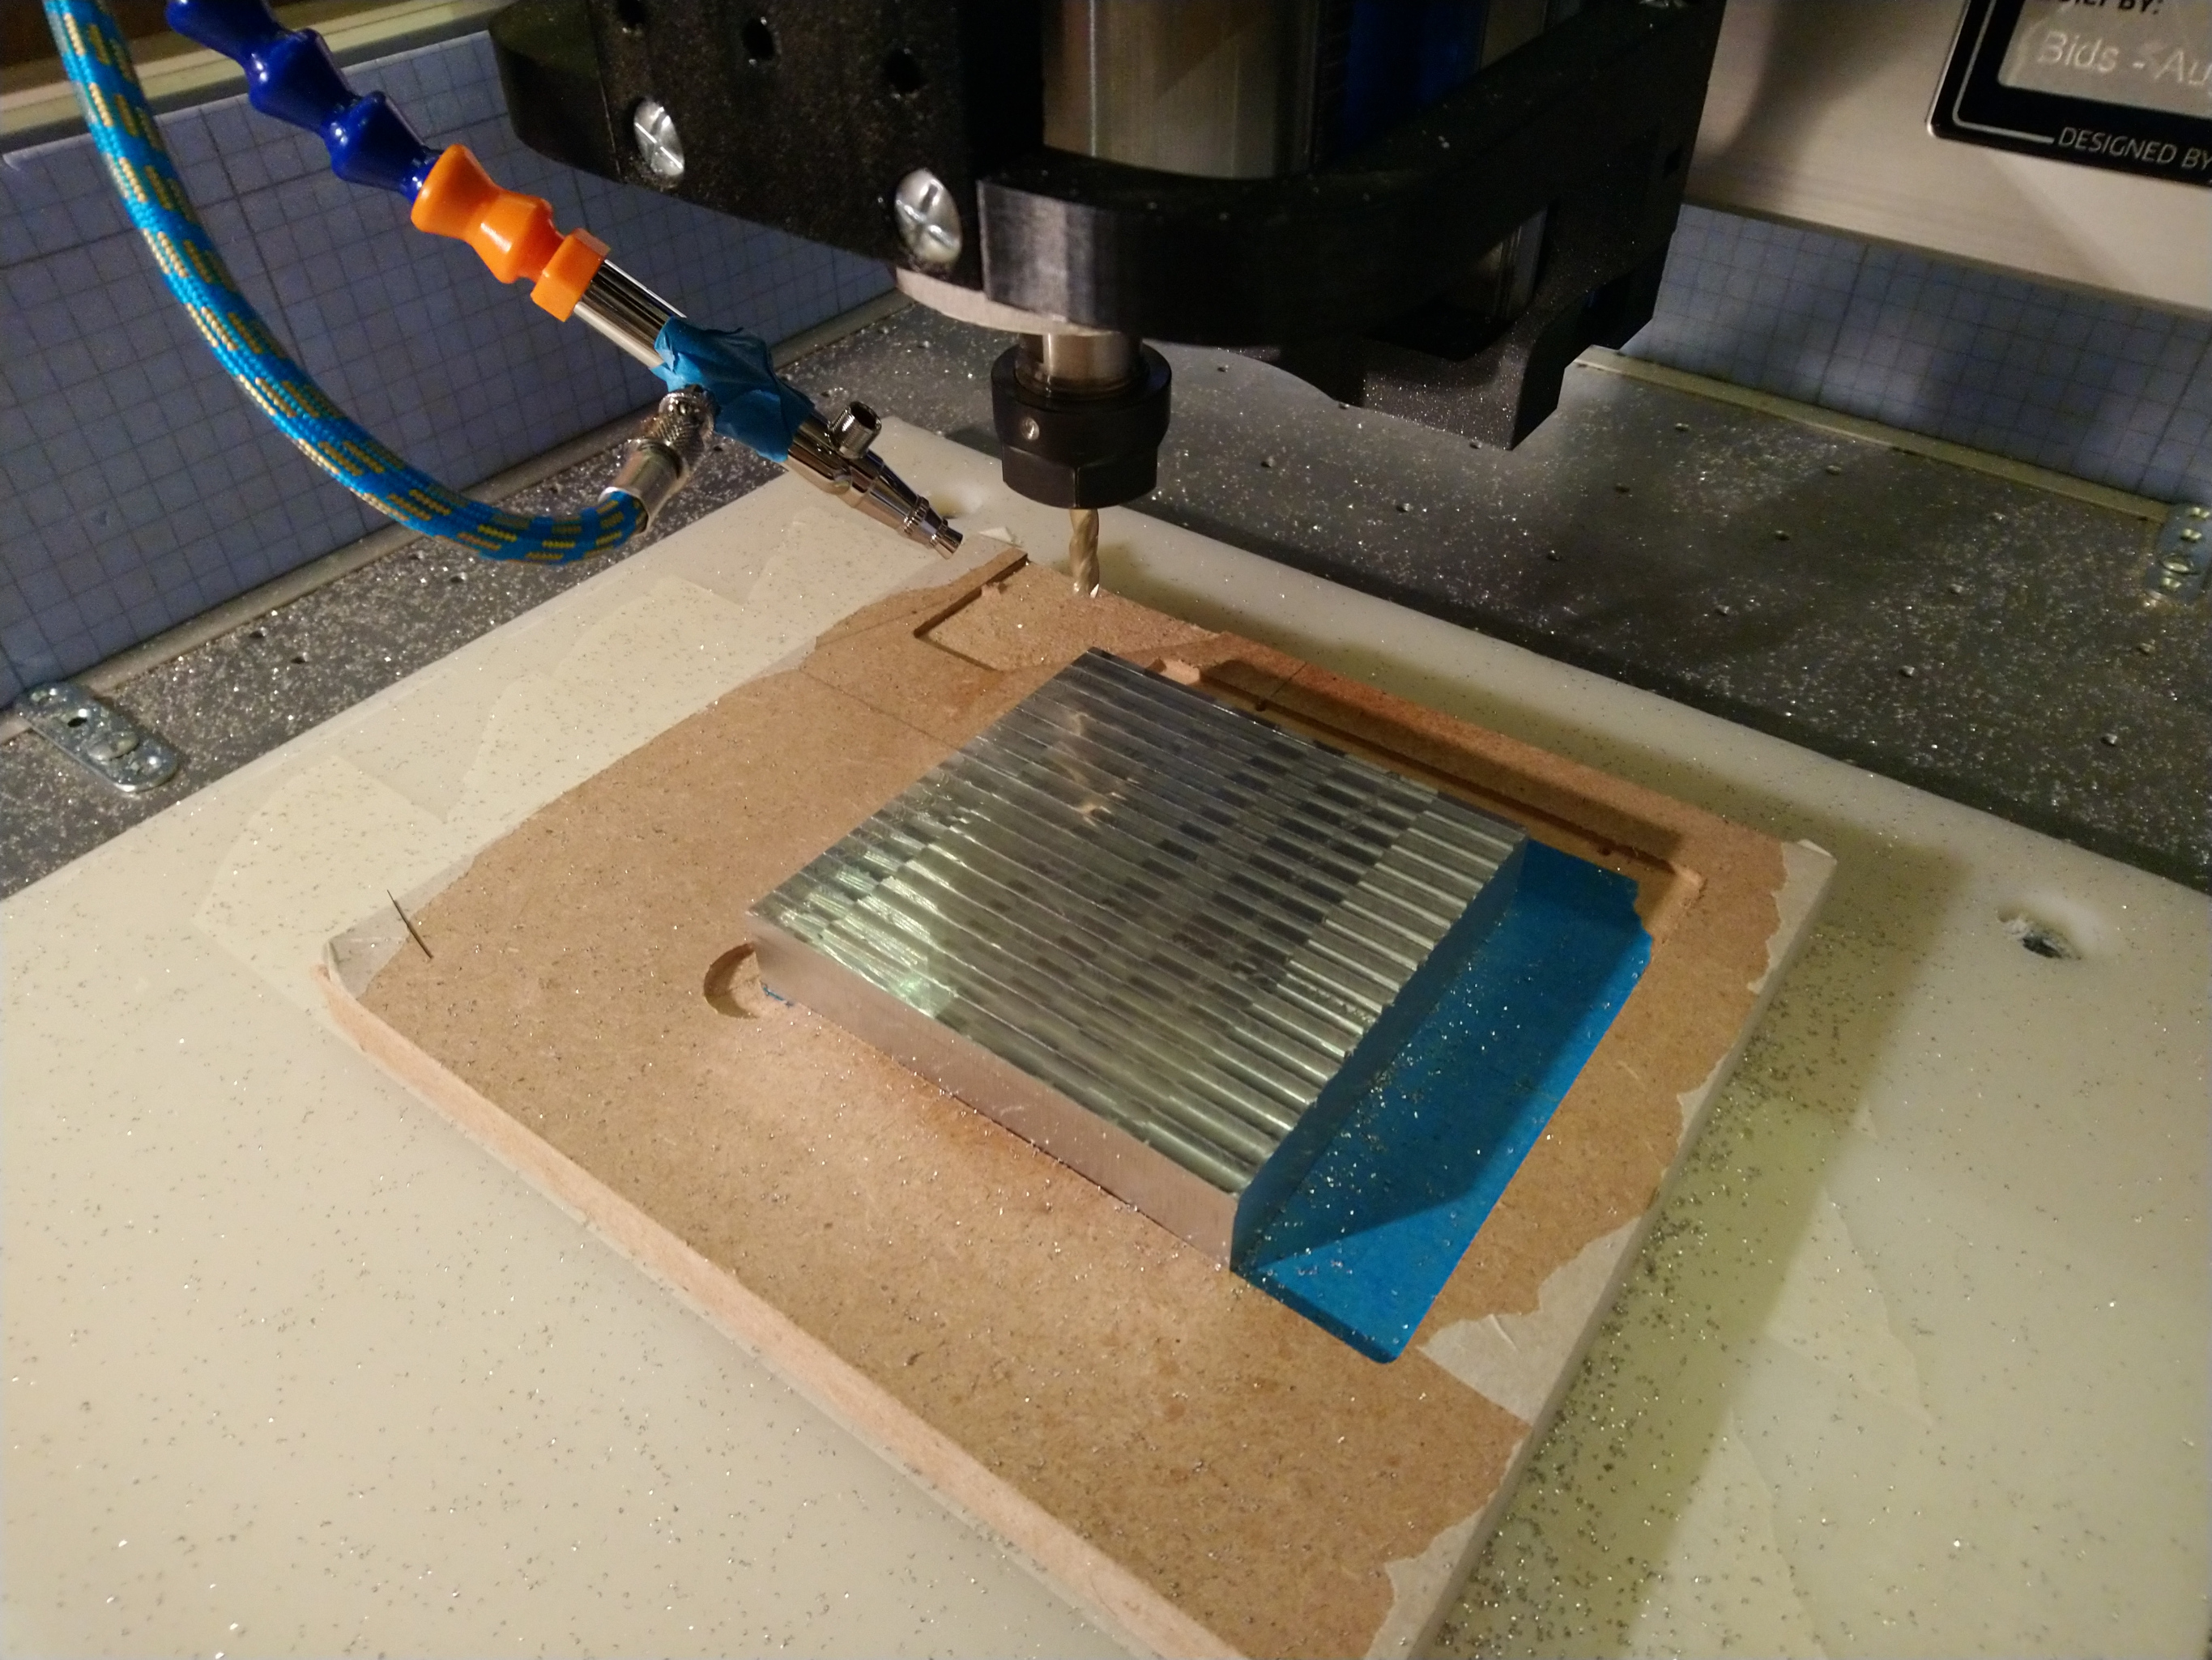
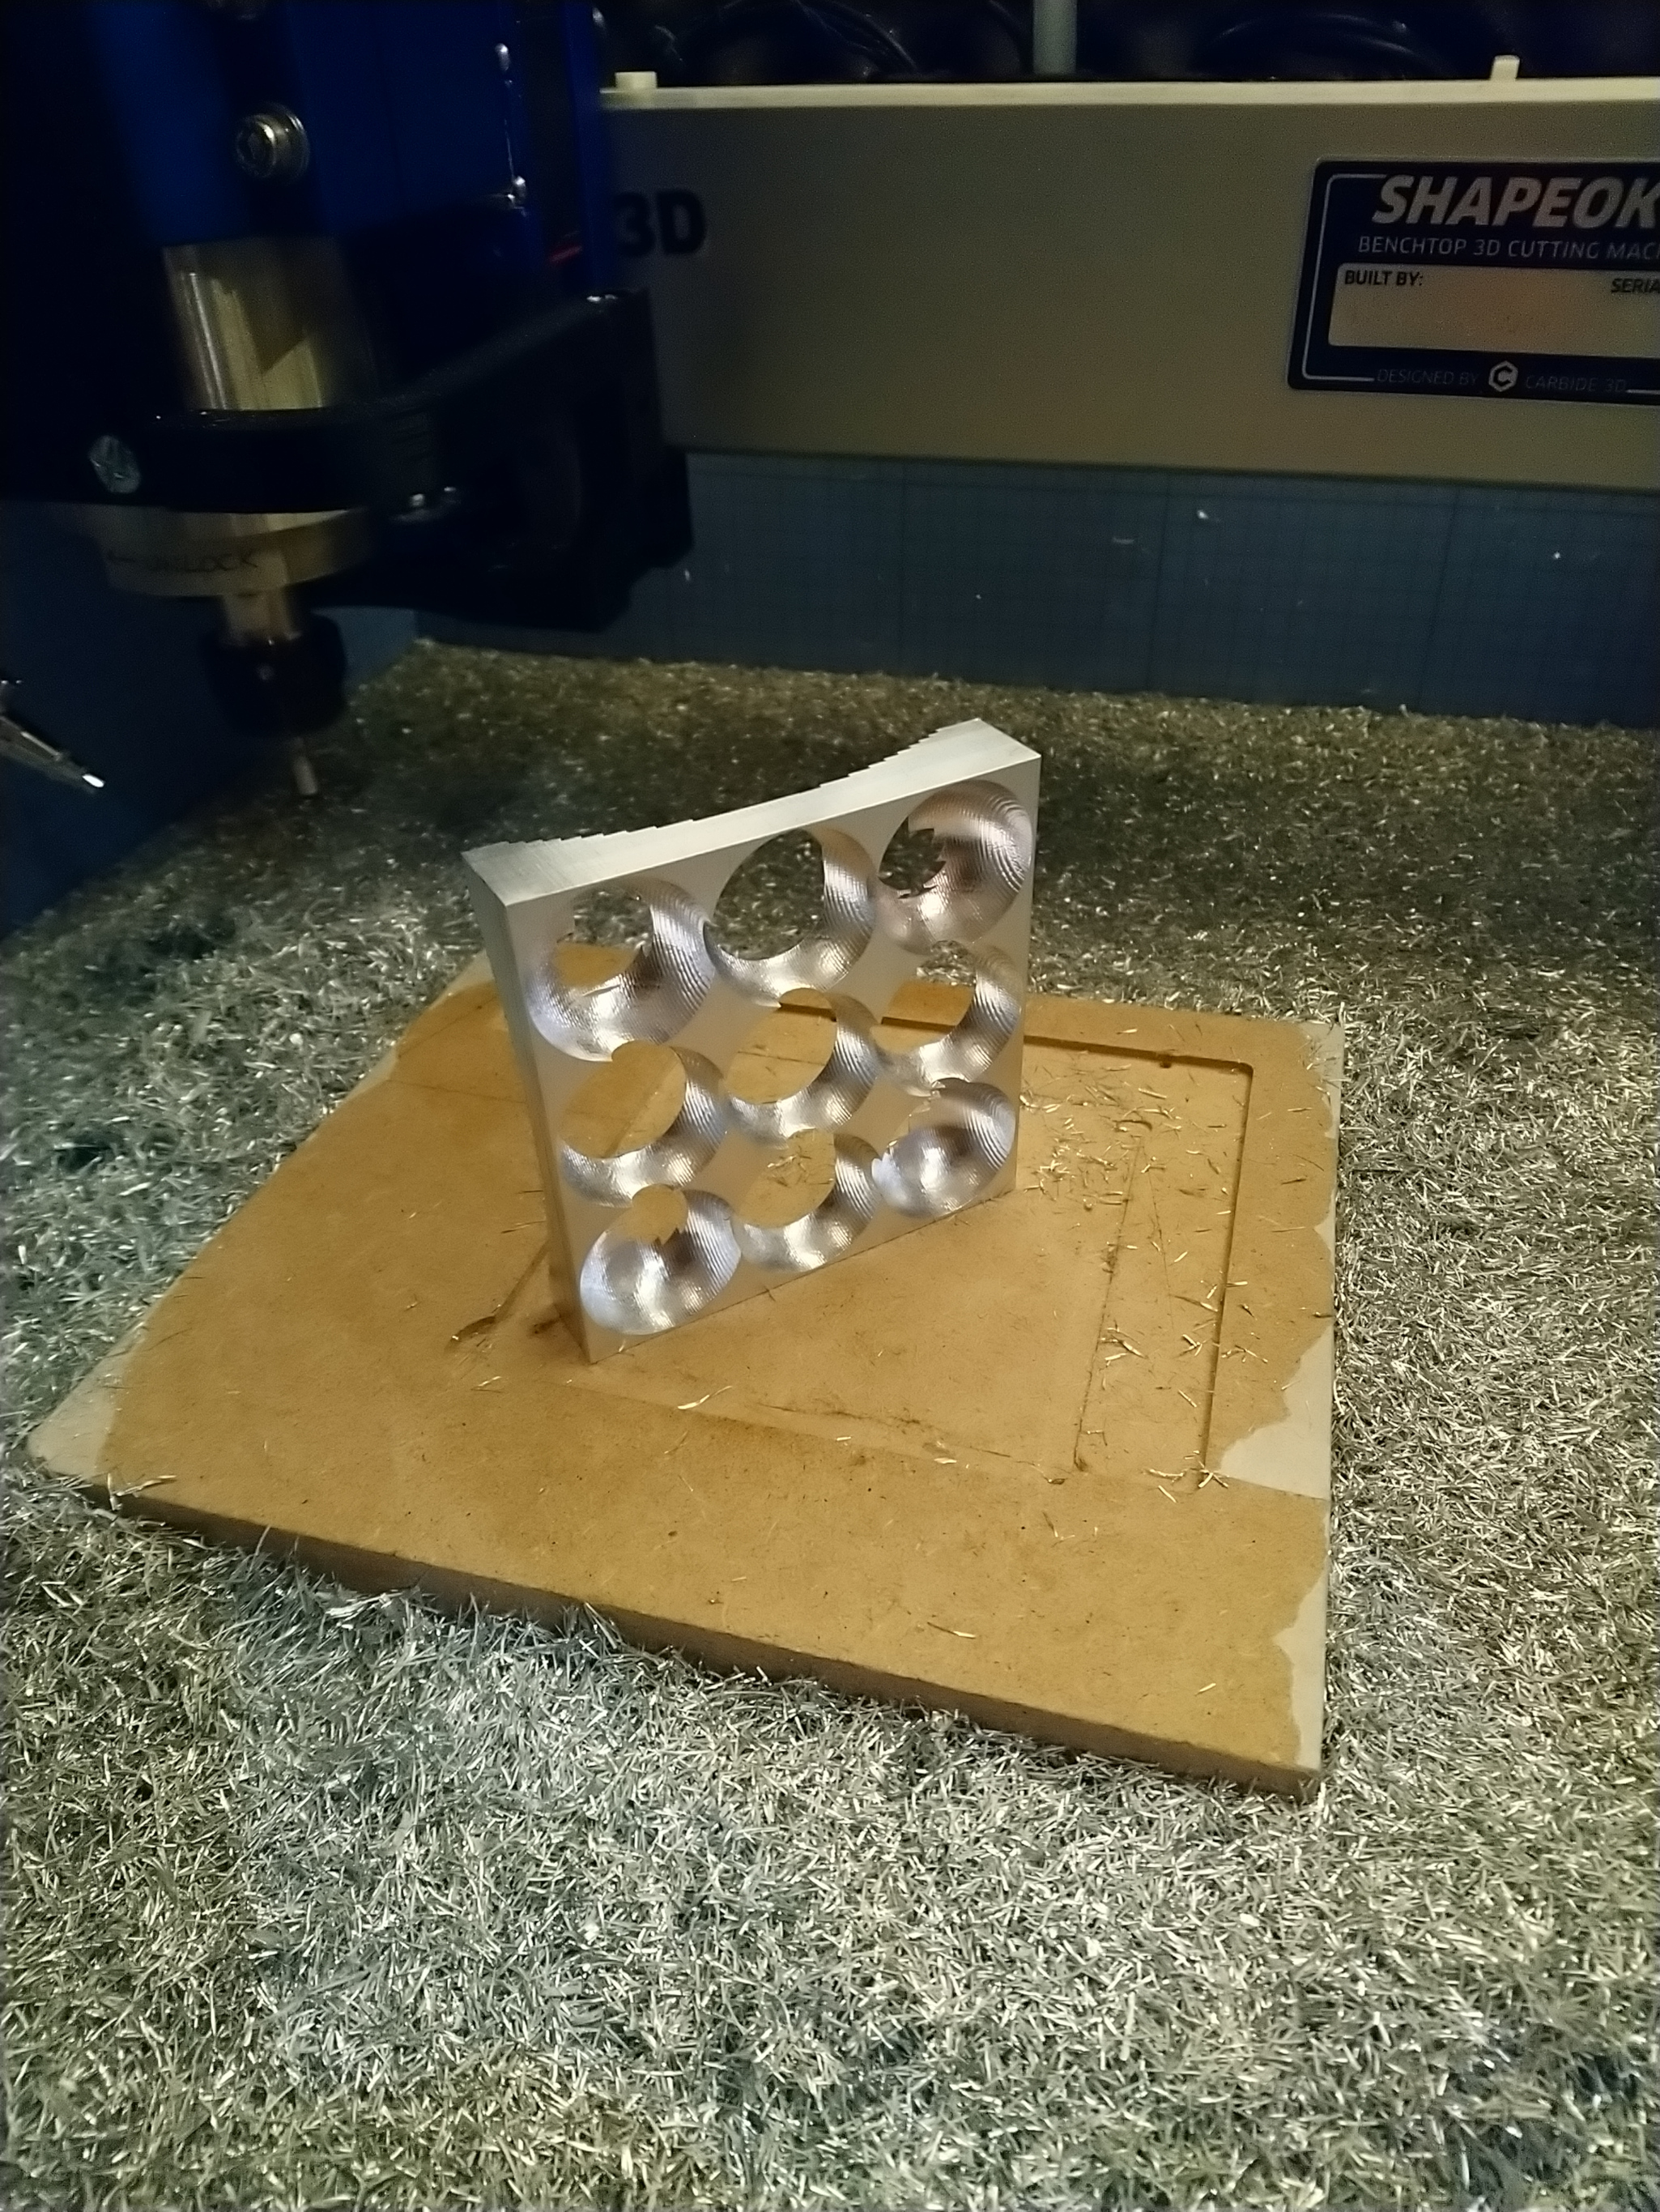
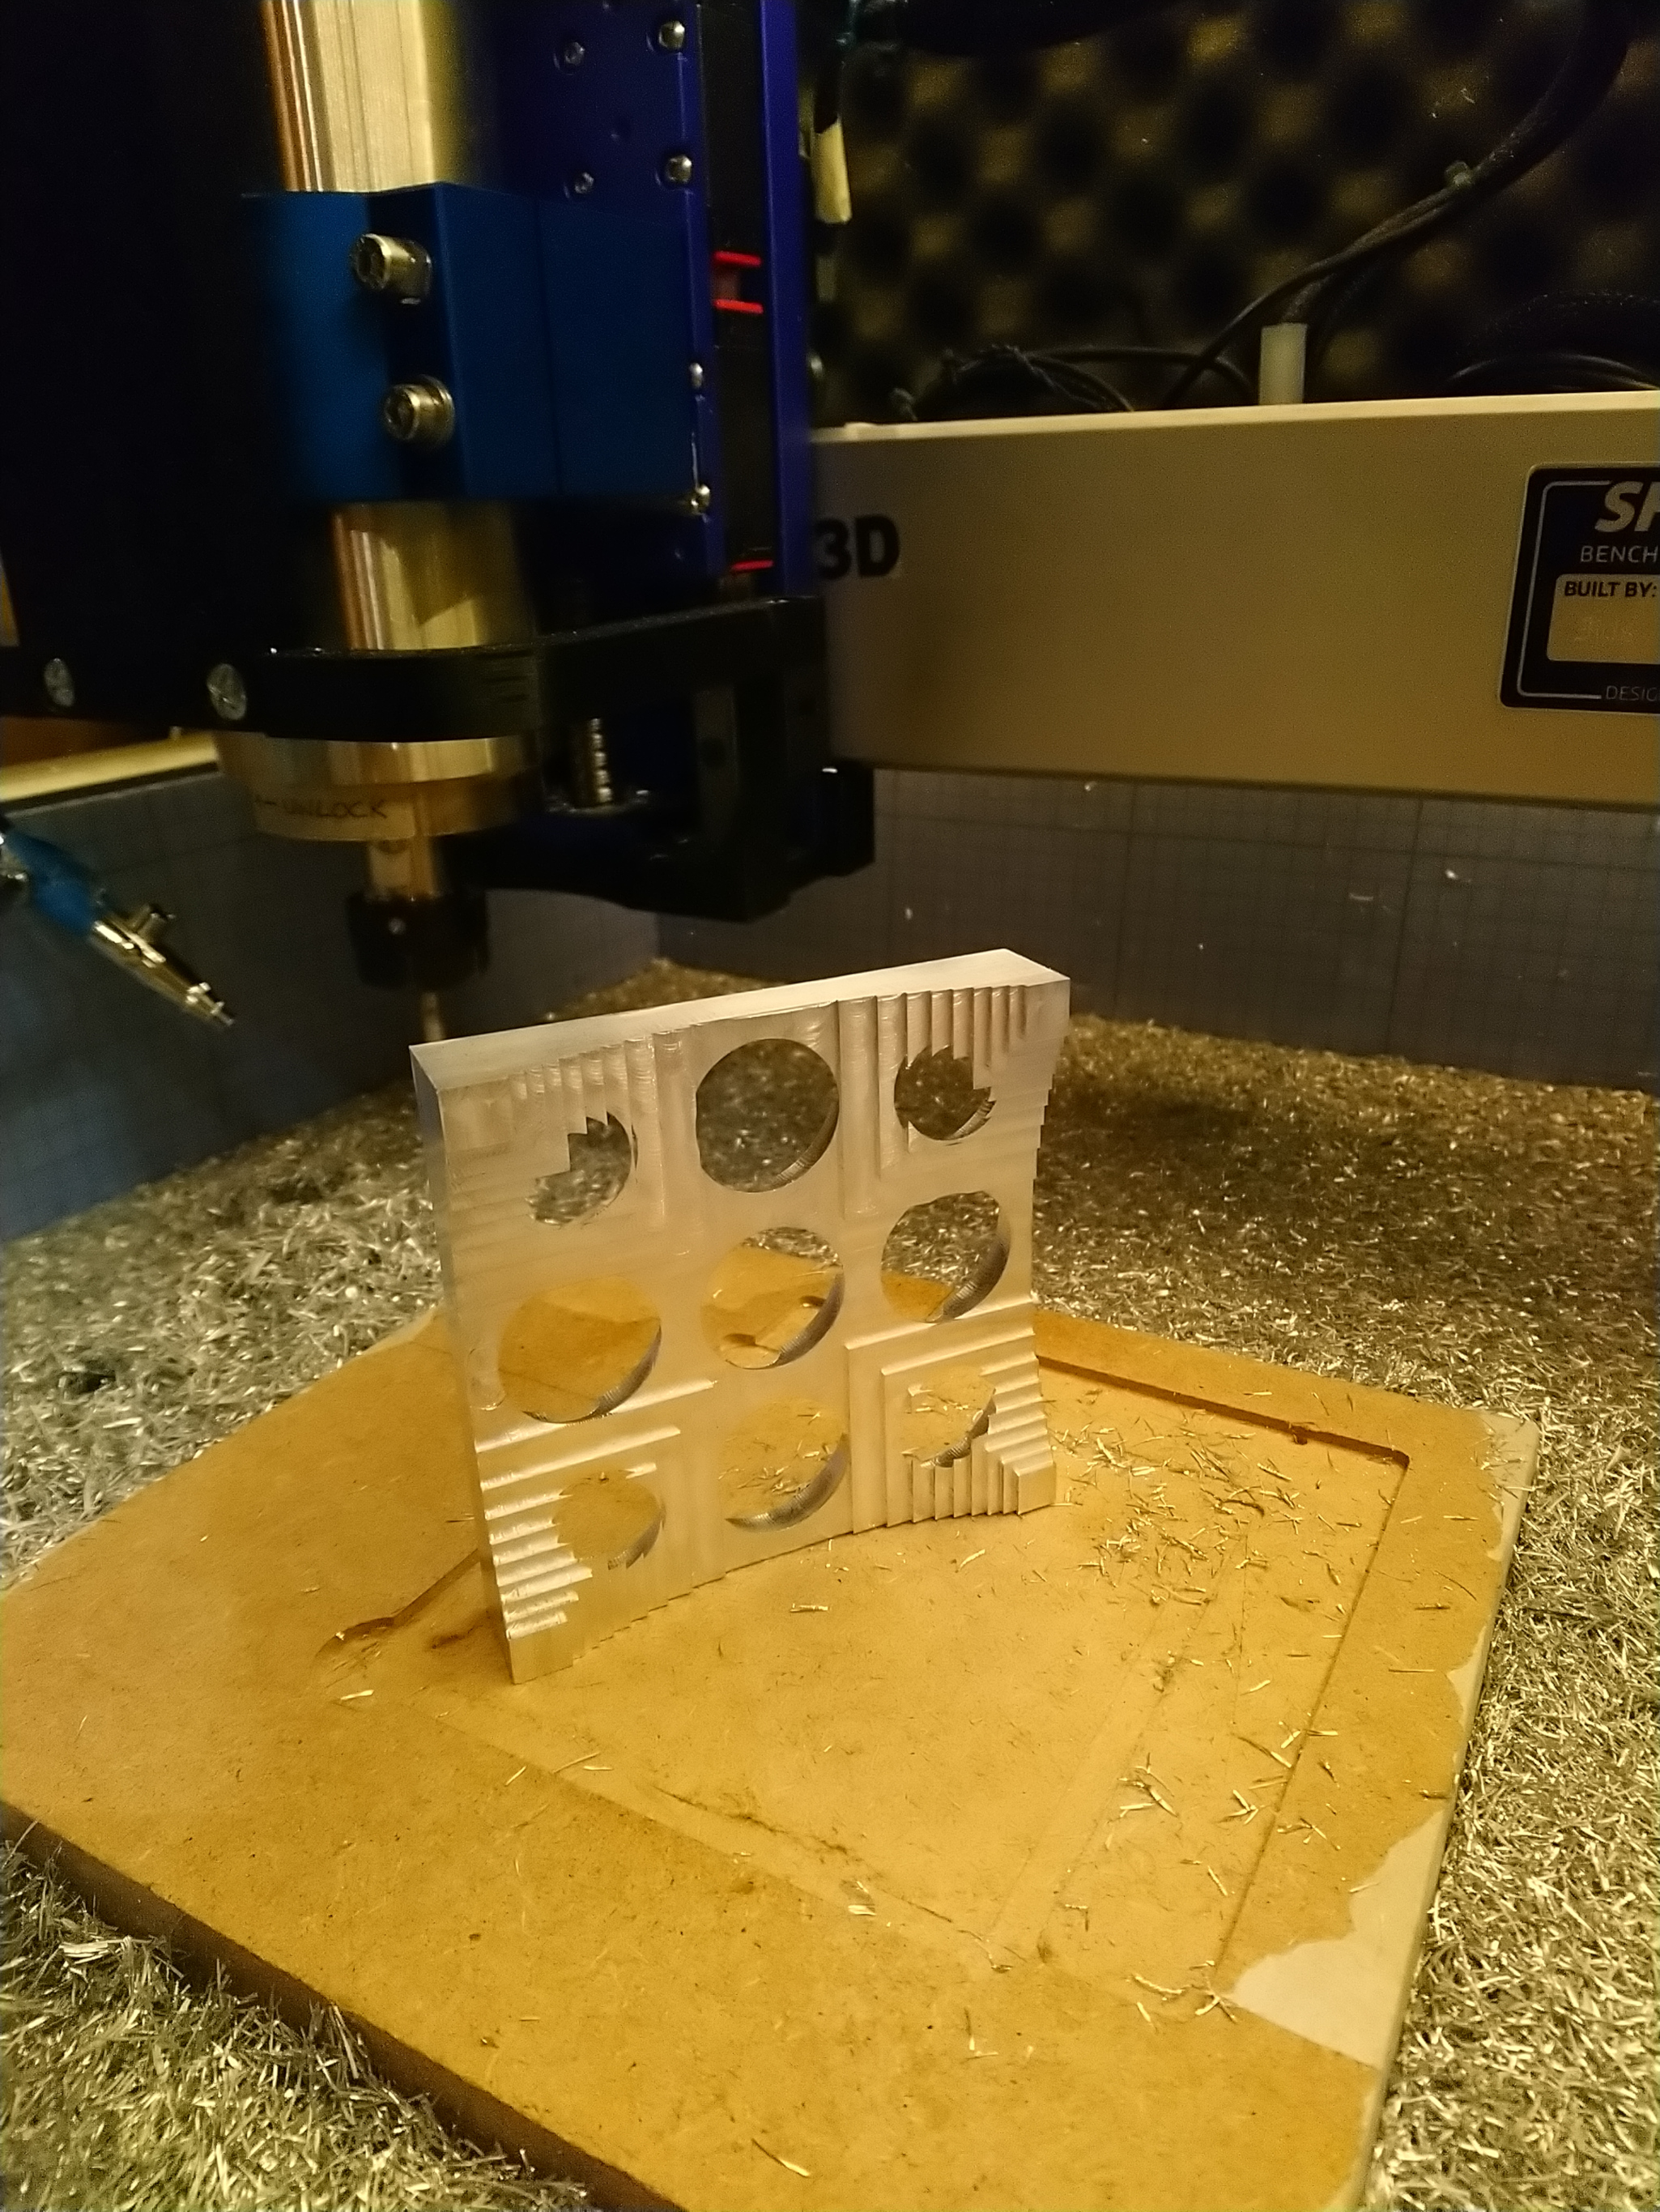
Time to flip the stock (luckily the piece still had enough flat faces for the tape & glue to still work)

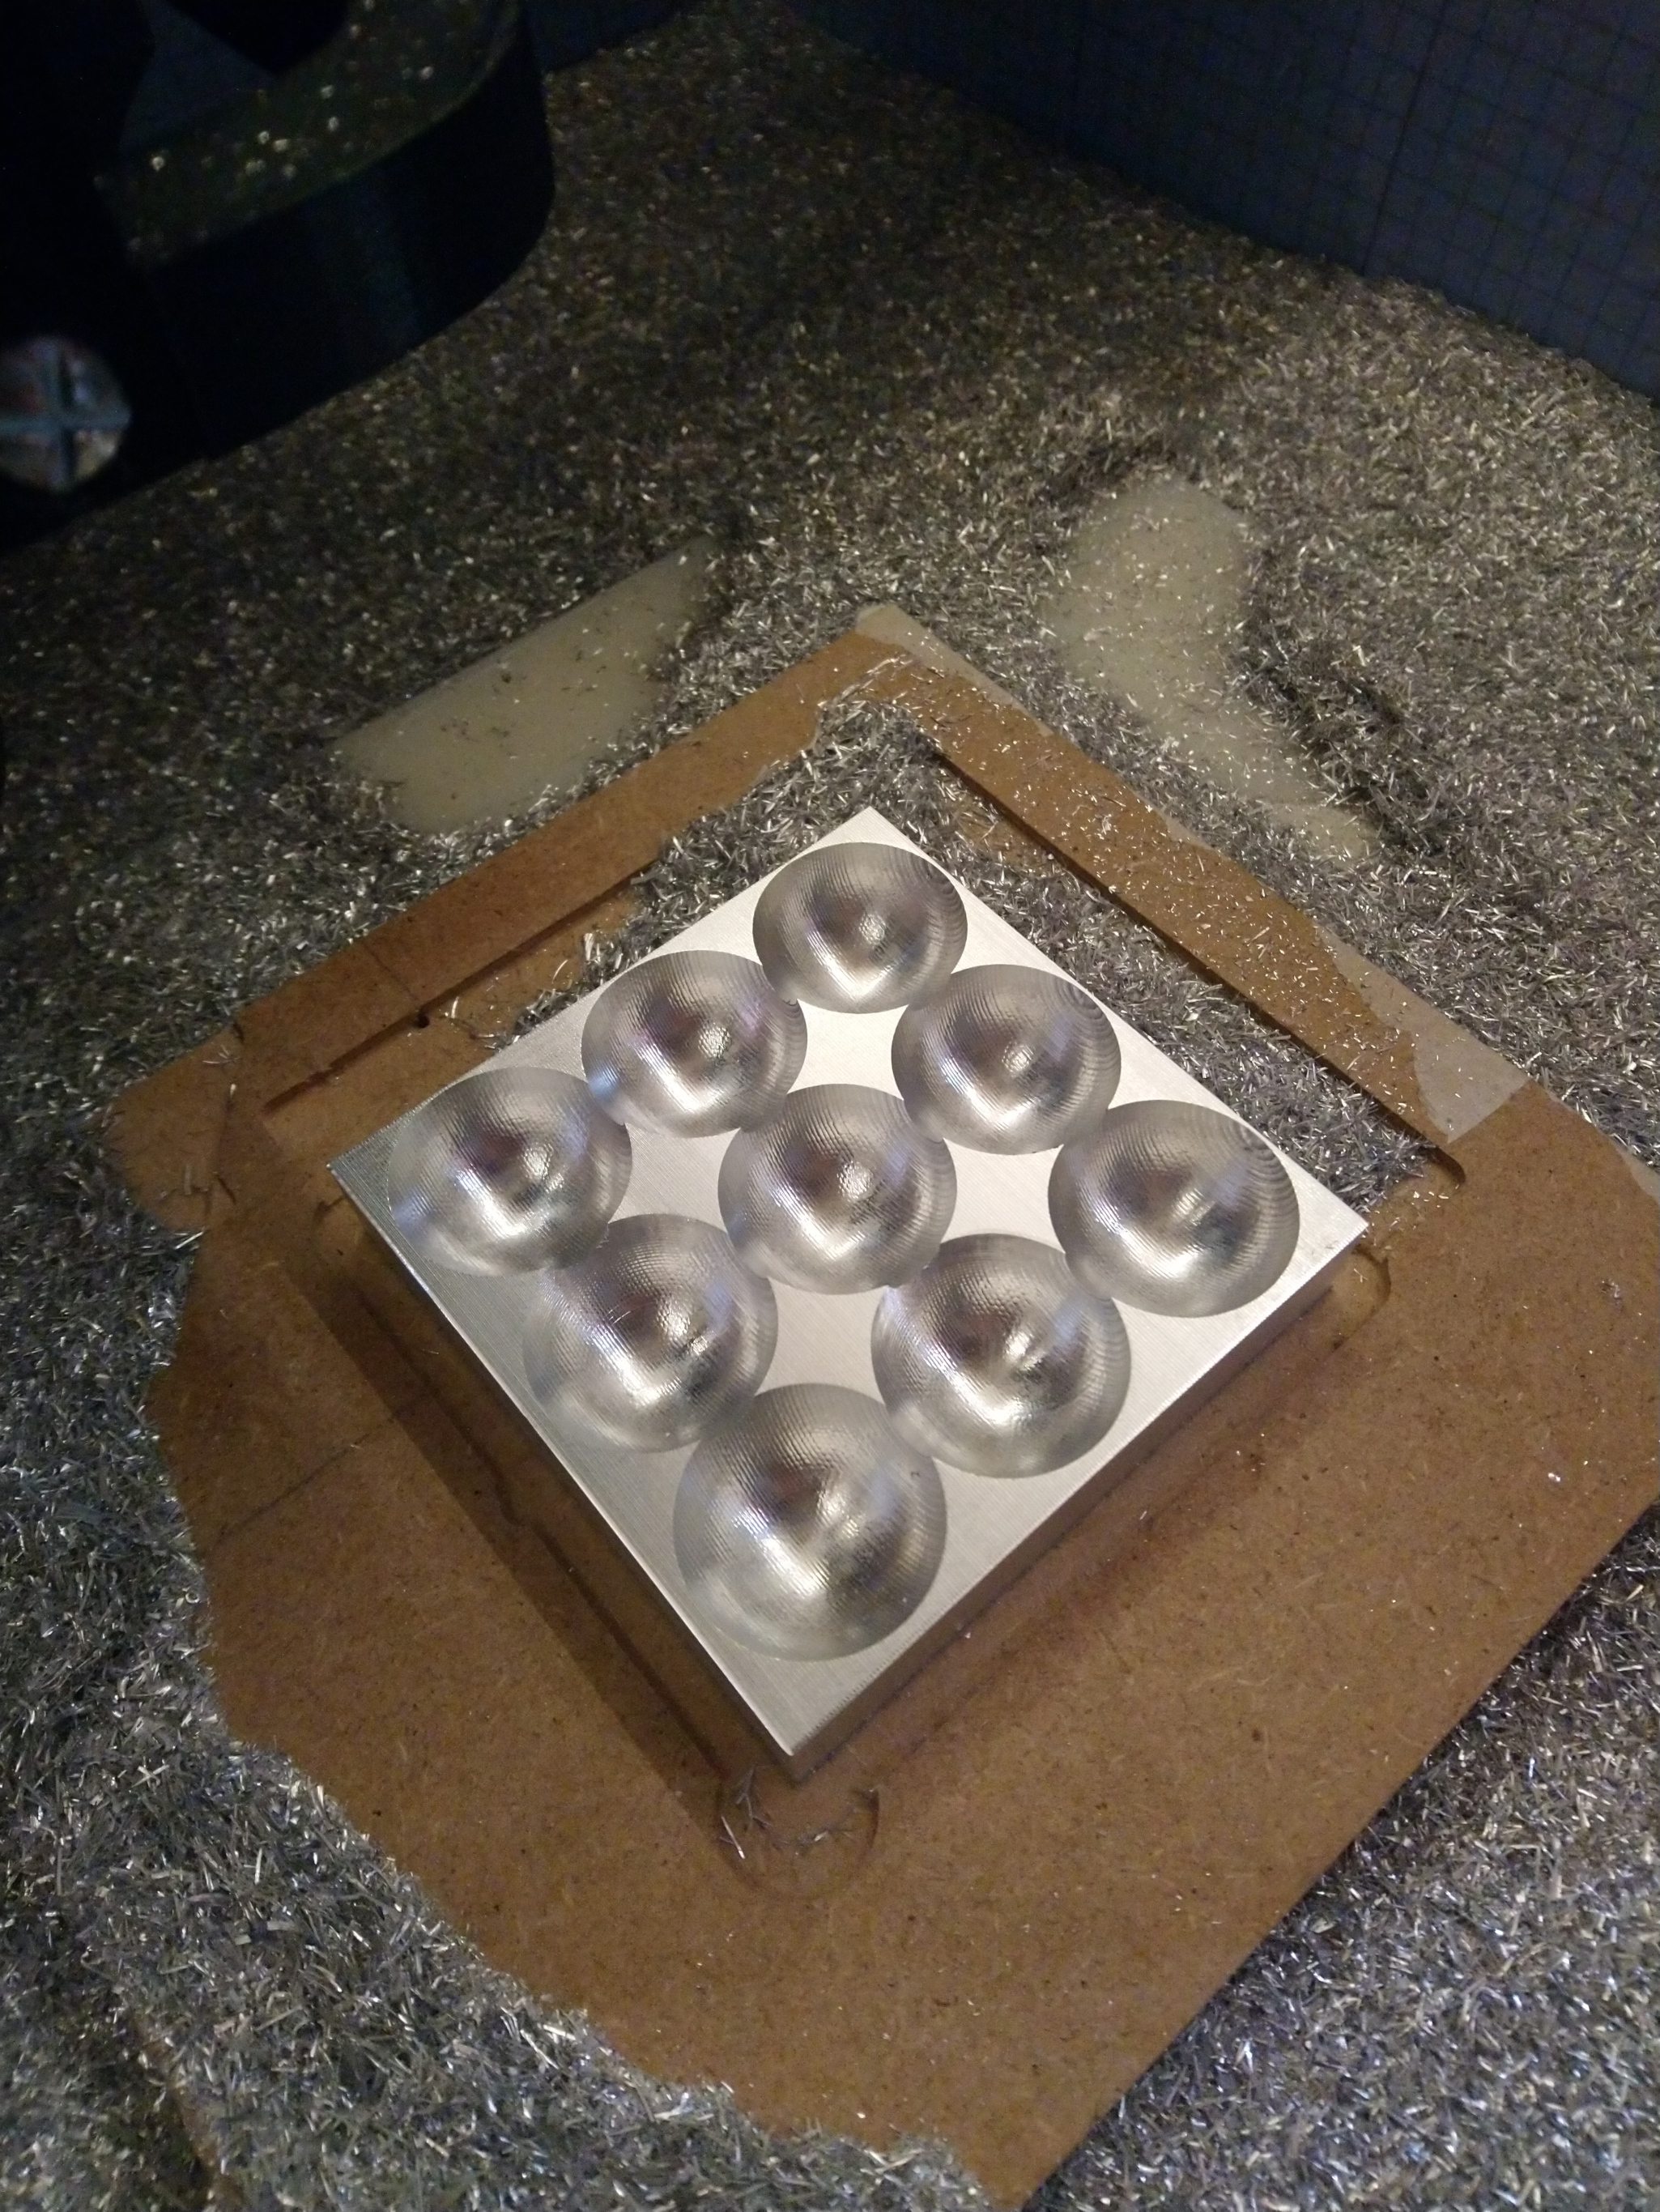
And then I proceeded to the roughing pass for the underside:

6mm single flute, 16000RPM, 1000mm/min, 10mm stepdown, optimal load 0.2mm, 0.2mm axial and radial stock to leave:

For some reason I liked the look of the piece after just that roughing pass, so I decided to stop there

Have you ever seen a Shapeoko overflowing with metal chips ? I have…

The final piece is not particularly pretty, does not serve any purpose (it’s not even a good trinket, it being metal and all…), but I enjoyed the ride and soothed my chip addiction (temporarily)

Happy cutting everyone!

18 Likes

Sometimes we get a craving for chips! A bit of dip with that? :wink:

4 Likes

Look at those chips!

Thanks for sharing your setup and settings, I have a query about the step down on your adaptive roughing cuts; on the first side/operation you used a 5mm stepdown, then second side you doubled it to 10mm. Any reason for this change? Or did you decide during the first side that you could take a bigger stepdown without any issue?

1 Like

I went for a smaller (~85% endmill diameter) stepdown for the top adaptive roughing toolpaths because I had concerns about chip evacuation, since

  • those toolpaths begin with a helical ramping straight down to -5mm.
  • this project was the first time I used my airbrush & airbrush compressor setup for any significant time, and while it turned out to work just fine, the air blast is not incredibly powerful.
  • I originally used the 201Z for those roughing cuts. Bad idea, I tried a variety of F&S and still ended-up with aluminium jammed in the cutter in less than 5 minutes. I should have known better, those 3 flutes are great for side walls/contouring/shallow non-adaptive pocketing, not so much for deep pocketing which is the realm of single-flute.

The bottom side is much easier, since the cutter starts from the side of the stock and carves a very wide channel to the center: chip evacuation is not a problem anymore, and after switching to that 6mm single flute I figured I could pull out a 160% endmill diameter DOC. Also, I was running out of time that night, so honestly I went for the parameters that would complete that bottom roughing cut in less than an hour :slight_smile:

I forgot to mention that my conclusion after completing this was:

  • I need to get me some of those sweet single flute ZrN (e.g. 278Z) cutters from Carbide 3D.
  • I wish Carbide 3D added a ZrN-coated 1/4" ballnose to their store
3 Likes

Thanks for sharing your thought process, that makes a lot of sense.

Was the difference that noticable in the end mills? I have been running uncoated chinese 6mm single and 2 flute endmills for the last year or two (I bought 4 of each a few years ago and have killed one of each type due to crashes) I’ve always planned on replacing them with the 278Z cutters but can’t warrant it while i’m getting decent results and they aren’t wearing out - I do majority timber jobs at the moment so they don’t get used a huge amount

2 Likes

Apple’s Cheese Grater

@ Julien
I’ll have to try out your high DOC parameters for adaptive cutting on my machine. I haven’t had much luck yet with that strategy, but I think I was too aggressive on my WOC. I also agree about the ZrN ball end. The only one I’ve found is this one from Lakeshore, which I haven’t had a chance to try out yet:
https://www.lakeshorecarbide.com/14variablefluteballendmillforaluminumzrn.aspx

@stutaylo
I’ve got some single flute 6mm Chinese end mills on the way that I plan to compare to the Amana and Carbide 3D 1/4" ZrN cutters. Hopefully over Christmas they will arrive and I’ll get a chance to see how they do.

Yeah, when compared to a “regular” toolpath (high WOC, low DOC), for deep adaptive you need to really dial down your WOC. I used 0.5mm woc for my single flute 6 mm, that’s 8%, I’m no expert but I would say the [5-10%] range is a good starting point

2 Likes

Nice! Beautiful work there.

I know you were concerned about milling time so one time you might try to optimize is MRR instead of DOC. DOC and WOC are a balancing act and going too far in one direction will decrease your overall MRR. One thing you could do in increase your RPM to 24000, which would make your MRR go from 2000 mm^3/min to 3000 mm^3/min. Another option is to lower your DOC and increase your WOC. With the 278Z, I can typically get an adaptive running smoothly with:

  • RPM = 28000
  • Chipload = 0.05mm/rev
  • DOC = 3mm
  • WOC = 0.75mm

Which would result in an MRR of 3150 mm^3/min.

I don’t want us to chase MRR rates on our small machines but I do think it wise to think about the balancing act that DOC and WOC play upon MRR.

4 Likes

Absolutely, and I confess to taking a shortcut this time and not even opening @gmack’s worksheet to optimize my MRR (and similarly, I usually max out RPM to 24000 now, but this time I started from Winston’s 201Z baseline which is 16k, and adjusted from there). I keep oscillating between overthinking before cutting, and rushing into cutting without thinking twice, and this time I did the latter (to beat procrastination during a rainy week-end!)

3 Likes

Haha, sounds about right!

Definitely, it’s night and day between 3 flute (201Z) and single flute (my 6mm or the 278Z), if only to push feeds and speeds while not having to fear about clogging the flutes

3 Likes

Seconding this. Chip evacuation is a big problem with the high RPM routers we use. 3-flute endmills either need to be run at 10,000 RPM with low DOC or else you can get chip clogging in the flutes. Single flute endmills have so much time and space to evacuate chips that I’ve not clogged one yet.

Edit: Griff and Vince are correcting my faulty memory. Thanks for the correction.

2 Likes

Hmmmm, you talking about slotting or adaptive? 3flute adaptive work quite well.
Remember this? From here Need help testing cutters, near the bottom. 18v brushless Makita on 20v power supply.

3flute C3D stub (same one I’ve been using)
30k
.027mm feed per tooth
2750mm feed rate
0.3mm OL
6mm DOC

Bumped feed to 3250mm/min, as high as I want to go for now.

Oh and, no air, no lube.

2 Likes

Just a final silly pic before I go back to making a “normal” amount of chips


It’s Christmas season right, so an Aluminium chips tree is in order :slight_smile:

9 Likes

Julien, you must have one big aluminum scrap store! Maybe pick a smaller piece for your next project? :smiley:

Thanks for the Christmas tree!

1 Like

This topic was automatically closed 30 days after the last reply. New replies are no longer allowed.