Aluminium newbie week-end

Hi guys,

This is just a little testimony for people out there who are a bit anxious about trying aluminium machining on the Shapeoko. Last week I decided it was time for me to give it a try. After having read many posts from the aluminium gurus over the last months, I concluded that investing in the right tools for the job would save me a lot of frustration, so:

  • I bought some ZrN-coated endmills from Carbide’s store (#112Z/#102Z/#201Z)
  • I installed a mister on my shapeoko, plugged a compressor to get a nice powerful jet of air pointed at the tip of the endmill (and/or lubricant, later if needed)
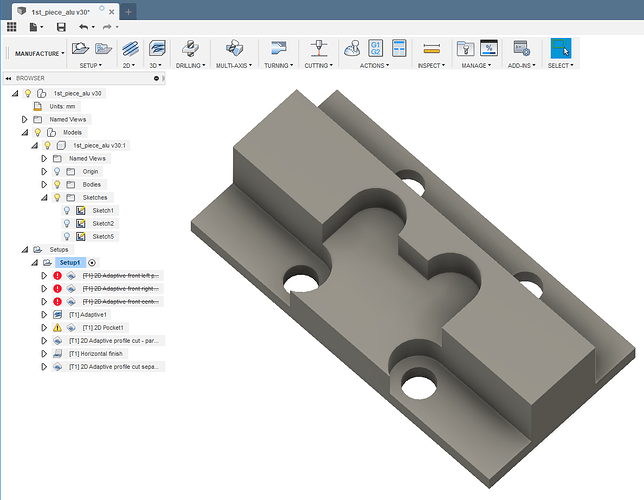
  • I took a crash course in Fusion360 over the week-end, just enough to model the piece I wanted to make and use some of the famous adaptative clearing toolpaths to cut it.
  • I relied on advice from the Wise for feeds & speeds, i.e. used exactly the settings recommanded in this video from @wmoy

It took less time than I thought it would to get to the point where I had modeled my piece, and created nice adaptative toolpaths to cut it. The piece is small-ish (about 0.8"x1.5"x0.4", and holes are about 0.15"), so I used an 1/8" endmill for all toolpaths.

Watching the endmill spiralling its way into the full depth (about 0.4inches) of the stock, and then eating aluminium across the full height of the piece was a revelation…no more shallow DOC and slotting for me!

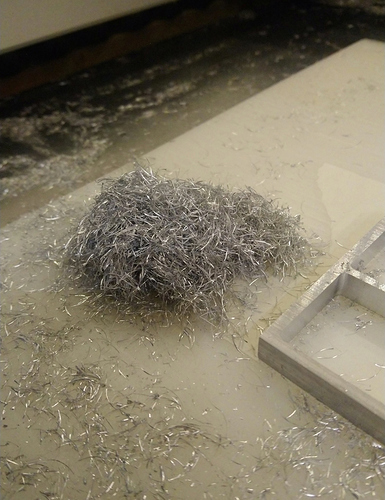
Getting this pile of nice long chips felt like a rite of passage :slight_smile:

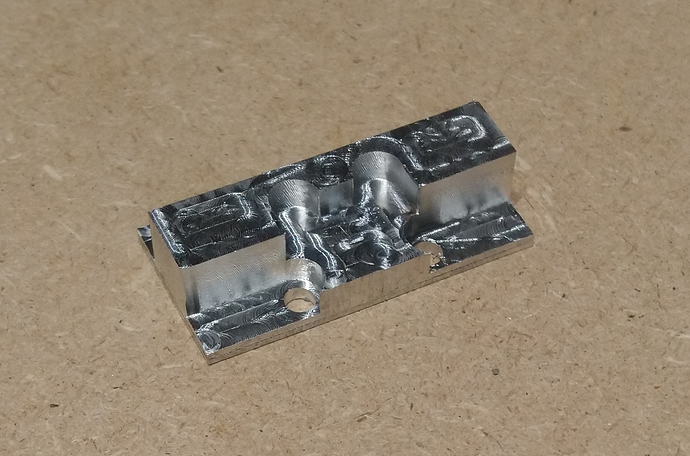
I’m sure there are lots of things to improve/optimize, but I’m very pleased with the result for a first try.

Anyway, this post was just to tell other Alu-newbies that the “Shapeoko + ZrN-coated endmills + air jet + adaptive clearing + a good starting point settings from Winston” is a very nice shortcut to successfully cutting aluminium !

On a scale of 0 to @Vince.Fab, I feel like I took one small step this week-end!
15 Likes

Nicely done @Julien.

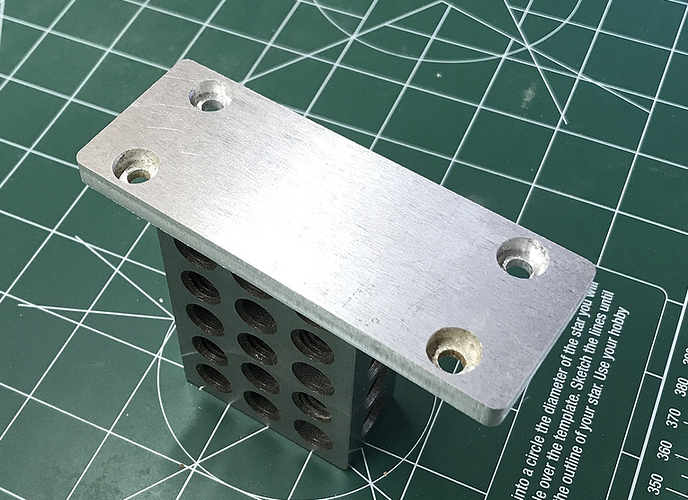
Haha, here’s my first, I was very proud.

5 Likes

Congrats @Julien! look at those chips!

Great to see your first foray into aluminium was a success, mine certainly wasn’t, but after some help from the guys on here I got to where you are too.

Funny that once you get the mix right you realise how capable the shapeoko is in aluminium :slight_smile:

1 Like

I’d love to here what your feeds and speeds were.

Nice! Any other changes to the machine other then air? Z axis upgrades or anything?

I tried to get bigger chips with my machine which limited DOC due to the side load. I may try to get more but take less aggressive cuts.

BH

1 Like

Matthew,

I used exactly the feeds and speeds from Winston’s video, and for the 102Z 1/8" ZrN coated endmill and an adaptative clearing toolpath, that’s 10.000 RPM, 762mm/min feed, 0.305mm optimal load.

I did not limit the depth of cut, so Fusion generated a toolpath that cut the full depth of pockets in one go.

Right, I should have mentioned that, as I am cheating there a bit too:

  • I have the HDZ, which probably helps.
  • I replaced the stock belts by steel-reinforced belts (see other thread on this topic)
  • I replaced the MDF bed by an aluminium one

so overall, far from a stock machine by now.

2 Likes

The HDZ definitely helps with this type of work. Awesome job! For a first aluminum project, this is really nice work.

If you tweak the optimization in the adaptive, you can slow down around corners and certain radii to avoid chatter in these areas.

Do you have any cut video for sound? Adaptive just sounds so good when programmed right.

Also I would just like to point out that the deepest cut path is not always the best one for our machines. Long chips are awesome (welcome to the club :wink:) but due to side loading limitations, usually speed has to drop considerably for full depth. This isn’t a problem on smaller parts but start getting into bigger blocks of material and it will make a difference.
What’s project #2??

1 Like

Thanks for the pointers.

I did capture a few videos during this first cut (originally intended for forensics in case something bad happened!), but the sound of the air compressor may have ruined them. I’ll try and check tonight if some are not too painful to listen to and upload one, but as far as I could tell I was getting a nice regular chatter-free sound.

Depth of cut: how do you characterize this side loading limitation / compute the compromise you are making between depth and speed ?

Project #2 is…more of the same (I need four of these) but I’ll use the opportunity to try more aggressive settings to characterize how far I can push things with my setup (and this 1/8 endmill)

Project #3 will be buying thread mills and learning how to use them.

Here’s a video
As you can tell I have no clue how to embed a video in this forum, how is it done ?

EDIT:

1 Like

I stumbled on a method using Google photos. Don’t know if you use it but it’s extremely easy.

Once Google Photos is installed your video will be automatically saved. Navigate to GP and choose share, create link, copy link. Then paste link into your post.

i put it on youtube and just drop the link in my reply.

Example:

2 Likes

indeed, couldn’t be any simpler, I made the mistake of inserting it as a link but I should have tried just pasting the link. Thanks!

1 Like

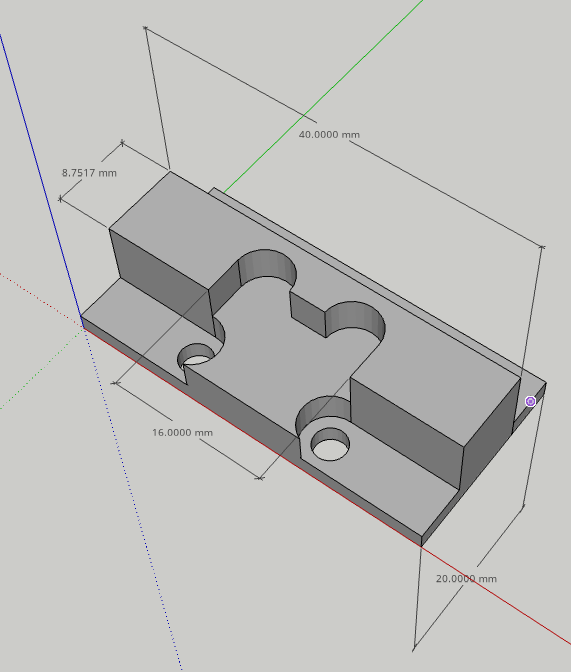
I have a question about this piece, that I have cut three times since then with quite repeatable results. The expected dimensions look like this (Sketchup screenshot, not Fusion, long story):

The dimensions I actually measure with a caliper on the finished piece are as follows:

40.07mm (expected 40mm)
20.05mm (expected 20mm)
~9.2mm (expected 8.75mm)
~15.5mm (expected: 16mm)

Though my X/Y calibration could be better, the ~0.2% error I get on the outer dimensions (40mm & 20mm) is ok. What’s not ok with that I am 0.5mm off for the other two measurements.

So I am thinking, the machine is fine but my toolpaths are incorrect somehow:

  • a 3D adaptive clearing with 0.5mm radial and axial stock to leave, does most of the job
  • “Horizontal” toolpath as a finishing pass of all inner features, with no stock to leave => this should take care of the remaining 0.5mm on vertical walls & flat surfaces.
  • toolpath for the holes (not relevant here)
  • 2D adaptive clearing to do the profile cut, no stock to leave (actually done in two toolpaths, one that cuts around leaving 1mm at the bottom, and a final one at the very end that cuts the remaining 1mm)

Any hints as to why my profile cut (with no stock to leave/no finishing) gives me the exact right dimensions, but my 3D clearing toolpath + horizontal finishing pass leaves an extra ~0.5mm everywhere, radially ?

The Fusion360 design is here in case someone is willing to look at the toolpaths

Probably because horizontal isn’t the best strategy for finishing walls.

All my vertical walls get 2d contour pass with spring. After that, adjust with negative stock to leave

3 Likes

Allright thanks, I’ll try a 2D contour finishing instead and see if this gets me closer. Is it common from your experience to have to adjust with a negative of stock to leave to get the right dimensions? I remember Winston discussing the topic of internal stock tension release while cutting, which could alter final dimension versus what was expected (and justify having to shave off a bit more than anticipated with a negative stock to leave)

I haven’t quite got to the point of trying Aluminum yet, though I have tried and succeeded in working with Brass. I found G-Wizard extremely helpful in determining the proper Speeds Feeds and Offsets to use when Cutting.

1 Like

Due to our machines deflection and type of cutting you’ll usually be undersized, also take into account the belt stretch variable and imo its always better to cut undersize and dial in with stock left adjustments.

This isn’t new stuff, the s3 can be extremely repeatable but tight desired tolerances usually require a manual input. Kinda like our “cutter compensation”, usually easy to get within ±5thou and even less with adjustments.

Now, if you are using a vise to workhold then internal stressed definitely need to be taken into account. You’ll see most big cnc guys use a gripped jaw or dovetail to minimize clamping forces and that in turn minimizes internal stresses.

3 Likes

It makes sense, and I’m fine with manual tuning to get right tolerances. I was just surprised to get this 0.5mm difference on one inner pocket dimension while the outer profile that supposedly has the largest amount of deflection is within 0.05mm. But that may be my toolpath and I still did not have time to do more test cuts.

In recent weeks, the interest in milling aluminum on the Shapeoko appears to have increased very much, probably due to the great projects and results from @Vince.Fab, @RichCournoyer, @wmoy and others. More recently @griff and @julien have made the plunge. I guess it is also in part due to the recent offering by Carbide of new quality ZrN endmills made for cutting aluminum and Winston’s videos.

I’m still learning the ropes with the Shapeoko and while I’m doing fairly well in CC and VCarve, I’m still learning about feed and speed, I mostly use known recipes (defaults) then adjust. I can successfully carve what I need out of wood and engrave different materials.

I have yet to seriously jump in the F360 pool where I only dipped my toes because I find that pool very deep and can’t swim very well.

I’m not ready to make the jump to aluminum yet but I hope to in a few months. I already have a few ideas of things I need to make.

There is a lot of good information scattered between the many posts here, the wiki and other online sources. For a relative beginner, it can be hard to follow as many people have highly modified machines, they use advanced tools with relatively complicated parts. Many online sources are not Shapeoko specific so the information may not be relevant to the Shapeoko.

I wish that someone would create a page with videos, maybe kind of a Shapeoko cookbook series.
People can learn (define the basic toolbox, material, F&S, etc.) to start, read the recipes (projects), get the ingredients (tools and materials) so they can try a few simple 2-2.5D projects. For example, Winston had a project with a bottle opener that I think Julien tried. A video guiding people through the whole process from creating the part in CC (since it is the tool every Shapeoko owner has and is probably familiar with) to calculating feeds and speeds using a free calculator, what material to get, choosing your endmills, setting the job (preparing the workspace, securing part, cooling, etc.).

That means not going into F360 or get into advanced toolpaths techniques right away. That would be left to the second section called: Milling aluminum with Shapeoko for the simple-minded along with more advanced tools and mods available to the Shapeoko to make it a better machine for the task.

5 Likes