Aluminum lessons learned but are they the correct ones

I’ve attempted two small jobs with 6061 aluminum and both failed. I do not view that as a bad thing as it’s part of learning. The first one failed because I did not properly secure the material. That’s a pretty easy thing to correct.

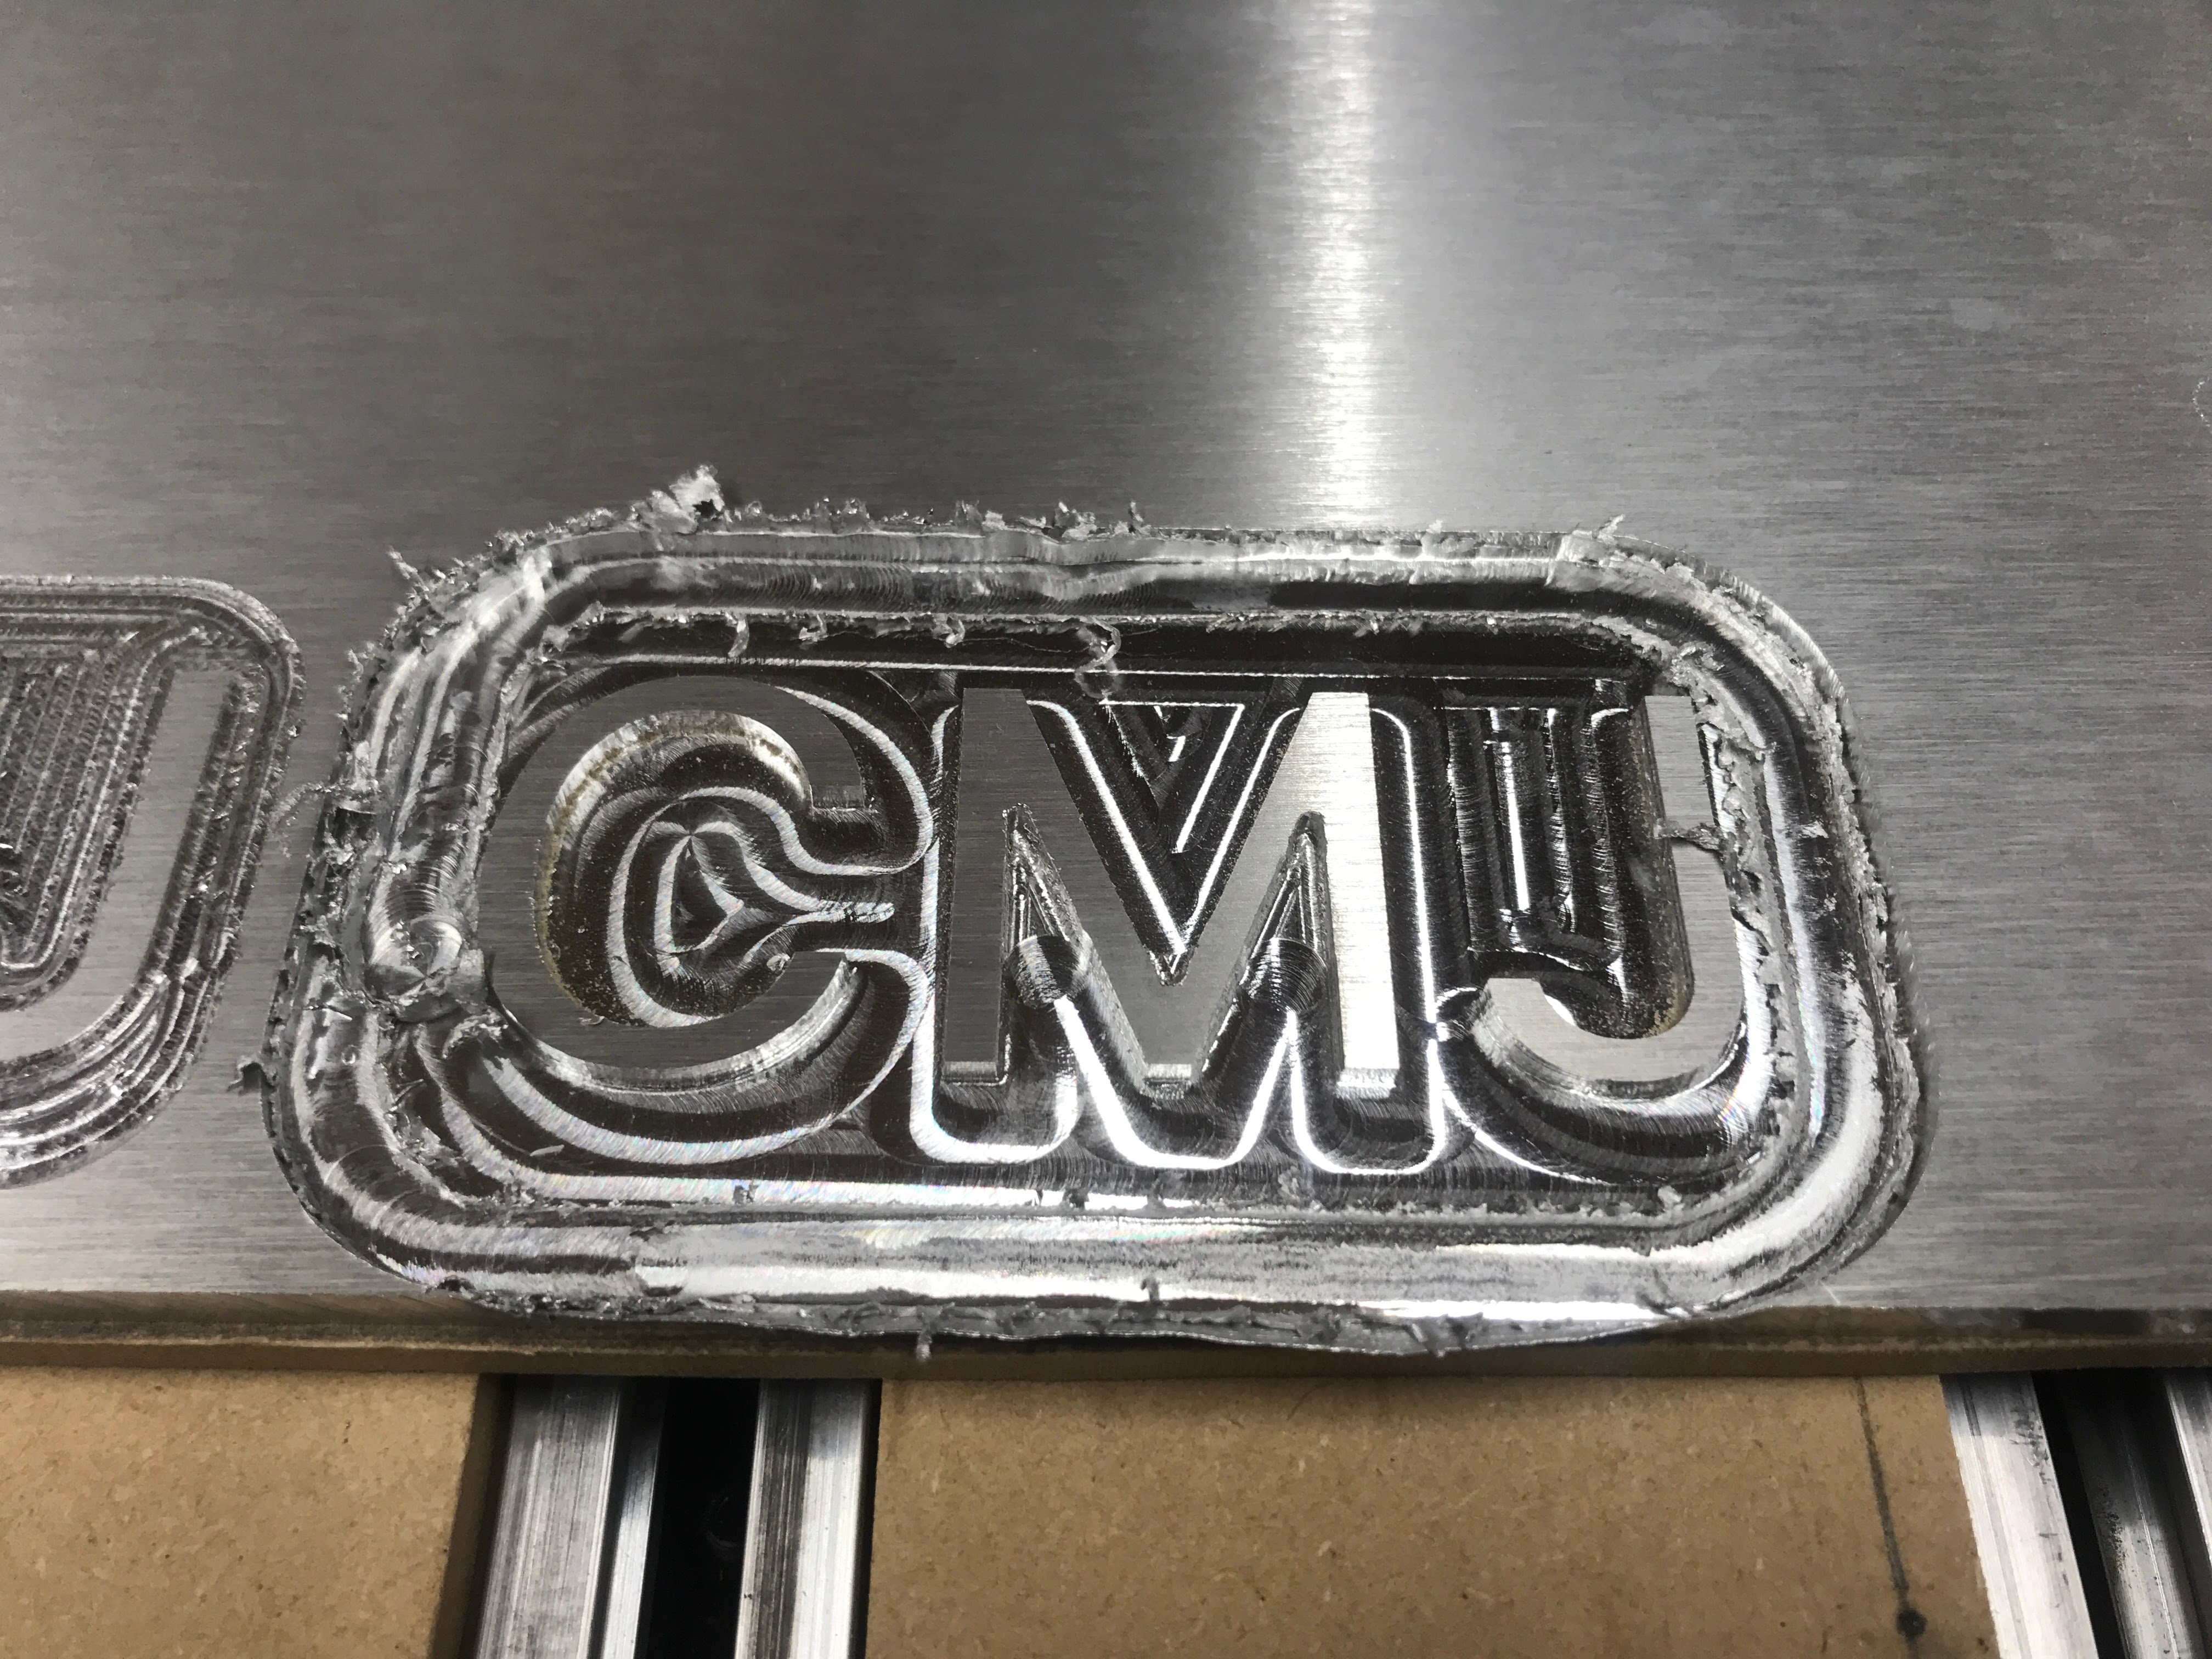
What I’m trying to make is a paperweight with my initials as it seems like a good mix of tasks.

The cutters I’m using are stock carbide #102, #112, and #201.

Feeds & speeds are coming straight from Carbide Create making sure to select aluminum as the material and not the Z coated endmills.

Job two failed after the initial pocket was complete while doing the perimeter contour to release the piece using a #201.

Based on previous posts, my theory is that there was not proper chip extraction, things got hot, and the aluminum clogged the endmill. This resulted in it pushing material versus cutting. As it usually goes, I watched the entire job right up until 30 seconds or so before the failure and it was the sound of things that alerted me to something wrong happening. My reaction time was a little slow to hit the pause button so it made a good run around the perimeter before digging in.


I was able to build back some confidence with a simple job to mostly clean up the material using a #201.

Before I start on job three, I want to make sure that the corrections I make are heading in the right direction.

Correction 1
Improve chip removal from the work surface.

Correction 2
Find a font that is more suited for milling. Sharp angles, such as the inner part of the M, are a pain.

Correction 3
I do not know. Beyond buying endmills more suited for the task or learning the dark art of speeds and feeds, I would default to take things slow (speeds and feeds). However, if what I’ve read is correct, that might actually be the wrong thing to do if not properly done in conjunction with correction 1. If anything, I’m looking for confirmation that sticking with what’s in Carbide Create is the best thing to do for now as a beginner?

Thanks in advance!

1 Like

If you are serious about learning how to cut aluminium, there are many (many) threads about where to start and how to improve, from folks like Vince who master this from A to Z, but I’ll tell you what my personal takeaway from all those threads was:

  • chip evac is indeed key. Recutting chips leads to all sorts of problems. An air jet and possibly a little lubrication with a mister go a long way to minimize the problems.
  • Using three-flute endmills like the # 201 to cut aluminium is tricky, and is definitely a trap for beginners. I highly recommend you get some single flute cutters (like the #278Z), they are virtually un-cloggable and are much, much more tolerant to sub-optimal feeds and speeds and chip evacuation. Really, they’re like training wheels, it becomes 10x easier to get good cuts.
  • For feeds and speeds, the magic chipload value is 0.001". Period. Target that, and you’re in the safe zone. Once you know your RPM and number of flutes, the feedrate can be computed from:

feedrate = 0.001" x RPM x nb of flutes.

There are lots of variations around this, and many more tips I’m sure other folks will add, but do that and the nice little aluminium chips will start flying.

And as usual, when in doubt, go back to Winson’s MaterialMonday videos for excellent starting points for all metal cutting situations. Start with the one about single flute cutter and why they rock.

EDIT: I’ll add that one thing that may hold you back if using Carbide Create is the lack of advanced toolpath entry strategies, like linear and helical ramping, which help a lot when cutting aluminium. But if you keep your plunge rate to a conservative value, there is absolutely no reason why a CC-generated toolpath cannot grant great results.

EDIT2: and once you are deep down the rabbit hole, there’s trochoidal milling/adaptive clearing, which also helps a lot when cutting metals.

4 Likes

Everything @Julien says above is good. Single flutes are king when cutting aluminum on machines like this. The specific video I would look at from Winston is this one:

For chip evacuation, I just use a cheap dust collector with a good dust boot. I have never needed to use air blast or coolant but I do wish I had it for some situations.

Your minimum chip load should be 0.001" with tools 1/8" or larger. I have spent a decent amount of time cutting aluminum and I personally target a chip load of 0.002"-0.003" most of the time. You don’t need to go as aggressive as I do but don’t go less than 0.001".

I would highly suggest looking into Fusion 360 or some other more advanced CAM software because of the better material entry strategies available. This helps quite a bit when cutting metals. Carbide Create is good but it will most definitely limit you in this situation.

1 Like

Thank you @Julien and @nwallace. I somehow missed the MaterialMonday videos and even after a single watch I feel empowered to give things another shot.

Additionally, air assist is on the way along with some single flute endmills.

3 Likes