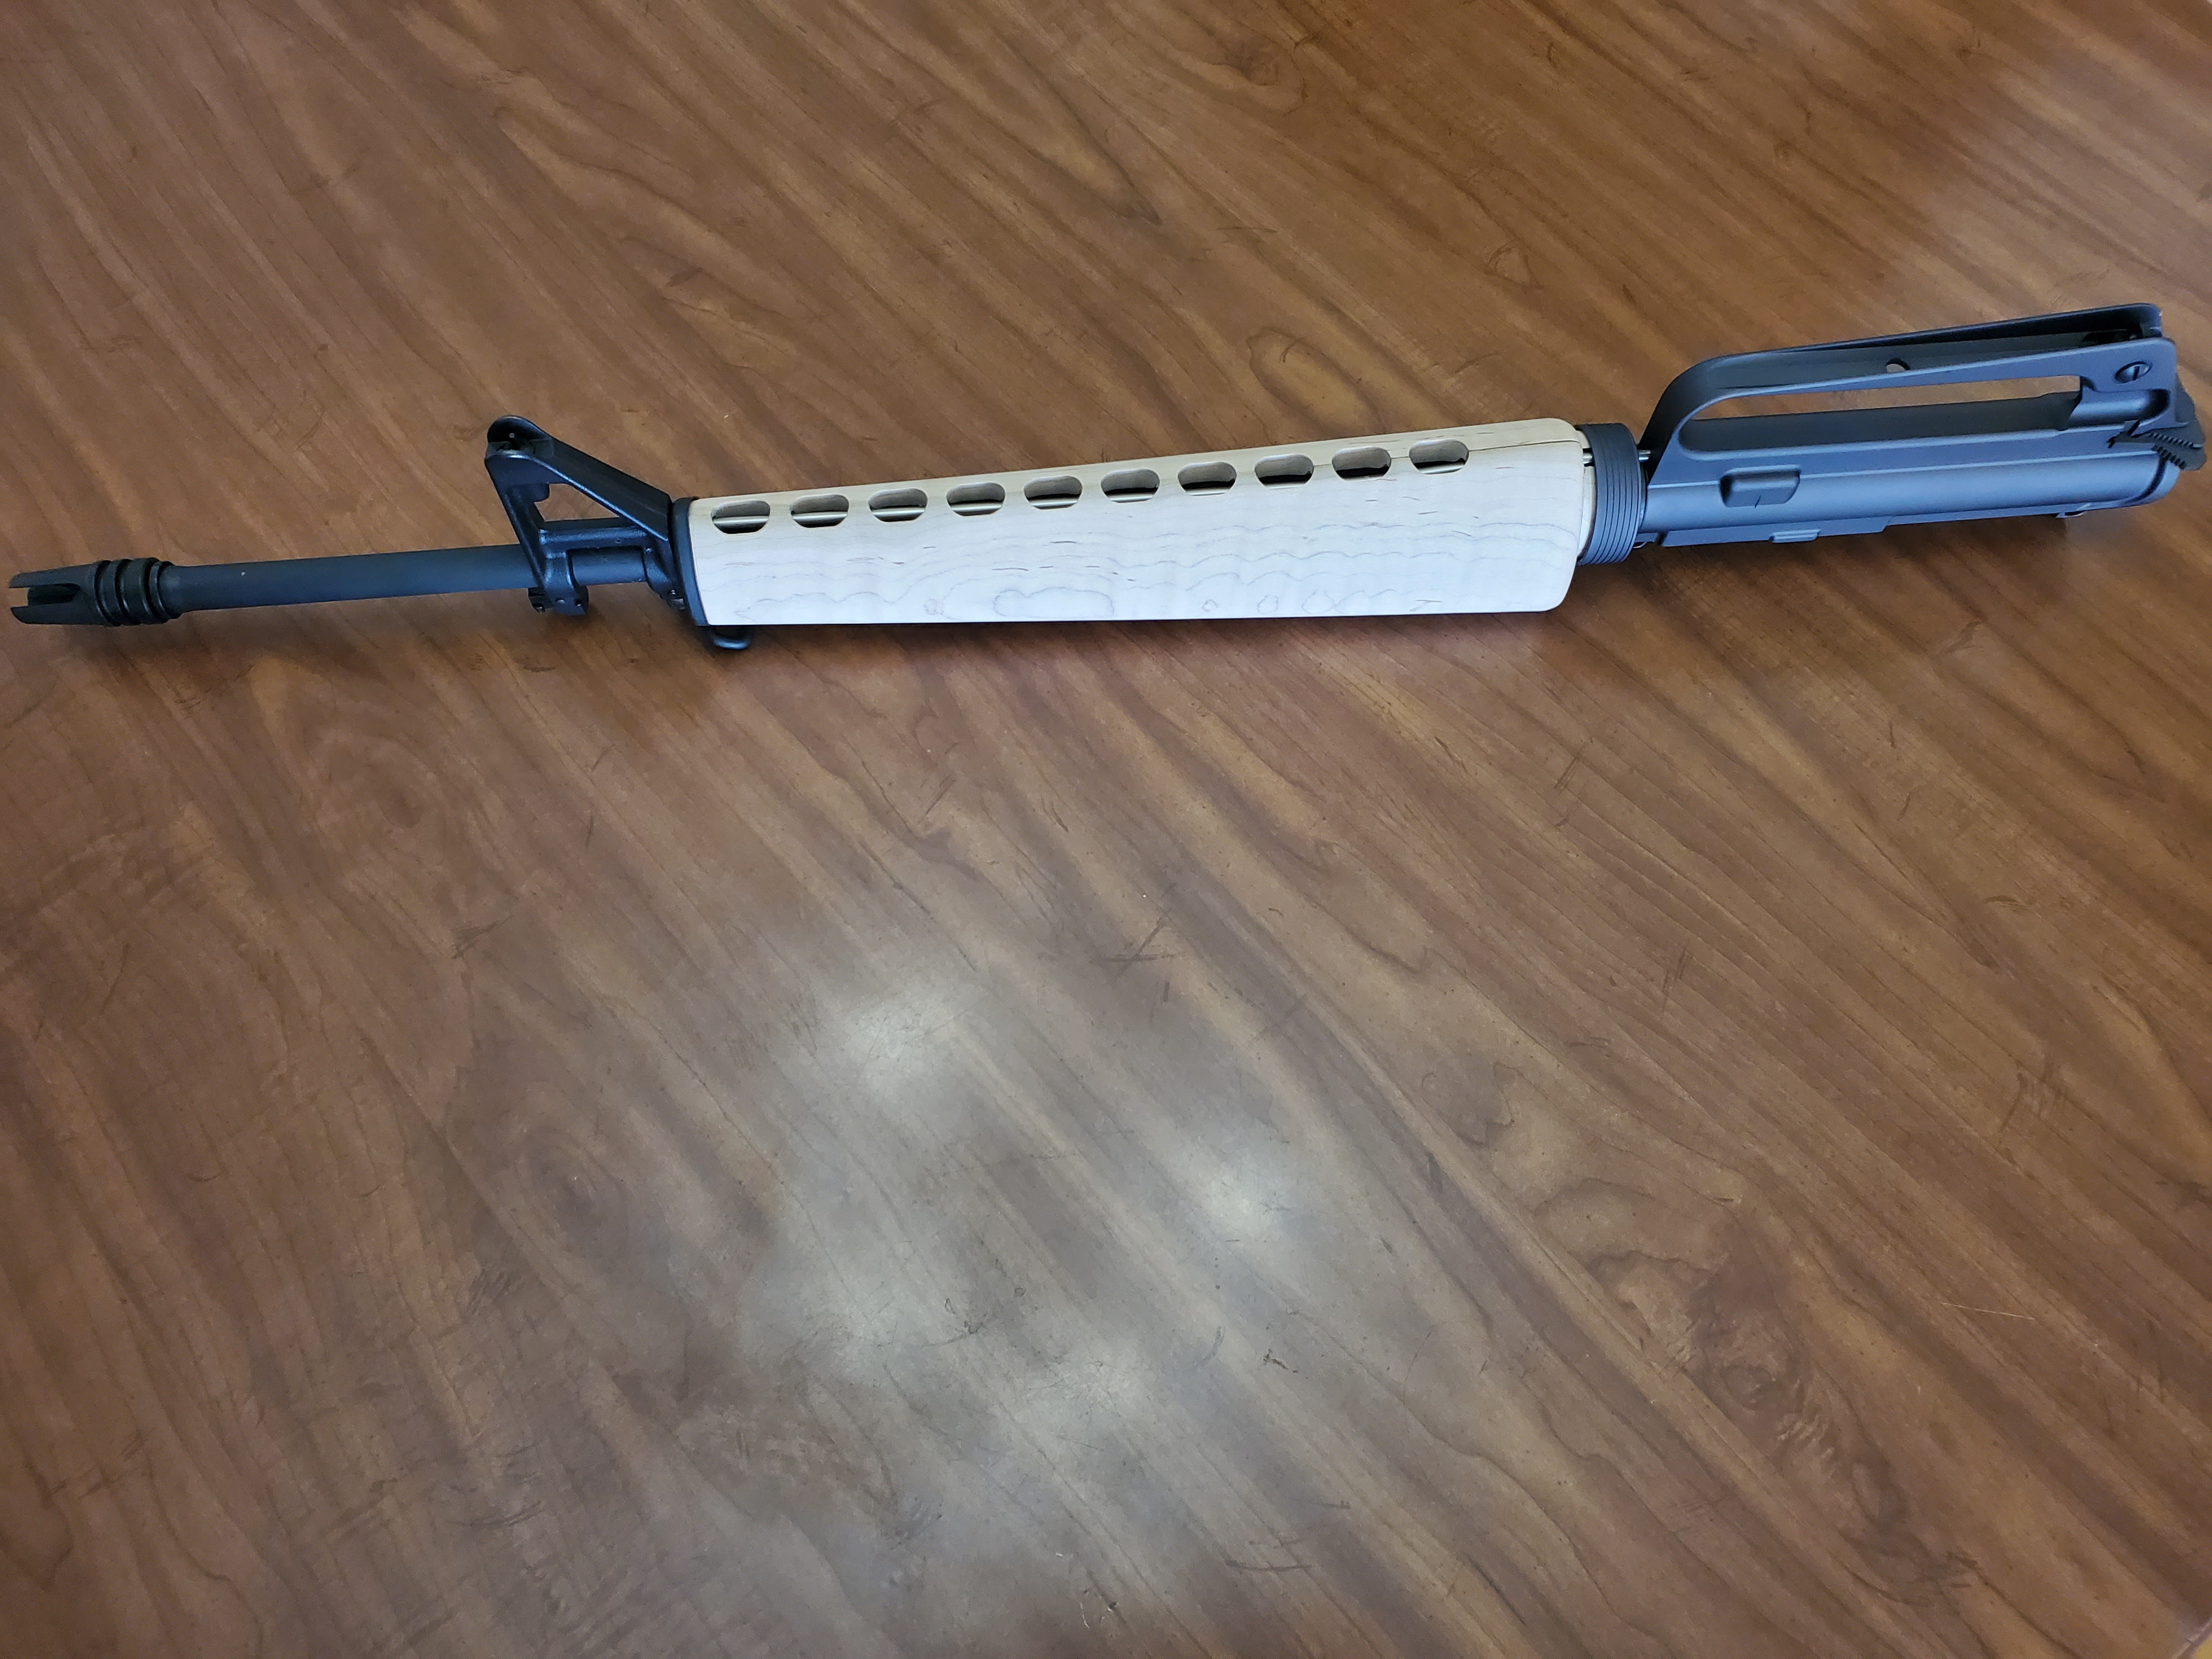
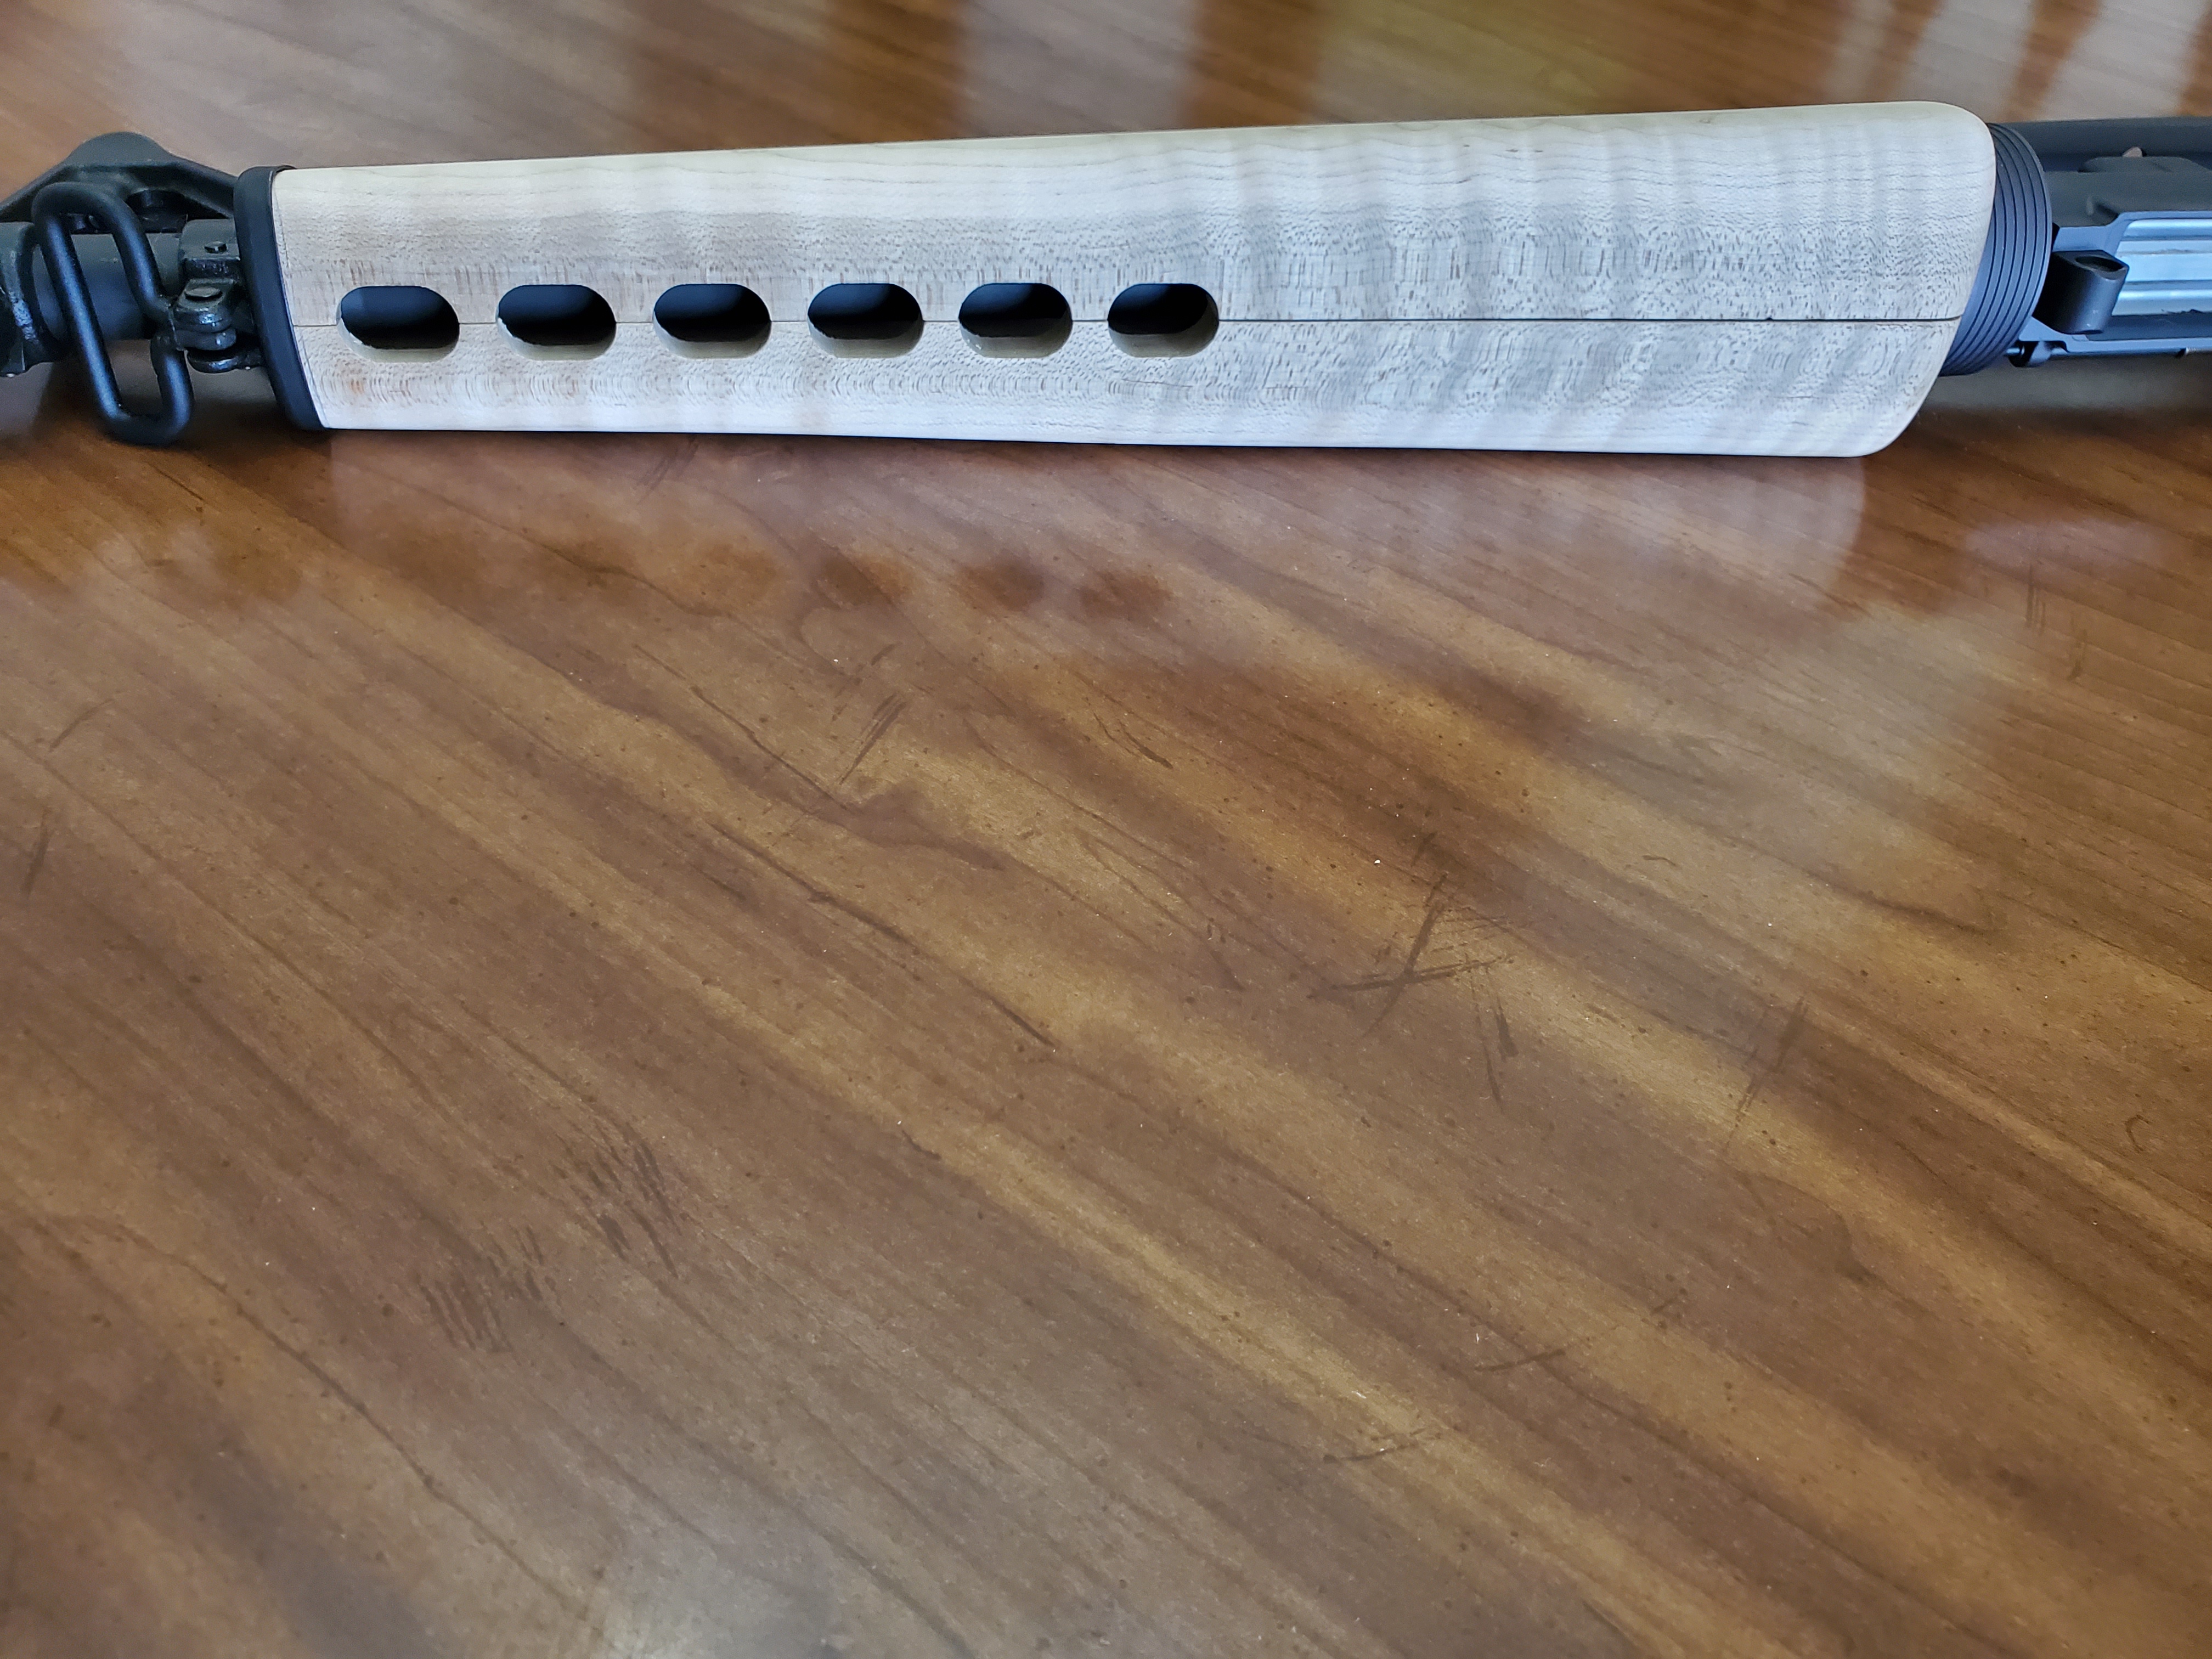
I have attached some photos of parts that have been coming off of my Shapeoko 3. These are wood furniture sets to replace the standard stock, pistol grip, and heat guards for the AR-15, and M16 in the A1 and A2 variants. This will be a product that I will be selling through my woodworking business but I thought that some photos amd demonstrations of the capabilities of this machine would be of general interest.
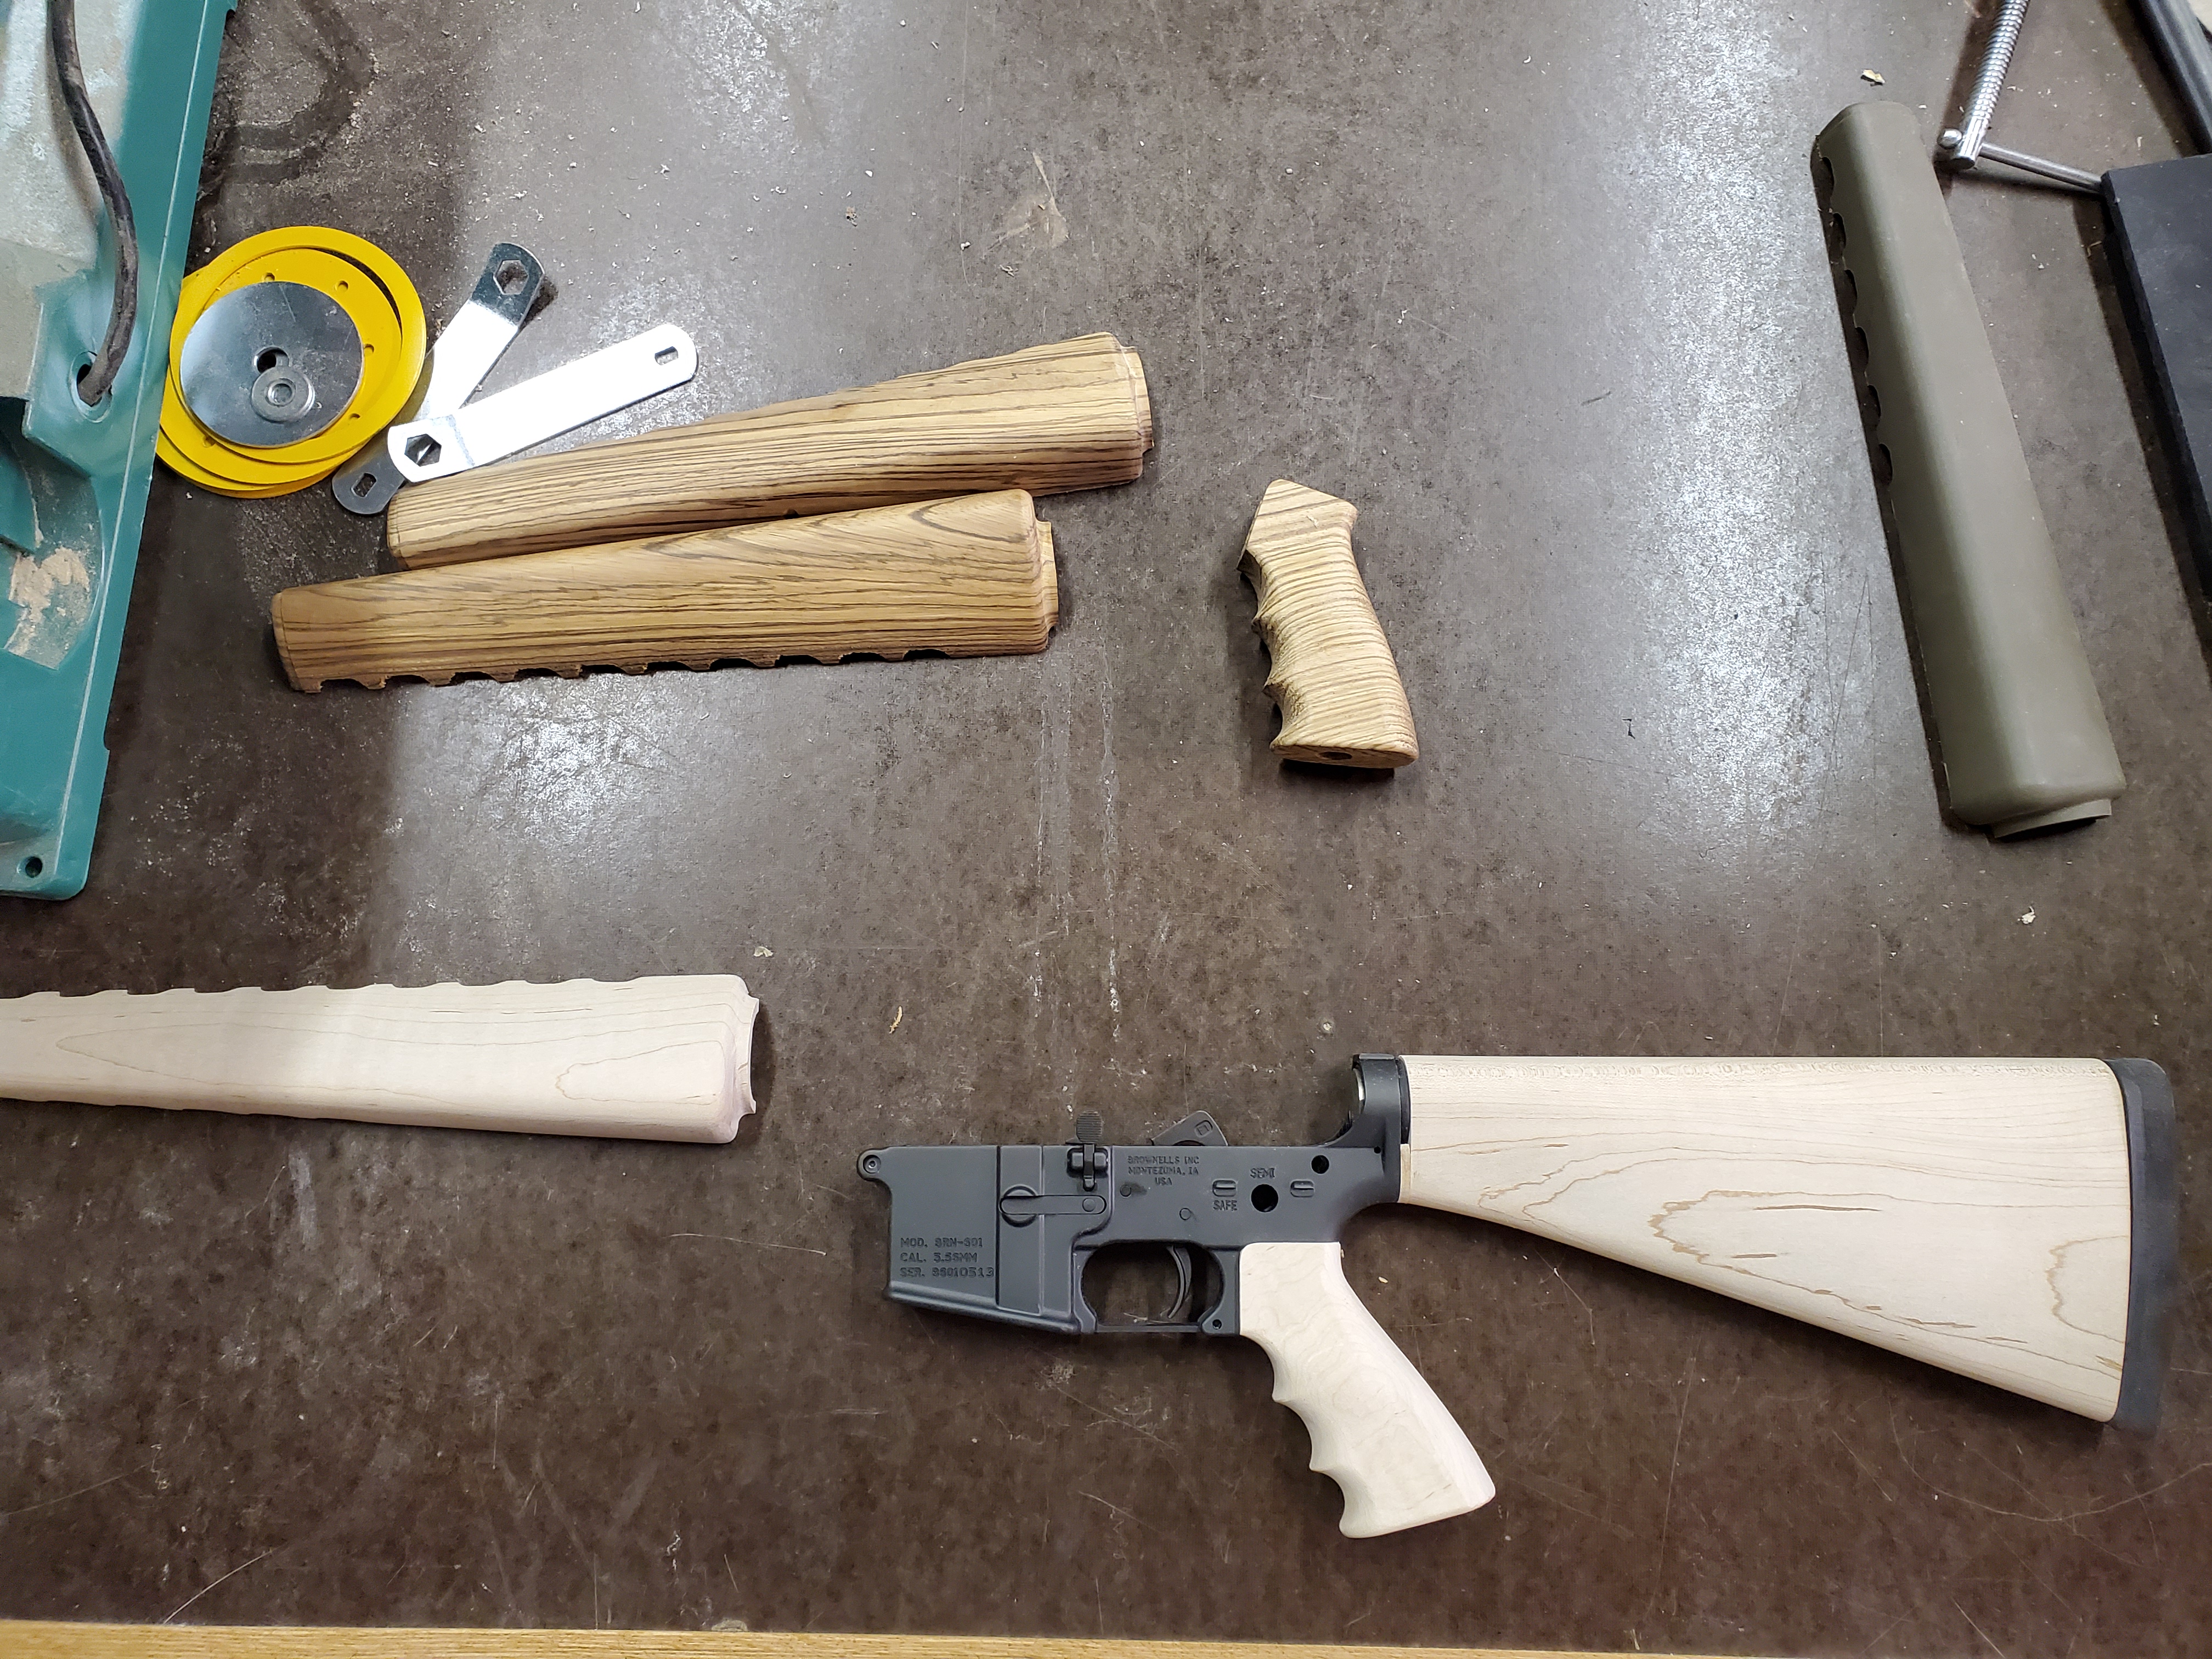
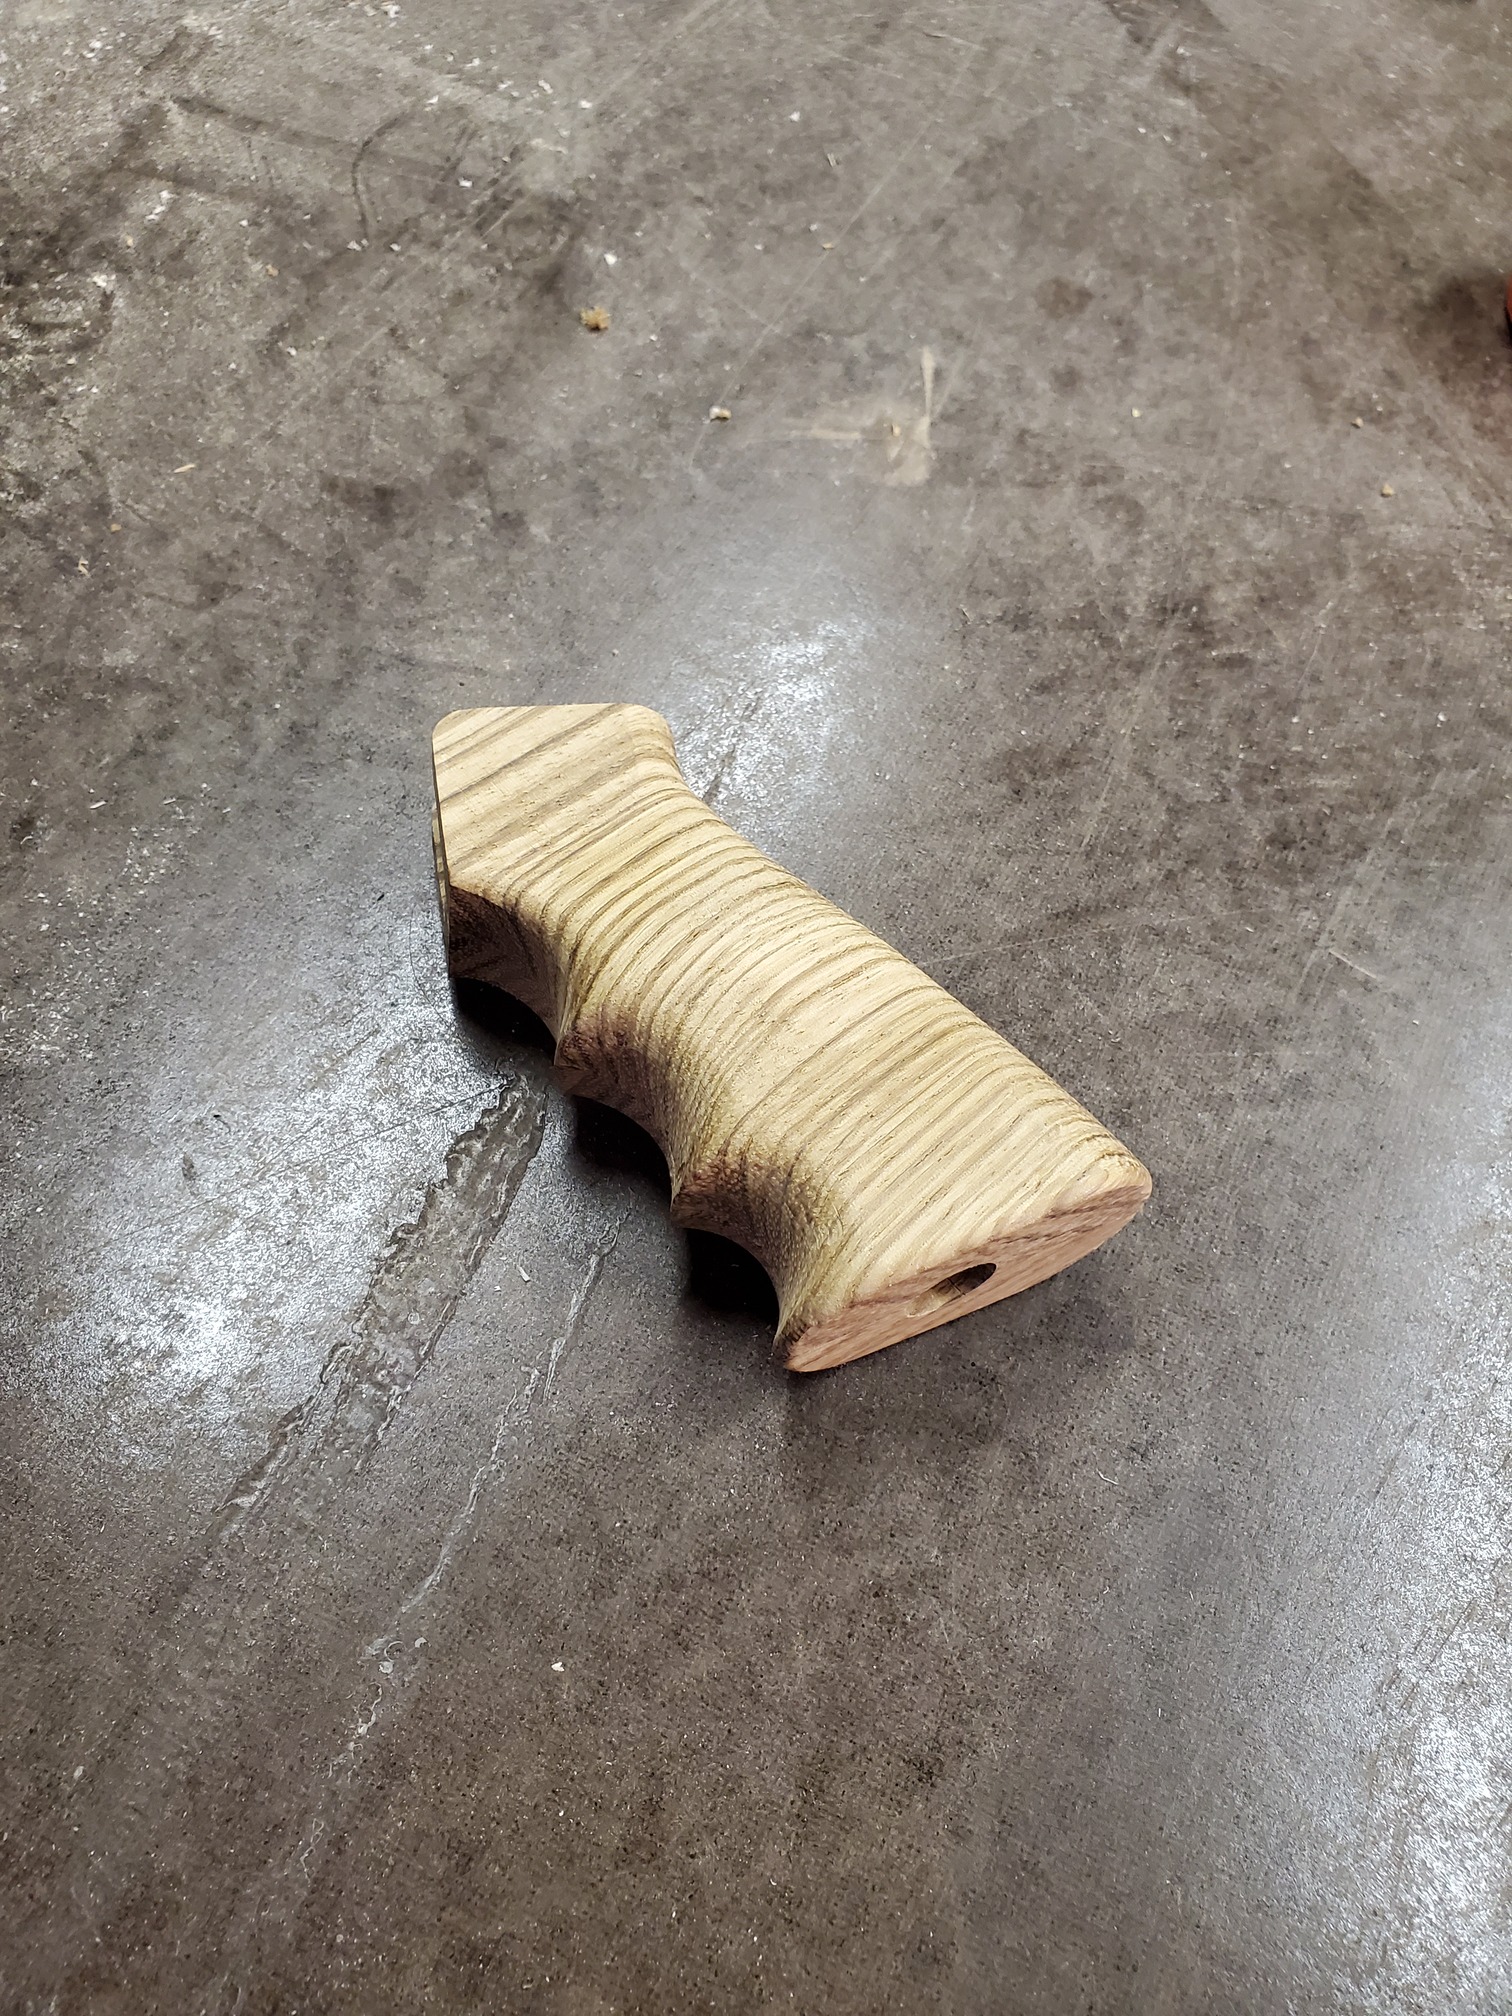
I had to draw my own CAD parts, and of course program the cutting operations. Both were a considerable challenge for me, and these parts represent the third iteration of my drawing and programming skills. I am working in hard figured maple and zebrawood, and plan to expand to walnut and cherry, as well as mid and carbine length variants.
I plan to use clear woodgrain sealer for the zebrawood followed by multiple coats of tung oil. The maple will probably be lightly stained or dyed then sanded down to enhance the figure, and then finished with boiled linseed oil. Both will be given coats of wax to improve water resistance.
I designed the parts in Solidworks Fusion 360 with measurements taken from actual parts. Figuring out accurate registration to do double sided machining took a lot of time. I eventually modeled the reverse of the part for the rifle stock and made a jig to hold the part for the second side machining. Also had to make a jig to hold the rifle stock for rough drilling and boring of the hole for the recoil spring tube to final size.
The alignment problem was solved by drilling holes in the wasteboard for dowel pins which aligned the jig for the second side of the rifle stock. A variation of that was used for machining the pistol grip and the handguards. Having the XY centered on the center of the part, and dowel pins along the Y axis allows the part to be flipped for the second operation with a reasonable chance of accurate alignment. I will take more photos of the jigs and the processes I use and post them later. Since this is meant for production, the real trick is to make the parts accurately and repeatedly…
I make my own ammo so I am not in any danger of running out of it anytime soon. Cherry is one of the woods I would like to use, and I have equipment to stabilize it which has the effect of making it harder and denser. It adds a lot of work though. The additional cost of stabilizing resin and my planned price point and time budget doesn’t support it. I might add the option for custom wood choices including resin stabilization for additional cost if I find there is enough demand for it.
I have since changed the roughing cut to .15 depth per pass, and to leave 1mm of material for the finishing pass. Speeds aren’t accurate because the speed only goes up to 10k for the Nomad which I also own. I usually set the speed at 4 or 5 on the Shapeoko router depending on the chip appearance and the cutting noise.
I have several methods for making the buffer tube hole. If it is a solid blank then I bore the hole undersize with a ship auger and bring it up to final size with a boring bar that is drawn through the bore after the rest of the blank has been machined with the Shapeoko. I have an alignment and clamping fixture that was also made with the Shapeoko that allows me to do this.
Blanks made from two pieces of wood are rough bored with a half-round cutter on the router table before being glued together. Final boring is the same as one piece blanks.
As you can guess, alignment is a very critical part of the process and most of the mental sweat haa gone into figuring out how to maintain alignment through all the various operations. I am certain there are far easier ways to do these operations but I am limited by the tools that I have. And deep hole drilling is an art in itself.
Haven’t had that happen yet. But then again I don’t do mag dumps. Originals were made of fiberglass with aluminum heat shroud inside the liner. Replica I based mine upon is made of plastic and never had an issue with that one at the range.


 what bit and step over did you use for your finishing pass?