As funny as a $3 dollar box

First, the outlines need to be modified to allow for the hinged lid — draw and position a rectangle to cut out the board thickness which is less in width by twice the board thickness than the intended width of the box which has a fillet corner treatment greater than the radius of the tool which will be used:

Boolean subtract it from the front/back:

Duplicate this, mirror it and drag the duplicate into registration w/ the other front/back and delete the other:

1 Like

Draw in squares at two corners to stand in for the geometry:

Then draw a box which is twice as tall and wide as the region of the joinery:

and halve it in size:

and drag it into registration:

Note the height, in this case 25.3mm and divide it by the number of box joints fingers/pockets there will be (7 should work well):

25.3 / 7 == 3.61428571

Set the height to that:

Drag it into alignment w/ the structure and add a fillet corner treatment 10% larger than the radius of the smallest tool which will be used:

Create a rectangular array to fill in the joinery:

Draw in geometry for the rabbet for the bottom of the box:

and add a reference square for the top right corner and draw in the rabbet for the front/back as well:

1 Like

Select every other joinery element:

duplicate one and drag it into alignment at the top:

and set the corner treatment to square:

flip it vertically:

Drag things into alignment:

3 Likes

Very nice.

Post a pic of the finished project when you can

Duplicate one of the joinery pieces and increase its size to encompass the board thickness and the radius of the tool (plus 10%) which will be cut out:

drag it into alignment w/ the original and repeat for the bottom of the box:

Delete the geometry which won’t be needed to clean things up:

Draw in geometry for the miter cut by the V endmill:

duplicate this for the front/back:

Duplicate the V endmill geometries and drag the duplicates back into registration:

Union a copy of the V endmill geometry and the joinery geometries for top/bottom:

1 Like

Duplicate the geometry for the parts and the joinery geometry:

mirror things horizontally:

and drag it back into alignment:

Boolean subtract the joinery geometry from the part outlines:

repeat as needed:

Draw in geometry to describe the center of the V carving:

Duplicate, mirror, and align the V carving geometry as well:

1 Like

Add dogbones to the rabbet geometry:

1 Like

Duplicate each finished part and drag it into alignment w/ the placeholder:

With all the geometry in place, begin creating layers and isolating each thing to an appropriate layer:

allowing one to isolate elements:

to work on.

For the finger depth geometry, we will need to offset the part geometry by the diameter of the endmill which will cut it out plus 10%:

Go into Node Edit mode to clean things up:

then delete anything which can’t be fixed when Node Editing and move to the appropriate layer:

1 Like

Since the finger depth is greater than the rabbet depth, we will need to duplicate the finger depth geometry to the rabbet depth layer:

Select the geometry for the sides and punch the rabbets for the bottom out:

1 Like

With all the geometry defined, toolpaths may now be created — select each layer in turn:

If the tool used for cutting out pockets is larger than the dogbones it will be necessary to offset things and do Boolean operations to get toolpaths which will handle cutting them w/ reasonable efficiency.

1 Like

Select one of each part, duplicate it in place, and offset to the outside by the size of the dogbones:

and isolate the offset and duplicate geometry on a new layer:

Use Node editing to clean things up so as to optimize machine movement:

Draw in geometry to define where the toolpath should begin/end:

Use Node editing to break the geometry so that things will fit together:

Where necessary, draw in geometry to close things:

and use the Join Vectors command to join into a closed path:

Repeat.

Duplicate, mirror, and align w/ the joinery geometry:

Assign toolpaths:

1 Like

Lastly add geometry to cut out the top and bottom of each part:

3 Likes

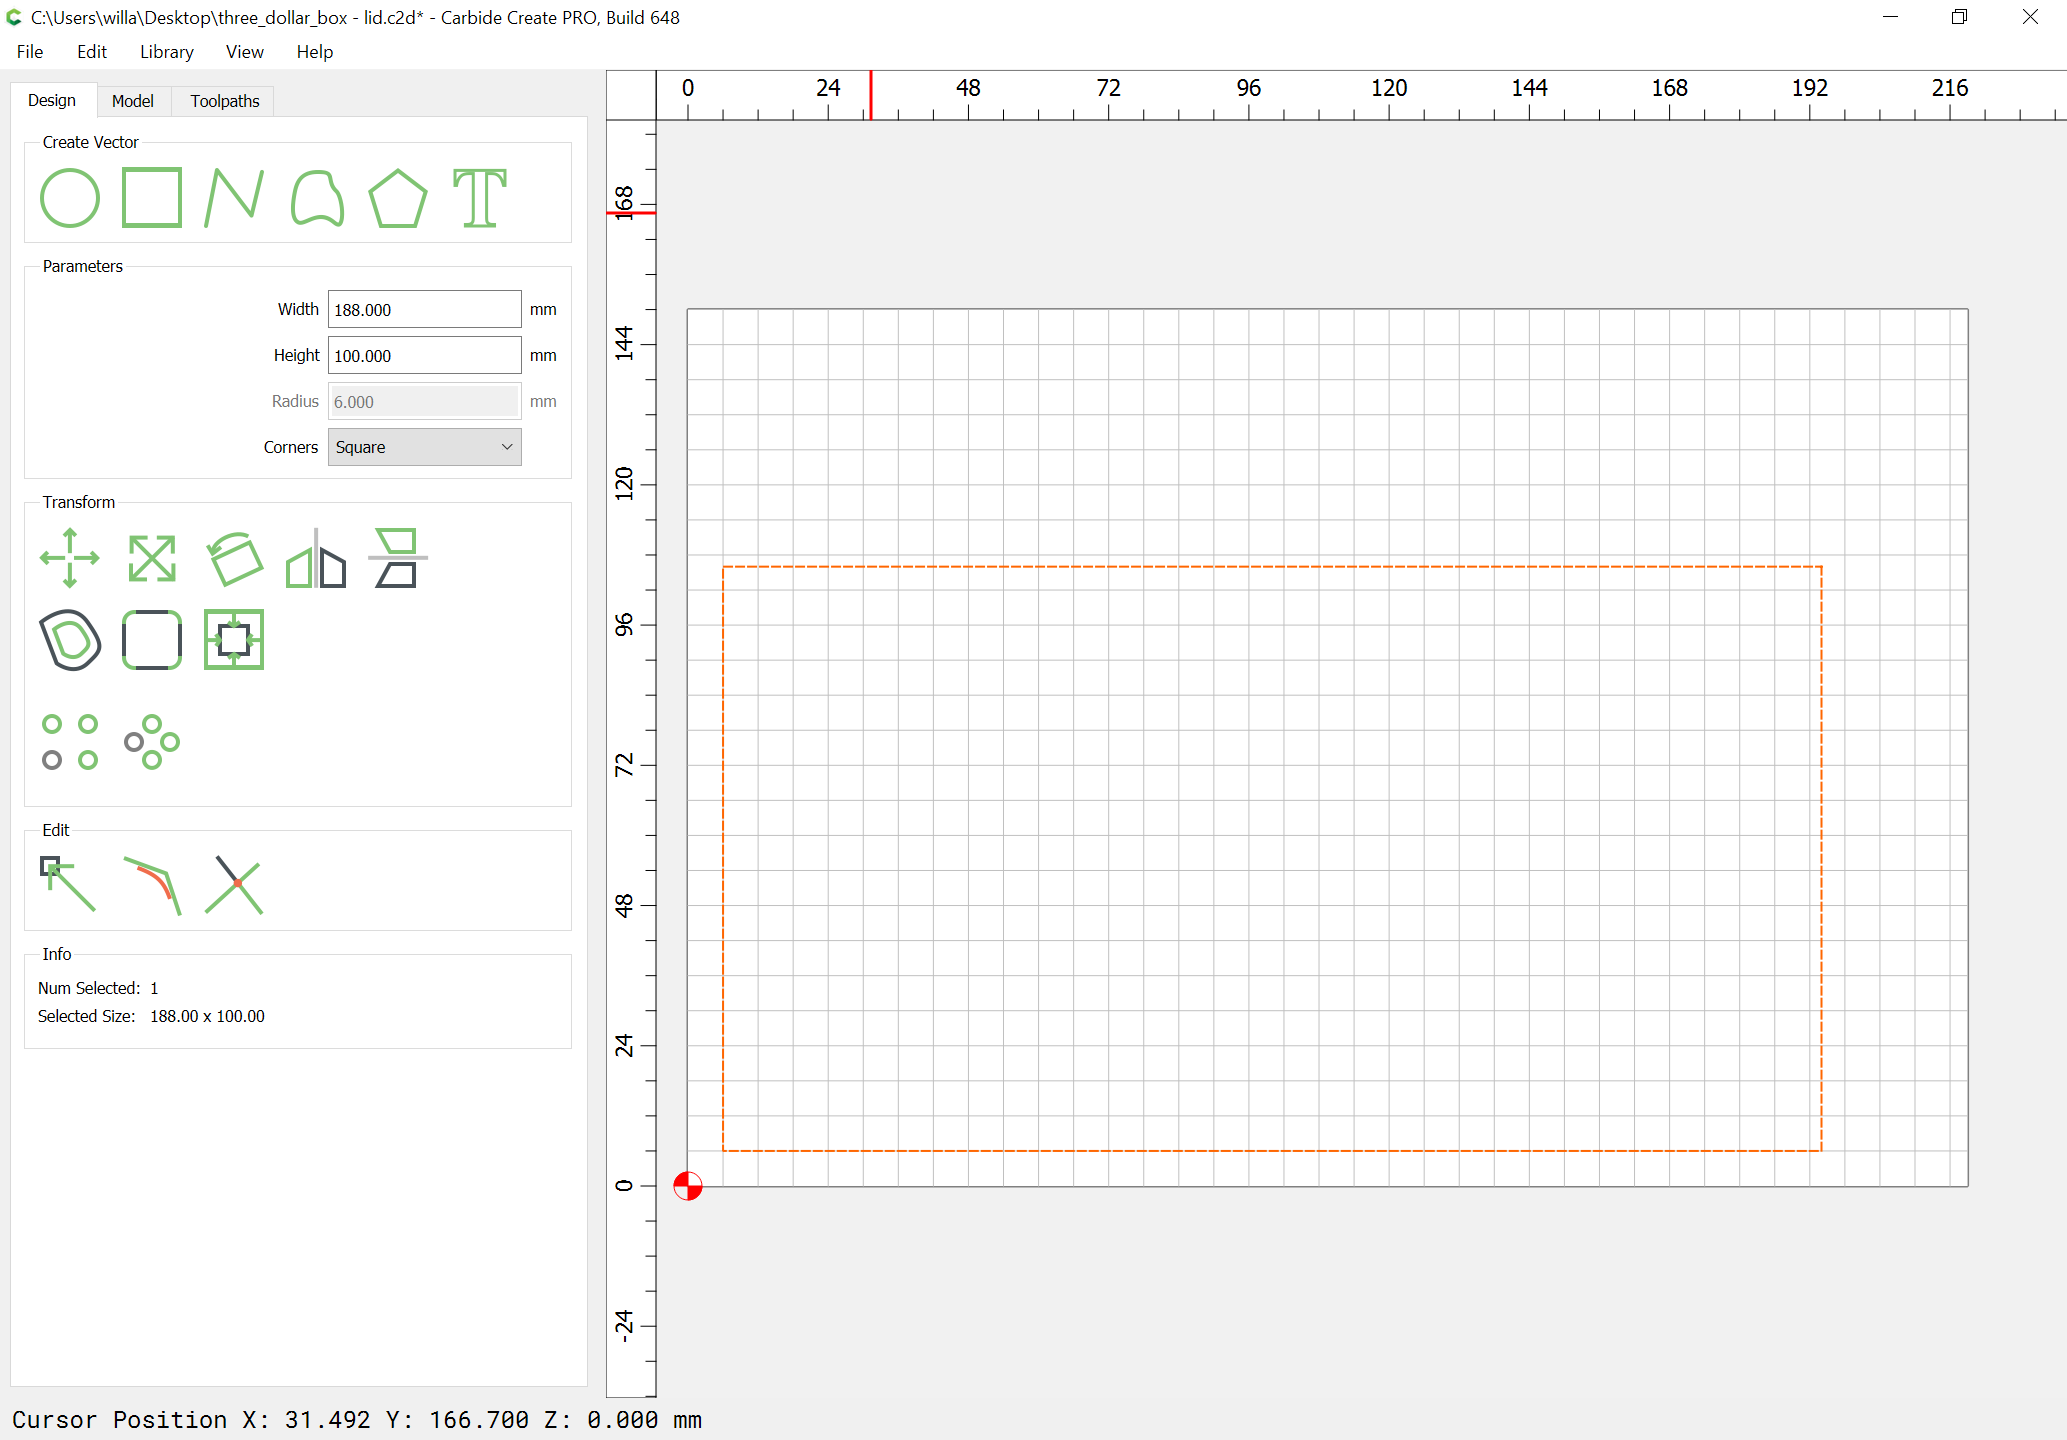
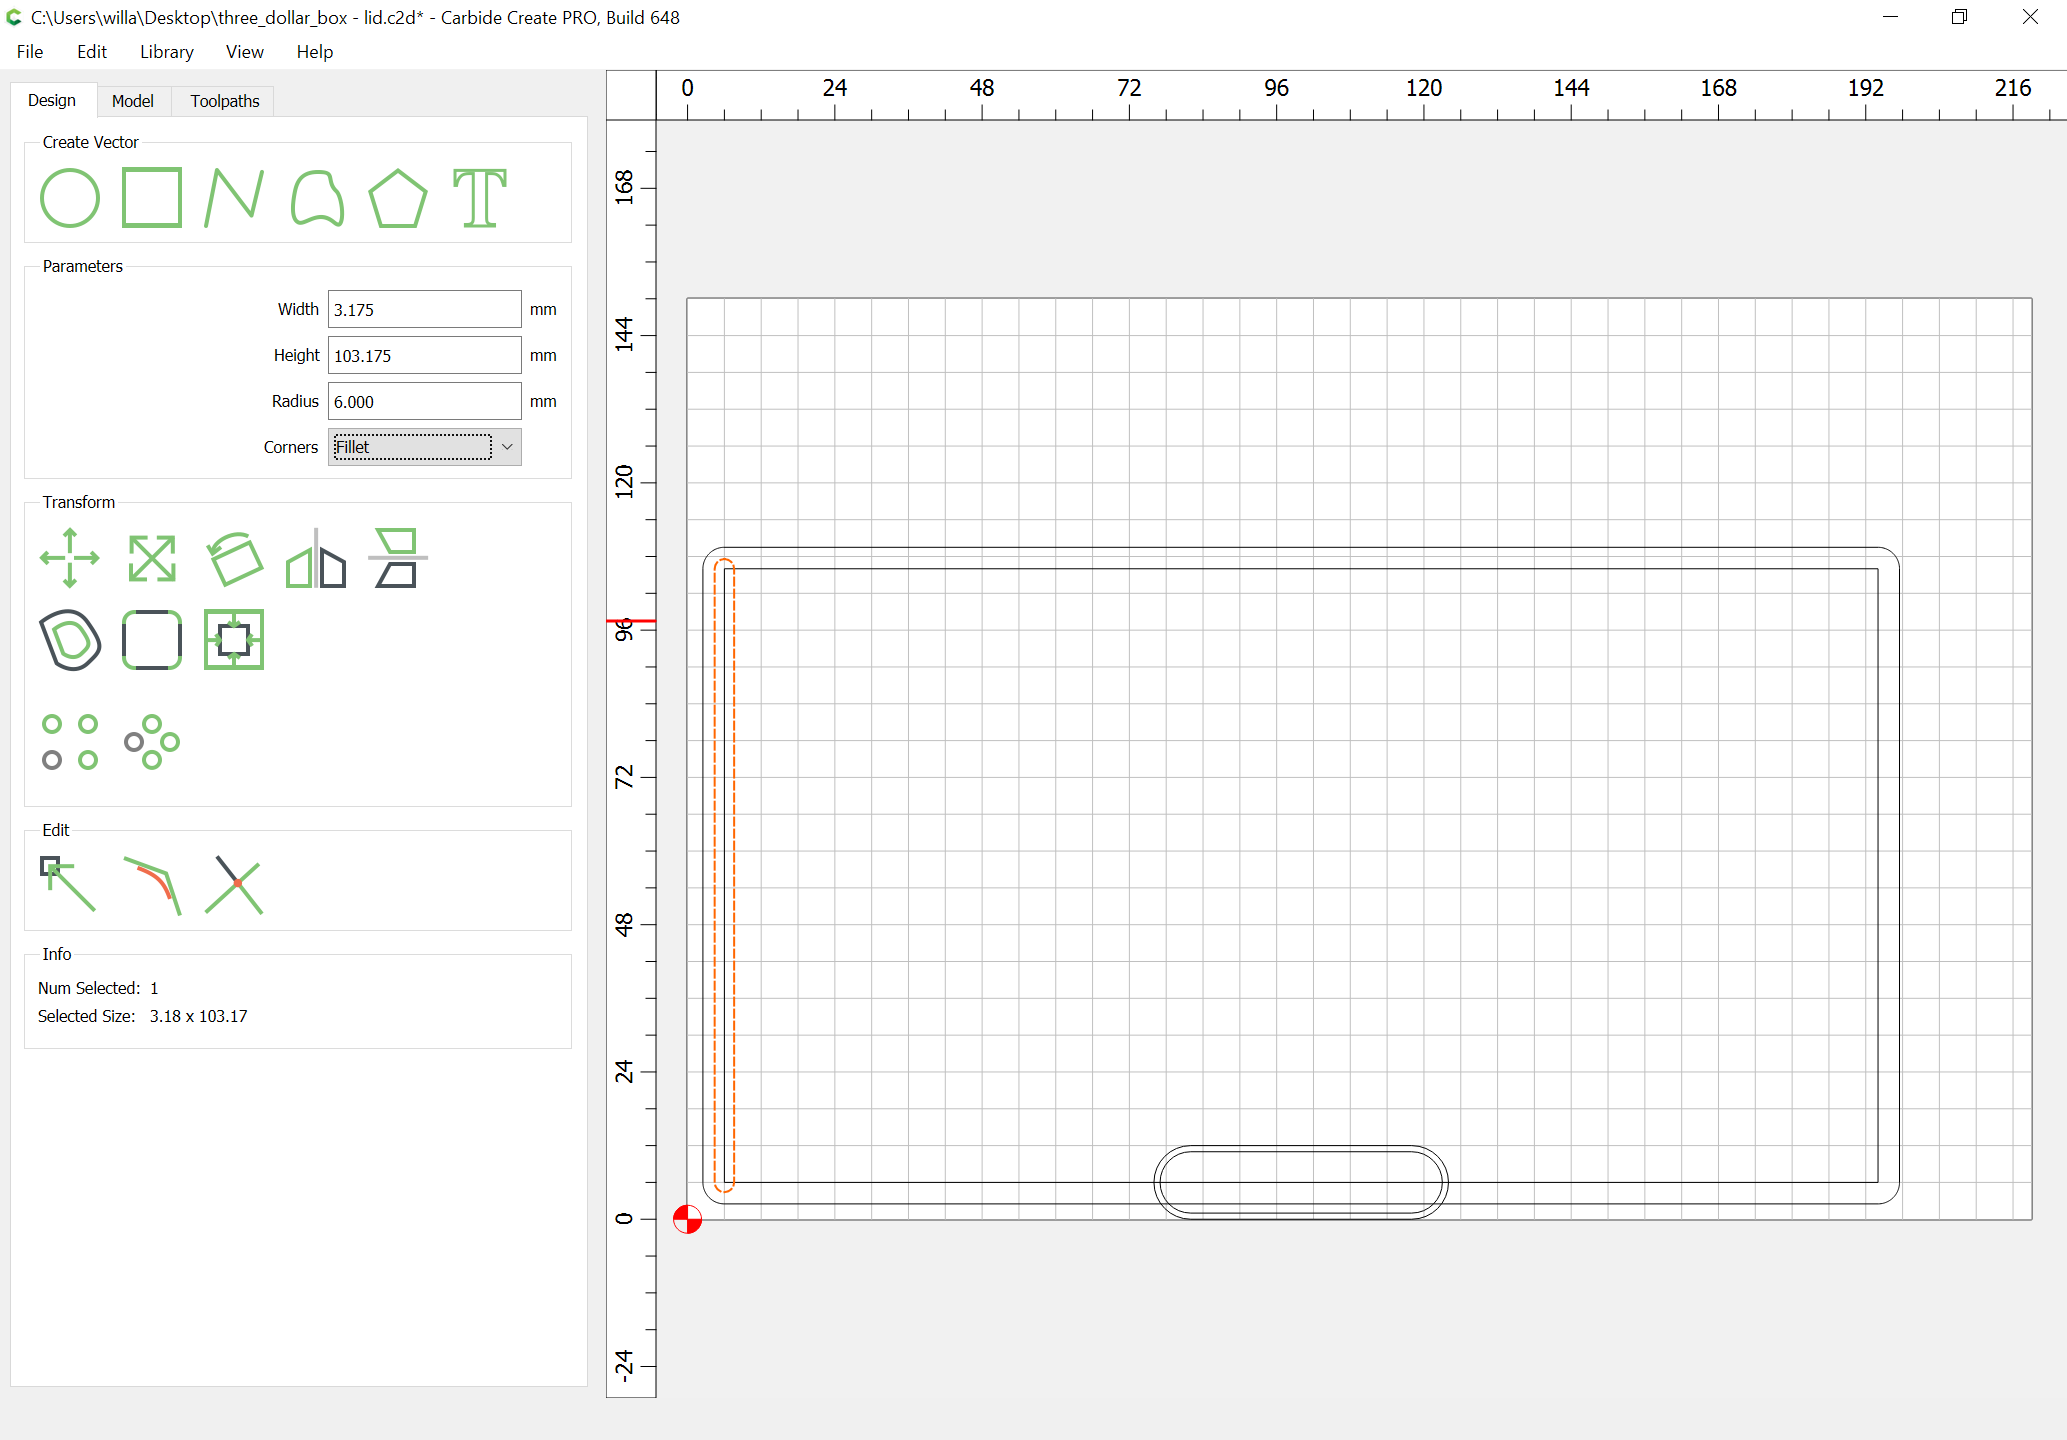
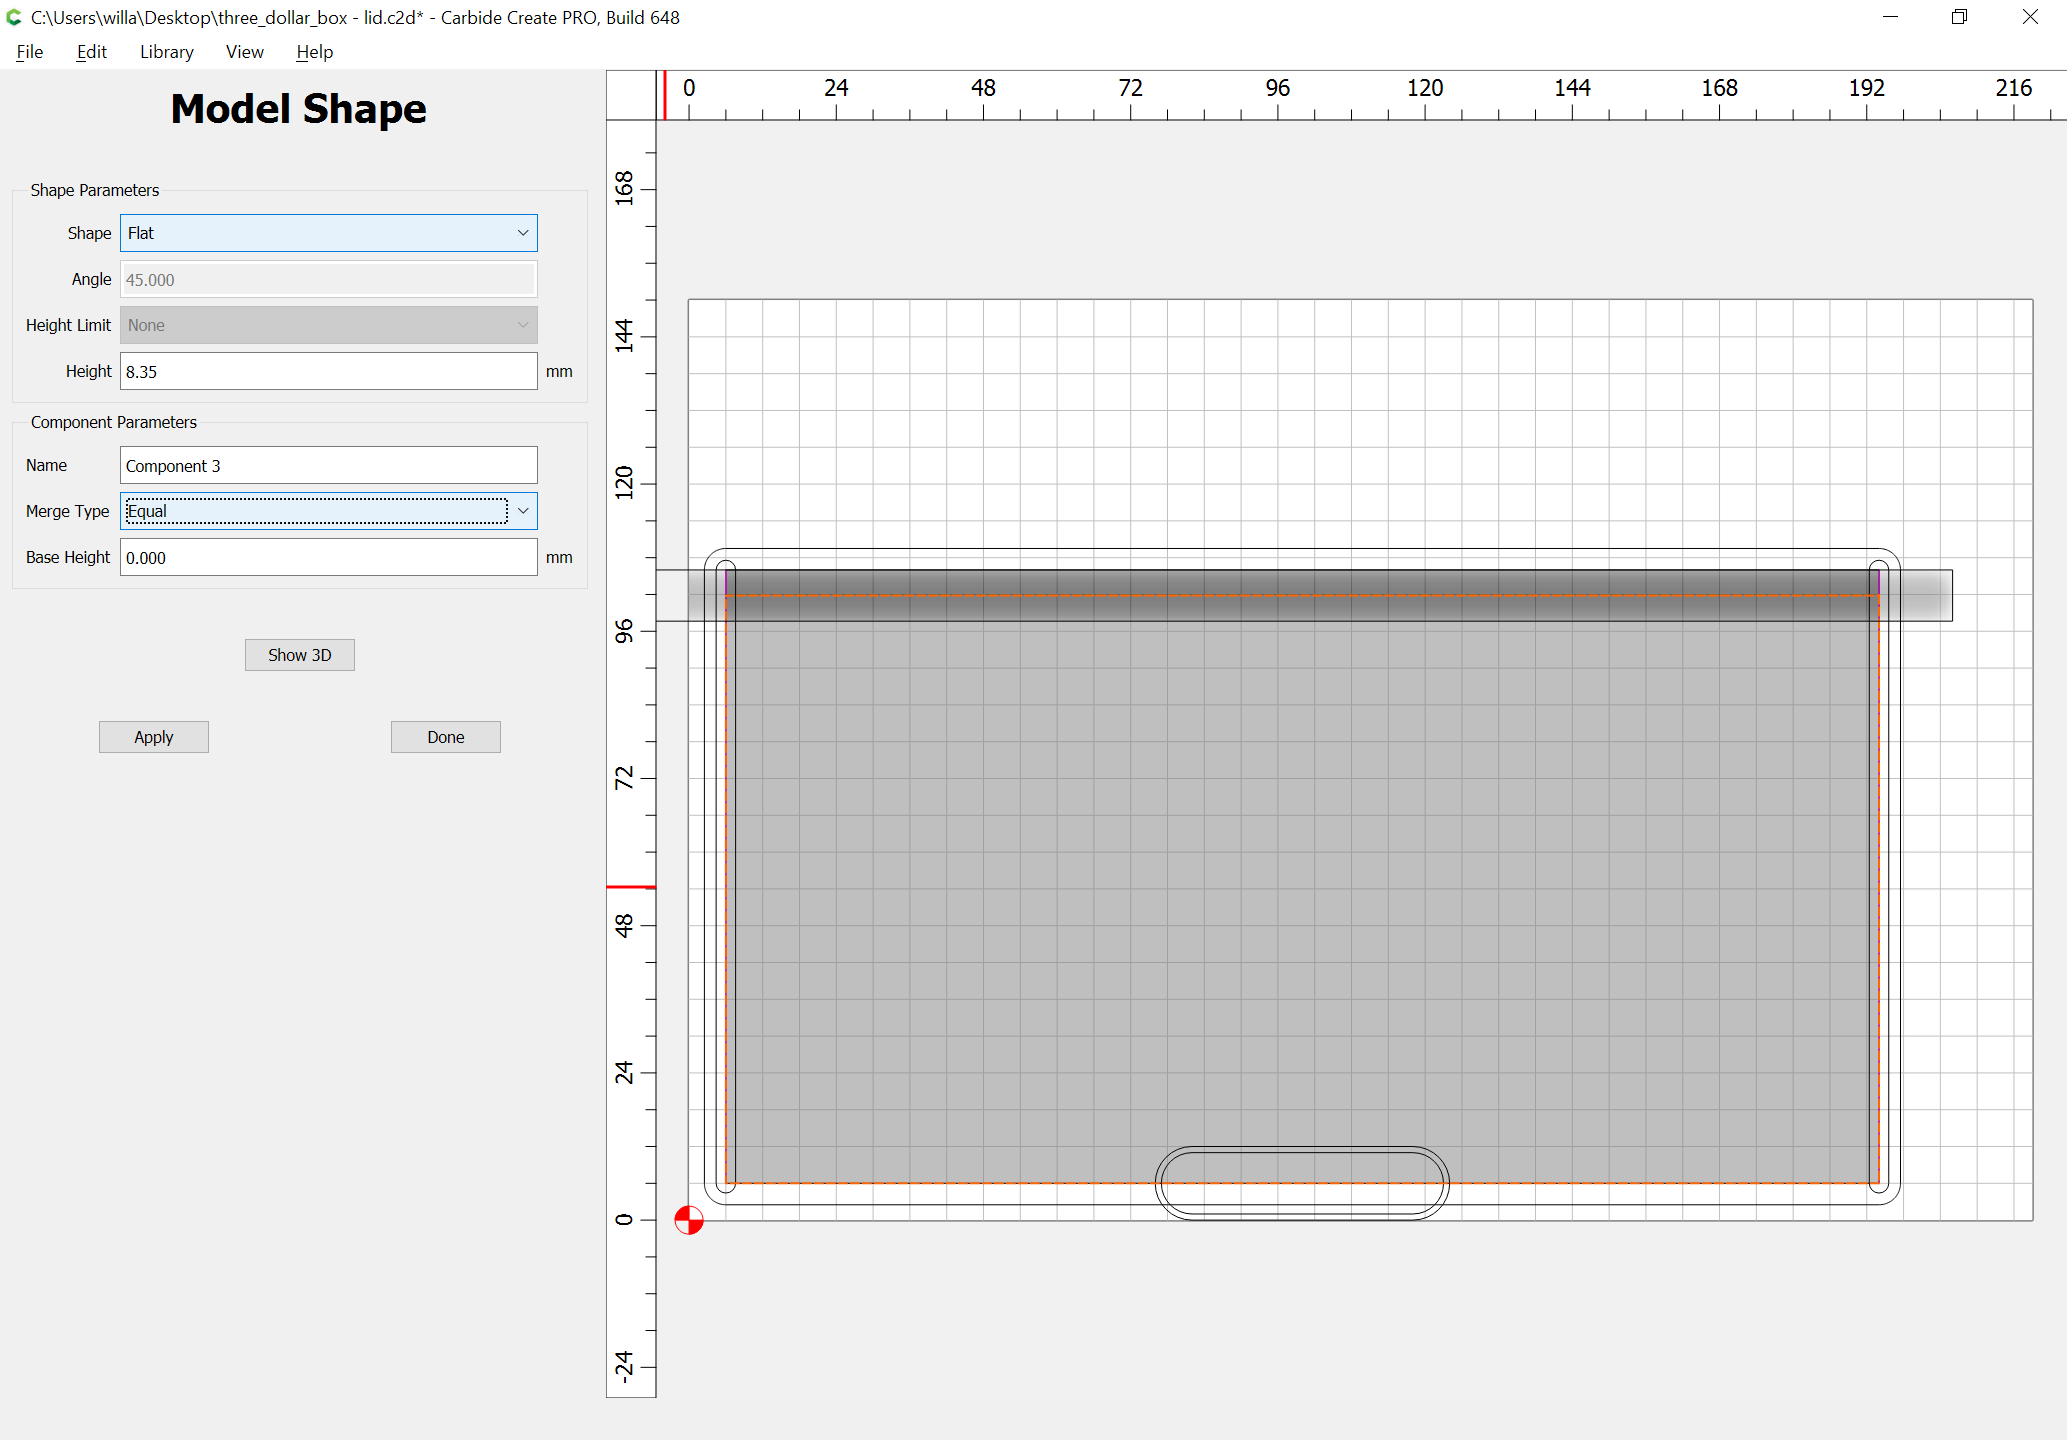
The lid is simply a matter of drawing a rectangle of the appropriate size:

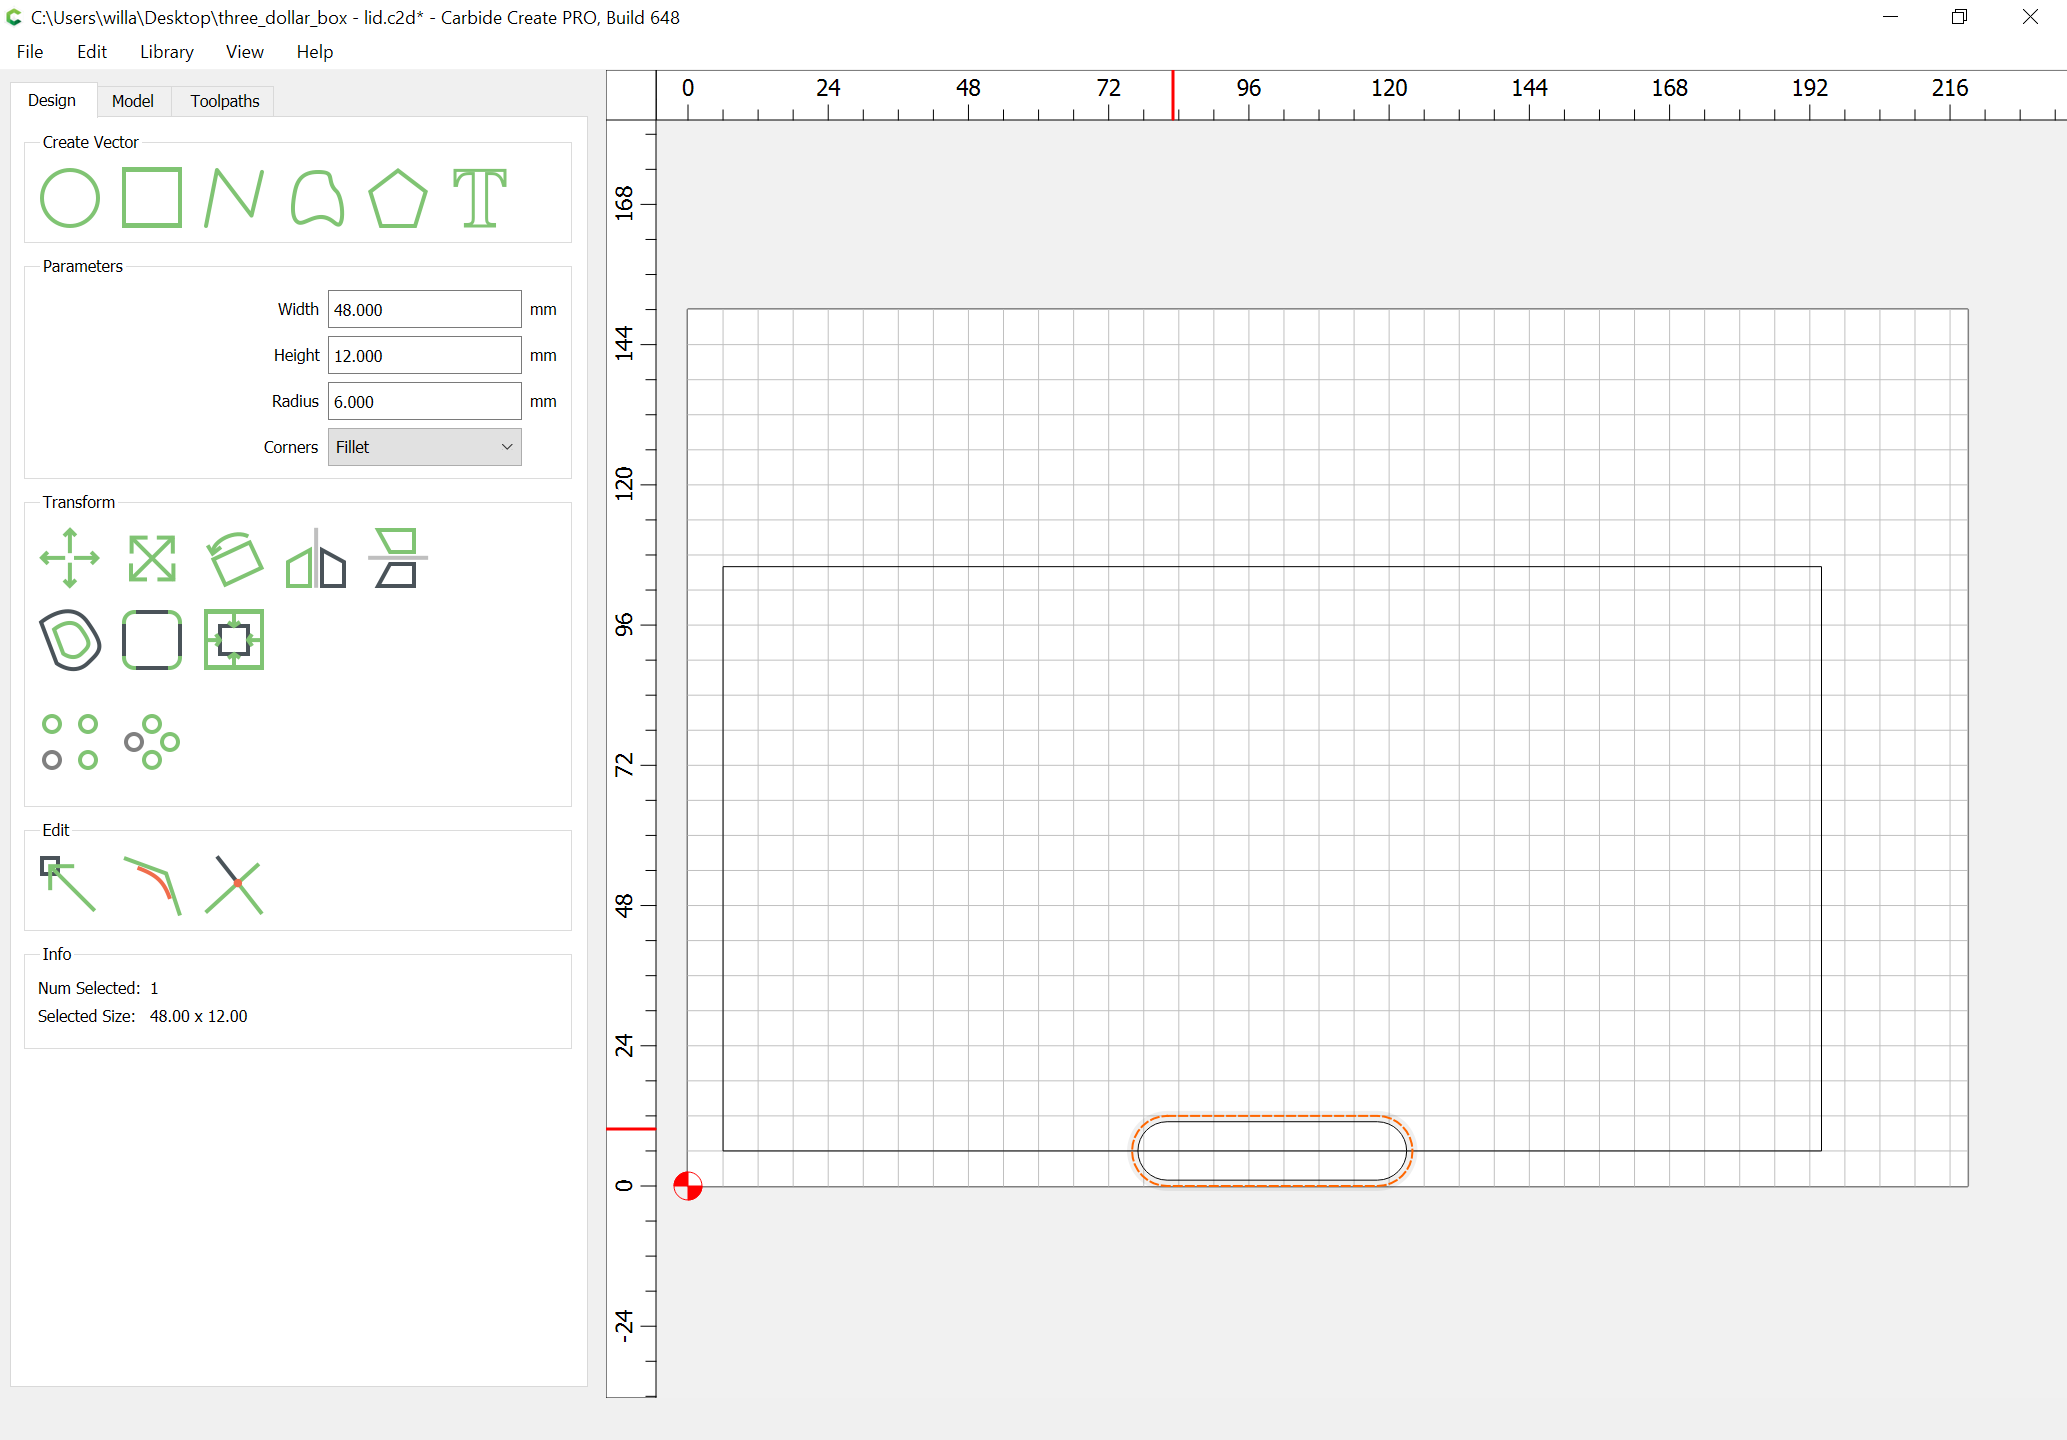
drawing in geometry for the finger recess for opening:

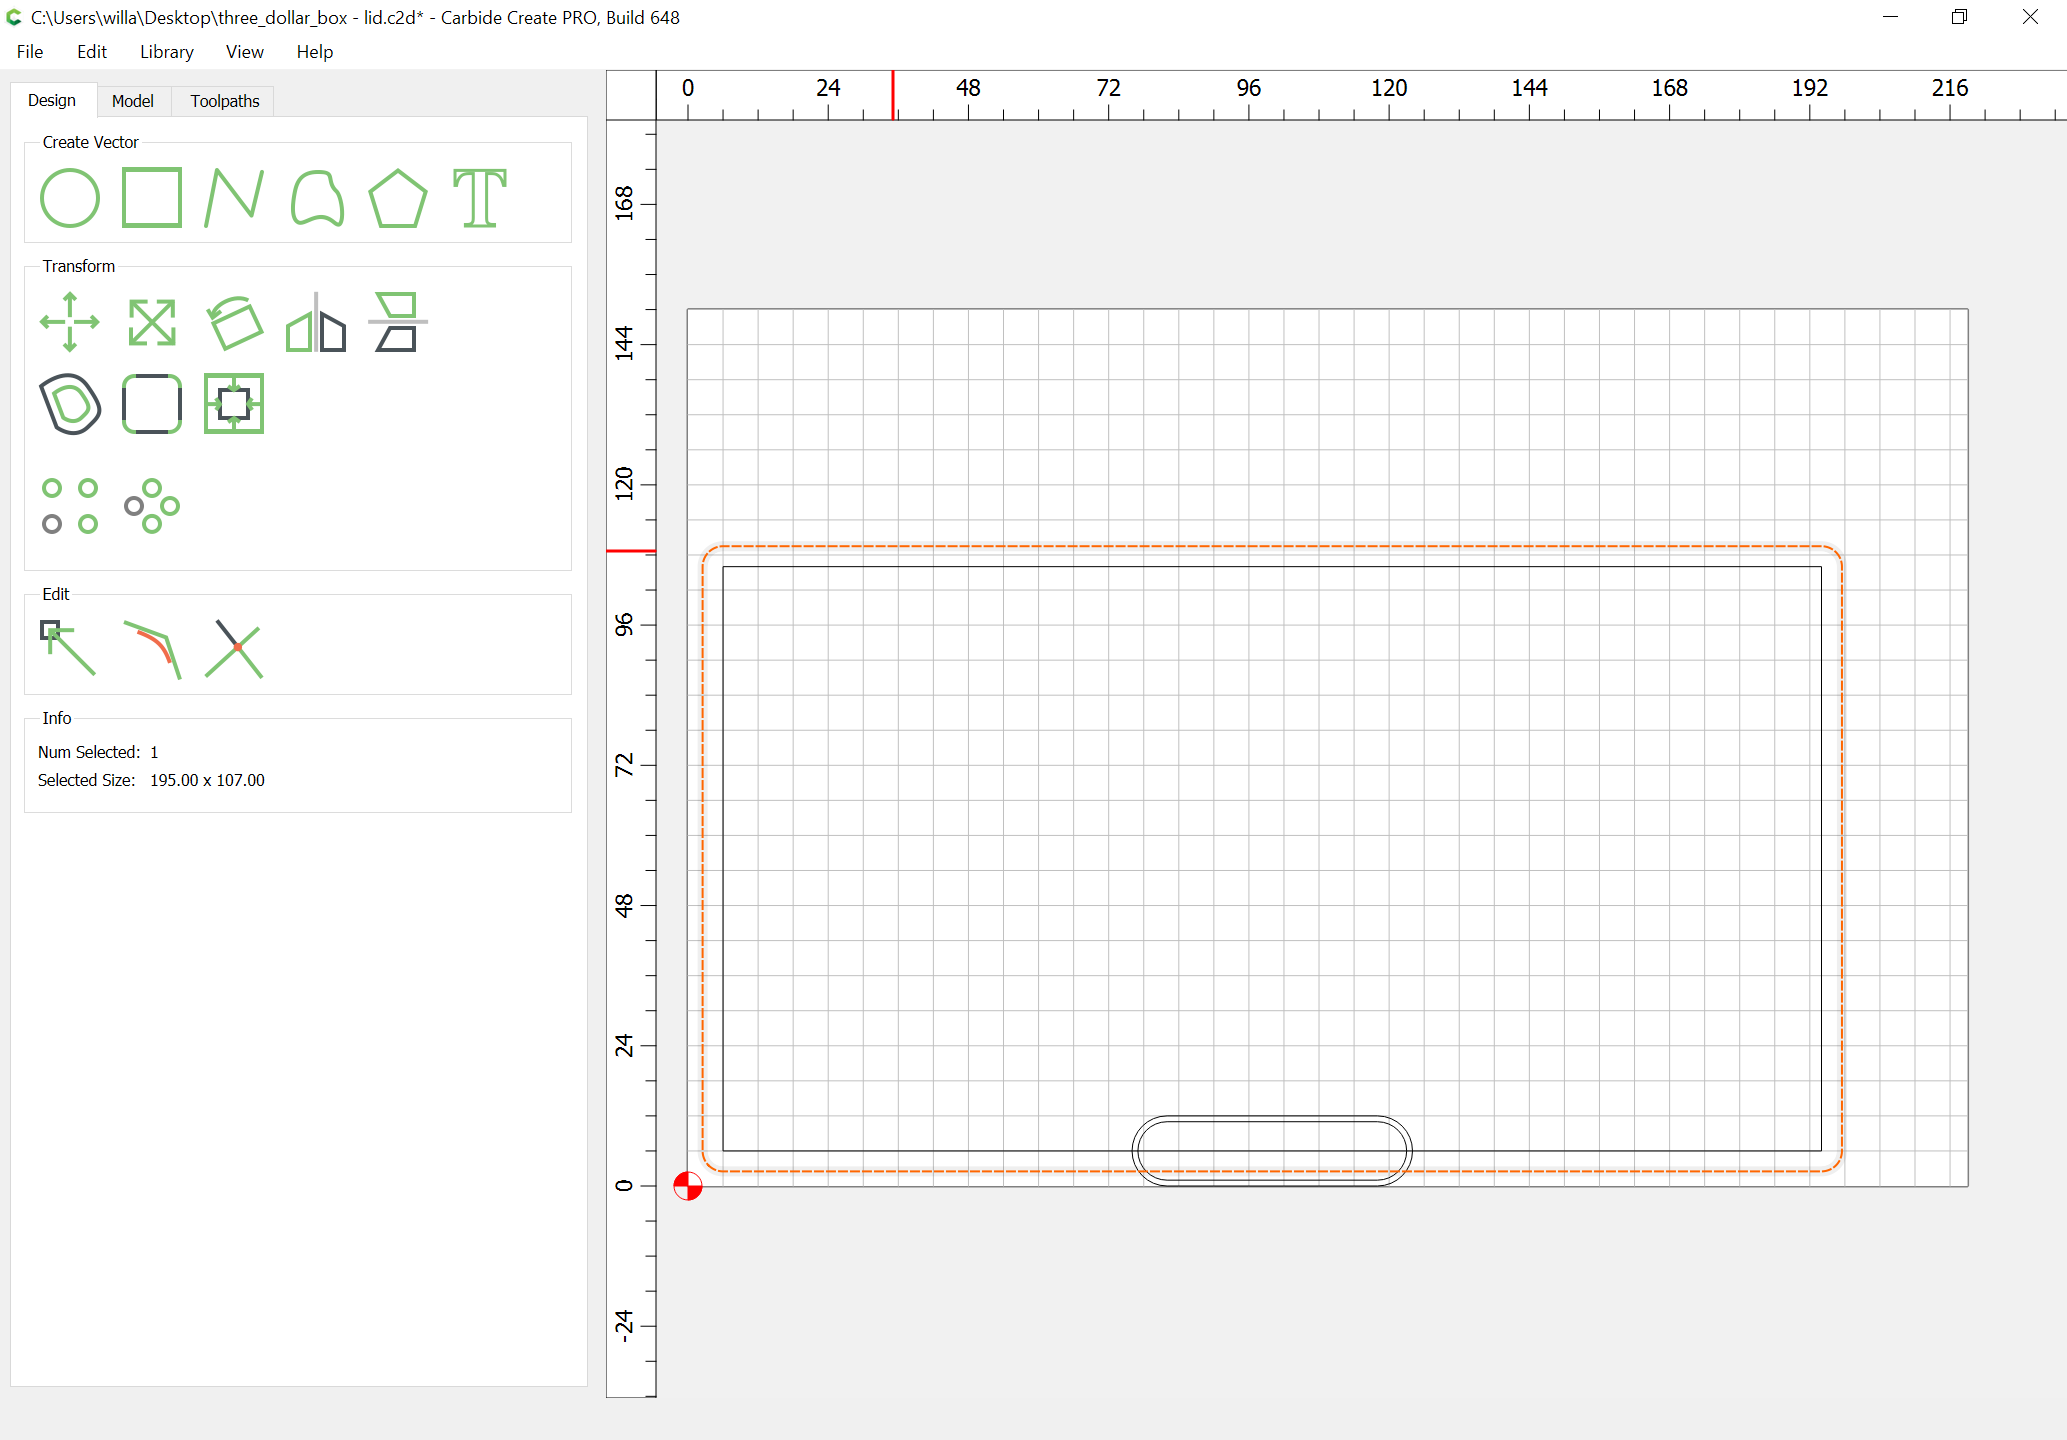
offsetting to the outside to the the lid out:

and drawing up the profile of the radius of the lid opening so as to calculate how deep a V carving needs to be to ease that (or one could source a corner radius tool of the correct size, or model it in 3D):

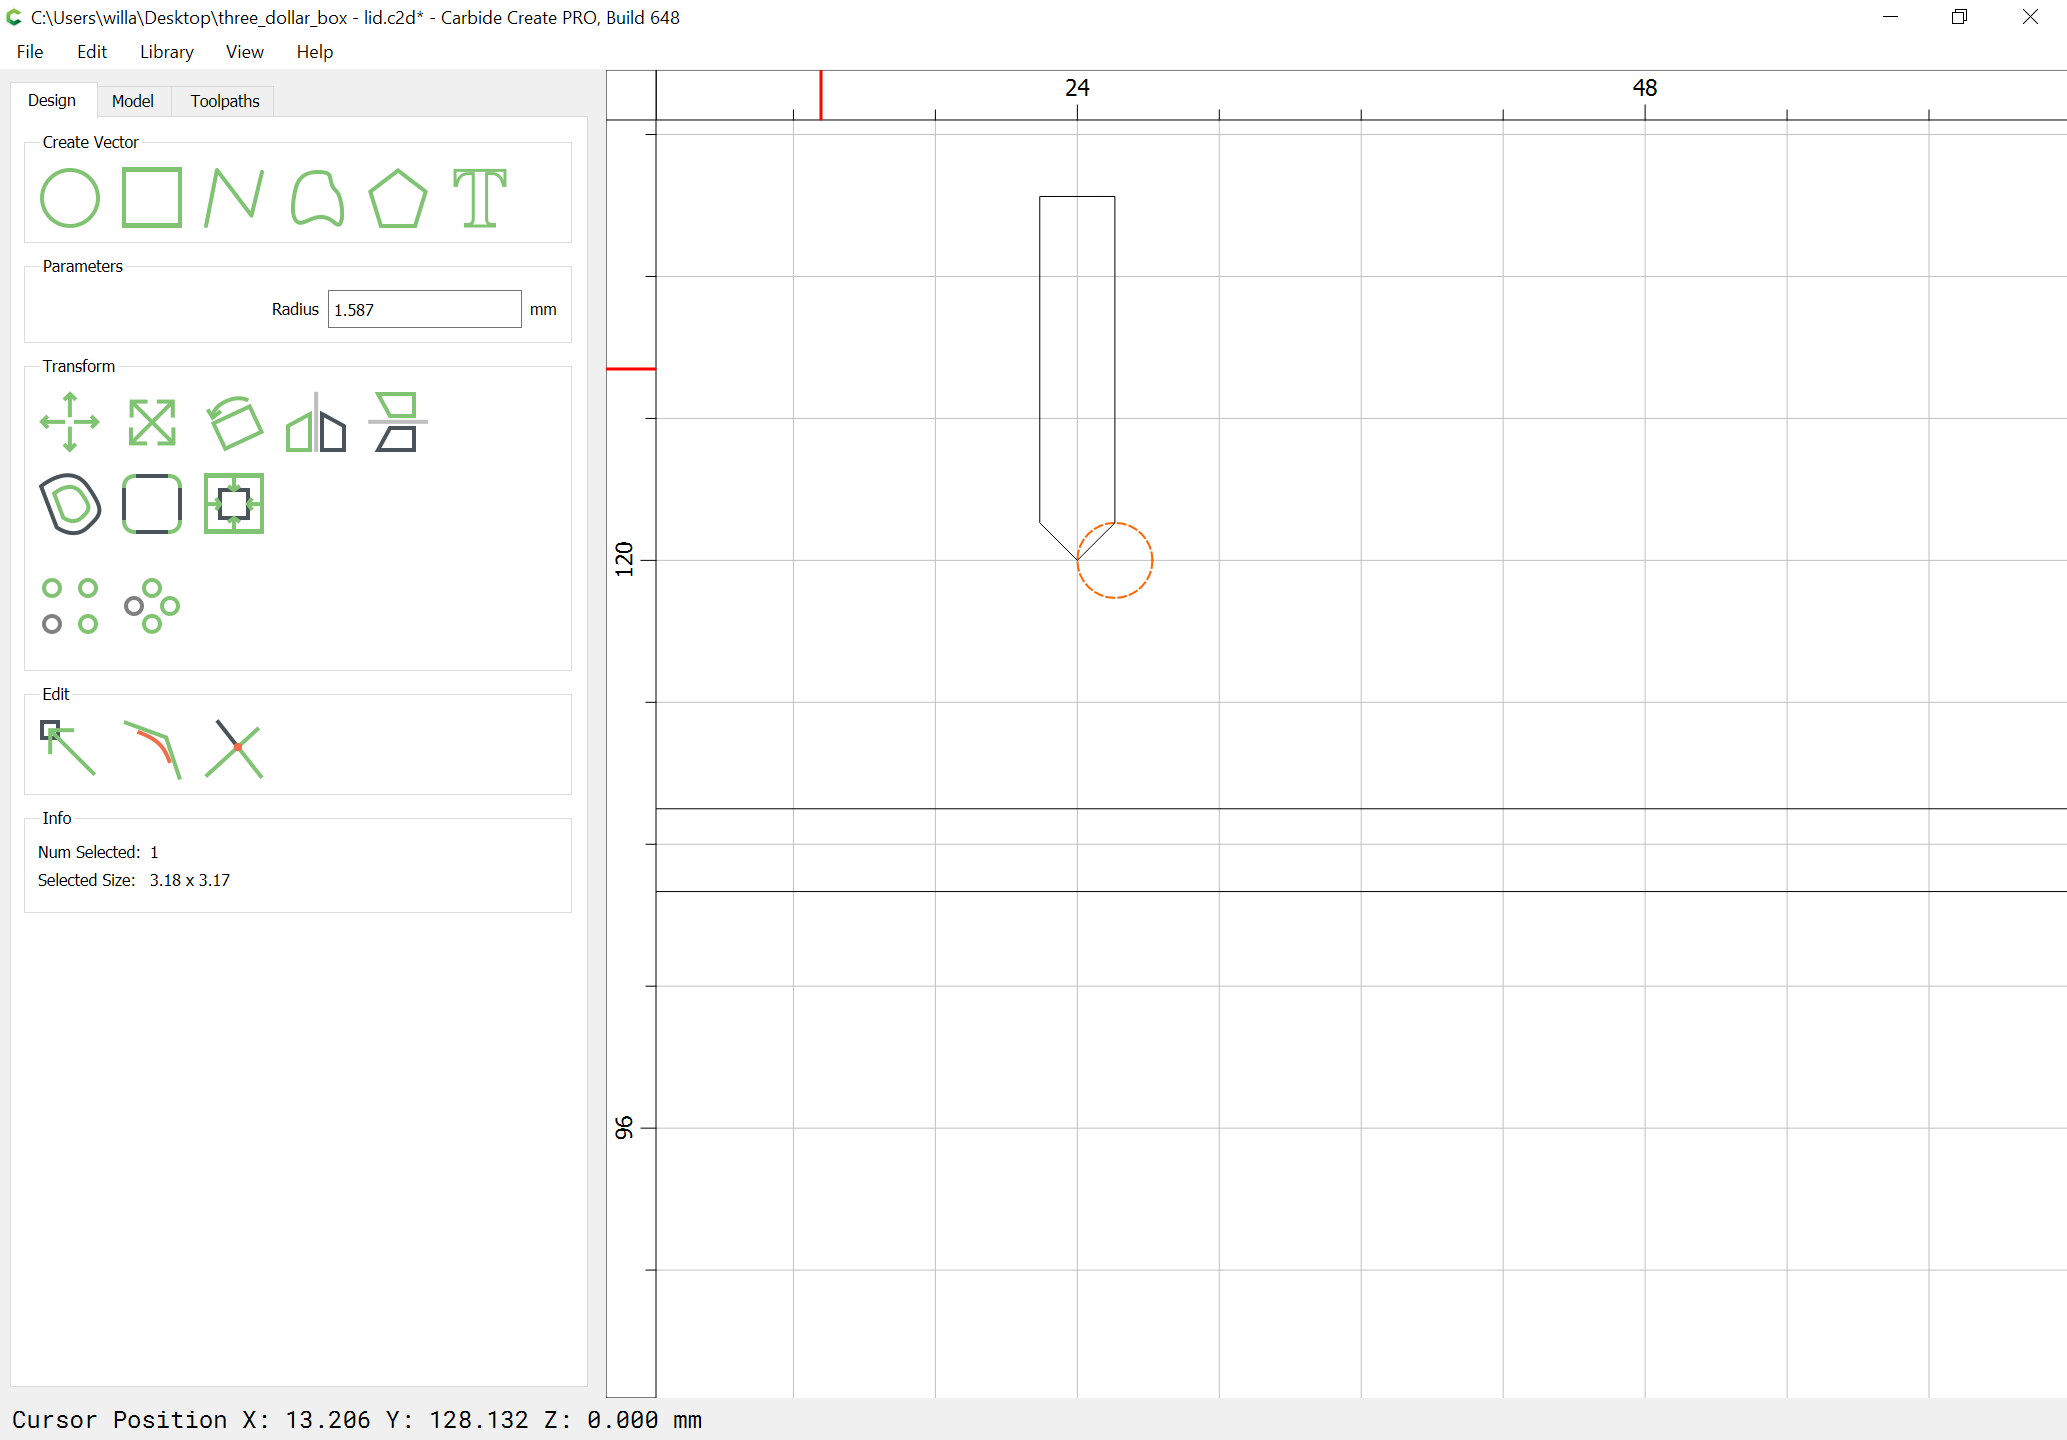
drawing in the geometry for the V carving:

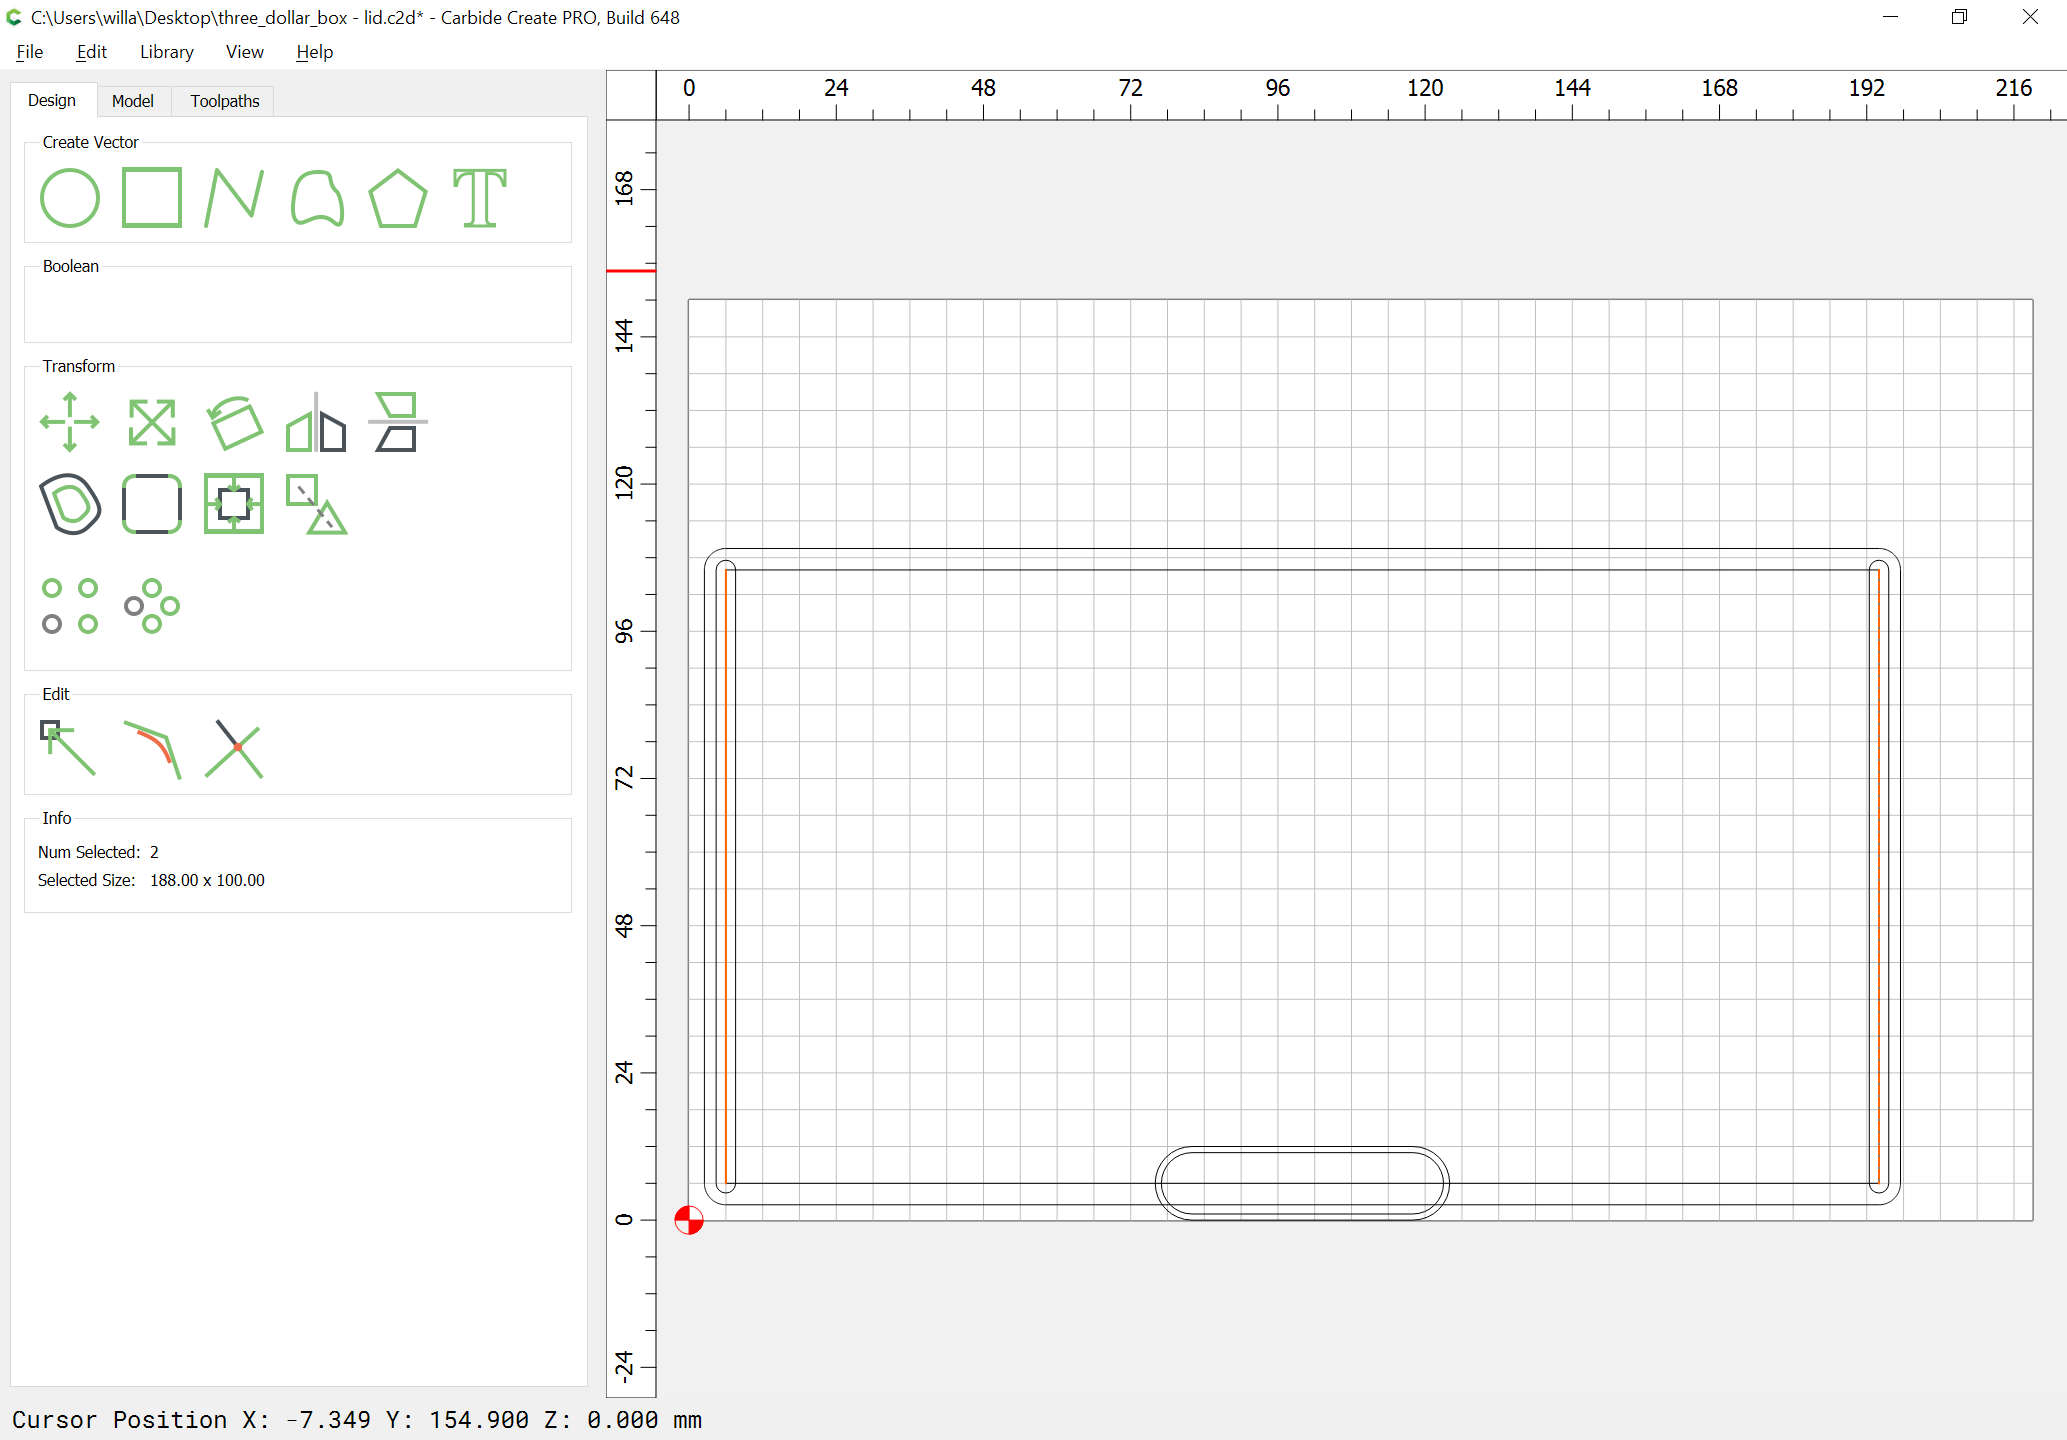
and working out how the radius relief to allow the box opening will be done — one can either source a tool

(the exact size doesn’t seem to be available, but there is a close Imperial size)

which fortuitously is available at my local Woodcraft:

If that isn’t an option, draw things up in profile and work up a series of cuts w/ a ball-nosed endmill as suggested at:

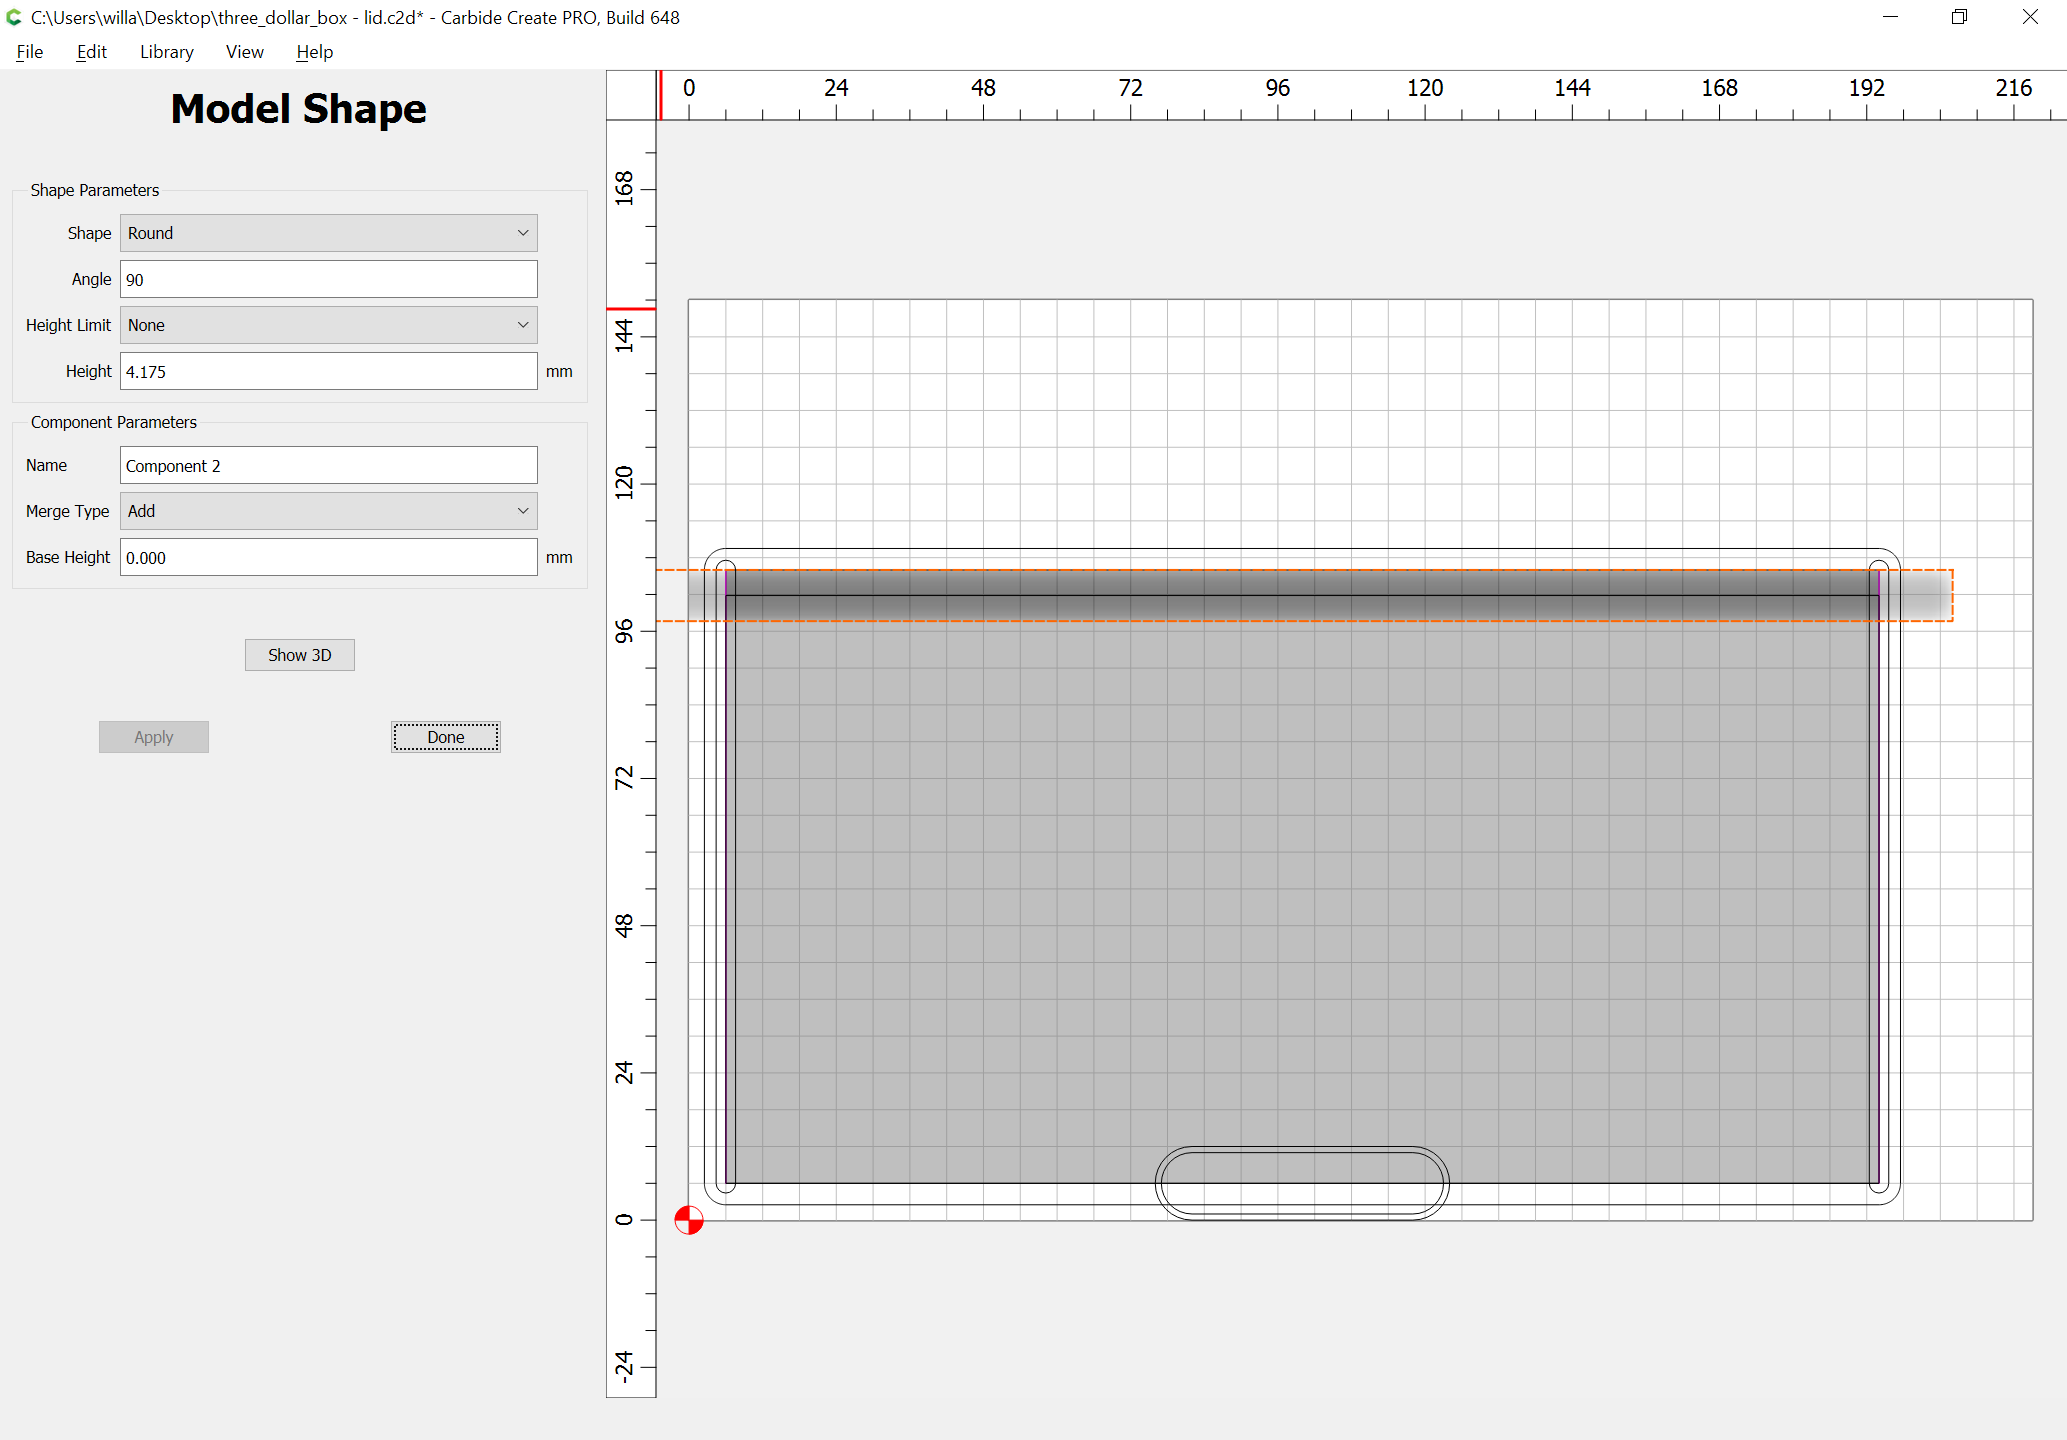
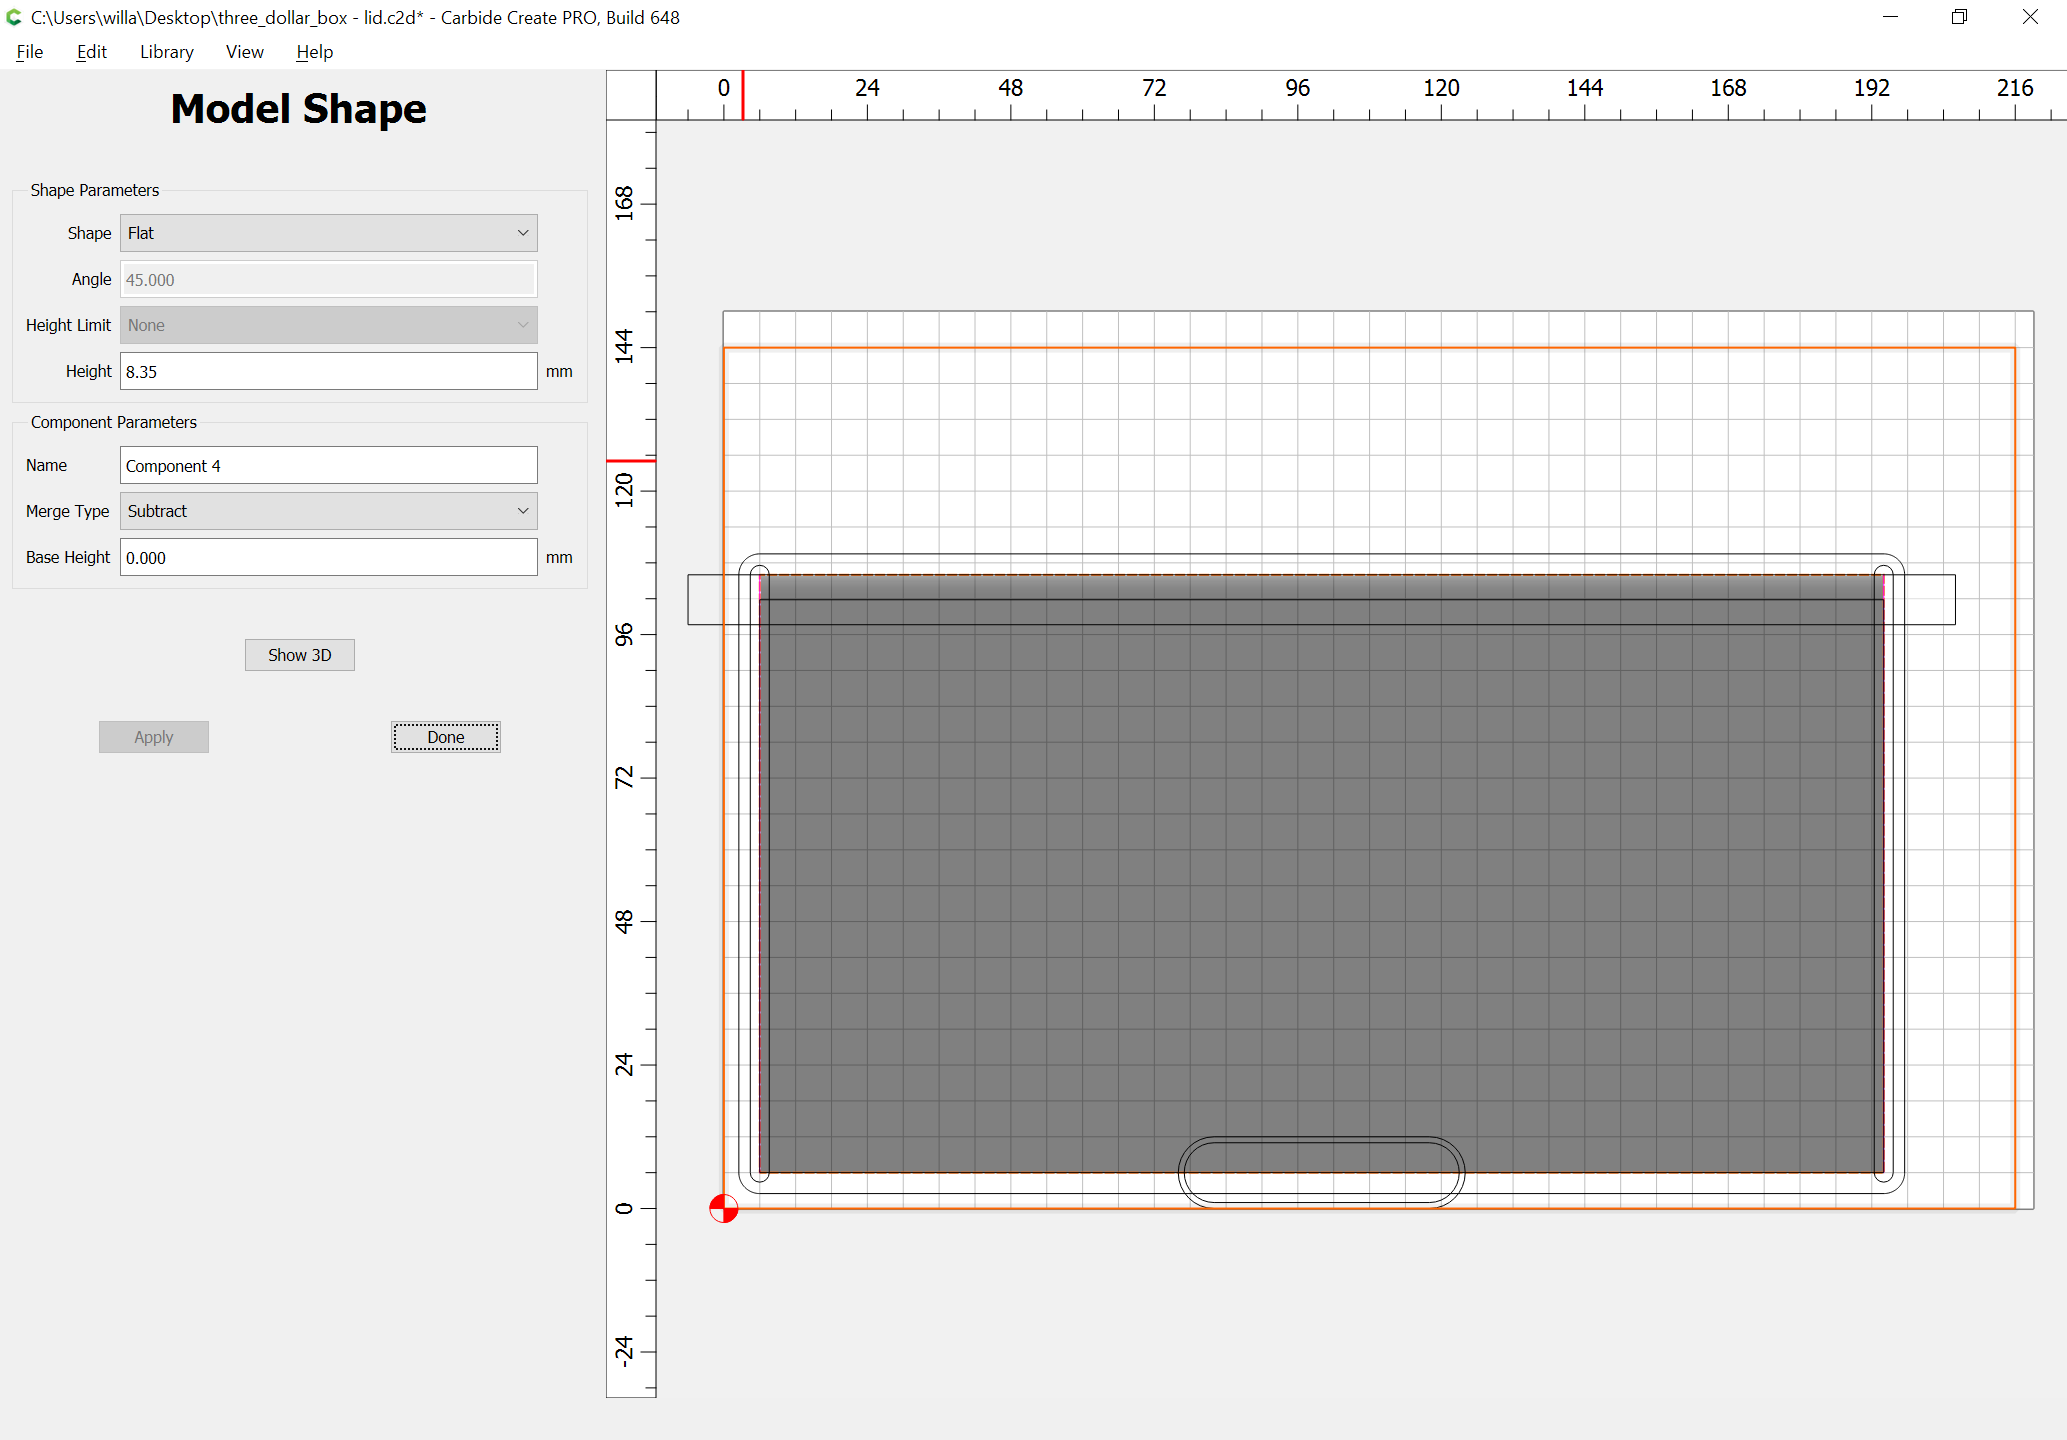
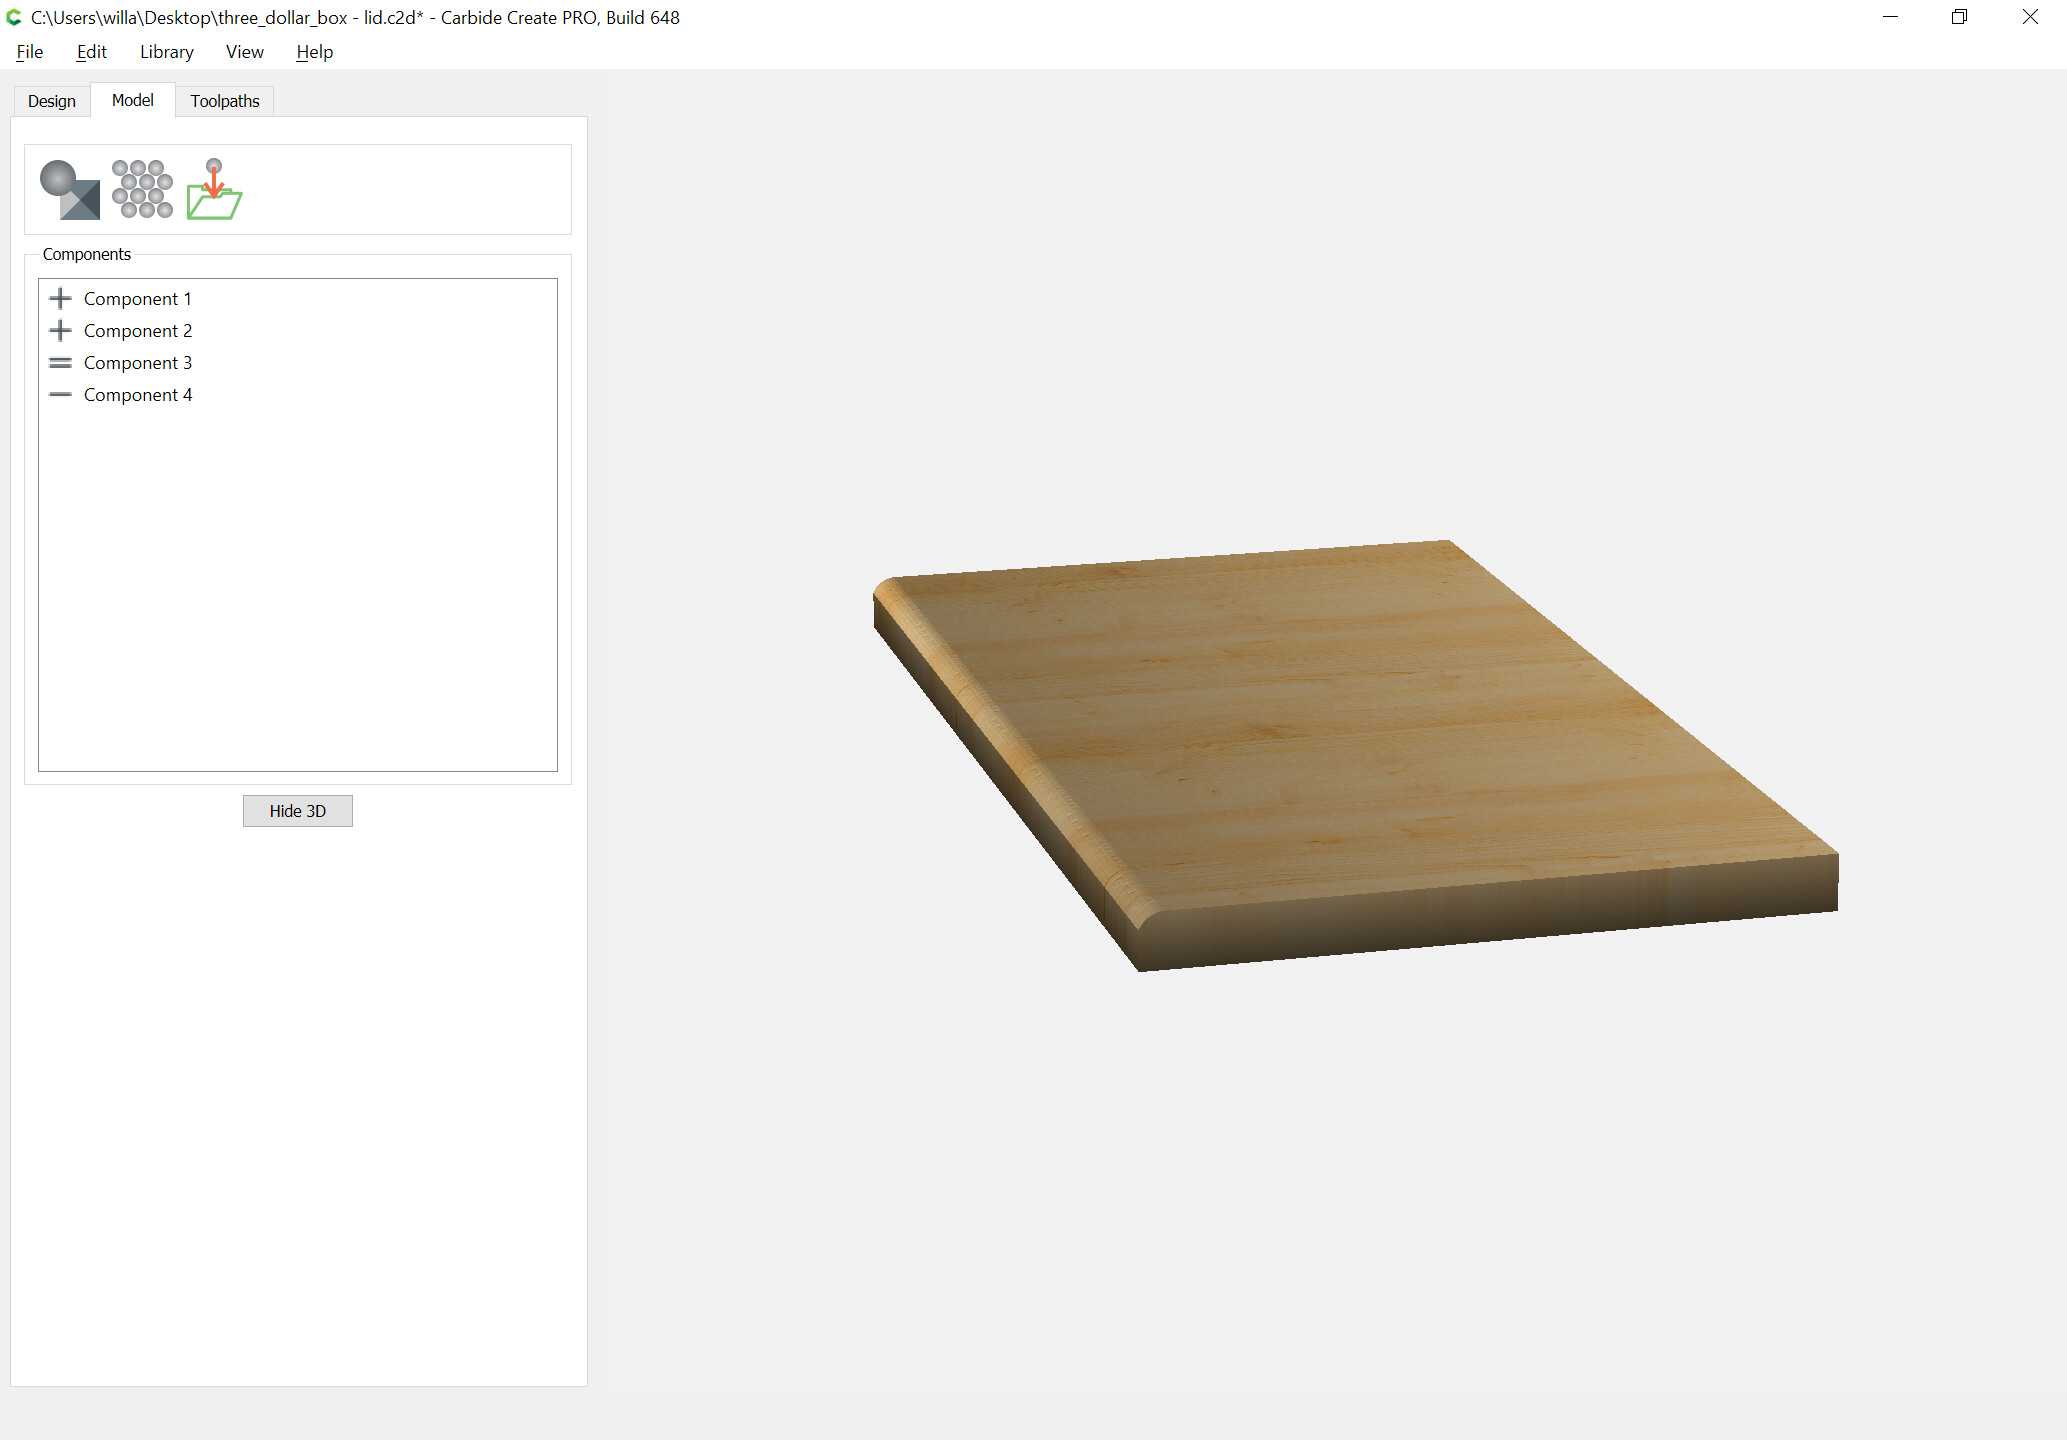
Or, if you have Carbide Create Pro, model the rounding using that:

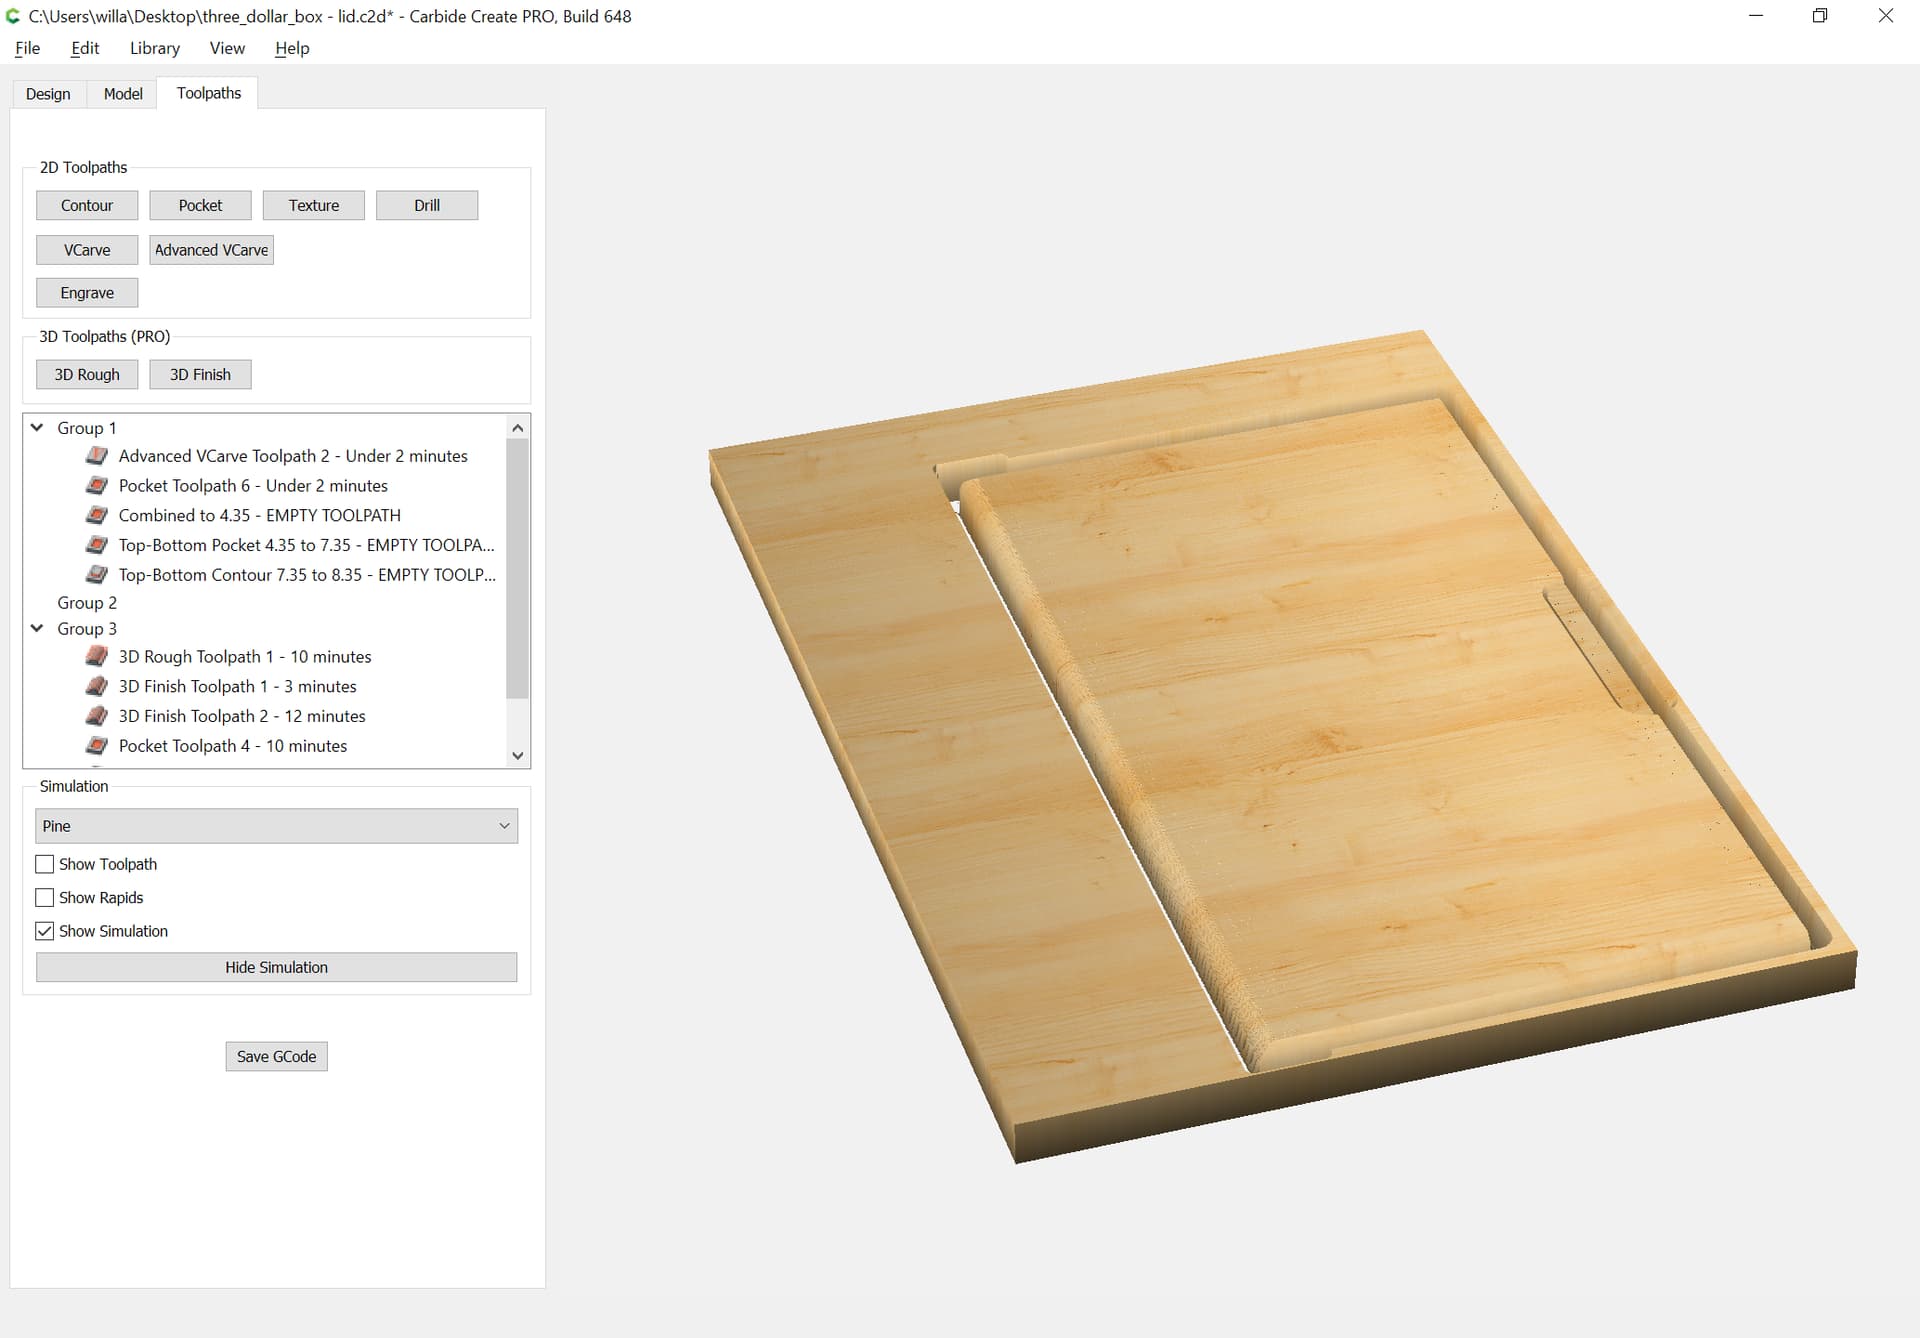
Assigning toolpaths we arrive at:

1 Like

The bottom is simply a pair of nested rectangles of the appropriate size w/ an offset to create a rabbet:

1 Like

The final consideration is that a jig/fixture will be necessary to allow drilling the holes for the hinges — this is easily drawn up in two symmetrical halves:

and one assigns toolpaths so as to cut it out of a left-over piece of stock:

Using two pieces allows us to cut channels which will become holes at 90 degrees:

Note that for such a shallow cut it will be necessary to set the origin relative to the surface for these cuts — the opposite of the rabbets, arguably this would be better on the lid.

1 Like

Alternately, since there are two pieces w/ space to spare, make the pieces separately.

2 Likes

Wrote a bit about previewing the roundover cut using V endmills at:

The parts cut out well:

and cutting the holes for the hinges using the jig went well — found some bamboo skewers, but they are ~2.1mm diameter, so probably the #111 endmill would be better than the #121.

1 Like

and things fit together well:

not anticipating any issues w/ the glue-up (though using a roundover for relieving the sides of the lid would probably look better).

2 Likes

In case anyone else has some of the $1.25 (w/ inflation, the box is now $3.75) cutting boards from Dollar Tree, here are the files:

three_dollar_box - bottom.c2d (179.1 KB)
three_dollar_box - lid - 3D.c2d (180.8 KB)
three_dollar_box - lid.c2d (490.6 KB)
three_dollar_box.c2d (1.6 MB)

As noted above, the #121 should be replaced w/ a #111, or whatever size matches what is being used for hinges.

5 Likes

Alternative lid at:

1 Like