I have observed the admins being very helpful and offering email support, but I believe the number of posts about assembly issues and emails could be reduced with some updates to the existing guides.
In the interest of supporting the community and improving the Shapeoko 5 assembly resources, I’d love to start this thread in the hope that assembly feedback will be welcomed by the staff and can be integrated into the next version of the Shapeoko 5 assembly guides (electronic, printed, and video).
I hope this doesn’t turn into a debate of opinions, but rather a constructive place people can post errors, missing steps…or how it could be improved…and helpful links existing resources (photos, video, or existing links).
Please post your specific observations (steps, diagrams, etc) and suggestions for edits if you have any that might help organize, clarify, or simplify the manual or assembly video.
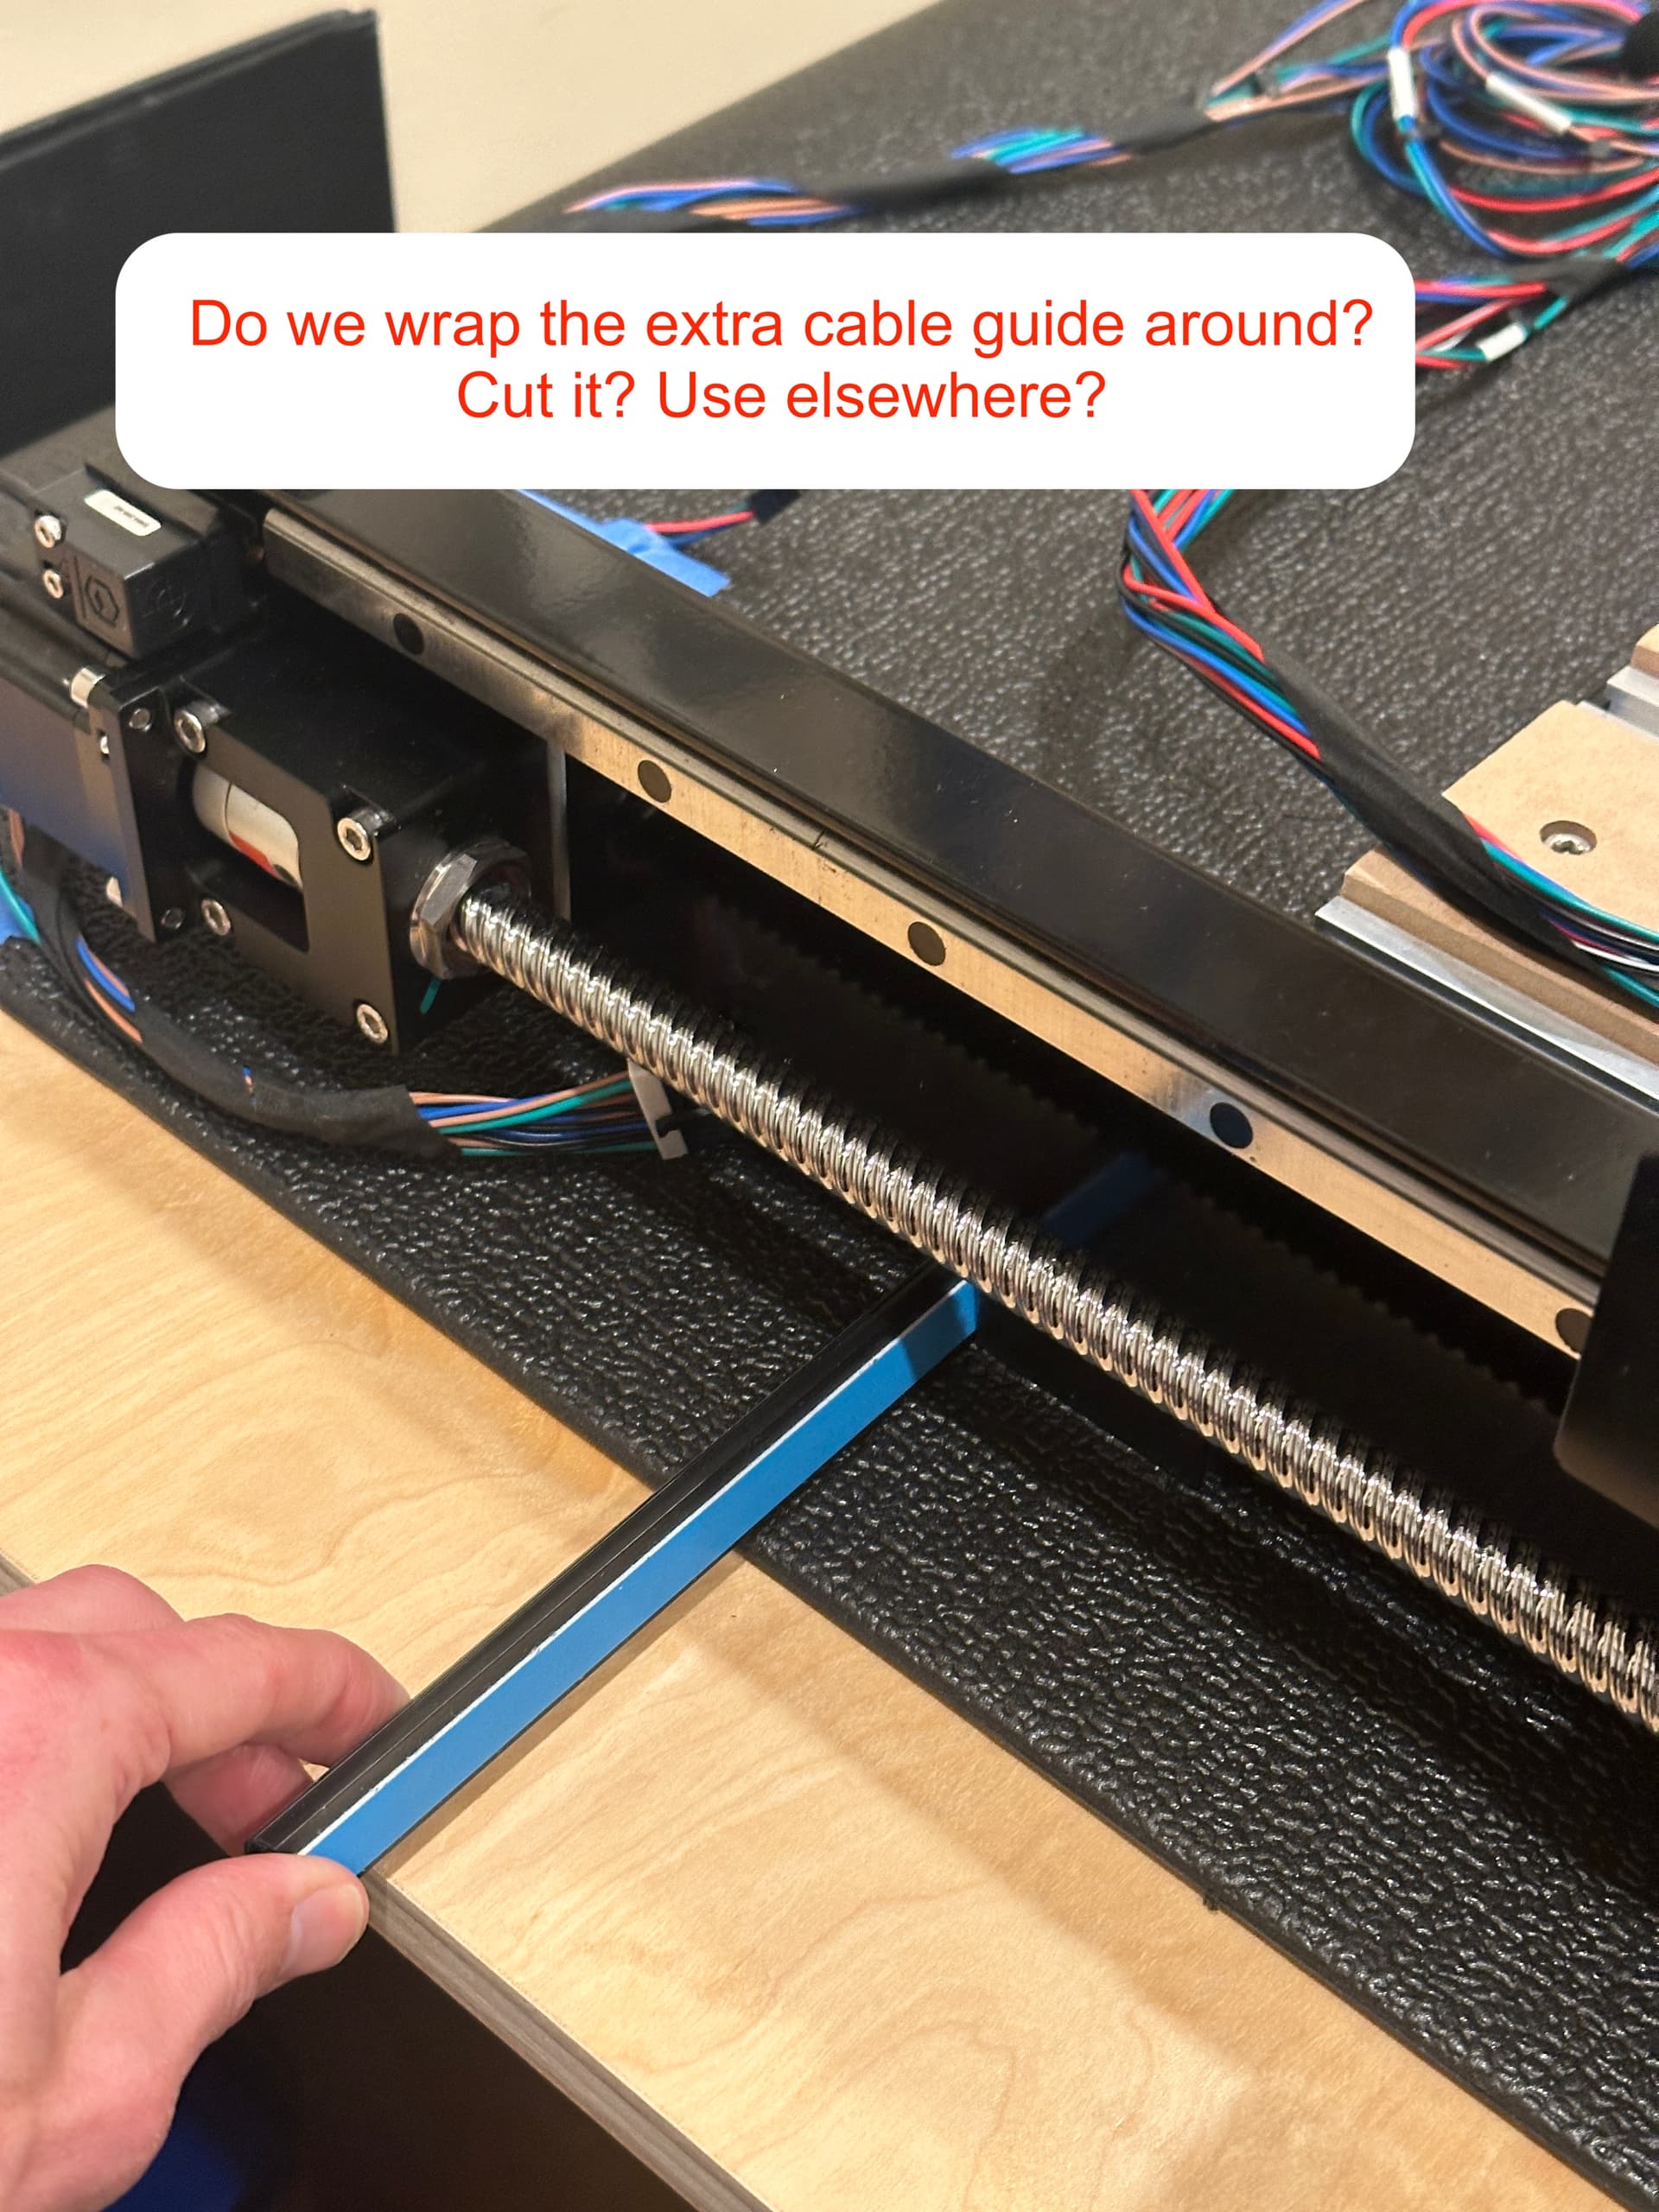
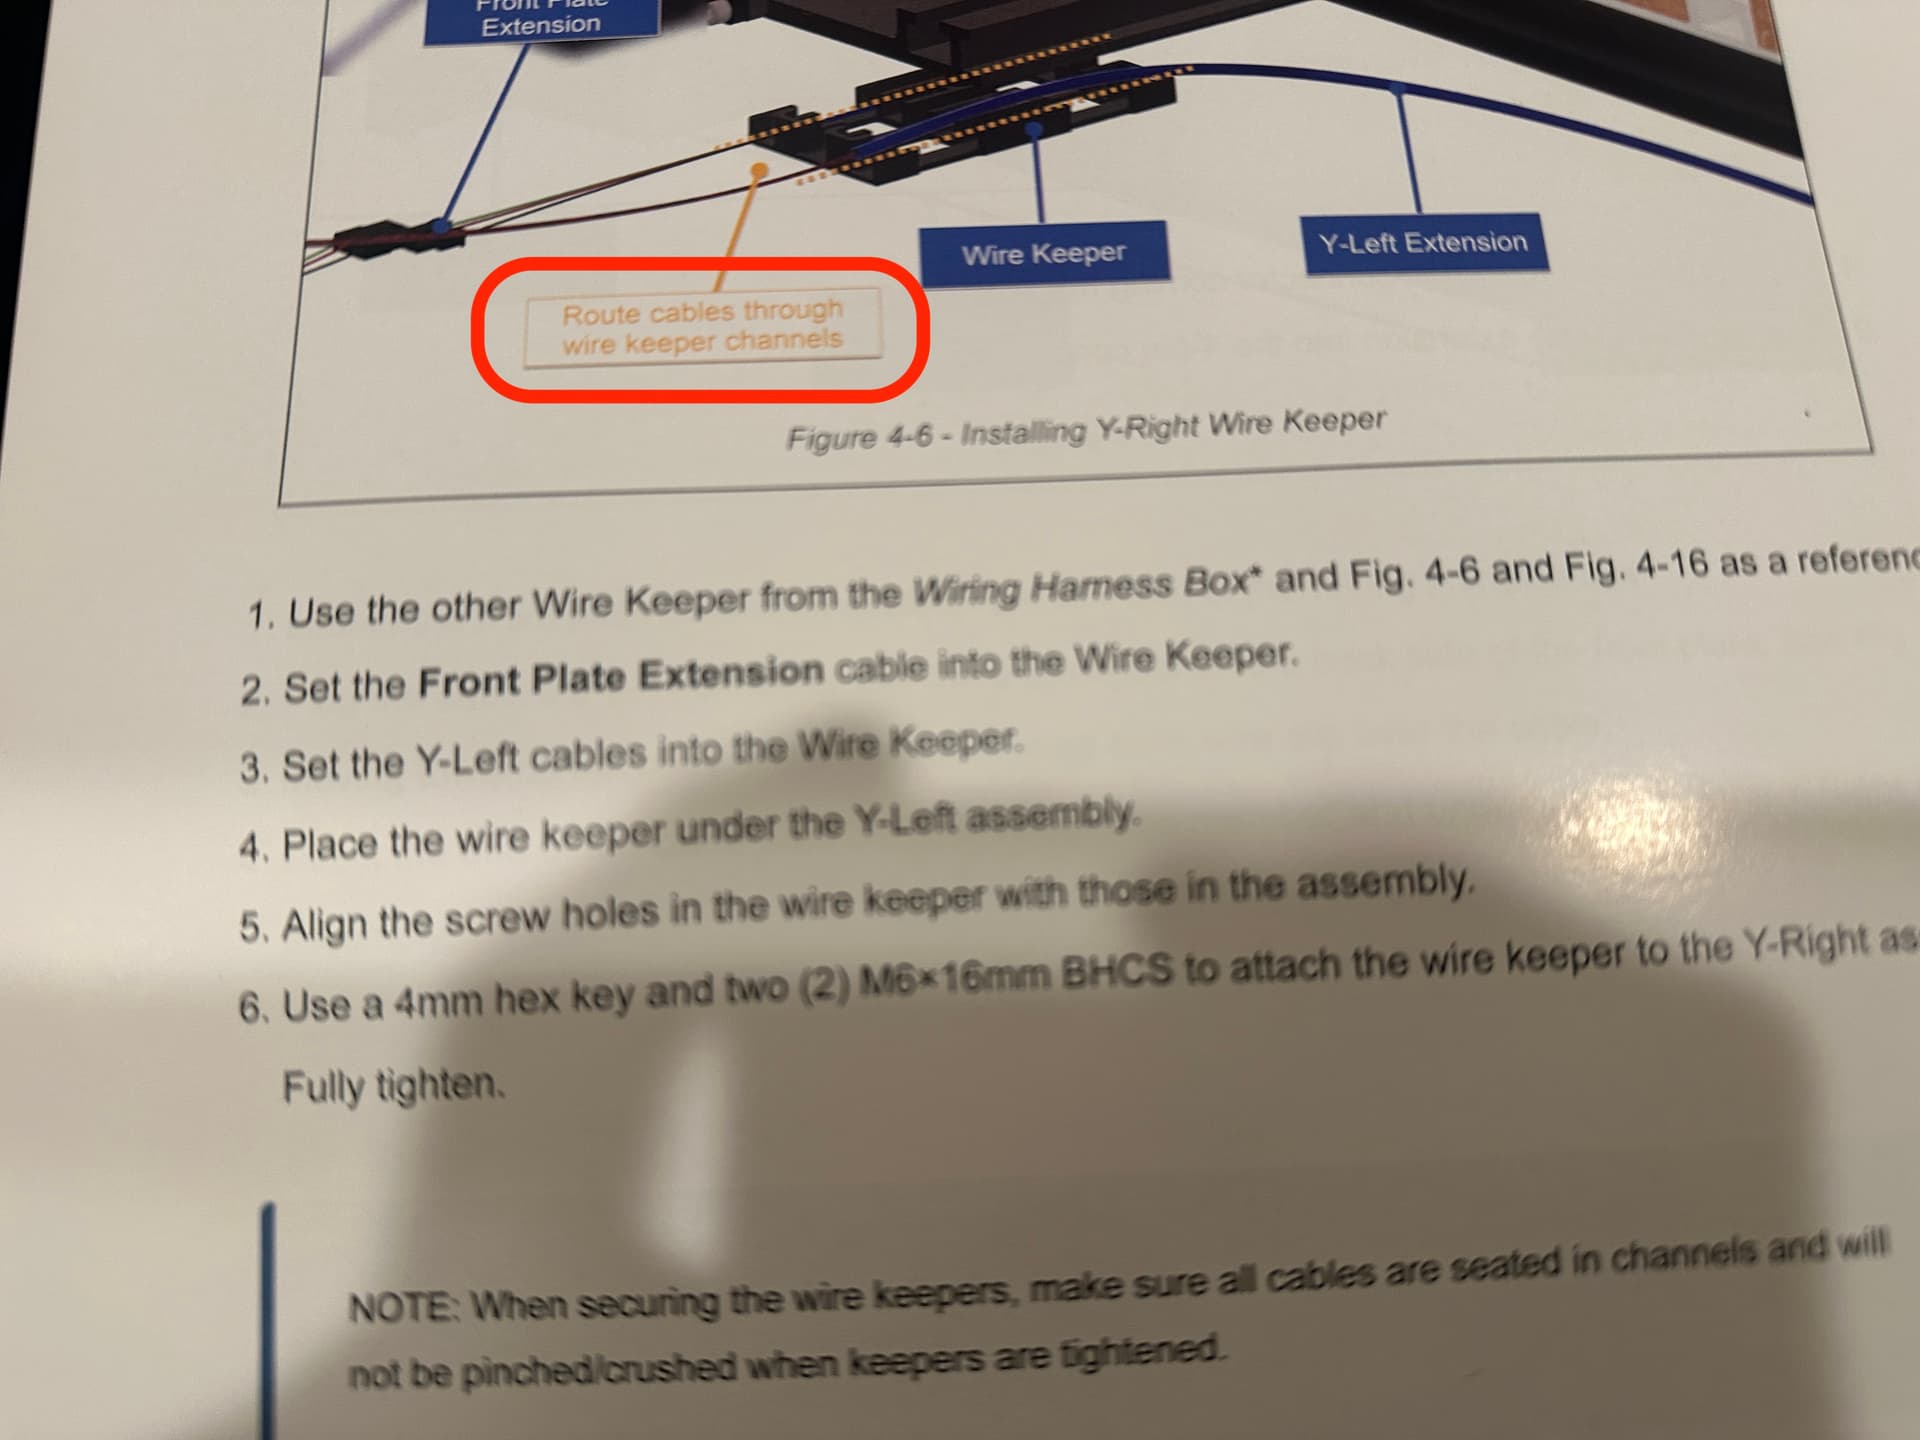
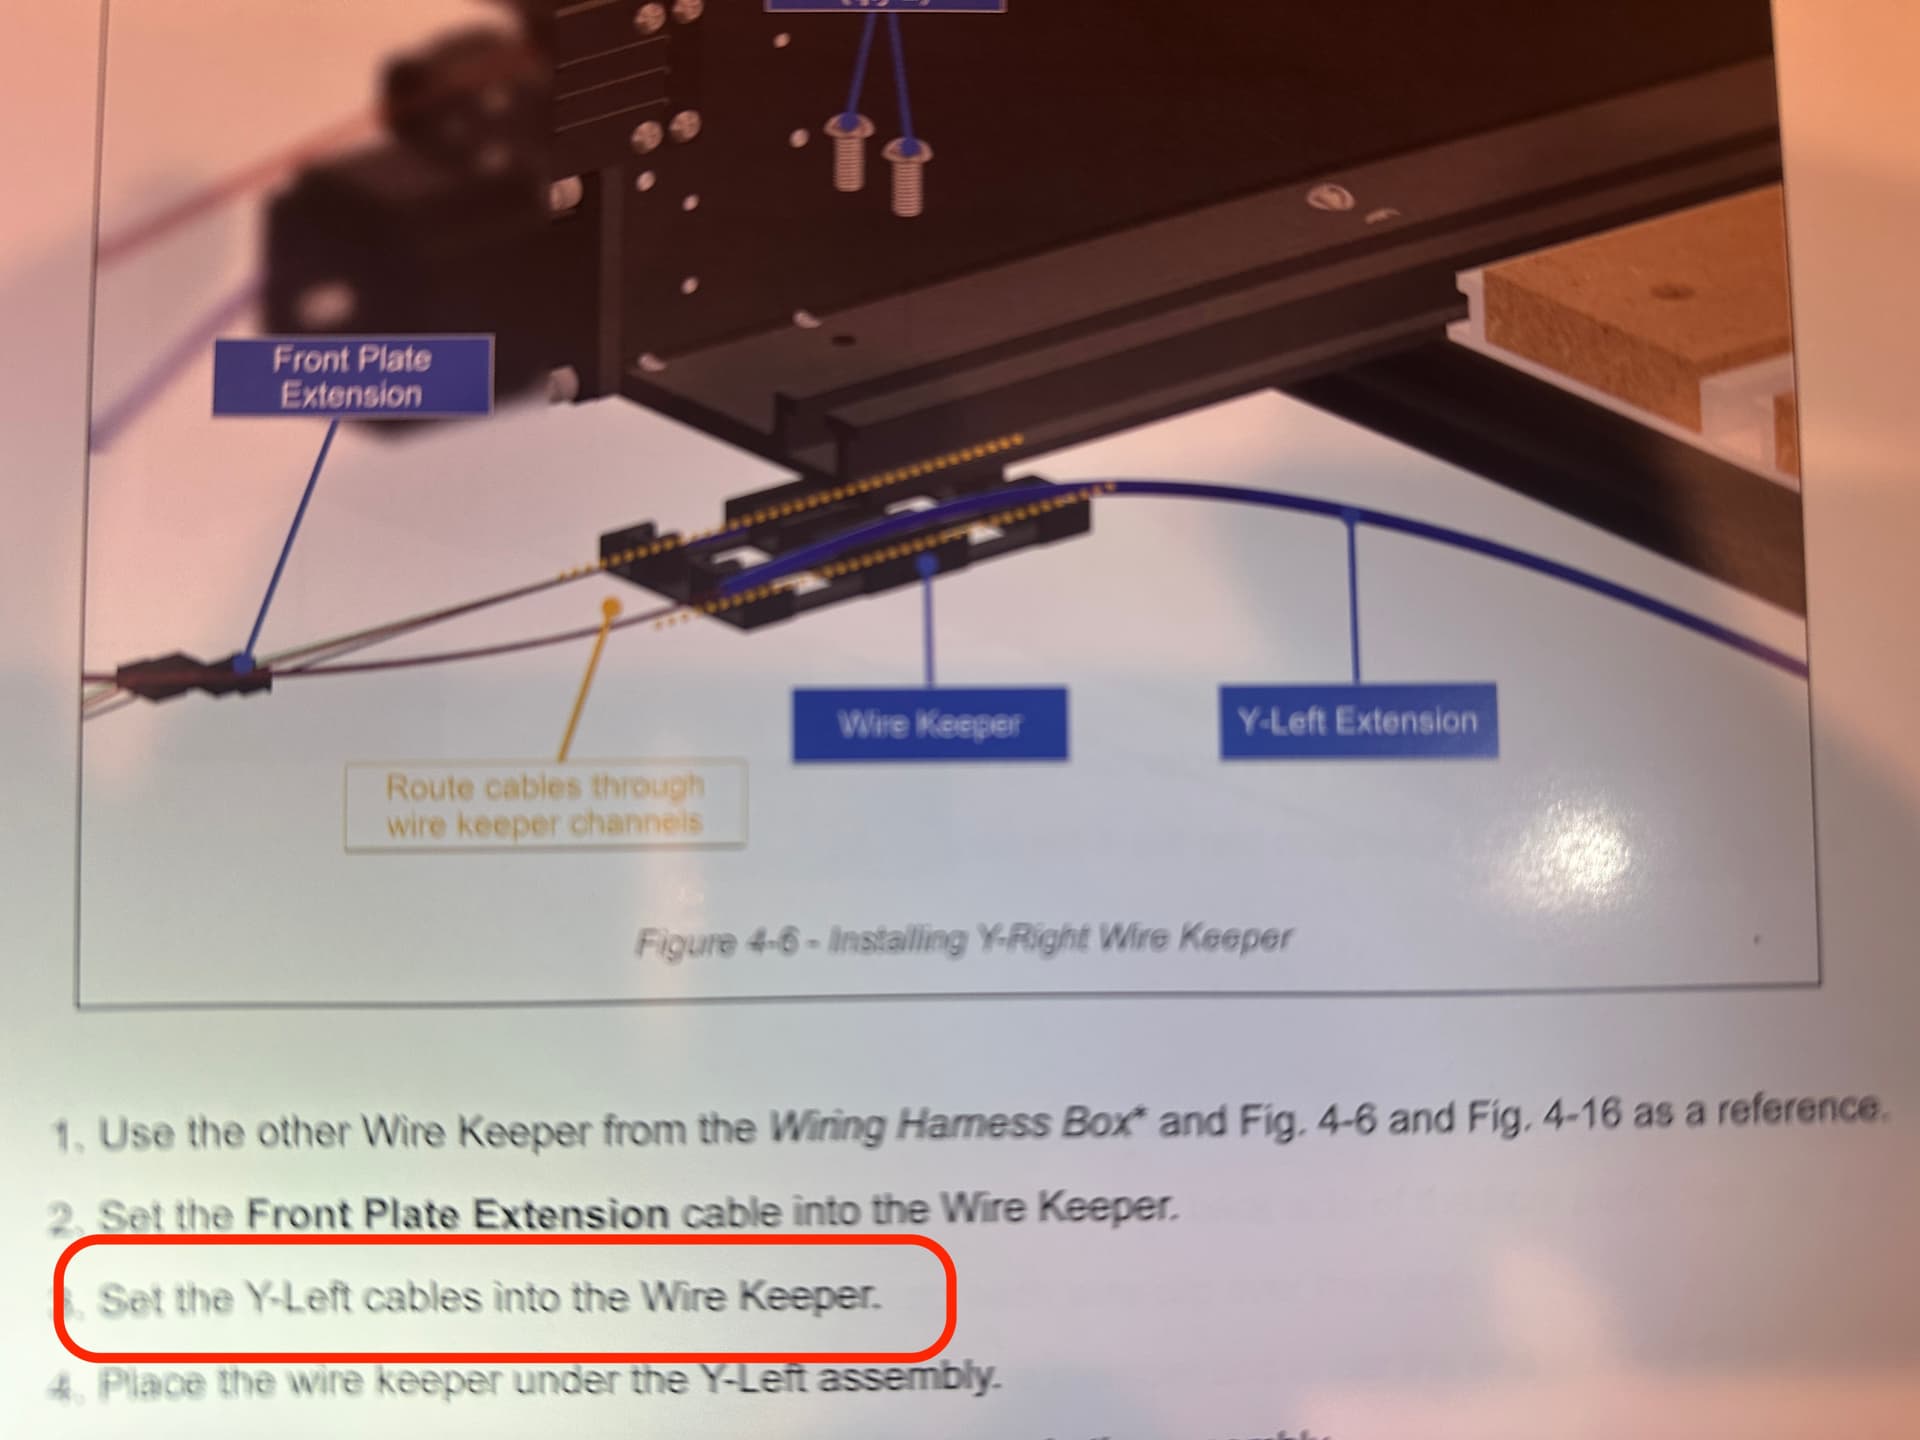
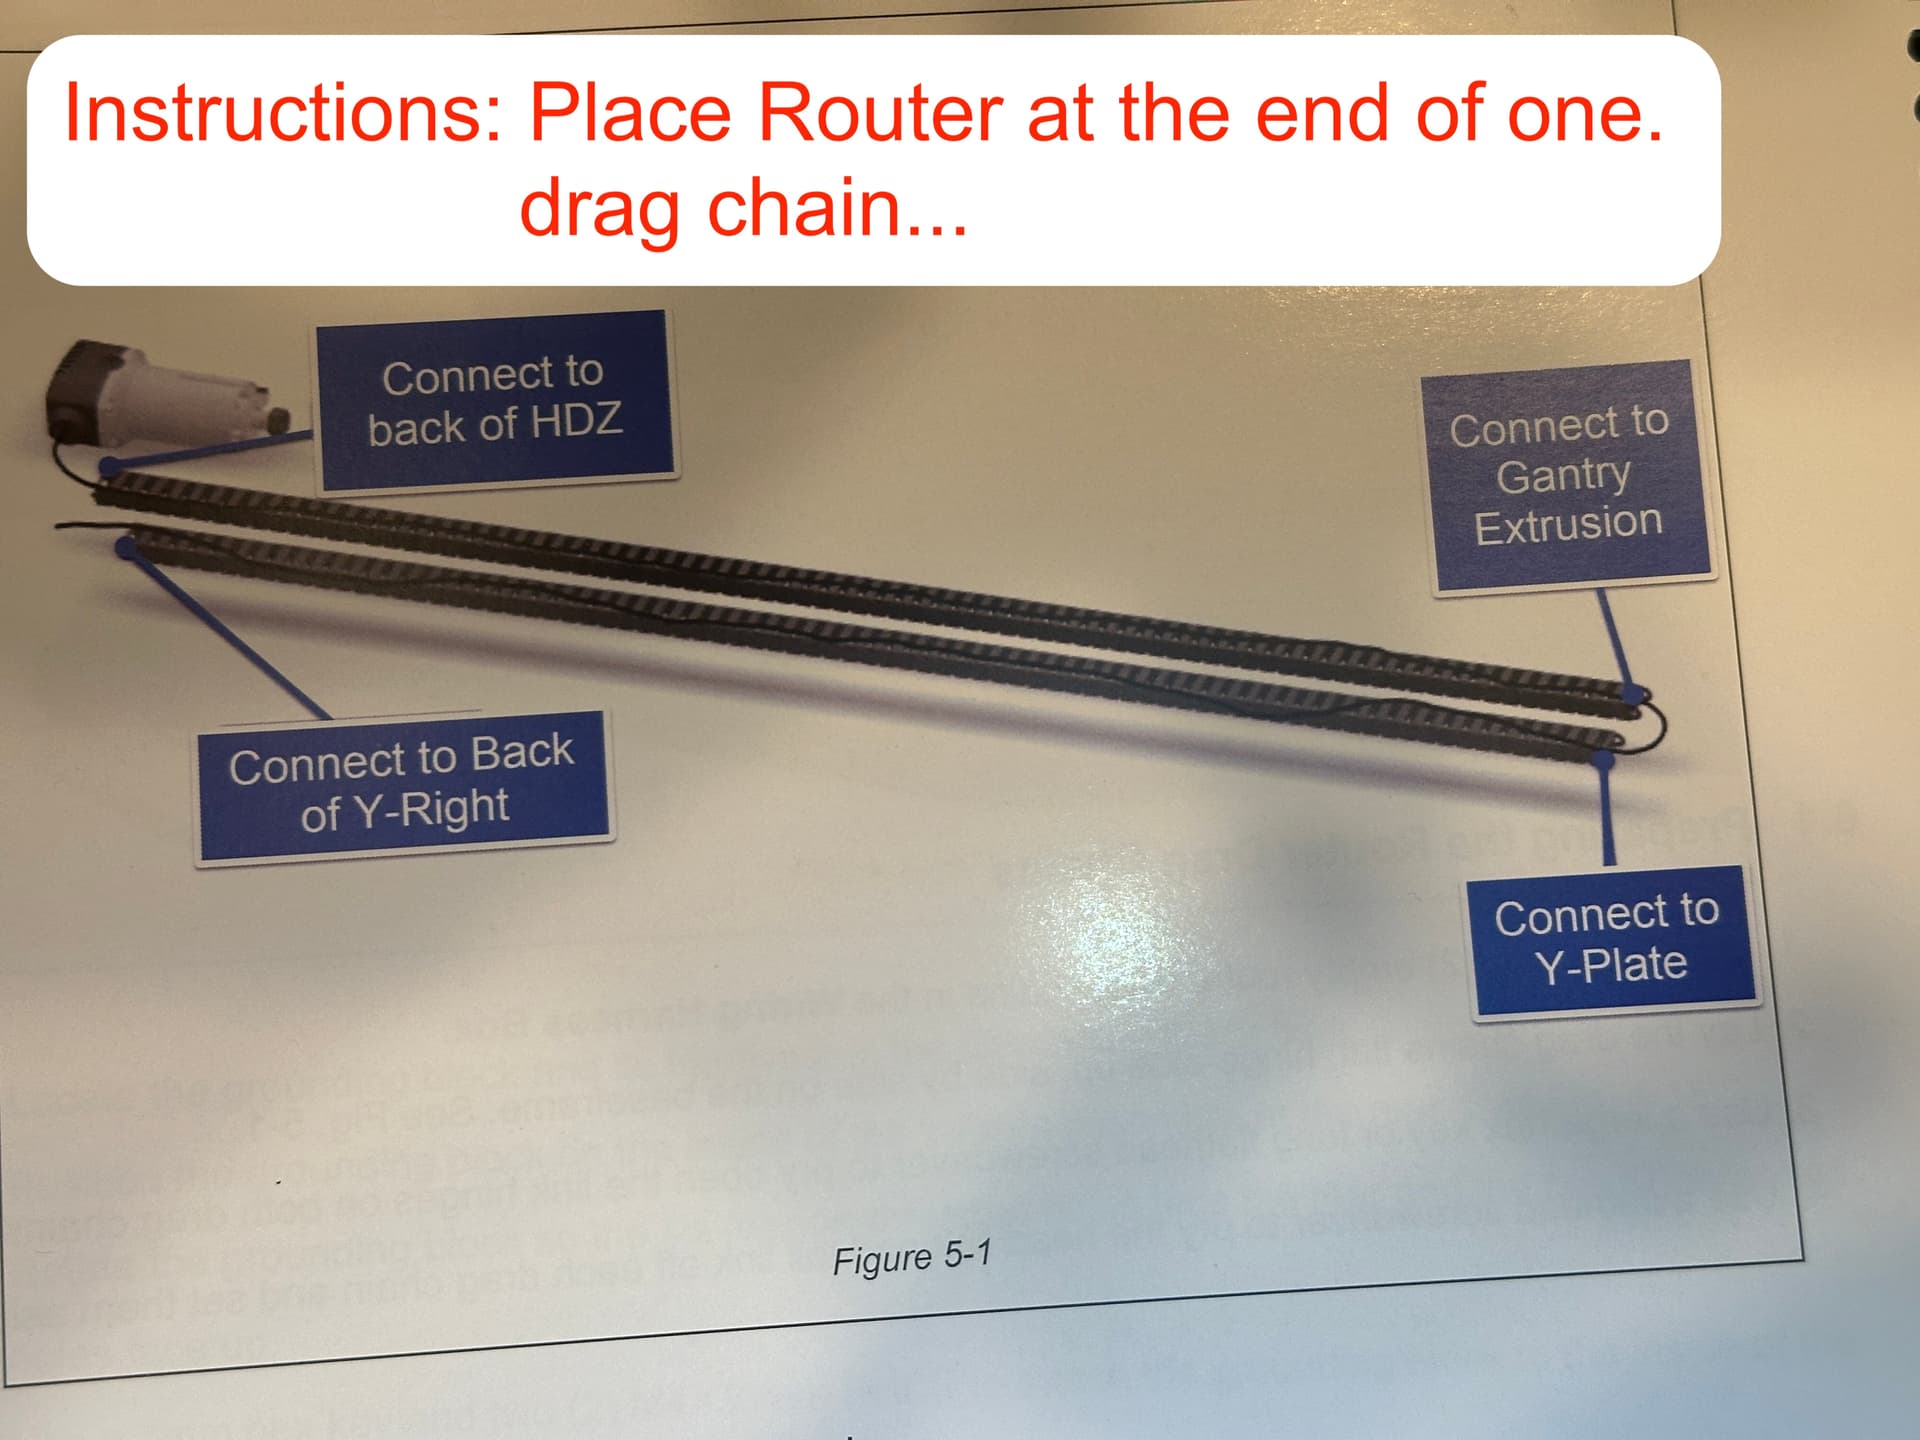
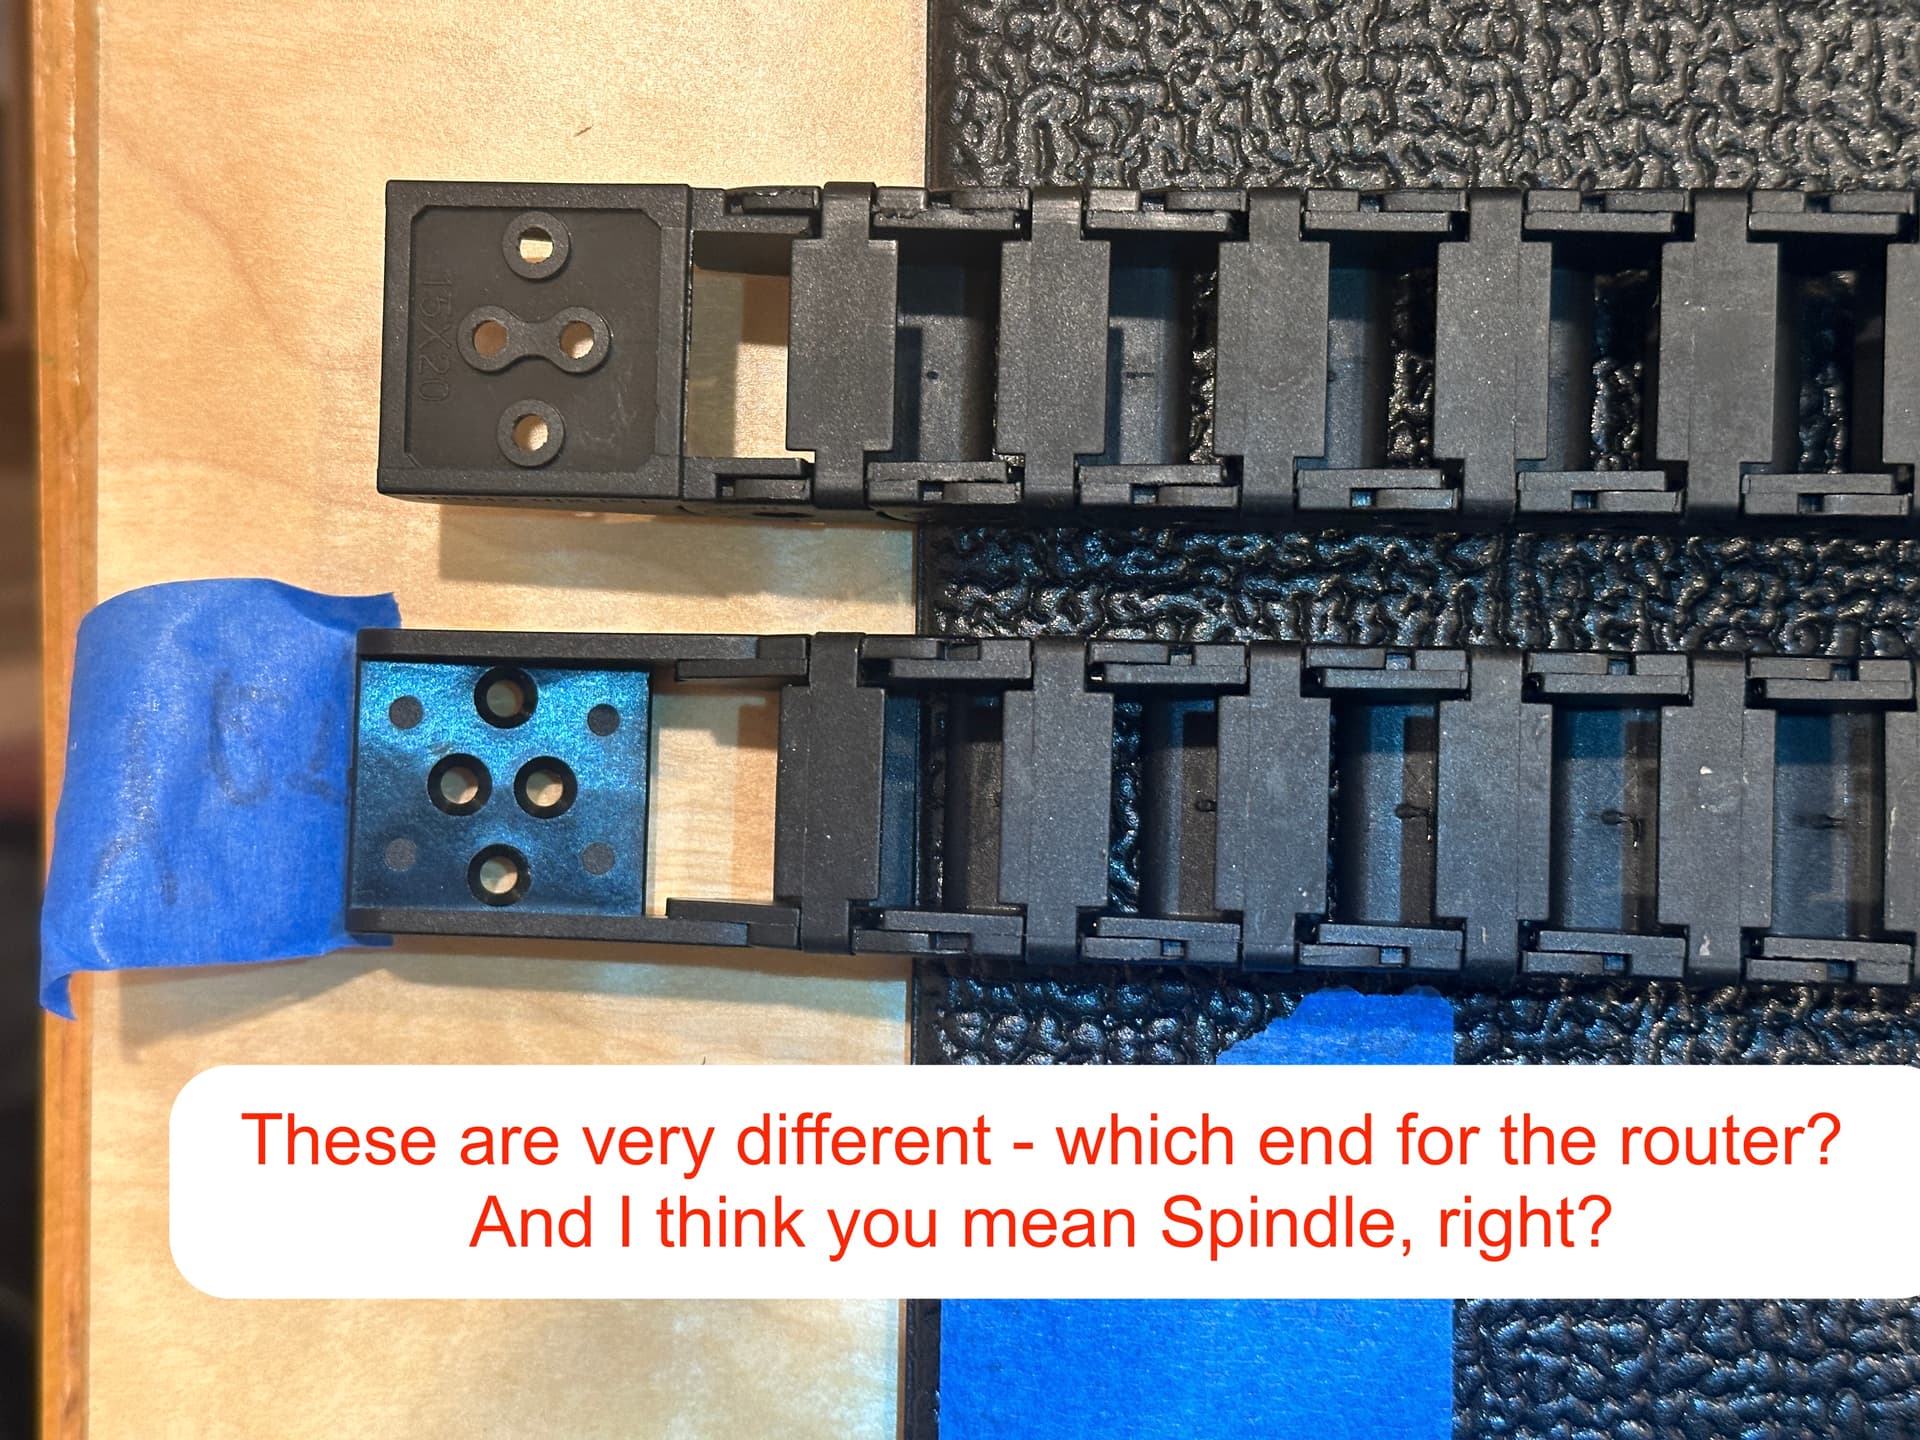
The router/spindle drag chain is installed as shown. You need to set the router/spindle in the mount, and then leave a short amount of slack or strain relief from the router/spindle motor into the drag chains and route thru the drag chains from the router/spindle end all the way to the rear of the machine. I can’t remember if I had to remove one of the drag chain ends and flip over to attach correctly.
Between the manual and the video you should be able to get things installed correctly.
I worked for Eastman Kodak for 19 years and then for Sun/Oracle for 20 years. Technical writers are always a problem for writing manuals. Not sure about C3D technical writers but often the technical writers are not actually users of the products they write about, If the engineers themselves write the manuals often they assume what they know is what the end users knows and can leave out important information that someone with no electrical/mechanical skills do not know or understand. Many of the guides I have used from C3D have been good while others not so much. The problem with an erector set is it can be assembled in different ways from the original design leading to frustration by the end users. Maybe C3D should hire people off the street to use the assembly manuals to assemble their machines and not what problems people with no expertise have.
Yep, I hear you! I co-own a manufacturing plant and our goal is to write manuals where someone with near zero experience could make each product.
The production manuals (SOP’s) we write are tested by people who are outside the business and feedback is gathered. As you say, when the engineers write the manuals, they often leave out details they assume end users know…and I’m finding this to be the case when assembling the Shapeoko 5 Pro.
This is easy to remedy by observing volunteers without experience building the product as well as gathering feedback.
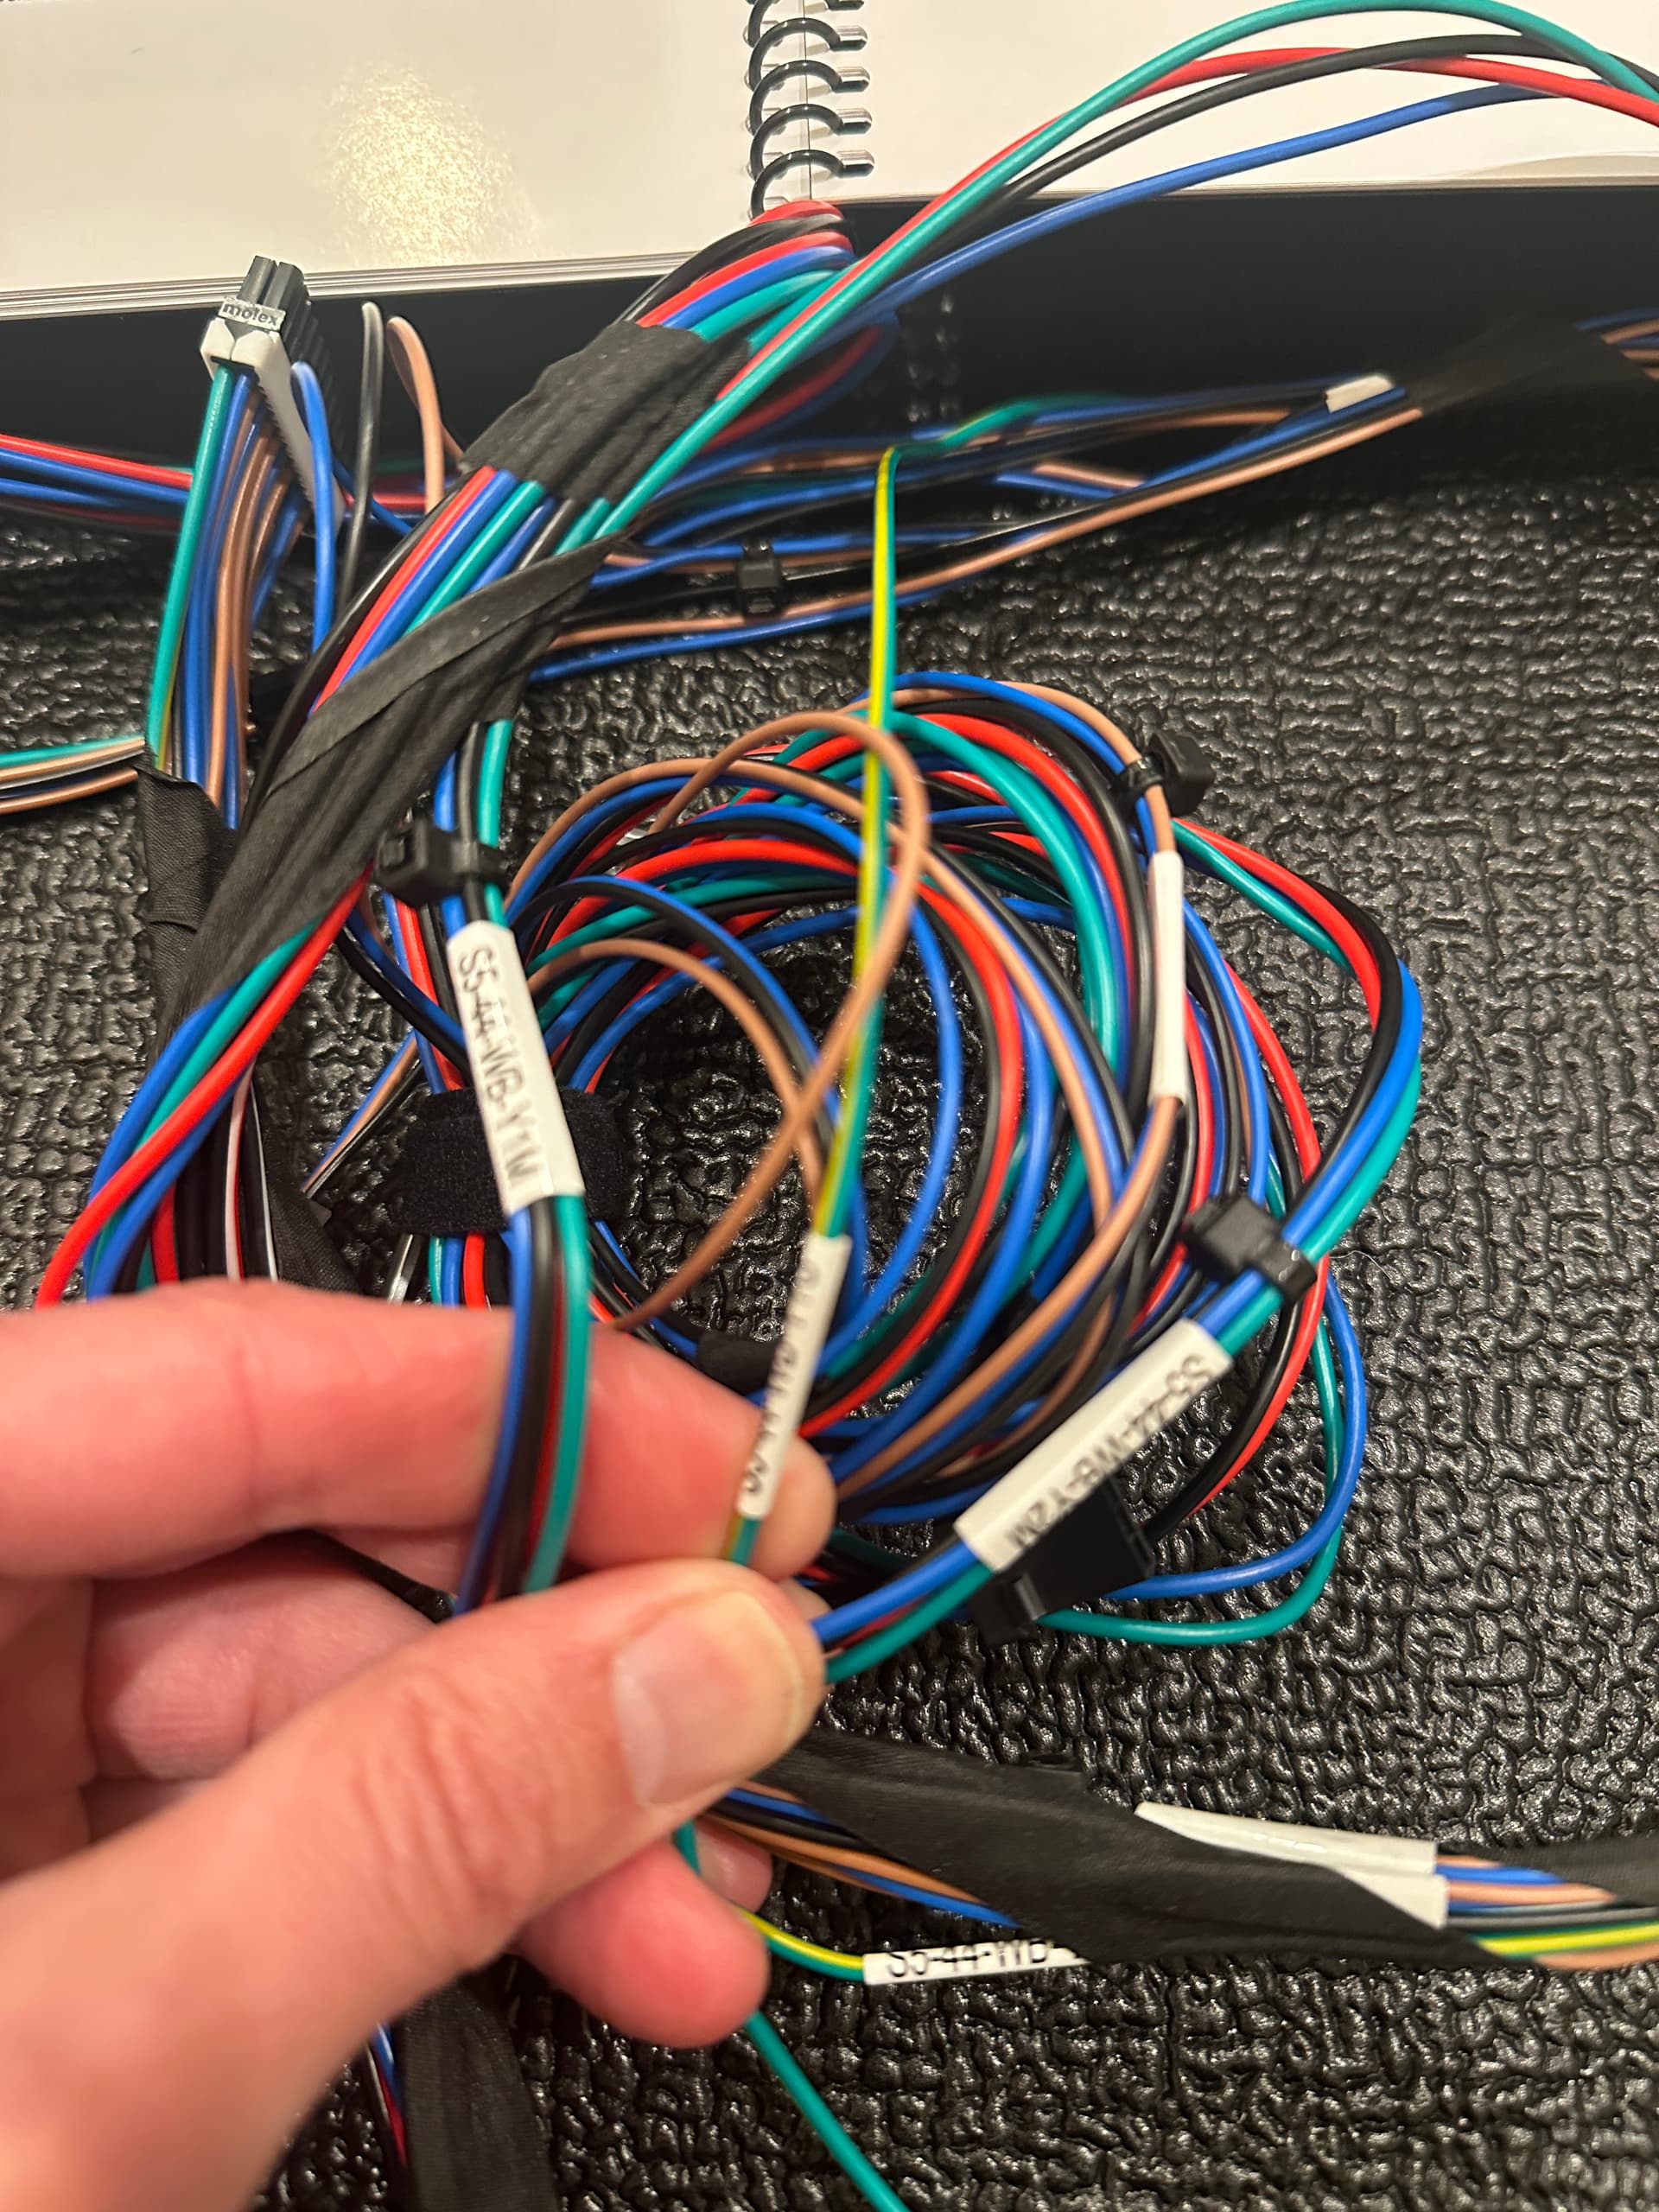
Well, I wish “as shown” was a touch more specific - the drag chains are different on each end (see my close up photo) and the manual does not say which end to start with the (the top one or the one I have blue tape on)…and the photo is too far a away to discern which one to put the router/spindle.
You’re going to have to install one end of the drag chain, you may even have to remove the retaining link (one with screw holes) and flip it over and snap back on to get the correct orientation.
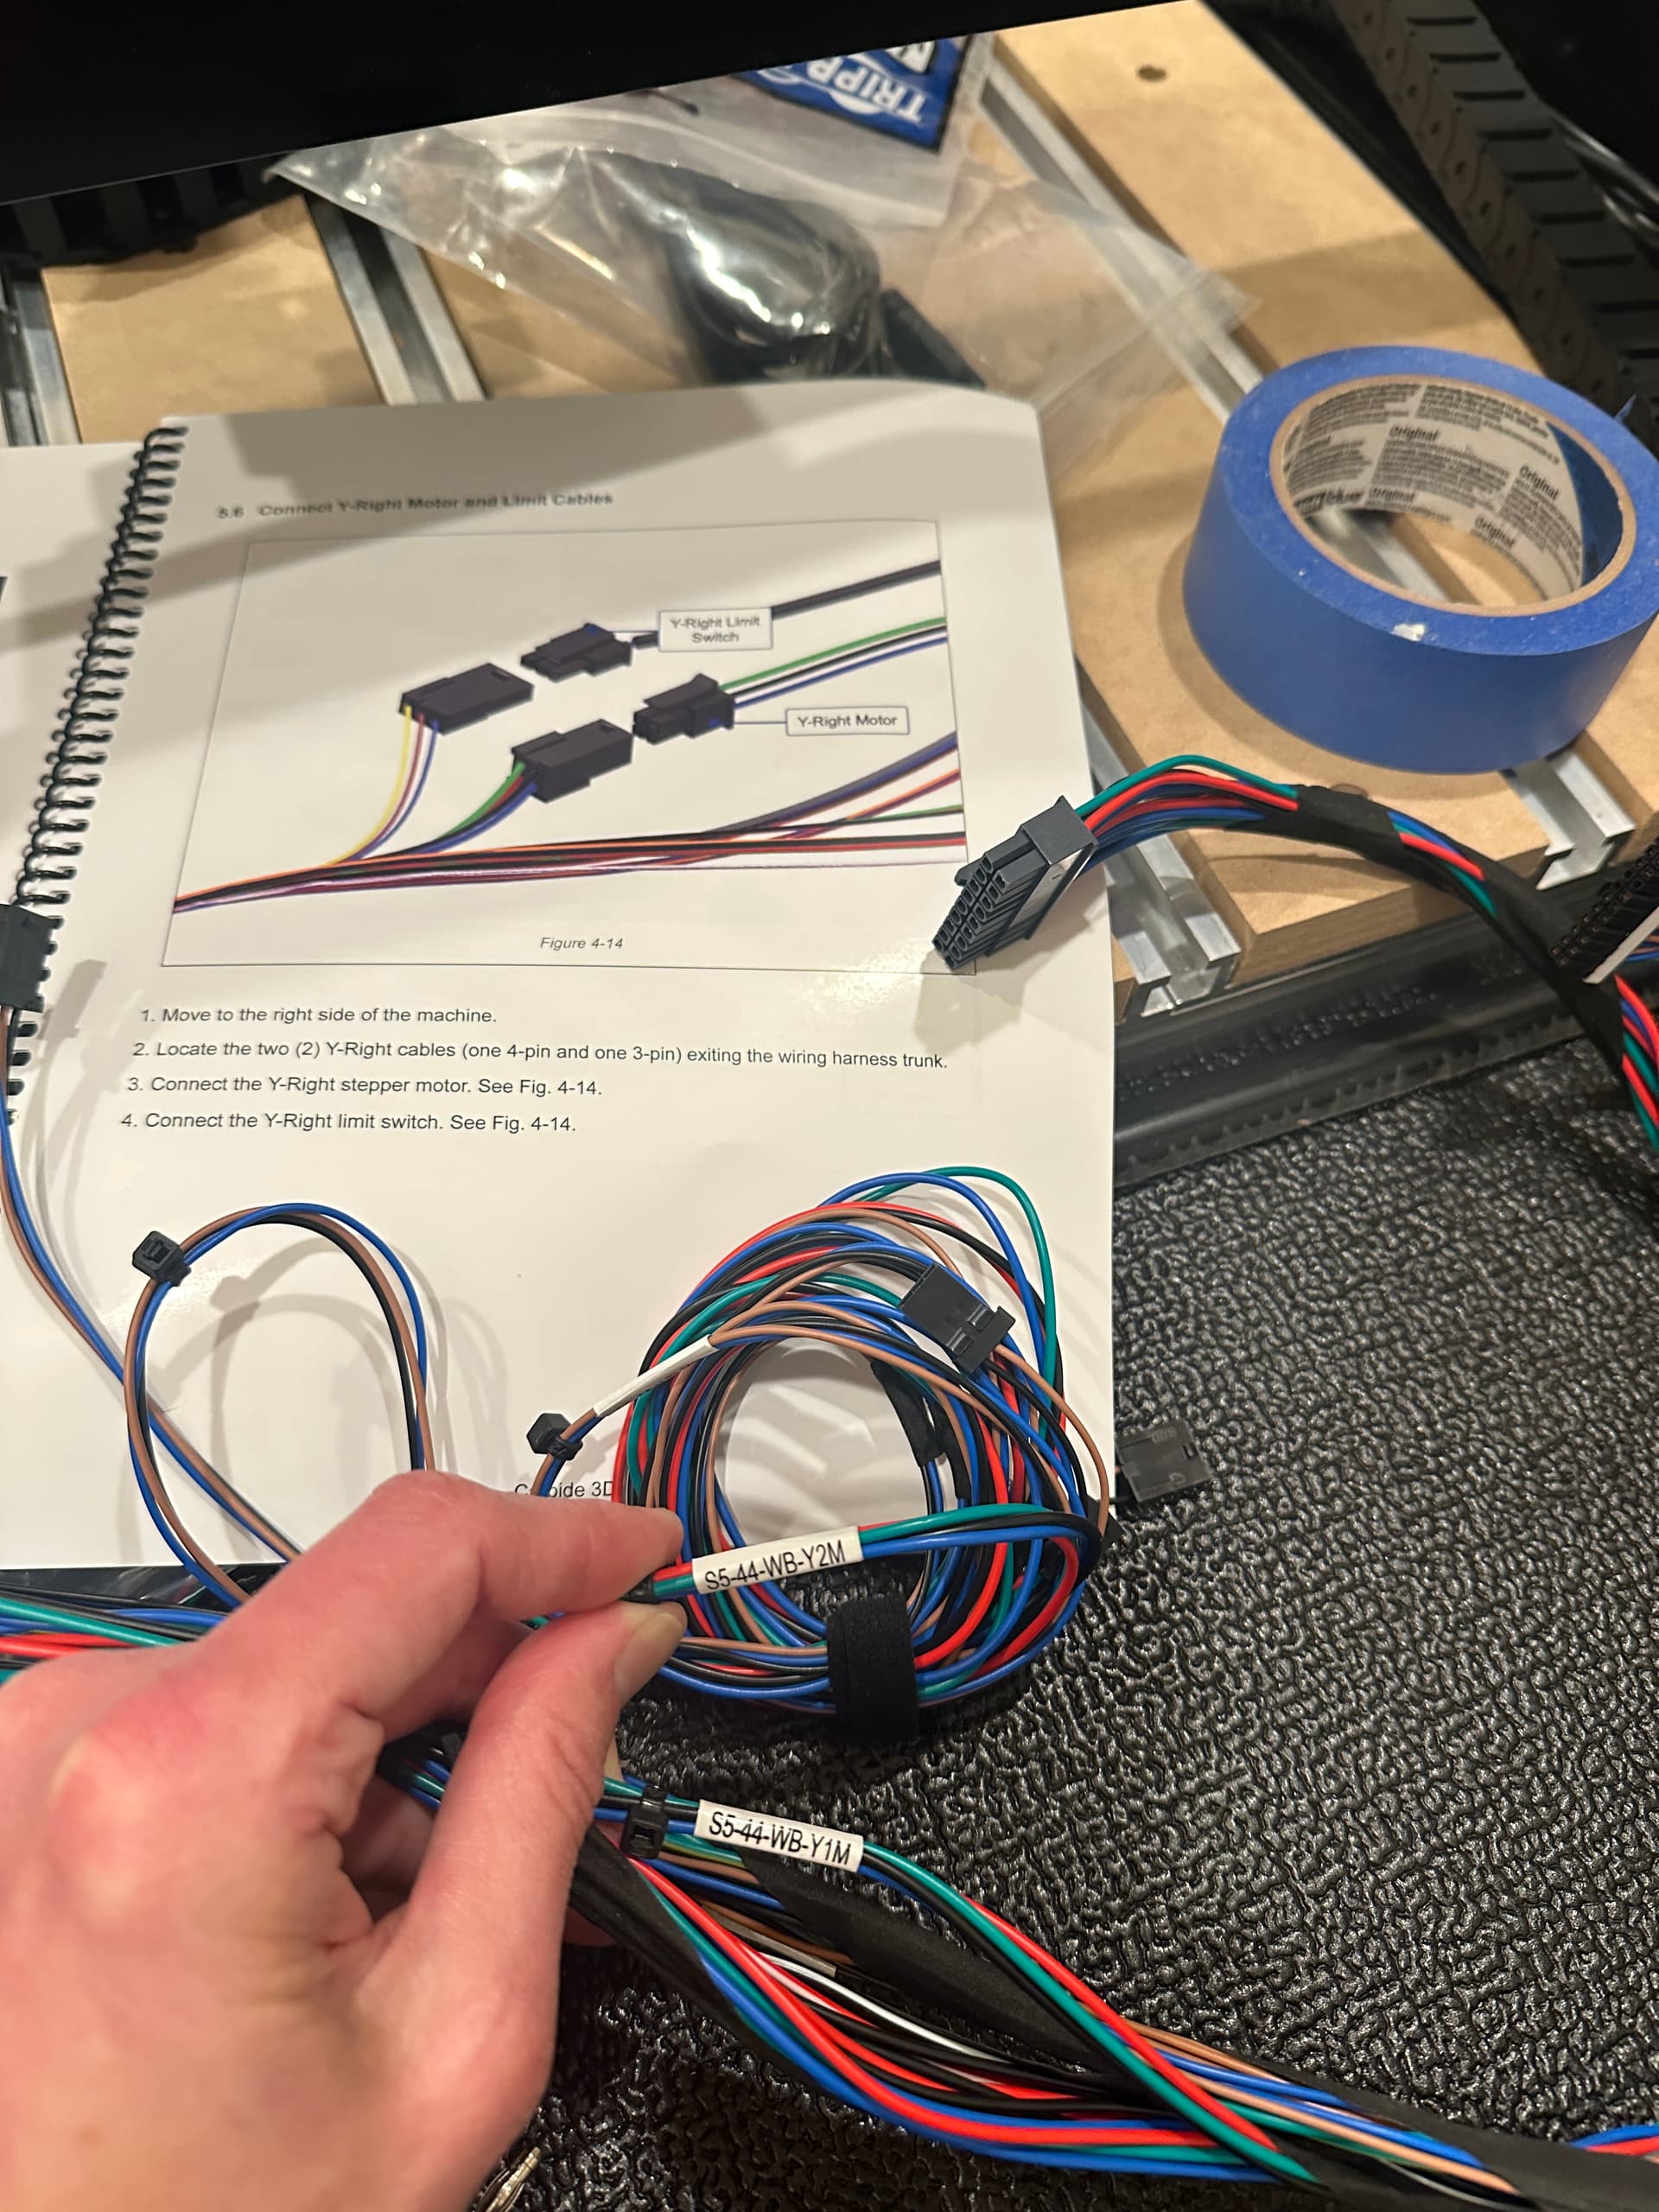
Another thing is to connect all the connectors to the controller, you then should only have the two that go to the opposite side of the machine for the stepper motor and proximity switch.
Yeah, one story I can share (and which I’m still annoyed about) — I had a new-in-the-box machine which I had my son assemble as part of a school trade program to justify his getting paid for the balance of an apprenticeship (long-story).
Gave him a printed copy of the assembly manual and set up an overhead video camera to film the assembly and specifically asked that he make notes of any difficulties encountered or any aspects of the instructions which were unclear — instead, he simply used my SO3 serial #0006 (upgraded to XL size, w/ an HDZ Z-axis and Mafell mount/spindle) as a reference and assembled the machine referring to it at need, w/o even opening the printed instructions.
I will note that one of the reasons @wmoy works for Carbide 3D is that he did an assembly video early on which was very well-received (but which unfortunately, seems to have been taken off-line, probably because it included the name of the company which was then producing Shapeoko 2s).
Like most things in life, the instructions/assembly videos are a balancing act — too detailed and folks view them as tedious and ignore them, too sparse and folks can’t find information which they need. The big problem here of course is that there are two types of people in the world:
That’s exactly the approach that should be taken with updating the Assembly Manual!
Someone with zero knowledge of the machine should be able to put it together if it’s done right. Lego manuals are considered some of the best for this very reason I believe - get kids to assemble and you know your manual is done right!
I’m curious if Carbide 3D make an effort to acknowledge the issue and actively improve the manual? That being said, I’ve received personal support from a couple people (who are surprisingly not employees) and their support was patient, detailed, and clear.
How about a photo of the 2x4 for STEP1 !!!
“Attach the crossbeams to right and left sides.” There’s a pic of the 4x4 with 4 beams- but the 2x4 has only 3 and there are 4 attachment points(screw holes)
Which holes to use?
Either:
–they don’t know how frustrating it is for some new users and that it wastes a ton of support time
–they do know but don’t care
–they know but don’t know how to make it better
None of these make sense to me.
A week in and given the slow pace of daily responses, I’m finally getting close to plugging it in… It could have been done in a day.
Earning trust is just smart.
The tone of “you’ll figure it out” makes sense in some areas, but most customers didn’t sign up for a machine construction process.
PS glad to have discovered this board–Discourse is fabulous.