Love it, especially the autoleveling trick with bCNC.
How can I use bCNC with Nomad ? Can I connect my Nomad to the Linux running bCNC ? My understanding is that the Nomad will understand a subset of gcode (carbide motion does the translation for missing commands). Is this right ?
After playing around, I can now rephrase my question more specifically.
bCNC allows probing the surface of a PCB which typically exhibit slight but noticeable warpage. bCNC does that in conjunction with GRBL (the program that runs on the arduino inside the Nomad).
Here are my questions:
1- can I upgrade my nomad to GRBL v0.9i ? or will this break CM which I am still planning to use…
2- is pin A5 (analog 5) used by the Nomad somehow ? Pin A5 is used by GRBL to connect the probe. Can I wire it from the Arduino or is this pin replicated on the Carbide shield that I can tap into ? Alternatively, I can recompile GRBL to use another pin; in which case, which one is free ?
For what it’s worth, I got good results without leveling, down to a pitch of 0.5mm. I did an initial milling pass of the wasteboard so it was perfectly flat/even and then taped down the PCB blanks with double-sided tape (I use Nitto tape).
I’ve done measurements on multiple sheets of MDF (spoiler board material) and saw variation of thickness of more than 0.010 inches across the surface. The same holds true with polycarbonate sheets too.
If one wants the best possible accuracy and precision of their parts, the spoiler board must be milled flat by the Nomad. In general, never accept that ANY RAW STOCK MATERIAL is flat unless you machine it yourself.
A fly cutter would make the job the fastest but a good square end end mill with 40% step over or so will do a good job. Don’t push the feed rate too far.
I agree. Also, after a while of using the milled down wasteboard it might become necessary to do it again. I just had to do that after getting inconsistent isolation widths.
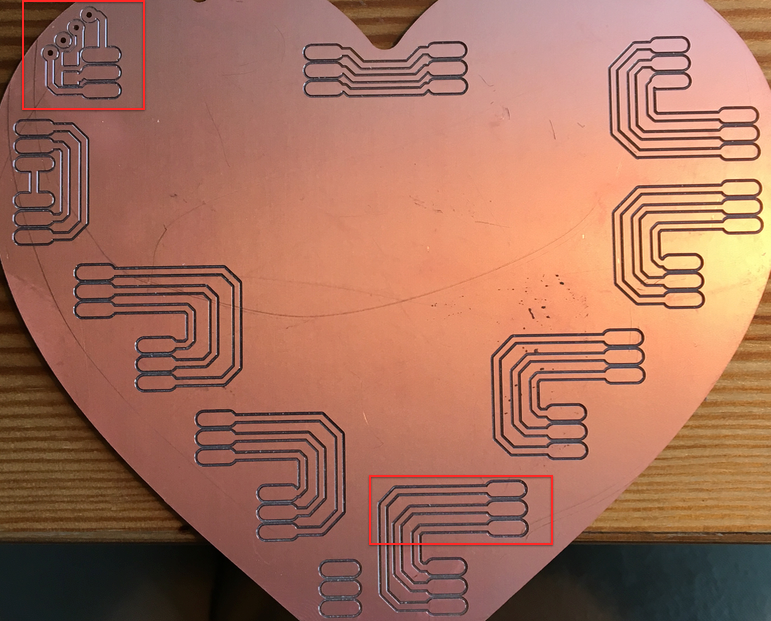
Here are two photos of the same job run before and after milling down the wasteboard. Notice the difference between the two areas in opposite corners. After the wasteboard milling they were much closer.
MDF is porous and temperature sensitive… it changes with the weather.
I can often go quite a while - months - without flattening it again - reasonably constant temperature and humidity in the house - however I do not put hot wax on my spoiler boards either. A heat gun can easily warp the spoiler… depends on the temperature and duration of the heating.
For projects that require to-the-limits precision I ALWAYS mill my spoiler board - a new one just big enough for the project - immediately before cutting a part. YMMV.
I should have added that I milled a dedicated hardwood board with a clamp to carve my PCB’s. The PCB’s I buy are definitely warped and yield good results at places, less good at others. I also agree that double sided tape helps.
For the reasons above and the fact that I would like to avoid the mess or re-milling and/or using tape each time (detaching tape can be painful), I felt the auto-leveling technique was very attractive.
I looked at the Nomad in detail and noticed that pin A5 is actually used by the end-mill measurement tool. I made a few experiments and this tool reports a limit on G38 commands (probing). In clear, it should be a matter of deriving the tool measurement wires to the PCB copper and end-mill to be able to perform a full-automatic, mess-free, precise PCB carving job… or so I hope.
I will try that within the next two weeks but if someone feels like trying before…
Thanks for the pointer; it was quite clear what to do but the photo speaks for a thousand words indeed.
What I was trying to convey is that for all practical purposes, this touch plate/probe takes the place of the end-mill measurement tool from an electrical standpoint. For those interested in a mod, this is where it should go.
I am planning to wire the touch probe and end-mill measurement tool in parallel then see how it works. Should I hit any unforeseen problem, I will install a switch to engage either tool without having to open the electronics enclosure each time.