Backlit wall panel/light thing (WIP / build log)

So I’m starting a new project, which will be the largest piece I ever did. There’s a wall in my living room that still has dangling wires from where a sconce used to be (and the former owner of the house took it with him), and I’ve had enough of sconces for a while (if you know, you know). So this time I’ll try something that’s half a decorative panel, half a wall light. Or something like that.

At this point it should look something like this:

Wood backing, and translucent acrylic/epoxy triangles that will be backlit.

Like this, just a million times darker (the initial render had the light emission factor cranked up too much)

This is 51" x 21", so I soon realized:

  • that it was going to be difficult and/or costly to find a single piece of wood that size
  • that if I did, it would weigh a ton. Unless it’s very thin. Which is impossible to find in such large dimensions.
  • that a giant panel of oak on the wall may not look right anyway, and that bamboo would give it a more modern and low-key appearance

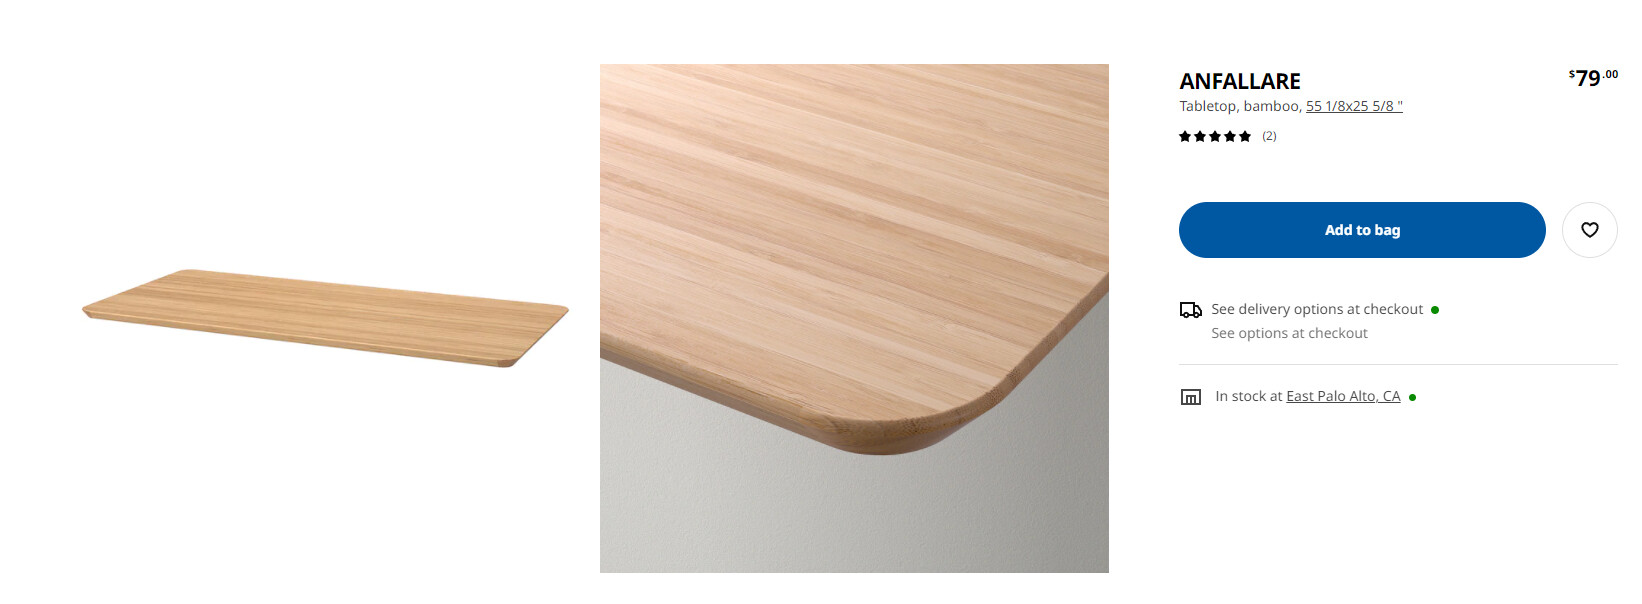
And then I remembered that we recently bought a tabletop at Ikea, that checks all the boxes: it’s slightly larger than I need, it’s bamboo, it’s surprisingly light, and it’s probably the minimum amount of money I can spend to get me a wooden surface that large.

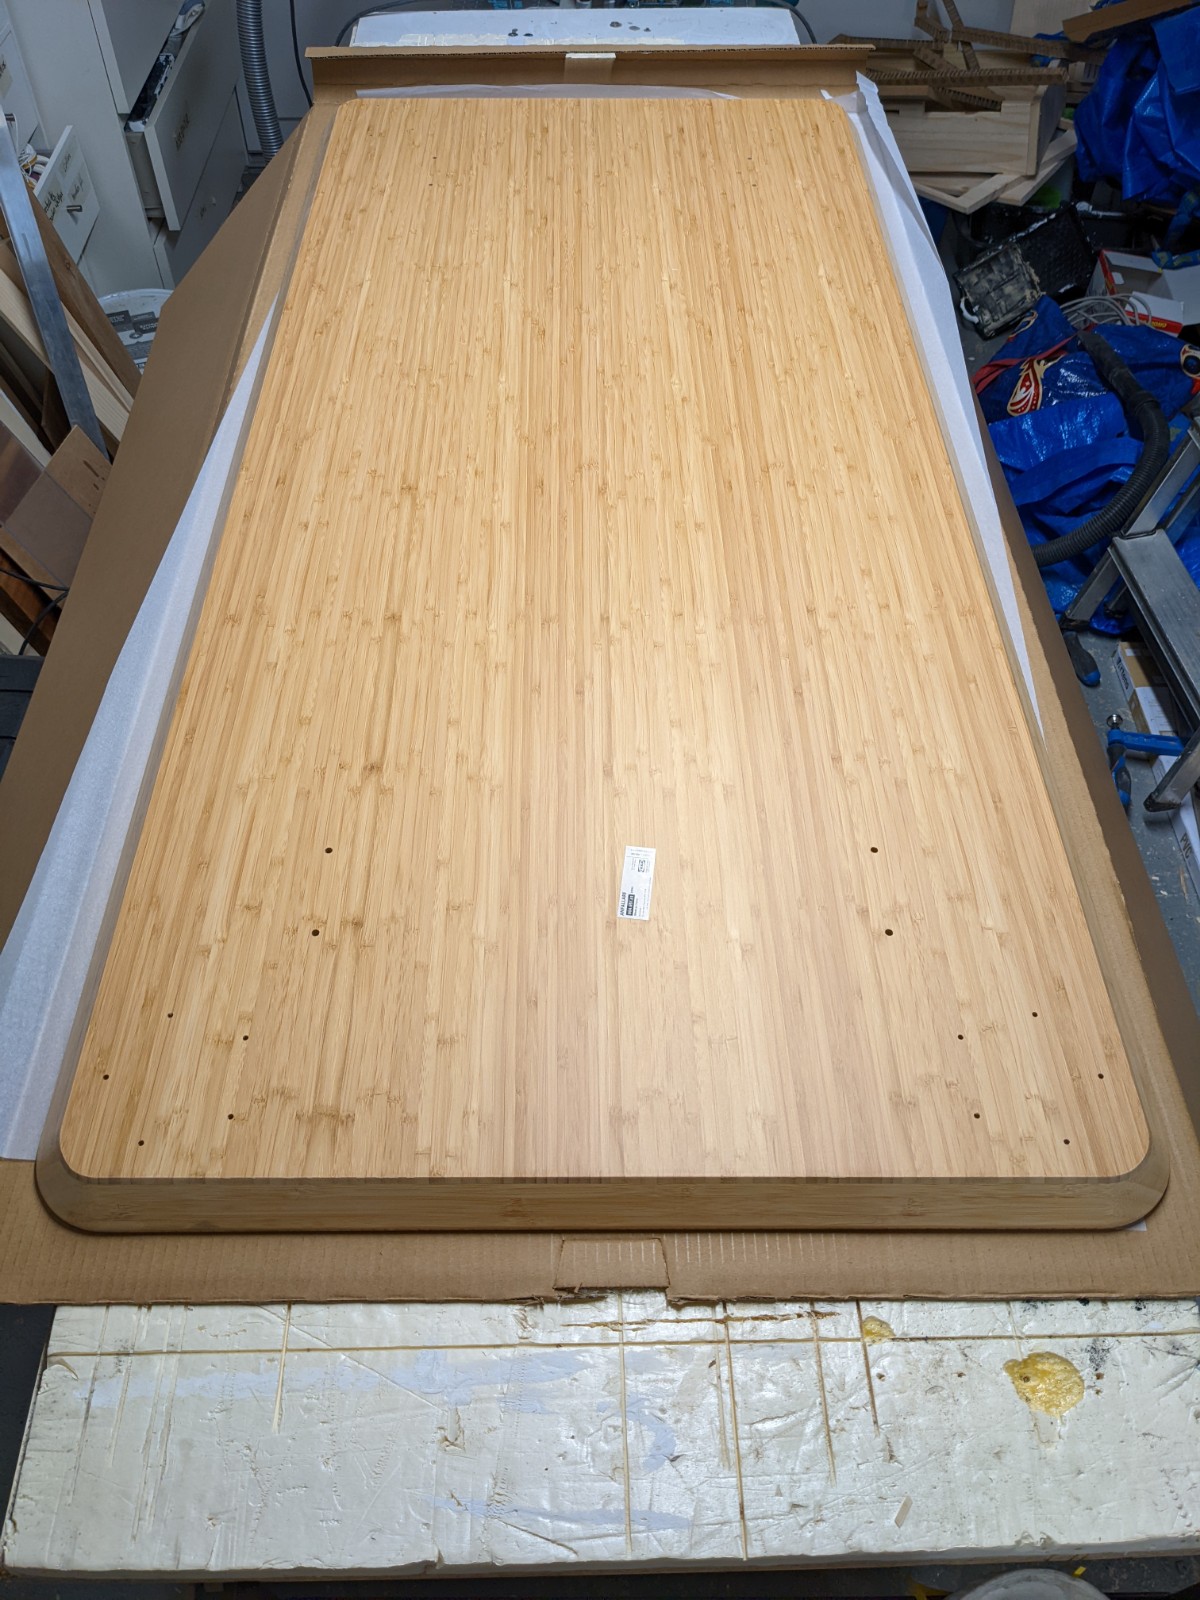
Here’s the underside of that tabletop,

Given the weight I was sure of what was inside (paper honeycomb), and sure enough, once I cut out the back and removed it: honeycomb.

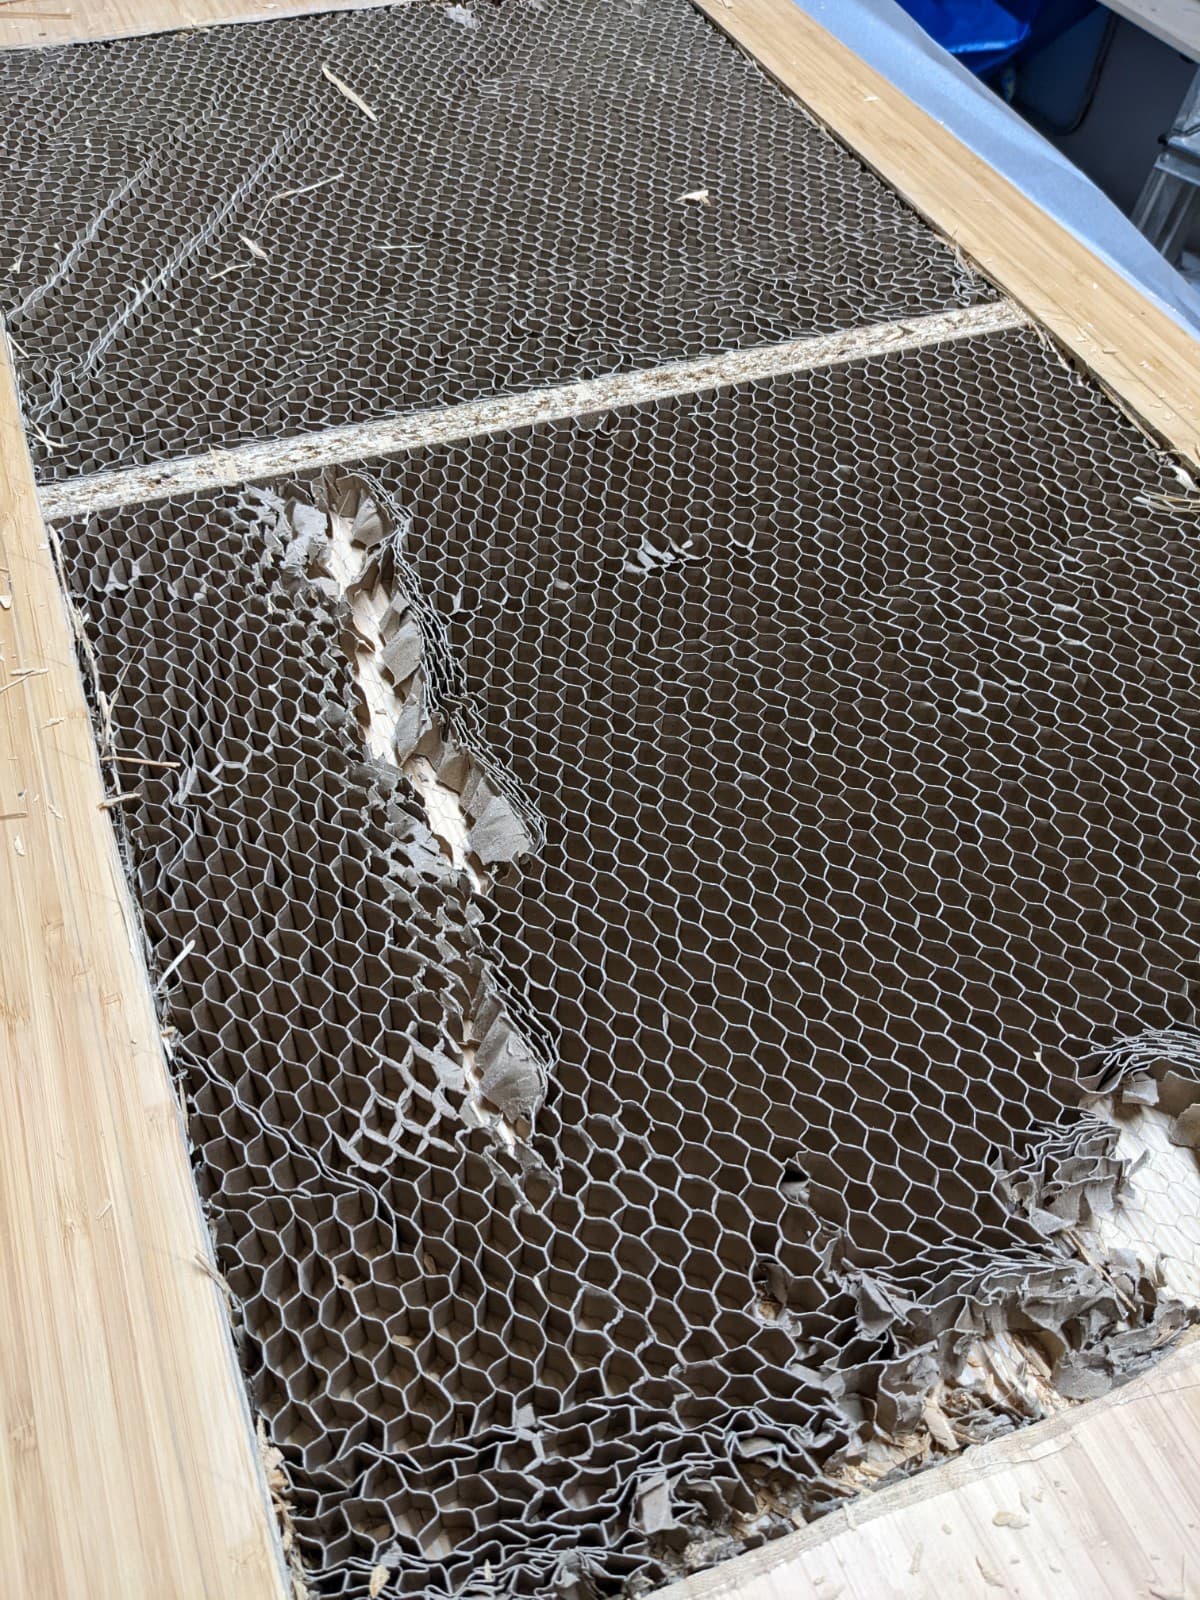
Removing it (and the wooden supports) gives me access to the full surface I want to mill:

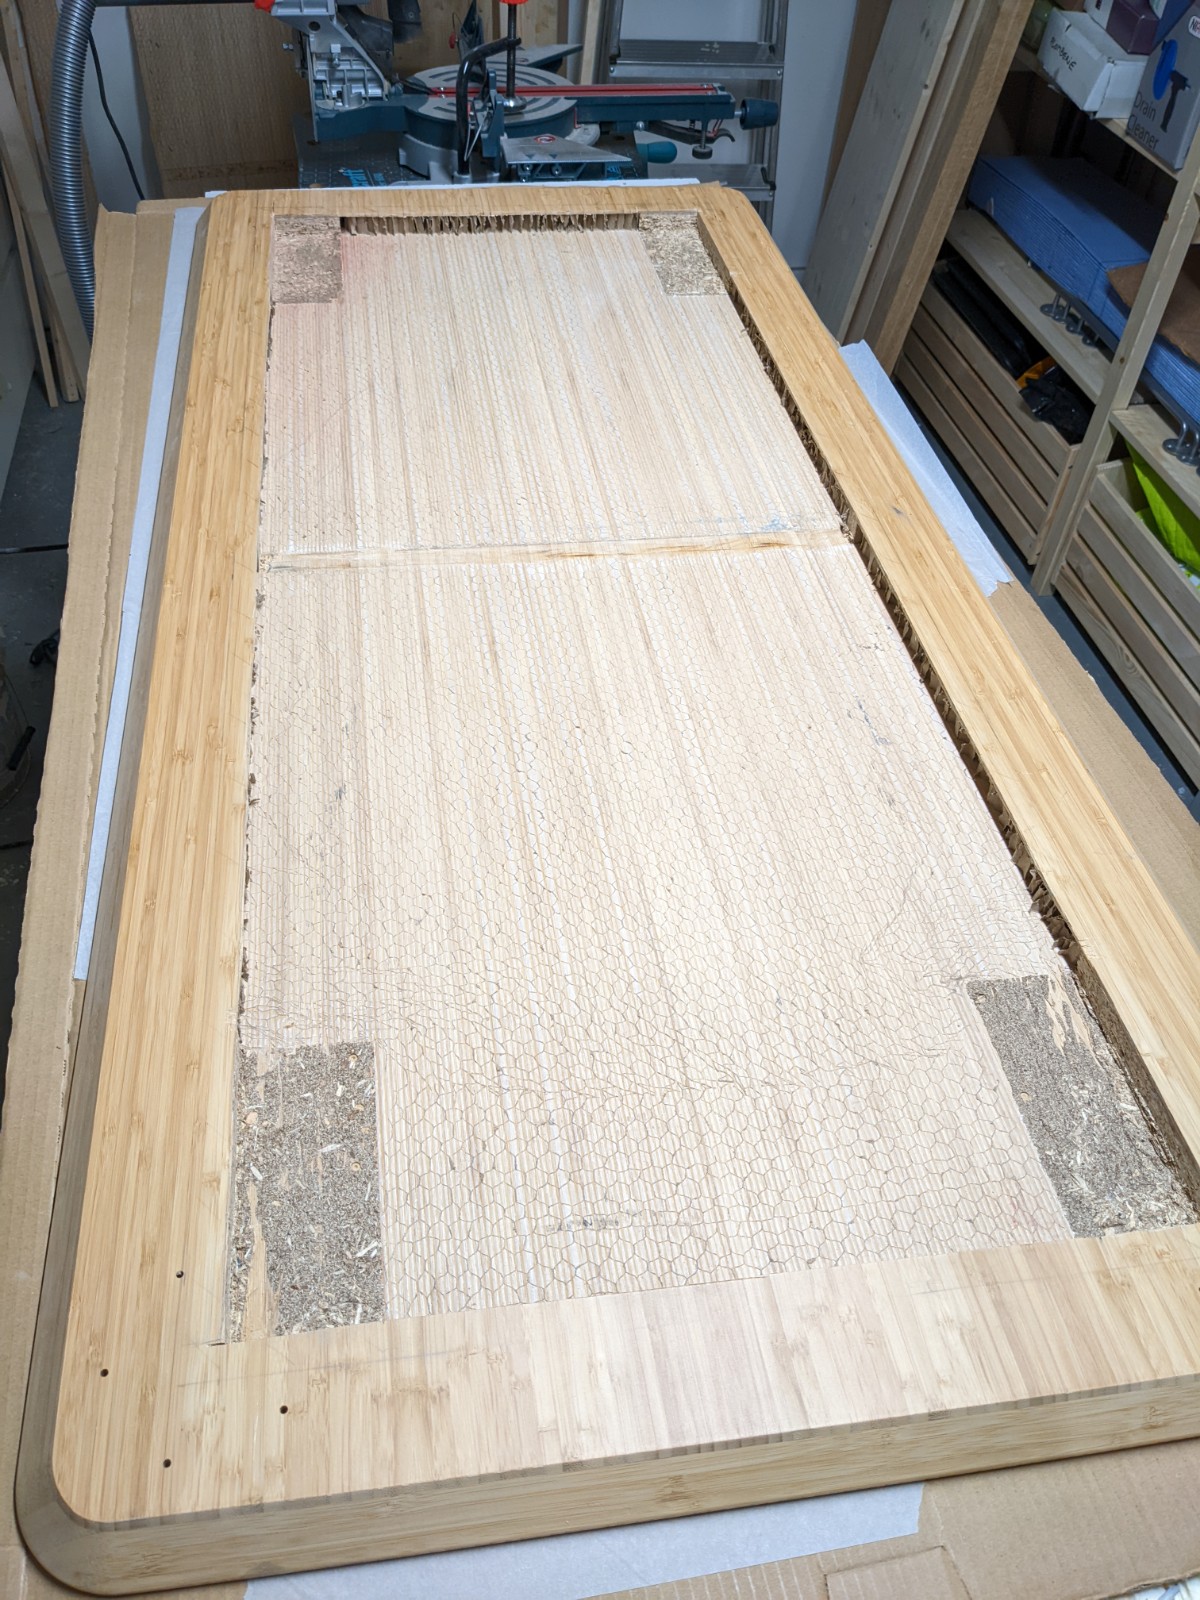
Next step: cutting openings for the acrylic/epoxy:

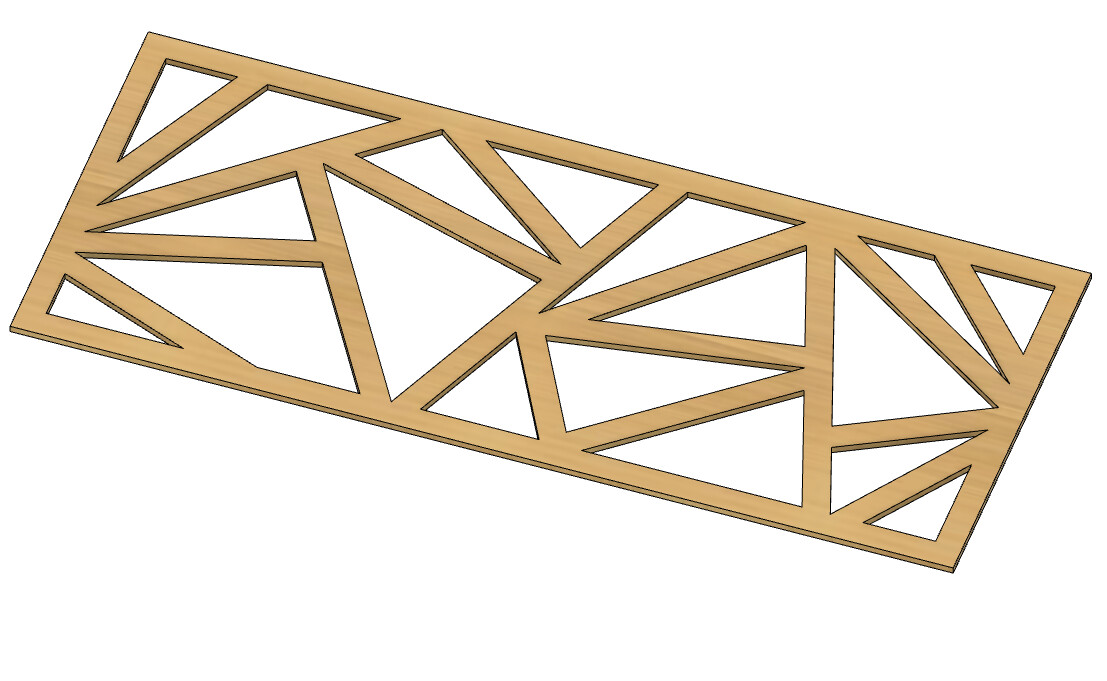
Each triangle will have a raised part above the bamboo backing, and a part that sits in the openings

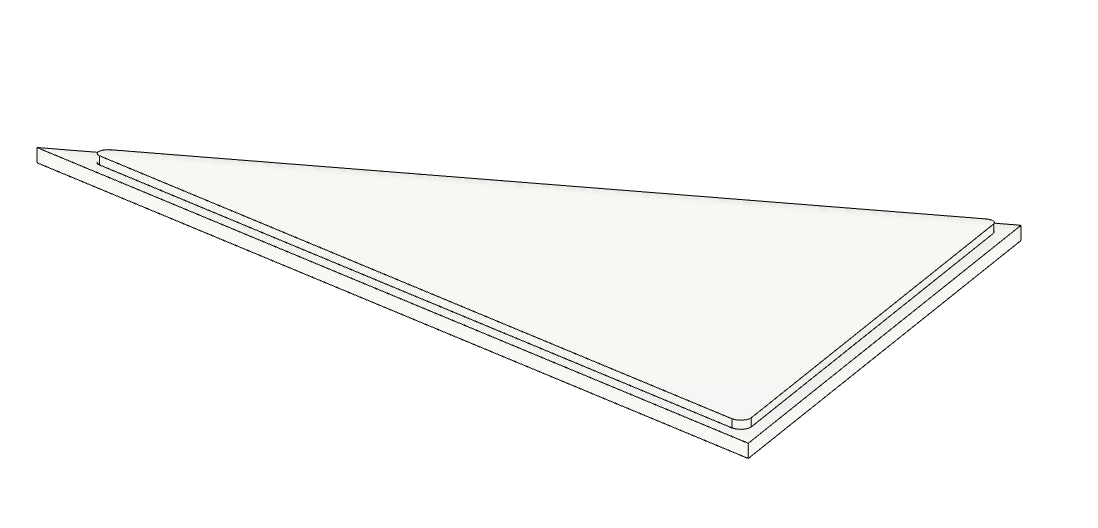
Since I don’t know where to get such a large sheet of translucent acrylic (without having to sell a kidney either), I’ll probably pour acrylic & white pigments again, and machine that into the final triangle shapes.

Stay tuned, mistakes and multiple iterations incoming.

13 Likes

Nice alternative useage of IKEA material!
As a finisher & renovator, I’ve had plenty of experience putting together IKEA products in ways that get the client what they want for a finished look/functionality vs. what IKEA intended for it. I have found that a lot of the quasi-solid materials are pretty thin on the finished skin material.
How thick are the actual bamboo layers on that table?

@Julien Are you saying that you looked “Askonce” at the idea of it being a light on the wall?

3 Likes

I was slightly worried it would be super thin, but it turned out to be about 3mm (0.12") which is enough for my purpose here. I’ll still need to reconstruct some kind of backing to support the weight of the acrylic triangles, but I’ll figure this out at the end once I am satisfied with the backlightning effect. I intend to run parallel strips of high-count LED strips, but their spacing to get a uniform diffuse light everywhere on the panel is still to be determined. Actually this might turn out to be the most challenging aspect of this project, as I really need the invidual LEDs (and strips) to be invisible. I may need to add a layer of some kind of light diffusing material, if the frosted acrylic/translucent epoxy is not enough.

Very much so :joy:
(I had to look up the word askance, which for some reason I had never heard/seen before)

Most of us haven’t either.

2 Likes

Look for “neon led” strips. There are some new ones that have an edge diffuser/concentrator that let them mount flat but redirect the light towards the edge. Ebay has loads of them. (They aren’t actually “neon” :smiley: and are very flexible.)

5 Likes

Have you considered using something like a diffusing film or paper rather than filling it all in solid?

How big is the biggest section?

I did consider it, and still have this in my sight, but I have not yet been able to find what would look like decent diffusing film/paper on Amazon yet. They all look cheap and probably ok for studio photography, but I feel they would show as cheap/plastic-y/paper-y.
But I’ll definitely reconsider and dig further, because it would be infinitely easier/faster than having to cut so many thick pieces of acrylic. Japanese lamp paper could look pretty cool and go well with the bamboo too.
I would loose the raised look though…mmh…choices.

The largest dimension for those triangles must be between 15 and 20".

1 Like

I was pleasantly surprised by how well Shoji paper works. You don’t just get a smooth diffuse light but you also see some of the structure of the heavy fibre paper up close so it doesn’t look flat and synthetic but more textured.


There’s just white LED strips behind that, fairly well spaced (2835 LEDs at 60/m) to keep the light level low enough. (Design based on Adrian Preda’s excellent YT videos)

Here’s the paper I used

11 Likes

I love it when the community sets me back on better tracks. Japanese paper it is!

3 Likes

May I suggest, just use the paper and avoid the Kumiko trap, unless you have a couple of decades to fill :wink:

6 Likes

You know how good I am at ignoring interesting rabbit holes, don’t you worry :slight_smile:
(first step: not to watch that video)

7 Likes

Crap … I watched the whole video. If I only had those tools. … … … :astonished:

6 Likes

Pick up a piece of tyvek to test. Diffuses bright led light pretty well, is pretty indestructible and it’s easier on the wallet. Not as classy, though.

2 Likes

When I was quite young, maybe my first woodworking project, I made a Shoji screen for our dining room window. It was quite a nice project and yes, the paper is wonderful.

Make sure you design a way to replace the paper over time - it does yellow, particularly if it gets humidity. But even without it, just sunlight and time will start the change. You’ll want to swap out the paper down the road. - So just make sure you plan for it.

4 Likes

I spent a long time trying to figure out how to use my Shapeoko to make Kumiko, I ended up making the planing depth guides (as I don’t have a thickness planer / sander) and the table saw jig for the half-laps on the CNC and everything else was full WillAdams with the Dozuki and hand planes. I tried hand cutting the half laps but I just don’t have the practice to get really clean tight joints that way yet. I even picked up the proper rice starch glue so the paper could be steamed off in a few years when it needs replacing.

5 Likes

For a lot of ‘diffuse’ LED light panels you can buy, the LED strips are mounted perpendicular to the direction of light emmission by the fixture along the perimeter edge of the fixture lens. Then they utilize white back reflection & frosted diffuser sheets to get a consistent light distribution through the lens. For the size of your installation piece, you may want to consider just buying a 2’x4’ flat LED panel from Home Depot/Amazon - these can also have adjustable white temperatures.

3 Likes

could…not…resist. I watched the video, well this is just fascinating.
The tools, the jigs, the craftmanship, the total lack of work safety, the cherry blossoms…it’s just a different world out there. My very last trip before the pandemic was to Japan, fantastic experience.
Ok, back to earth, I ordered a variety of papers, we’ll see how this goes.

2 Likes

I have done a lot of custom lighting projects in the display business, and from what I can tell you plan to wall mount this pce. I think you need to determine the diffusion material ( I’d recommend a thin film) possibly something like these Light Diffusing Window Films: Decorative Films, LLC., you wont get that flush look on the face though , but it will be very light. then you’ll need to determine the source and positioning or baffling of your lighting to avoid hot spots. A single sheet or fixture might work, the way we have done light boxes is to place the LEDs on the back of the face and have them shine towards the back of the box or even directly onto a light colored wall first, then reflect forward towards the face, that evens out a lot of the hot spots. It’s all a matter of lumen output, diffusion amount % , distance and reflectivity. Small testing might help if that’s feasible. ALso just standing off the light fixture ( panel) from the wall with no sides at all will give you a floating , lighted halo effect around the perimeter. It’s a really cool look if you can hide the cord. Pictured are two laser cut table lamps I did with a thin film diffuser material , it worked really well. I just added a theatrical gel around the source.for the colored version

Here is stood off light box. w the halo effect . same concept as what I think you are proposing Ideally you want a Junction box behind the sign . It’s a commitment but very cool, and get LEDs which are dimmable.

Screen Shot 2022-01-03 at 2.43.13 PM

6 Likes