So much great advice. You guys don’t disappoint, thanks all. Now I have to deliver!
When I first read it I thought you wrote scone. Who has a scone on their wall?
Never mind. Looks a cracking job.
5 Likes
Ummm, I would like a scone please.
3 Likes
Or a wall mounted scone dispenser…
3 Likes
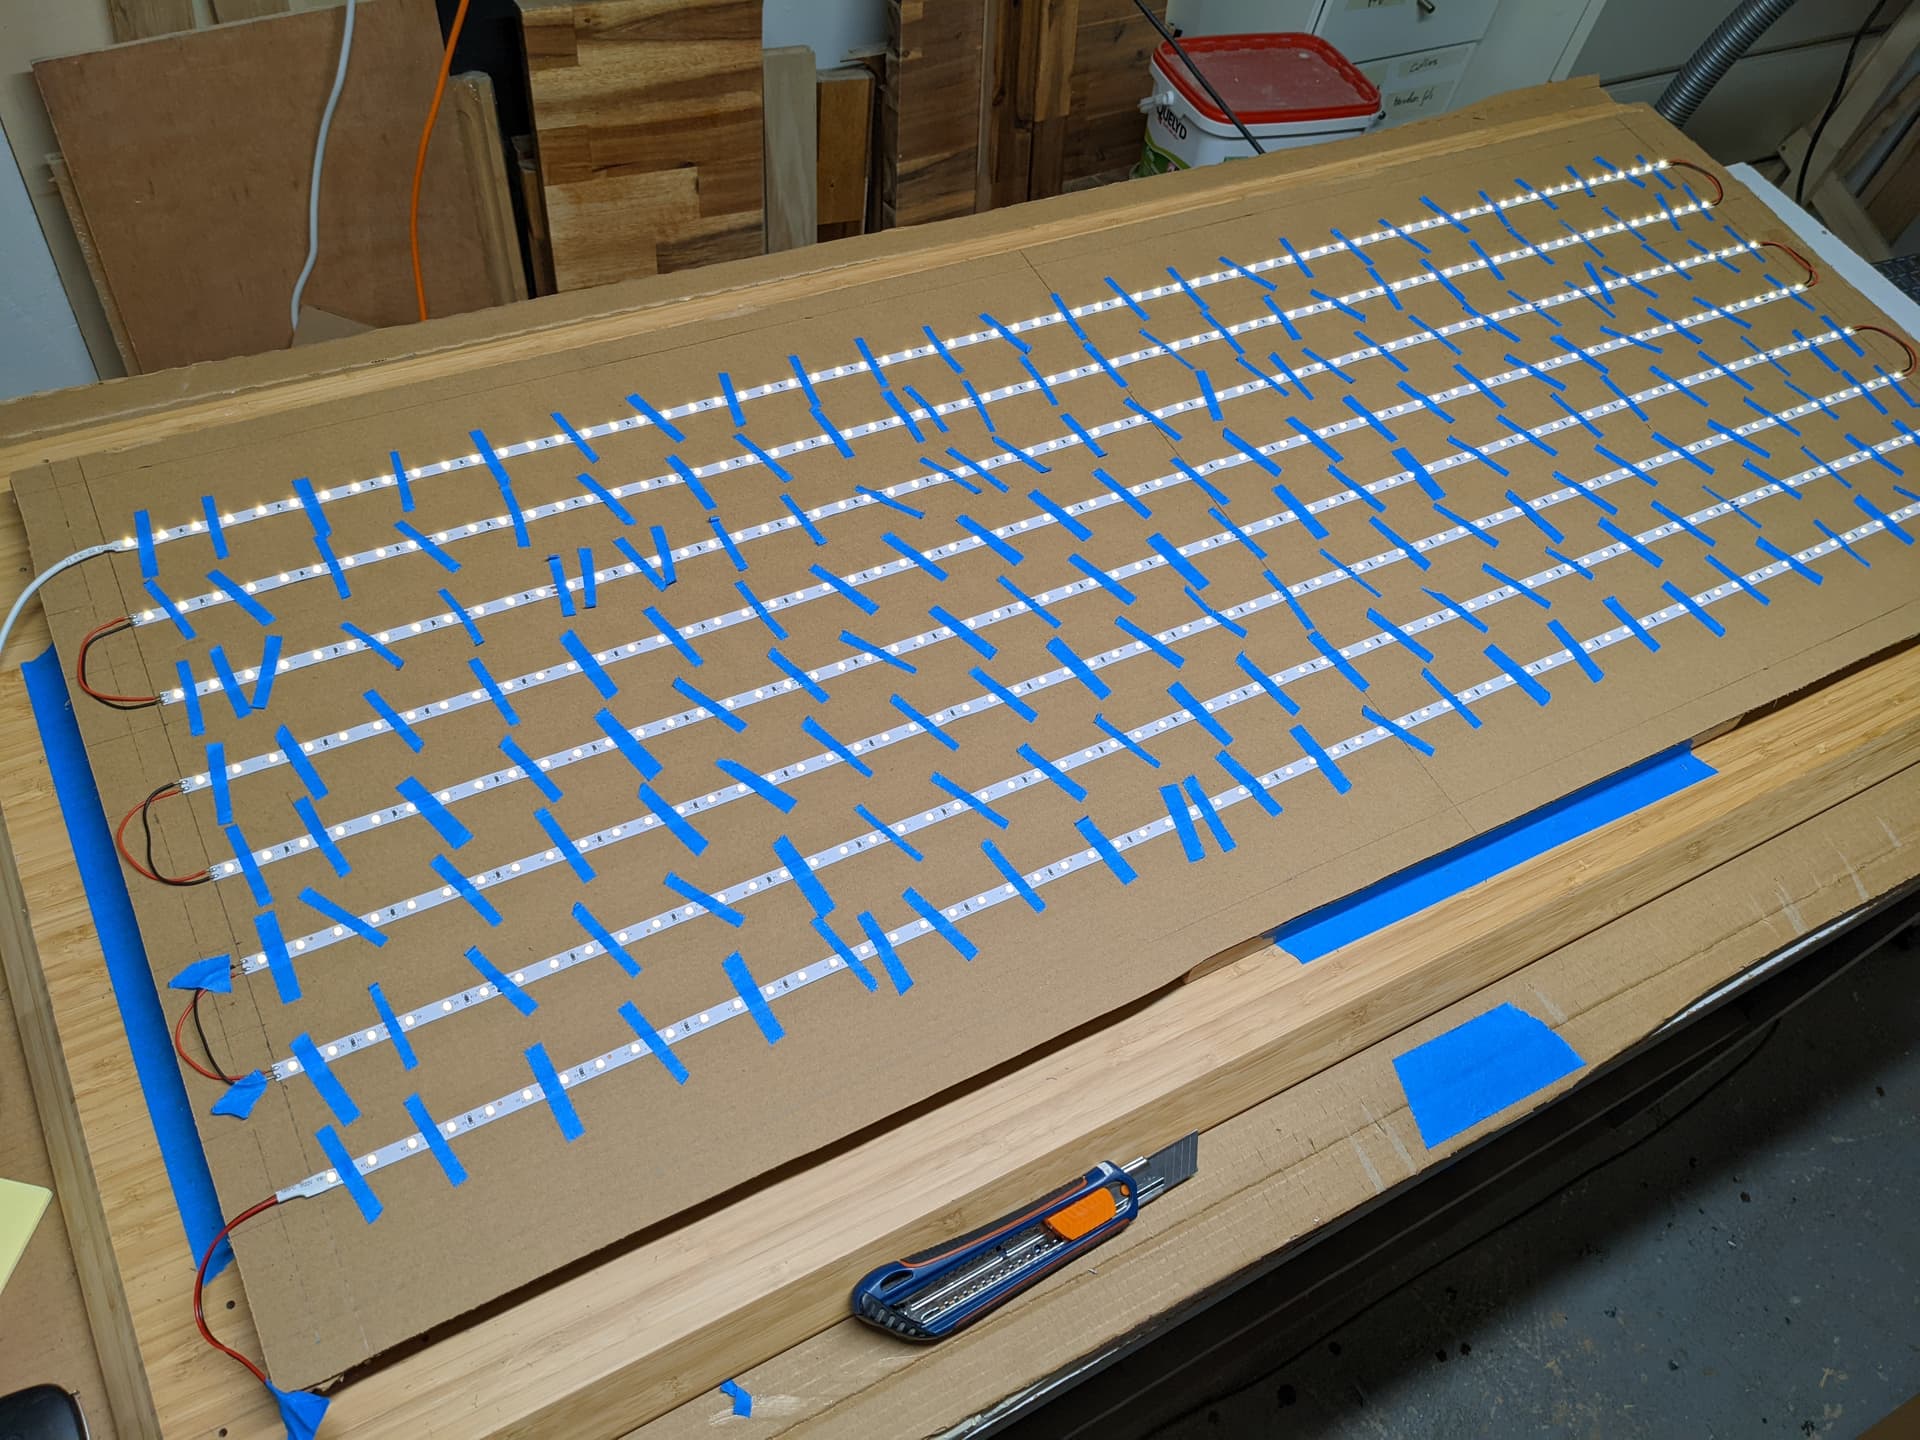
For anyone doing lite up signs and other various projects I highly recommend COB led strips. They offer a solid strip of light instead of the typical spotty coverage provided by spaced out diode lighting strips.
The diodes are smaller but there way more of them tightly spaced together and you can’t tell unless you dim them way down to barely on.
4 Likes
Actually I considered COB LED strips, but by definition they have a very high LED count which also means a significant power draw, and I’d like to minimize power consumption since this will only be a decoration on the wall, it won’t contribute to the ambient light.
I was thinking, even though COB LED strips are great to avoid the spotty look, I am going to need to diffuse light enough anyway that one can’t tell the parallel sections of strips to cover the whole area. And at this point, I don’t need 300+ LED/m. Also because I definitely won’t run the strip at full intensity, quite the opposite actually.
Anyway, I agree COB strips are great, I just wonder if for this particular project they might be overkill
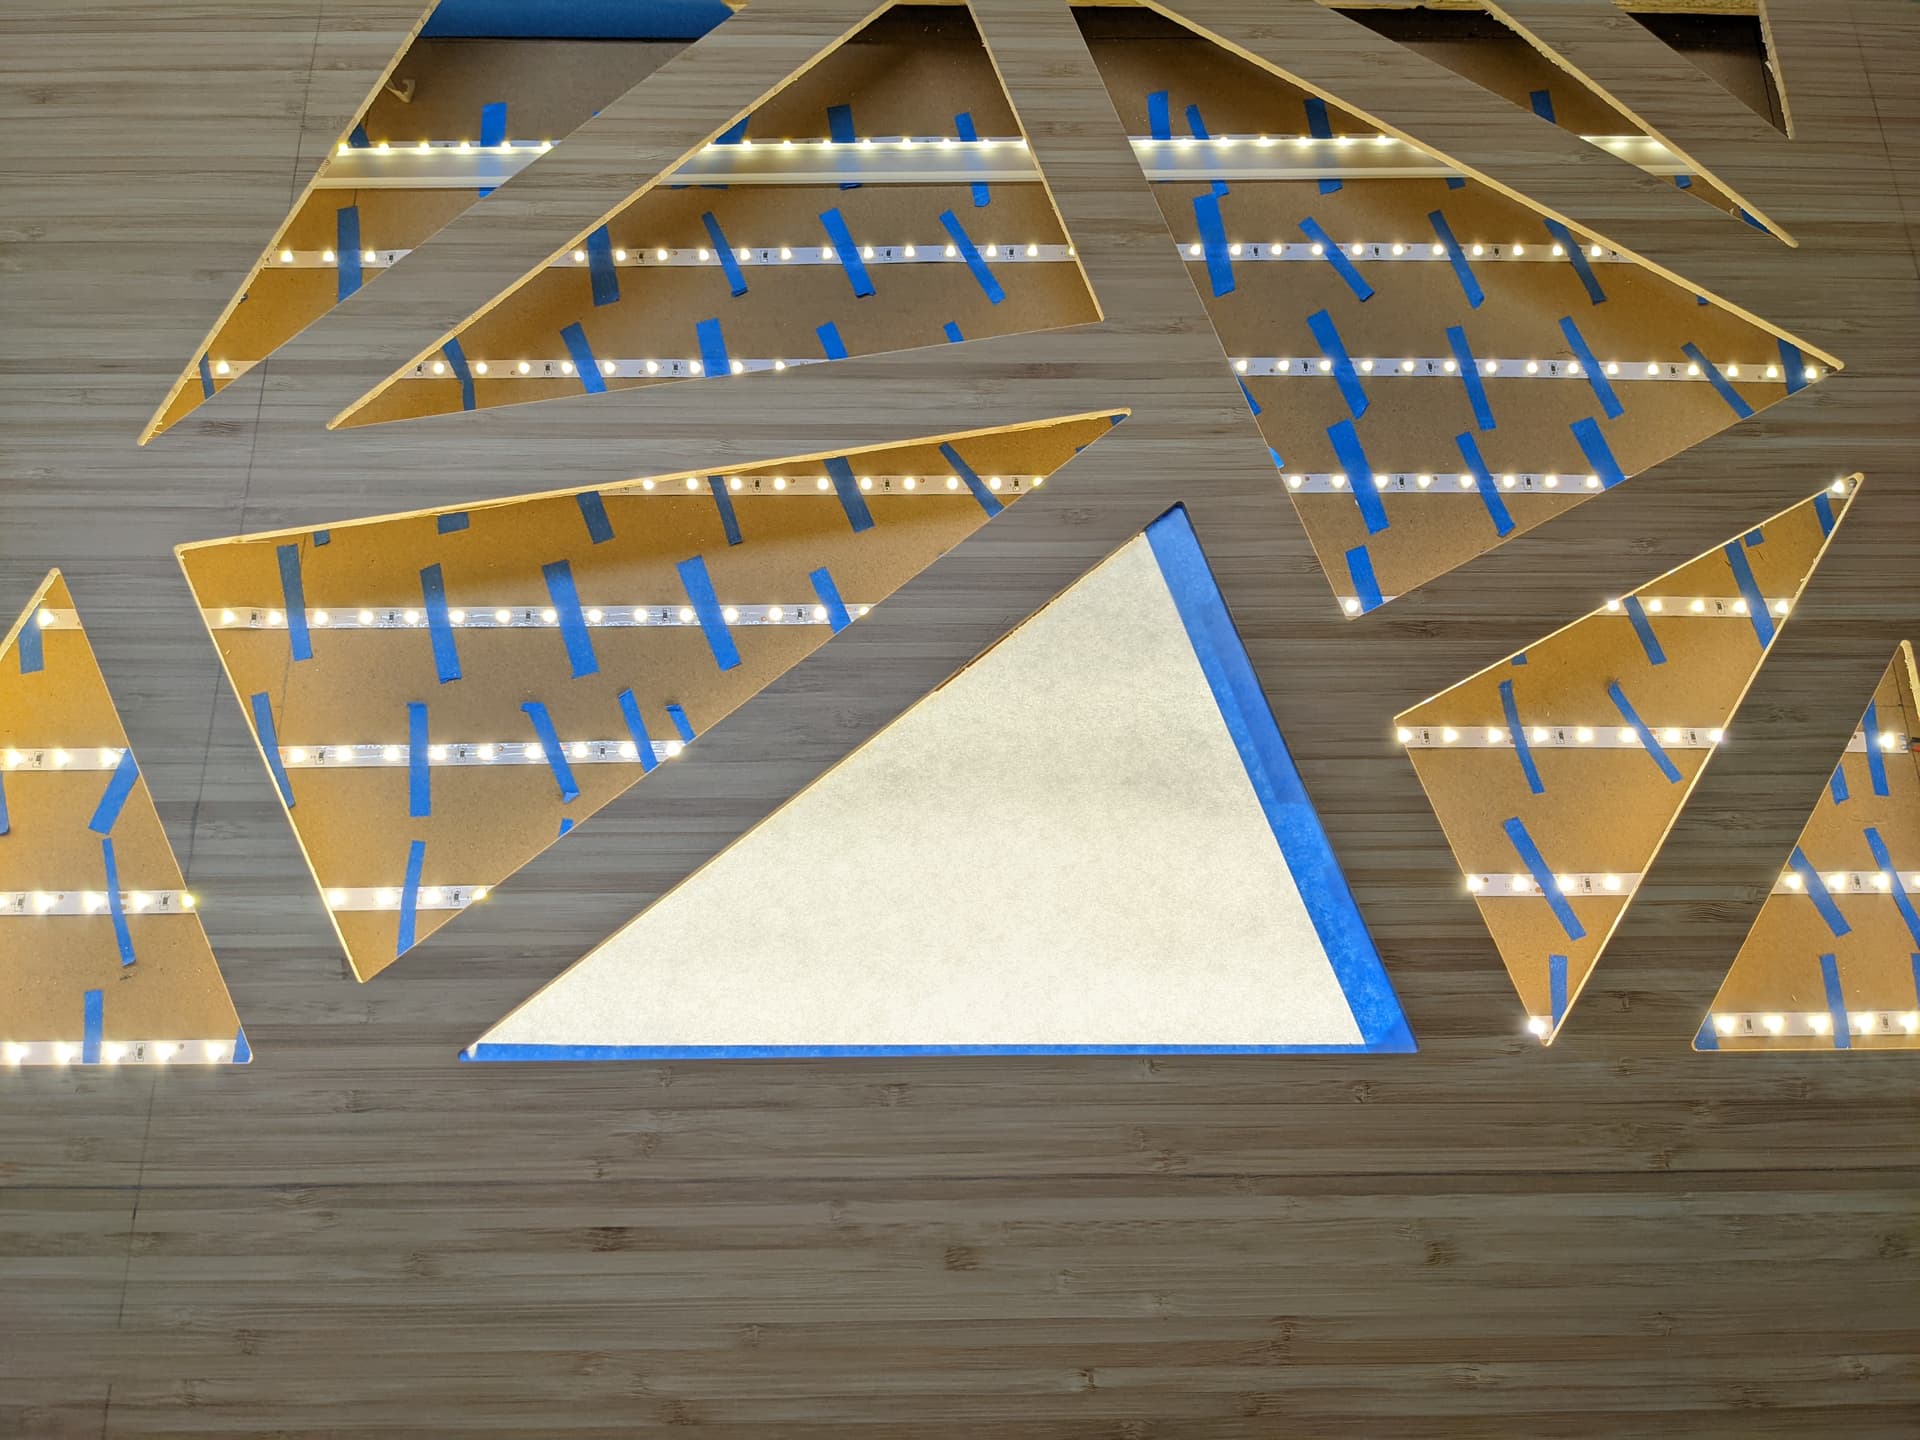
I’m sure glad I planned to have an opening in the back of my enclosure…

I won’t actually tile but cut/rotate it 180°/cut the remaining part.
I jogged the machine along the Y axis with a dowel pin in the router to align the left side of the “stock”, it’s within 0.1mm across the length, plenty good enough for such a large piece.
Used a couple of gator tooth clamps for referencing, and more clamps to hold it down.
Tomorrow I’m making chips (or crying for messing up)
5 Likes
You should be able to find translucent acrylic from a sign supplier, Grimco or Sign Warehouse would be a good start. You can also find online suppliers who will cut to size the pieces you need and ship. Which works b/c anything 4’ or bigger needs to go freight.
Translucent sign vinyl is a good diffuser, the standard brands are Avery, 3M, Oracal.
The technique you’re attempting for the triangular shapes is commonly known as push through and if you go for thicker material, you can get the edge of the acrylic to push past the face of the bamboo. Gluing the triangles is potentially messy. If all else fails, you can cut the triangles, pocket, and then cut a square piece of acrylic. Then instead of flush or push though, you’d have the bamboo edge. That way is super easy and looks good
1 Like
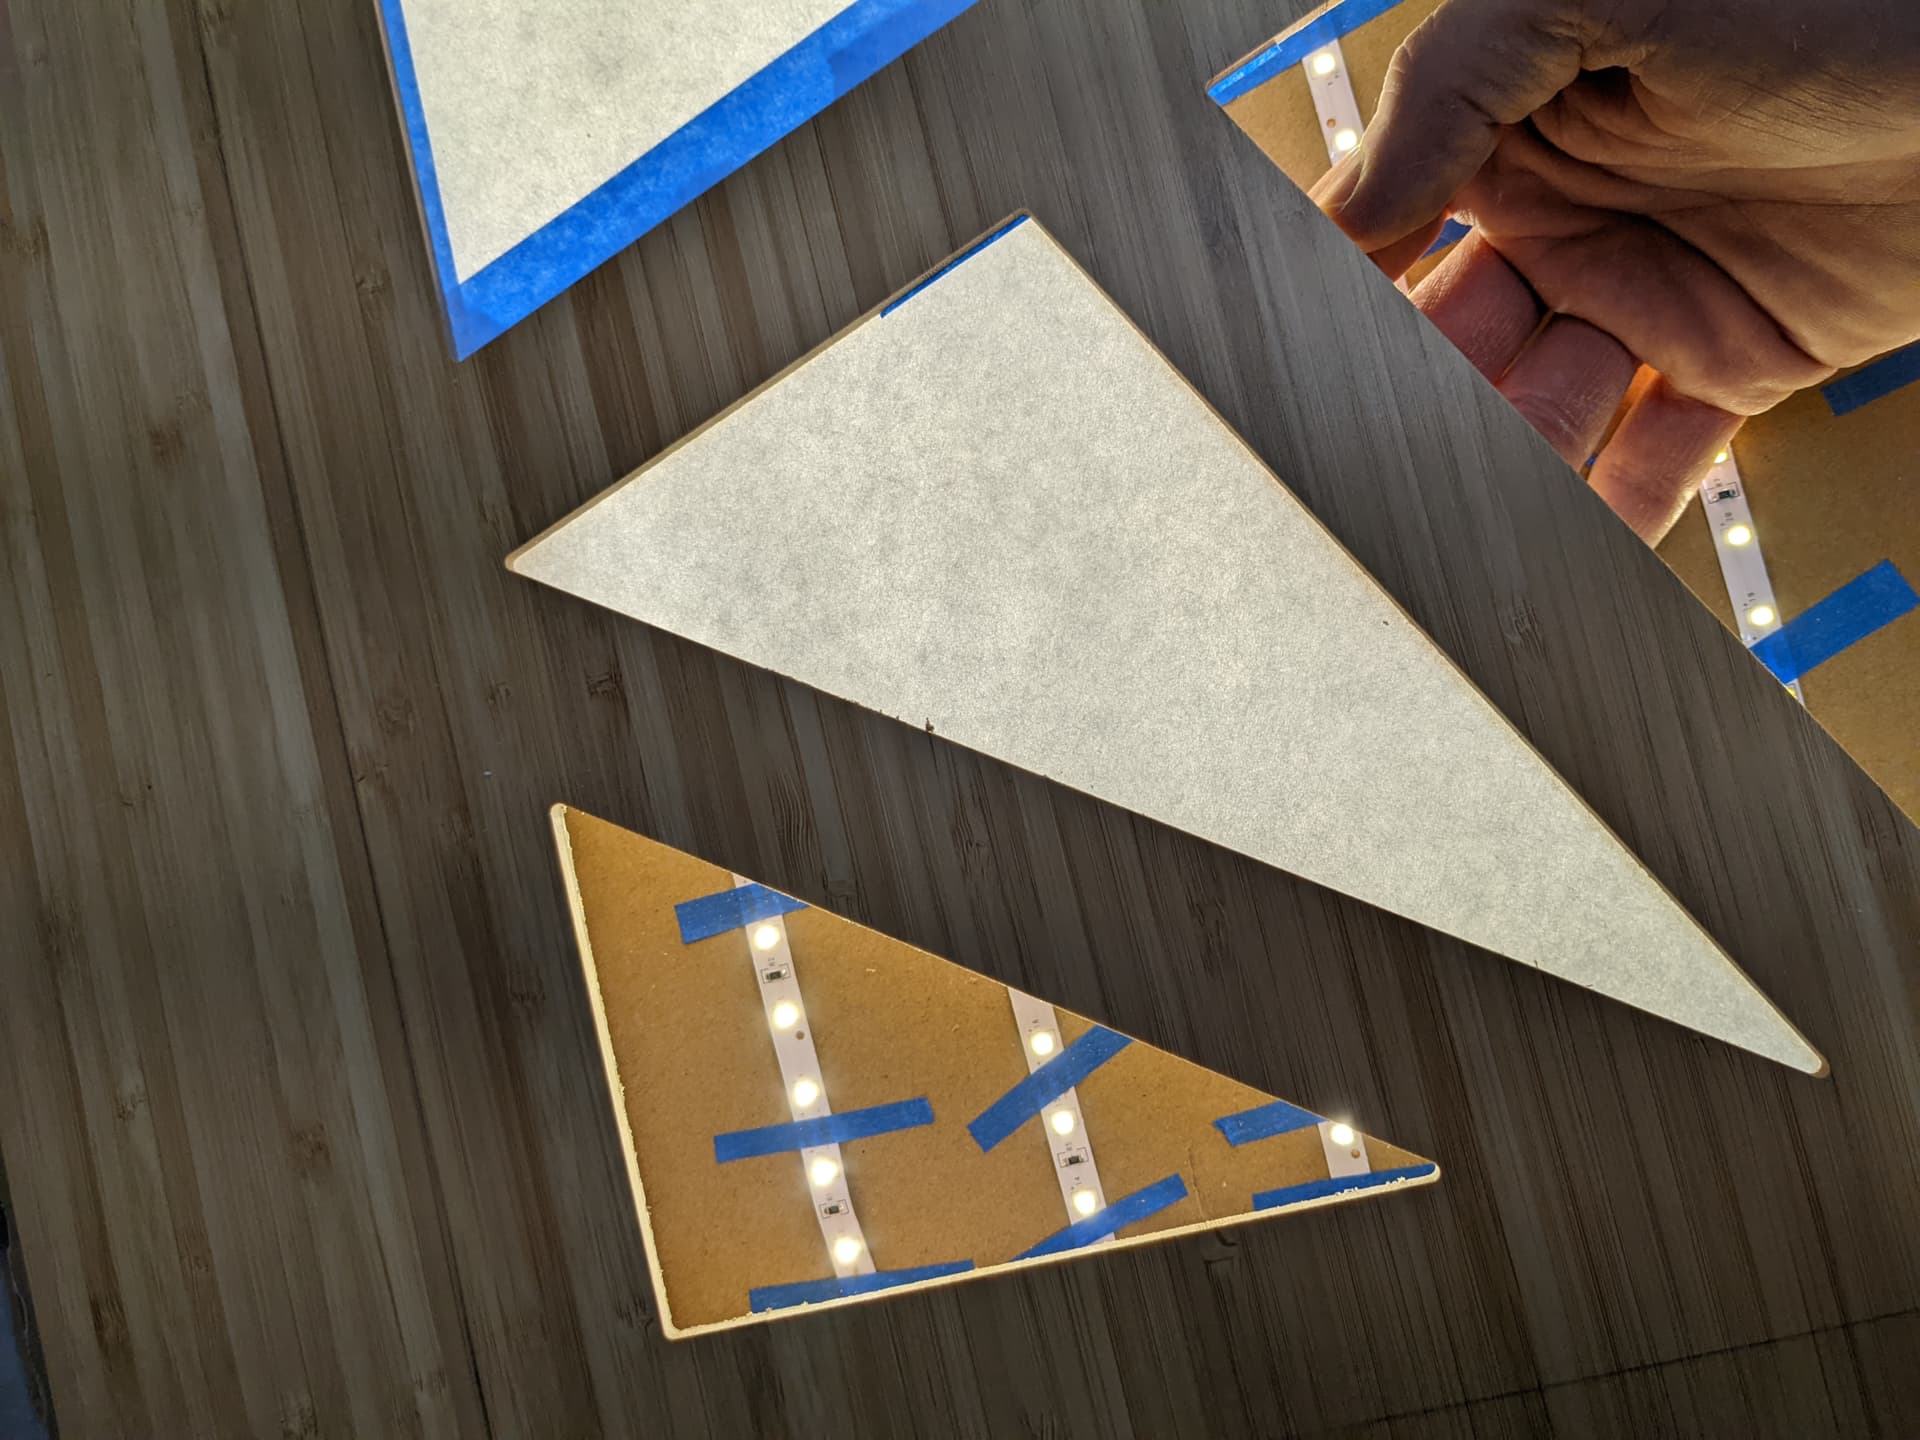
Some rapid prototyping for the backlighting, to figure out if the spacing & distance to the paper will actually provide a nice uniform lightning (there was nothing “rapid” about making this mockup though…I’m exhausted. But for the mockup I did not want to peel off the sticky side protection).
Did I mention I use blue tape for EVERYTHING ?
First tests indicate that shoji paper alone won’t work, transfer paper alone is better but not quite enough nor as looking as nice. One layer of transfer paper and one layer of shoji paper seems to give a very decent result, we’ll see.
5 Likes
I think you need more LEDs Julien, you’re never going to get a tan with that stingy layout 
6 Likes
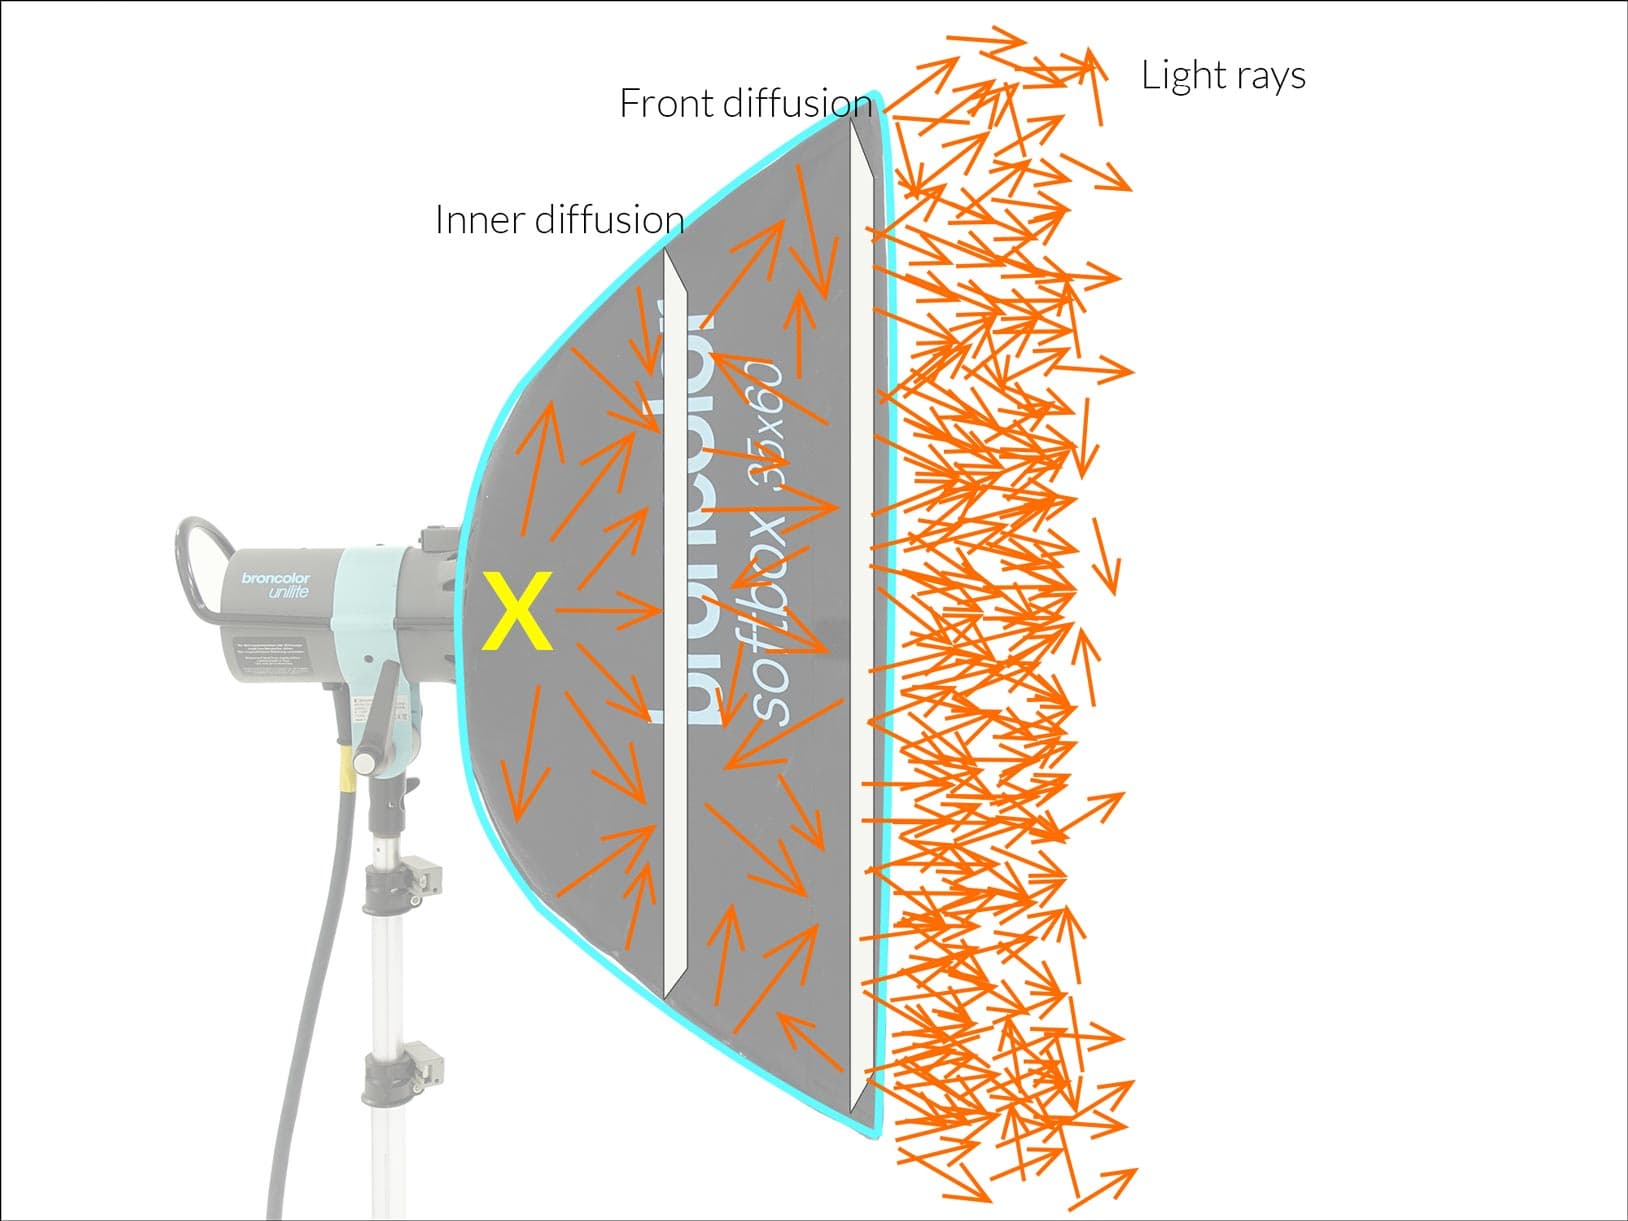
Consider mounting the strips facing down onto a reflective surface. Let the light all be reflected. See how that works
EDIT: This is the way photographic soft boxes that don’t have an inner baffle work…they shoot the light backwards into a reflective material, then the light reflects back past the light source,and then out the white material that provides the outside light.
5 Likes
That makes a lot of sense, I wonder what the loss in light intensity will be though (I measured the full strip at max level drawing no more than 20W). But my first problem would be, what kind of reflective surface can I find in such large dimensions? (lighting newbie here)
Ummm…aluminum foil? 20 Characters would be awesome.
2 Likes
If you’re using two layers of paper, try with one close to the LEDs.
White paint.
2 Likes
I’ll try those options.
In the meantime, I tried a variation: one layer of shoji paper backed by 5mm acrylic (only had clear acrylic on hand, I sanded it on both faces to simulate frost acrylic)
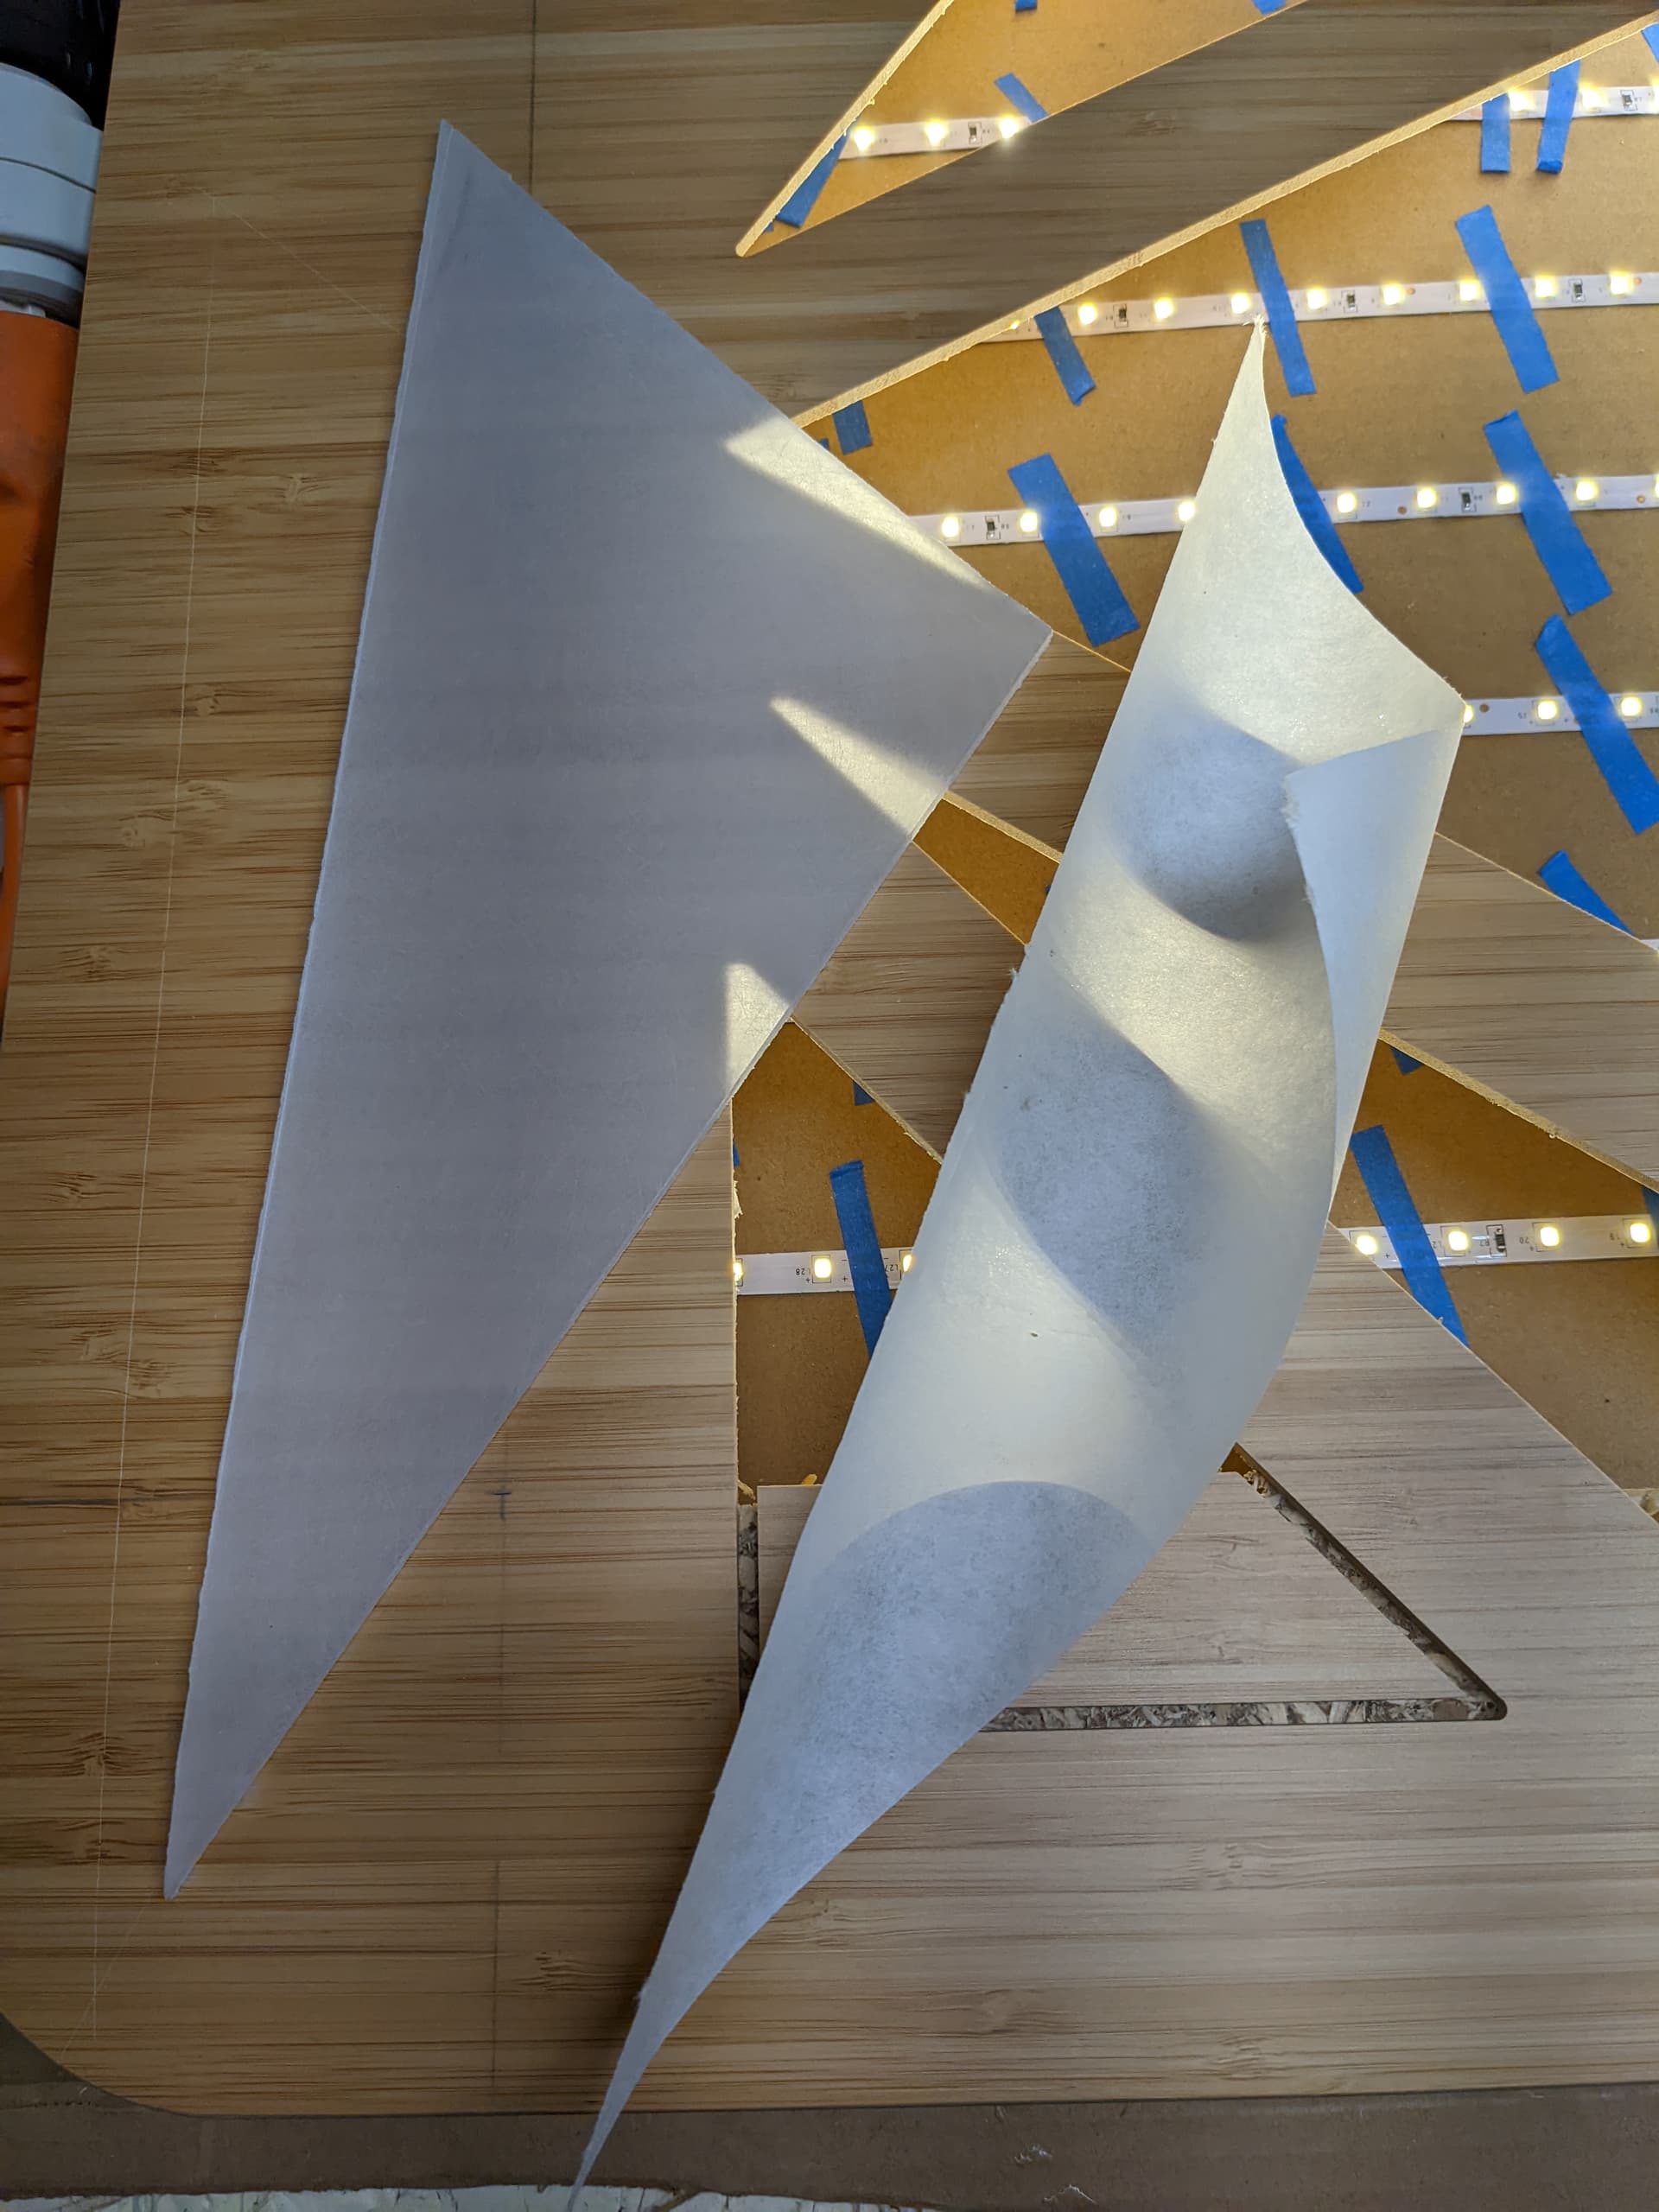
It works really well, and the shoji paper is dead flat with that backing (hard to tell from the pic, but it looks much cleaner than the first one. I’m tempted to proceed like this to minimize complexity (I’m afraid the flipped LED strips will turn out to be complicated to handle. How would I hold the individual strips ?)
4 Likes
The problem is, unless you put space between the two layers of translucent material, the hot spot is still going to be visible. You either have to put space for the light rays to scatter before hitting the second layer of material, or bounce the lights right off the bat.
I was thinking, the reason that latest trial looks better is because light first gets scattered when crossing the bottom face of the “frosted” acrylic, and then a second time when it crosses the shoji paper/top face of the acrylic. They are naturally spaced by 5mm. I could try thicker acrylic (again just using acrylic as the “spacer”)
1 Like
I get that, but can’t the acrylic thickness be that space? Assume it’s clear acrylic and I just put a layer of shoji on each side of the 5mm acrylic.
2 Likes