Actually I did use the tea trick, brushing water infused with black tea before applying the vinegar mix. Anyway since I posted, those clear spots have completely disappeared and I have a uniform dark color, it was only a matter of time. More tests and pics tomorrow
2 Likes
“A watched pot never boils …” or the French equivalent! ![]()
Looking good!
1 Like
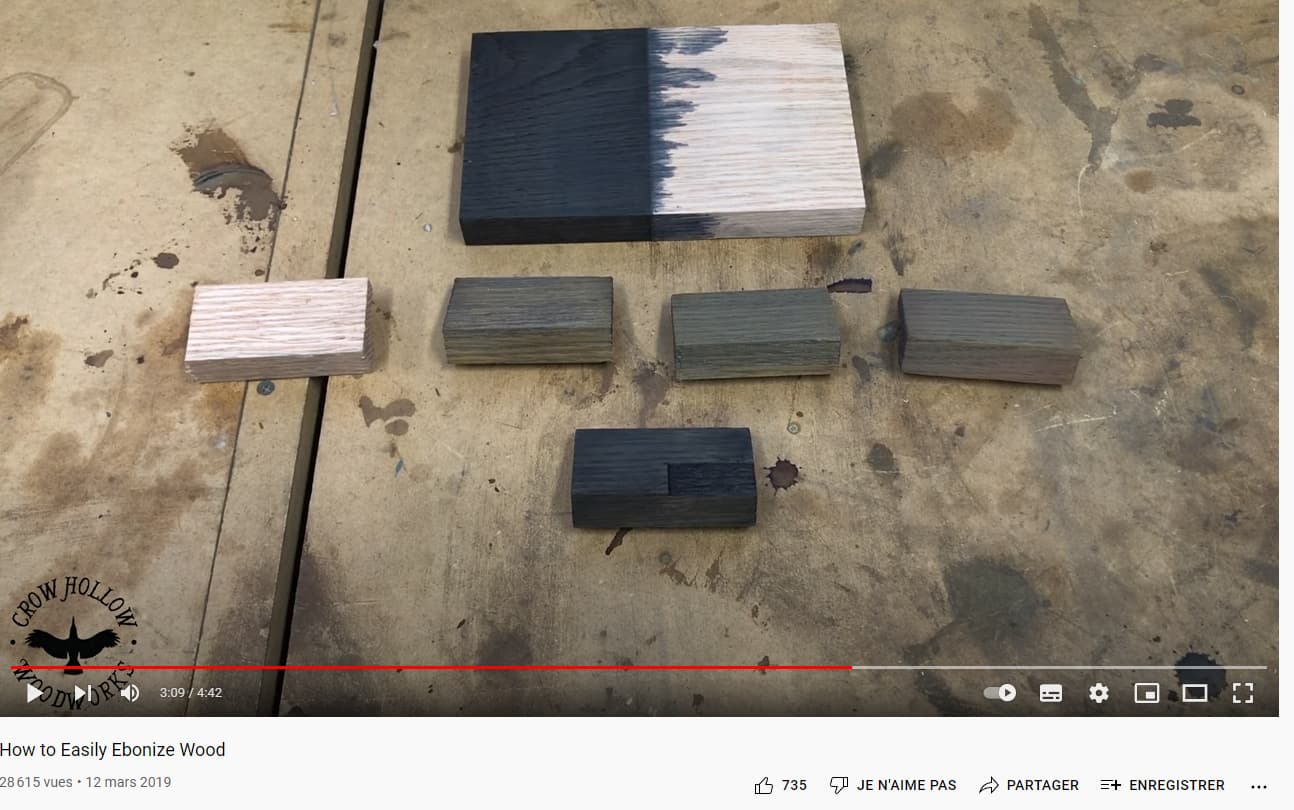
I watched this Michael Alm Video recently (timestamped appropriately How to Make Floating Picture Frames - YouTube) and I really liked the results he got with simply a black oil paint and a drier mixture. He was able to buff it nicely to the desired finish. I may try this next time I need a dark ebonized finish.
2 Likes
This is coming along very nicely. Glad to hear the clear spots eventually changed as you were expecting/hoping. That said if it didn’t change it would have been quiet unique giving it an aged look. Can’t wait to see the final results.
1 Like
Well I wish I had interesting news but it seems like I’m getting nowhere with this ebonizing now.
Yesterday it looked as if just another coat would bring me to a nice black tint, but tonight after letting it dry (I did soak it yesterday when I brushed more vinegar on the frame, which is maybe a beginner’s mistake) it looks much lighter, not uniform, and above all the four sides did not react the same even though they were cut from a single piece of wood.
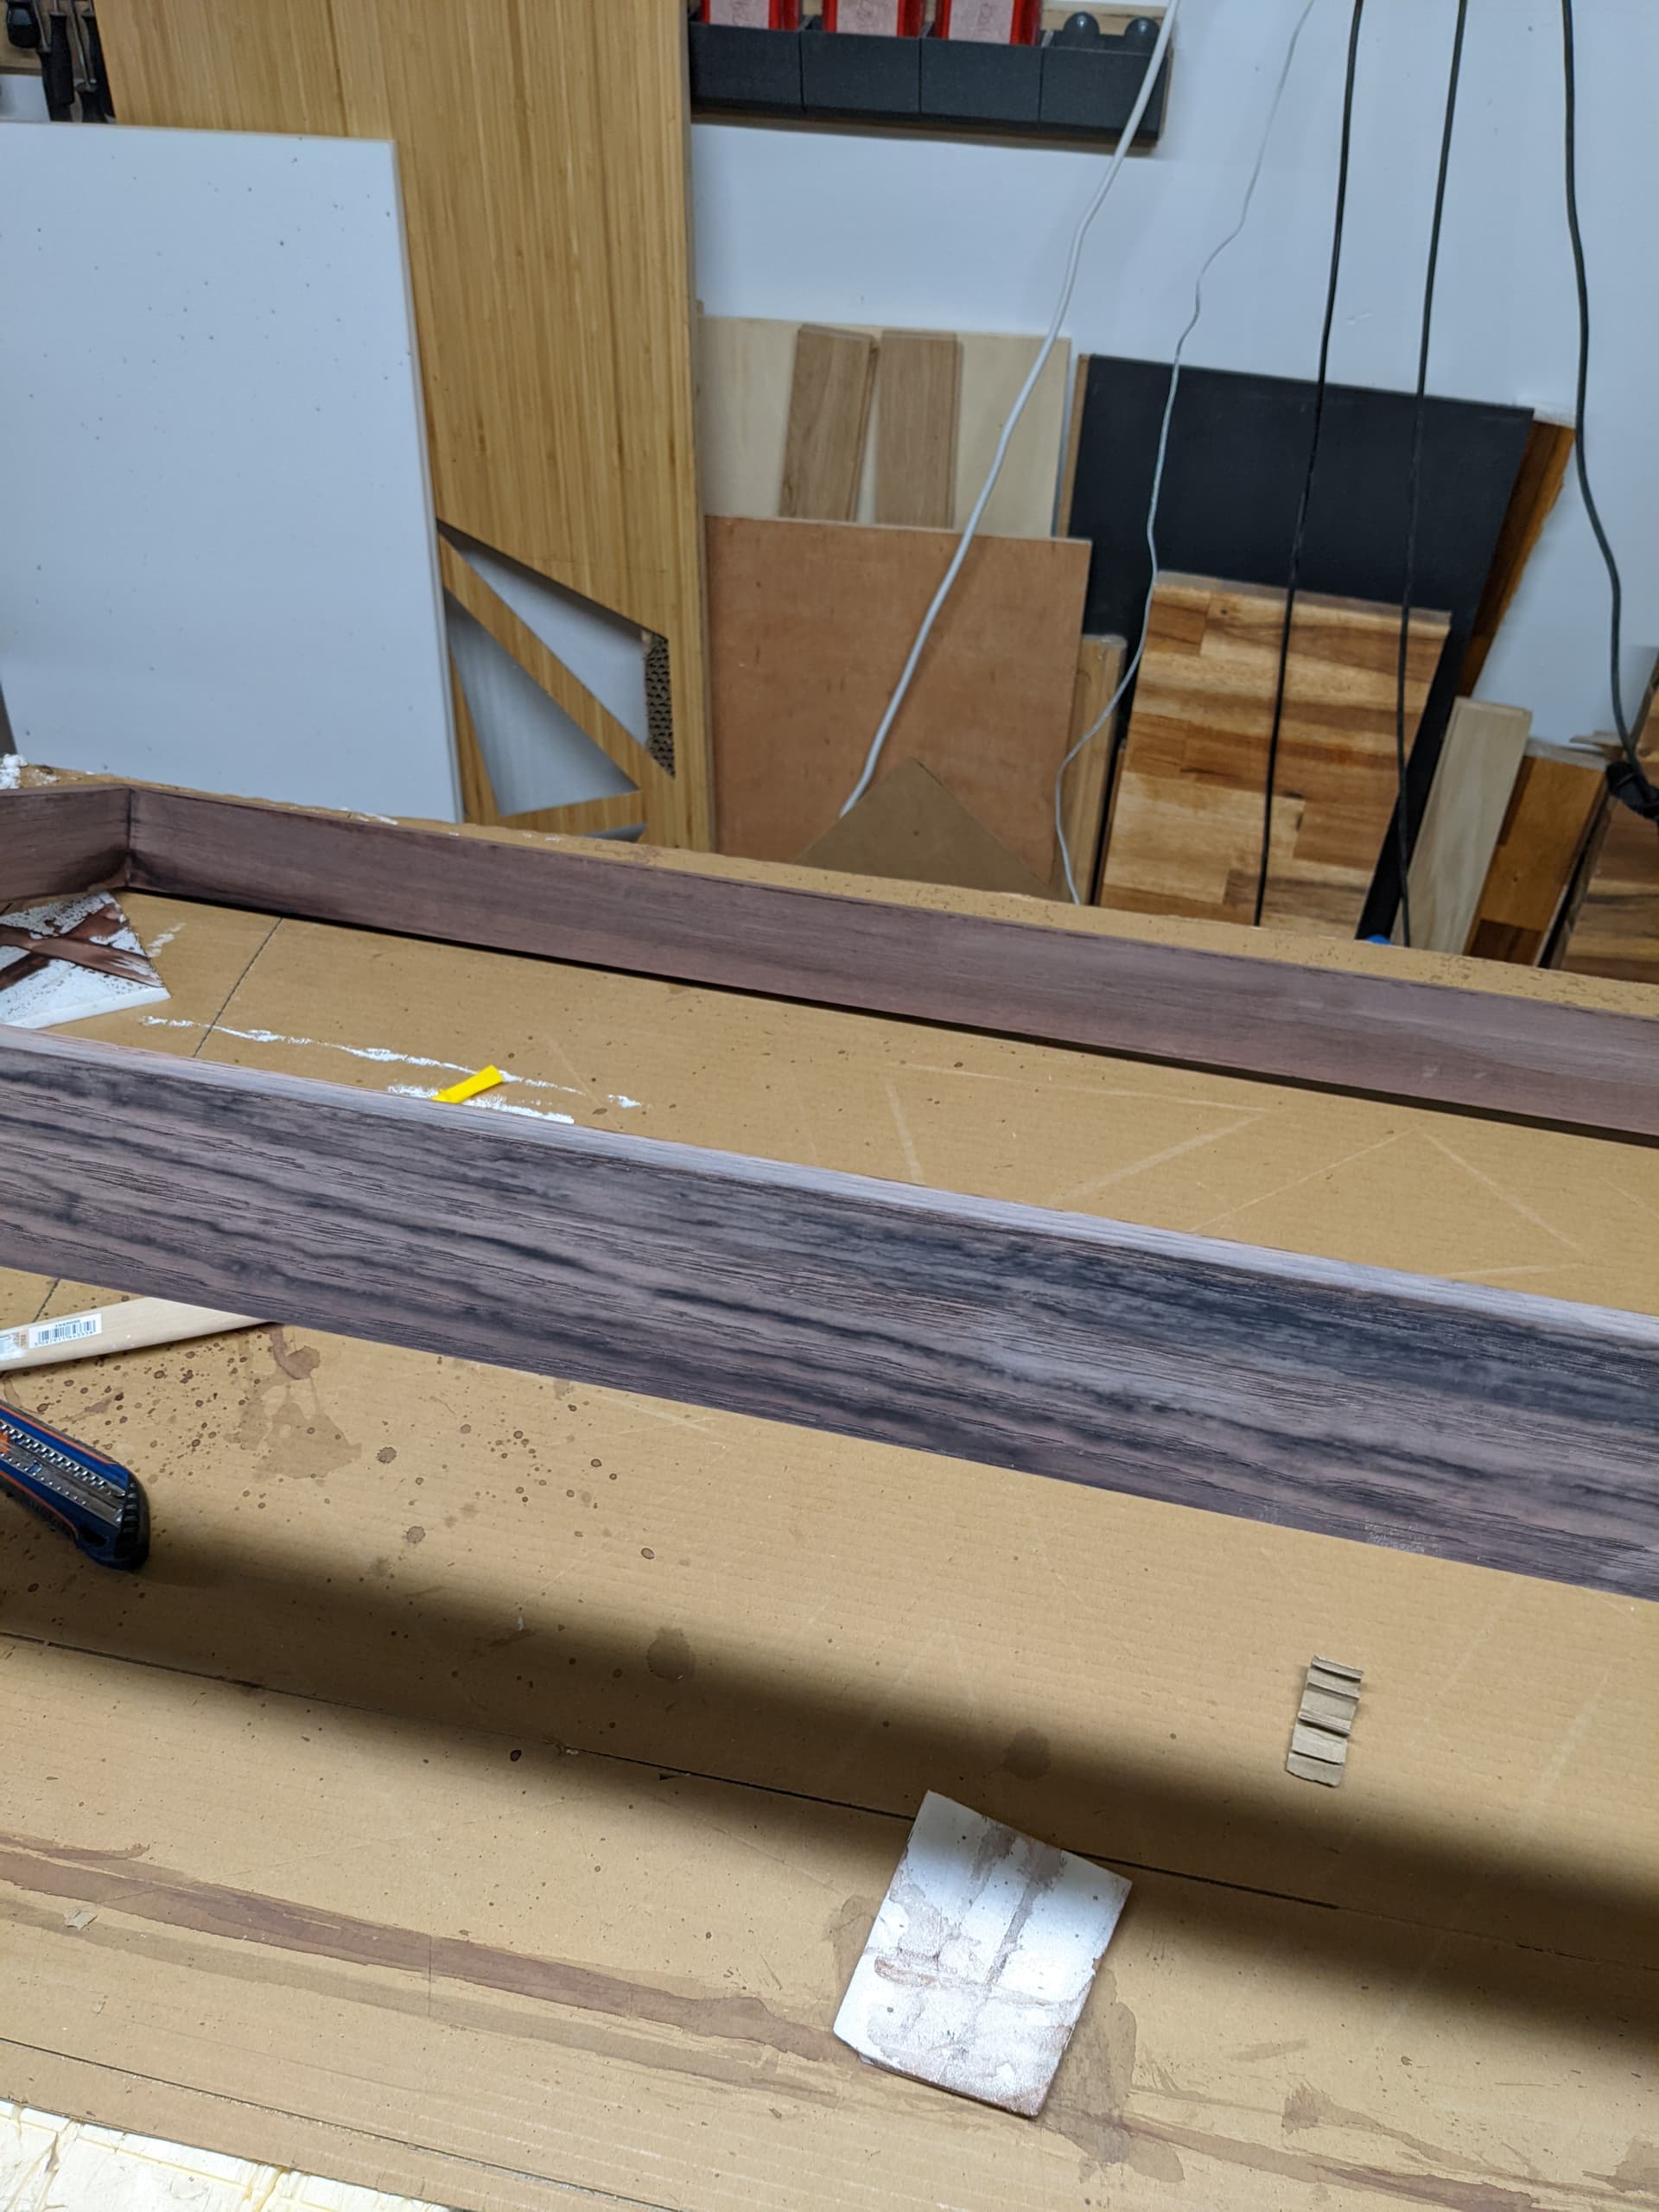
compare this to the latest pic I posted, and you’ll understand how confused I am.
Can anyone tell me what’s going on, and whether this means the wood needs MORE of it or if I just went over the top ?
At this point I’m tempted to hide this all under a very dark stain coat. Or paint.
Going back to the ebonizing videos, looks like I failed to do a number of things:
- washing the steel wool before putting in it in the vinegar
- waiting for a week (!) in “warm conditions” for the mix to be ready
- sanding the wood between successive coats AND re-applying the black tea coat before the vinegar
And then again, from this guy’s video where he did 1 coat, 2 coats, and 3 coats, I may well be in a semi-normal situation after 1 coat
Regardless, next step = sanding again. And then deciding if I’m willing to spend another week (sigh) doing this.
3 Likes
@Julien I hope you stick with it, its great to watch your progress…
2 Likes
How is it that, no matter what we do, next step = sanding again ???
4 Likes
When I’m not patient, or if I want it darker, my approach in the past has been black shoe polish (if need be multiple coats, buffing in-between each), followed by an overcoat of Johnson’s paste wax (and a final buffing) — but probably any clear wax will do, and if nothing is touching it, might be able to stop w/ the shoe polish.
1 Like
When applying stain usually the end product will be darker when a finish is applied. I have a lot of things that looked dull and with the finish it looks great. Try some mineral spirits to see what it will look with a finish.
I have used ebony stain before and it did a good job. I also tried some ebony gel stain and that does not penetrate as well as oil based stain. Even with your vinegar solution you may still have to stain to get a dark finish. Even with the vinegar you could spray paint it black either gloss or flat. After all it is a back piece that wont be seen much.
2 Likes
I say take a torch to it. Shou sugi ban style.
4 Likes
Well the good news if the burning does not turn out well the light wont have a place to hang after burning down your home.
1 Like
thanks for all the options, hopefully I can salvage this. The wife said ok to a “dark but not black” tint, so there’s that.
2 Likes
Uh, oh. The pressure is on now. ![]()
2 Likes
@Julien I agree…In fact, it is SO MUCH better to watch you uncover the pitfalls than to experience them myself ![]()
4 Likes
Episode IV: A New Hope
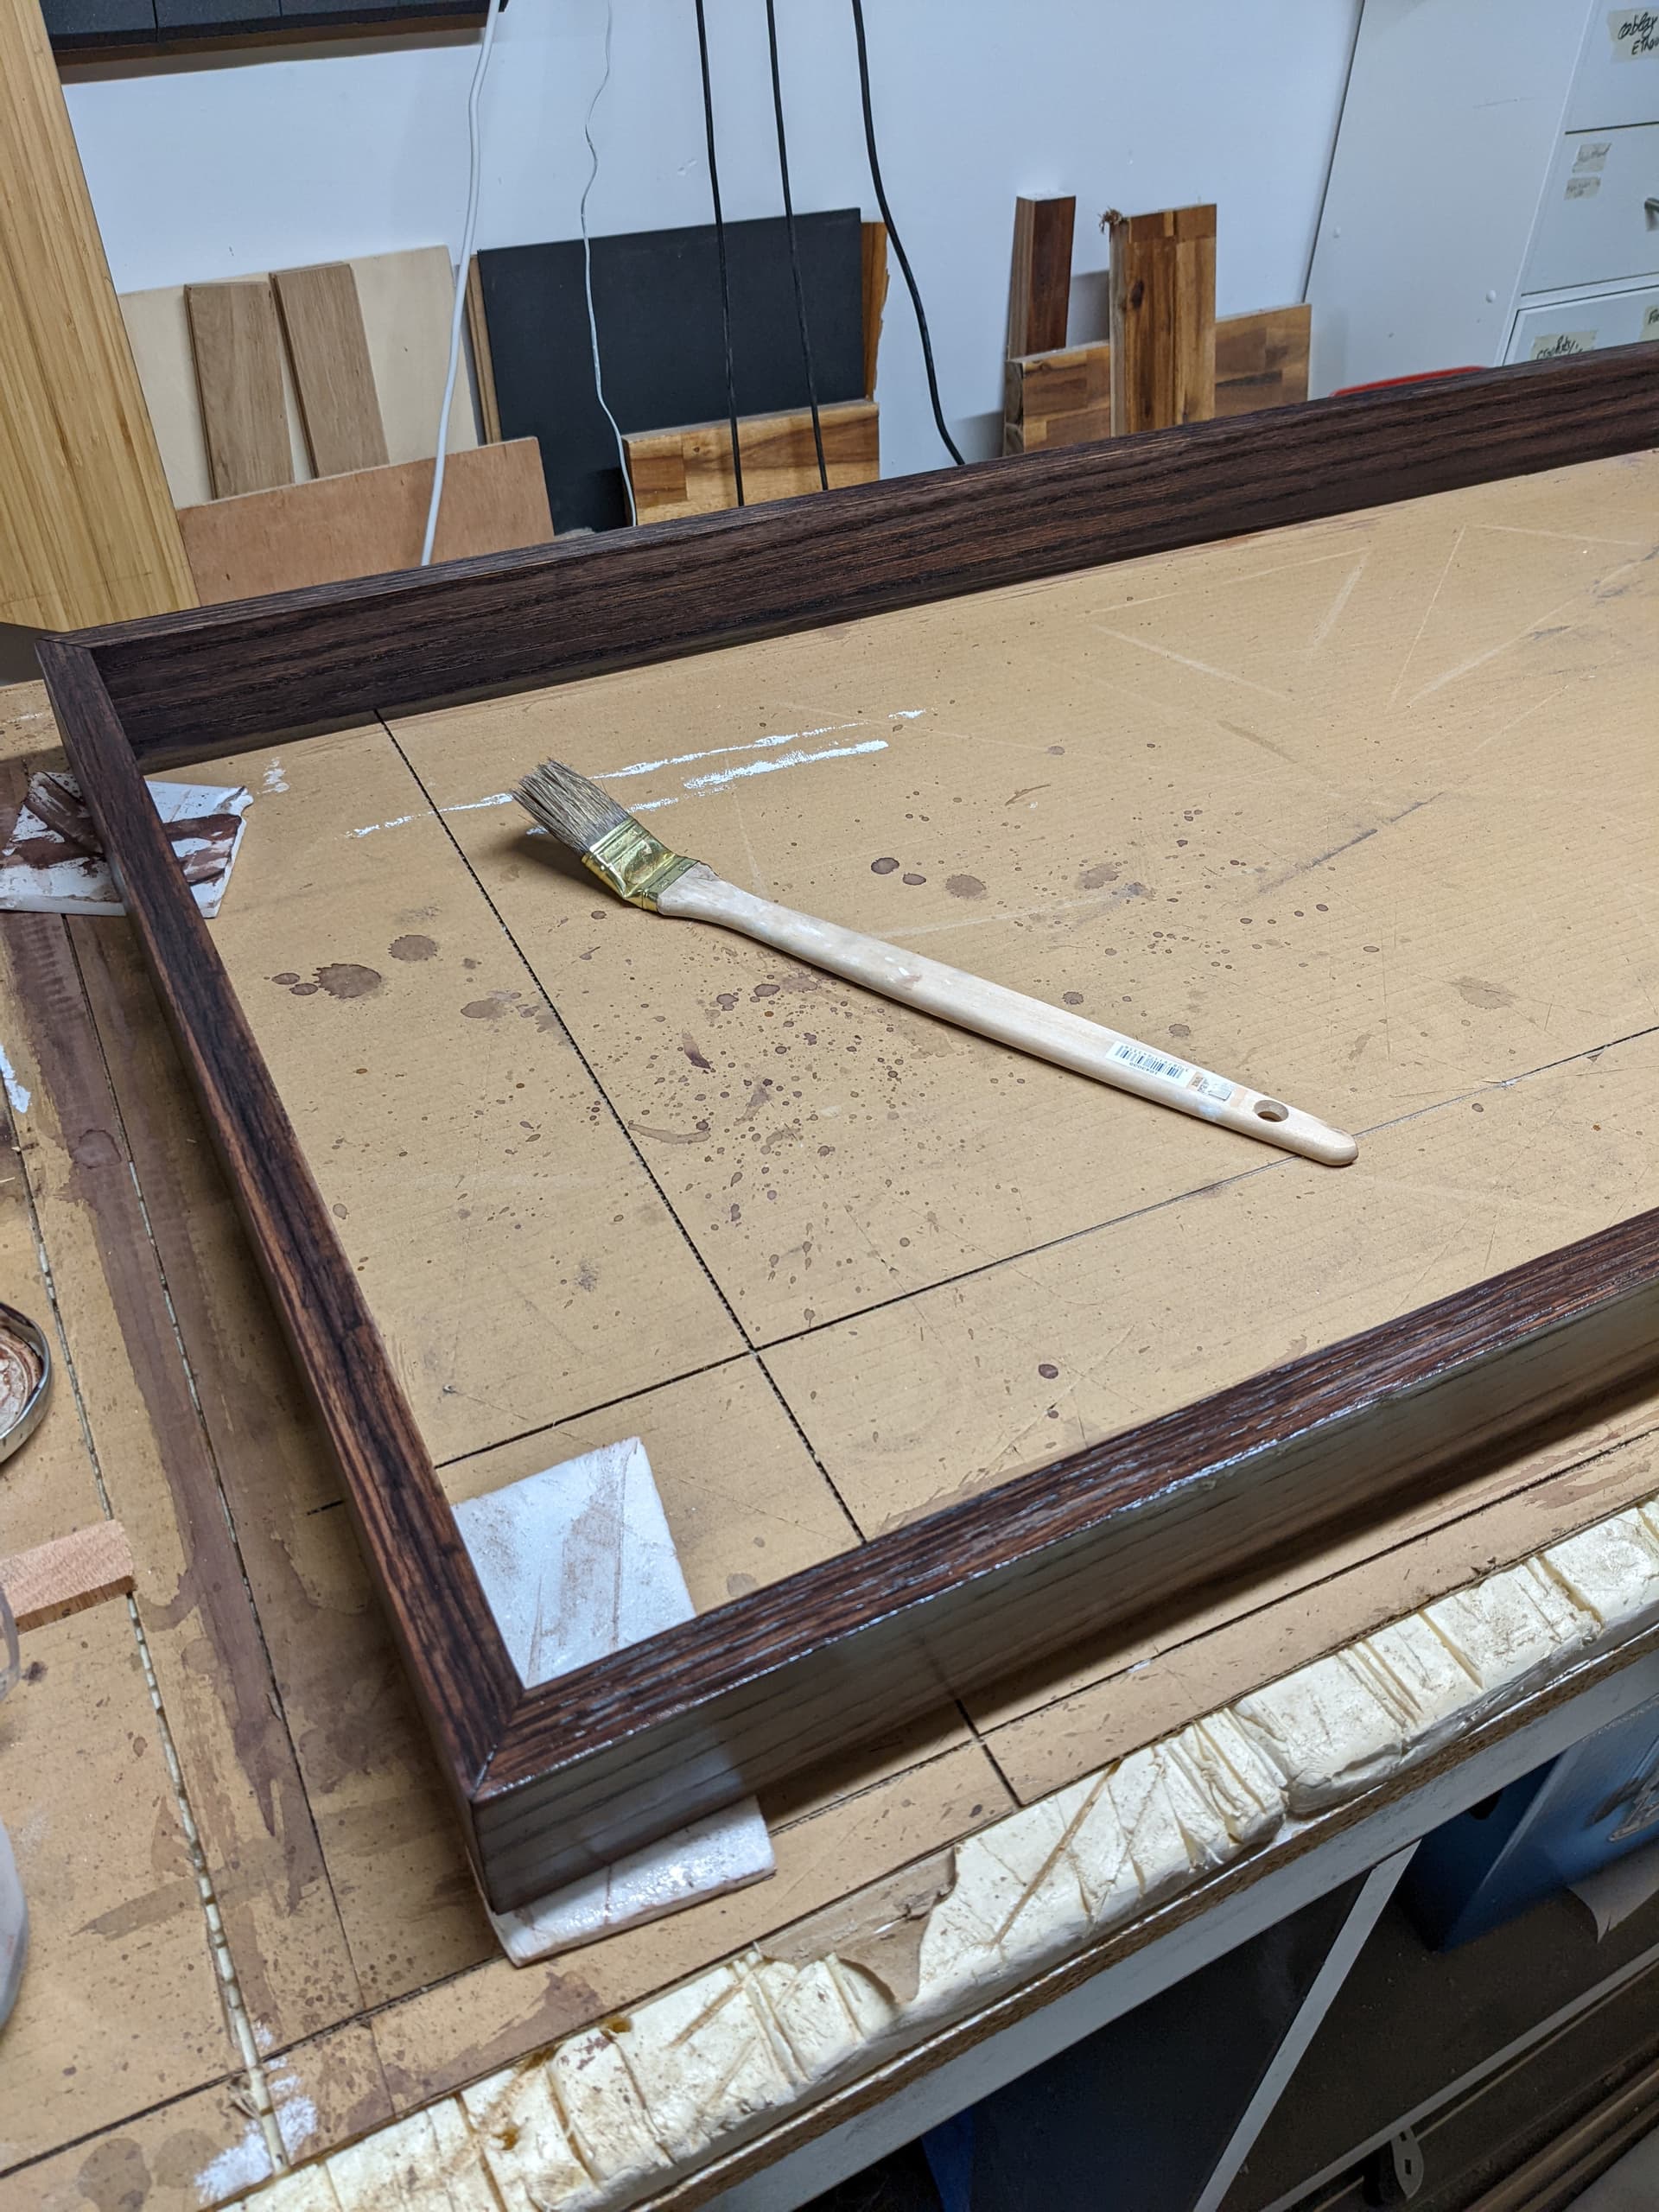
While the frame looked bad yesterday evening, it turns out that after it dried completely overnight AND I rubbed it with a piece of cloth, it looks quite decent. So since everyone knows that third time is the charm, I sanded it ONE LAST TIME,

and applied a FINAL coat of vinegar/steelwool. And I say “final” in the sense that I threw away the rest of the jar on purpose, so that I can’t change my mind tomorrow evening 
I believe that when that third coat is dry, and I wipe it again with a cloth, and apply the finish, it should looks just right. Not ebonized, but a cool dark wood appearance. Or so I want to believe!
BUT, since the vinegar/epoxy mix seemed to be getting better (darker) every day, I decided to prepare another fresh jar and leave it alone for a week. Then I’ll use some on a test piece of wood, for science.
Right now it’s making bubbles, as it should, so I’ll forget about it until next week

Turns out the CNC part was quite easy compared to this 
4 Likes
Sounds like you’ll have just what the boss requested!
1 Like
Fast forward 1 week…
Julien: Hey everyone in the name of science check out my ebonized spoilboard!
2 Likes
I believe the project has now become quite French with things pickling in vinegar in jars ![]()
2 Likes
Oui Oui !!! Very French
1 Like