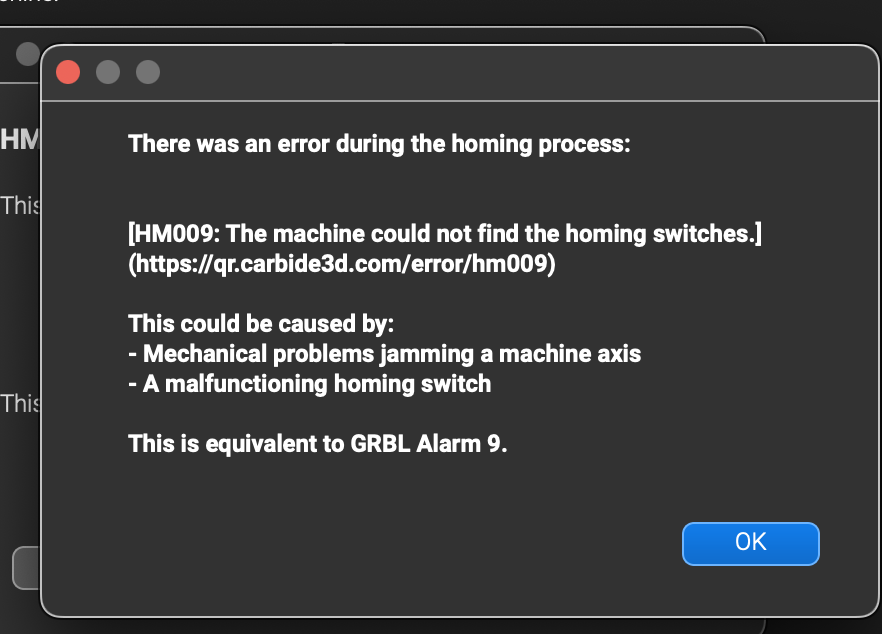
I was routing some squares 22x22 inches (well within the specifications) when suddenly the sweepy nails the bit setter at the front fight of the machine. From there onward, the machine doesn’t seem to know where it is.
The gears are grinding when it trys to go all the the way left on the X axis…and when it tries to find the bit setter with a job, it’s confused and misses it by almost 2" now!
I had assumed I could cut within the full 24x24" space, but it was not even able to cut a 22x22" out of a full 2 foot x 2 foot board.
How do I reset or recalibrate? I’ve tried to turn off an re-initialize, but that does not seem to fix it. Here’s the error:
Can you check the homing or proximity switches and see if the red light will turn on? (You can do this by just using your collet wrench by holding it close to it and see if the red light comes on).
Or is one stuck on already? Does Carbide Motion show a switch issue?
Where are the homing and proximity switches? Can you describe of point me to a photo of those? I used the “setup a new machine” and it seemed to work, but after turning on and off, it missed the bit setter position and the gears are grinding when it tries to reach it.
All I did was try to cut a 22 inch square (my second time using the machine) and when the sweepy slammed into the bit setter, it ground for a few secs and then continued on, but obviously the lines were no longer correctly aligned.
I hit the stop button as soon as I could, but something is definitely off. It thinks everything has shifted left and when it gets close to the edge, it sounds like it’s straining and sometimes grinding.
LOL!! Working mid shift.
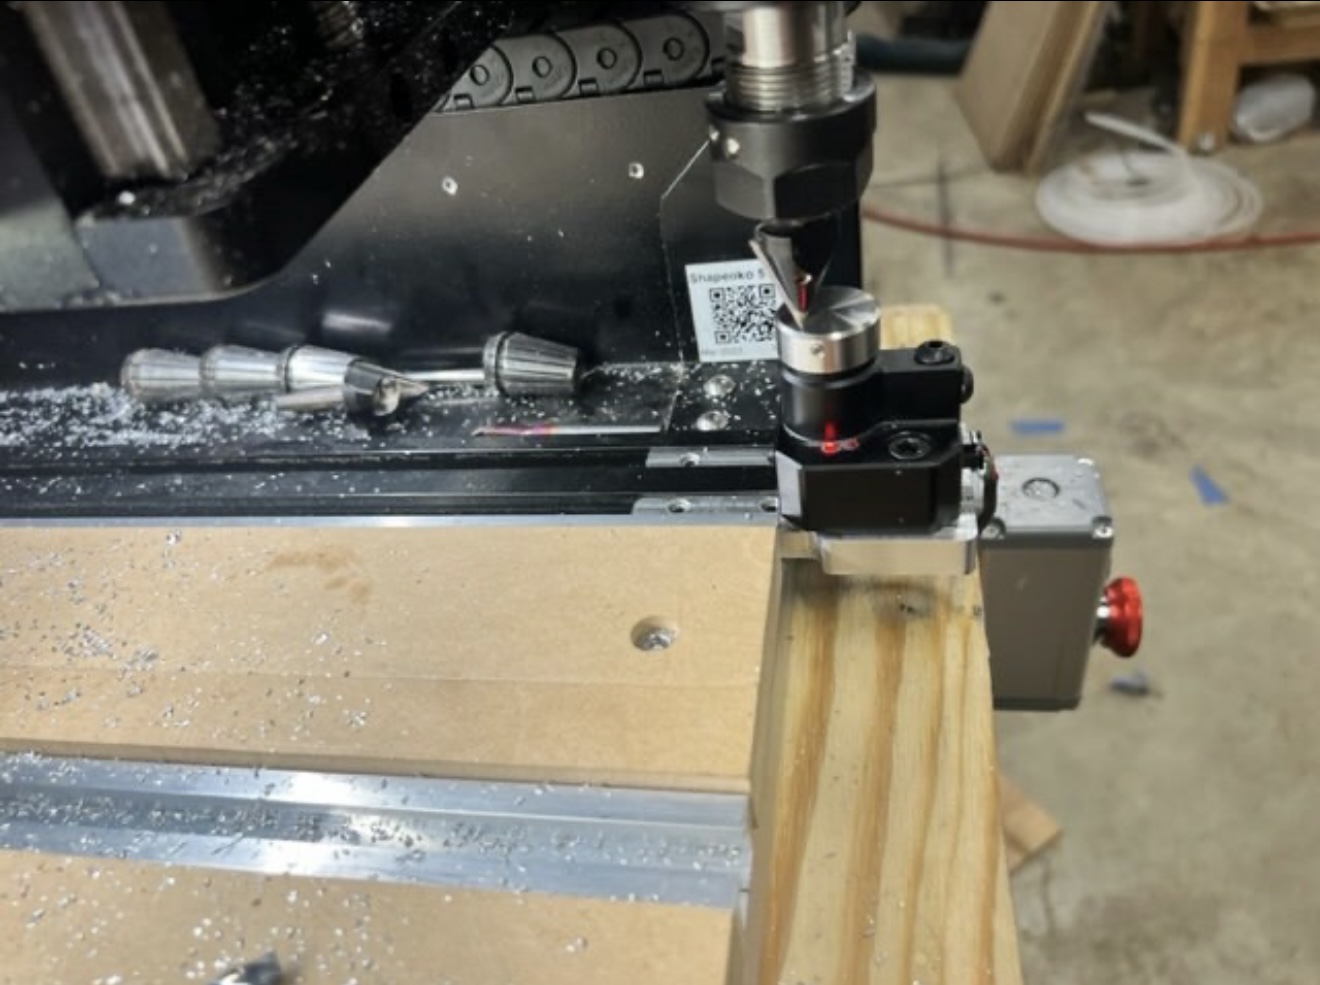
The switches are at the back of the Y axis and on the right end of the X axis. It’s the position the gantry returns to when you “initialize” the machine upon startup in Carbide Motion. You will see a little black switch. If you hold a piece of metal close it will turn in the red light. If it does not turn on then it could be a bad switch. You had a spare shipped with your machine. Take a look at it and then look at the back of the machine on Y axis. It’s one of the wires in the “wire keeper” you bolted into the back of the Y rails.
Why was the spindle even close to the bitsetter? There is plenty of room to set your stock away from it when cutting, especially if you only cutting 24”x24” stock.
Unfortunately the bit setter is right up front (front right) where the spindle will travel if I’m using a 24 x 24 inch work piece and want to cut something 22" wide. If you place a 24" work piece flush with the front of the machine, it’s going to be directly next to the bit setter.
I assumed all area within (and above) the spoil board is usable space - at least there’s nothing in the manual that says the workable space is actually much smaller than 24" wide. I did not see anything that said you cannot use the space that’s within 3" of the bit setter, but I found out tonight, the usable width is less than 24" of usable space if you’re using the sweepy…and you gotta use the sweepy, right?
The depth of the MDF is only 25", so even if you push it back an inch, you’re going to ram into the bit setter if you are using the 4" long sweepy. And the width is only 23", so the usable space near the front is actually more limited than I assumed…and definitely playing with danger!
There’s no markings on the machine that show where the actual usable zone is, but if there’s a manual that shows the actual usable area and where it’s located, I would love to see that. And certainly it should assume you are using the sweepy.
You have the 2’X2’ Pro? I thought you had the 4X2.
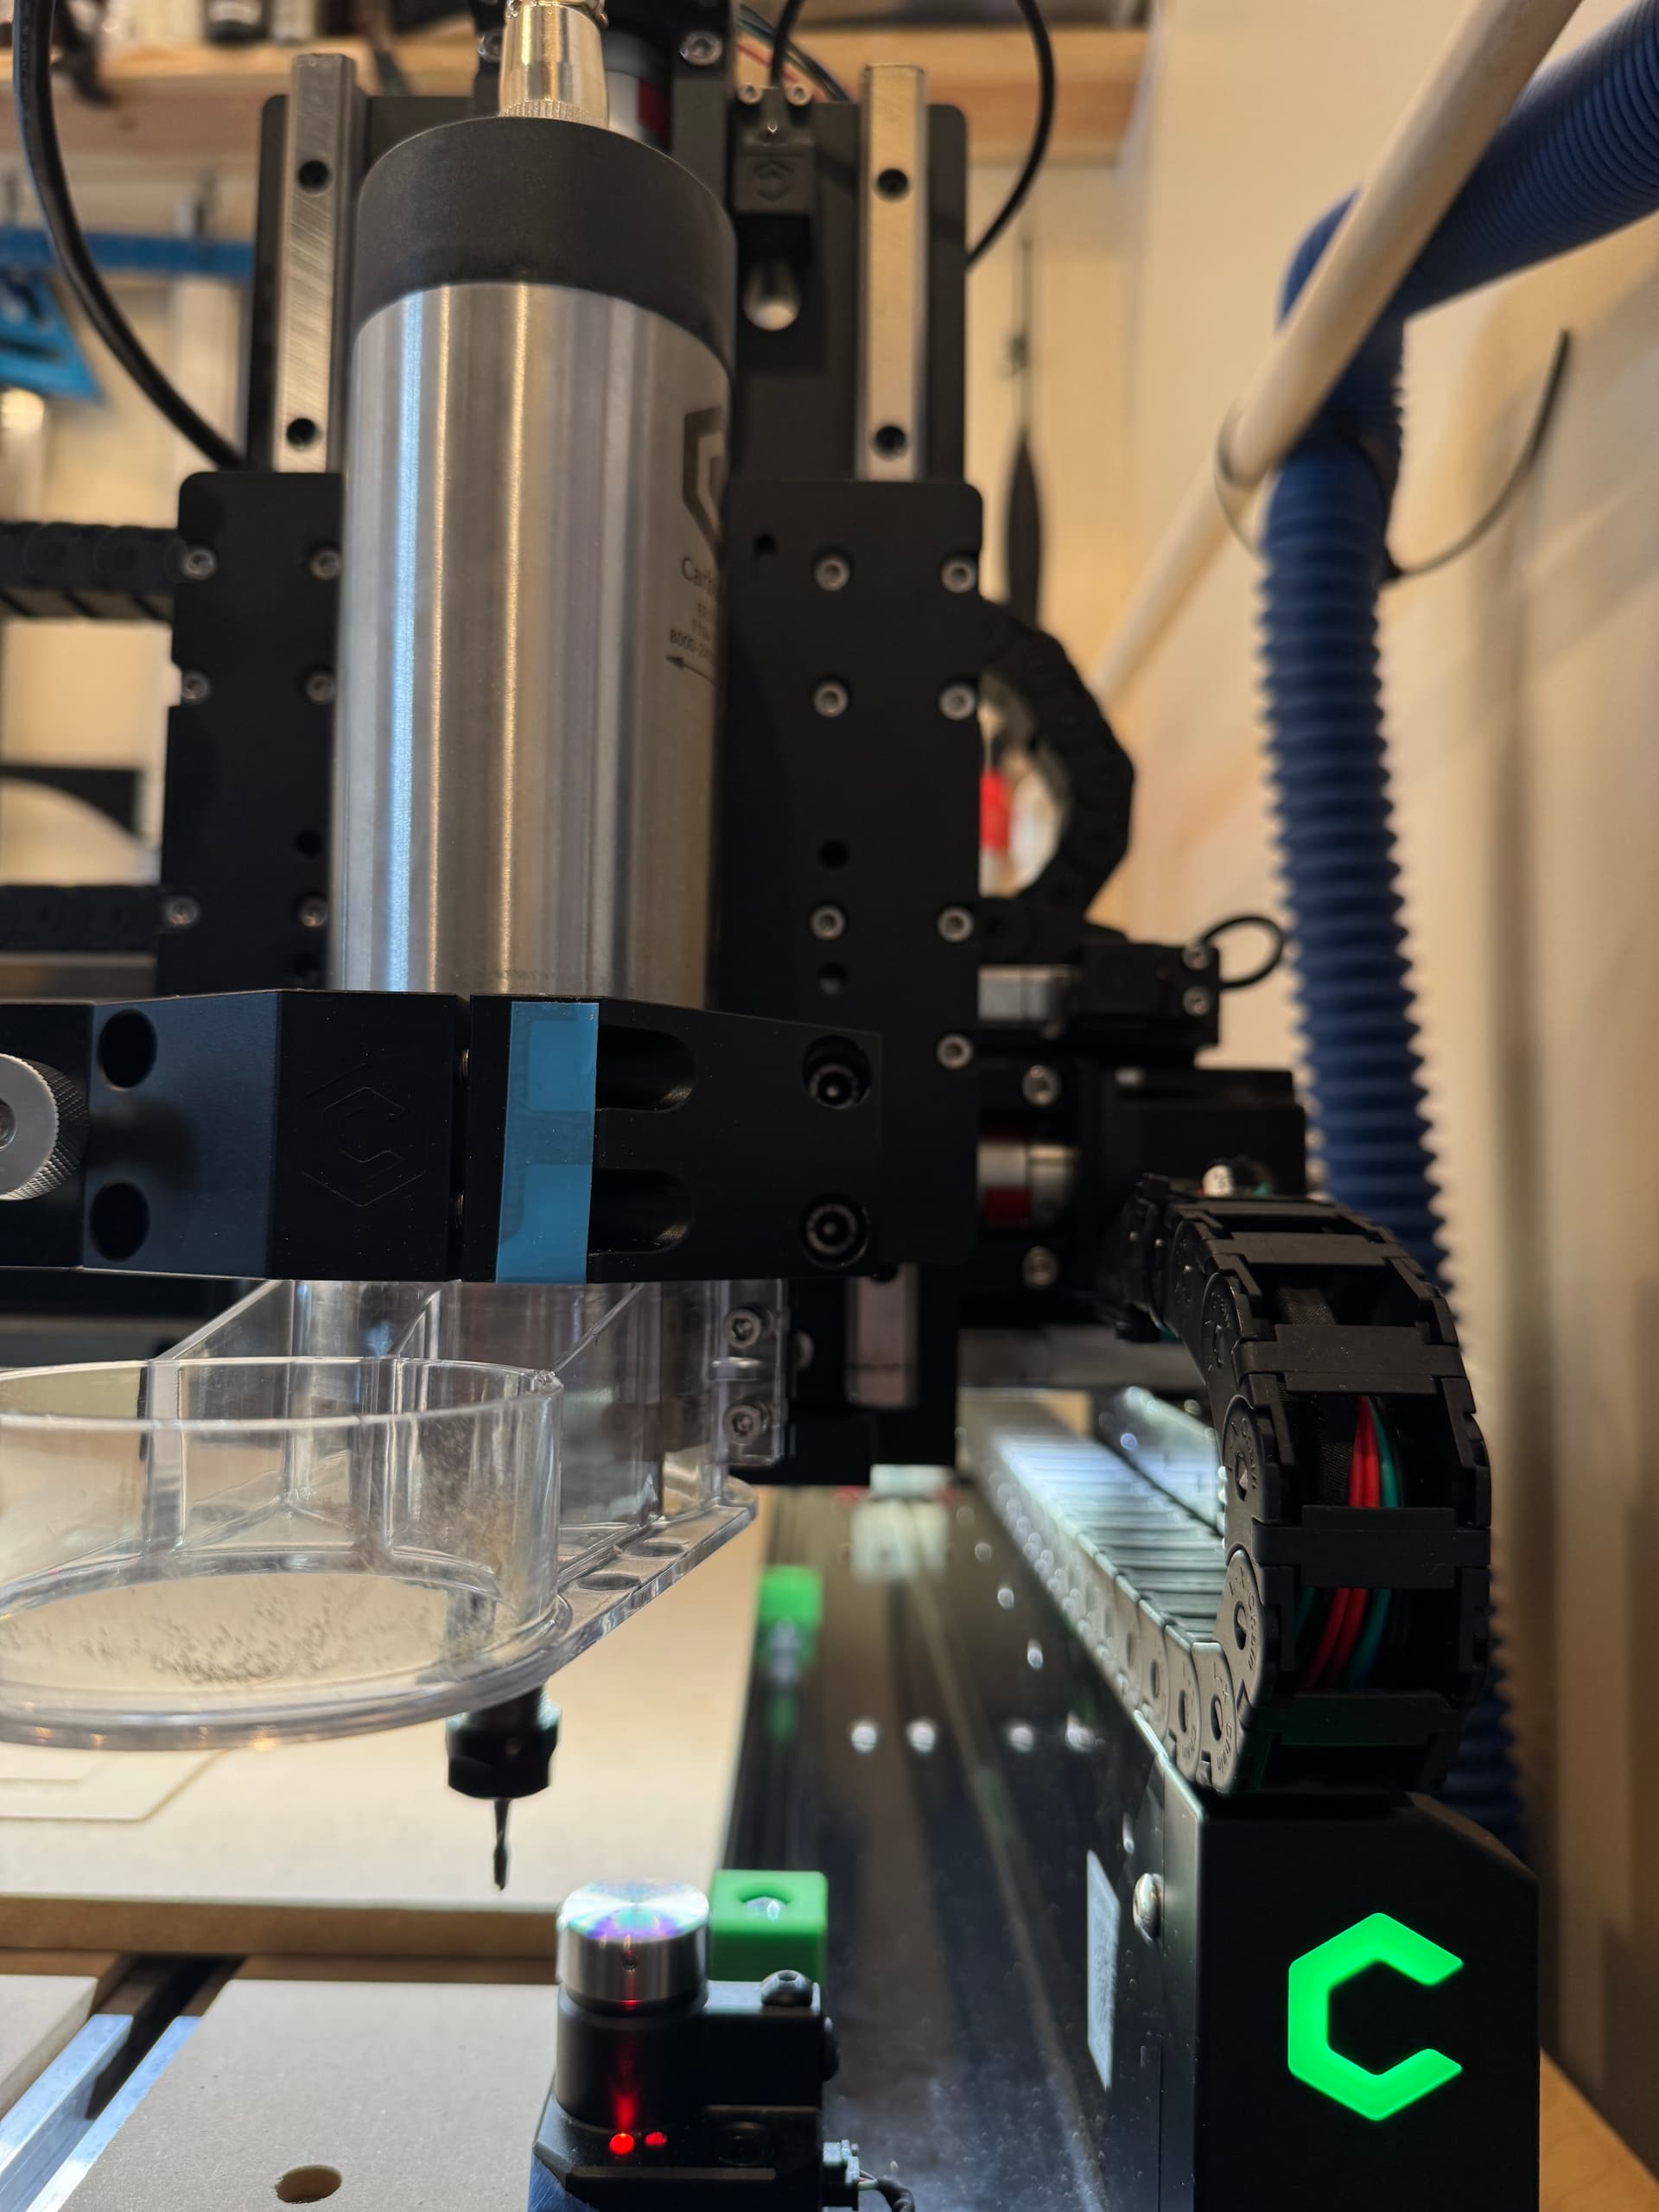
You don’t have to use the sweepy, you can cut without it. You just have to hold the hose or just clean up afterwards. This spoil board maybe slightly larger to hold your stock piece. You may need to adjust your sweepy to the left some to miss the bitsetter.
You can also make sure your sweepy is set up high enough on your spindle to miss you bitsetter.
You should be able jog your machine around with the x axis raises up high enough to miss the bit setter. Doing this allows you to actually see where there may an issue of running into something. I moved my machine all around to just learn this myself.
The other way to get around hitting the bitsetter is to raise the height of your stock off the spoil board with another piece of 3/4” MDF. This way your project is higher and the sweepy wont run into it.
How do I determine the actual zone that the spindle will effectively reach?
For example, if I have a work piece that’s 26" wide x 30" deep and placed flush with the front spoil board, how far back will it reach? Is it exactly 24" from the front of the spoilboard? Where does the Y start begin relative to the front? …and does it reach exactly 24" deep from there…or is 24.5 the limit?
Also, what about the width, can I cut wider than the bit setter, so long as the sweepy is off?
About half the time when I’m setting my zero, it will do the attempt at finding the bitsetter…and when it gets to about 1-2" left of it, the machine will make a very loud, screeching, grinding noise and I have to hit stop to avoid damage.
As I mentioned yesterday, it’s as if it no longer knows where it is on the X axis, like the spiral rod is offset incorrectly, even though I’ve tried to setup a new machine twice.
Although it is clearly damaged in some way. I sure hope this machine I’ve used once before to cut a square can be fixed!
When you start up Carbide Motion and “connect” to the machine, what does it do or say on the screen?
When you hit “initialize”, what does the machine do? It seems this would show the same result when initializing but only in the right rear corner of the machine.
I would let the support team walk you thru this. The machine is still working, it will cut again.
One thing I always ask for movement issues is, have you lubricated the linear rails/bearings lately? If a side has gone dry, it won’t move correctly. Also, check the stepper electrical connectors and the coupler from the steppers to the ballscrews.
Well, it’s brand new, so I have not lubricated anything, but it does appear to have sufficient lubrication in various parts.
Being that this started when the Sweepy hit the bit setter and the spindle and sweepy could not move past it…and the spindle immediately got “thrown off X” that I had programmed.
The spiral kept driving and ramming…and made all sorts of screeching sounds until it gave up…and that’s what it continues to do, but it’s odd, it happens when I finishes a project and try to keep the same X Y to do another project.
The second project screeches because it can’t move any further right and misses the bit setter.
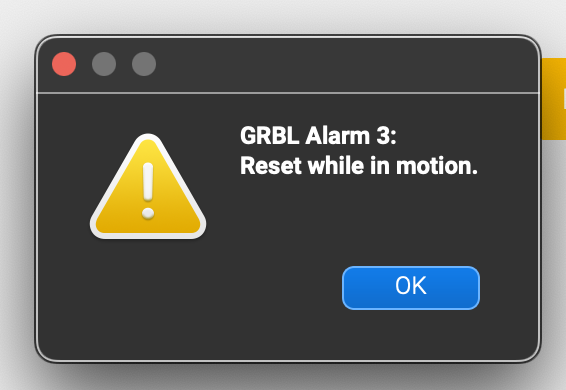
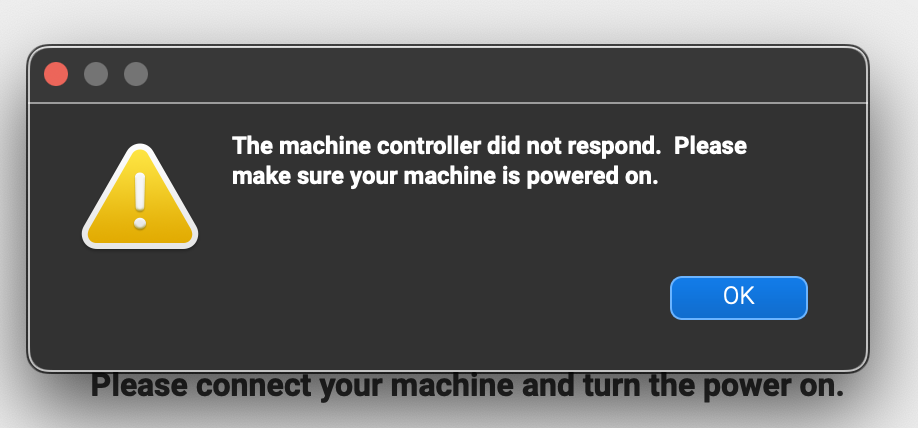
See below - this is the error I’m getting now, even with the machine on, the green C lit, the LED lit and obviously my computer. Since the incident, it connects sometimes…and sometimes not. I have to reboot everything a few times now, whereas that wasn’t the case before. It would connect every time.
downpower computer, like you would normally shutdown. Leave at least 5 minutes.
downpower the black C3D controller power. Cycle the power switch while unplugged. Leave it off for 5 minutes.
With everything shutdown, slowly push the X axis all the way to the rear and the spindle to the right corner. Just like the machine does when you hit “initialize” in CM. Leave it in this position.
Power up the C3D controller with the E-cutoff switch in off position.
Power up computer and open CM. Ensure cable connected to computer and C3D controller.
It seems from your reply’s above, you need to manually move the spindle all the way to the right against the proximity switch. When you power on with the E-switch, before you hit connect or initialize you should see all three proximity switches with a red light on. Maybe with the red light on the X axis (spindle against the hard right side) then you can hit connect and initialize with proximity switches in correct position. This might reset the X axis back to where it knows it’s at.
Should not hurt to try. If this does not resolve I would not try to cut anything until support helps you out.