Hey I came across this image today and I wanted to ask: Can Shapeoko Do This? And if so, how would “you” go about achieving the small letters? V Bit? Tiny Endmill?
Feel Free To Share
Thank You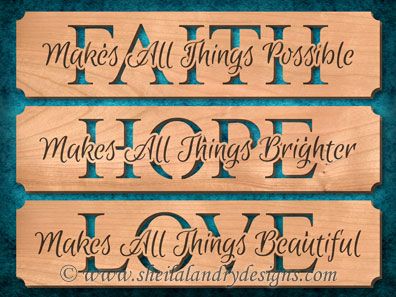
Hey I came across this image today and I wanted to ask: Can Shapeoko Do This? And if so, how would “you” go about achieving the small letters? V Bit? Tiny Endmill?
Feel Free To Share
Thank You
Cut the small details out using a V endmill using a V carving toolpath.
Project design is pretty straightforward:
But once you boolean, it all becomes one path won’t it? how can I then pick and choose what gets the V and what gets the endmill?
Please try it — you’re Boolean subtracting the offset path from the detail text — after the offset the detail text remains.
So I can never seem to get my Booleans to work right. I selected the Top offset then the back bottom text like you said, but most of the back bottom text disappeared, so then I switched it up and …it just didnt do right. did I miss something?
Here goes what happens, maybe you can tell me what I did wrong https://screencast-o-matic.com/watch/cYjDf2GmQs
The key object (indicated by having a dashed highlight) is subtracted from the other object.
Select the text “VETERAN” first, then shift click on the offset text and then Boolean subtract.
Remember that if you undo the operation the selection will be reversed, so undo and then retry usually works.
Hmmm…so this is what I’m suppose to end up with?
I purposely removed the detailed text just so you could see this goodNo, you’re supposed to remove the outline from the text behind it — it may be that you’ll need to duplicate it and drag the duplicates back into registration with the originals several times — if you have difficulties please post the file.
I took a shot at this following @WillAdams advice and was able to make it work - but it was not easy.
I found that, in order to make the subtraction actually work (not sure why), I needed to work with a single letter at a time and a single word at a time. If words crossed two letters, it simply wouldn’t work.
So…I was either going to put in a separate text field for each letter, or I typed the whole word in, then did an offset of the text and didn’t join them together again…so I could select each letter individually.
I did the same thing with the text.
I created the plaque with an inverse fillet
I created the text “LOVE”
Then I created “Makes all things possible”
Then I created an outside offset on the “Makes all things…”
Then I created an offset for Love
I selected ONE LETTER AT A TIME from “LOVE” and made sure the “Makes all Things” offset was still selected as the dashed line
Boolean subtract
Repeated with each letter of “LOVE” and all of the overlapping words, until I had done them all
That worked. However, I had TROUBLE with any text that crossed two letters. I actually had to create copies of the words that were the second that overlapped the letter and use those to subtract. So “Things” had to be reproduced in order to separately cut the O and the V.
Then I found that I had secondary overlapping copies of a whole bunch of the “Makes all things…” letters - that I selected and removed independently. This let me set up the toolpaths correctly…and I FINALLY got it to work.
This was NOT straight forward.
Not able to stop…
I went into LightBurn, where the tools are a bit more powerful and easily created the cutting. Again, I wasn’t trying to get the offset or anything…just trying to get the letters to easily cut each other out. This worked very easily in LB… I exported the SVG and imported into CC and applied the toolpaths:
Unfortunately, not so easy in CC
EDIT: I tried with a script font in Lightburn…equally easy - however, selecting the parts of LOVE with the script cutouts to make the Toolpaths in CC was not as easy. Doable, however.
With the script font, you’re at least able to do on word at a time — usually these designs use connected scripts for both layers which makes this easier.
This difficulty has been mentioned and will hopefully will be addressed at some point in the future.
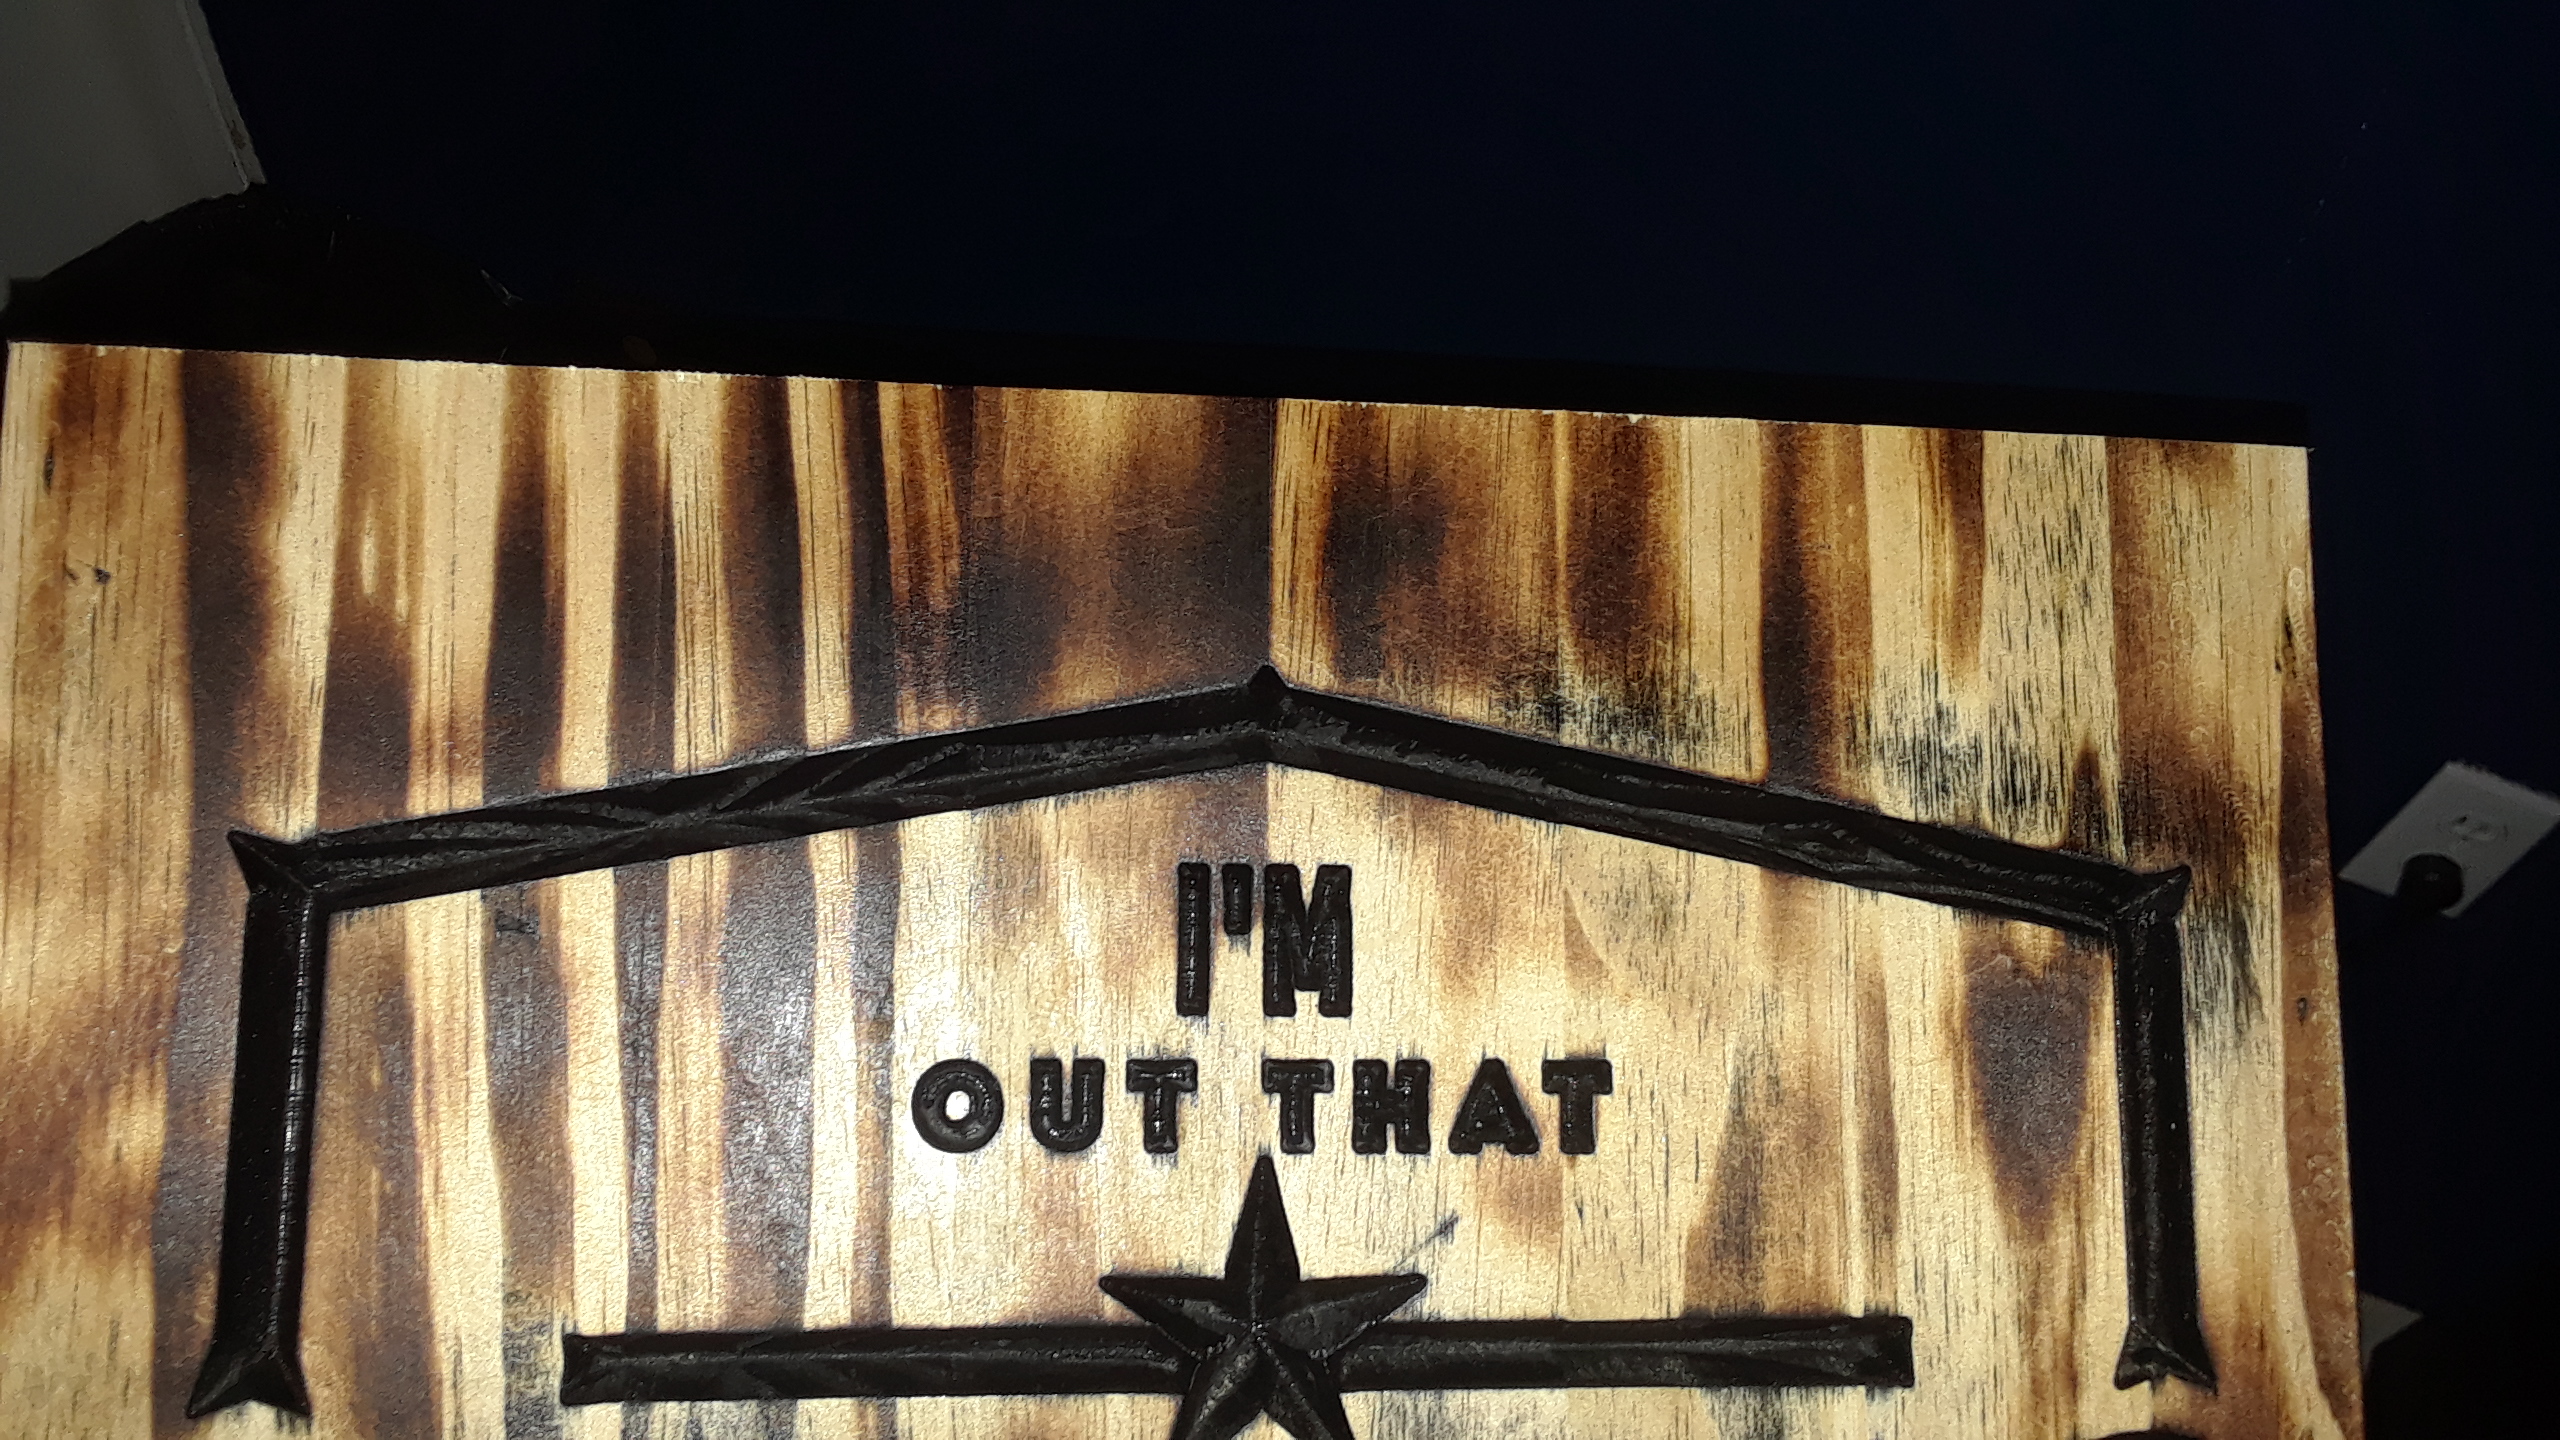
Yeaaaaah, I’m with you. I decided I’d just get into my graphic design software and just create the knockouts in there. So then the thing became, @WillAdams told me I should use the V Bit, But I’ve just not every been successful at controlling the V Bit’s depth, matter of fact, my research pretty much led me to believe that with CC you “cant” because it calculates it by line width or something. So…When I do the simulation of my V Carve, I’m not seeing it go “through” therefore, I…I just gives up lol. I’ll admit it. I’m wondering if nice small, scriptive text could be done with a 16th or 32nd endmill because I just can never get my V bits to carve how “I” want them to, they seem to do their own thing. Take a look at this sign I made, notice when the V bit got to a sharp corner, it made those “extra” little dip outs? I was like…WTH??? lol those were not in my design lol !
This usually happens when the angle of the vbit you used for the cut does match the vbit angle you selected in the design , check that first ?
This is caused by not matching the V endmill of the tool to the V angle in the software (3D preview doesn’t match result) , or using a V endmill to narrow to cut out the area desired (3D preview shows that this will be the result) — either use Advanced V carving or see:
for a work-around.
Wait so @WillAdams & @Julien are you guys saying that I had a v bit chucked up that did not match with the edited tool in the library? or did I misunderstand?
I’m saying that’s one of the things which causes the problem.
I provided two descriptors:
which matches determines the underlying problem.
Cool beans. I’ll take a closer look at the file and try re run it on some scrap. Preciate it.
If you load it in Carbide Create, you can select the letters you want, and set the toolpath for it. This includes your end mill and depth. Then create a new toolpath for the other text.
This topic was automatically closed 30 days after the last reply. New replies are no longer allowed.