I have a tree cookie that I’m putting a design into. It’s hard to find the corner of the cookie because it’s round and odd chapped. I can however find the center. Is it possible to set in carbide create the center point as the starting point of reference?
yes: 
2 Likes
I’ve already tested it with Meschcam. But never with CC. There’s no reason why it shouldn’t work…
So when I’m zeroing everything I just zero it like I would be on the bottom left corner? Easy enough.
I always use the centre as a toolpath zero (coincidentally I just wrote this in another post :)) since you never need to consider what constitutes corner alignment for a round endmill.
One cough issue you might find is that CC won’t remember the toolpath zero in the same fashion it remembers all the other things on that settings page/tab thingy.
2 Likes
Just to be sure there is no misunderstanding I’ll state the obvious: you need to zero (physically on the stock) consistently to where you have declared your zero to be in CC. So in your case, if you set the Toolpath zero to “Center” in CC, you then need to do the zeroing in the center of your piece (probably manually with the paper method, because using the touch probe is not very convenient when choosing center, at least for X/Y zeroing it’s not).
I like to use the center for most projects because I can recycle projects and put the toolpath on a larger or smaller piece of material without having to edit a lot of parameters. For rectangular and square stock simply put on a piece of painters type in the approximate center. Then use a straight edge from corner to corner and mark with a pencil. I like to use the painters tape so my project is not marked up. After marking the center on the painters tape just center the router bit over the mark for x&y. You can use the touch probe if you have it for the Z. If you have difficulty finding the center with a round end mill put the vee bit in and center x&y and then put the round end mill back in. I keep a flashlight handy to help with centering as the router casts a shadow on the spoil board and the flashlight helps get an accurate placement of the point of the bit.
3 Likes
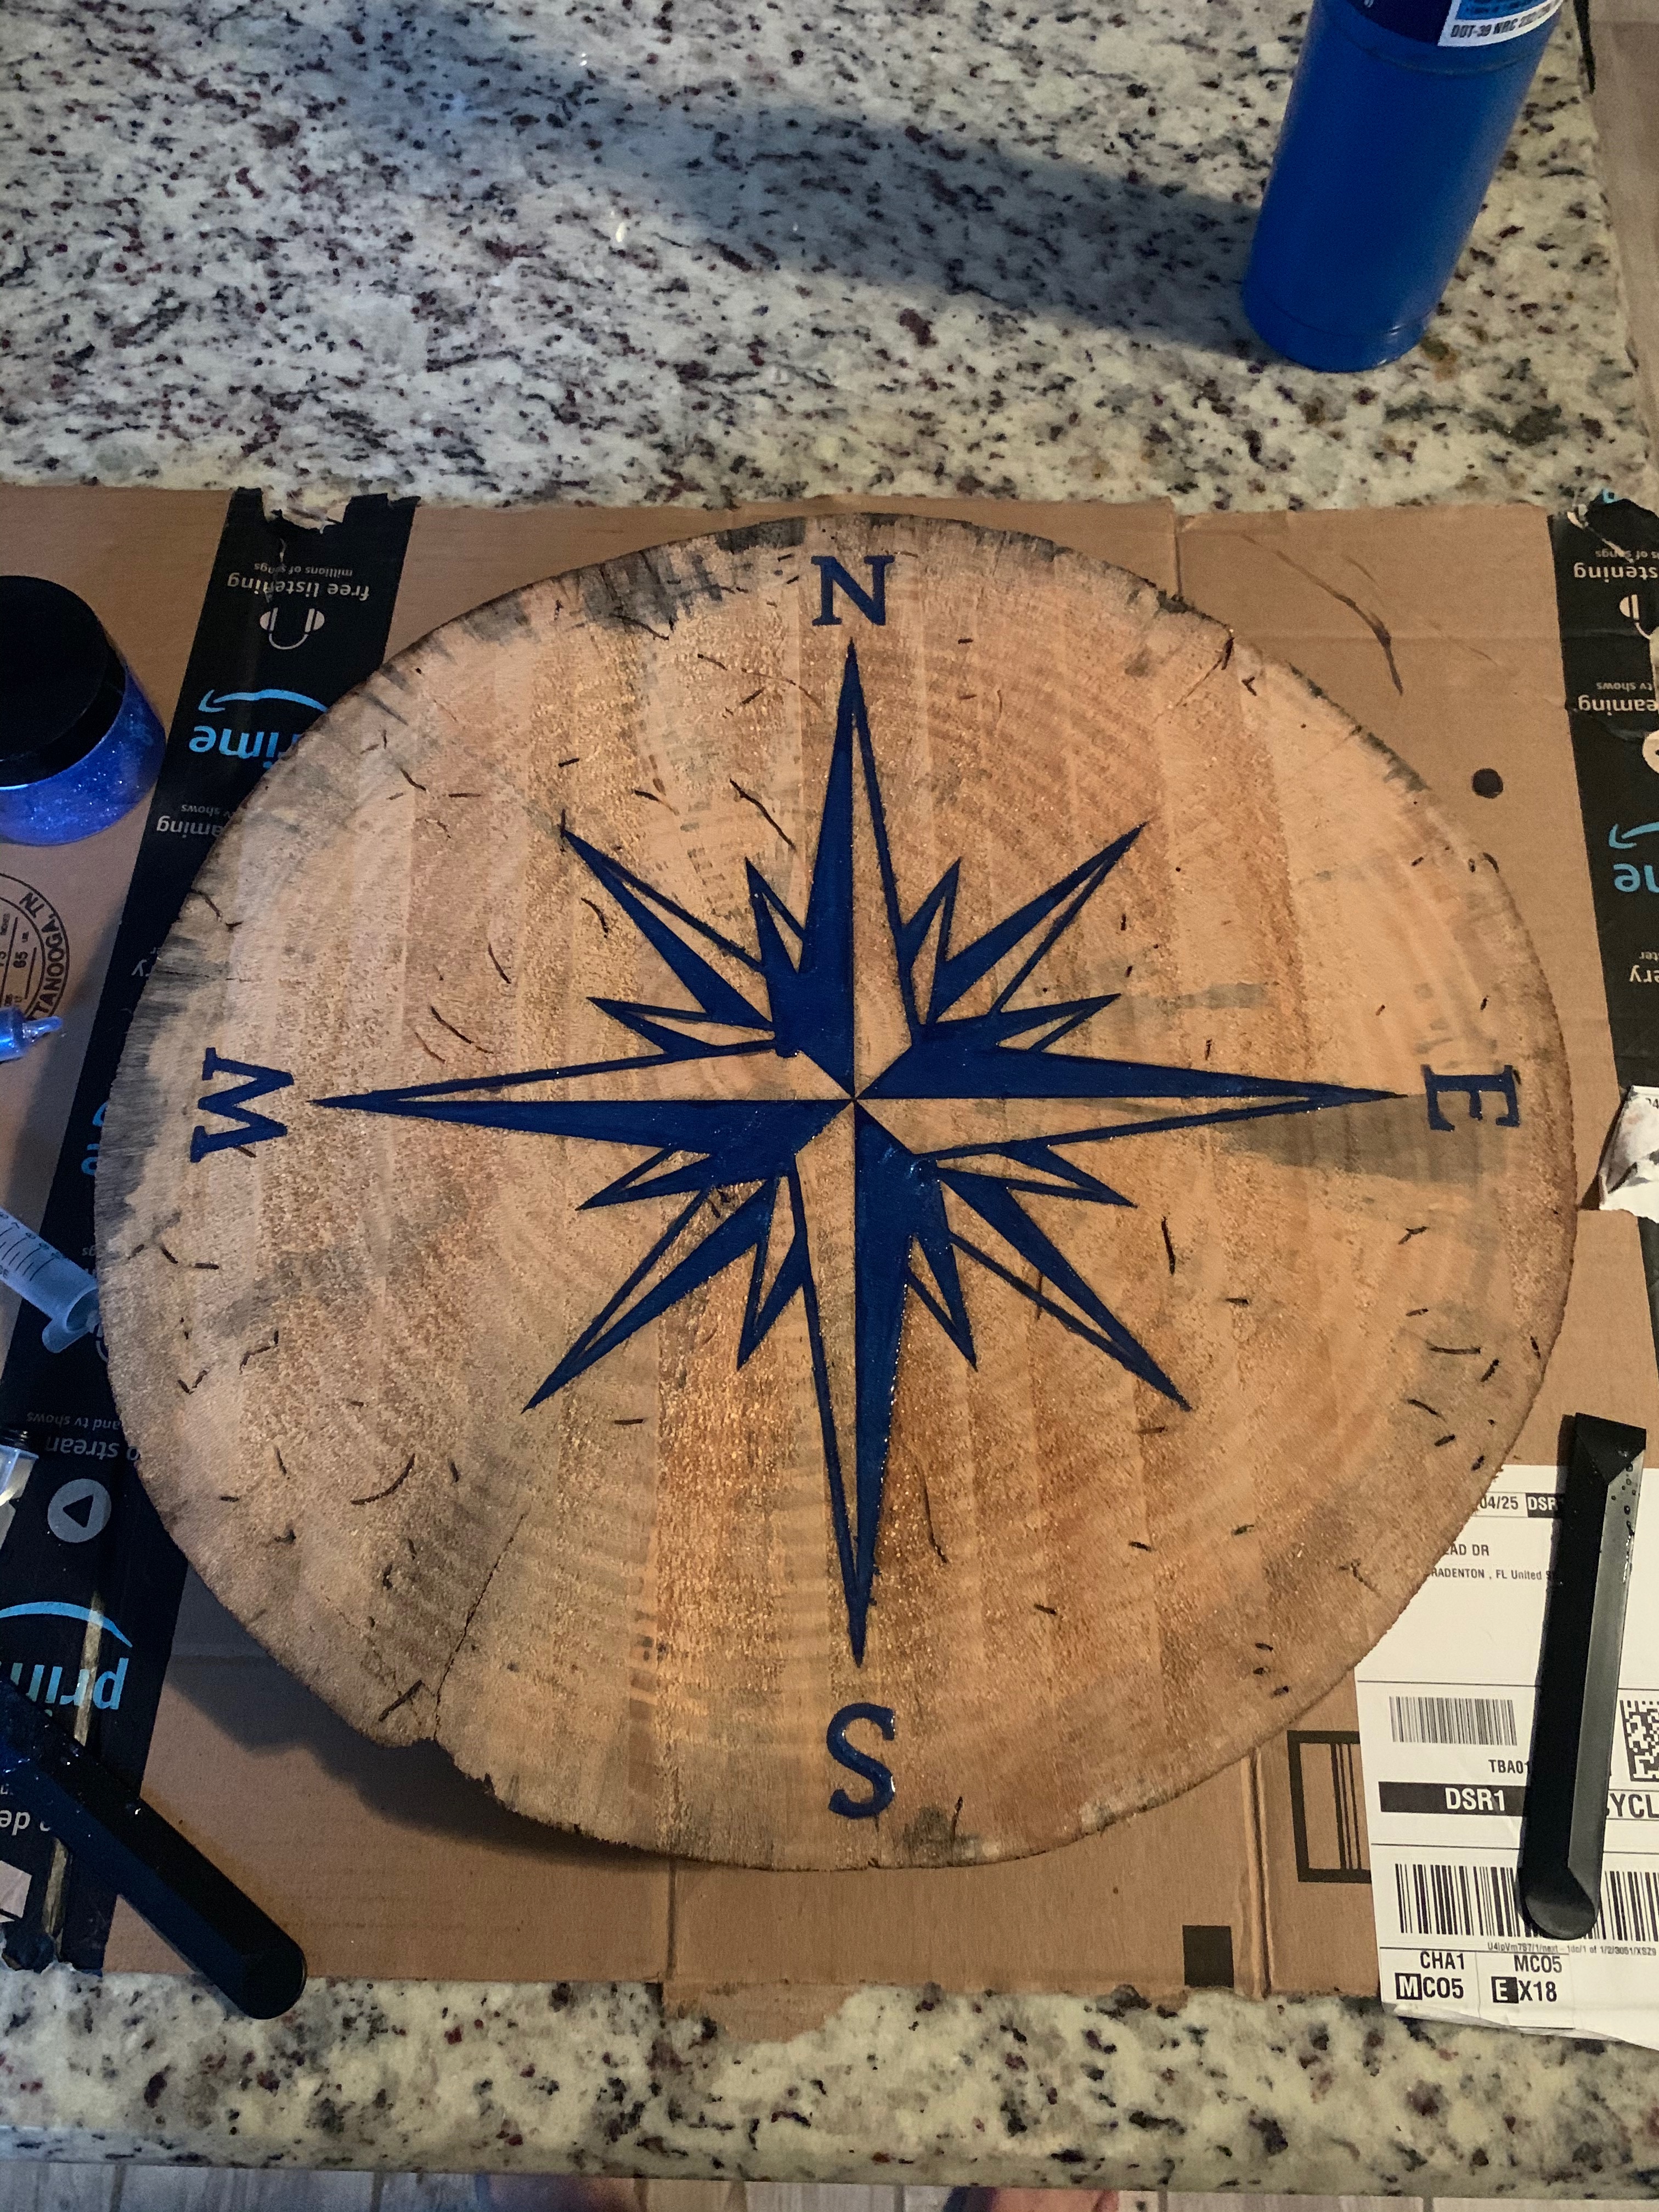
Worked perfectly. Was worried about setting the center as zero thinking it would default to bottom left, but in the end no concerns!
6 Likes
Nice job!⠀⠀⠀⠀⠀⠀⠀⠀⠀⠀⠀
That’s really cool Ryan! Is it epoxy filled and if so, what kind? I’ve done a few end-grain epoxy fills and really enjoy the look after milling flat.
1 Like
Because the pour is shallow I am using West System Epoxy. Faster cures. I prefer Ecopoxy Liquid Plastic but dont like to wait three days for it to cure on something like this.
1 Like
Some of these questions hurt my head…
Hurt mine just asking something so simple. Over thought the obvious.
This topic was automatically closed after 30 days. New replies are no longer allowed.