I had posted previously about an issue I was having and thought it was a combined issue of work holding and relief in the material when it came to to chamfer and edge. Bah… Still have the issue and I have yet to understand why it’s happening.
To eliminate the work holding issue I thought I was having with two sided tape I went straight to clamps. Ensured that the bed surface is level and the spindle has been trammed correctly. The bed was flattened after tramming. Ensured that the material I was using was flattened on both side to eliminate any warp that may be in the material. Ran the chamfers tool path first just to see if it could be the material moving after a pocketing operation. After the pocketing was completed… The chamfers were still off as though they were shifted to the left a small amount.
Ran that same test again but did the pocketing first and yes I still had the same shift when the chamfer operation ran.
I have also just noticed some other strange tool path things that appear… Shifted during operation to the tune of some text that was pocketed and the very outer line having a slight dip or shift… Some small circular holes not being concentric…
Tried the new version of CC and didn’t see a change. Is there a way or do I need to verify calibration of my machine?? Seems like something isn’t quite right with the accuracy compared to what is set in the software.
First, verify that the machine is in good mechanical condition, with all wiring in good condition and all connectors secure.
Check feeds and speeds and tooling engagement, ensuring the former are suited to your material and tooling, and keeping tooling engagement as low as possible.
If you have a belt drive machine see:
Upload your .c2d file and photos showing how the cuts turned out?
I’ll run some tests tonight to post pictures and the files.
My 5pro currently is less than one year old and I try to keep it as clean as possible and keep it well oiled with the provided maintenance kit. Haven’t had any head crashes or issues with anything loosening or not being out of place that I have found anyway.
I’ll also verify the depths of each pass I have in a particular project. I typically do not wander to far from the CC defaults for the tools unless I know for sure I can adjust without any adverse effect.
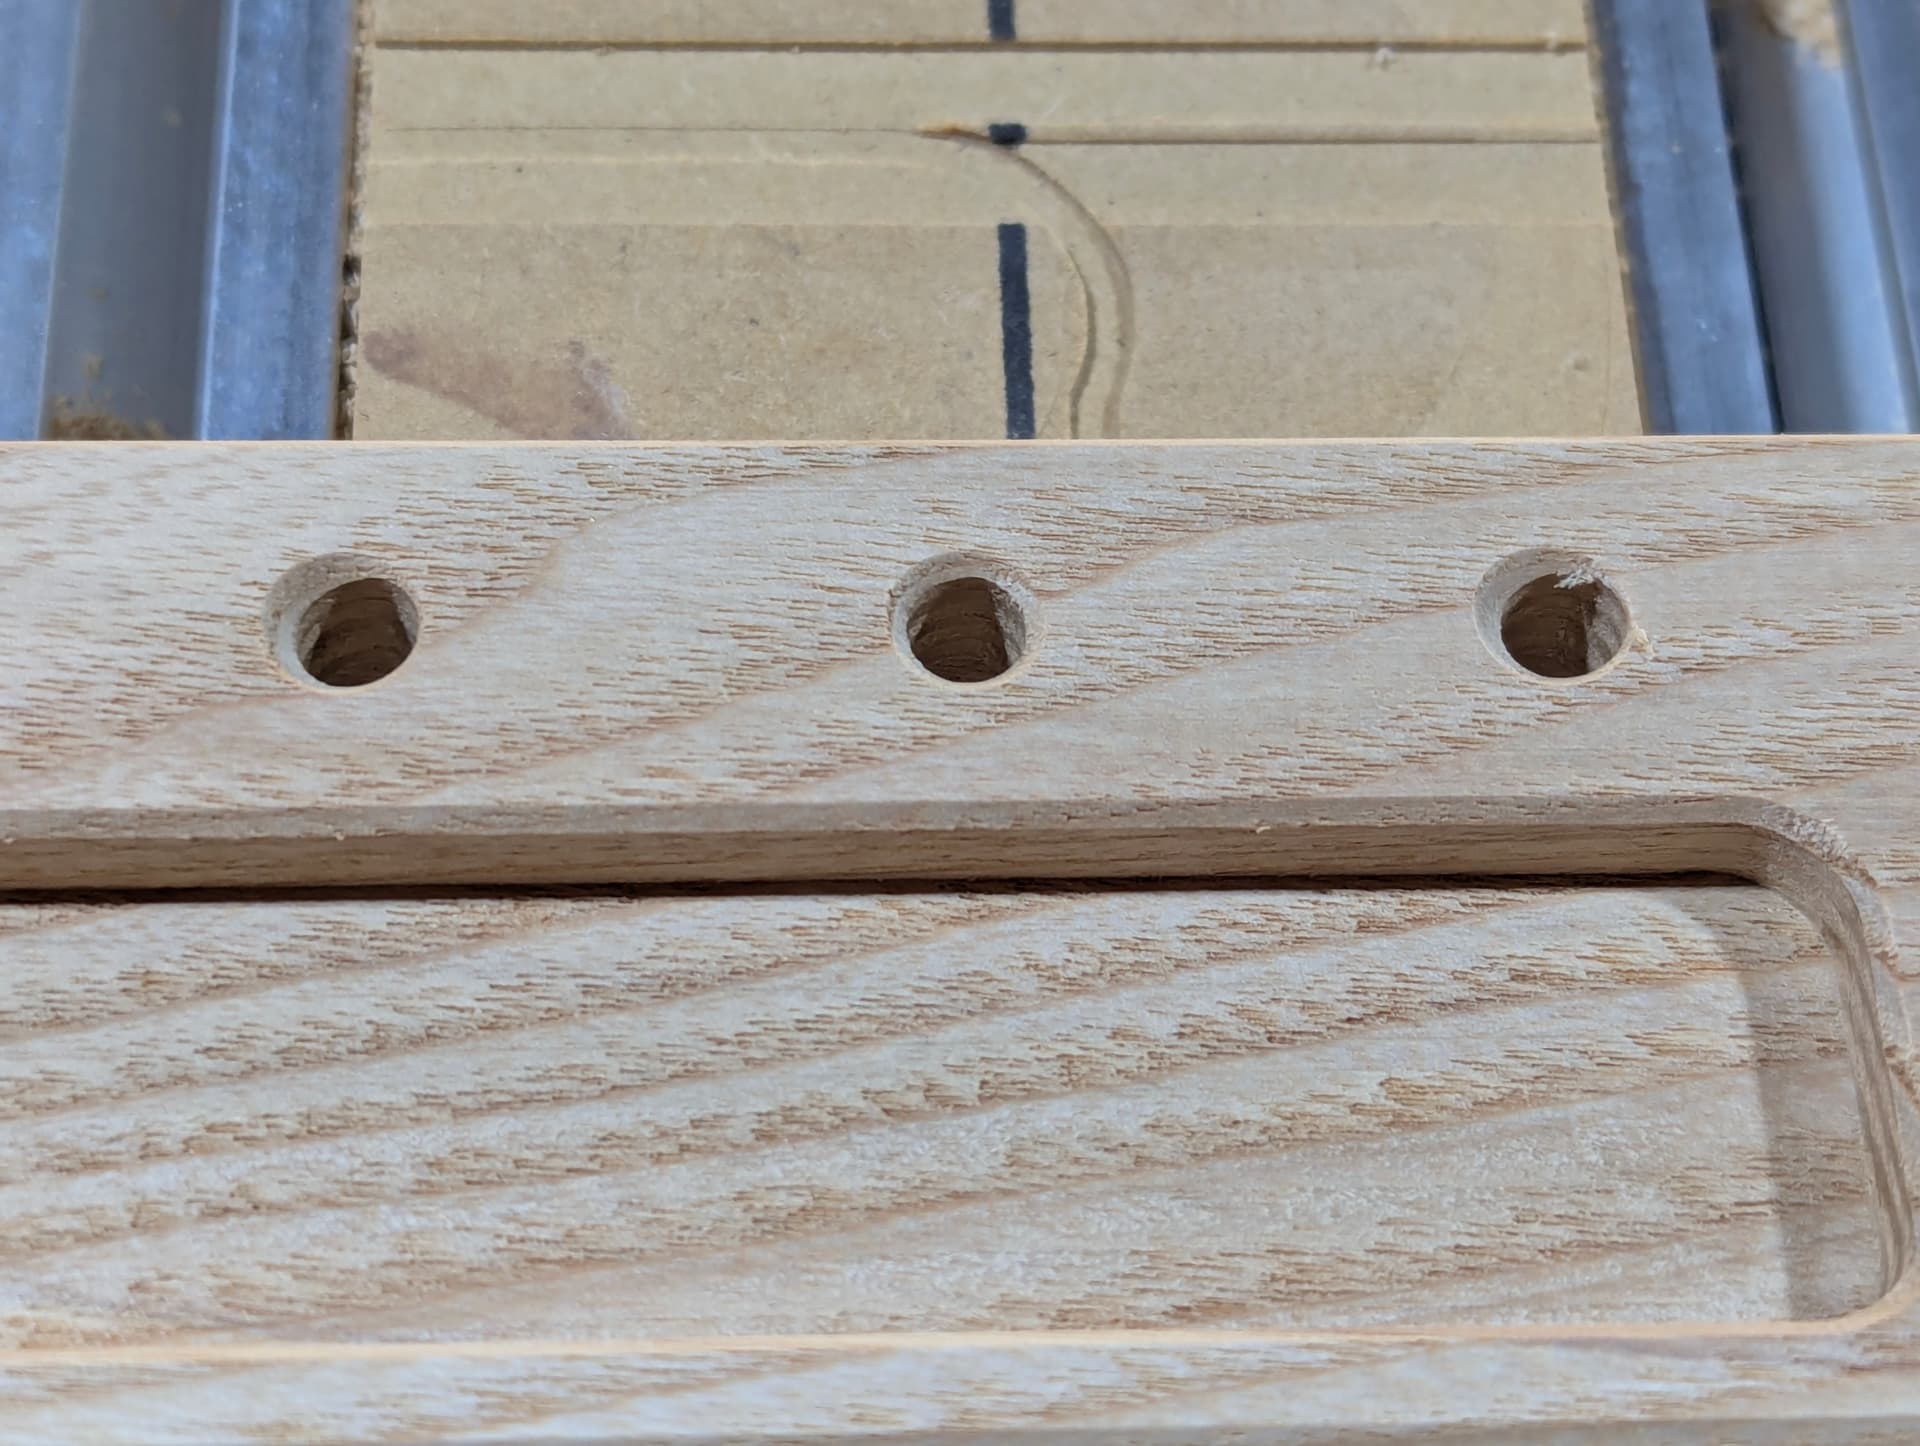
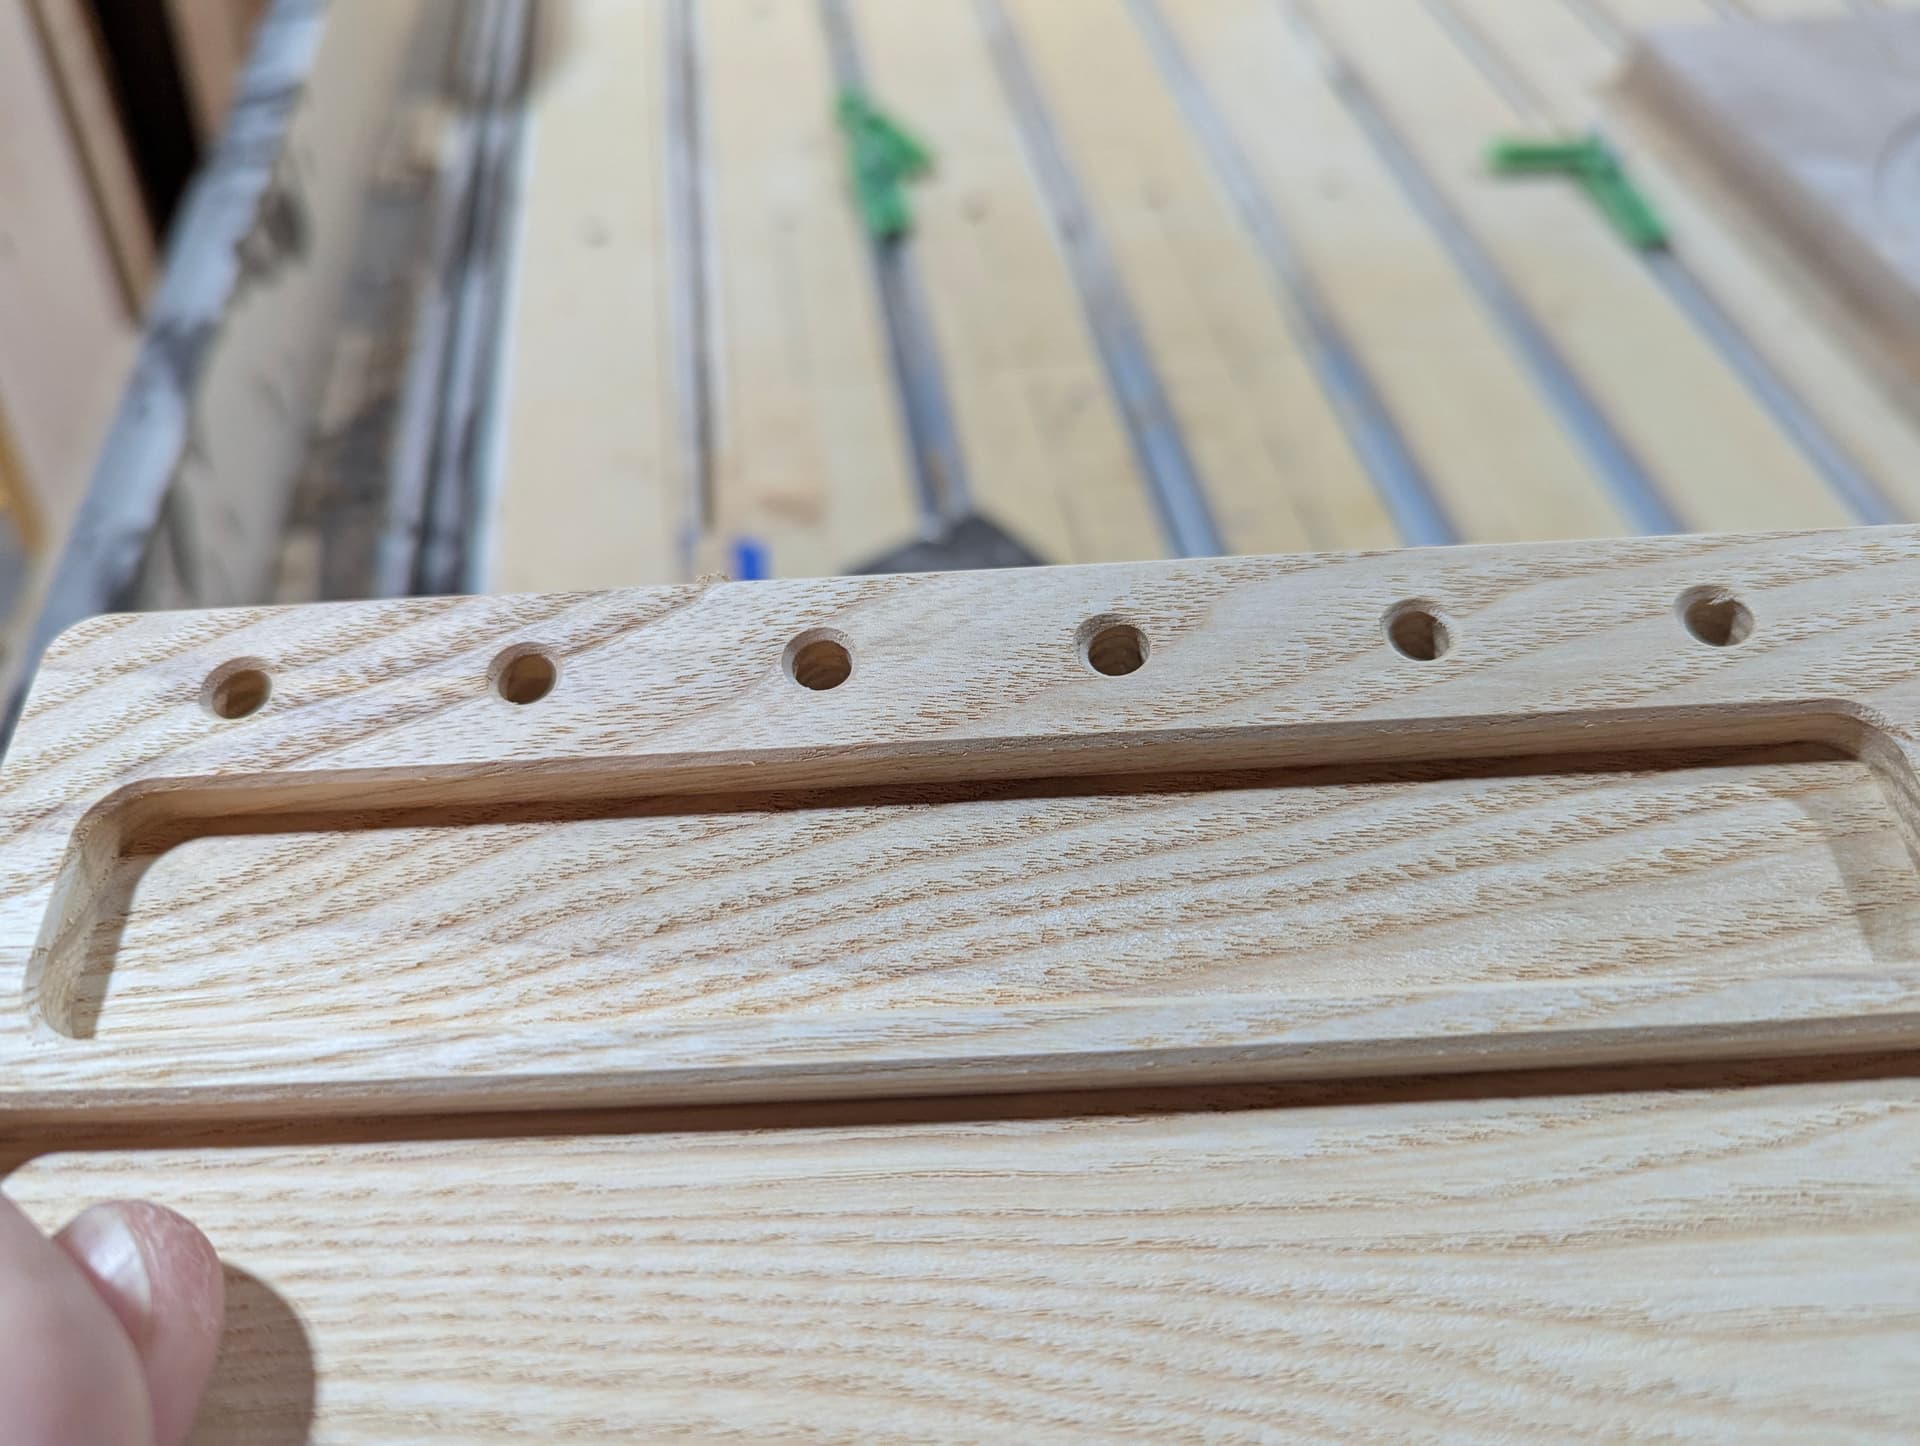
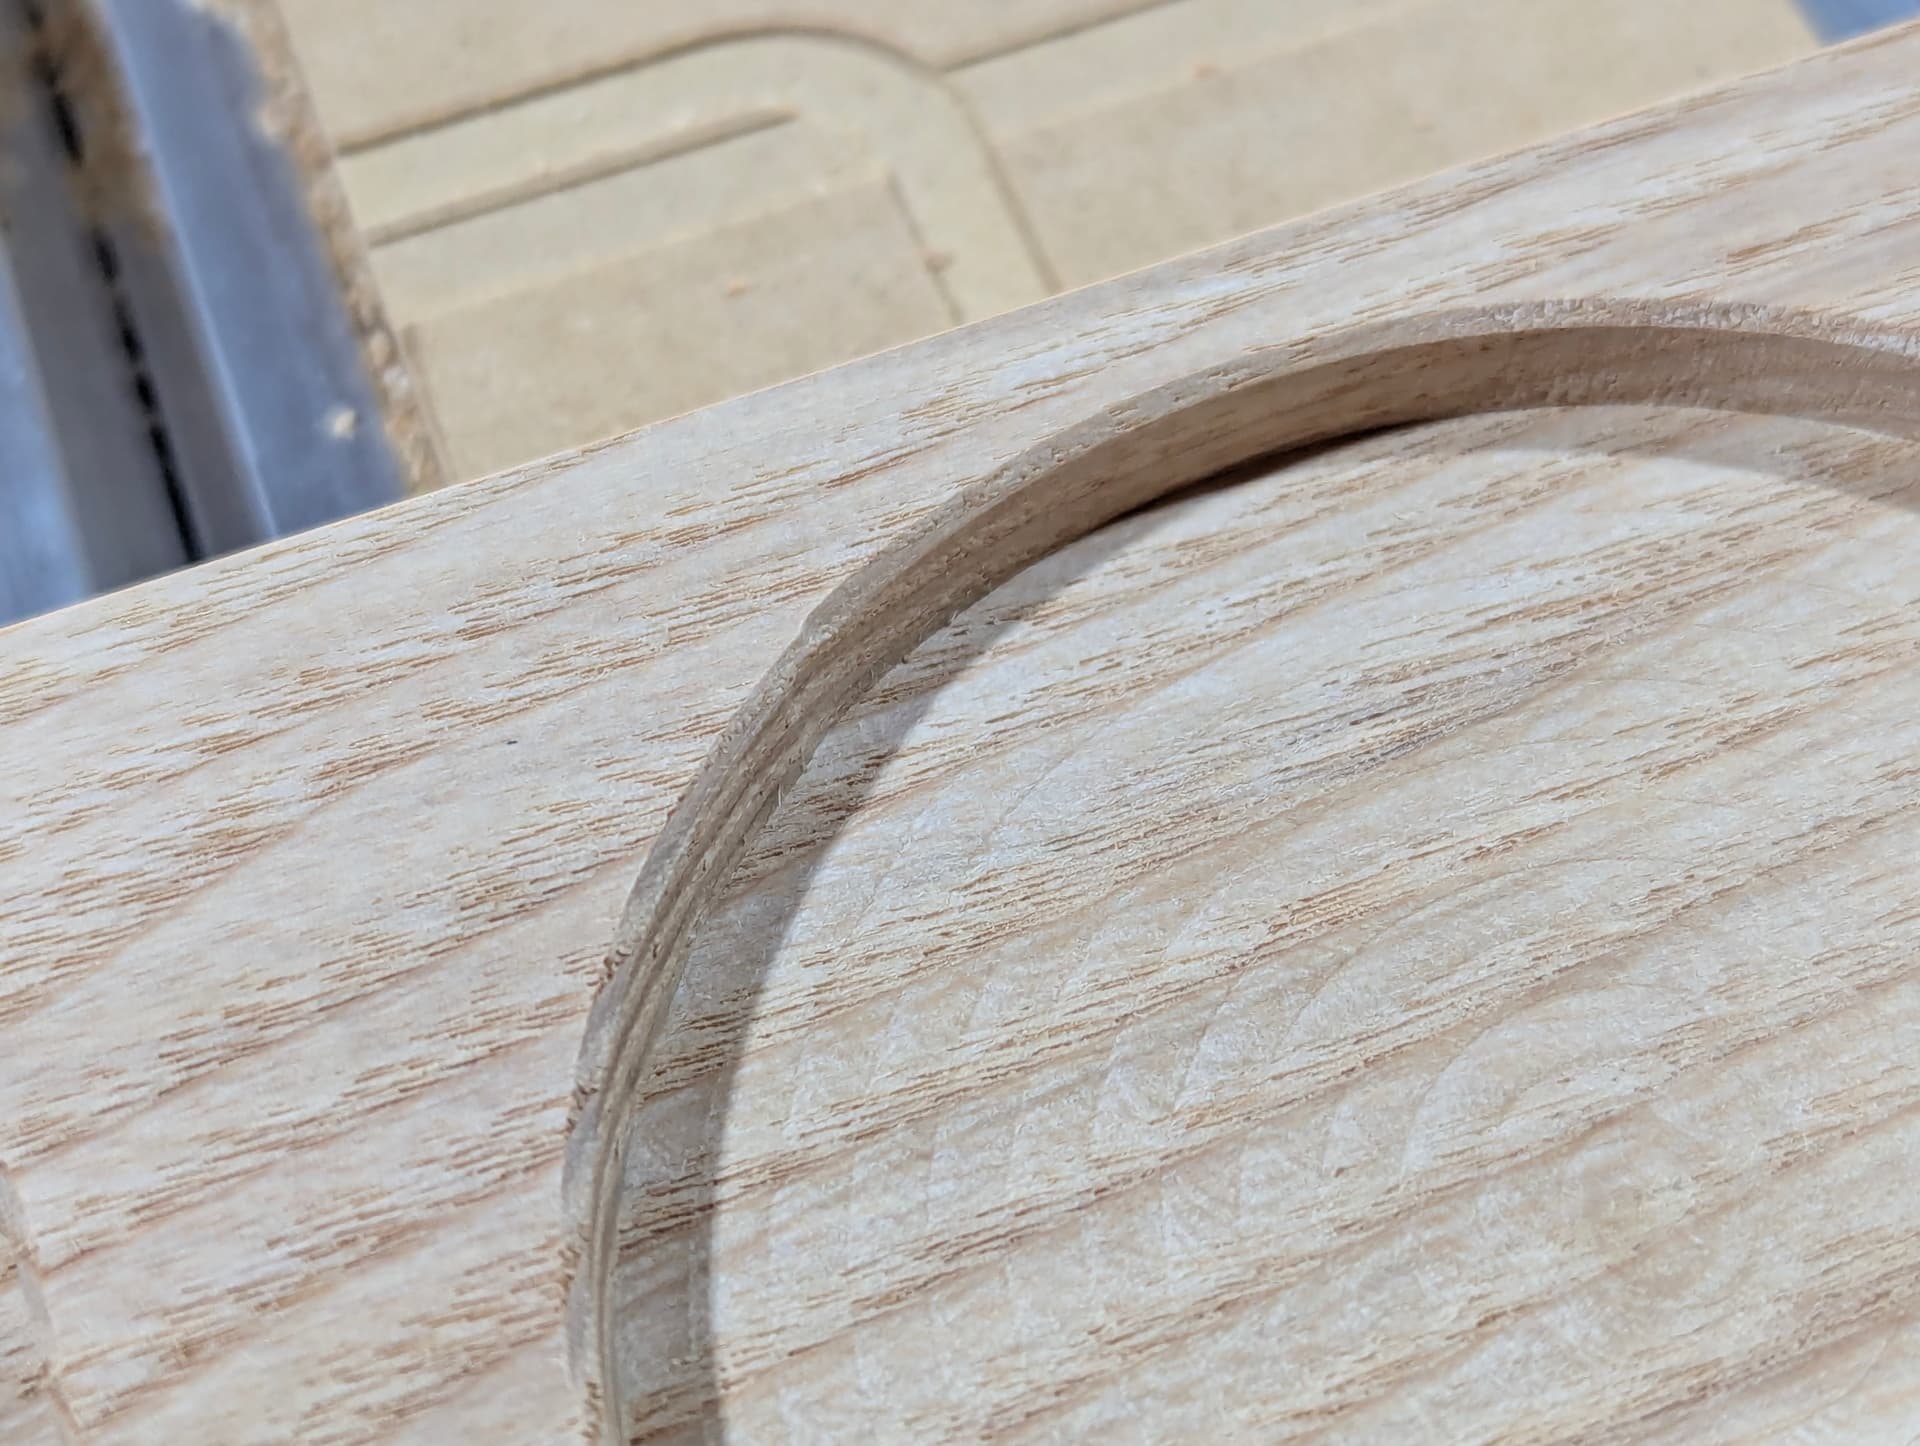
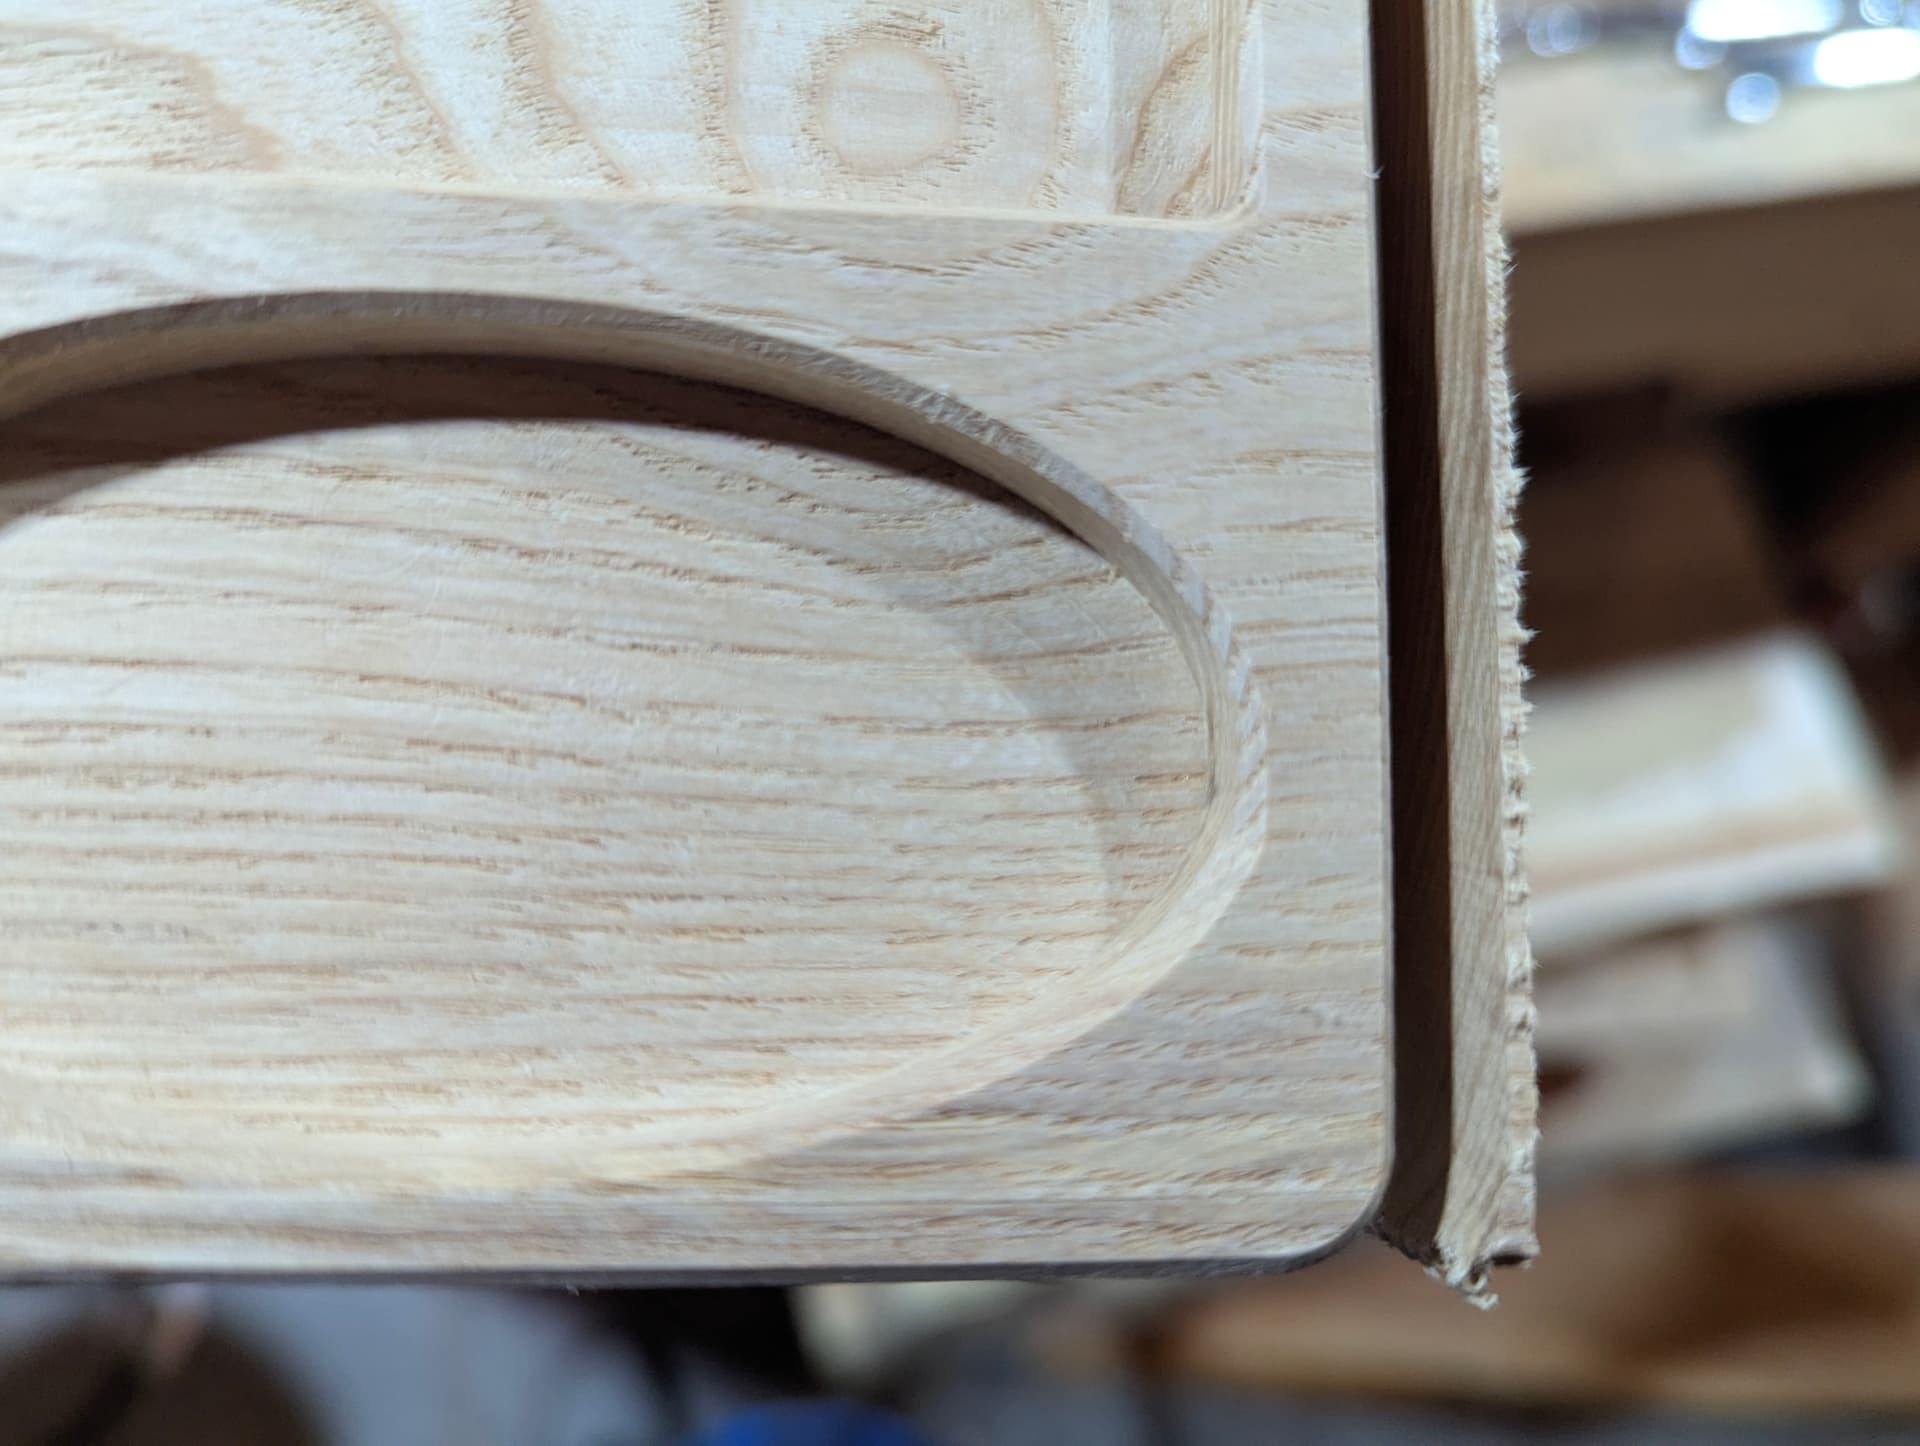
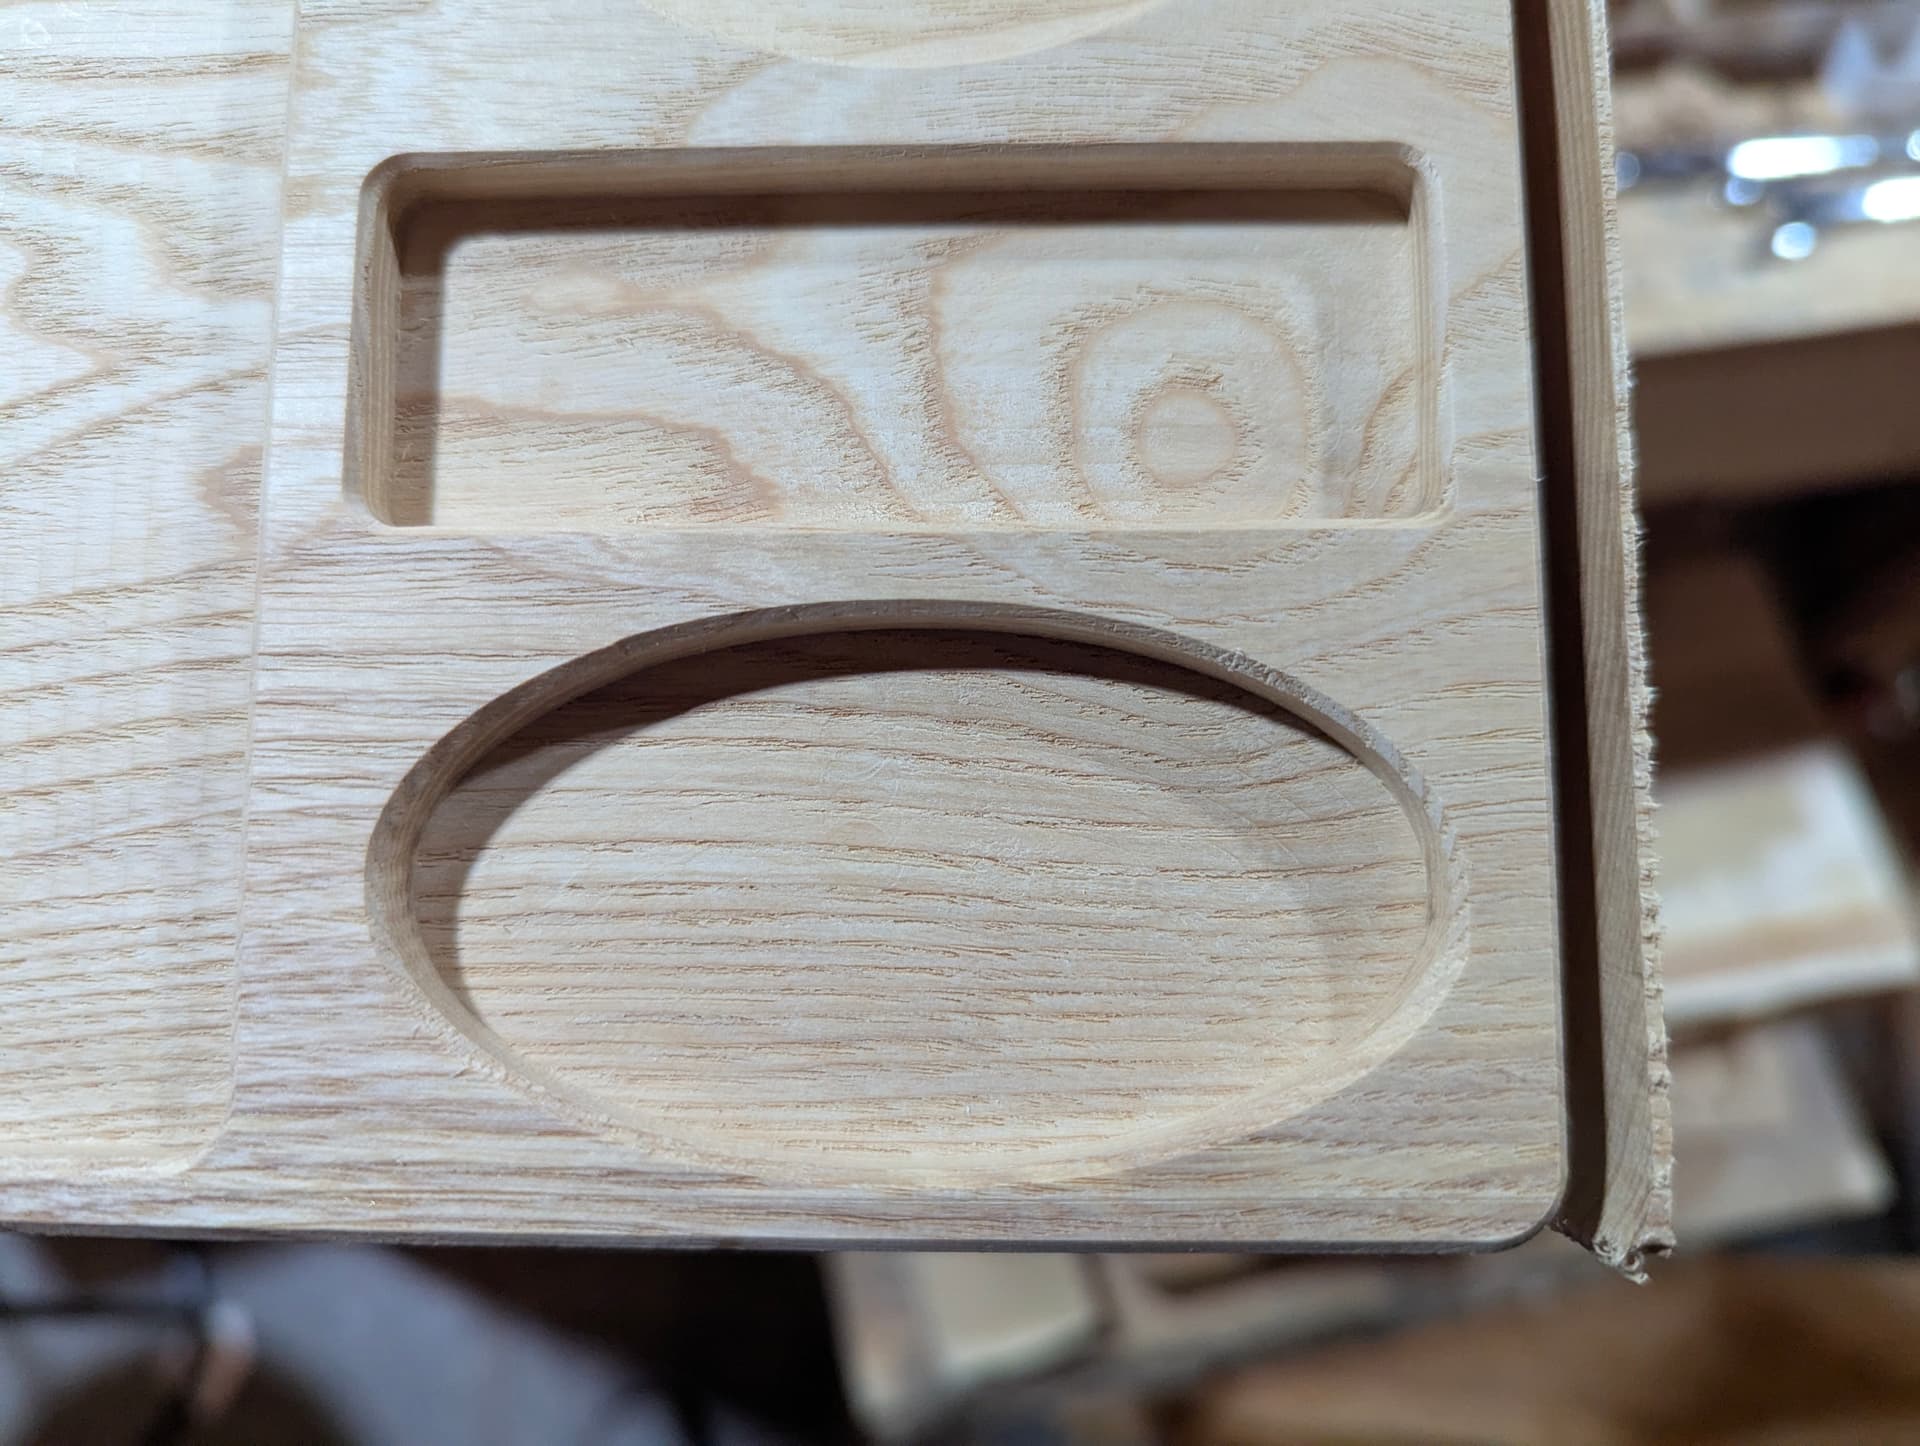
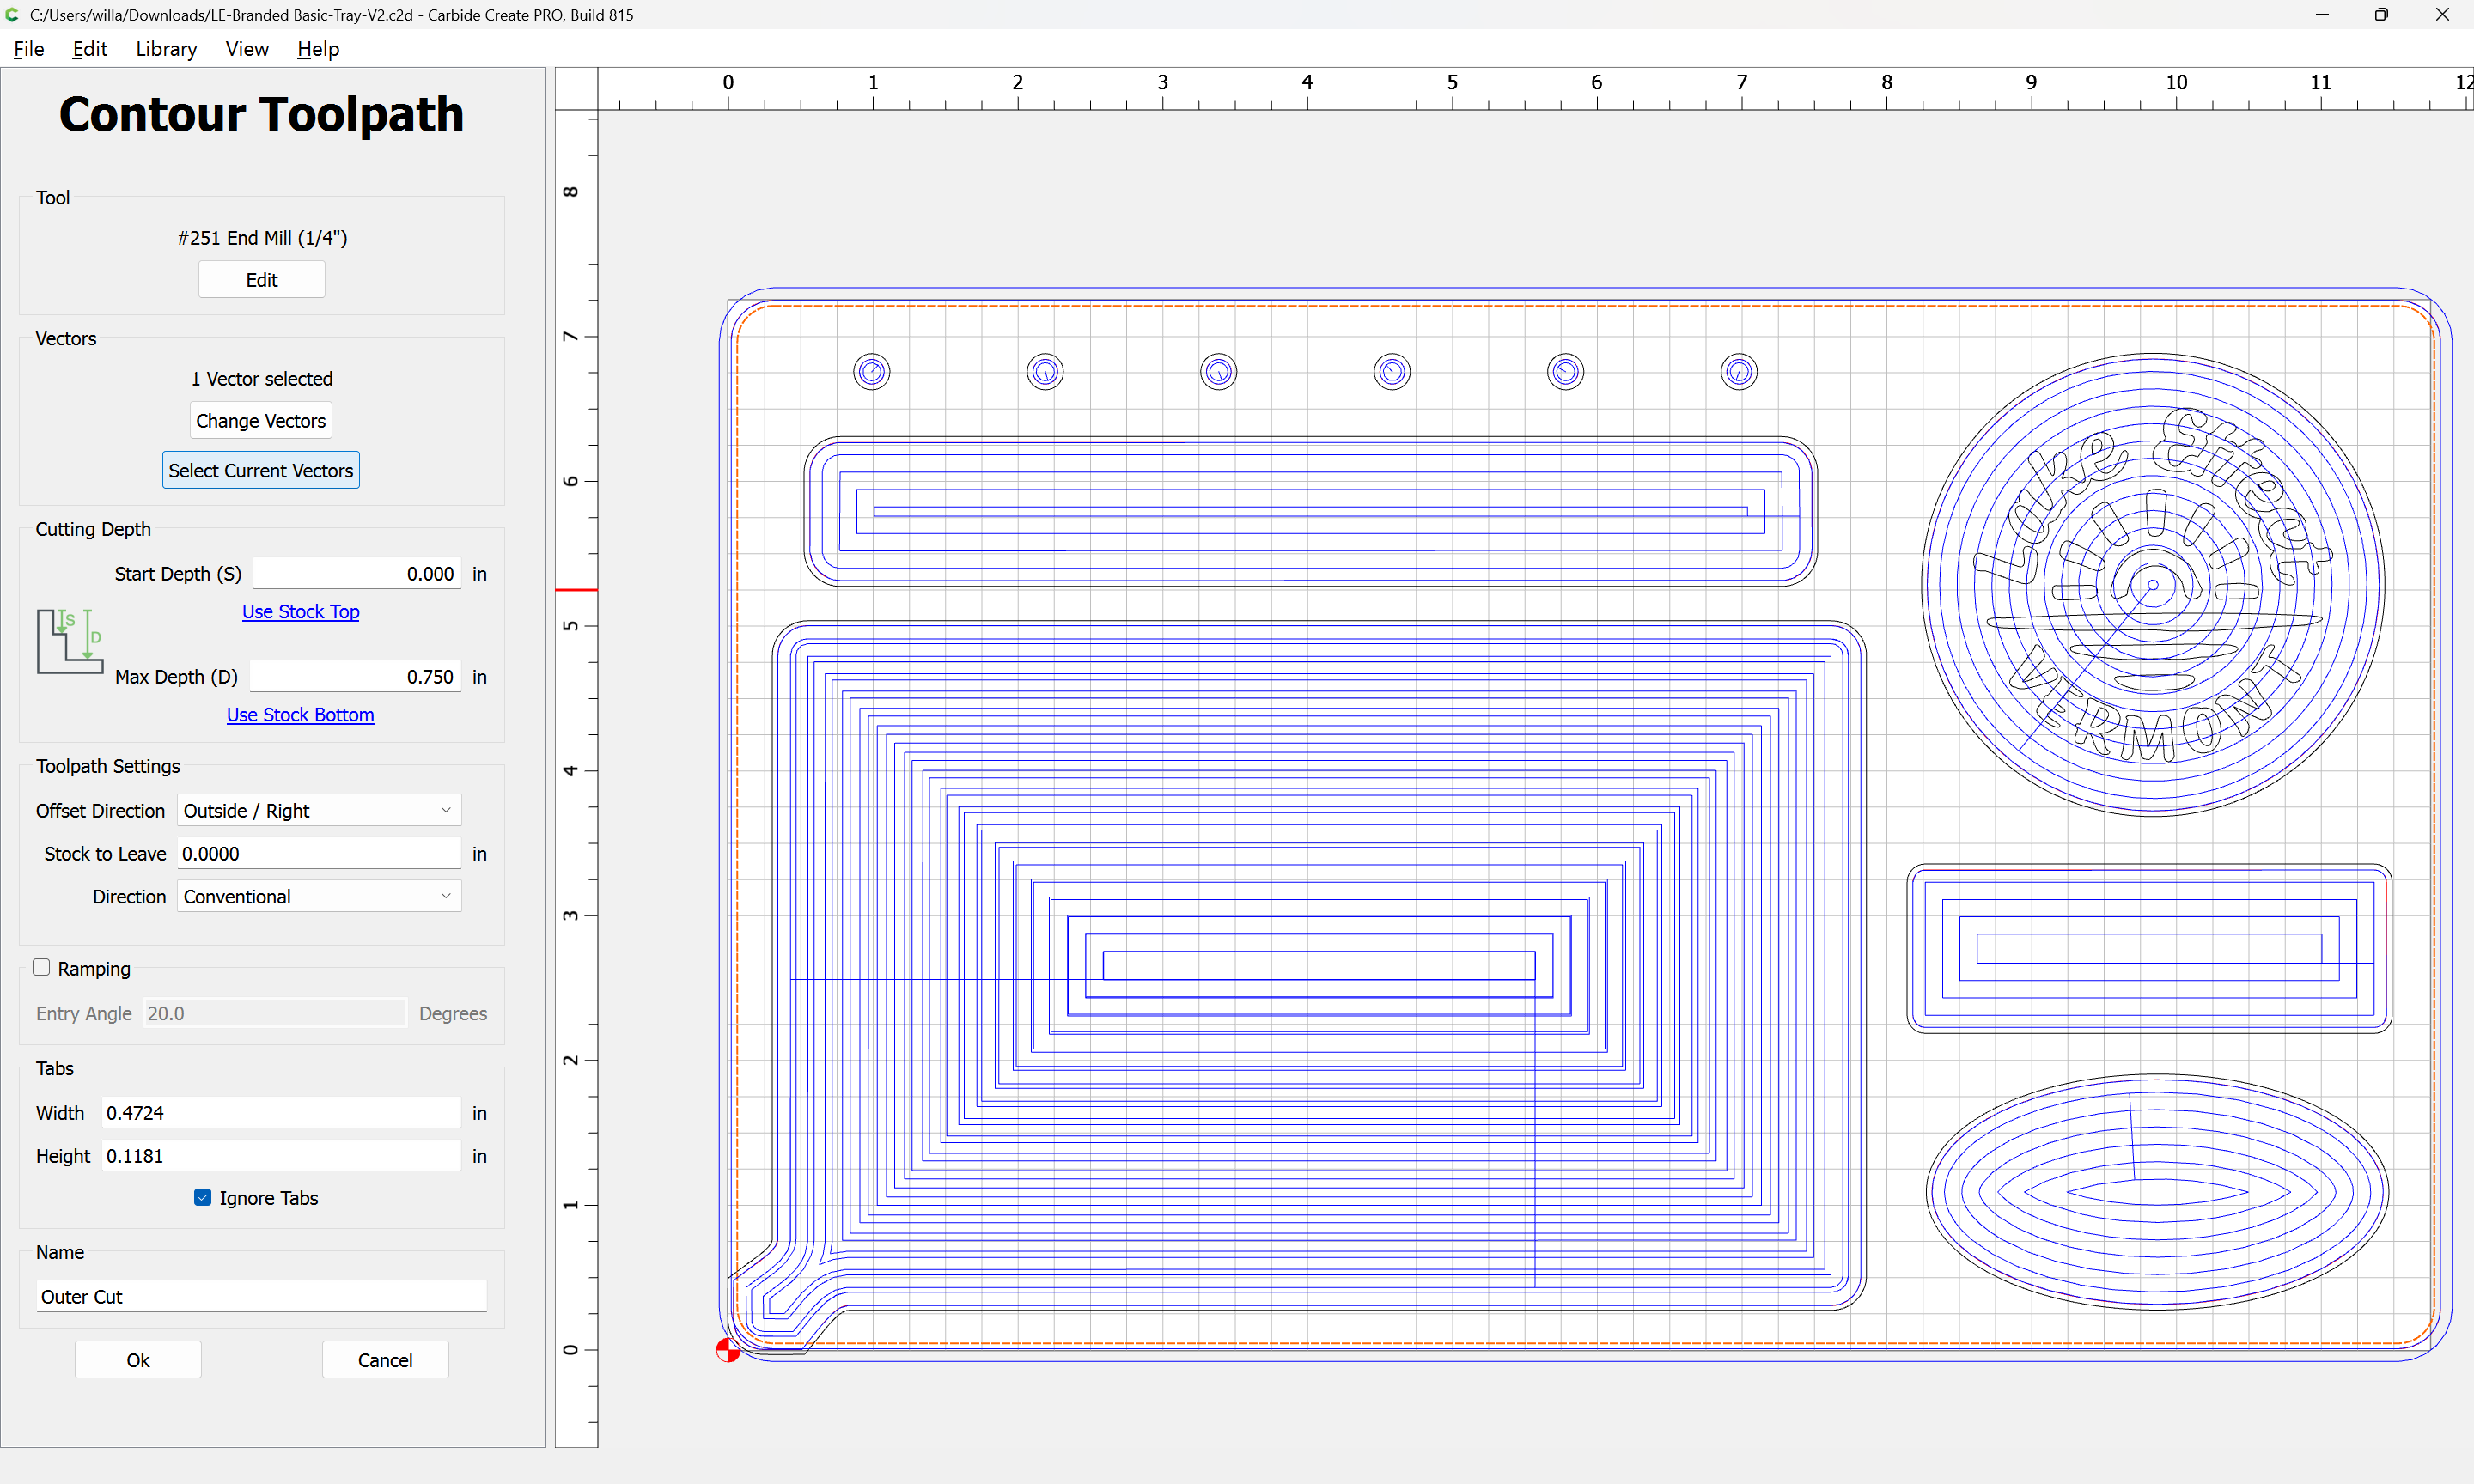
Here is a copy of the project file I worked with tonight. The camfers around the small holes at the top of the tray were done from left to right while the holes were drilled from right to left. Pictures will be attached next but 2 of the holes the chamfer is shifted to the left for some unknown reason. A couple of the other chamfers were not completely clean either. Look like they stepped partially deeper half way around the circular pocket.
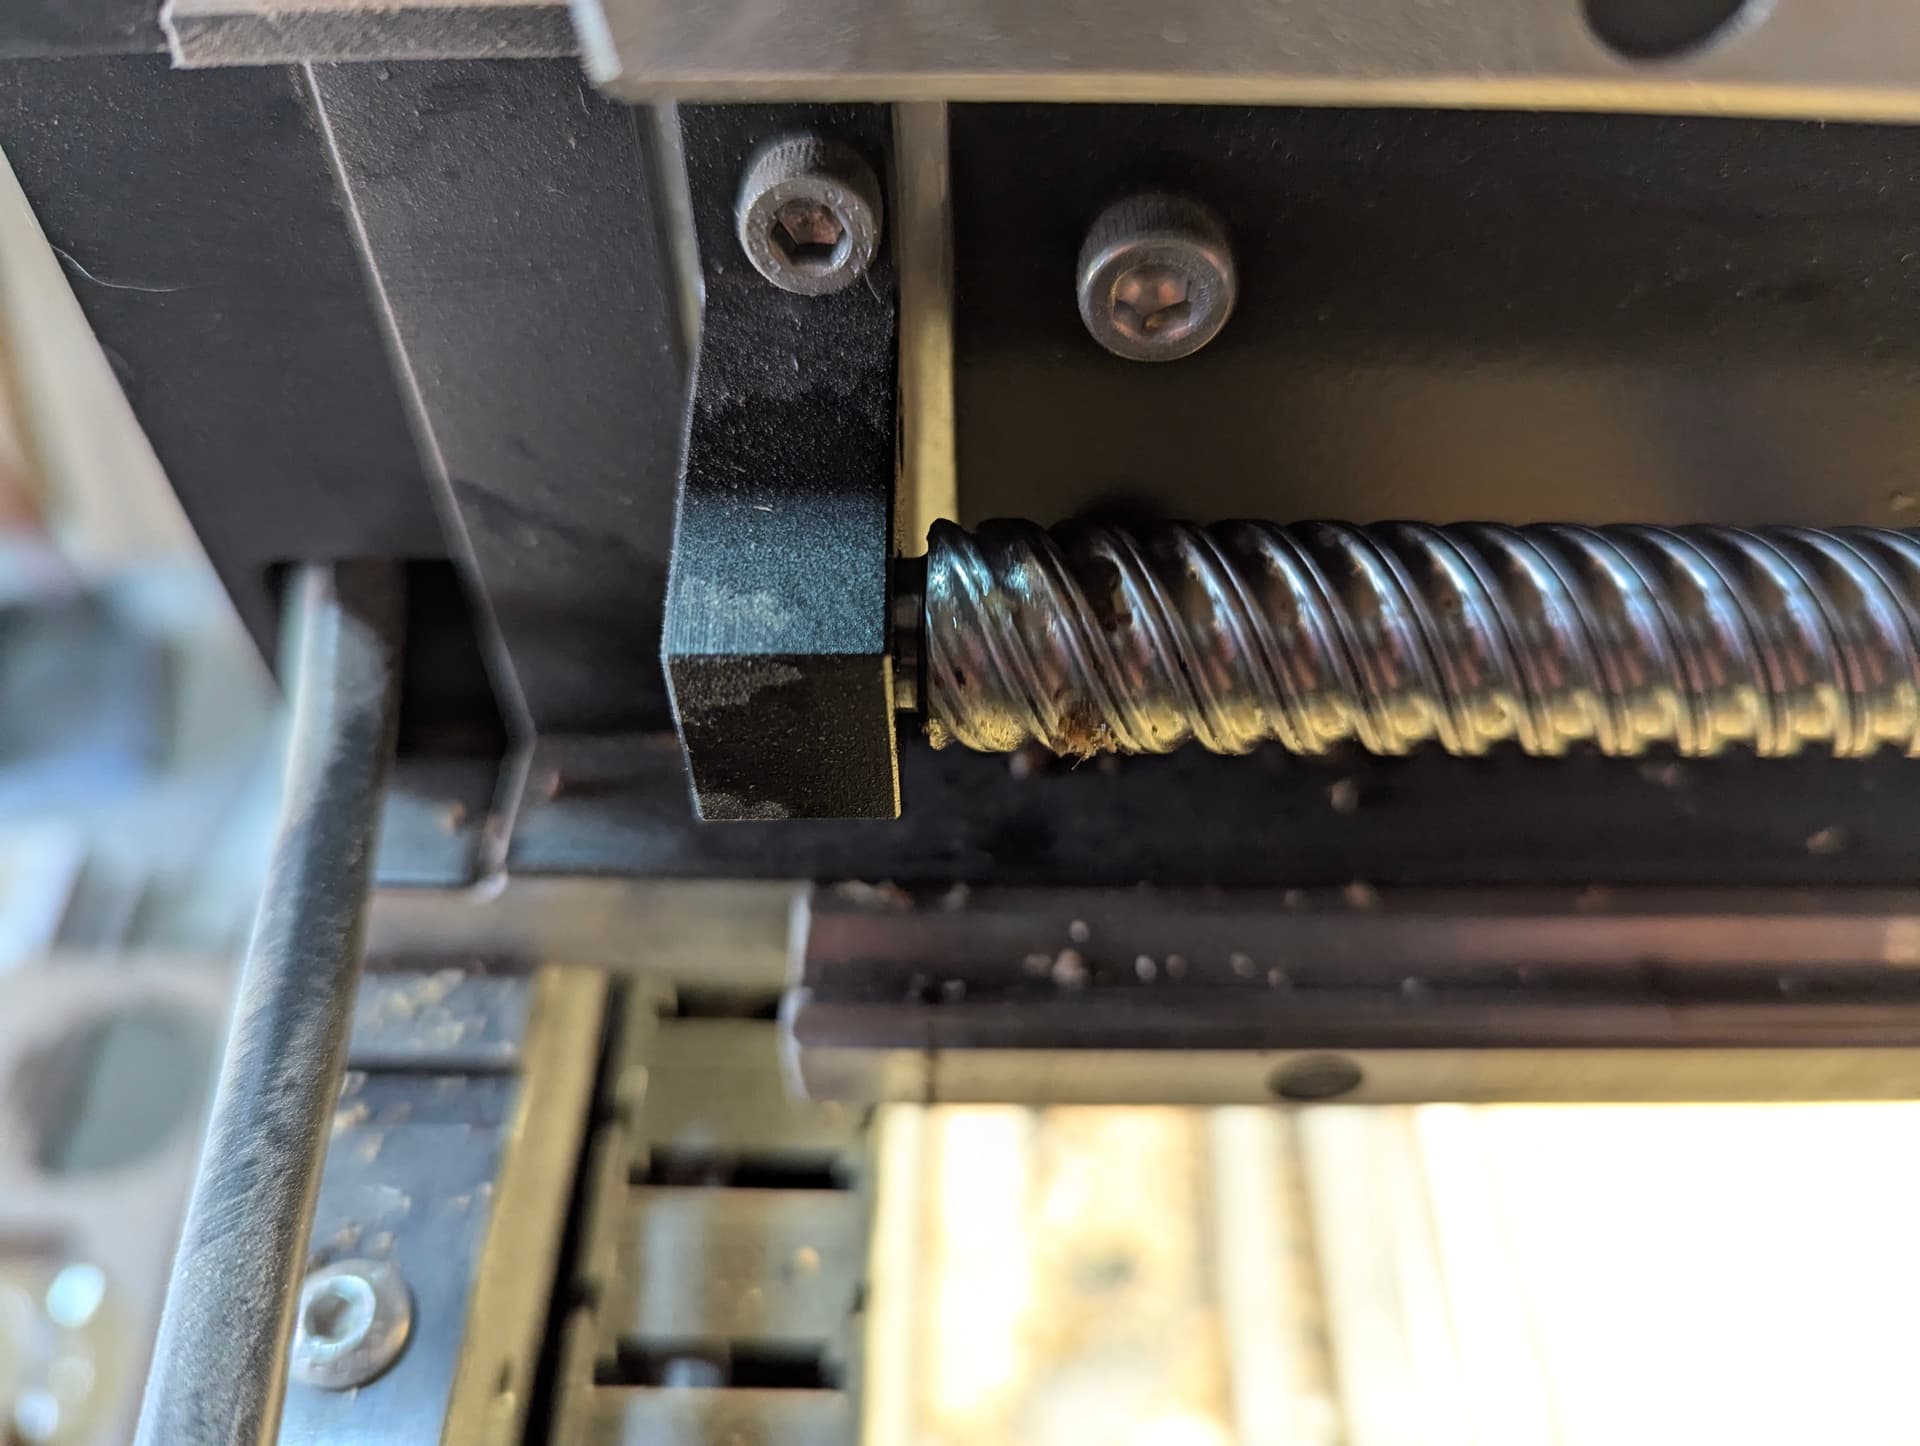
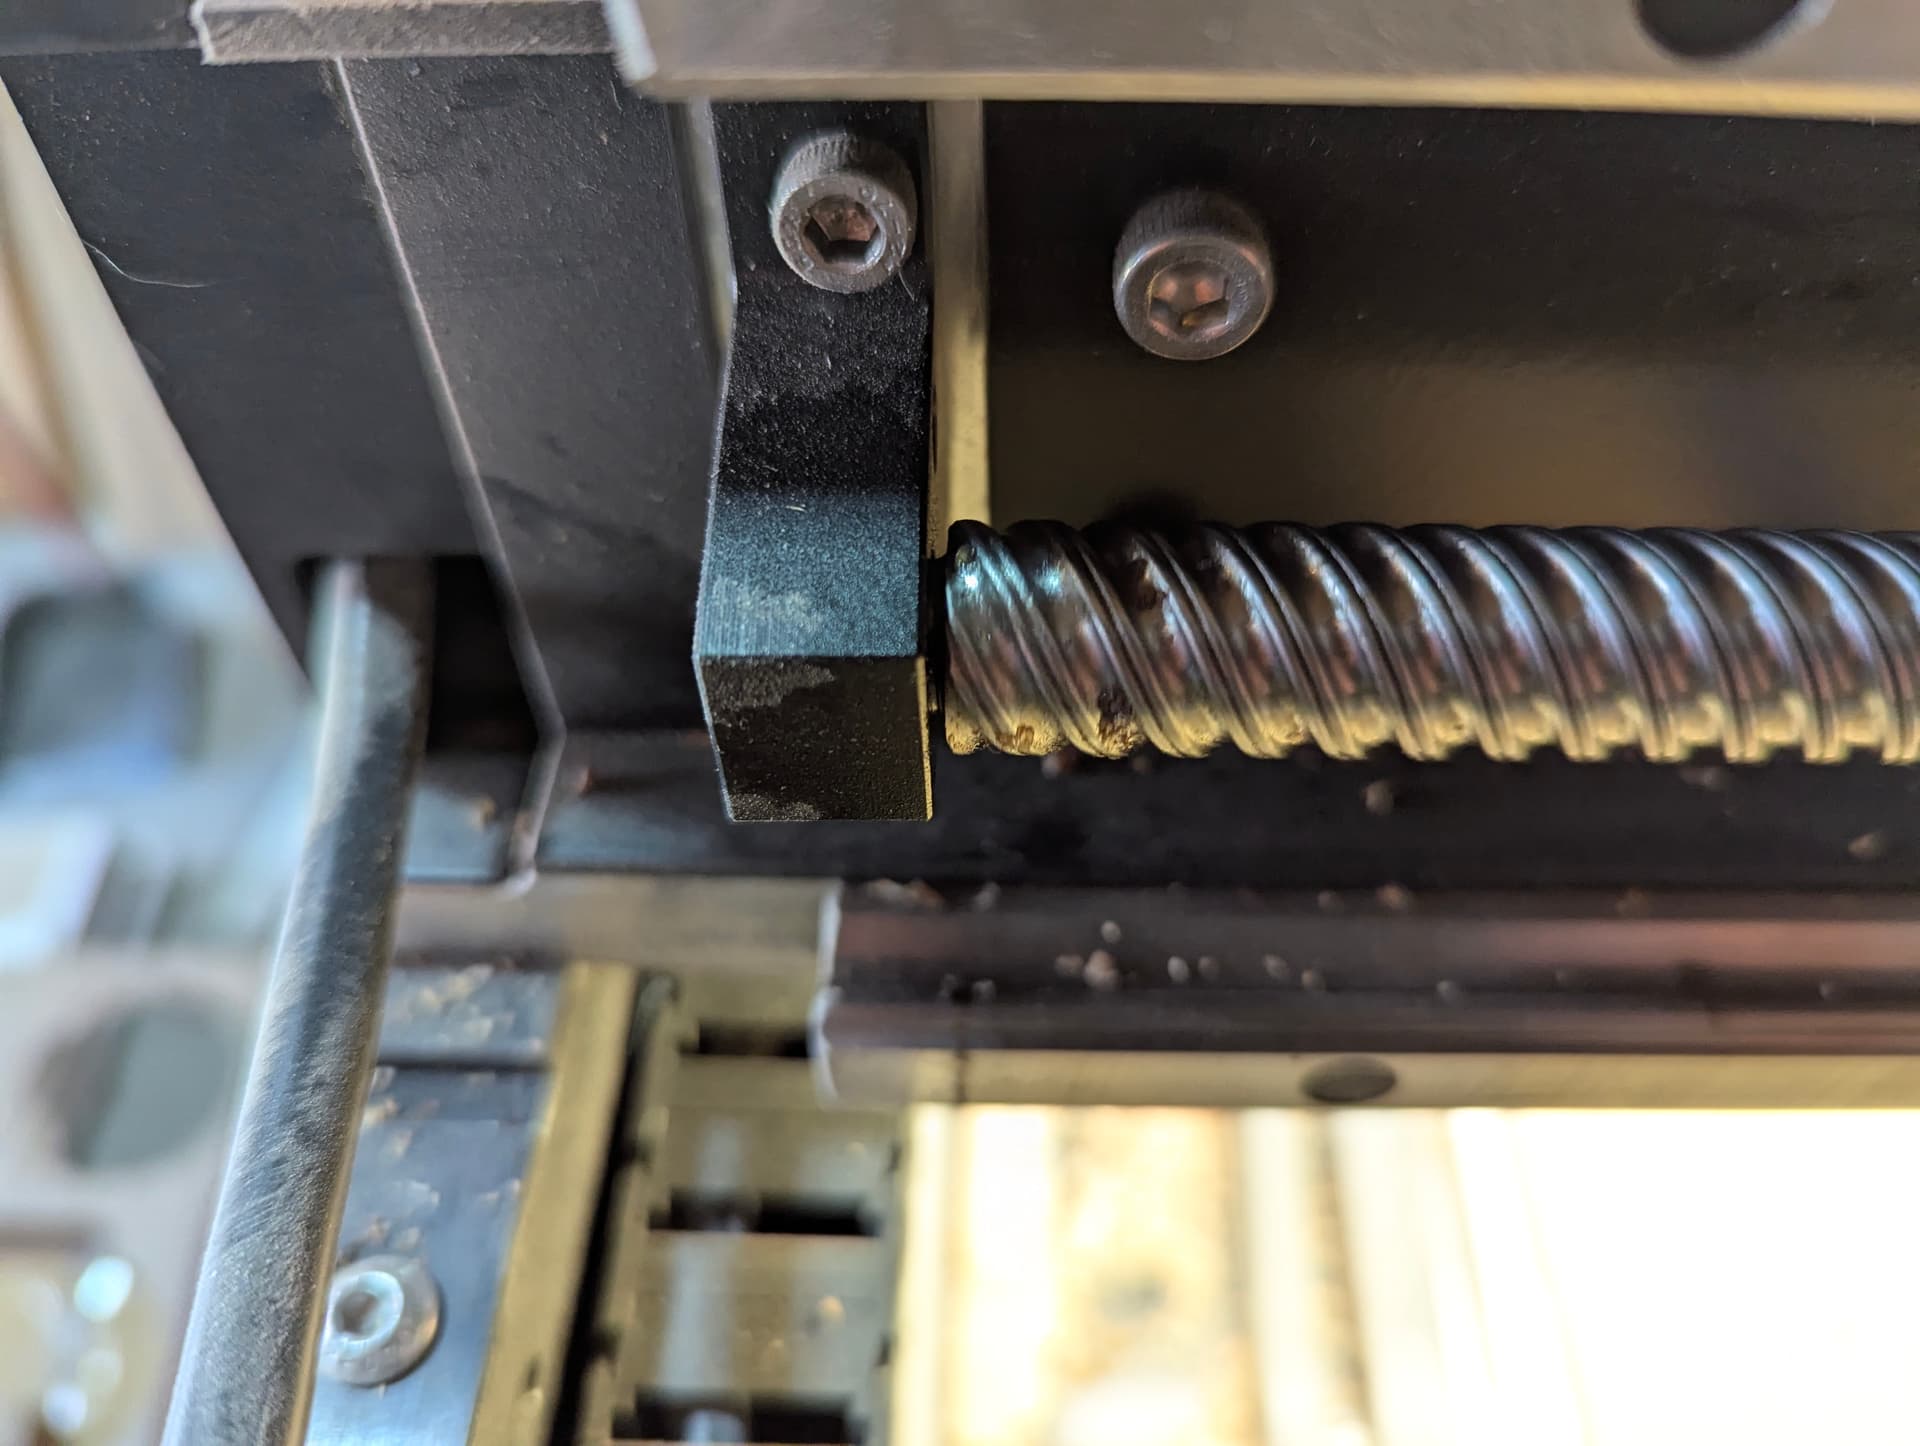
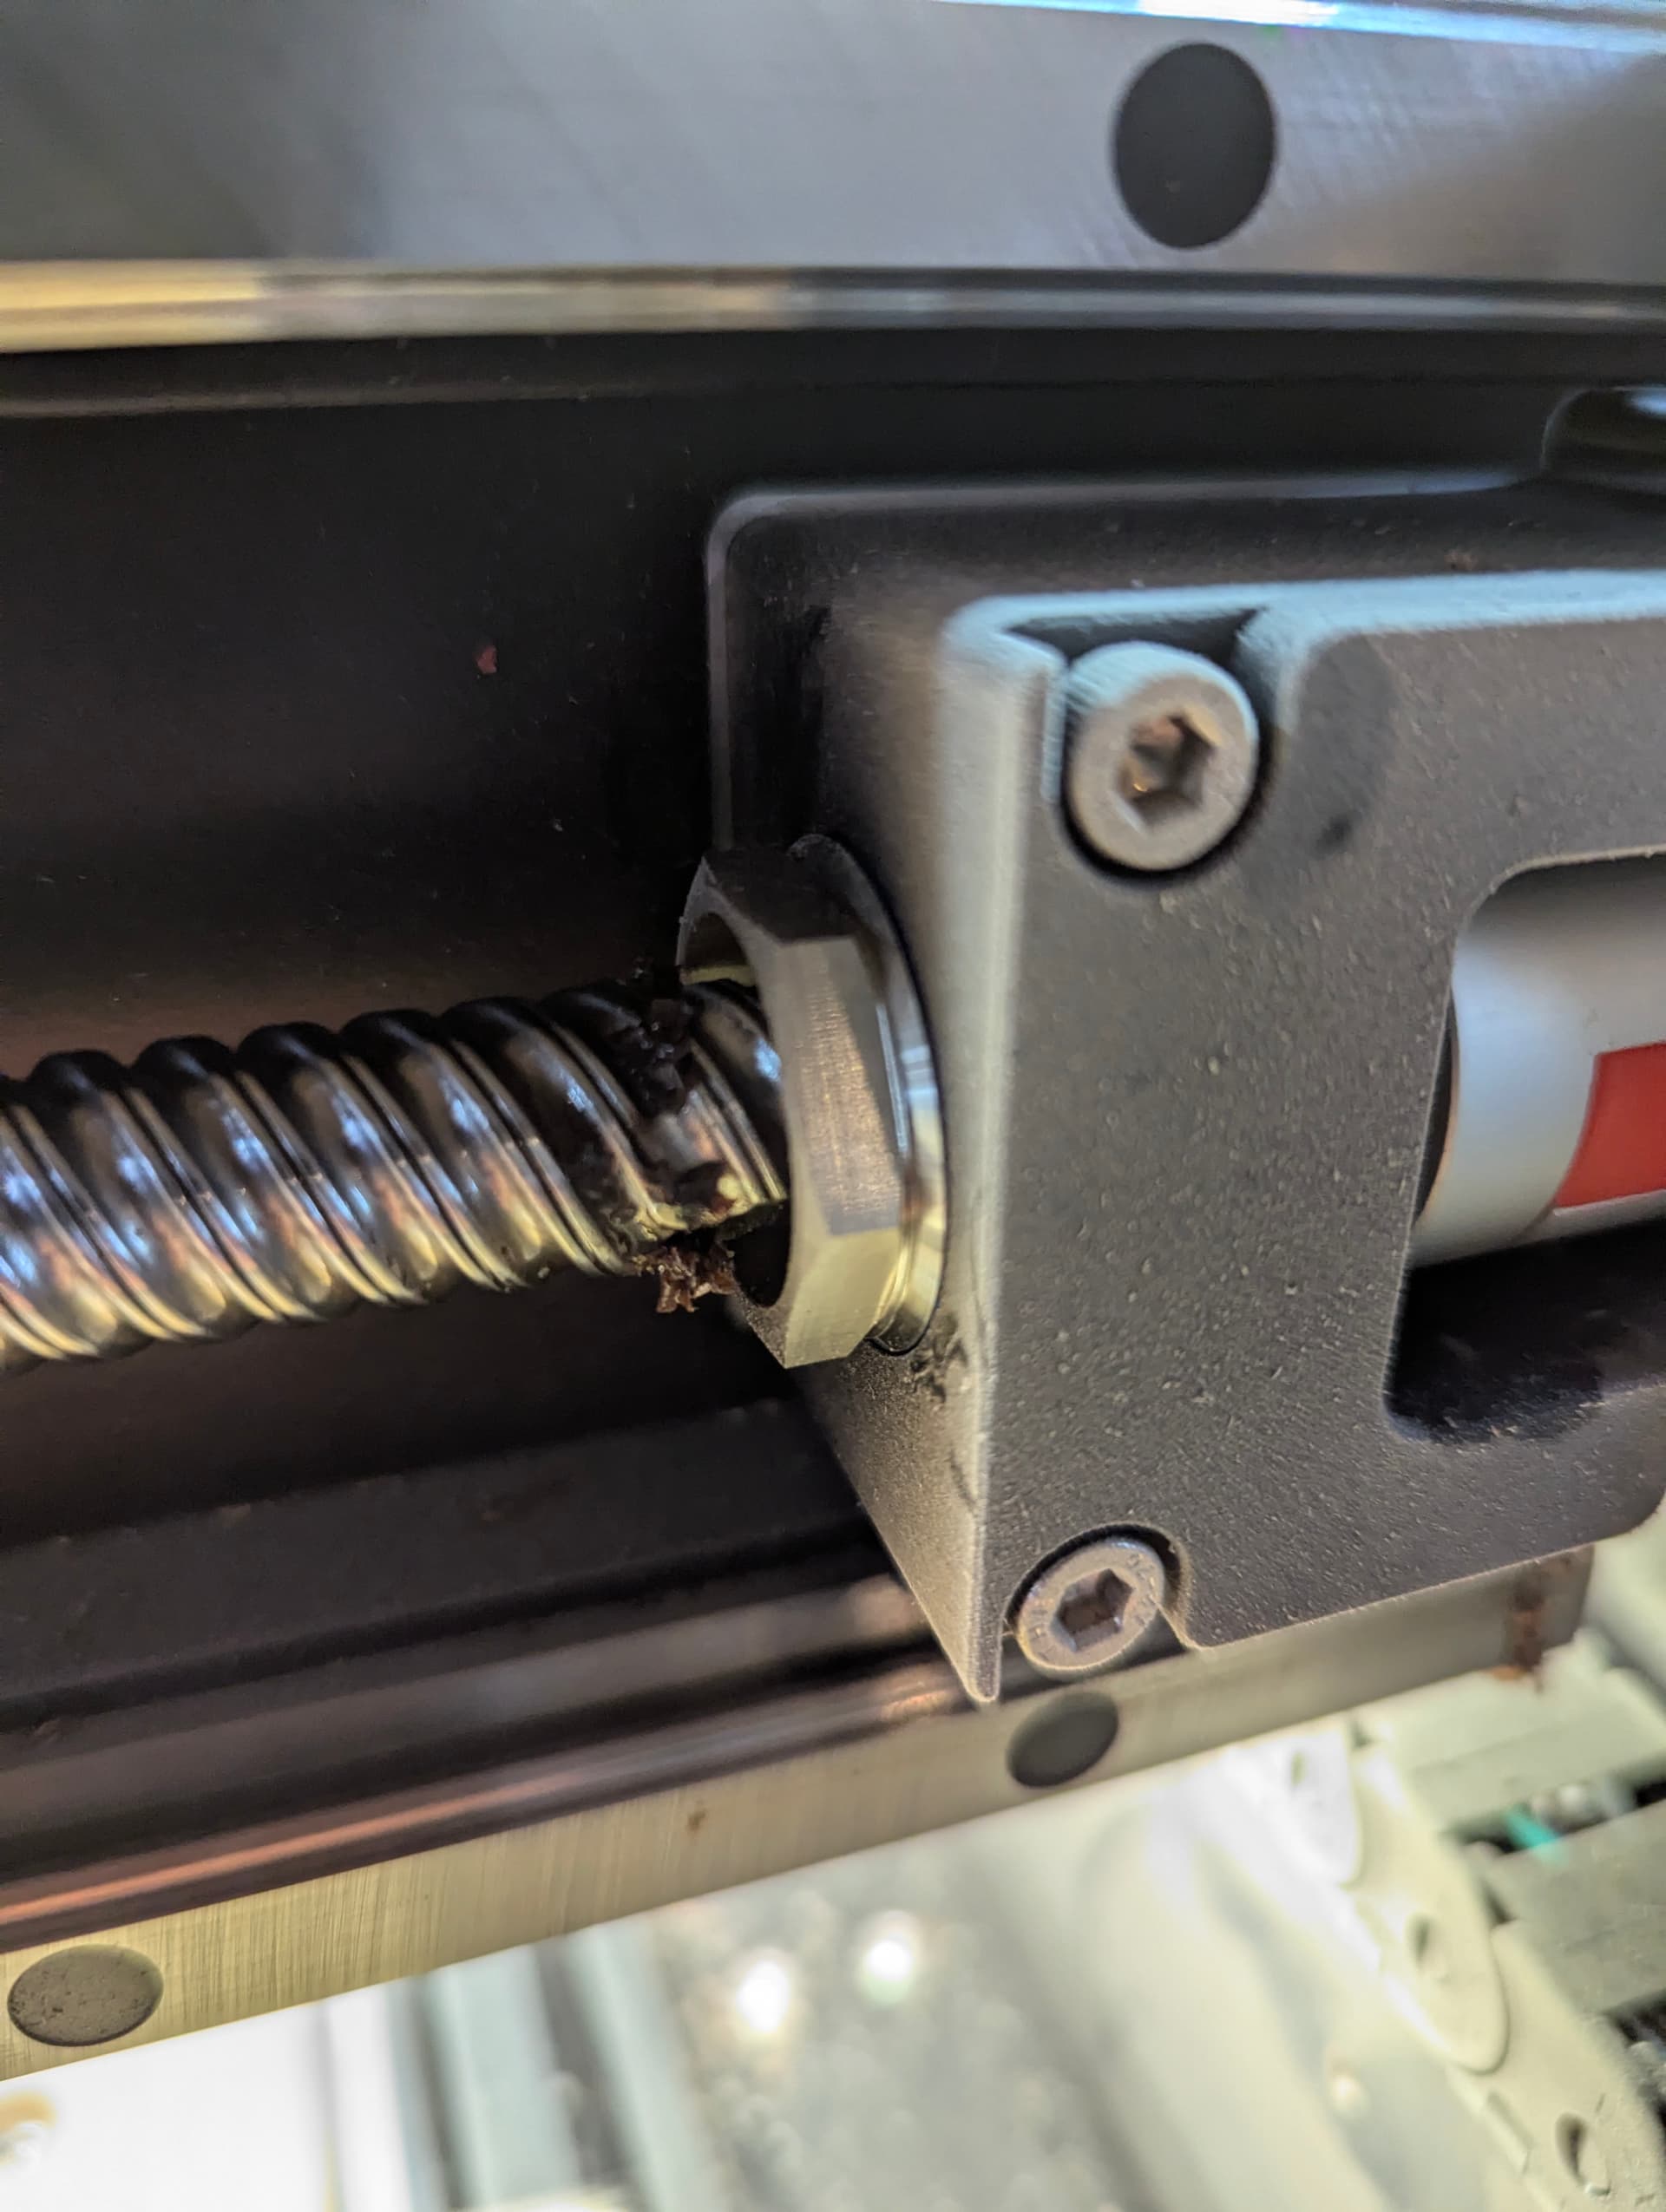
Making some adjustments now to see if it improves. I also just now noticed some lateral movement in the X ball screw rail that I had not noticed before at the end block that wouldn’t have expected to see and am wondering if this is the root of my issue?
Looks to be in alignment with the discrepancy I have seen all along. I double checked the stepper motor mount and you can see movement where the ball screw rail meets the motor. The motor is not moving… the rail is. Is there a specific adjustment there that needs to be checked that won’t throw everything out of alignment?
Looking at all of the other locks on the machine I’m seeing blue thread lock… But unfortunately not on this one.
Is there a certain spec that this needs to be torqued to and is there a specific position that the motor end needs to be in? I’m guessing the nut on the other end has moved as well.
After snugging the lock down with some thread lock… The wandering appears to be gone. Amazing what you catch when you really watch what’s going on… Doh!