CNC automated sanding?

Here is a little inspiration for you…


The sanding heads that @Vince.Fab recommended look like the way to go, they just may be on the pricey side, Also the first part of the video looks like they are using a random orbital sanding head like @fenrus suggested.
6 Likes

You’re a life saver. Thank you for directing me to what I’ve been looking for.

1 Like

How many beers would we need to hold for this @Luke?

I mean it would be handy, but spindle speed…

1 Like

It would take one heck of a reduction gear.

Rather than trying to get rid of the sanding marks, embrace them like this:

3 Likes

Have You considered just blasting it?

Sandblasting, soda blasting . . . walnut shells, coconuts, shredded corn chips
I have been thinking about using a Baking Soda blaster like the ones at Harbor Freight.
They have a 15 and 40 lb version -
https://www.harborfreight.com/40-lb-portable-soda-blaster-60801.html
It is on my long list of things to check out.
Now if I could hook it on my Shapeoko with an extended arm (just kidding)

2 Likes

I had no idea what a “soda blaster” was before I clicked that link, and somehow I expected something based on Coke and Mentos :slight_smile:

4 Likes

Actually in the US anyway, the spelling seems to depend on the application. For braking systems, they are “disc” brakes. But when you are talking about data storage, it is a hard “disk” drive. Being a car guy before I was a computer guy, “disc” looks more familiar to me.

On the other hand, we don’t have boots, bonnets, wings or windscreens on our cars in the US. :grin:

2 Likes

I remember driving a '59 Cadillac Sedan de Ville which had some pretty serious wings on it :wink:

3 Likes

Sorry . . . I live in the USA and one of my cars has a bonnet, windscreen and even plexi “wings” attached to the windscreen.
http://wwwphoto.org/cars/20080726-MGA_2778crop.jpg
http://wwwphoto.org/cars/20080726-MGA_2716crop.jpg
I used to be a “car guy” but now my CNC eats all my time.

6 Likes

When you were still a car guy I assume you used a “spanner” to work on it. :wink:

That’s rather nice, I see there are vehicles with wings there too :wink:

picked up one of these guys in 1/4" shank offering, have only used it on occasion.

the bigger units are popular on large CNC applications

http://www.brushresearch.com/brushes.php?c1=49

4 Likes

This topic was automatically closed 30 days after the last reply. New replies are no longer allowed.

It’s been 3 months since the earlier post of mine in this thread where I said I would get one of those on Amazon:

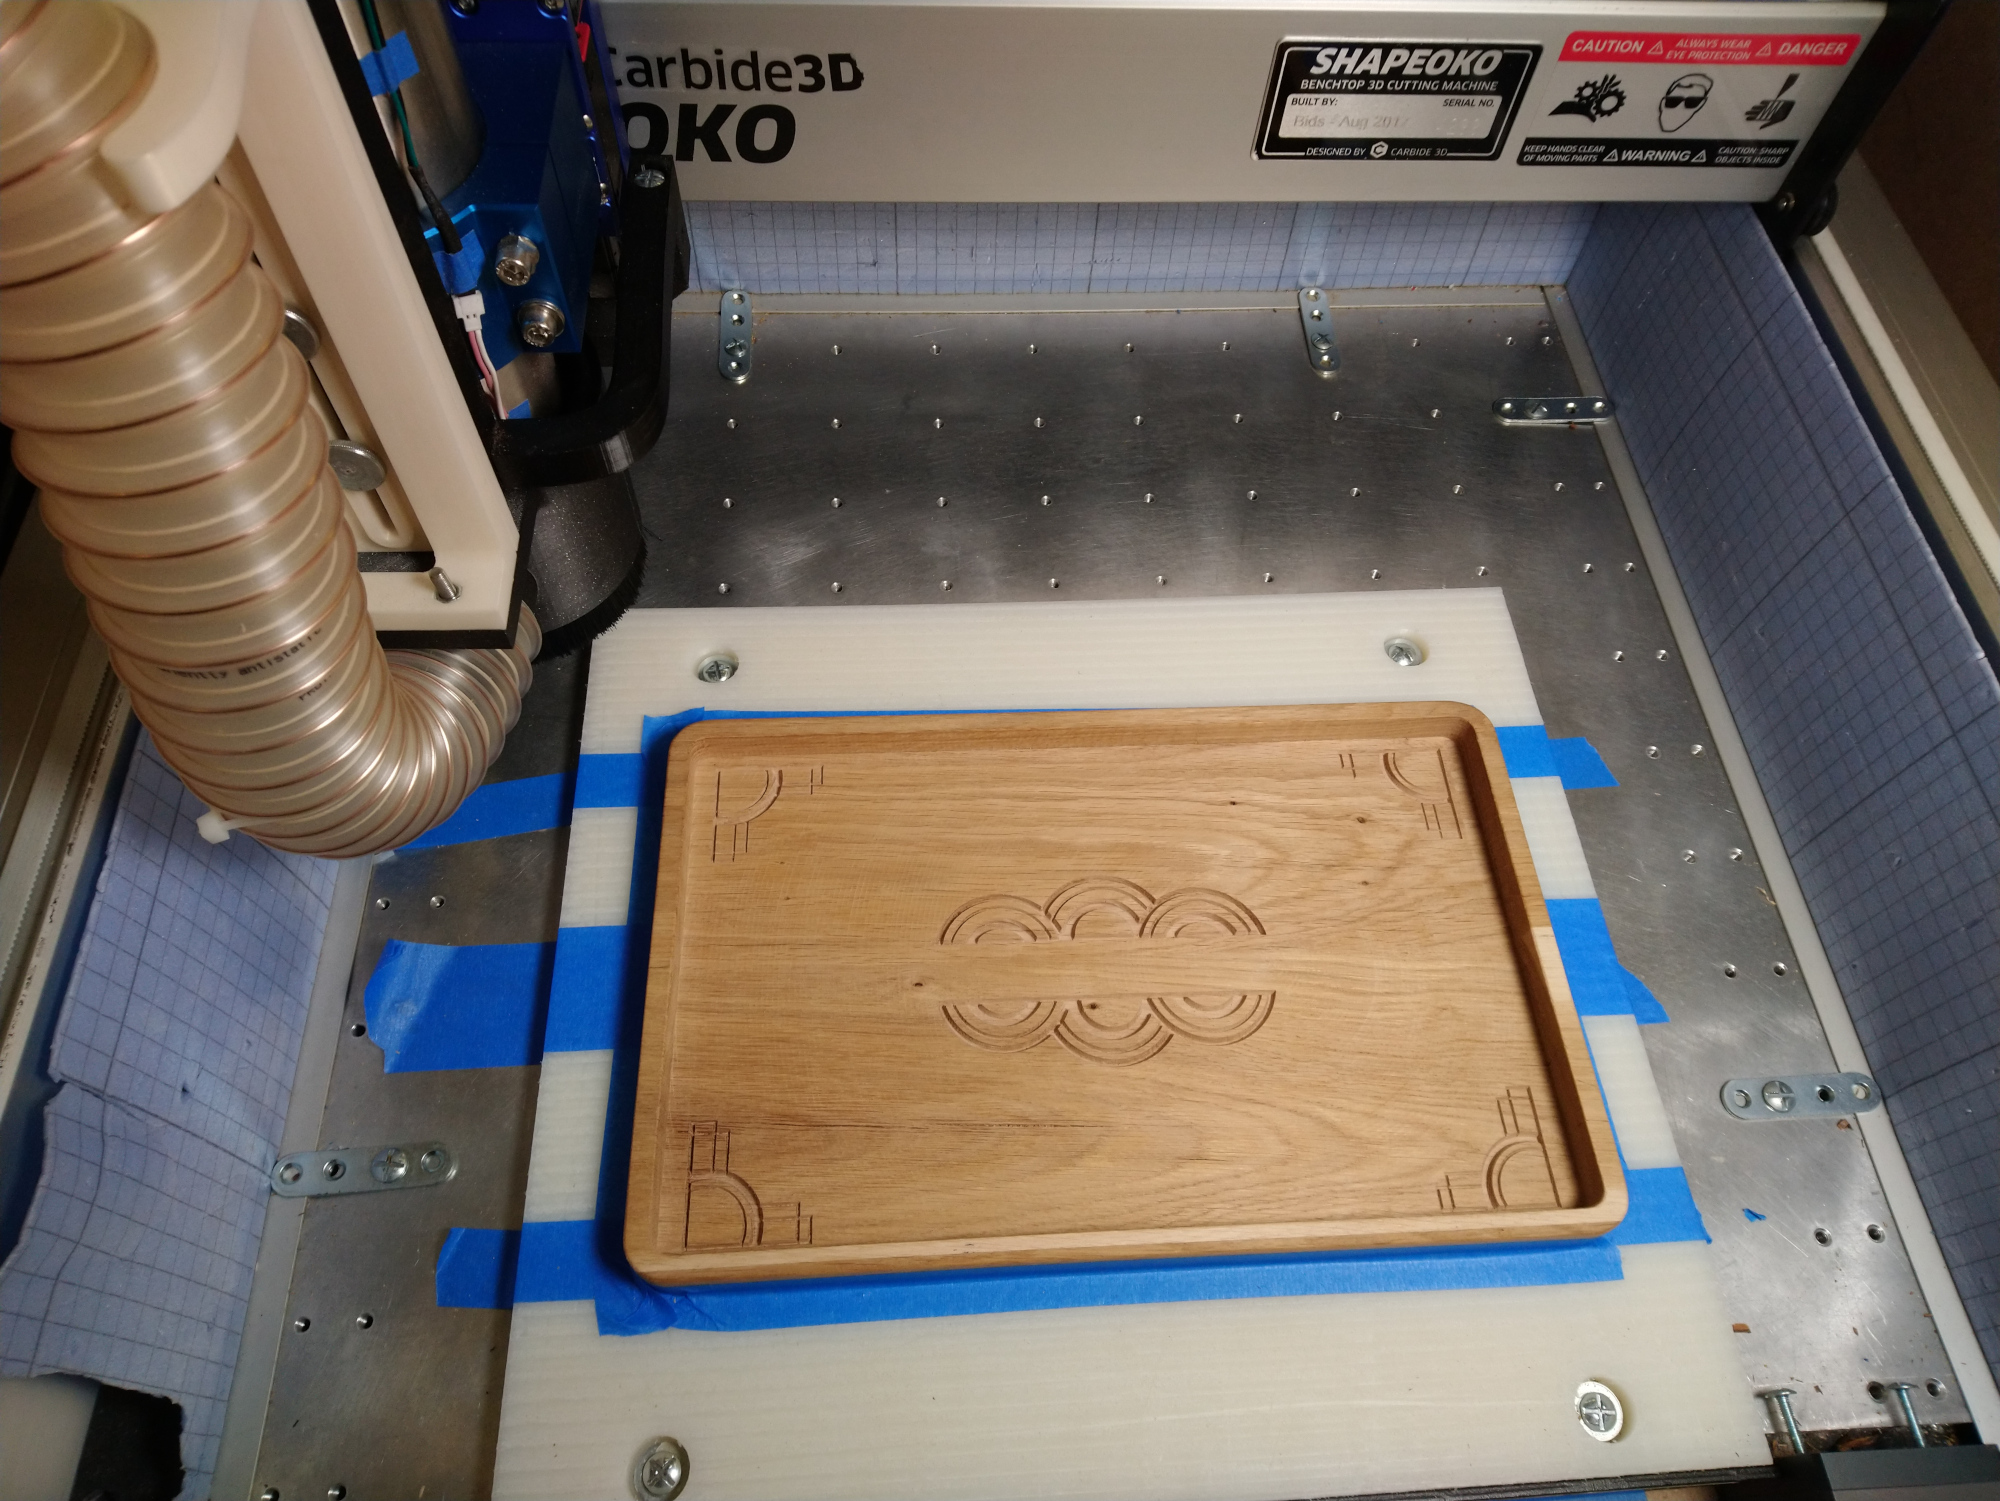
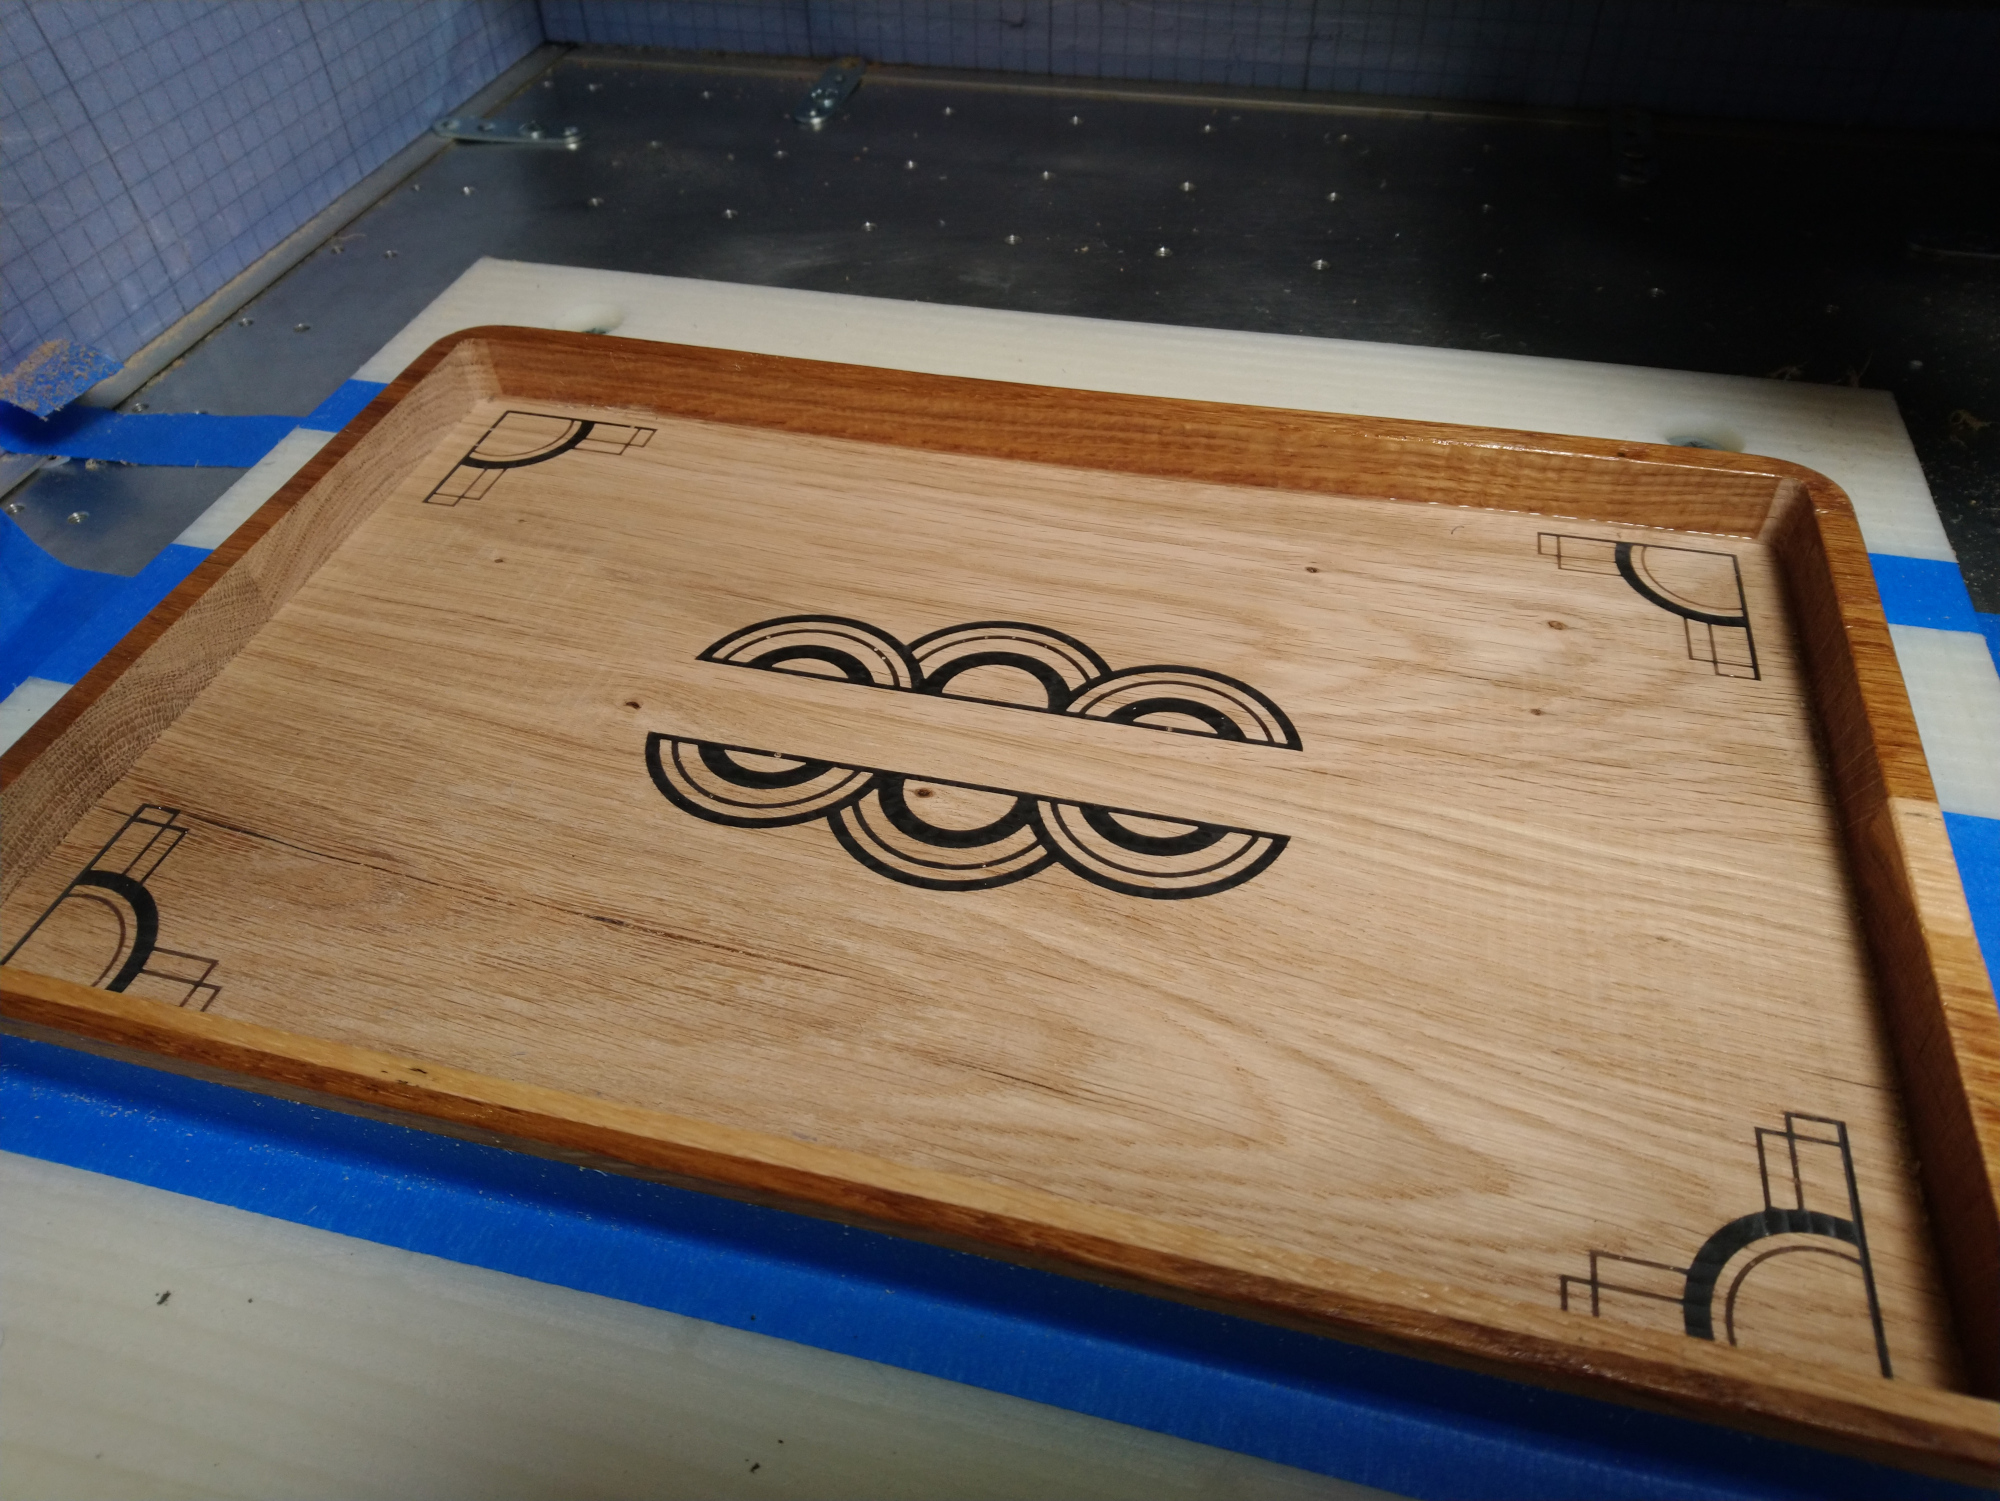
The opportunity to test it surfaced a few days ago when my wife told me that this wooden tray I had cut for her two years ago was not fancy enough and could use some improvement:

So I v-carved it Art Deco style,

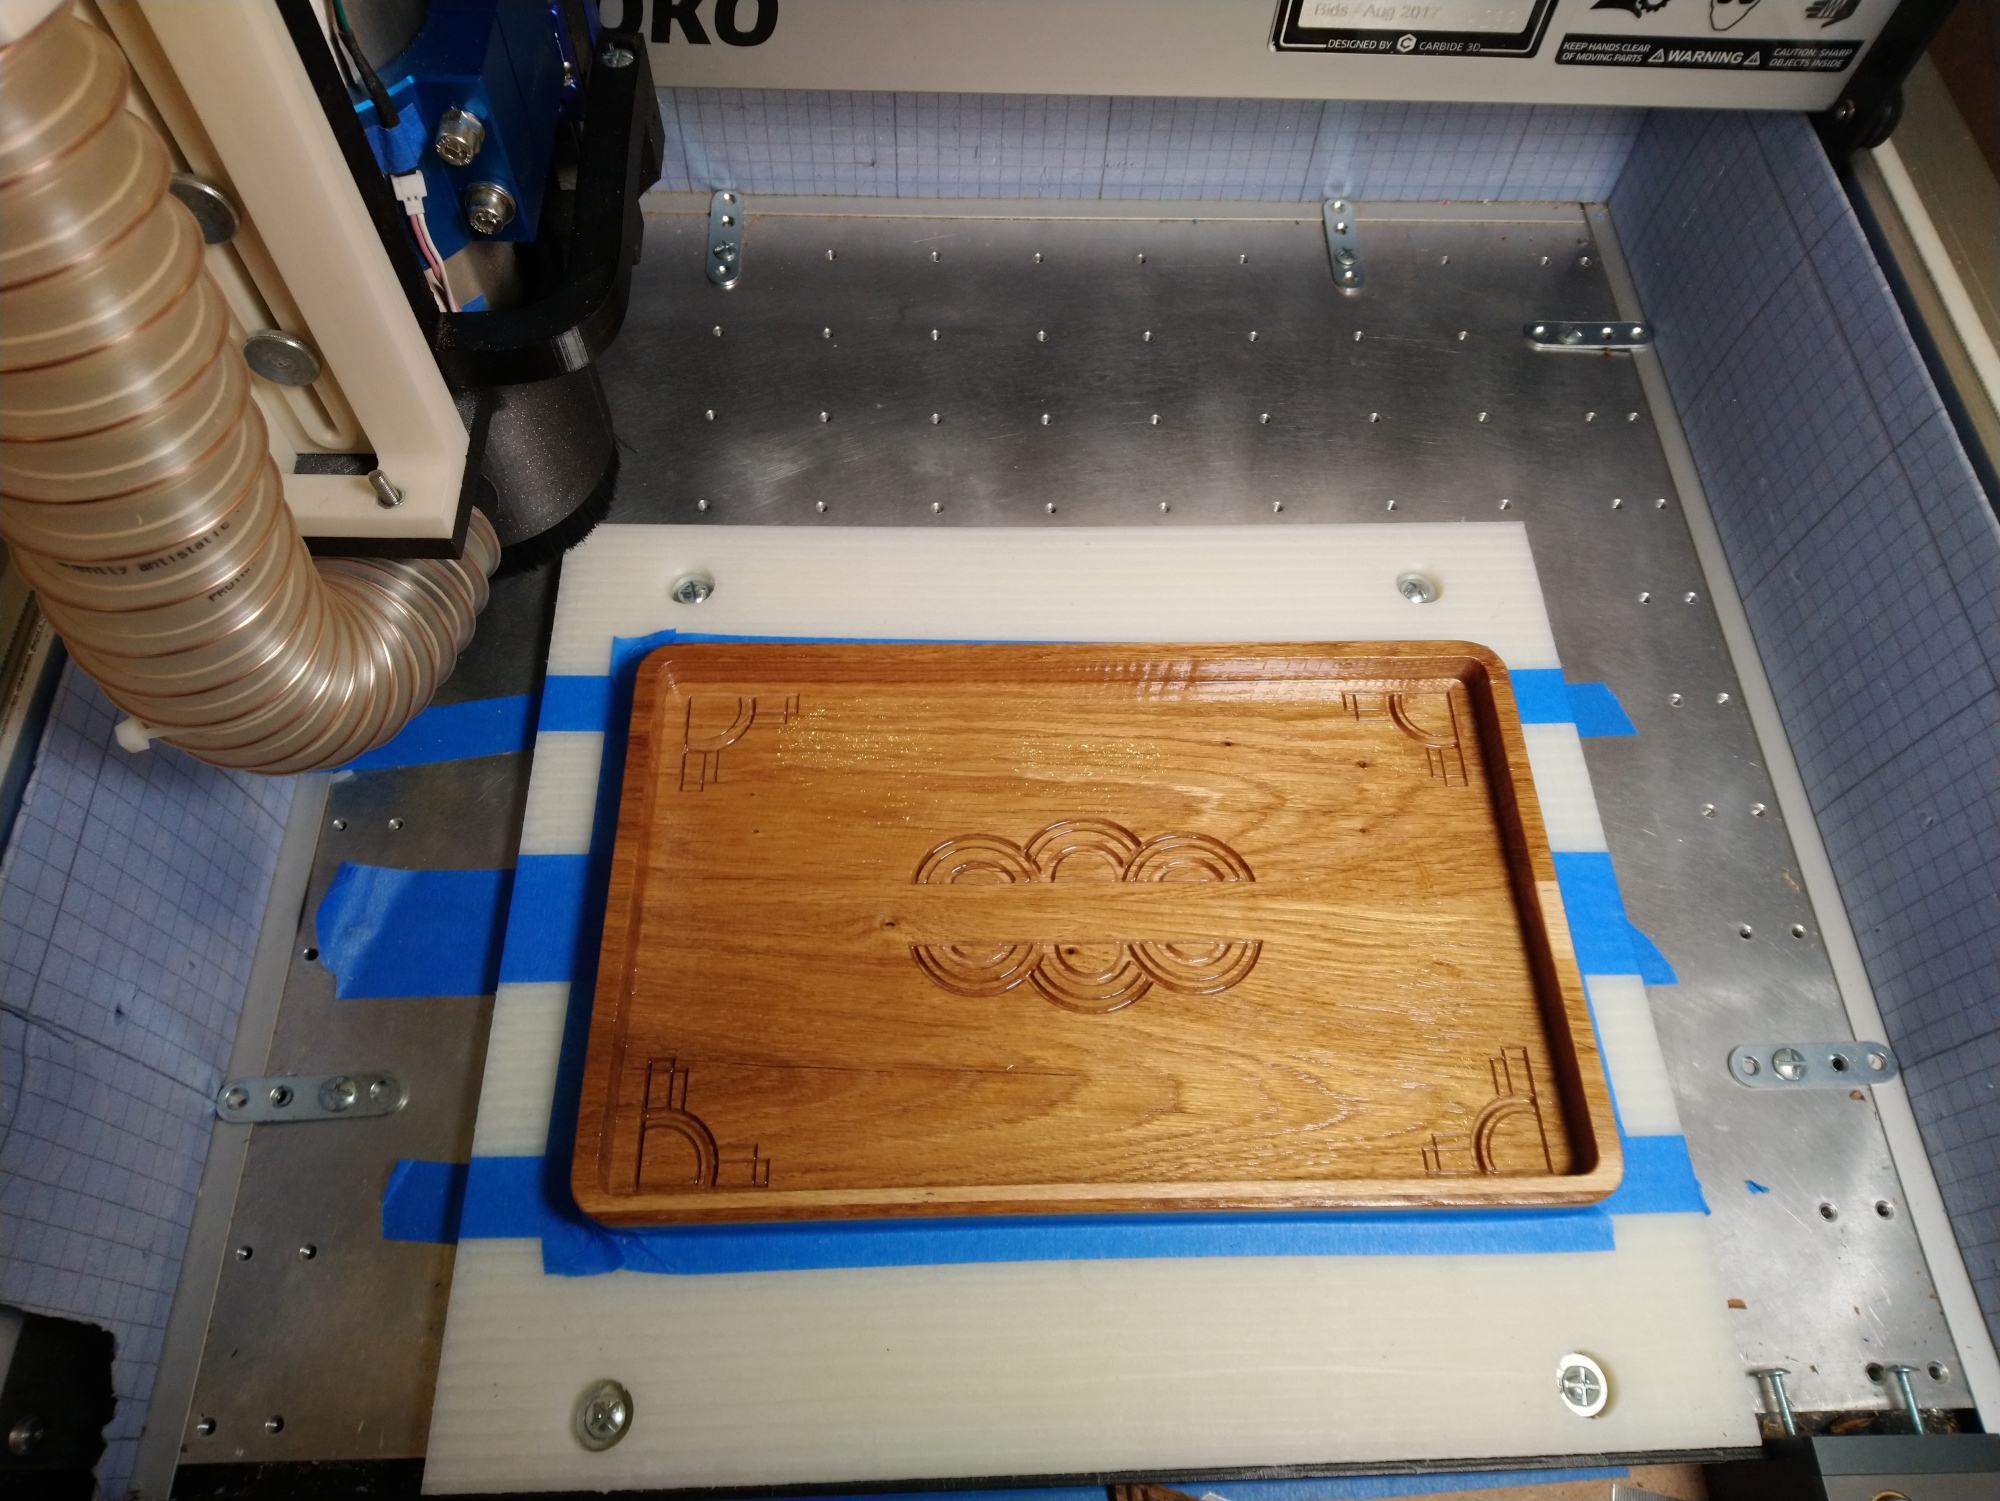
used a coat of clear epoxy to seal the wood,

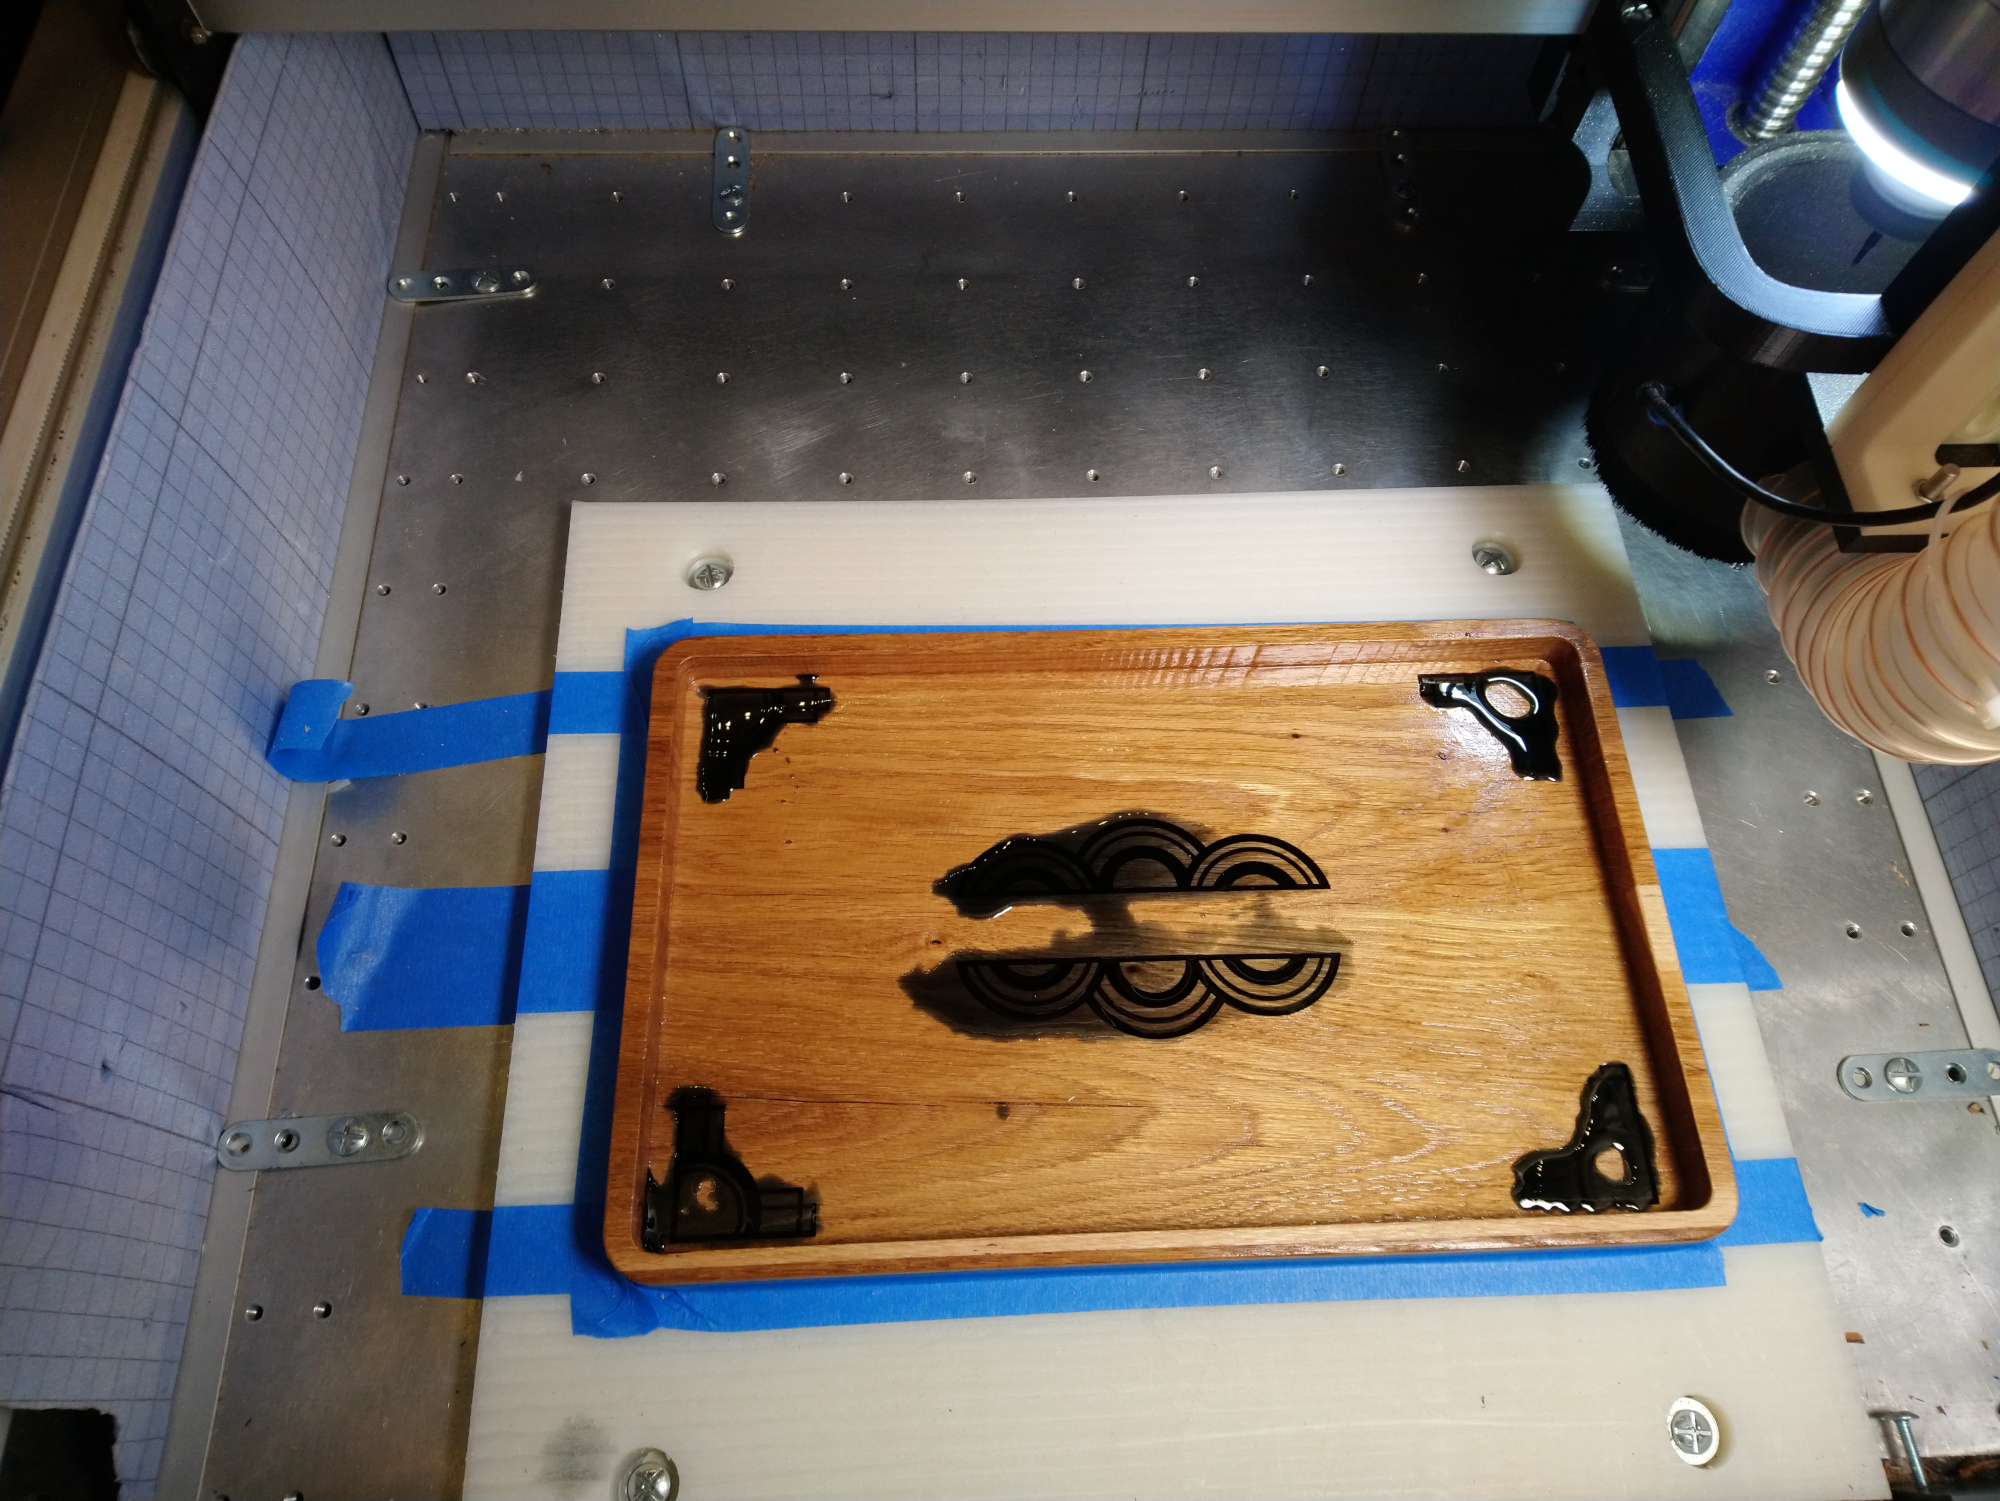
poured black epoxy “Julien style” (messy),

and then surfaced it with the Shapeoko, which left subtle tools marks (see the vertical stripes on the left and right sides? Yeah I mess with my machine so often that I’m in an endless “I need to re-tram it soon” mode))

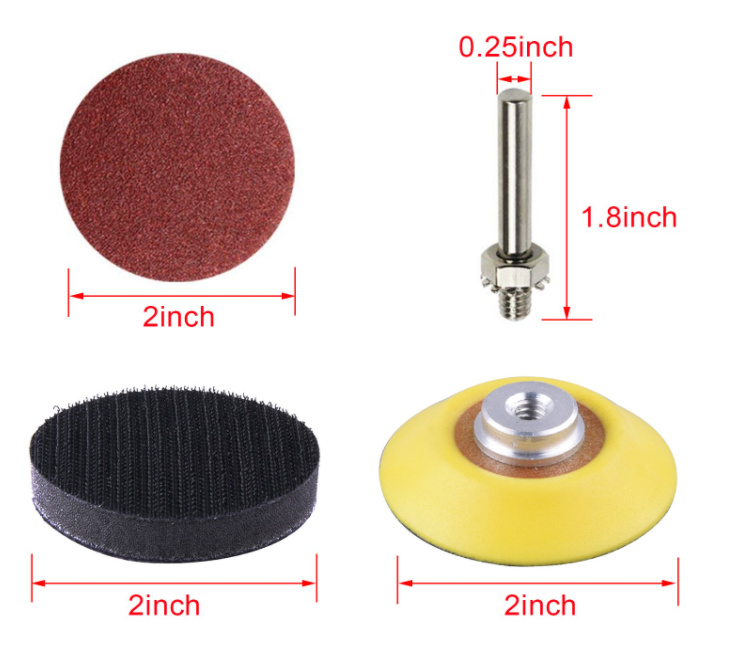
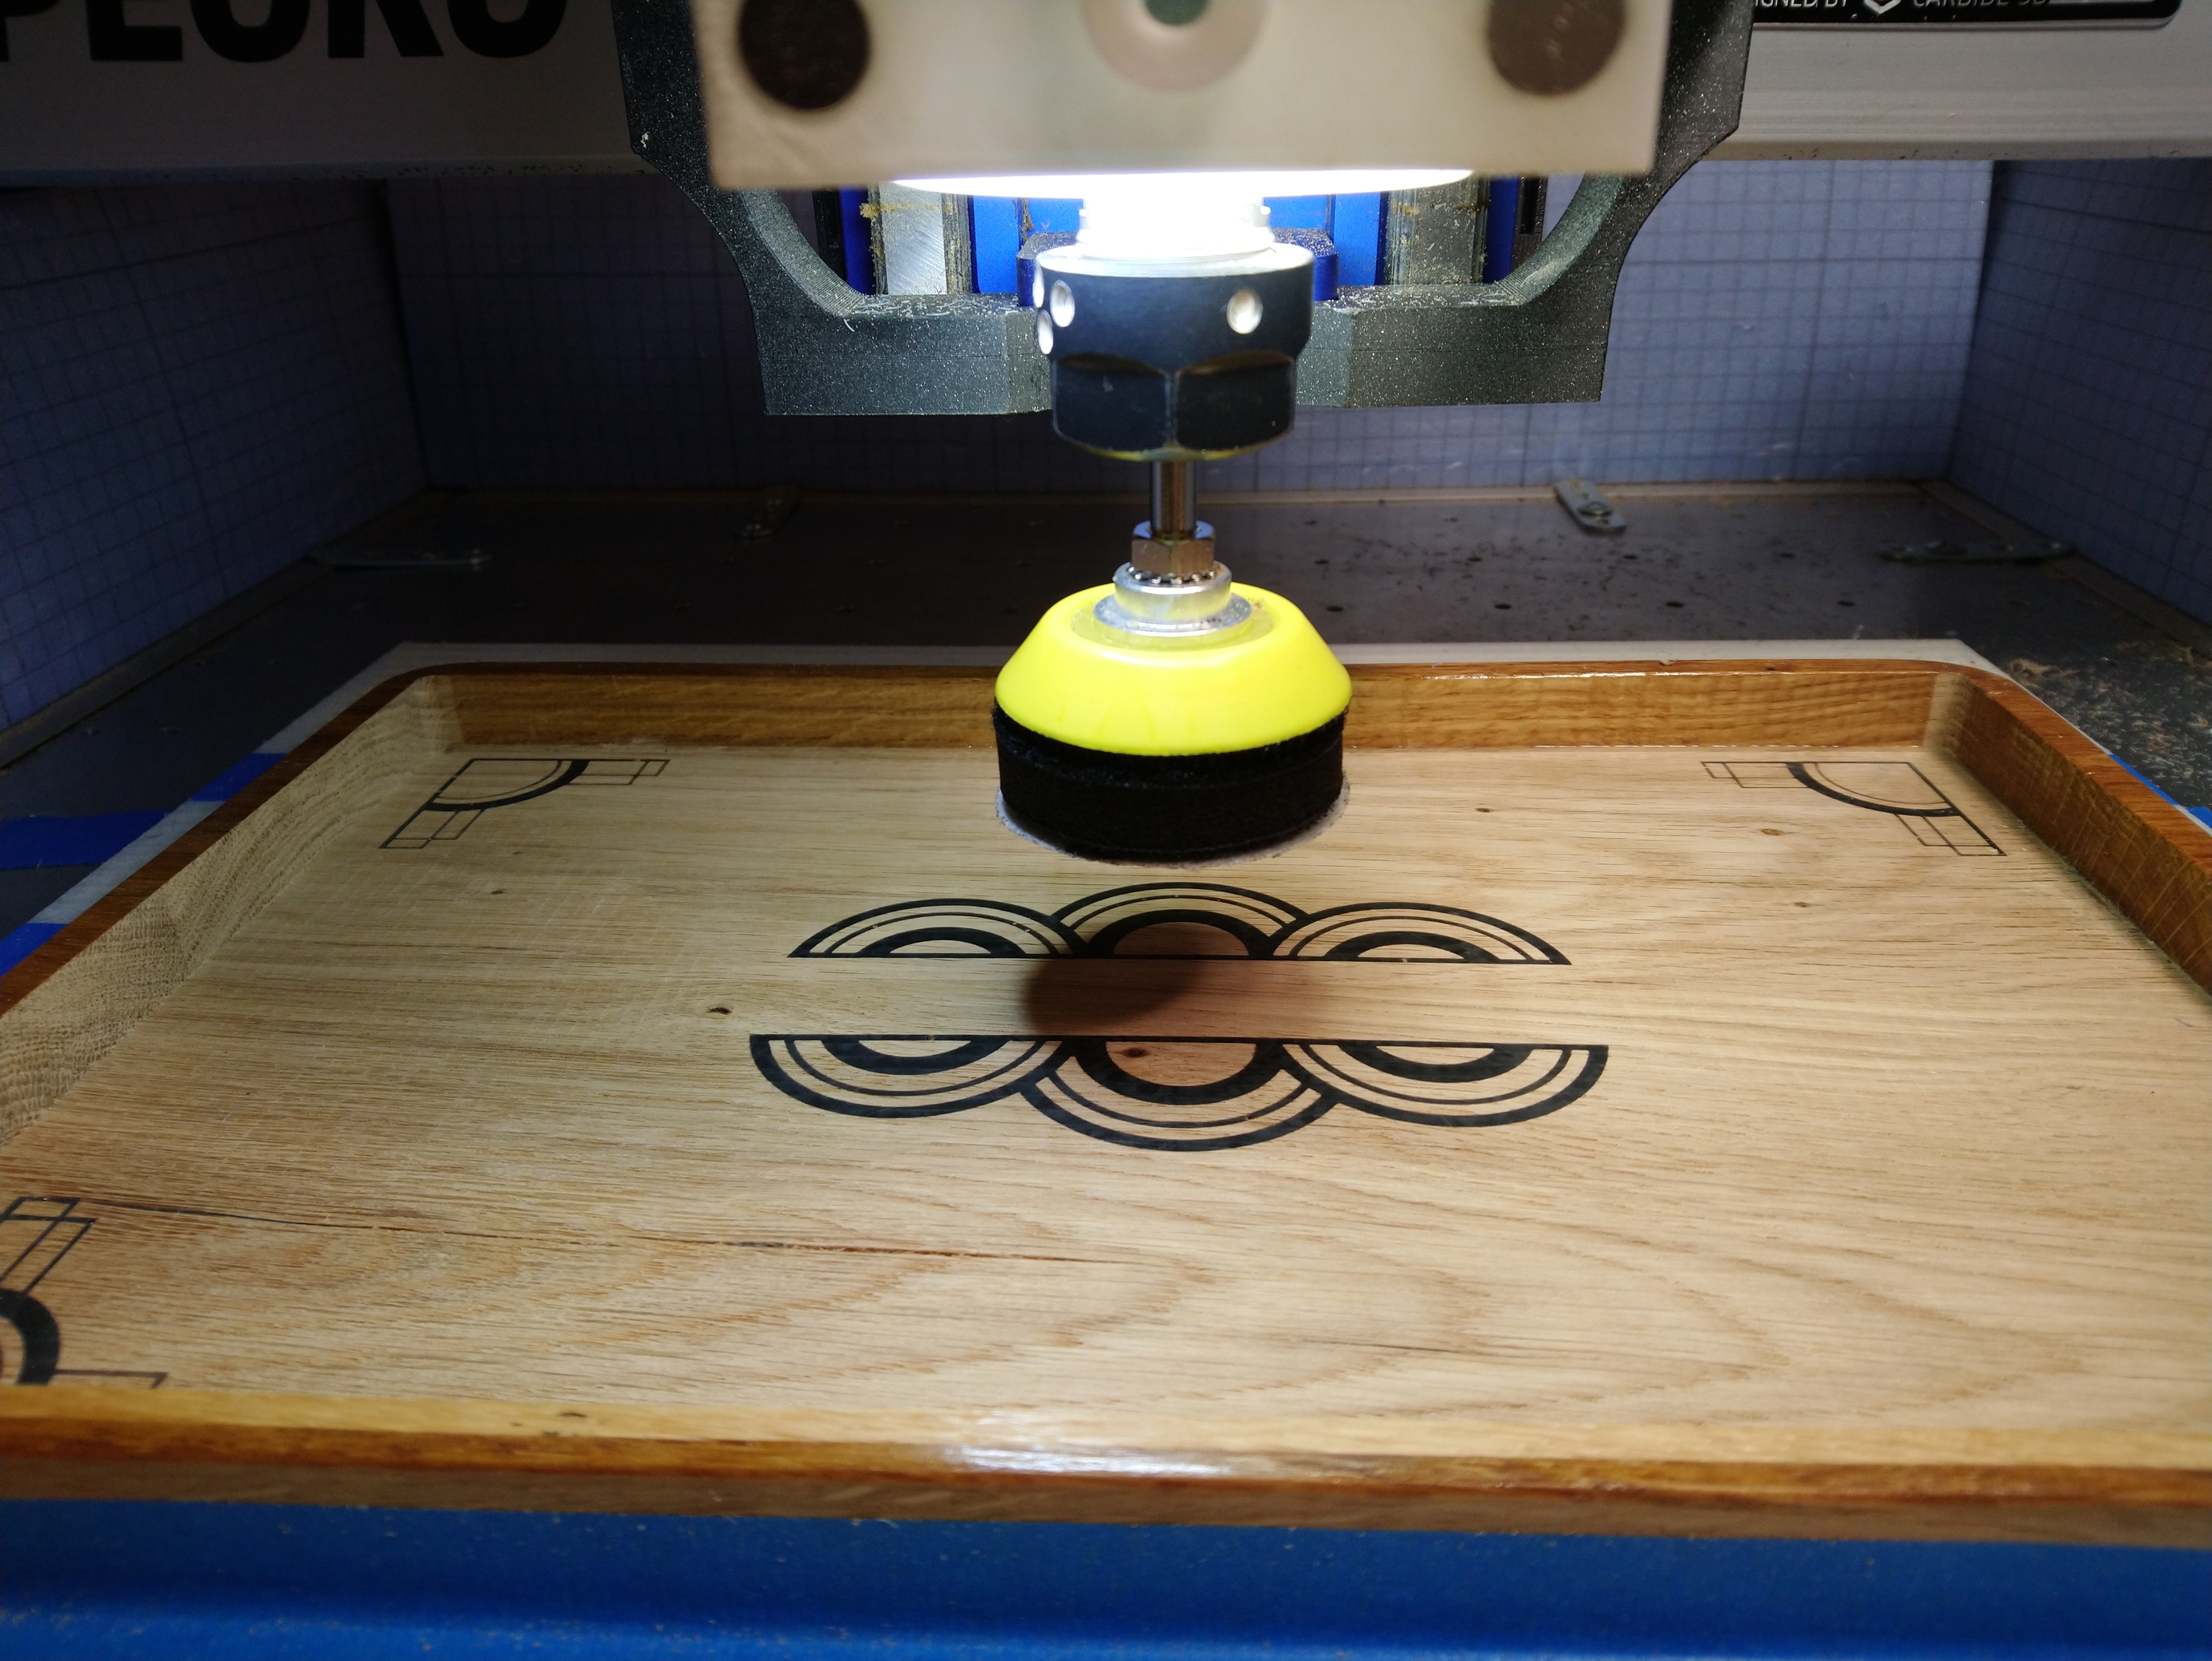
And since I hate sanding (with a passion), I figured I would try running a pass with a 180 grit disc:

And that’s where having a VFD and water-cooled spindle is an enabler for silly experiments like this one, I was able to set my RPMs very low (I chose 1000 RPM, arbitrarily, could have been less), because it would of course not be safe to spin that sanding head very fast.

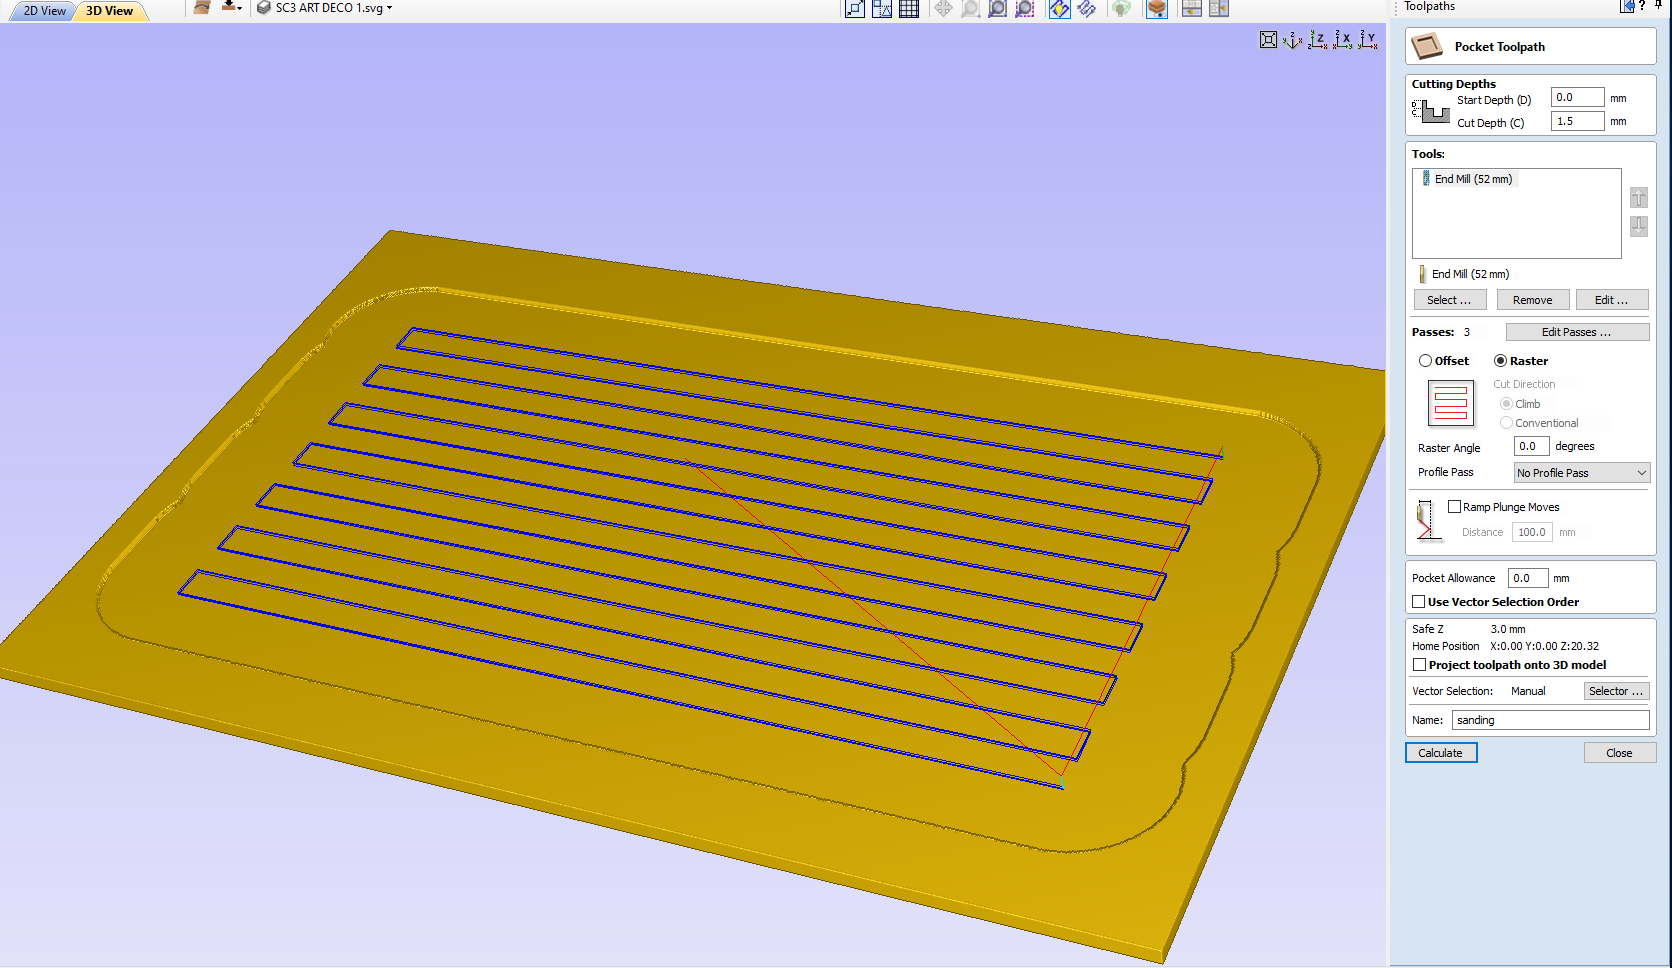
I used a basic raster pocket toolpath, programmed for three passes of 0.5mm (which does not really mean much because the pad compresses, so depth of cut just translates to more or less pressure on the pad)

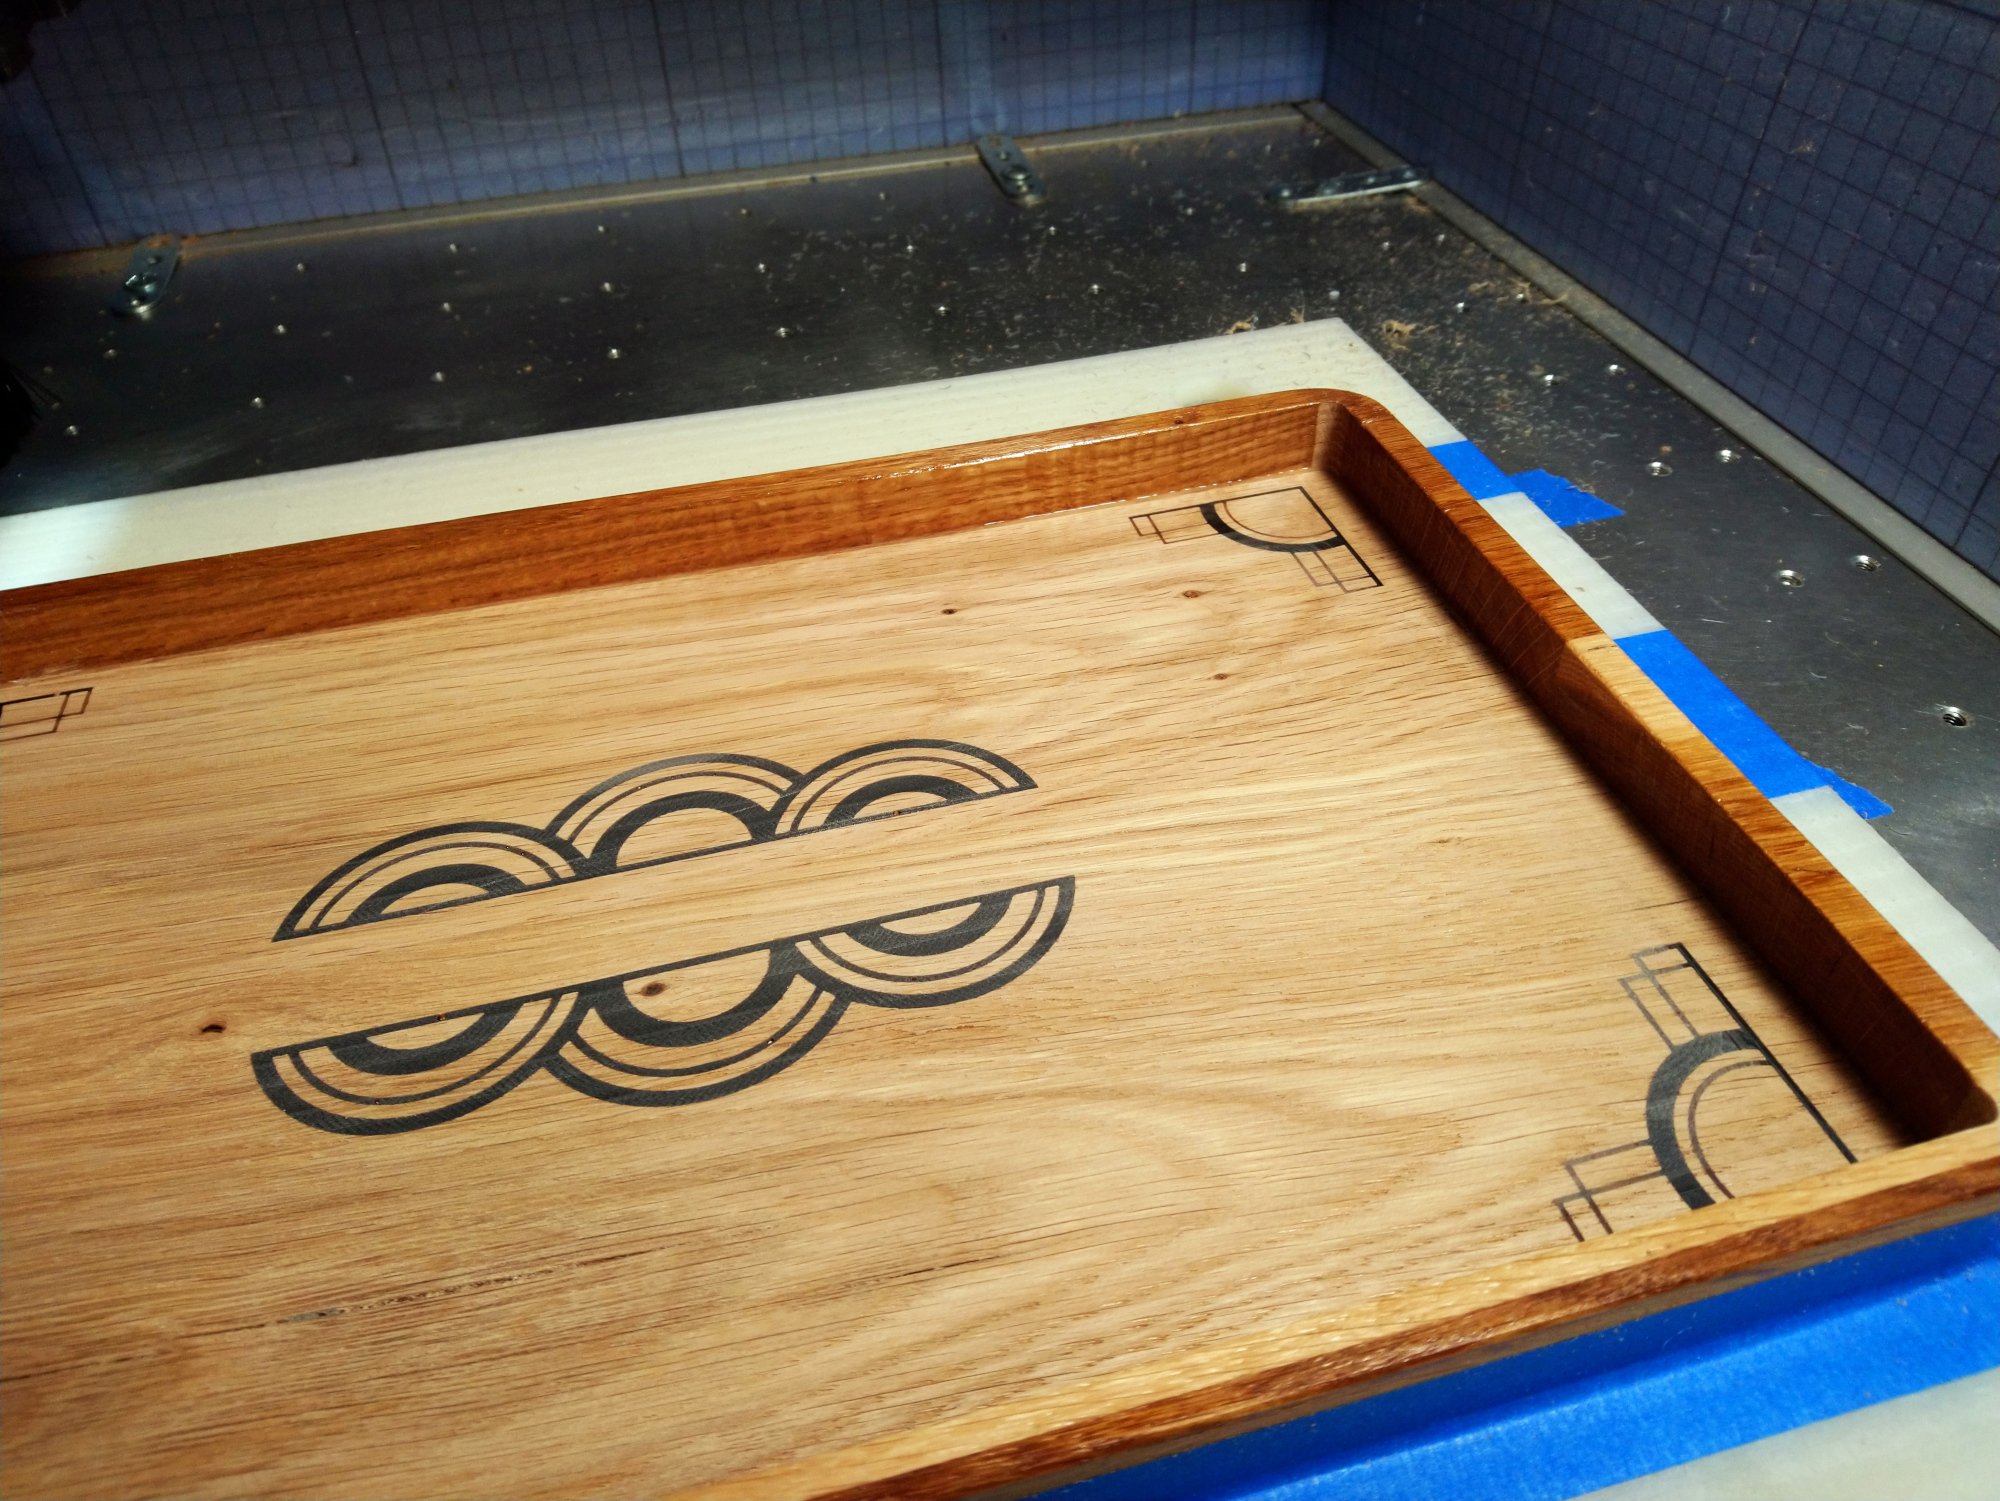
And inefficient as it may be to use a CNC for this (manual sanding would have been faster), I enjoyed not being the one doing the sanding A LOT:

Toolmarks all gone, but of course in the process I then learned the (obvious) lesson that the pad does not really do much sanding on its edge, and I can’t make the toolpath go too close to the walls, so I ended up with a good 10mm area around the walls and in the corners that will need manually sanding.

After the first pass, changing the disc to the next finer grit is very quick and I just reran the same toolpath repeatedly.

I’ll keep this option in mind for cases where I have large areas to sand on a top surface / with no obstacles, if only because I get to do something else nearby while the machine is working for me on sanding, which I call a minor victory.

16 Likes

Julien, do you think you could have re-run the surfacing toolpath(s) for the graphics, after the black epoxy fill, with a flat end mill of appropriate diameter? Z-zero would be set just at the point of not cutting the wood.

The purpose being to surface only the epoxy fill and not the whole tray. Of course, sanding after to level and polish.

3 Likes

That’s a good question, but I think that would only work if I had poured epoxy very carefully inside the cuts with no overflow at all. Since I poured like the clumsy left-handed hobbyist that I am, I needed to surface the excess epoxy around the carved features, and therefore the whole surface.
Also, this was my excuse to have to sand the whole thing :slight_smile:

3 Likes

Yep, almost as big as the ones on my old ‘57 Plymouth Fury. :sunglasses:

2 Likes