Community challenge #28: Return of challenges

Do we have to use Carbide Create?

I don’t see any issues with using some other design software.
Give us a how you did it write up though if you use something else.

I should also note that you can get a free trial of carbide create Pro: Carbide Create Pro

1 Like

Here are some potentially useful/helpful resources:

https://elements.carbide3d.com/category/united_states_outlines/

https://elements.carbide3d.com/category/united_kingdom/uk_map_detailed.svg/

http://jthatch.com/Terrain2STL/

Also, in case someone wants to do Hawai’i (which is too large to be grabbed in a single go last I checked):

4 Likes

Here’s a previous project of mine - Hornby Island, BC, where my wife grew up.

I made up a blank from two different kinds of woods - a mahogany-like wood on top, and a figured maple for the bottom. Then I set up the cut so that ocean level would just reveal the figured wood as the ocean.

All work on a S3 XL, lettering from CC, topography from ‘Touch Terrain’, the 3D paths generated from the ‘STL2NC’ web-page. No 3D modeling program used!

There’s really no design file for this project except for the lettering - the STL was directly converted to GCode.

I did a second one as well, but it failed - as the cut progressed, the wood warped so that the bottom layer wasn’t flat enough to look good as an ‘ocean’.

There’s a few more pcitures here:
https://www.facebook.com/media/set/?set=a.10158155826243457&type=3

13 Likes

Well there goes my weekend(s). Love the community challenges, stoked to see them come back :slight_smile:

7 Likes

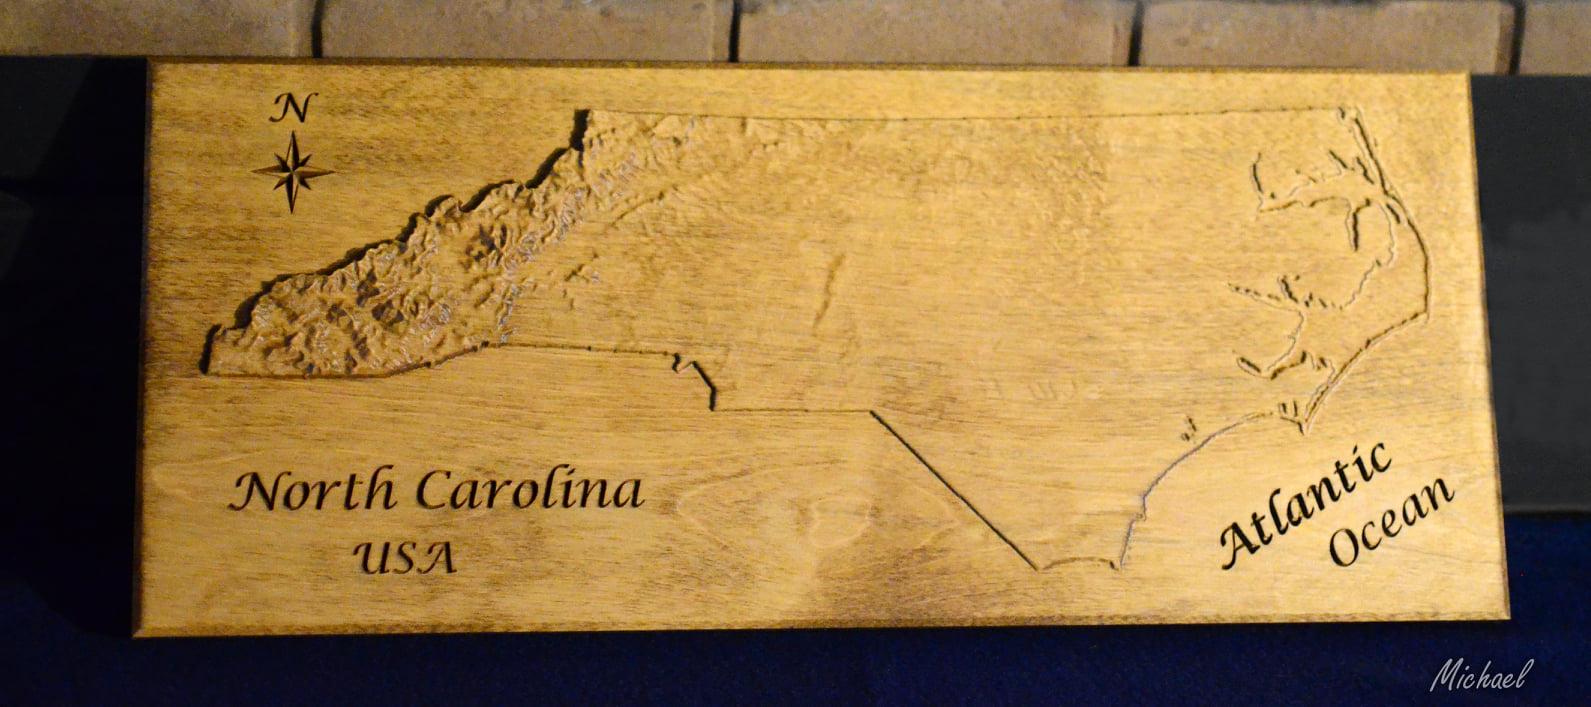
Here is a slightly simpler topo map, this time of North Carolina. For this project, by far the most time consuming portion was finding / creating a good definition file for the outline of the state!

I started with an outline that was perhaps too detailed (particularly along the coast), then pulled it into Google Earth to simplify and export as a KML file.

Once I had that, I again used Touch Terrain to generate an STL, and STL2NC to generate the GCode. A simple CC design for the lettering finished it off.

6 Likes

Looking forward to this, now I have something to do on my shapeoko.

4 Likes

Just a couple weeks ago my wife was asking when these contests were coming back. She loves seeing what everyone else makes as well. This category is the perfect excuse to finally get around to milling some topographic ideas I have had on the back burner for a while now.

Looking forward to seeing some great projects!

2 Likes

Awesome! I happen to be in the middle of this exact type of project! Exciting stuff, glad to see challenges back! I am in!

Here is the link to my ongoing entry.

Community Challenge 28 Entry- Matching Topo Table Tops - Gallery - Carbide 3D Community Site

Hopefully something contained in there will help someone else entering this challenge. The topos are some of my favorite things to do. This one, clearly shows I am no woodworker. Hopefully time allows me to complete these before the end of the challenge.

3 Likes

Dumb question: tiling is gluing a ton of plates to create topography?

Toolpath tiling is a new(ish) feature in Carbide Create. It is generally used when machining a project that exceeds the available workspace on the machine by using fixed reference points to allow you to move the workpiece. I am new to it… still haven’t wrapped my head around it. Most people here could give a better description than that.

Screenshot 2023-04-22 180257

1 Like

Awesome. I’ve done that manually before. Is that in free CC or only pro?

Pro only. Haven’t used it yet but think ill test it tomorrow just to see how it does.

I hope to be able to participate in the contest, but I understand if I do not complete the project in time. I had surgery 2 weeks ago and am in the process of the 6+ week healing for a broken ankle. It has been rather difficult to get around the shop easily to build any projects with only walking on one leg. :frowning: This is all I have on it at the time and not sure when I will actually get it done under the current circumstance.

  • Tucson, AZ

I am working on a project for a customer that lives on Lake Texoma. The plan is to take a 18"x24"x1/2" sheet of plywood, engrave it at 0.1, paint the lake blue and paint everything else white or black, then frame it out with some hardwood trim (dark walnut something with some dark accents). I am thinking of adding some extra depth to the center of the lake with another pocket at 0.2" then painted with a darker blue.

I accept constitutive criticism well and treat it as a learning opportunity. I welcome the advice as I am still learning this trade.


Lake Texoma picture.c2d (743.2 KB)

8 Likes

Love it. Some blue epoxy works great in these as well! Get well… important to keep moving and take rehab serious. Get after it!

1 Like

Oh that’s a great idea! I’ve been wanting to try some colored epoxy.

You may lose the depth variation using epoxy unless you use a semi transparent pour or do multiple pours with the shallow first and the carve and pour the deeper. That may have too much of a defined edge to look natural.

If the color difference isn’t important to you then just cut it all the same depth and save some epoxy.

I have only begun my epoxy adventure so maybe there are other techniques to achieve the desired result.

2 Likes

I appreciate the advice. I was wondering if the epoxy would be like candy paint where it gets darker each layer added.
My first thought was to do the deeper part a darker epoxy and then the shallower part with a lighter blue epoxy. But I wondered if the top layer would cover the lower layer. I’ve been watching reels of guys doing epoxy tables and from what I saw it always looks like they do clear above the objects they place in there so maybe would be more like a base paint and just cover.

I guess if I do epoxy I loose the depth to the lake. But I think the epoxy would look cooler.