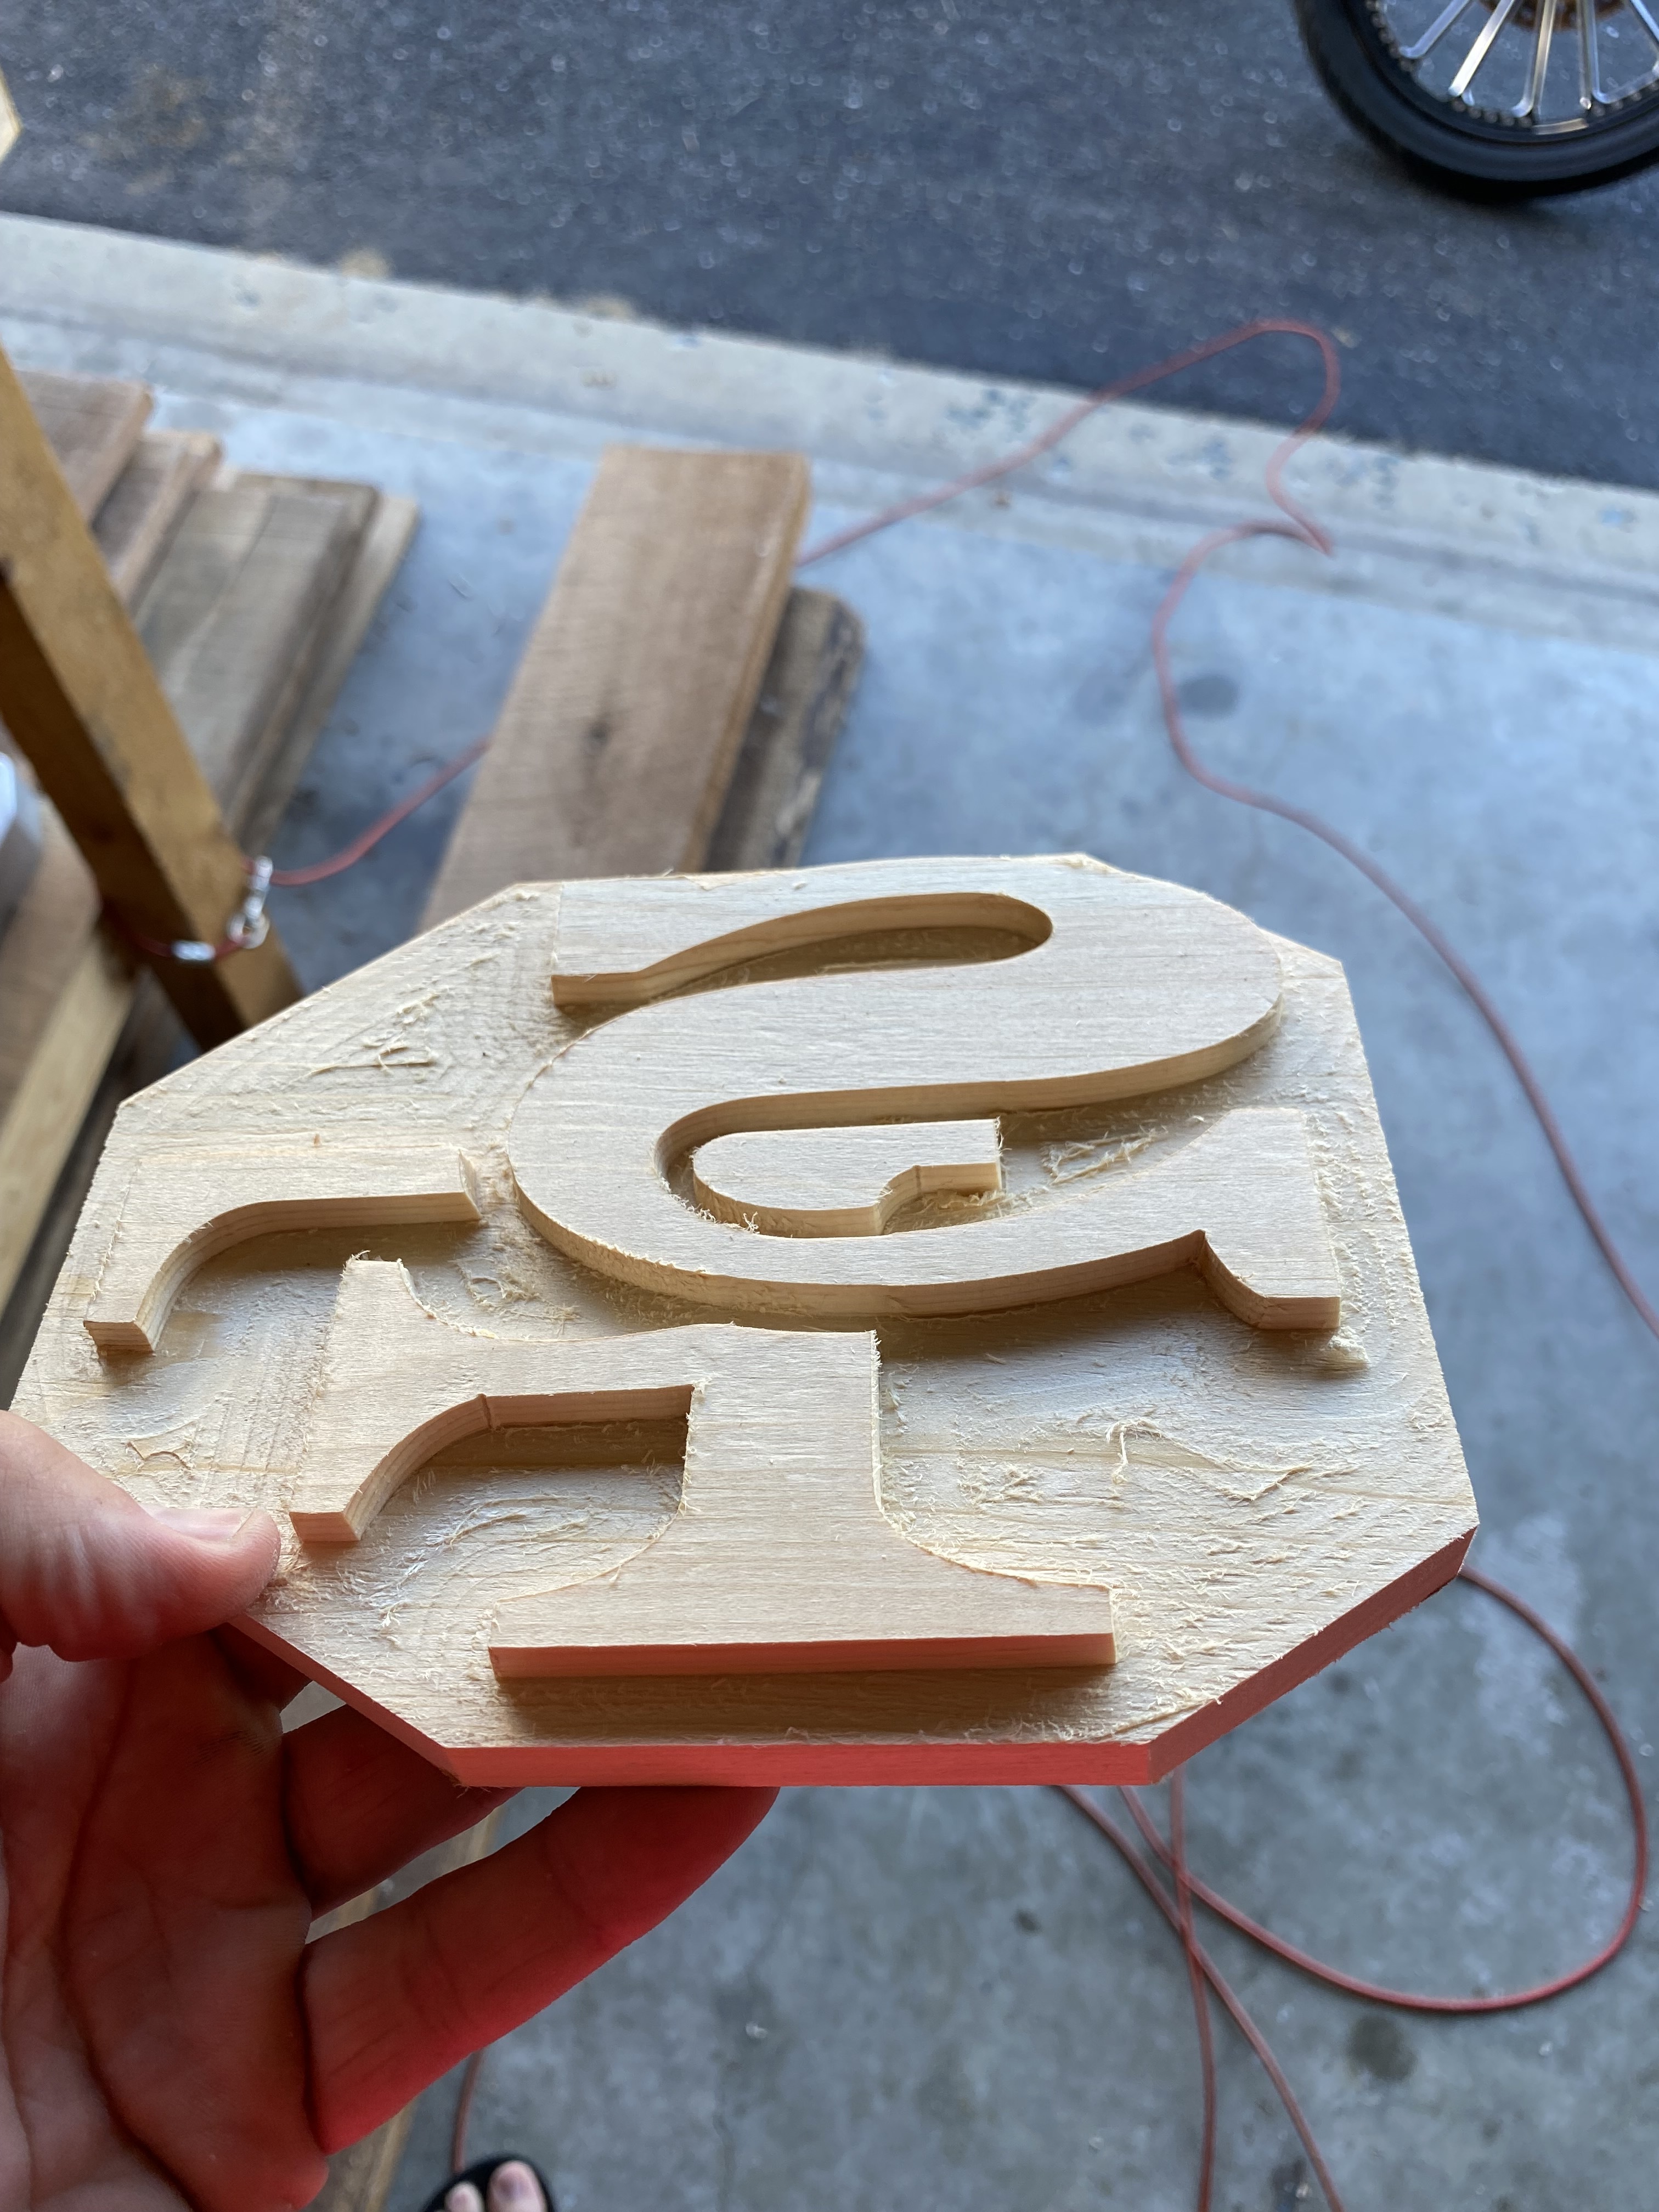
Also, the reason I was trying to keep it 7x7 is to conserve wood and time since I am using end grain so the glue up process is slightly time consuming
My suggestion is to use scrap or MDF until you are confident in the machine operation.
The usual causes of plunging too deep are noted at: FAQ - ShapeOko
If you get a too deep plunge in a machine which is mechanically sound, correctly configured, in which the endmill is not pulling out, and with all tool changes done using the interface, then we want to have it documented so that we can investigate.
Yeah I have been using scrap to practice each plug for my inlays before I use the final stock, but still frustrating to get the correct start depths when the depths keep changing after it is zeroed for whatever reason. I’ll read over the FAQ and do another test piece with a 7x7 and 7x9 piece of stock with the same zeroing procedures and see if it narrows down the issue. I will update later this evening.
1 Like
I’m not real familiar with my shapeko 3. But since the system remembers the home location of the last cut. Can’t one put in code to make the Shapeko go to this location give it the first line of code that moves the bit to start the first cut. With the stock removed and this procedure completed. The original stock could be used to see if the bit is in the correct position. If the stock is 1 inch thick. and the bit was first set to cut .02mm deep. The bit should be .02 mm lower than the stock. This is my idea of how to determine of the bit moved. Or am I all wet?
1 Like
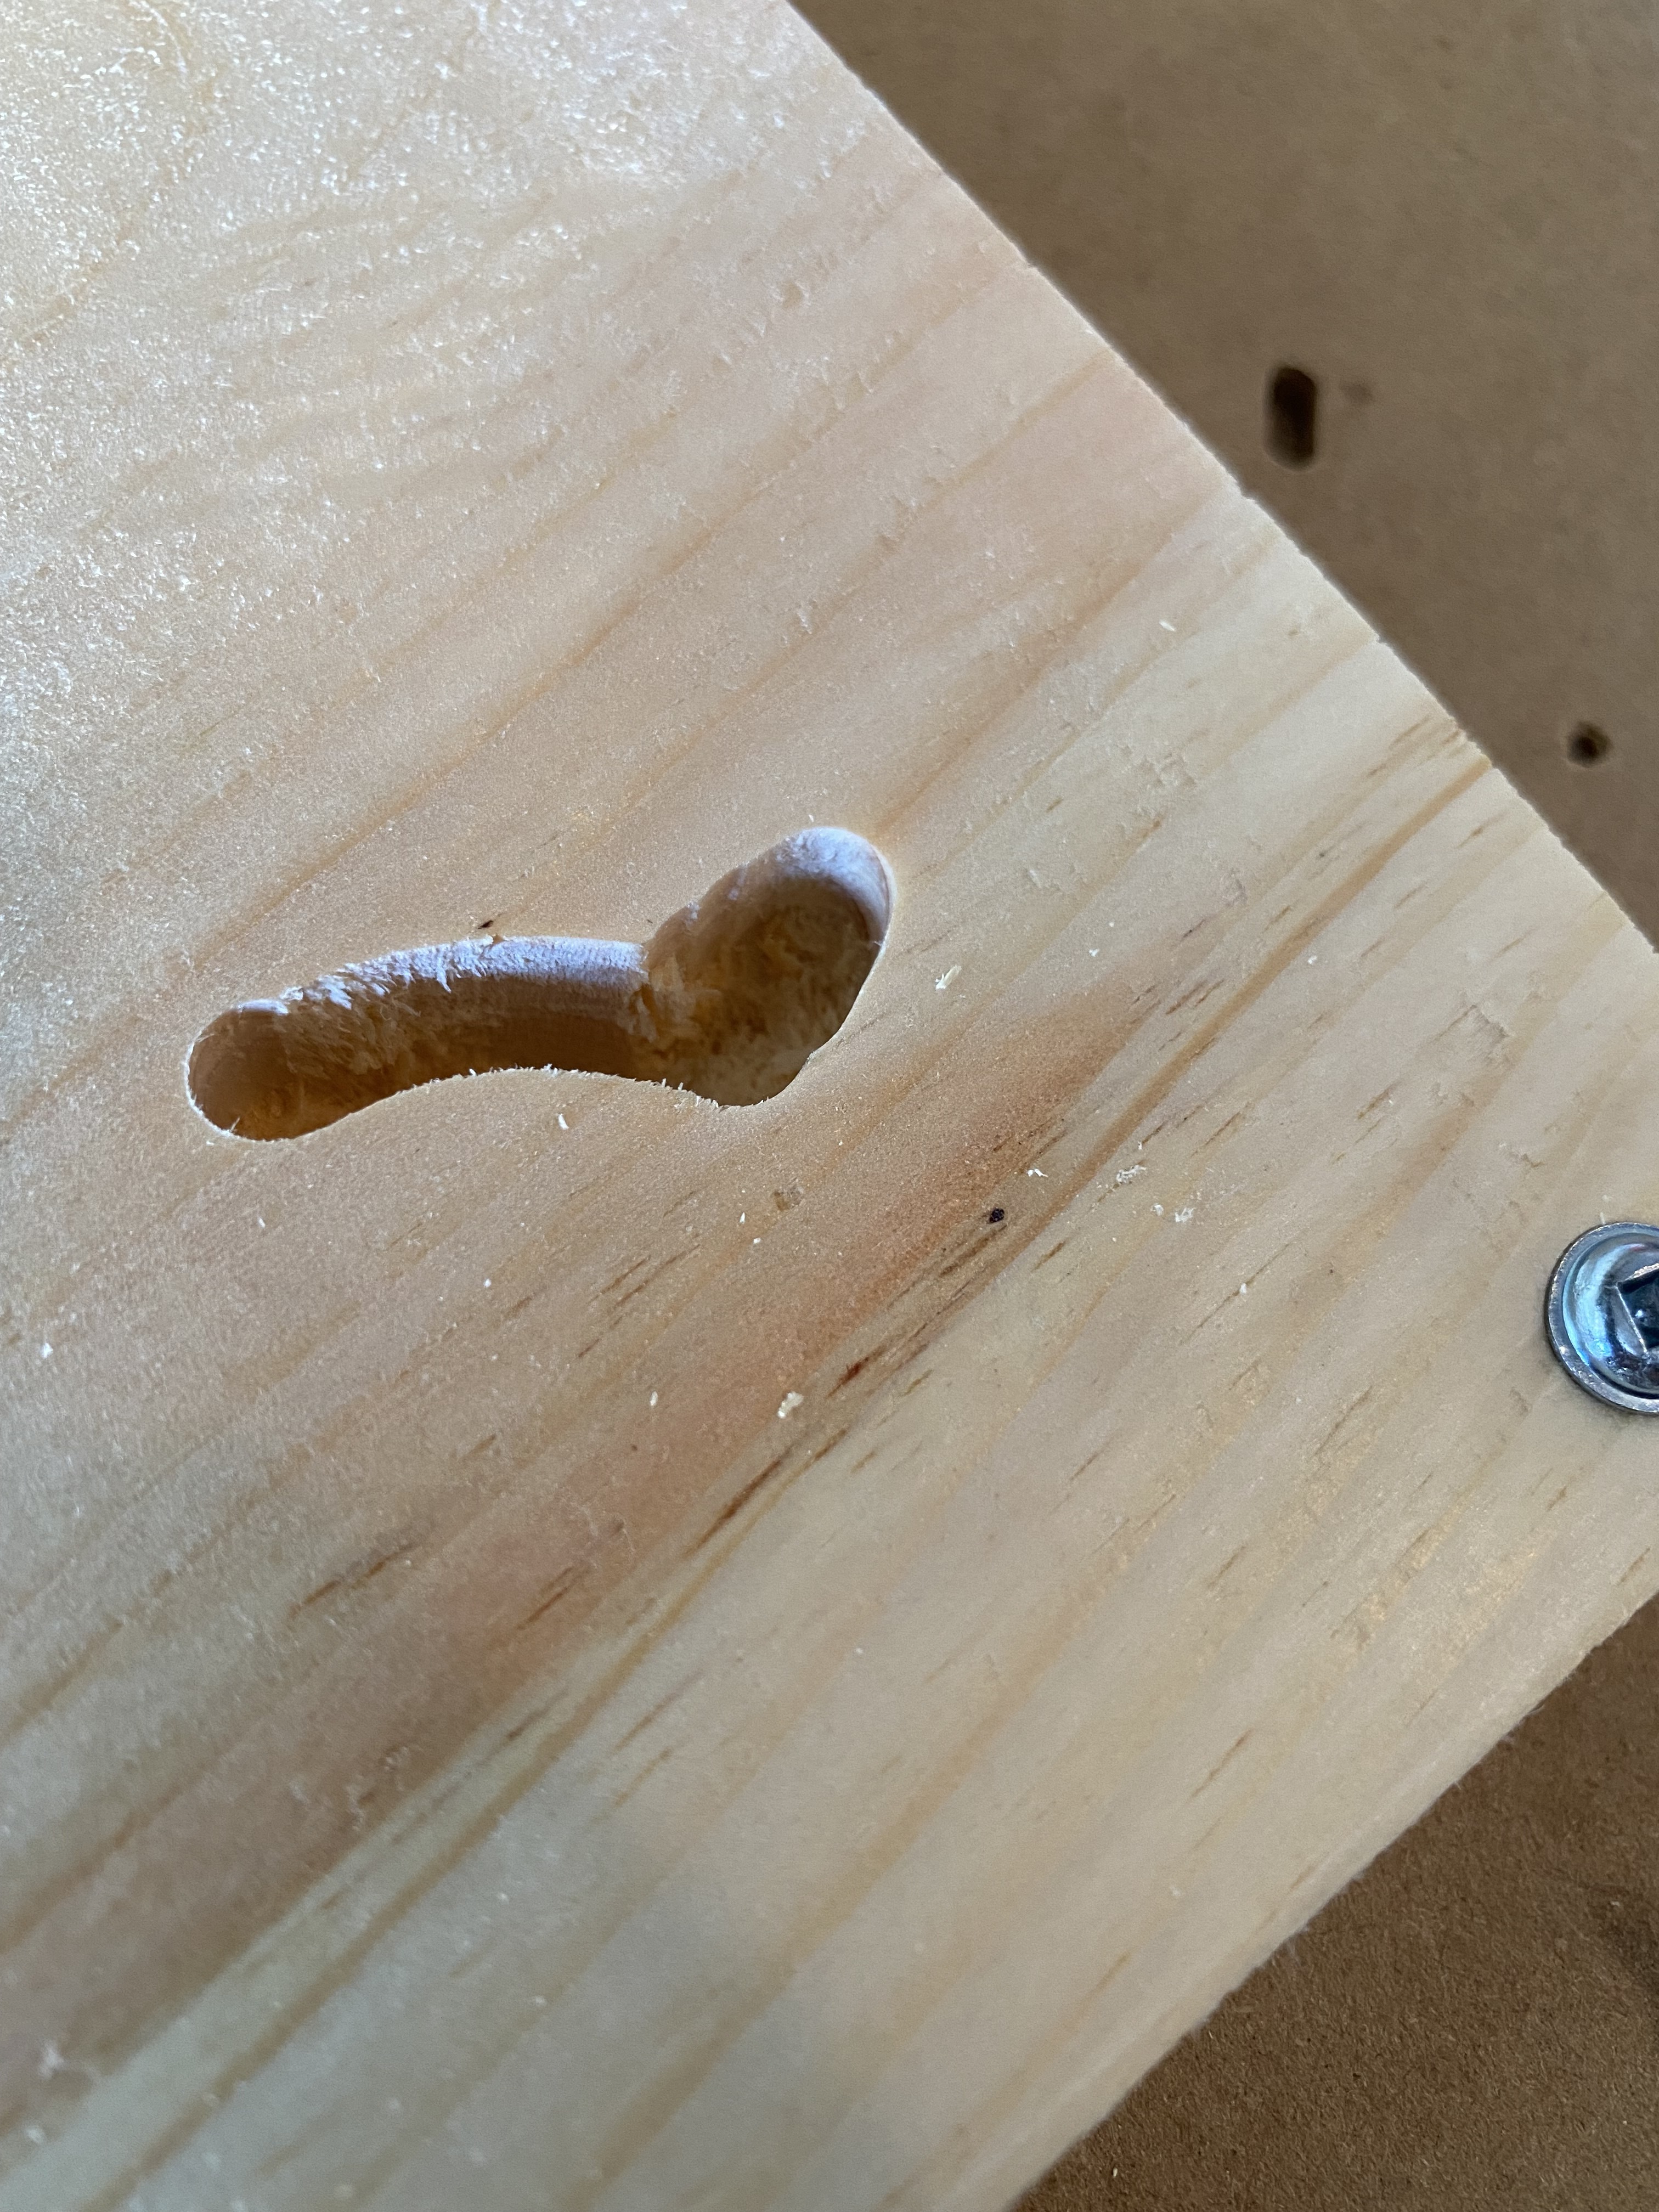
So I did the two practice pieces just now with 7x9 and 7x7 pieces of stock and they both cut the same, as I expected them to yesterday, the sizes were literally the only difference between all this… So yesterday it plummeted multiple times (with the 7x7) and also slight variations of depth using the exact same files, exact same wood and thickness, and using my bitzero to zero my bit. But today it decides to work twice in a row. What am I missing here? I’ve changed absolutely nothing between yesterday and today.
49ers PLUGS.c2d (337.0 KB)
maple plug.nc (261.6 KB)
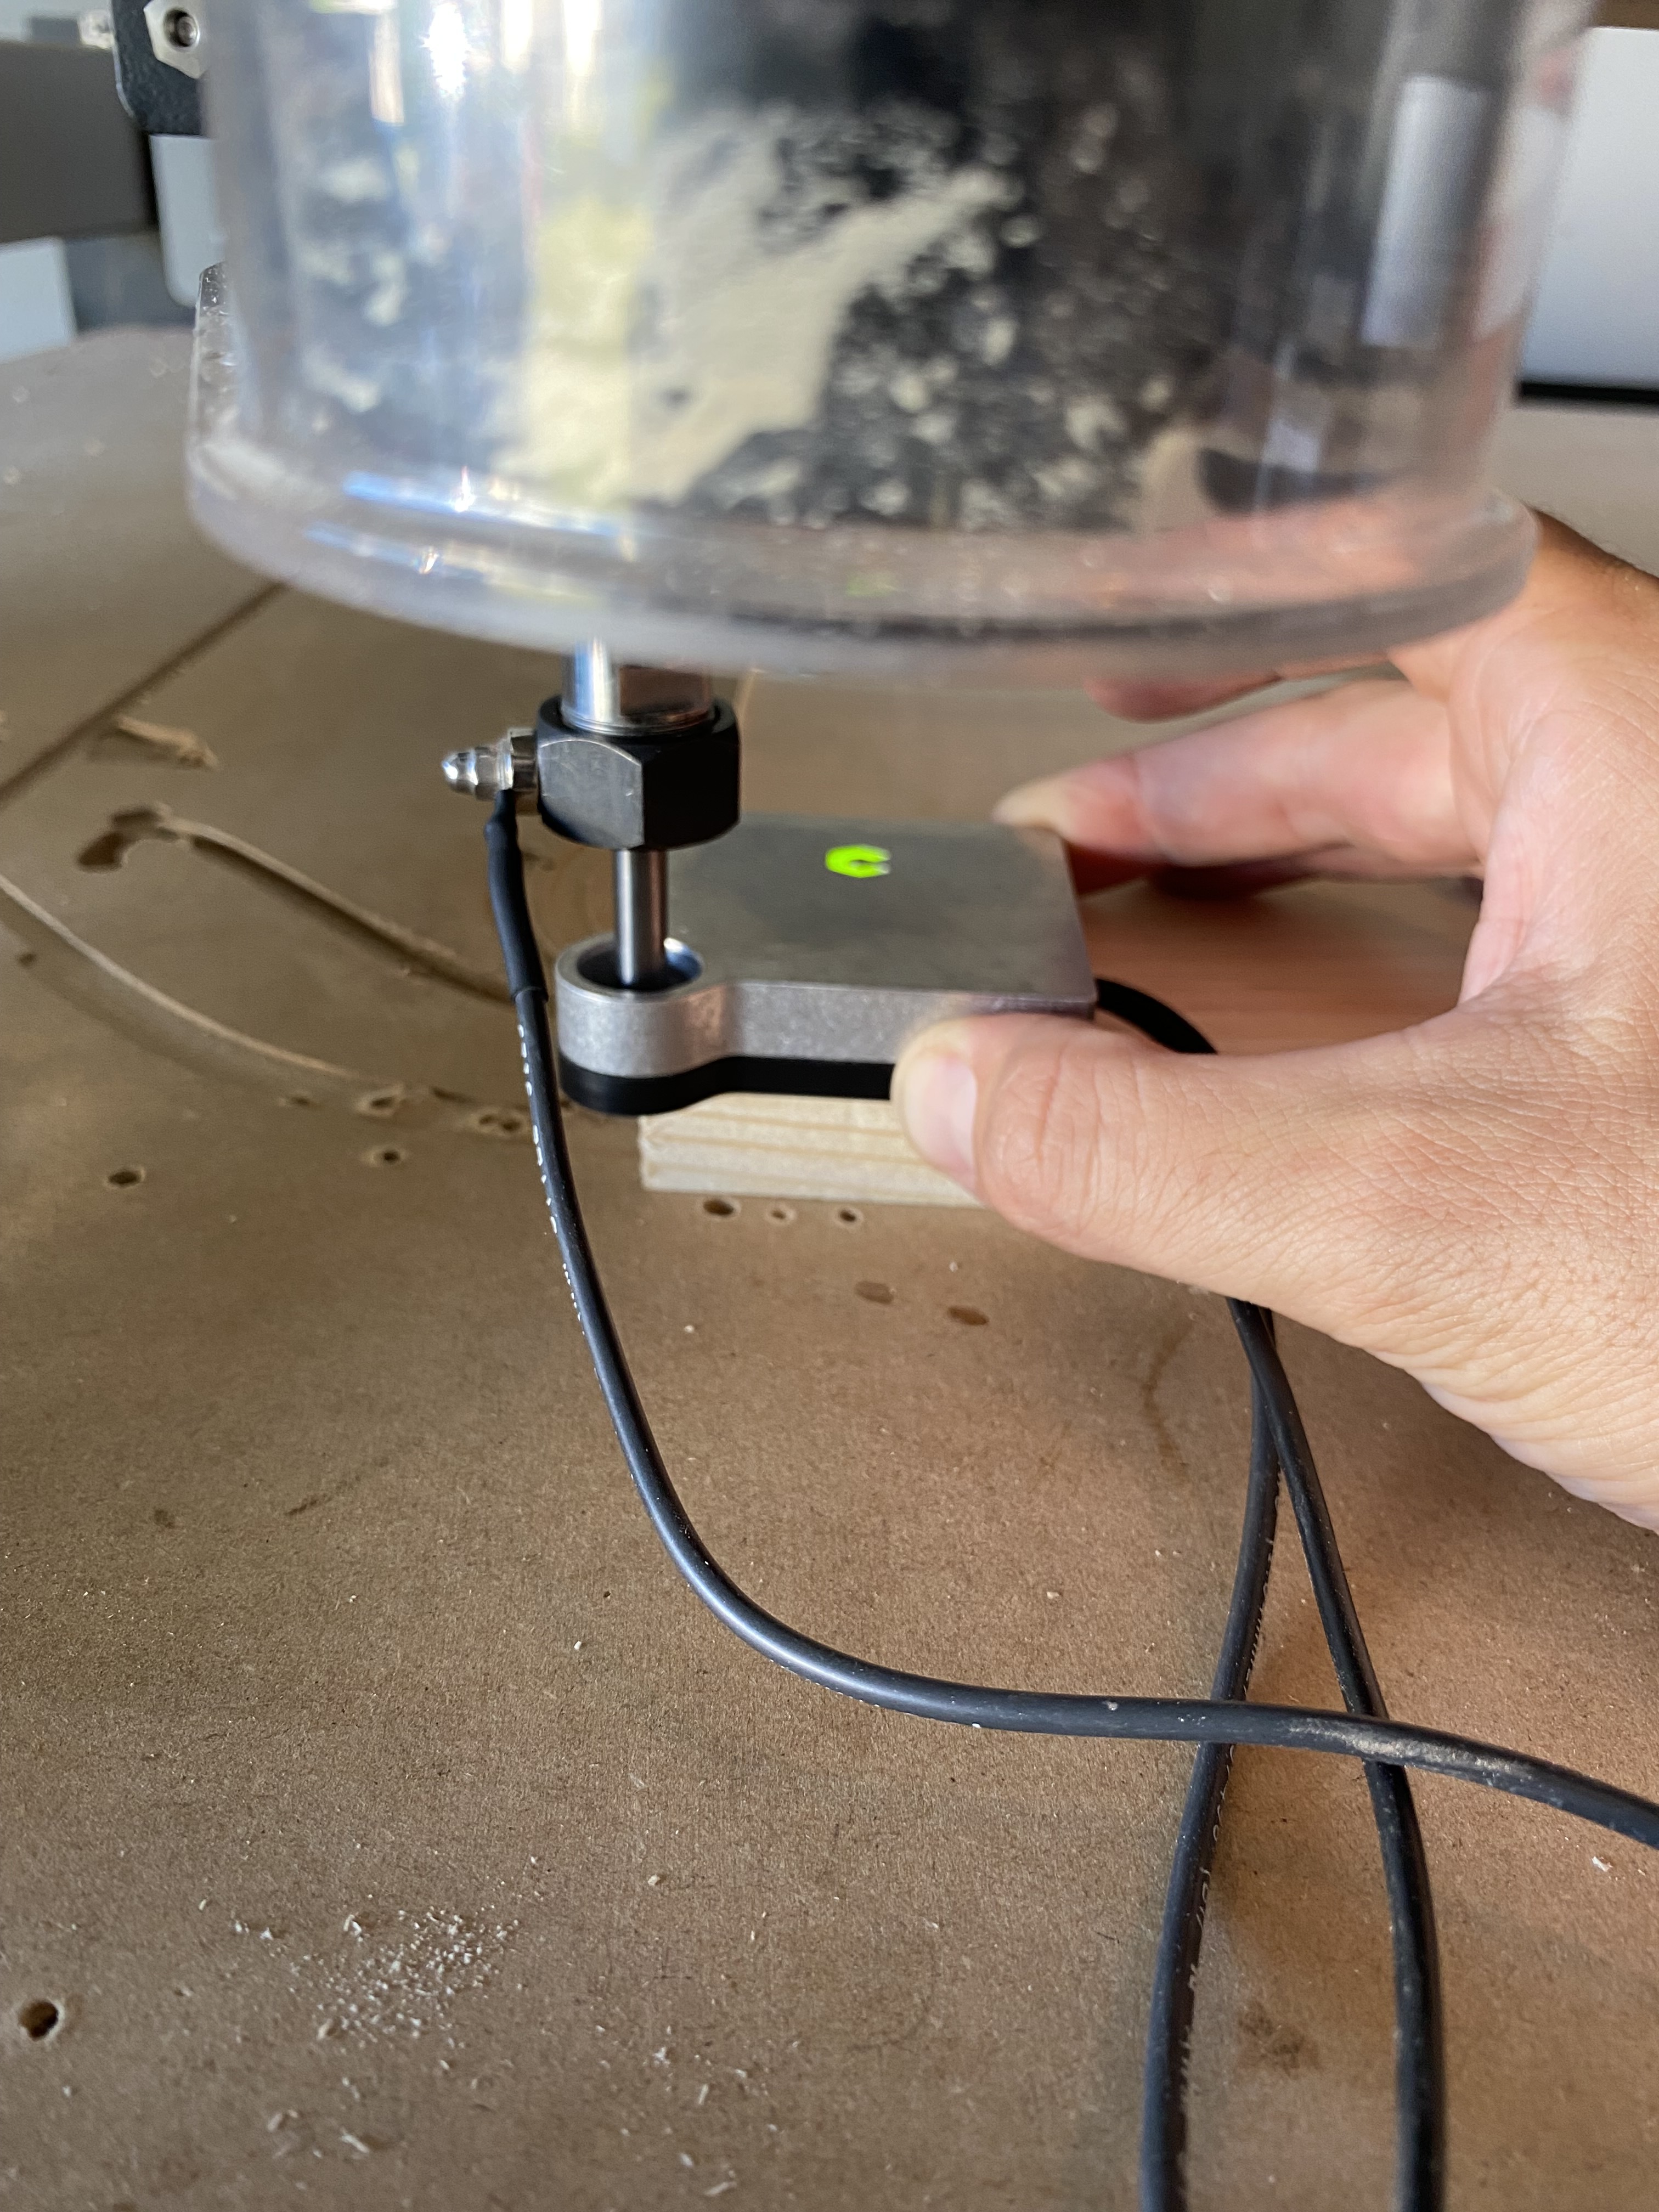
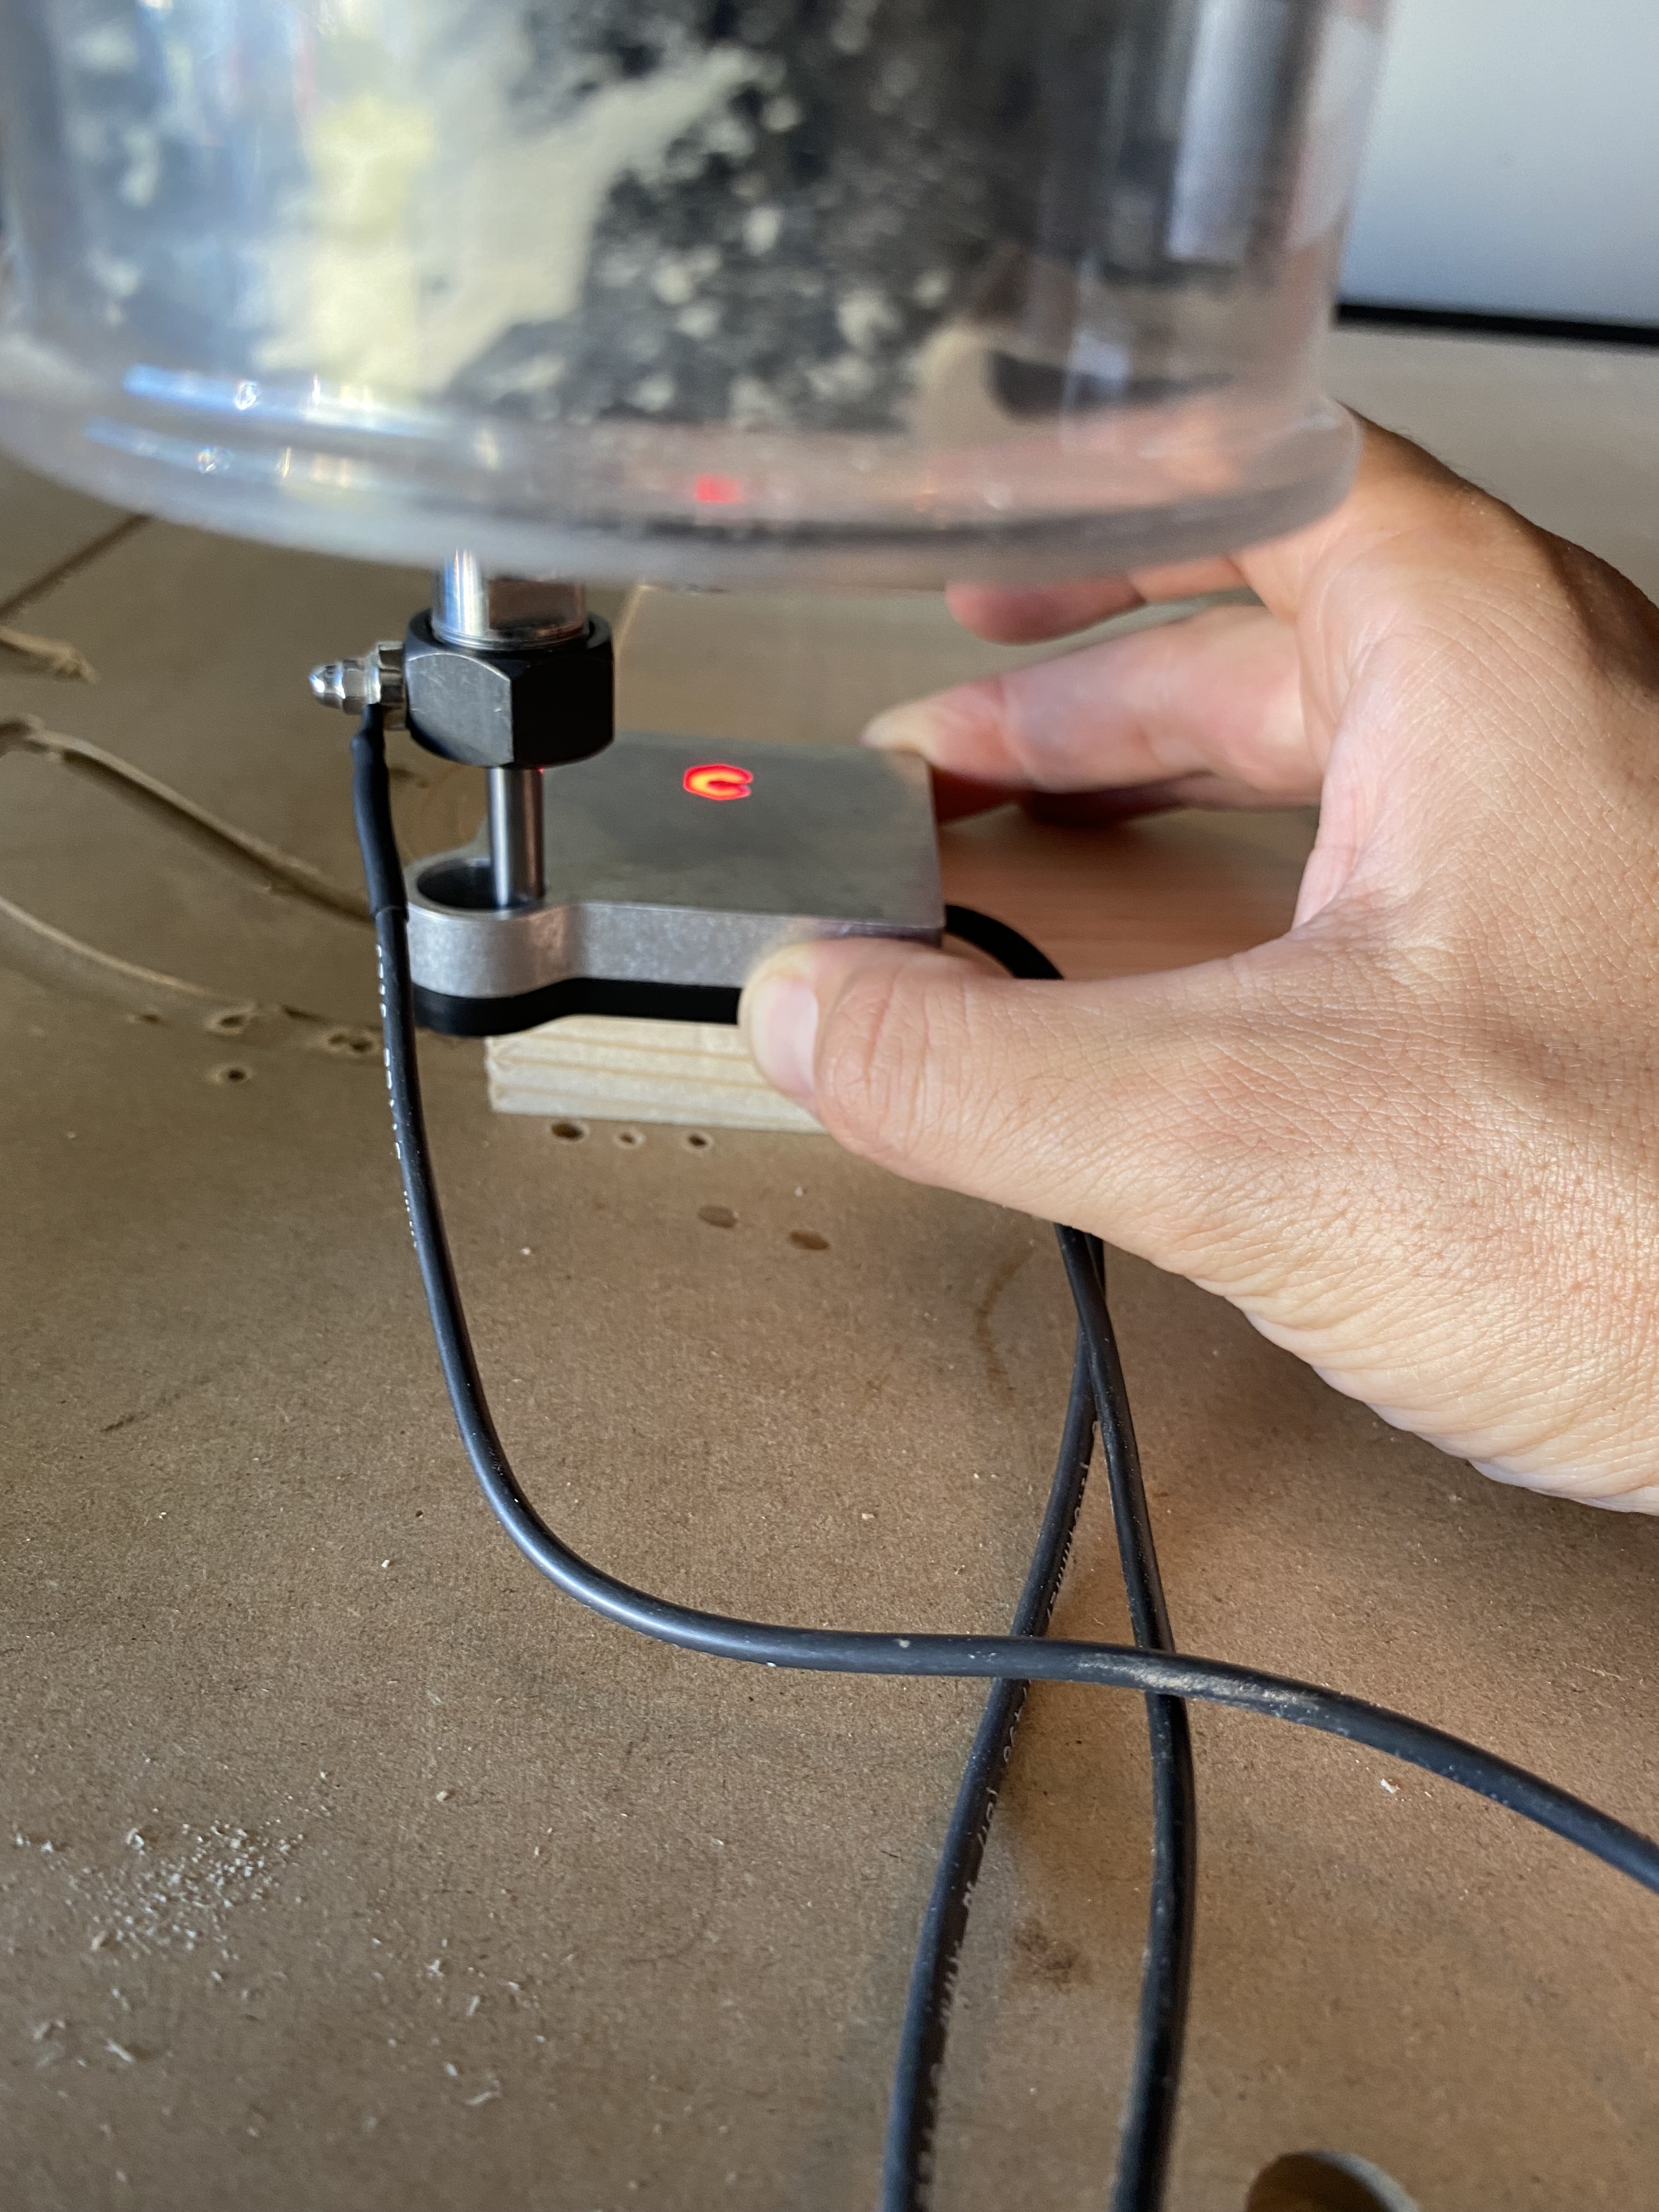
So, I knew I spoke too soon… I tried again today, it worked the first time then I did another practice and it plunged about an inch deep, did a third attempt and plunged the same. I re-zeroed with the bitzero and it plunged again the same depth. I feel like it has to be a Bitsetter issue now. Do they just randomly decide to not work at times? I attached some photos of the zeroing process since I was unable to send the video because the file was too big. I also attached the first practice piece I did today and how it is supposed to turn out. I used the EXACT same file for all three attempts today, along with the EXACT same zeroing process with the bitzero. And yes the “C” light on the bitzero turned red each time it touched.

I haven’t been able to replicate any of the reports of random too-deep plunging — if you can document a step-by-step repeatable procedure for causing it, we’ll do our best to look into it.
I see you are using the probe tool. When replacing it with a bit are you pressing the “New Tool Button”? to reset from the probe.
1 Like
I’m curious about that first pic:
Did you zero Z only and then proceeded to zero X and Y only in the probe hole afterwards ?
4 Likes
I’m curious too. I only have a BitZero v1 but hanging it over the corner and doing a Z-only probe is incorrect.
It has to be sitting completely on the top of the stock.
1 Like
It’s worth noting that the Carbide Motion UI is misleading with respects to probing. I think it is technically wrong, but I’ll be kind, and stick with “misleading”.

The “Probe Corner” operation is actually “Probe X,Y and Z”. It does everything.
The image should look like this:
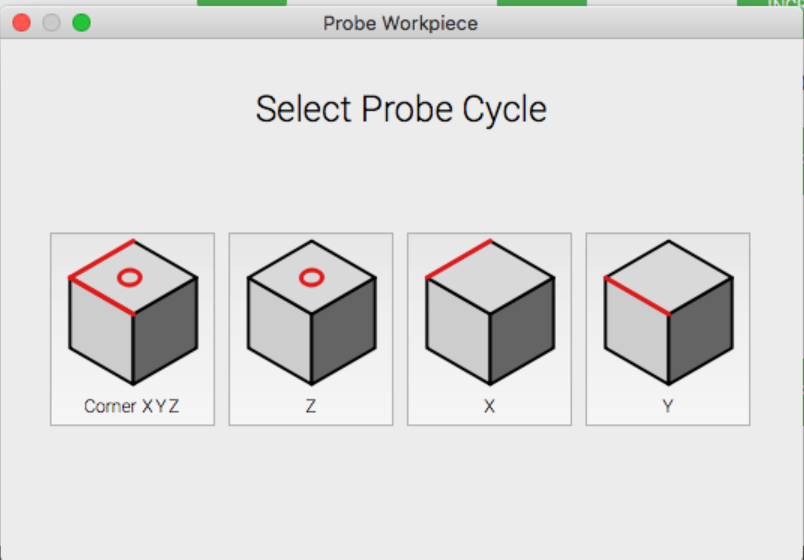
For your situation, you just need to do the “Corner” operation and nothing else.
2 Likes
Nope, I am probing X,Y, and Z all at once. I have it set on the corner exactly as the cycle shows and I click “corner” option. Once it is done probing, I click “load new file” click the plug file I’ve been trying to cut then it proceeds to tell me to insert the first bit, in this case it starts with a 1/4 inch endmill. I insert my 1/4 inch endmill then it goes to the bitsetter. Once it probes the bitsetter, a window pops up telling me to resume with the router at 18,000 RPM. I start up the router and hit resume, and it begins to cut, sometimes plunging. I do the same process every single time. The plunge issue only occurs when I do plugs for my inlays (sometimes), for whatever reason it may be. It seems to be only on smaller/thinner pieces of stock. As you can see the board I am trying to work on, I have had ZERO issues doing any of the pockets.
SF.pdf (277.1 KB)
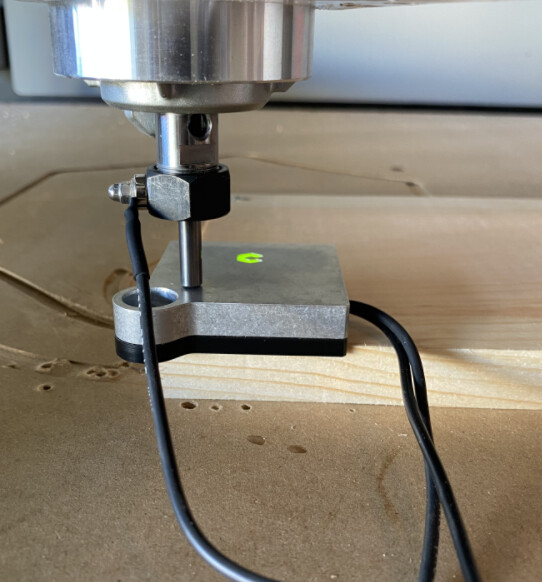
Thats probing the Z after the X and Y
Please note that if the stock is less than 3mm thick (the height of the lip) you should reposition the BitZero and probe for Z only, or remove it and probe for Z manually.
Nothing I cut is that thin, my plug stock is usually a 1/2 to 3/4 of an inch thick
I don’t have the Bitzero v2, just the v1 and the bitsetter — but I’m interested in the answer to the question above,
Did you press “New Tool Button”? If not, I believe this could be the same as many of the other “order of operation” problems with the bitsetter. You can never change a tool before starting your job without pressing that button.
1 Like
Are you talking about the pop up that comes up instructing me which bit to install prior to going to the bitsetter?
After it probes on the bitzero, I immediately go to “Run” tab at the top of carbide motion, then I click “load new file” once the file is loaded I hit “start”. That is when it instructs me to insert the first bit, which then it goes to the bitsetter, then instructs me to resume with the job
It depends. If you initialize with the probe in the router through the bitsetter sequence, then zero with bit zero using the bitzero, and then start the job, you can just change the bit when it prompts you to. However, if you did not initialize it through the bitsetter with the probe, just put the probe in to zero it, and then started the job, you would probably face the kind of problem you’re experiencing (I think).
Just make sure the bitsetter knows the tool you’re using to zero it, before you zero it - and you should be OK…but if you don’t, all bets are off.
1 Like
Sorry I’m a little confused by that… So when I first turn on my machine, I initialize the router, it homes it in the back right corner then proceeds to bring it up front. Then, it instructs me to insert a bit, (I insert the same bit that I probe with on the bitzero). After I insert that bit, I hit resume and it goes to the bitsetter first. Next, I jog it over to the Bitzero and start with the XYZ probing sequence. After it is done, I go to “run” and “load new file” once the file loads, I hit start and it tells me to install the first bit (1/4inch endmill). It then goes to the bitsetter again. After it probes the bitsetter, it brings the router back up front and I hit resume, job starts.