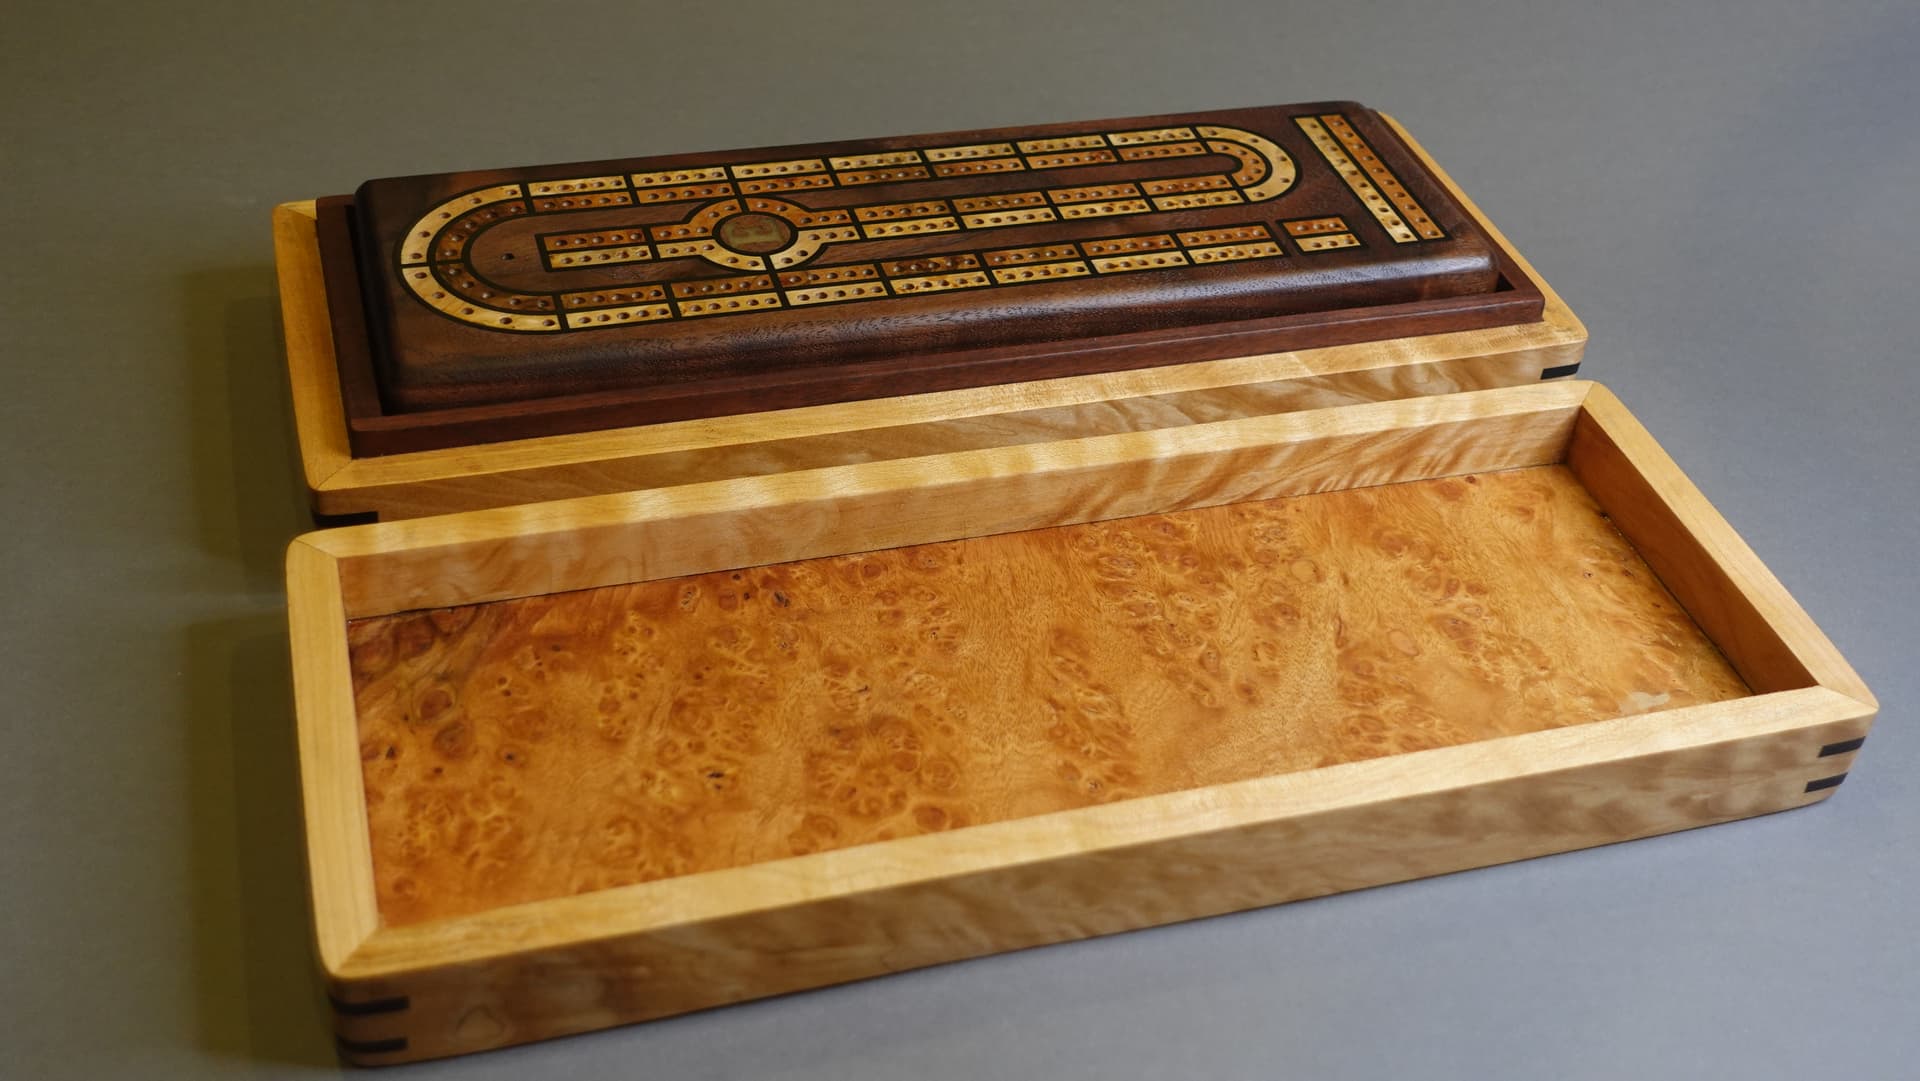
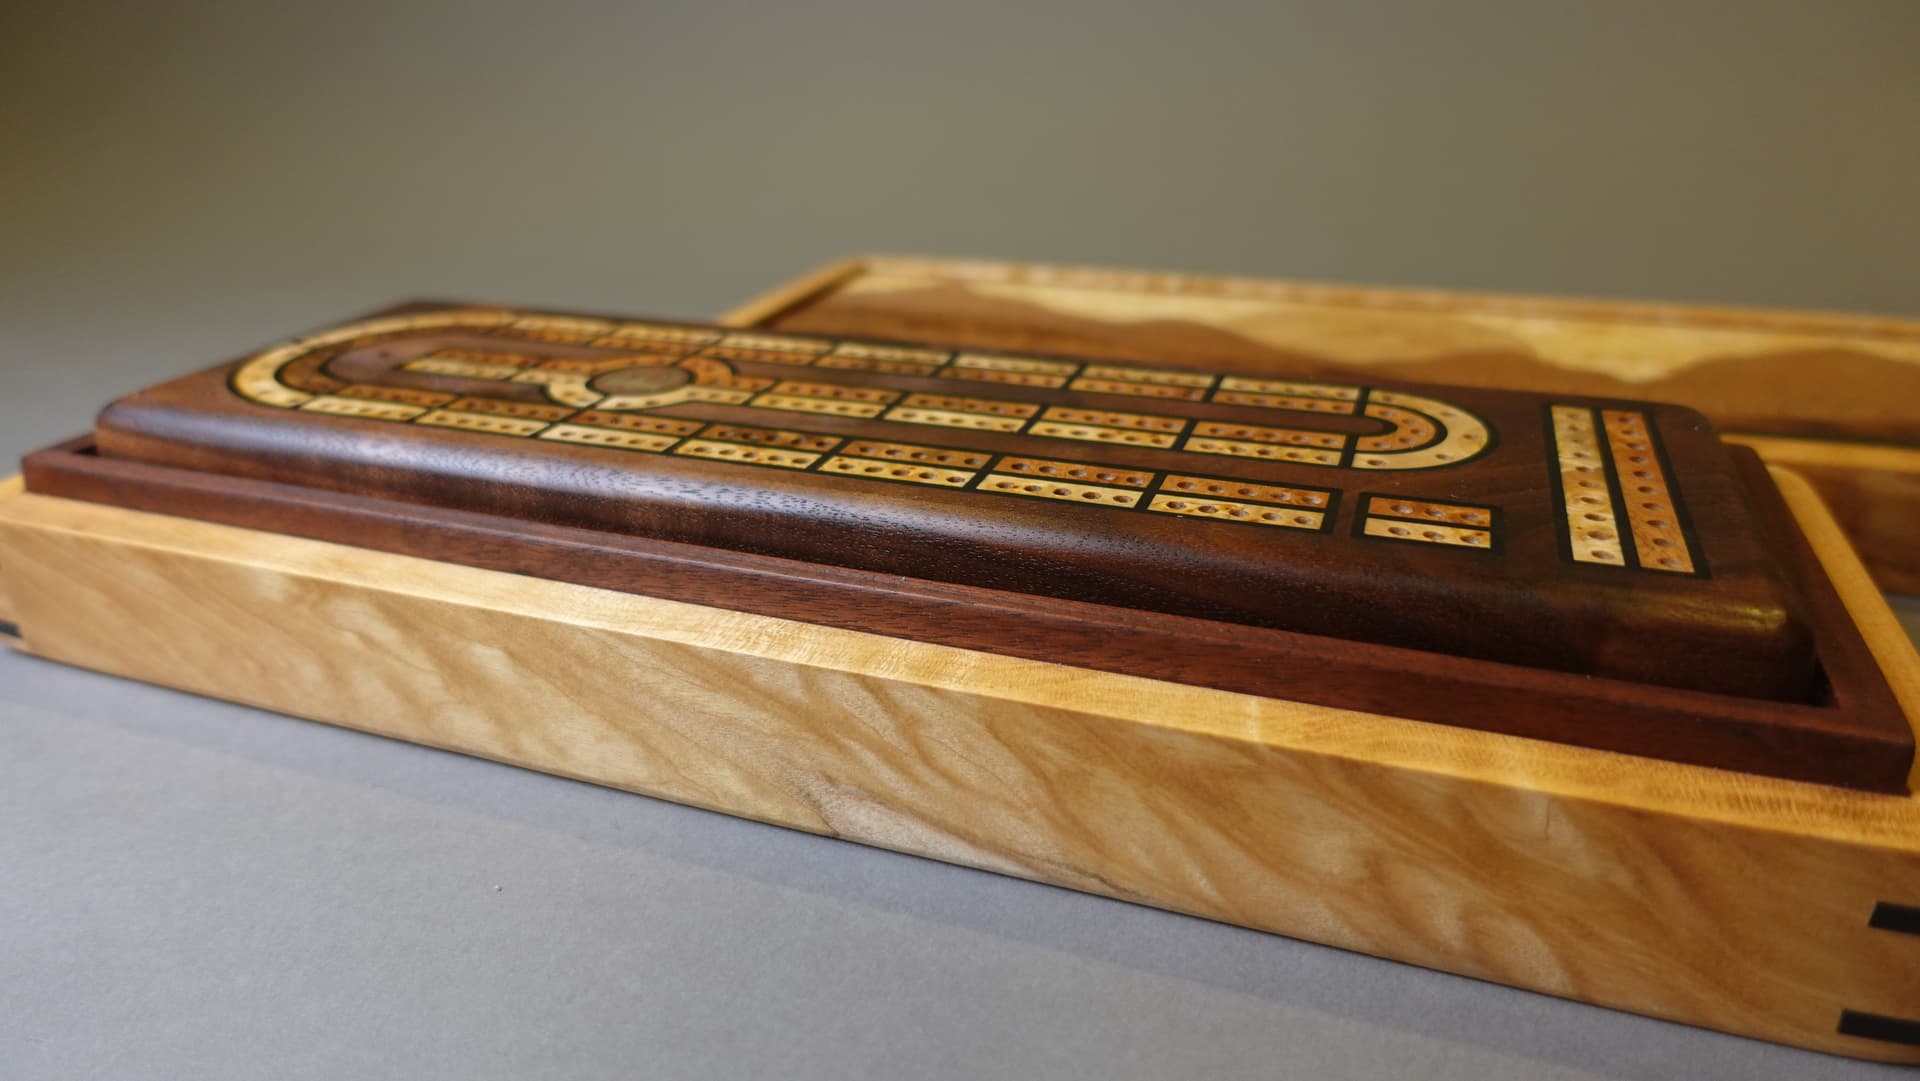
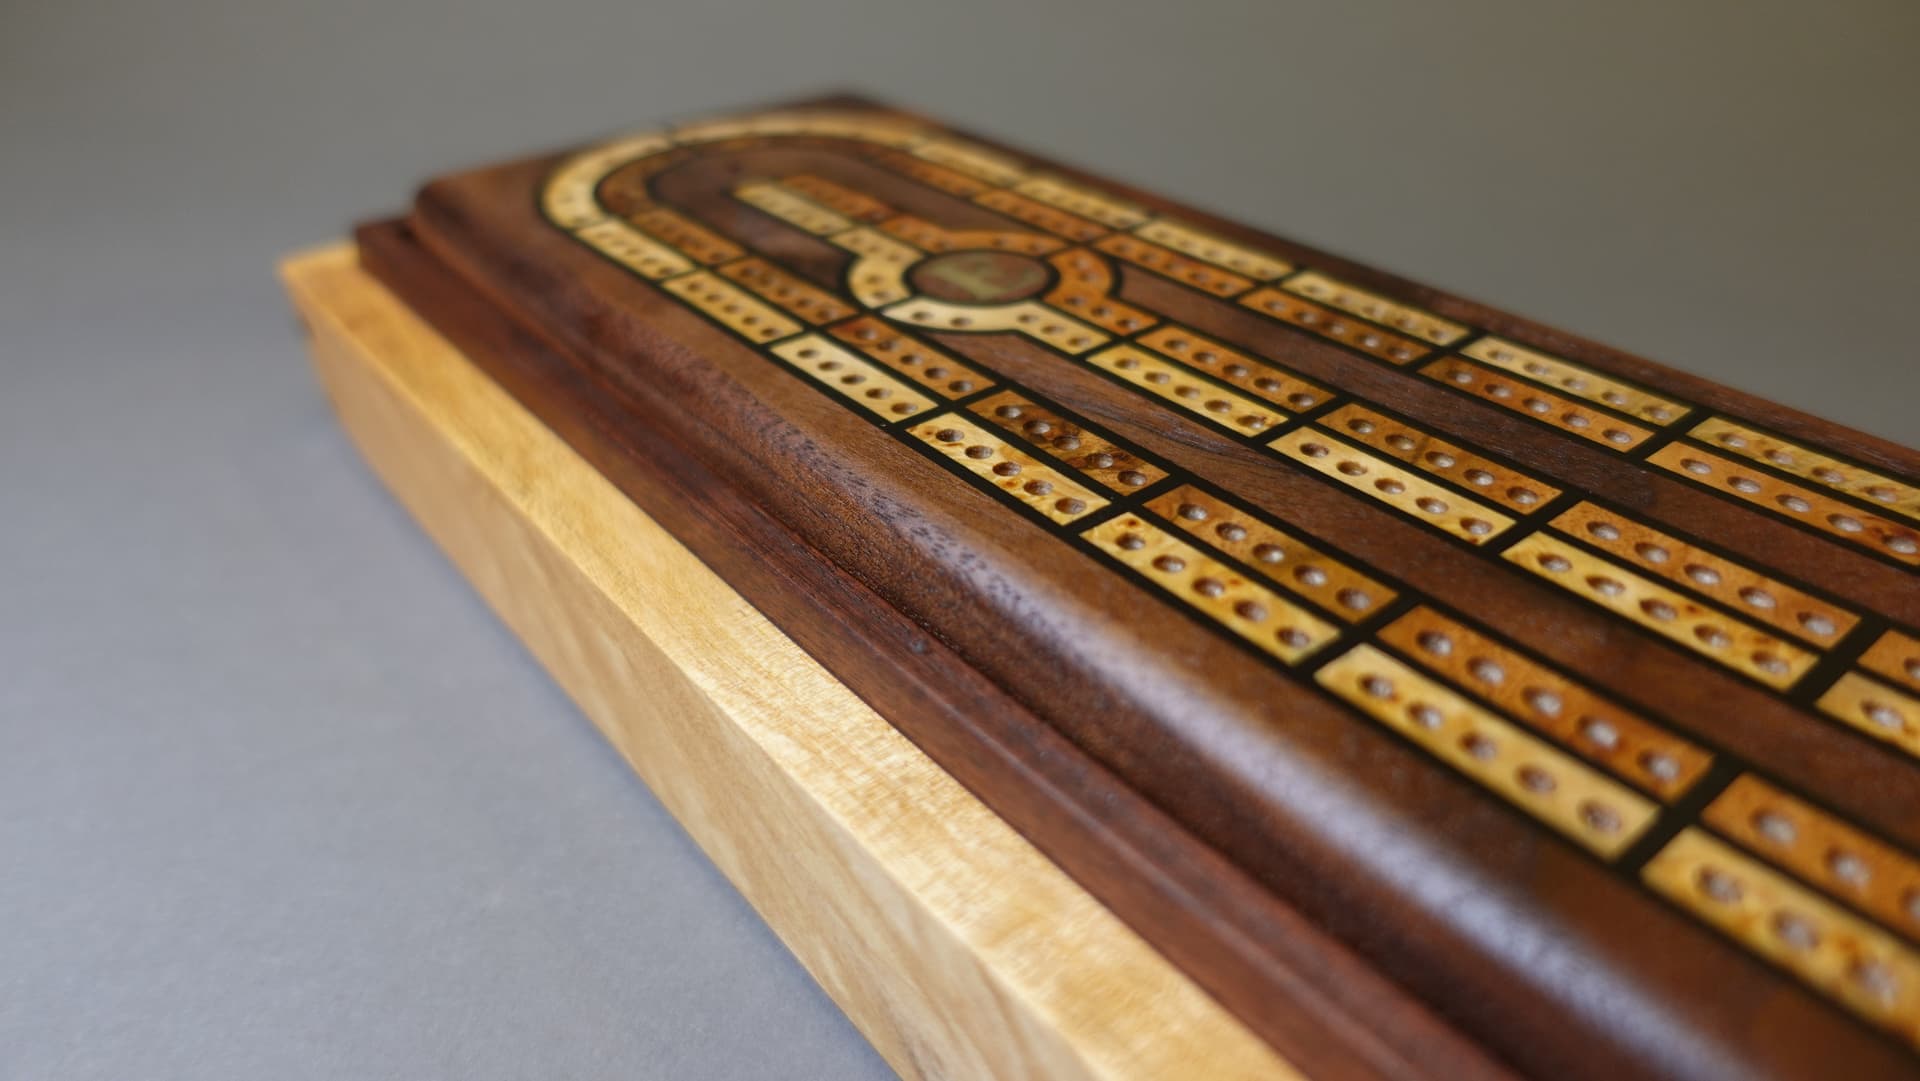
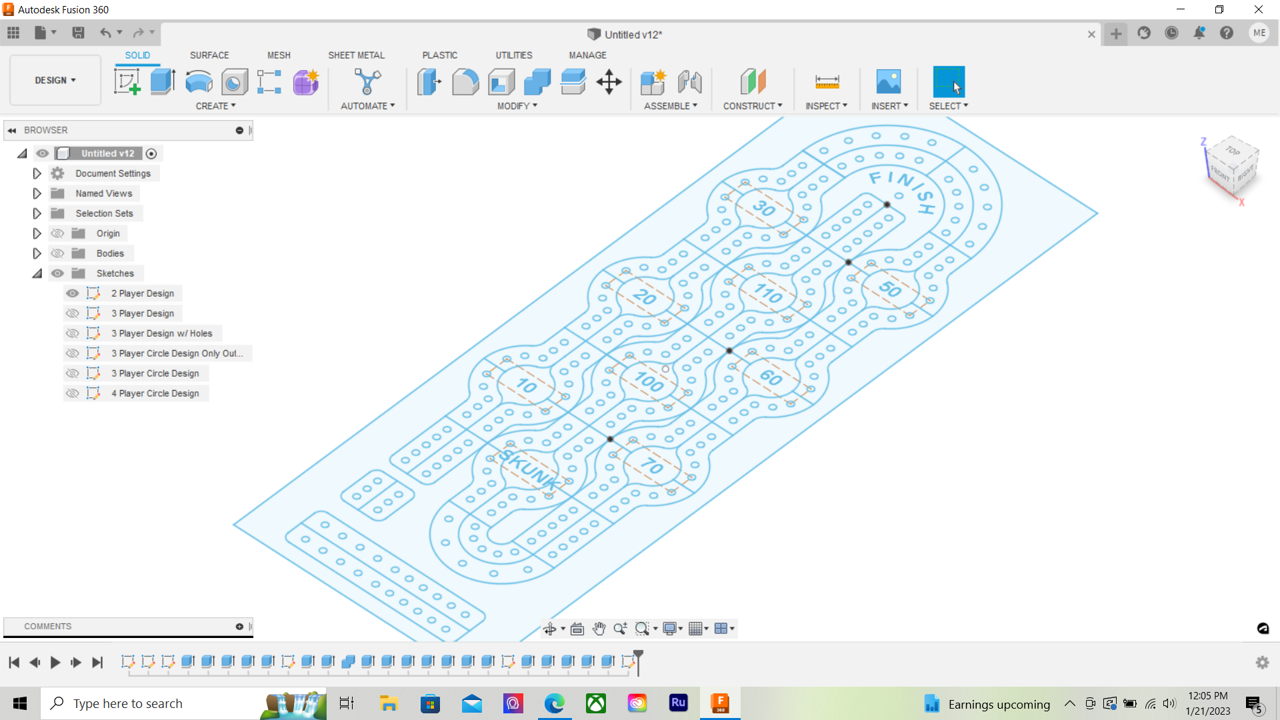
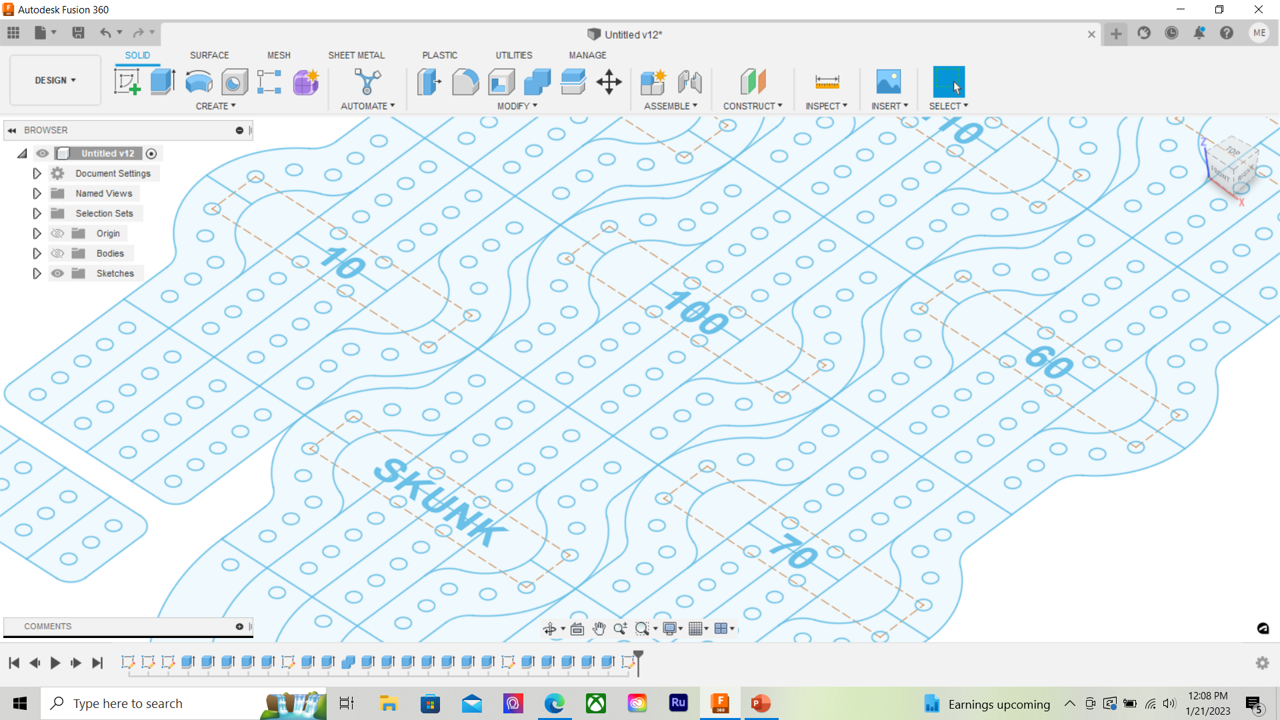
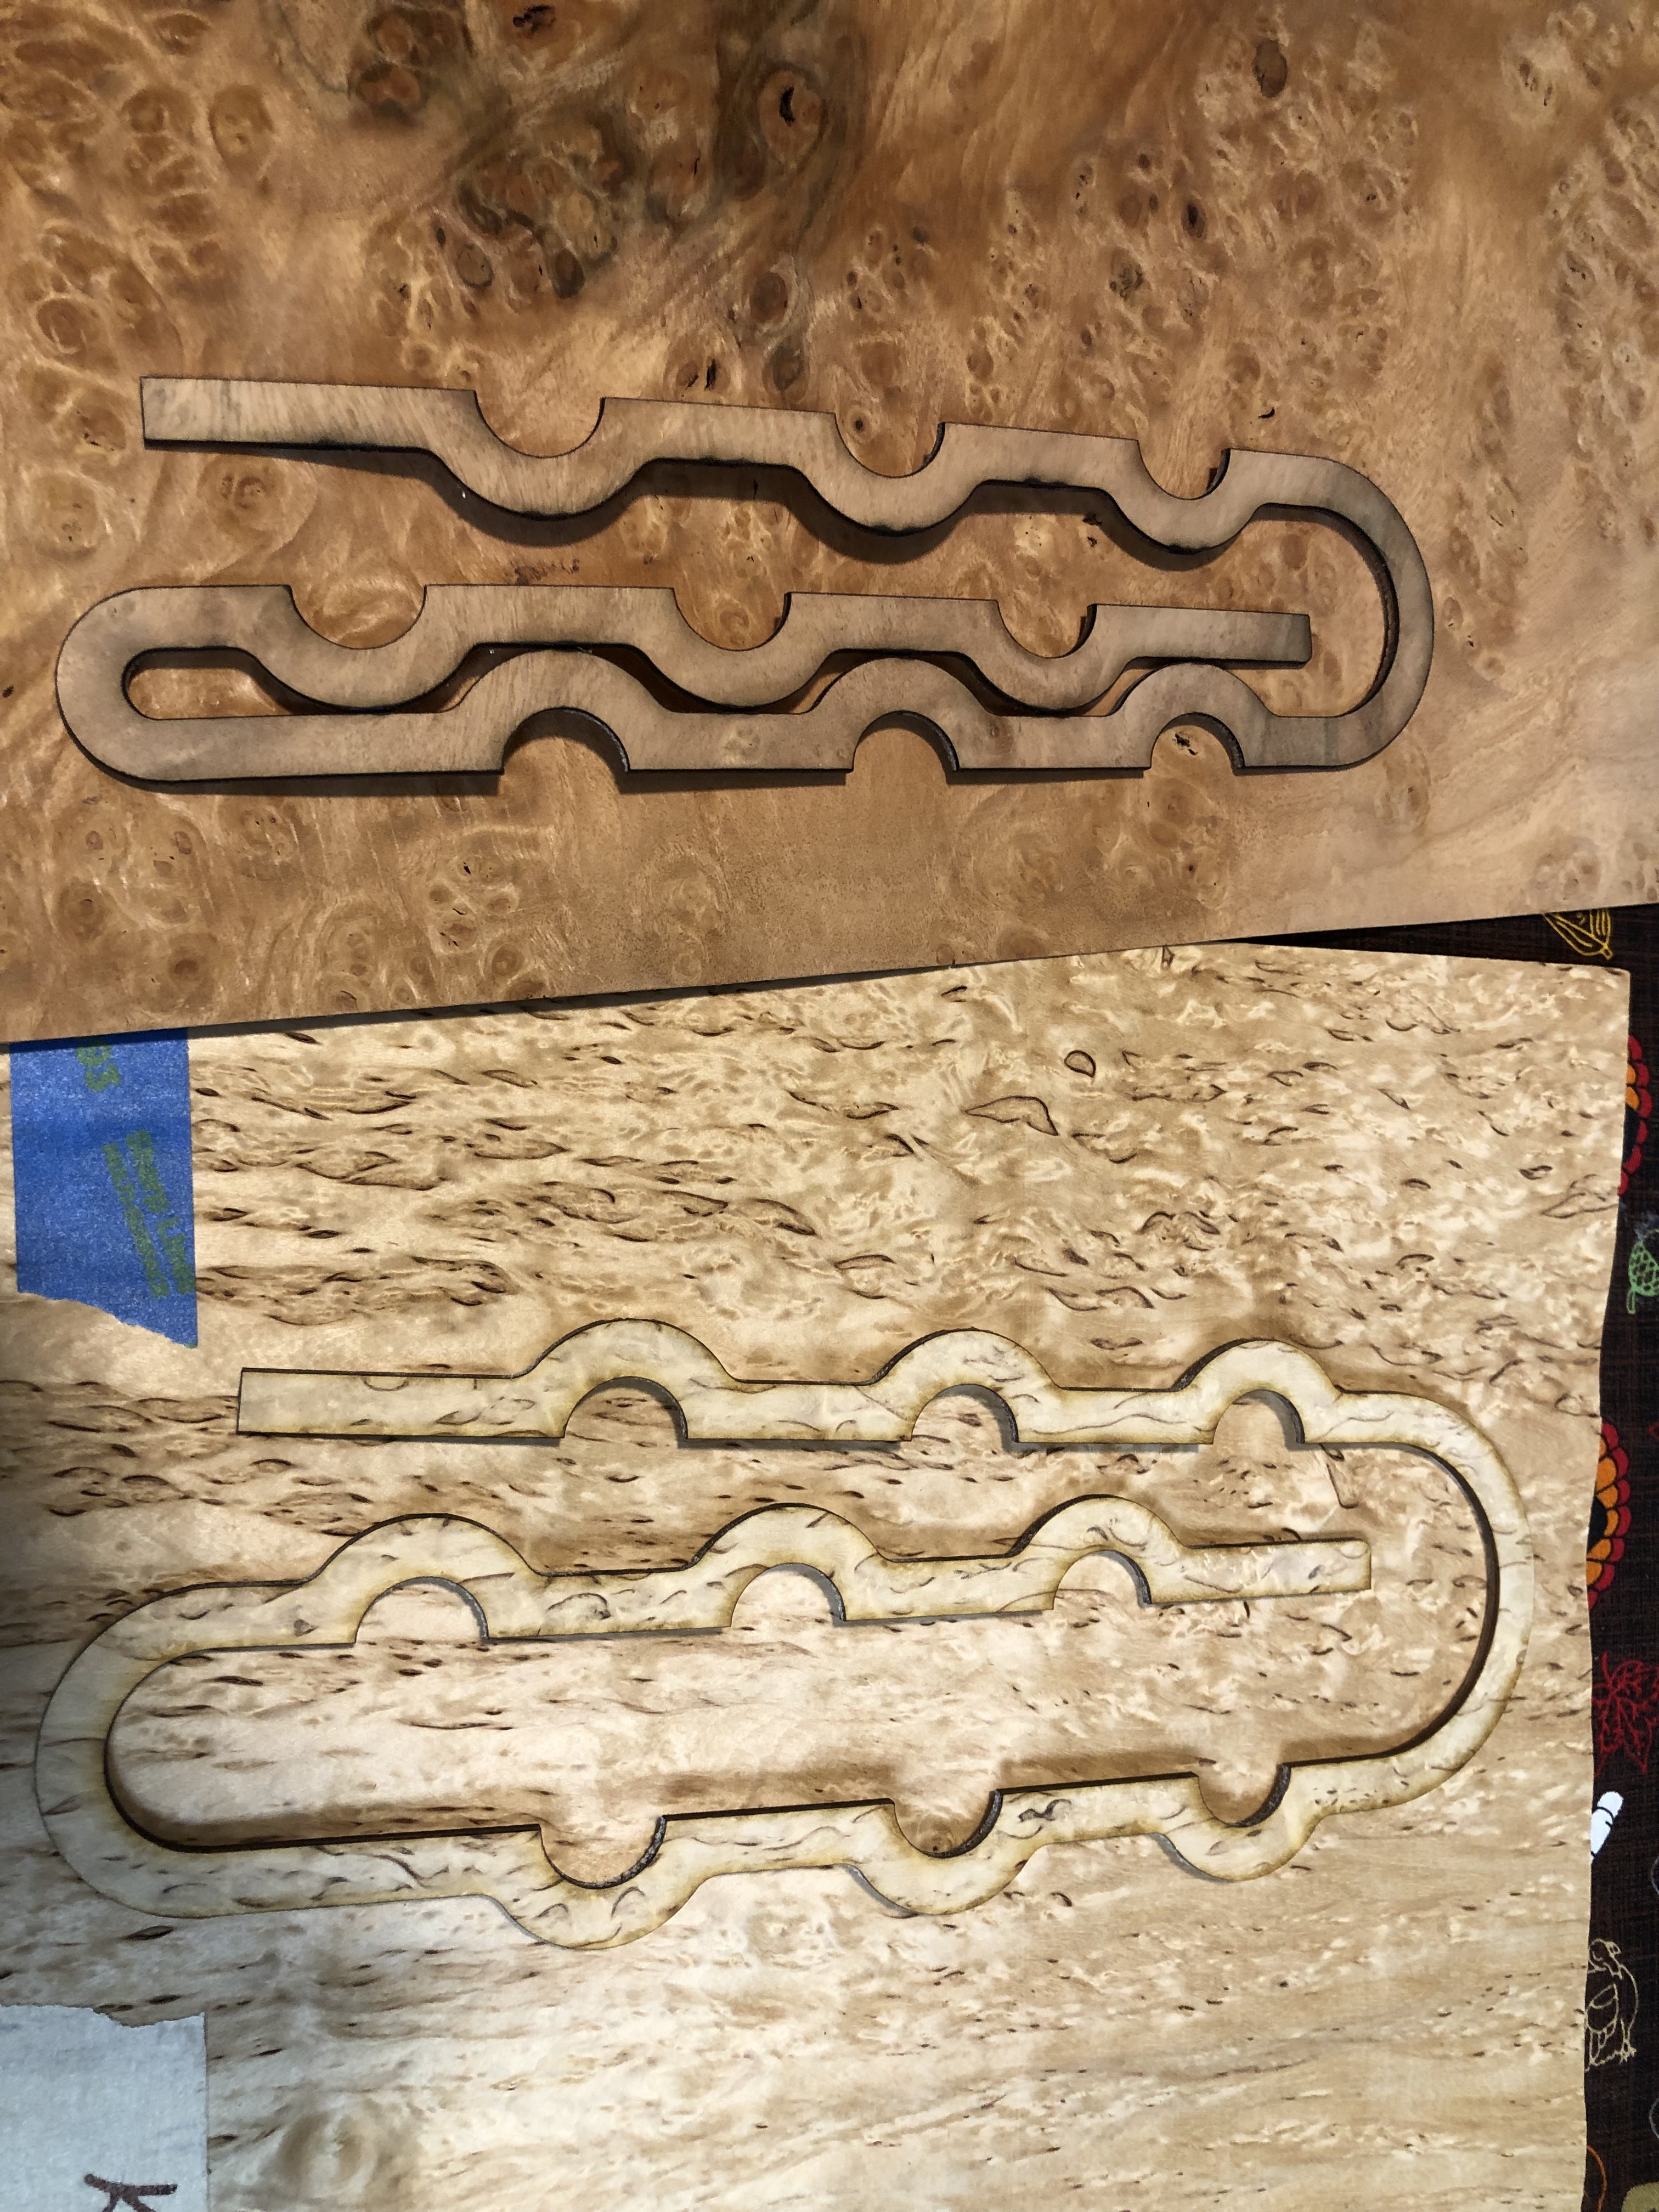
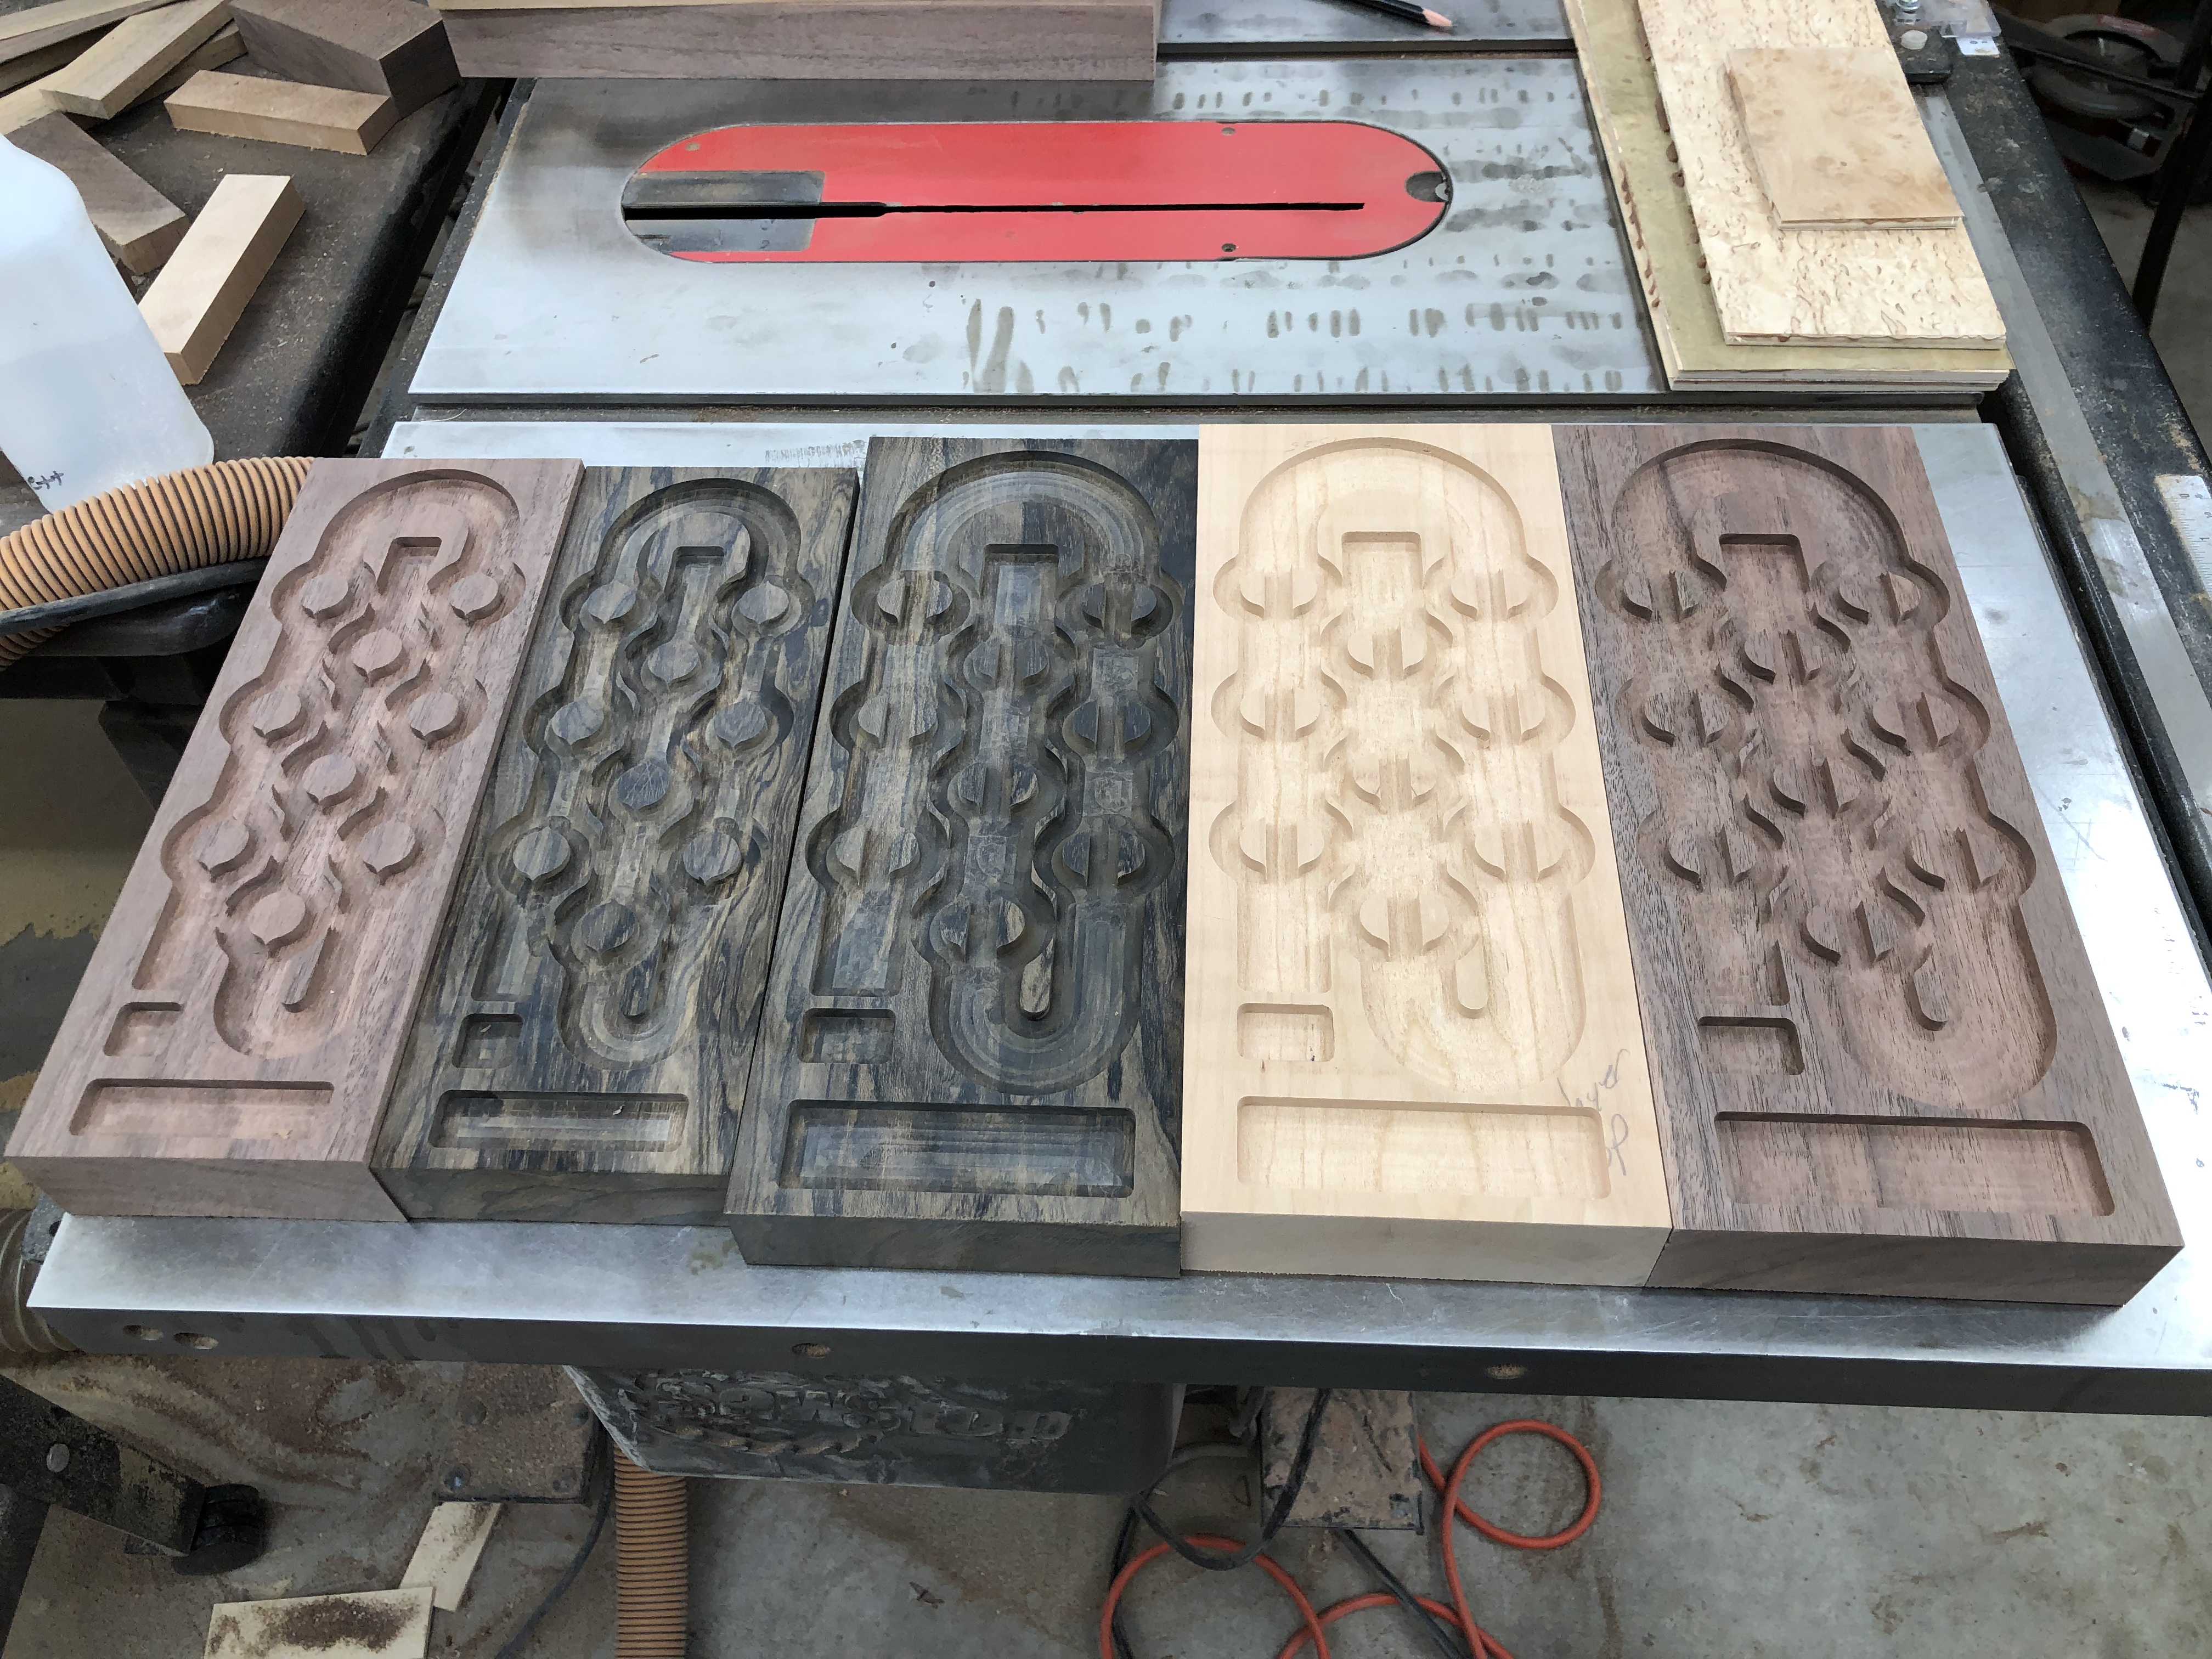
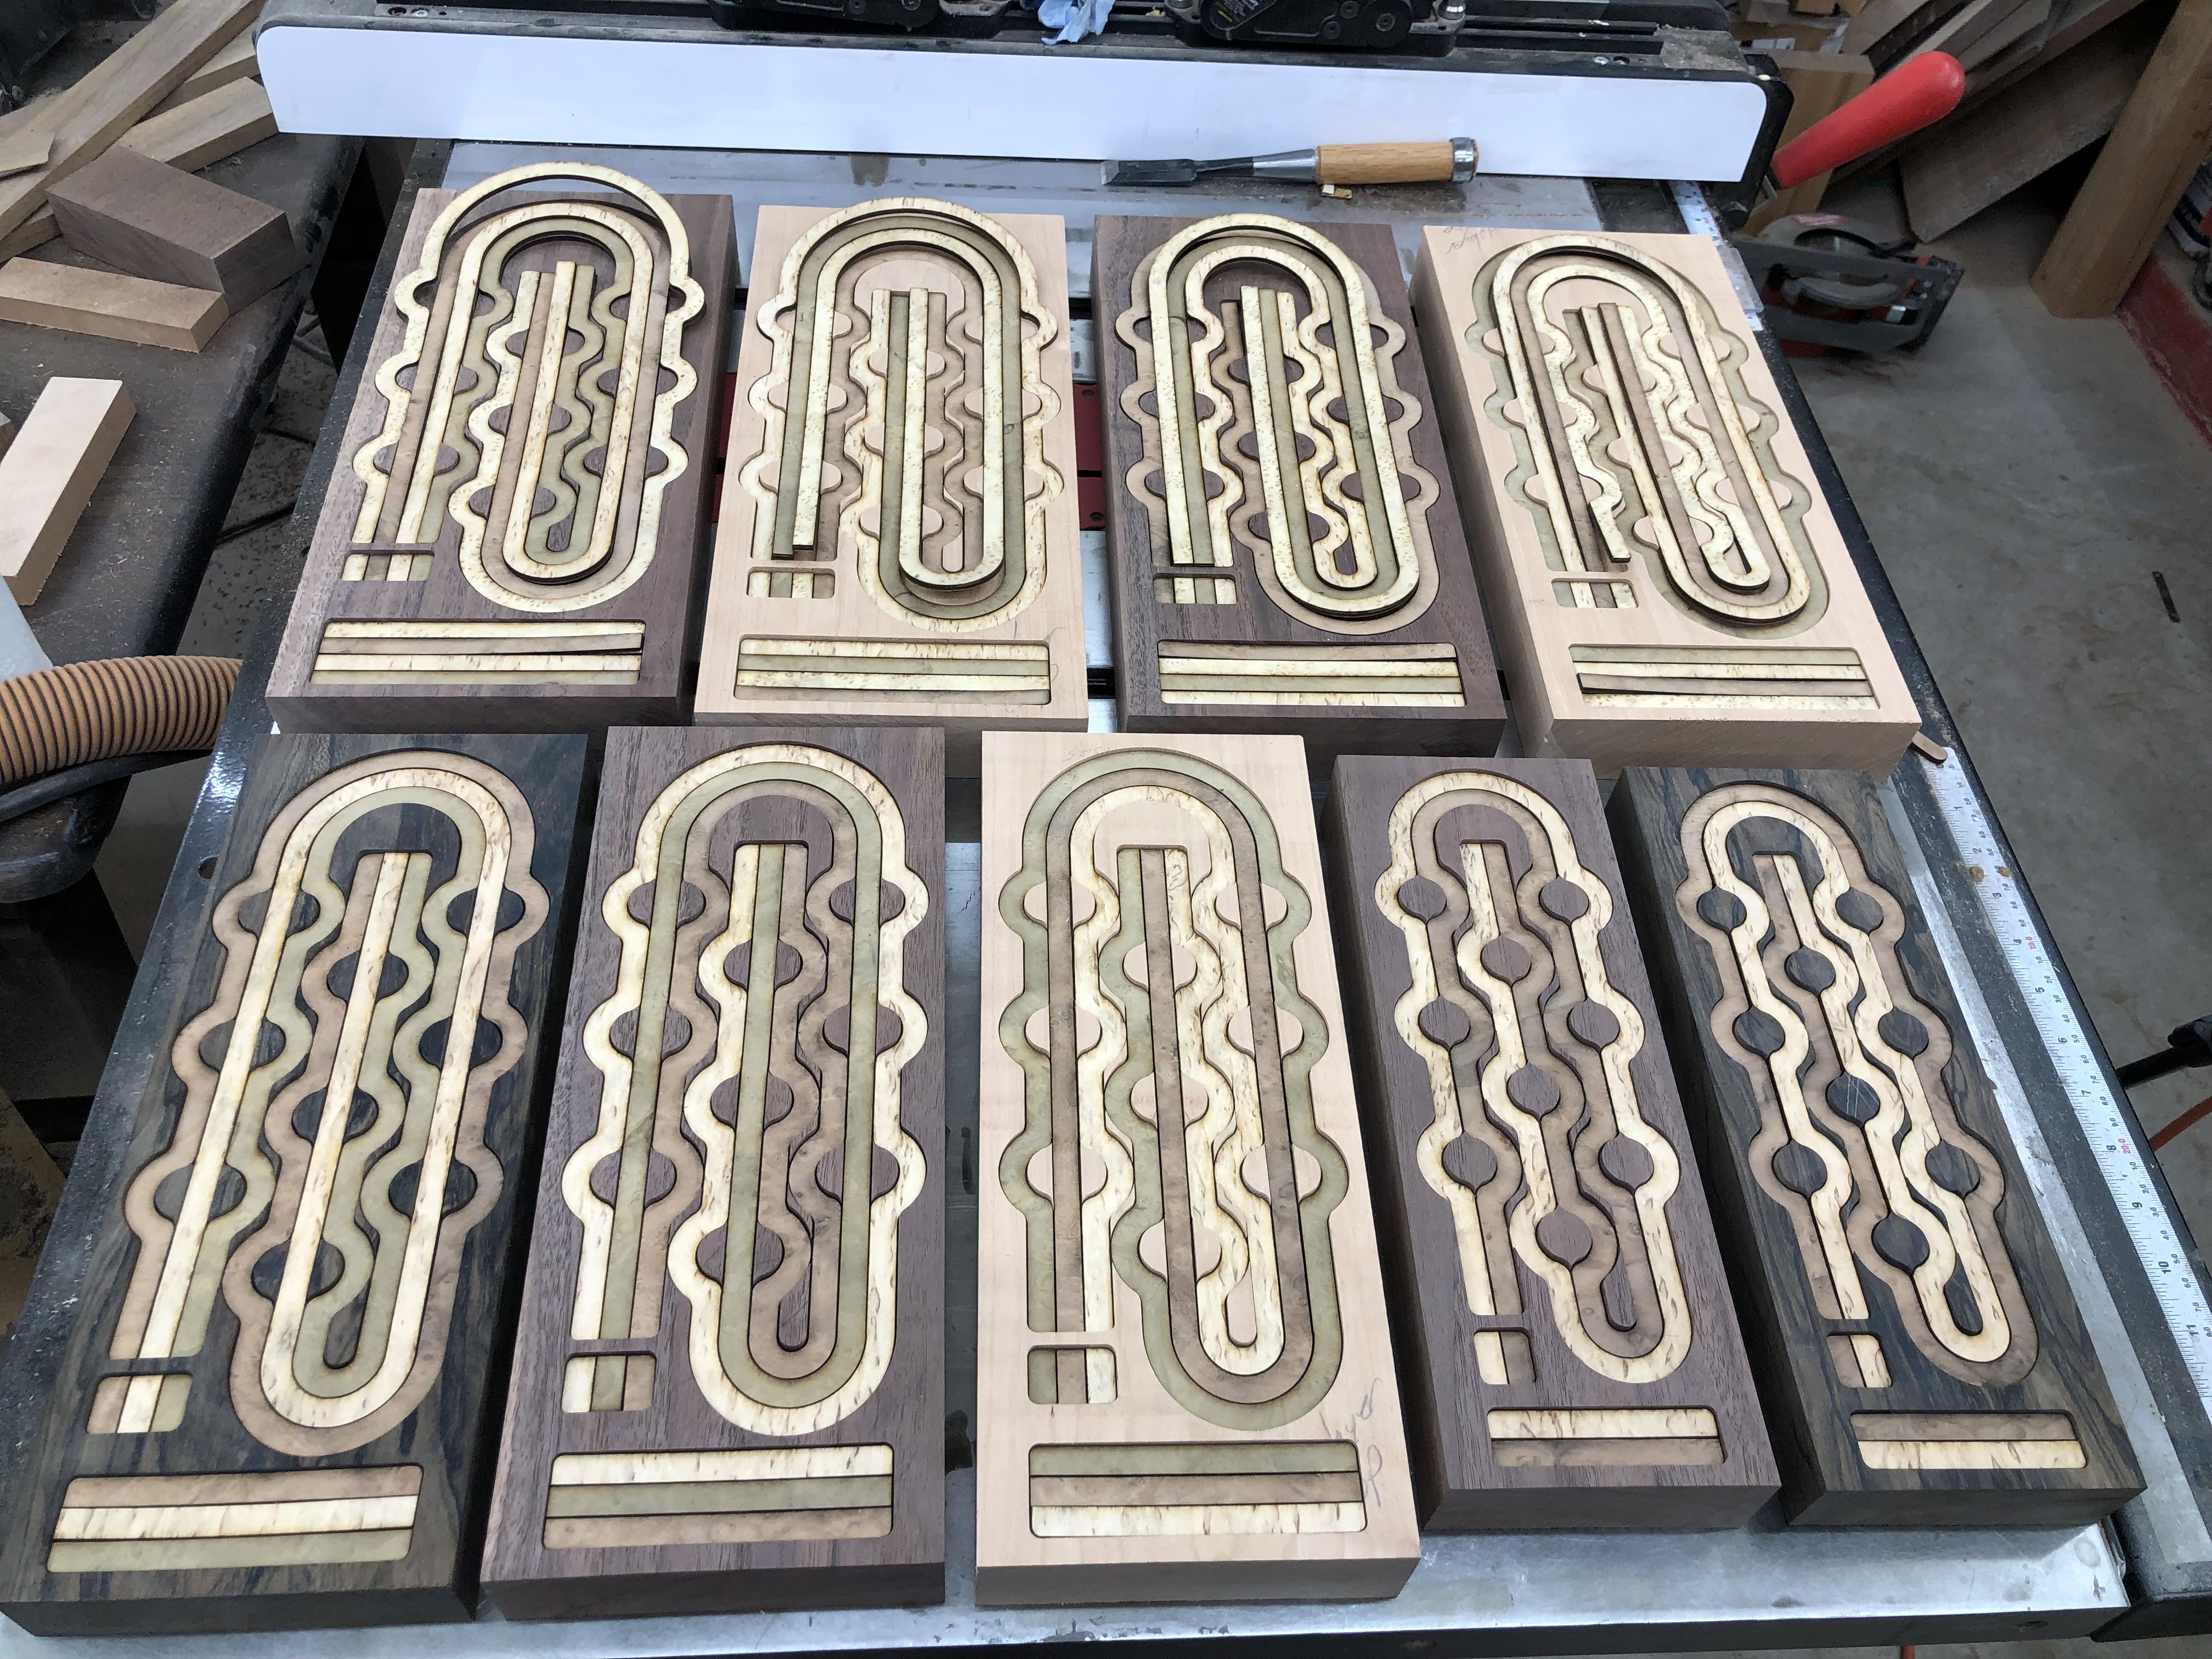
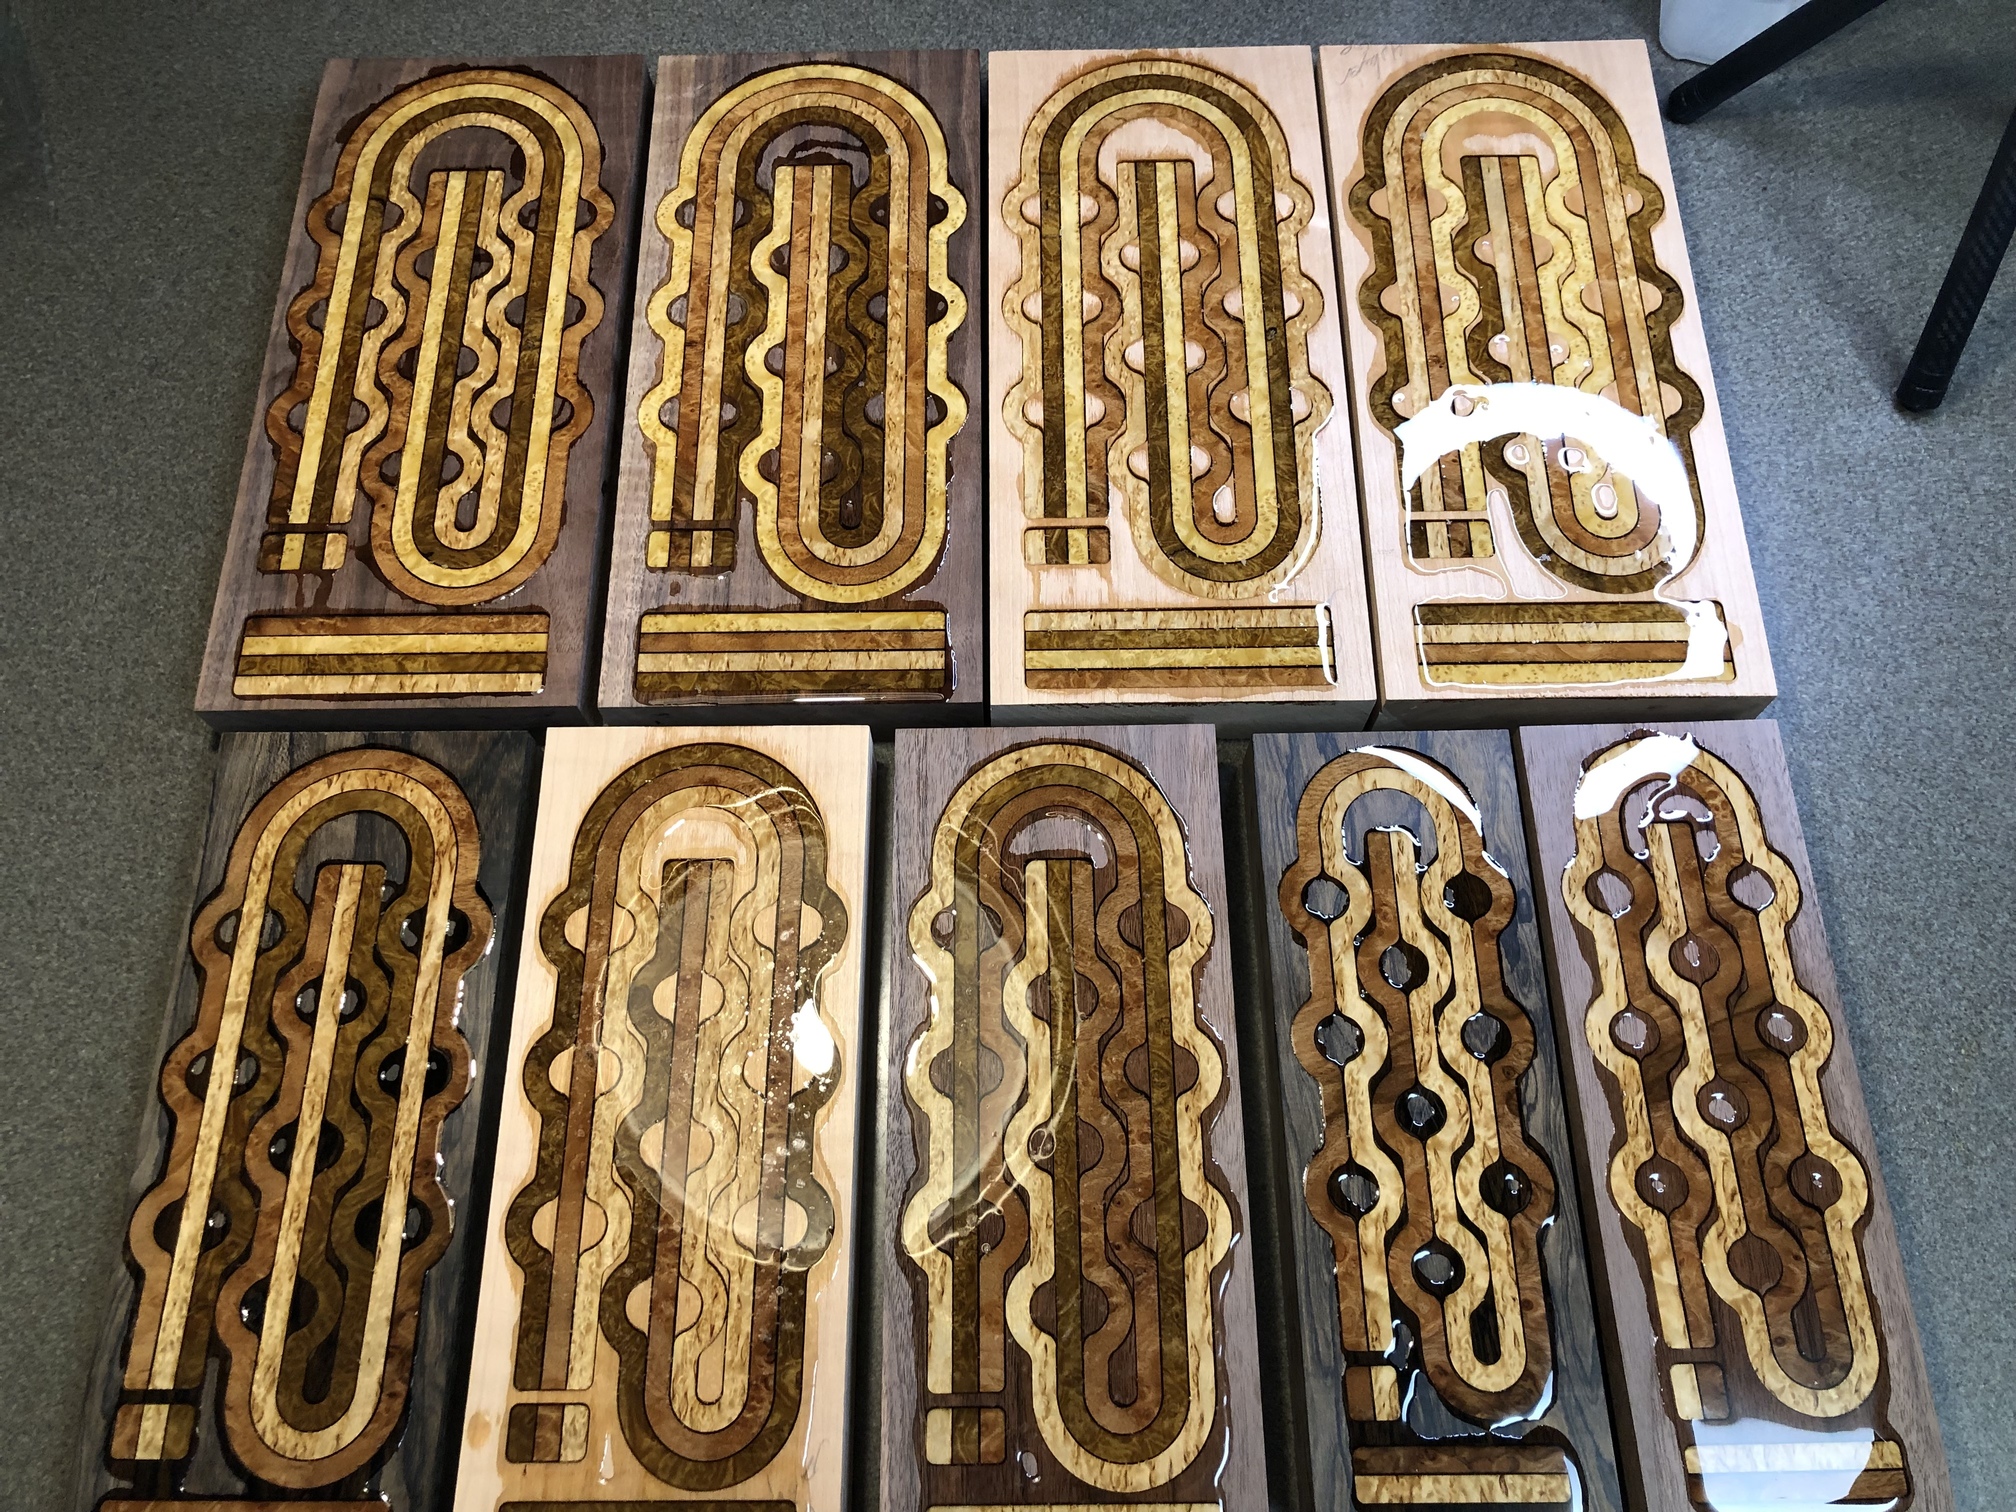
After the recent cutting board disaster, figured I would spend the Saturday morning doing CAD designs to bounce back my motivation of woodworking. My goal is to standardize a design as a series, capturing 2, 3, and 4 player boards with the design theme.
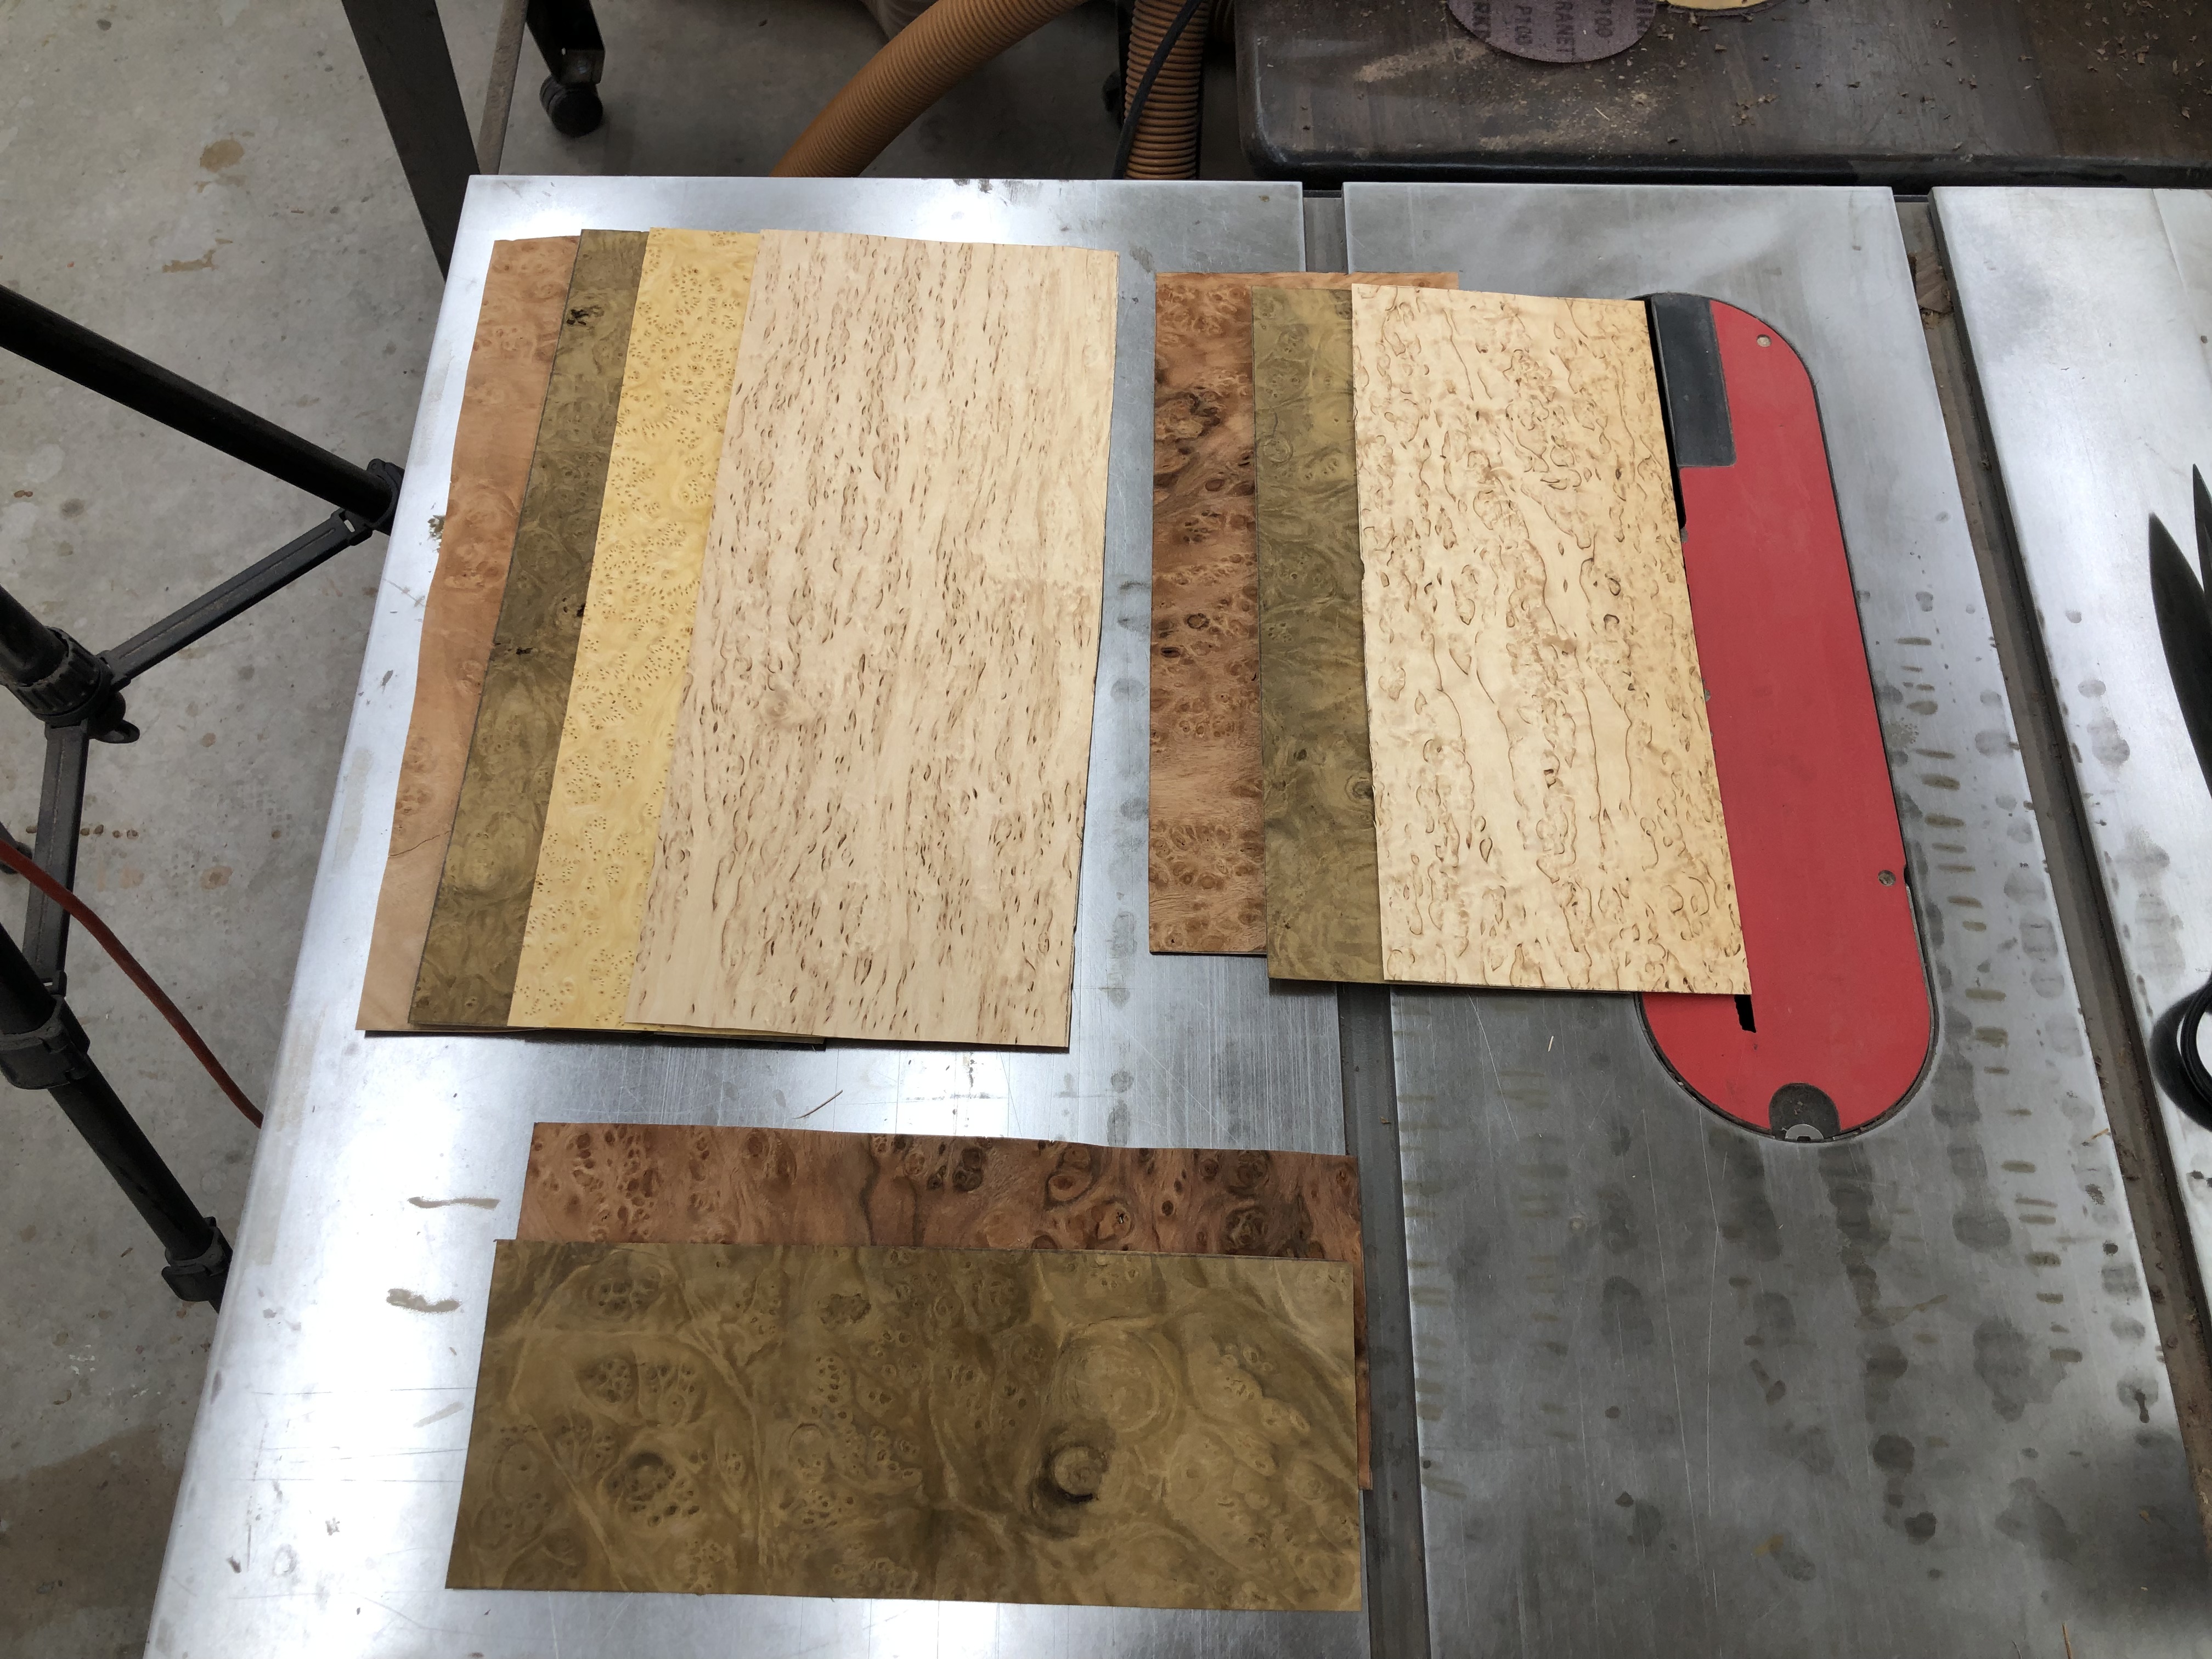
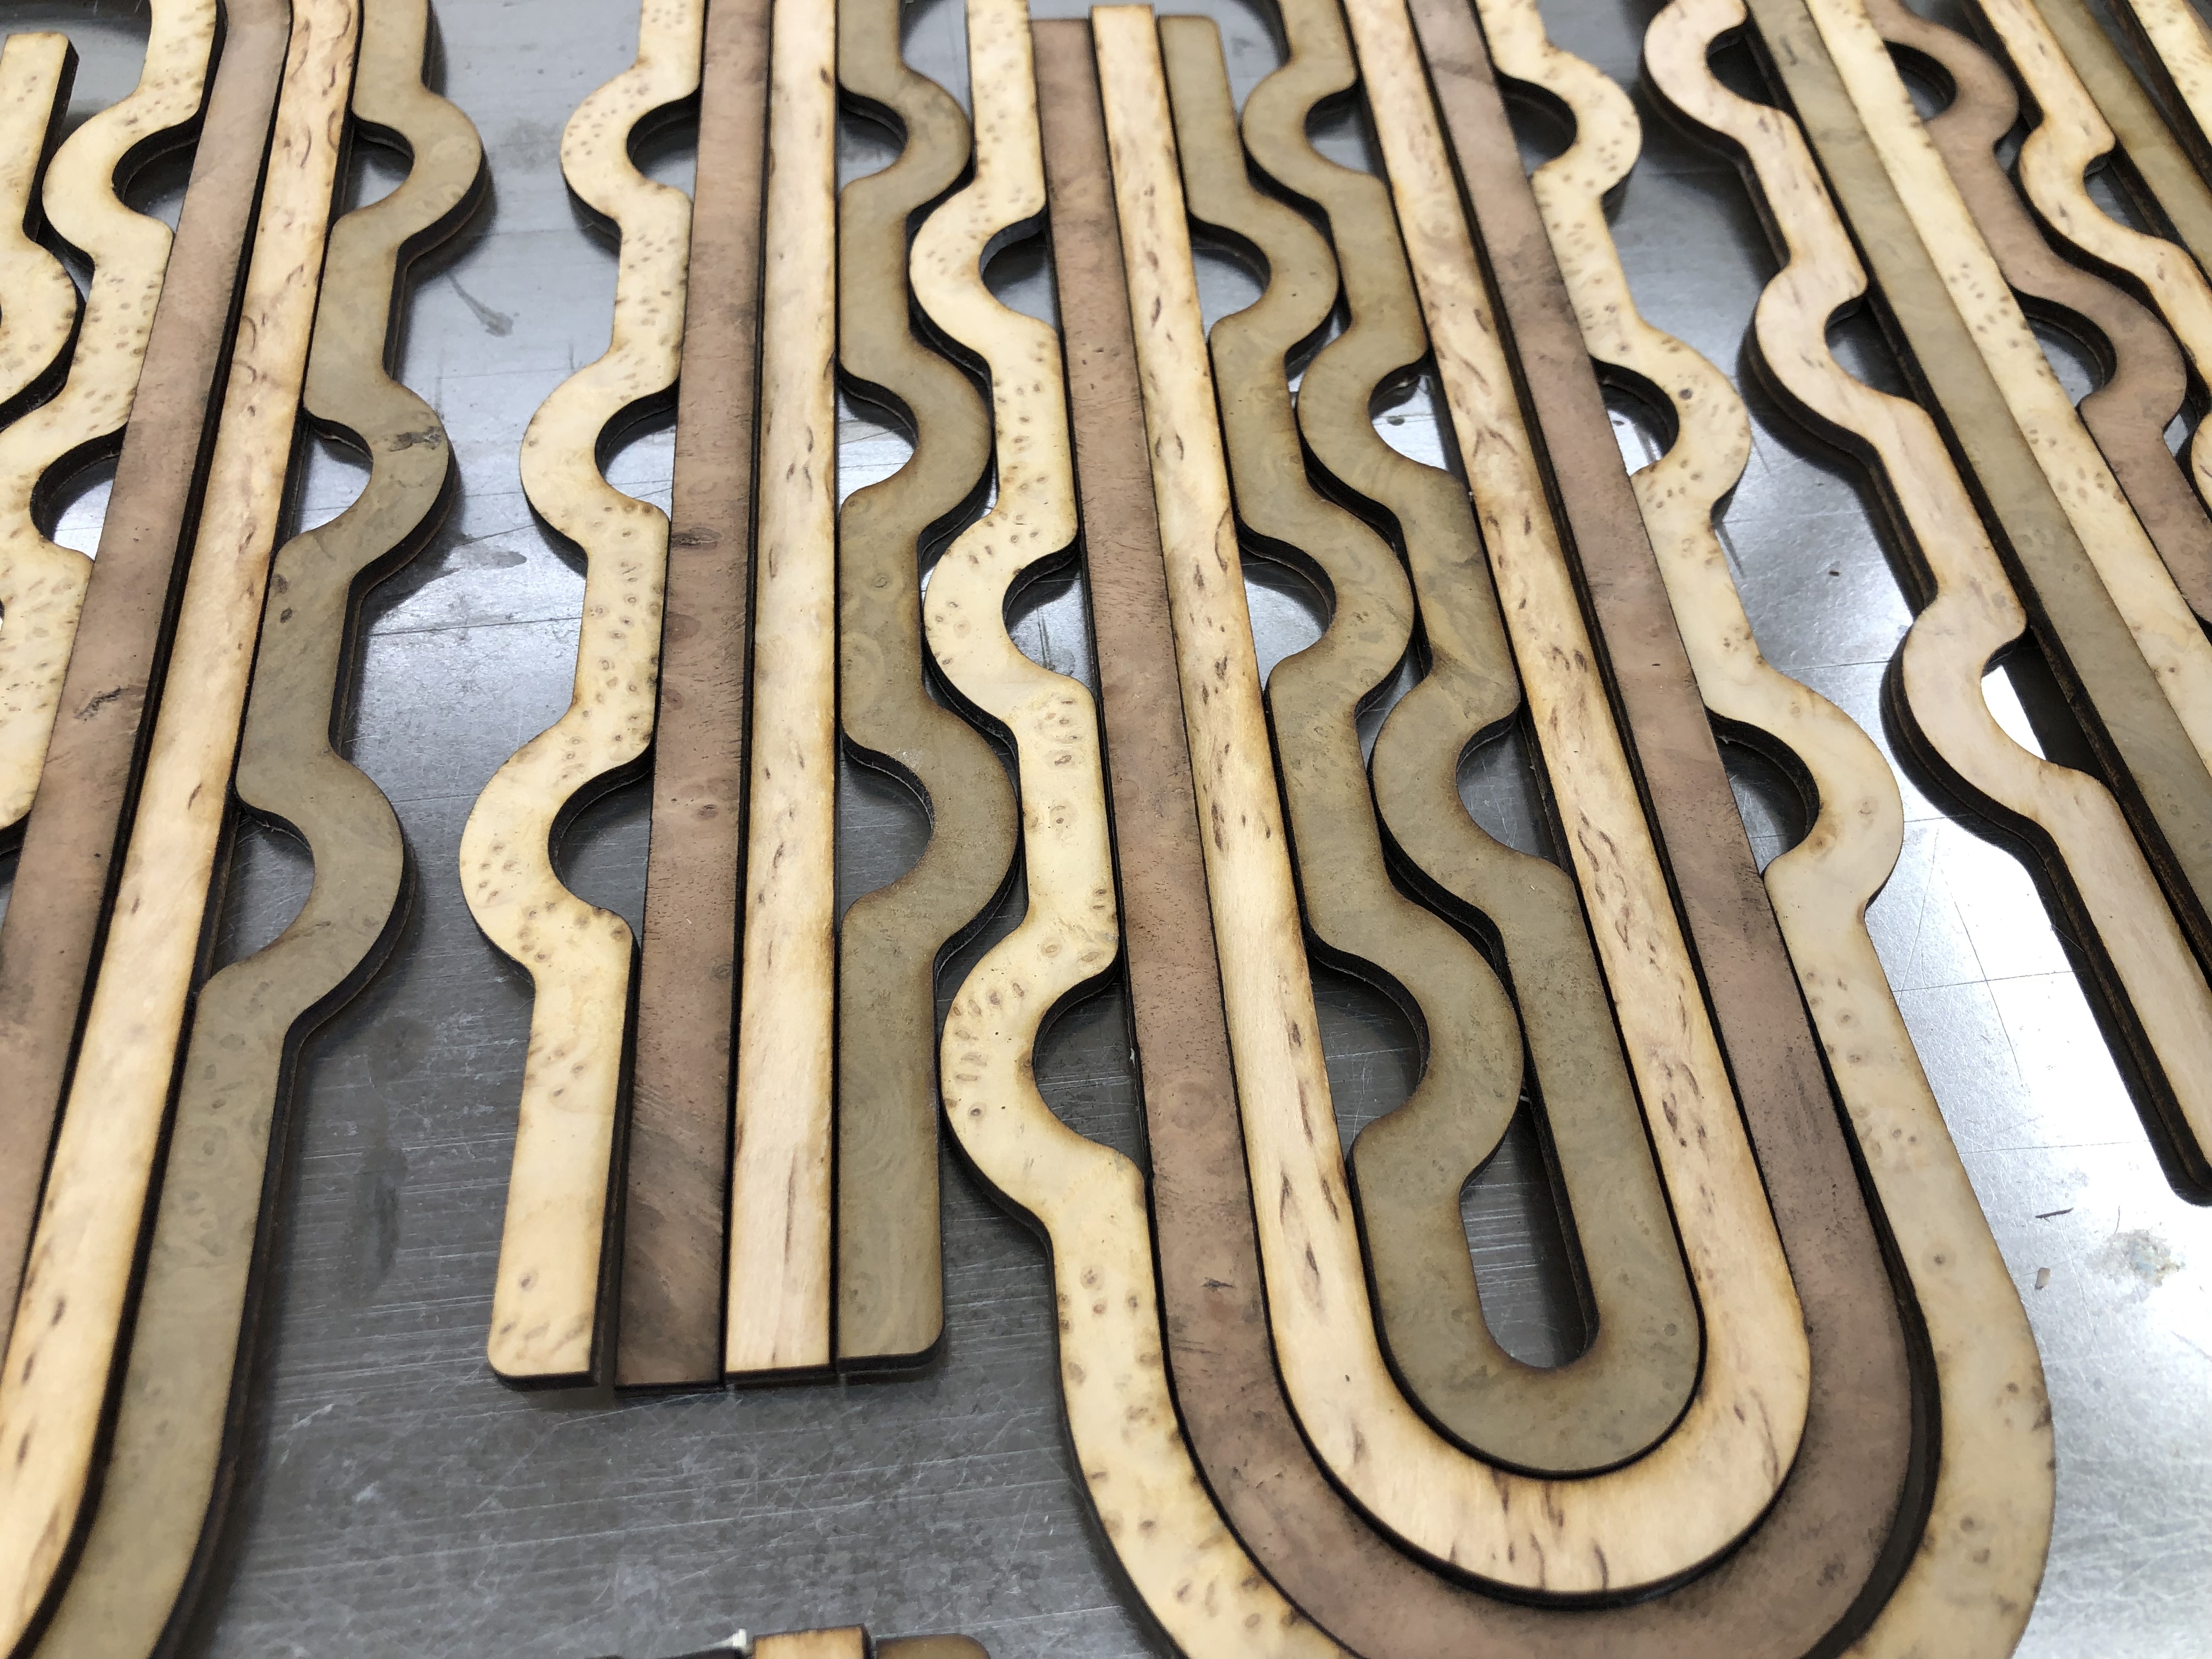
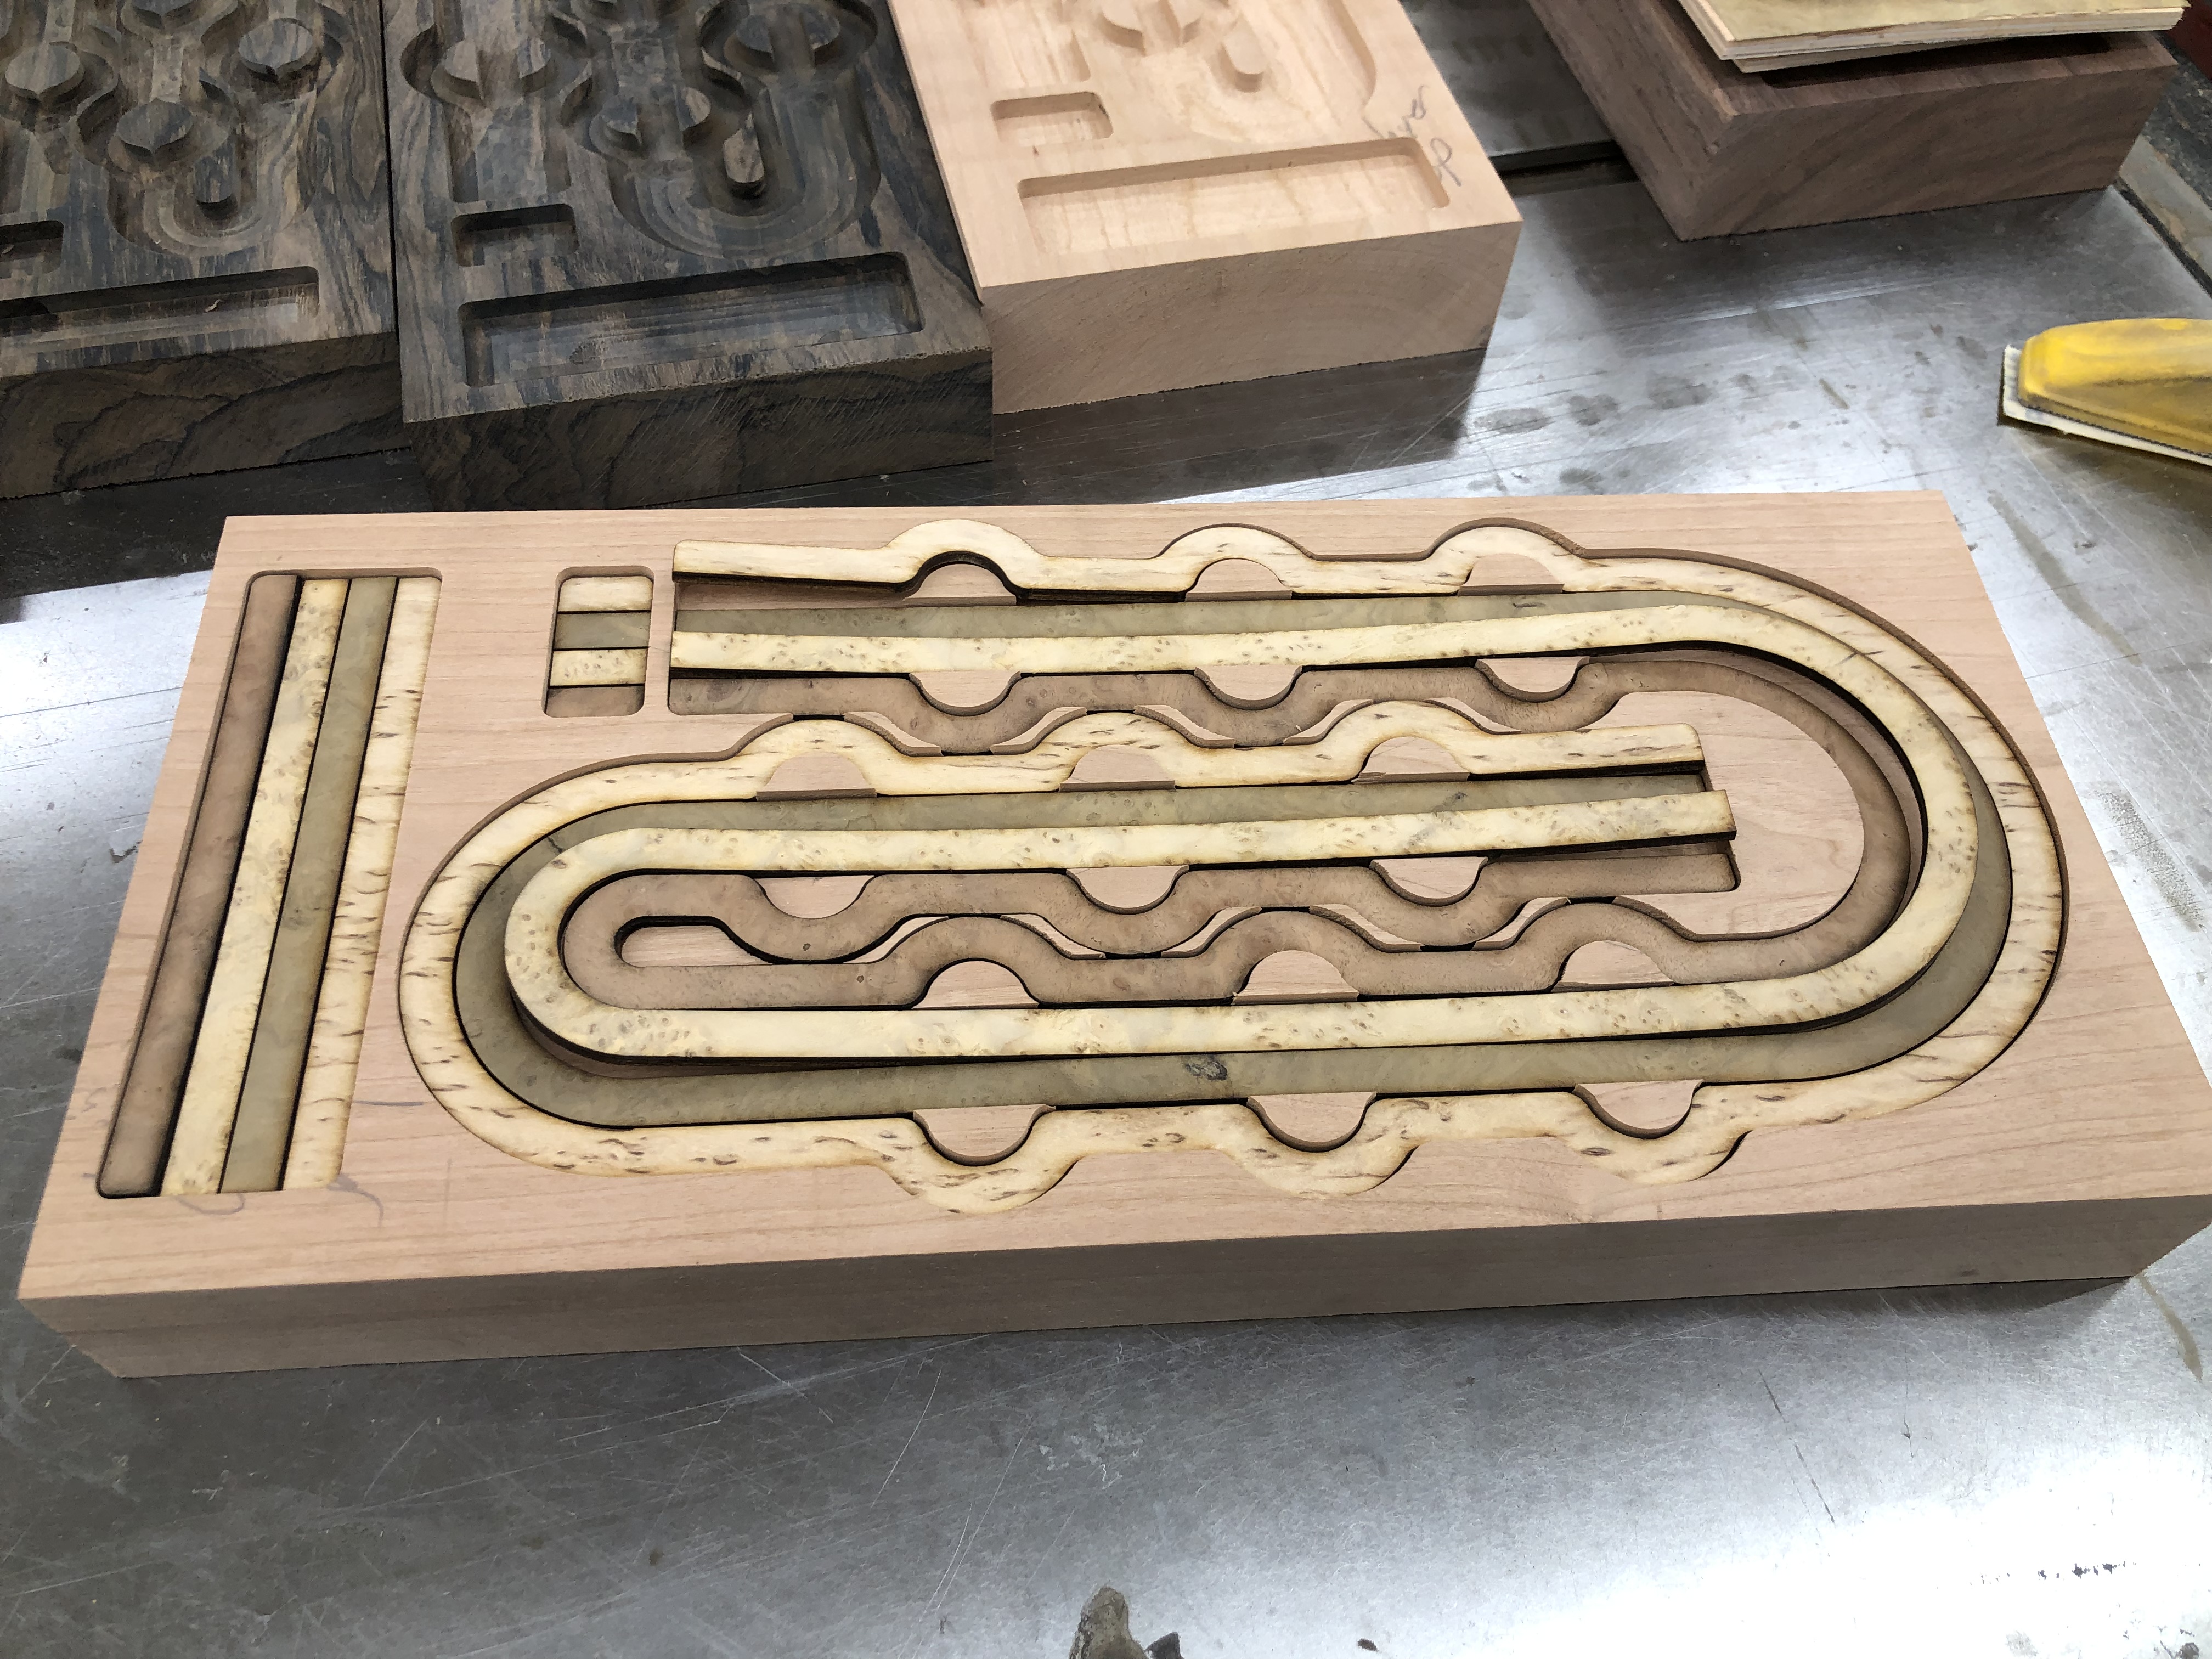
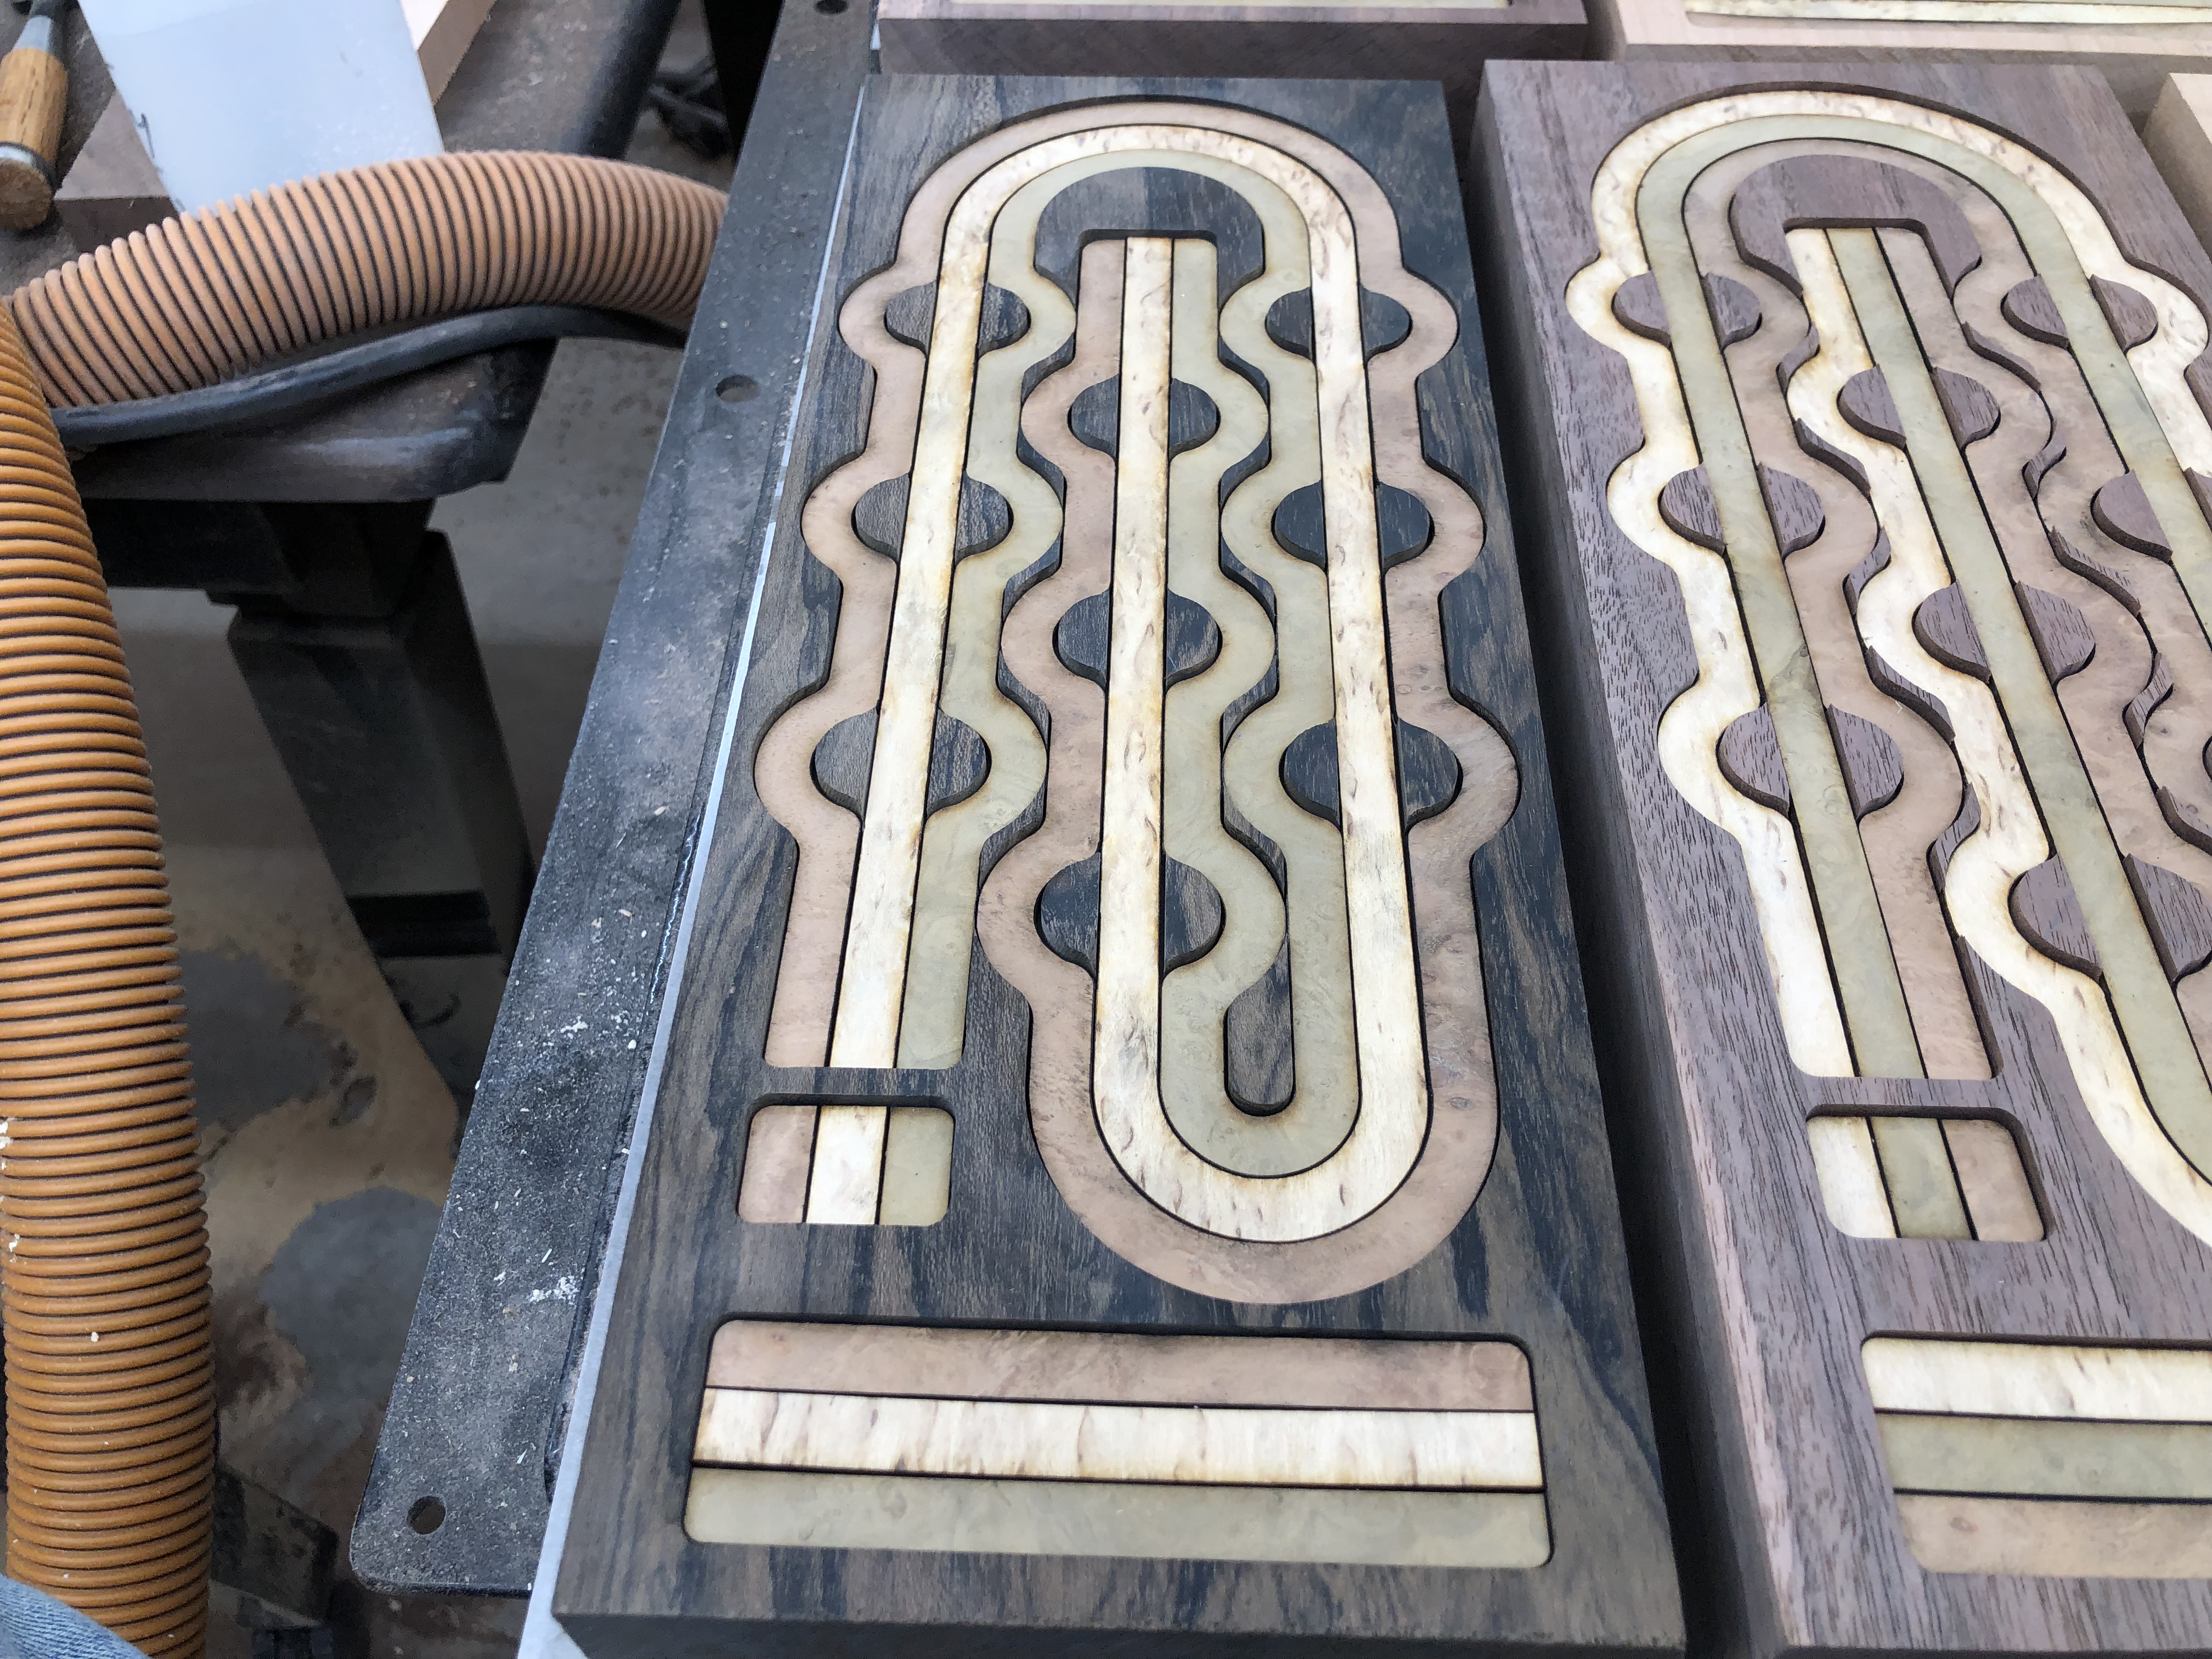
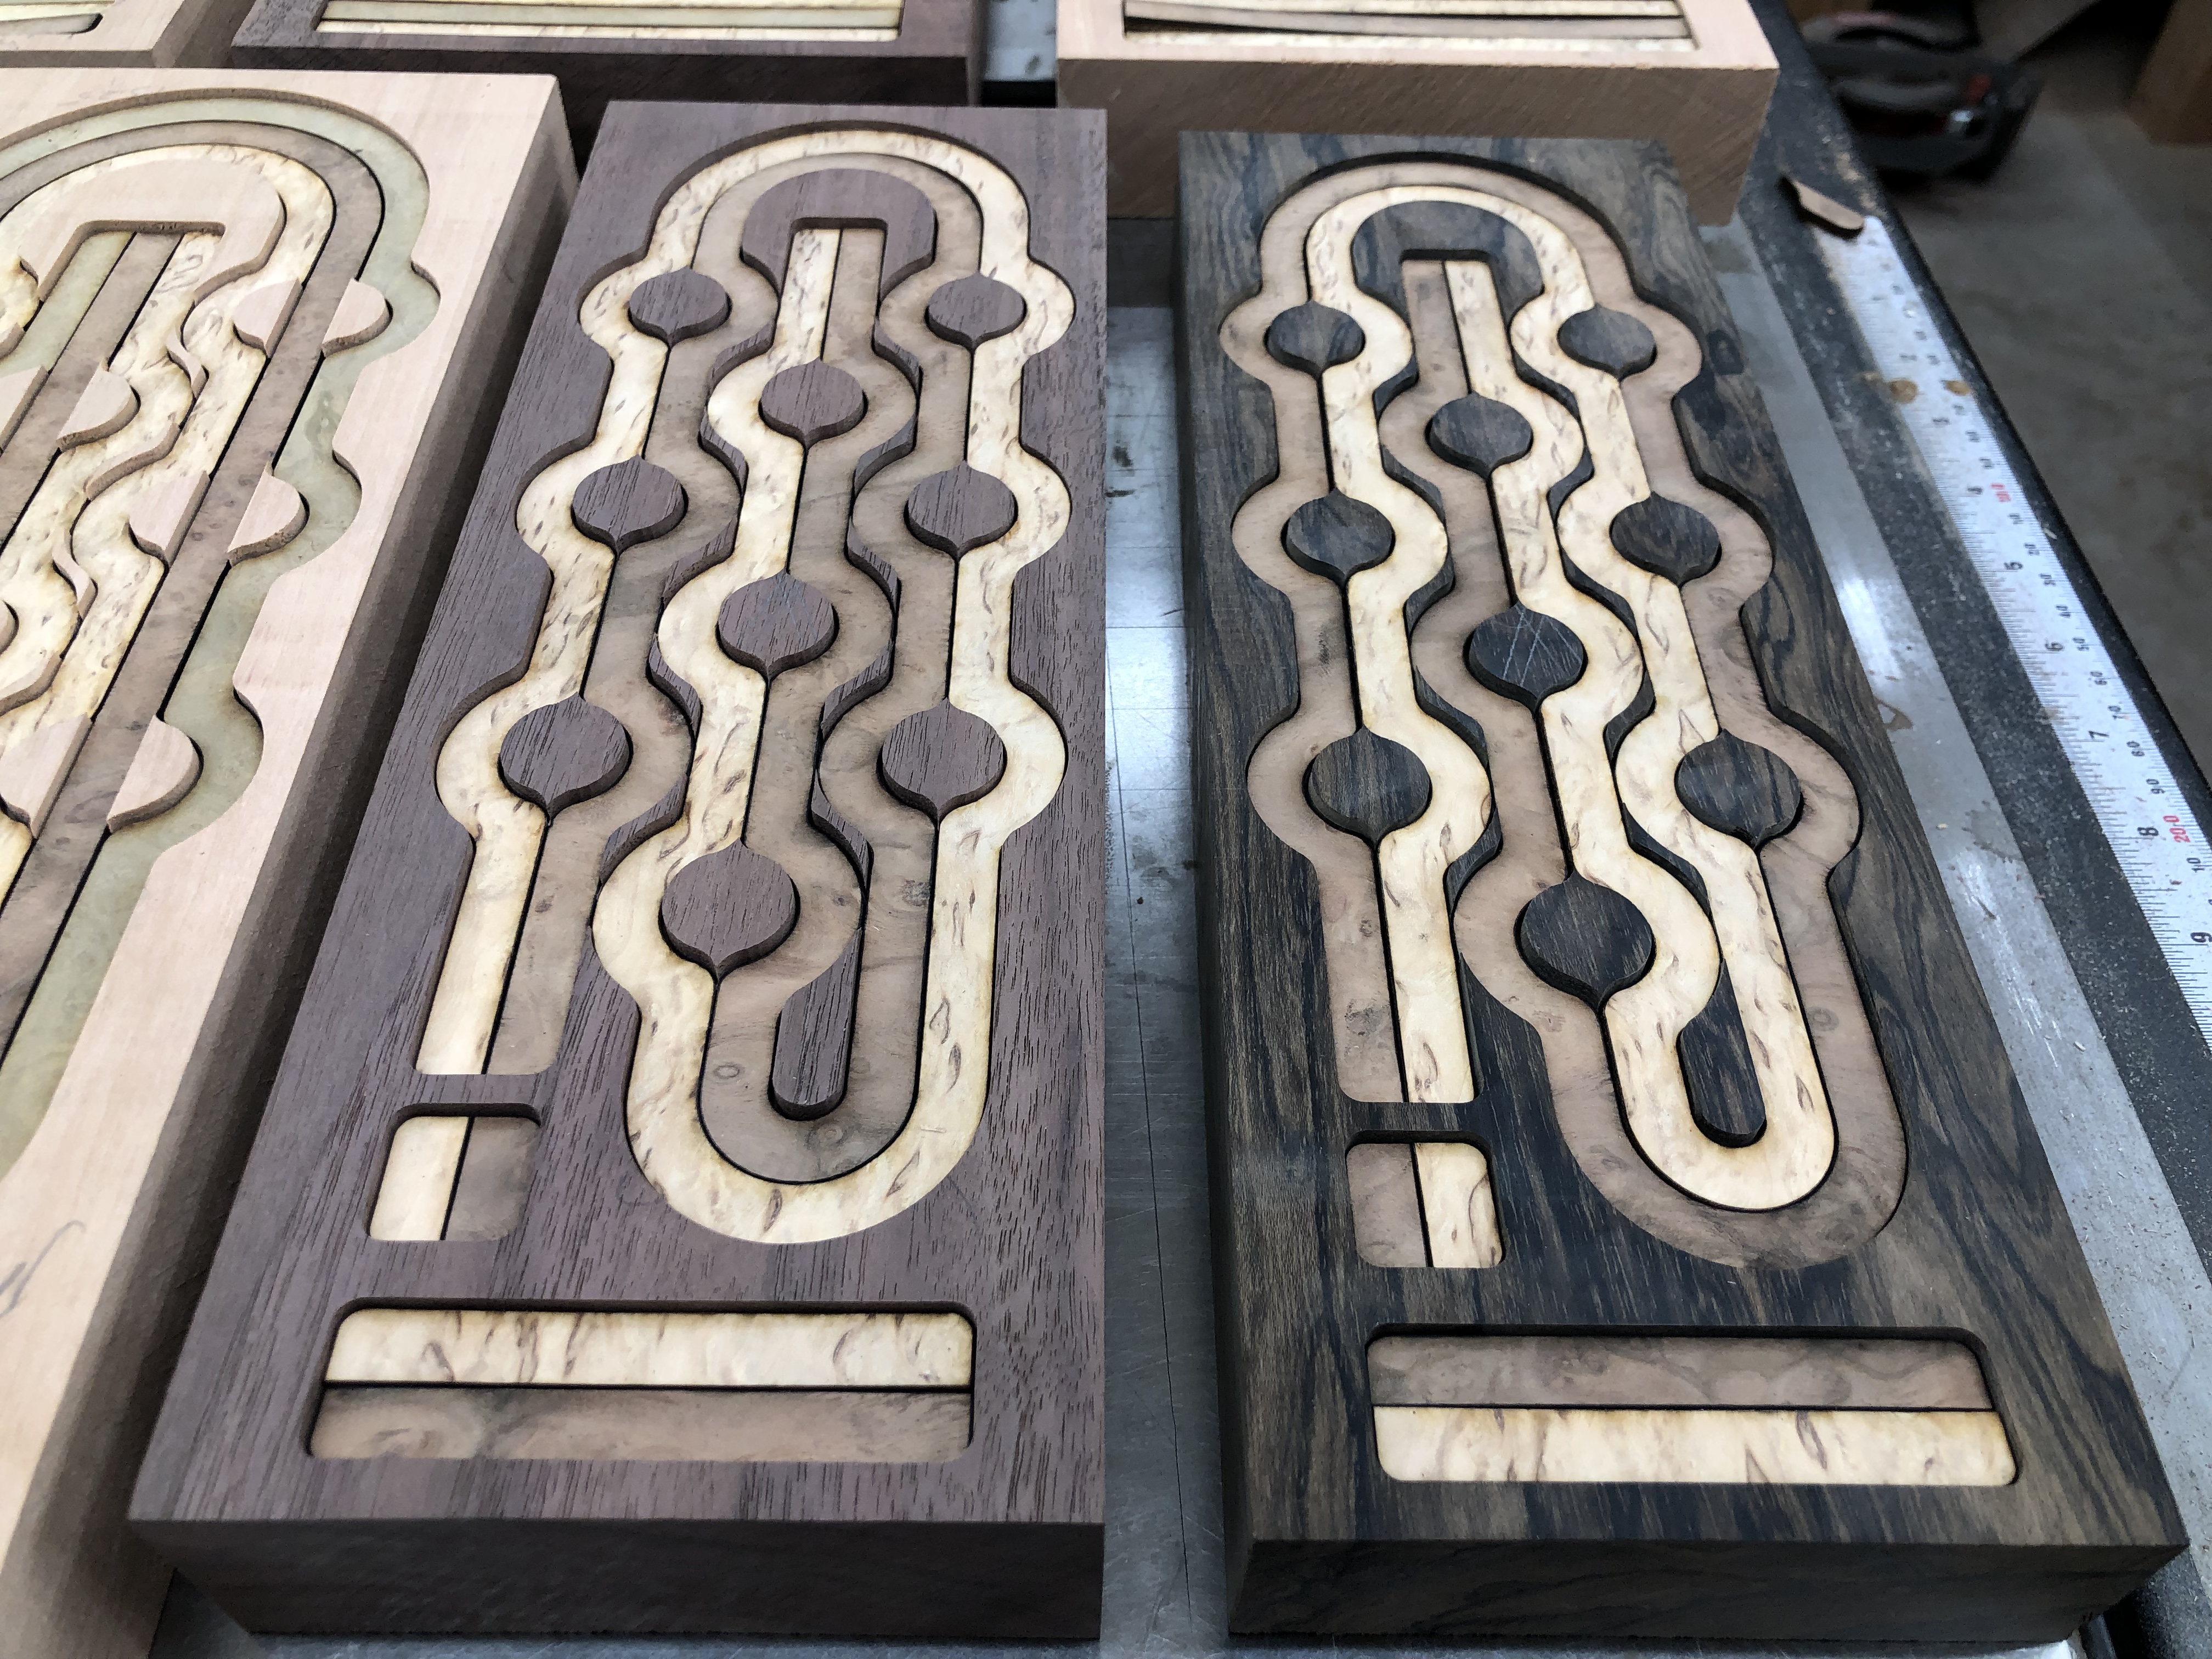
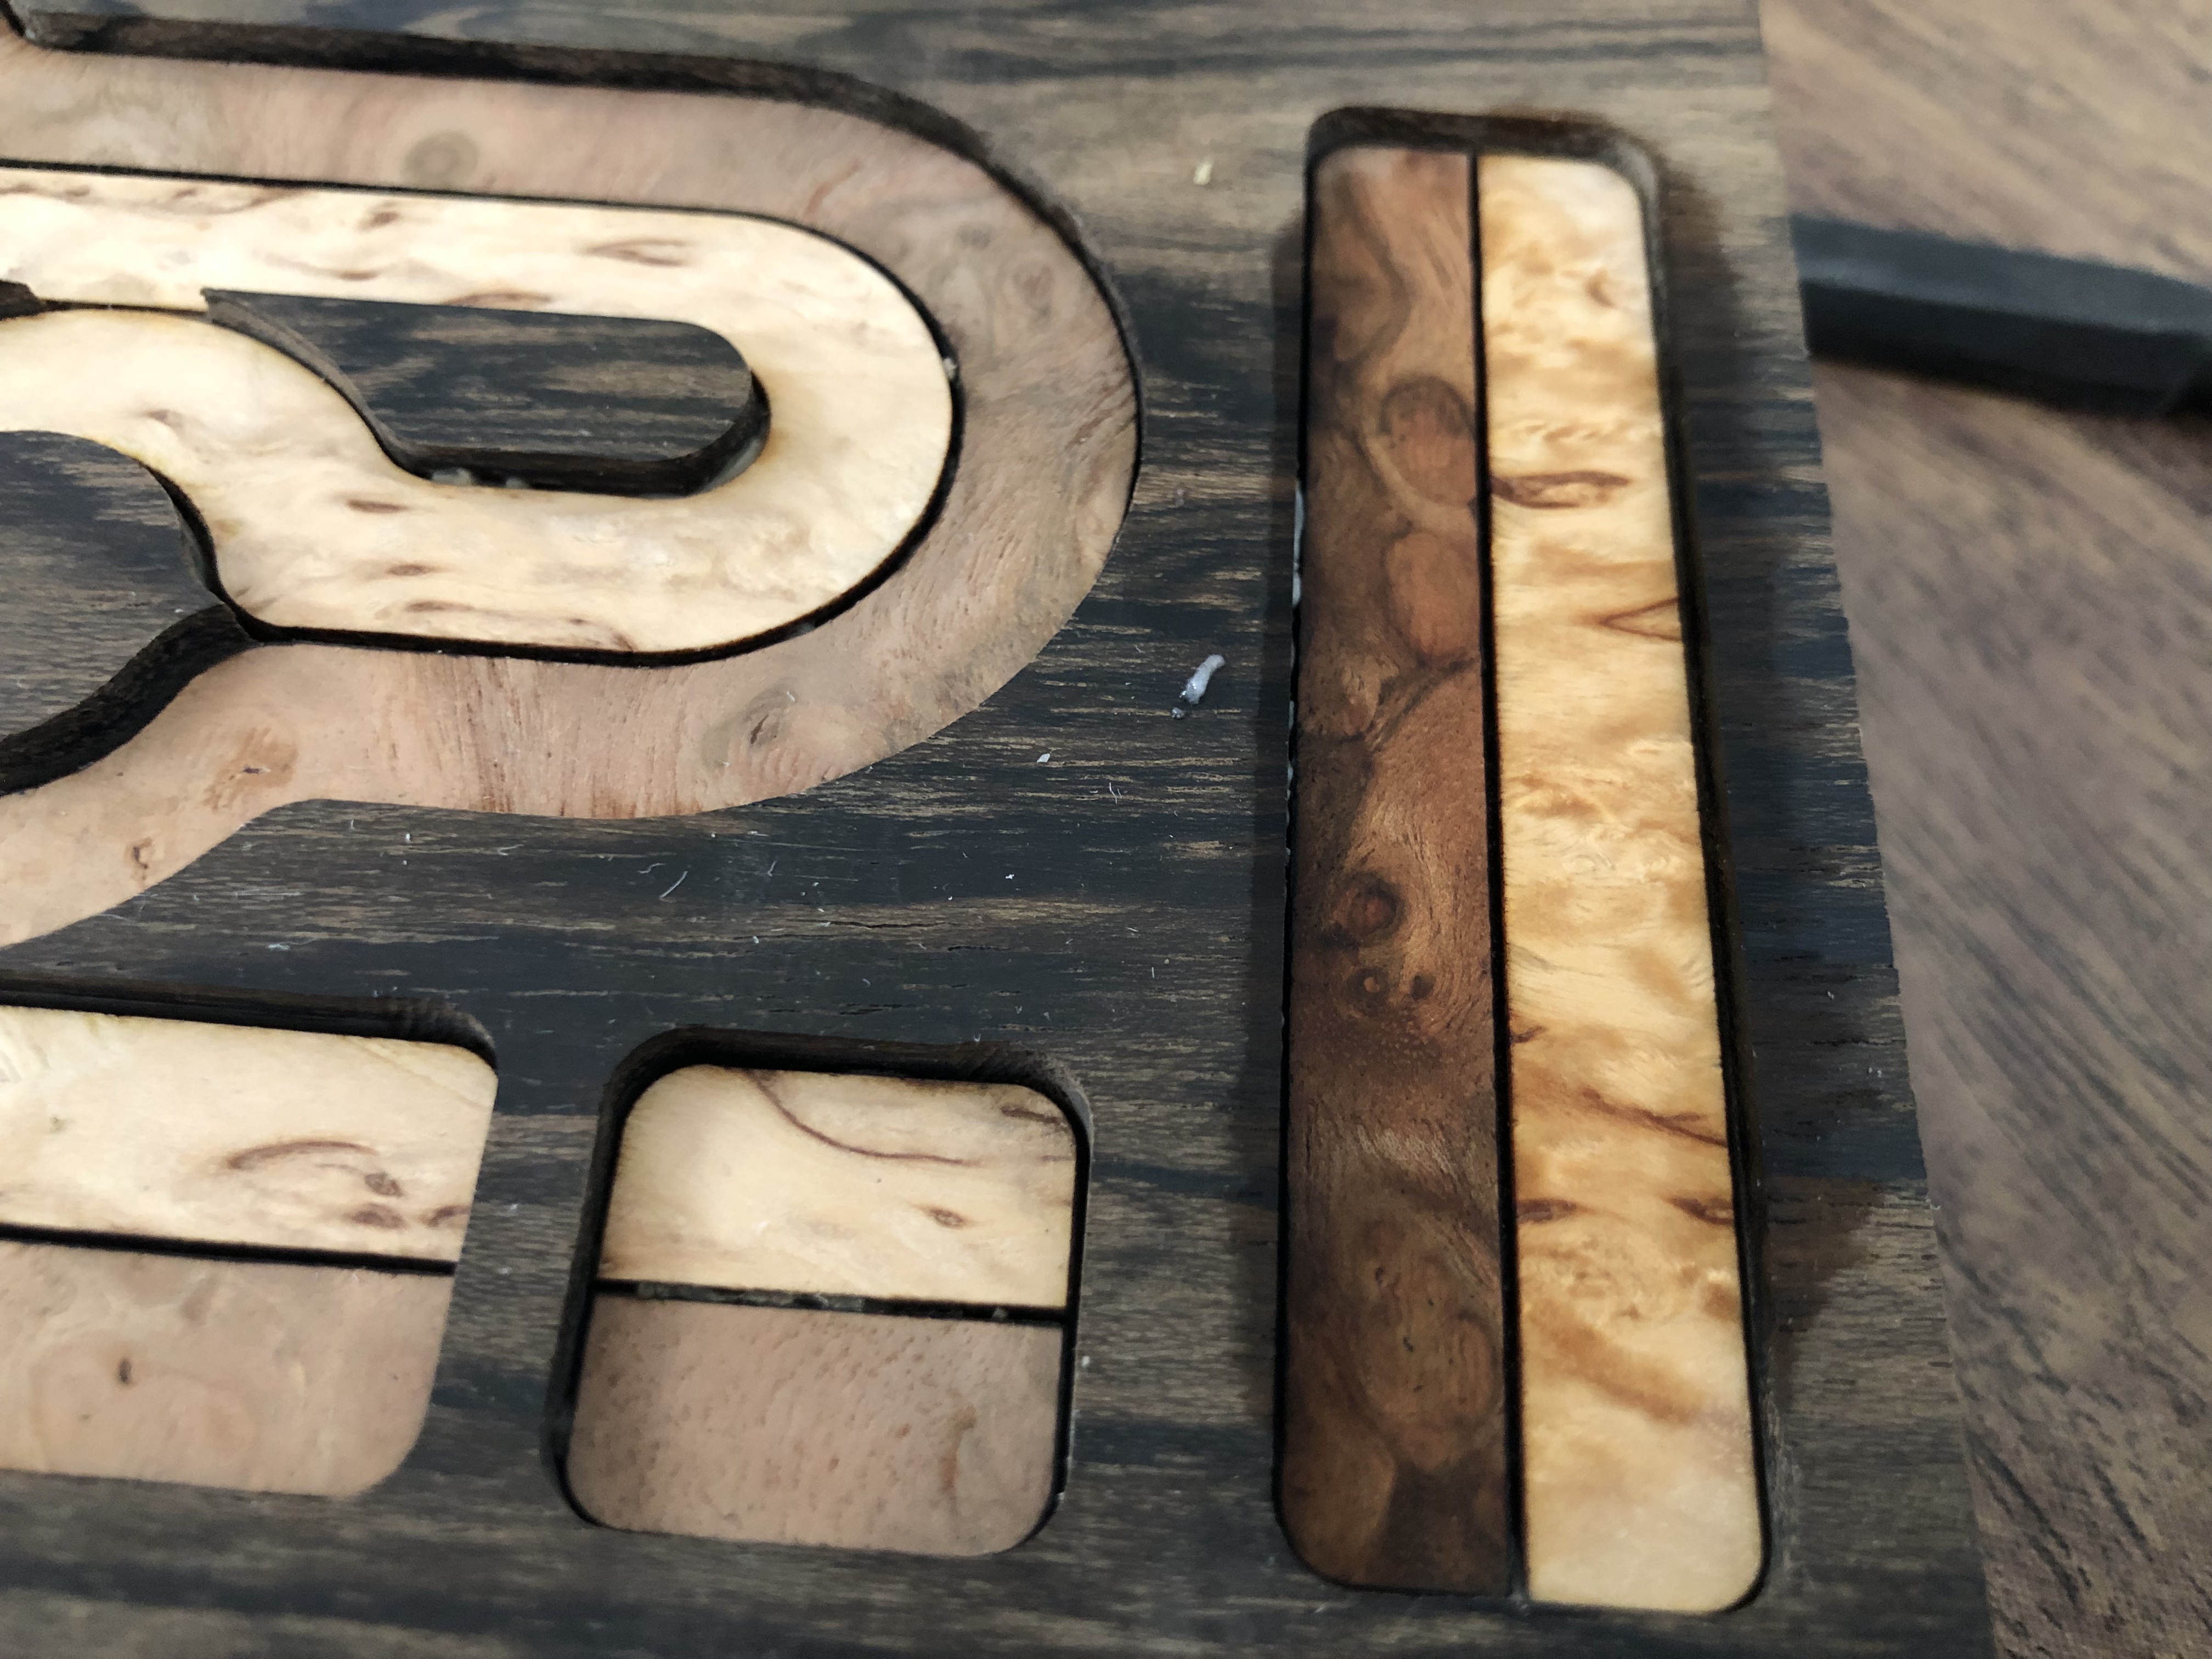
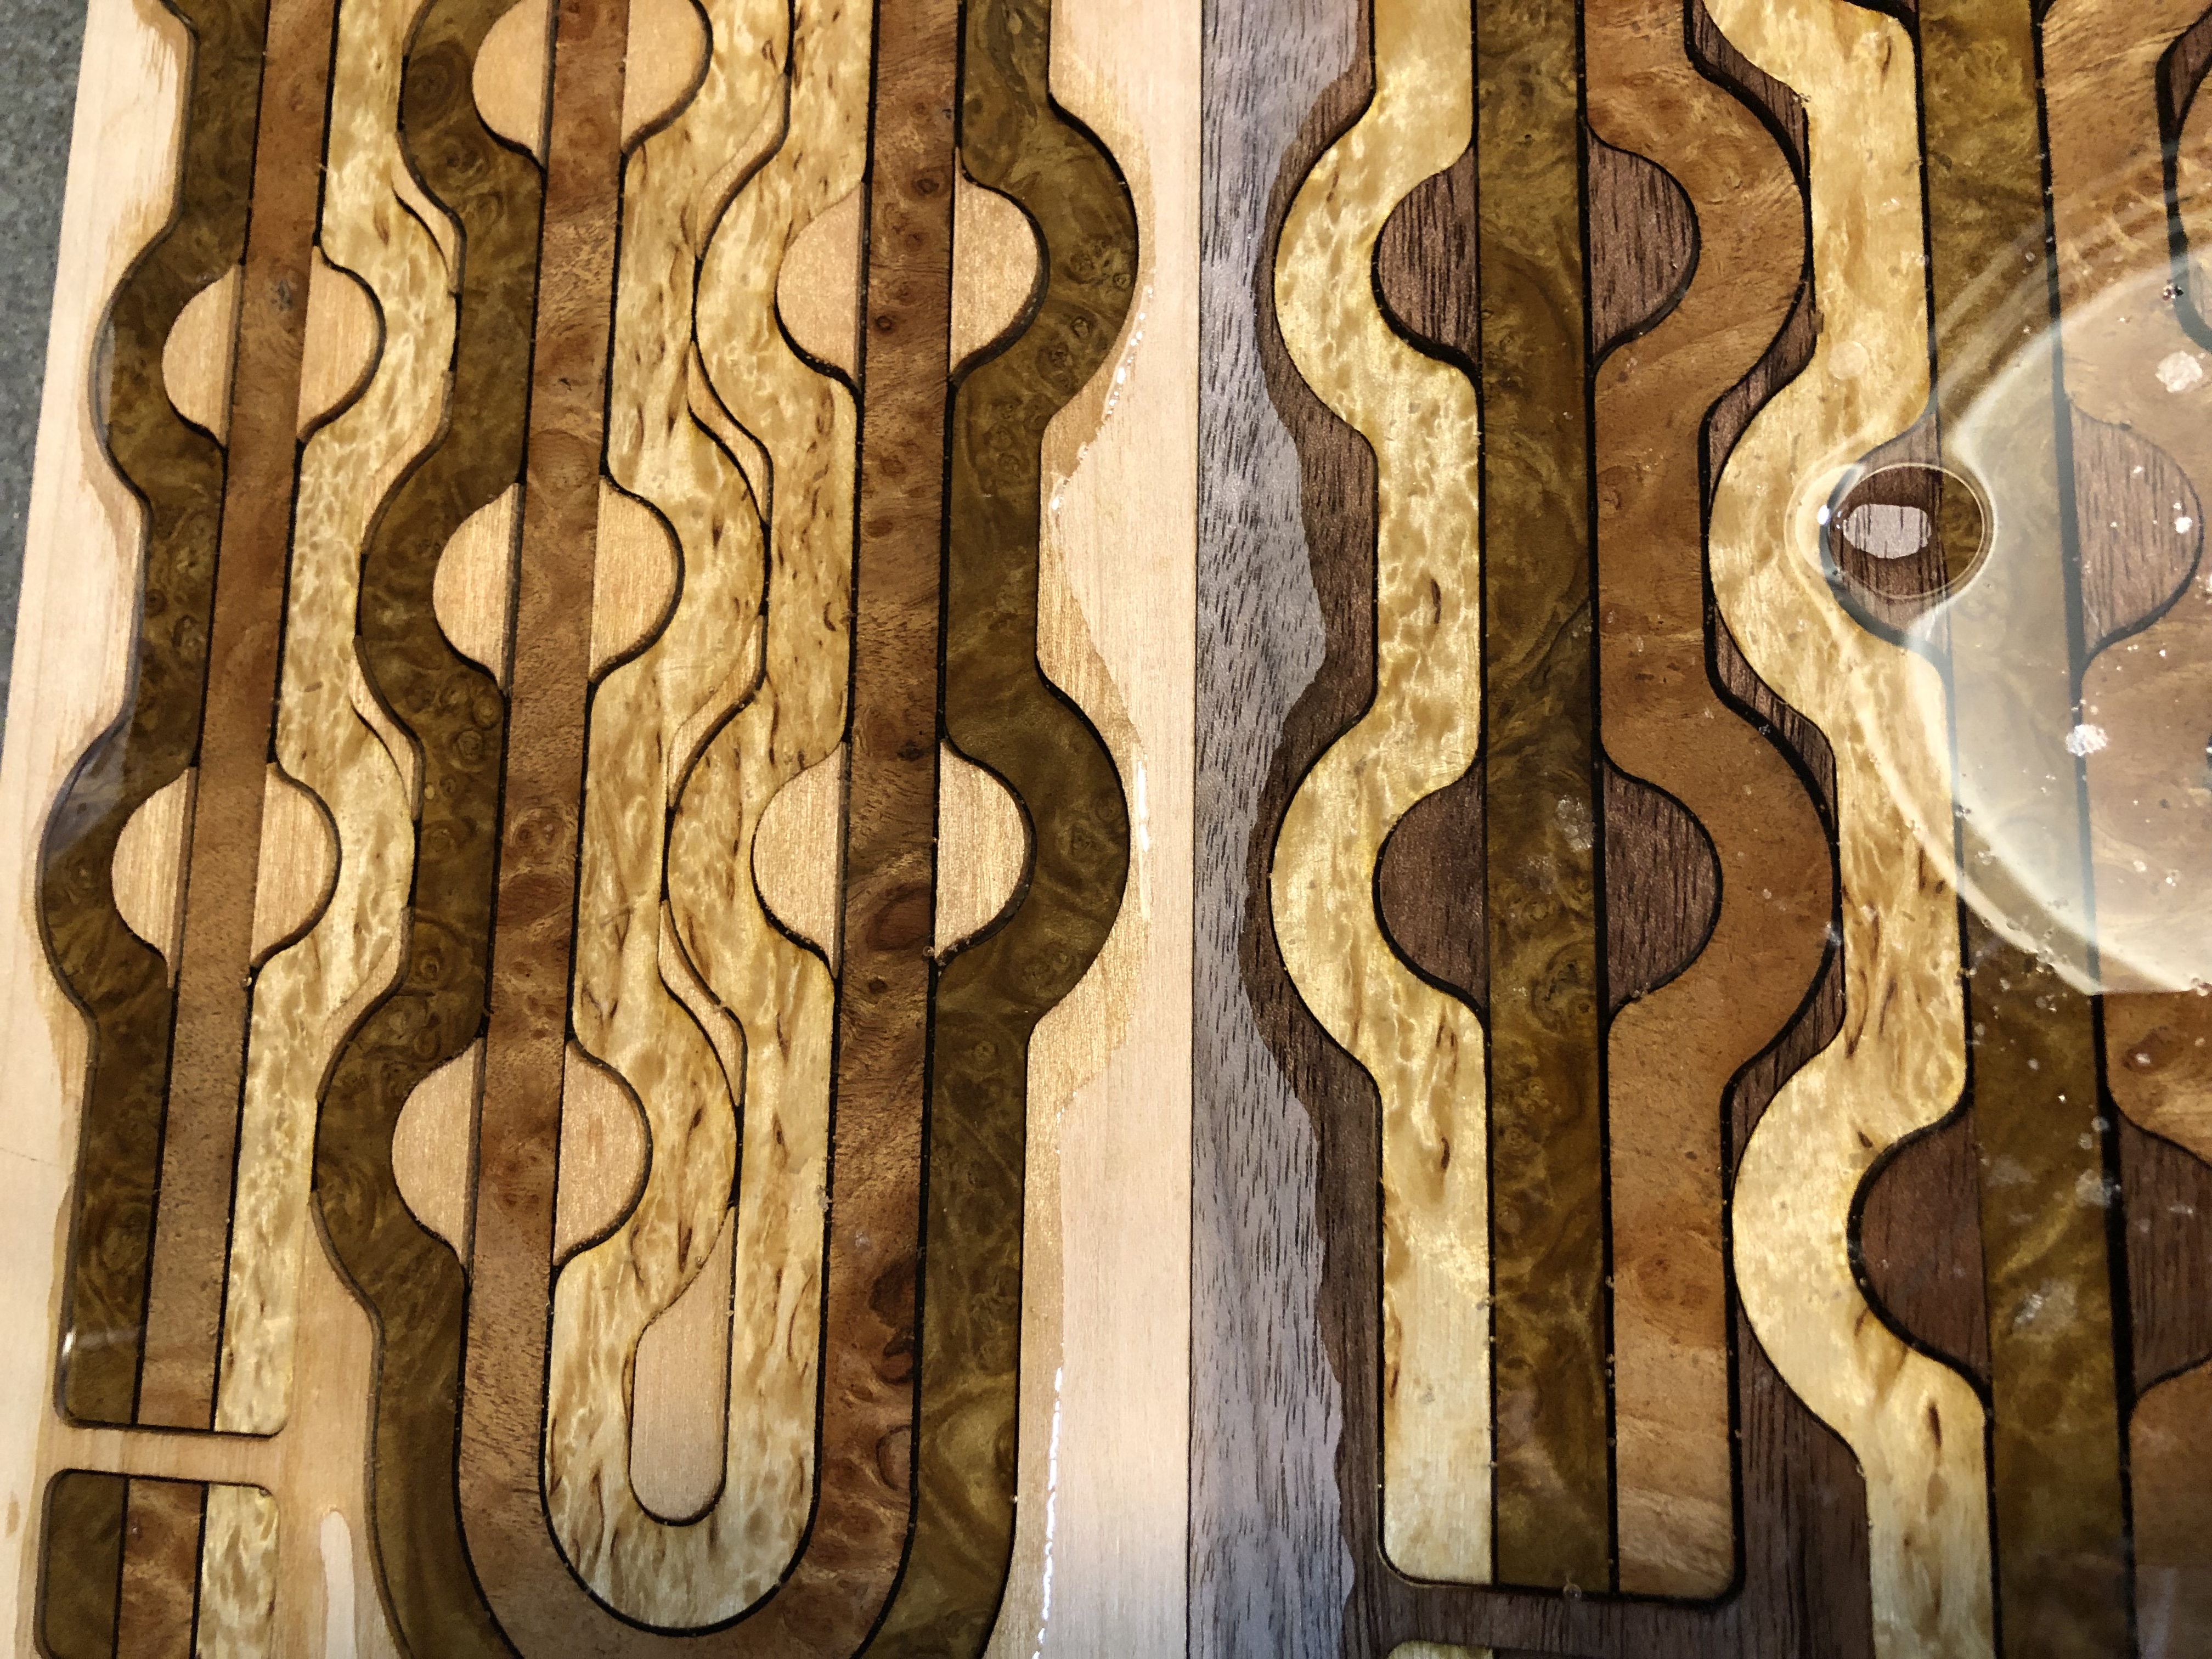
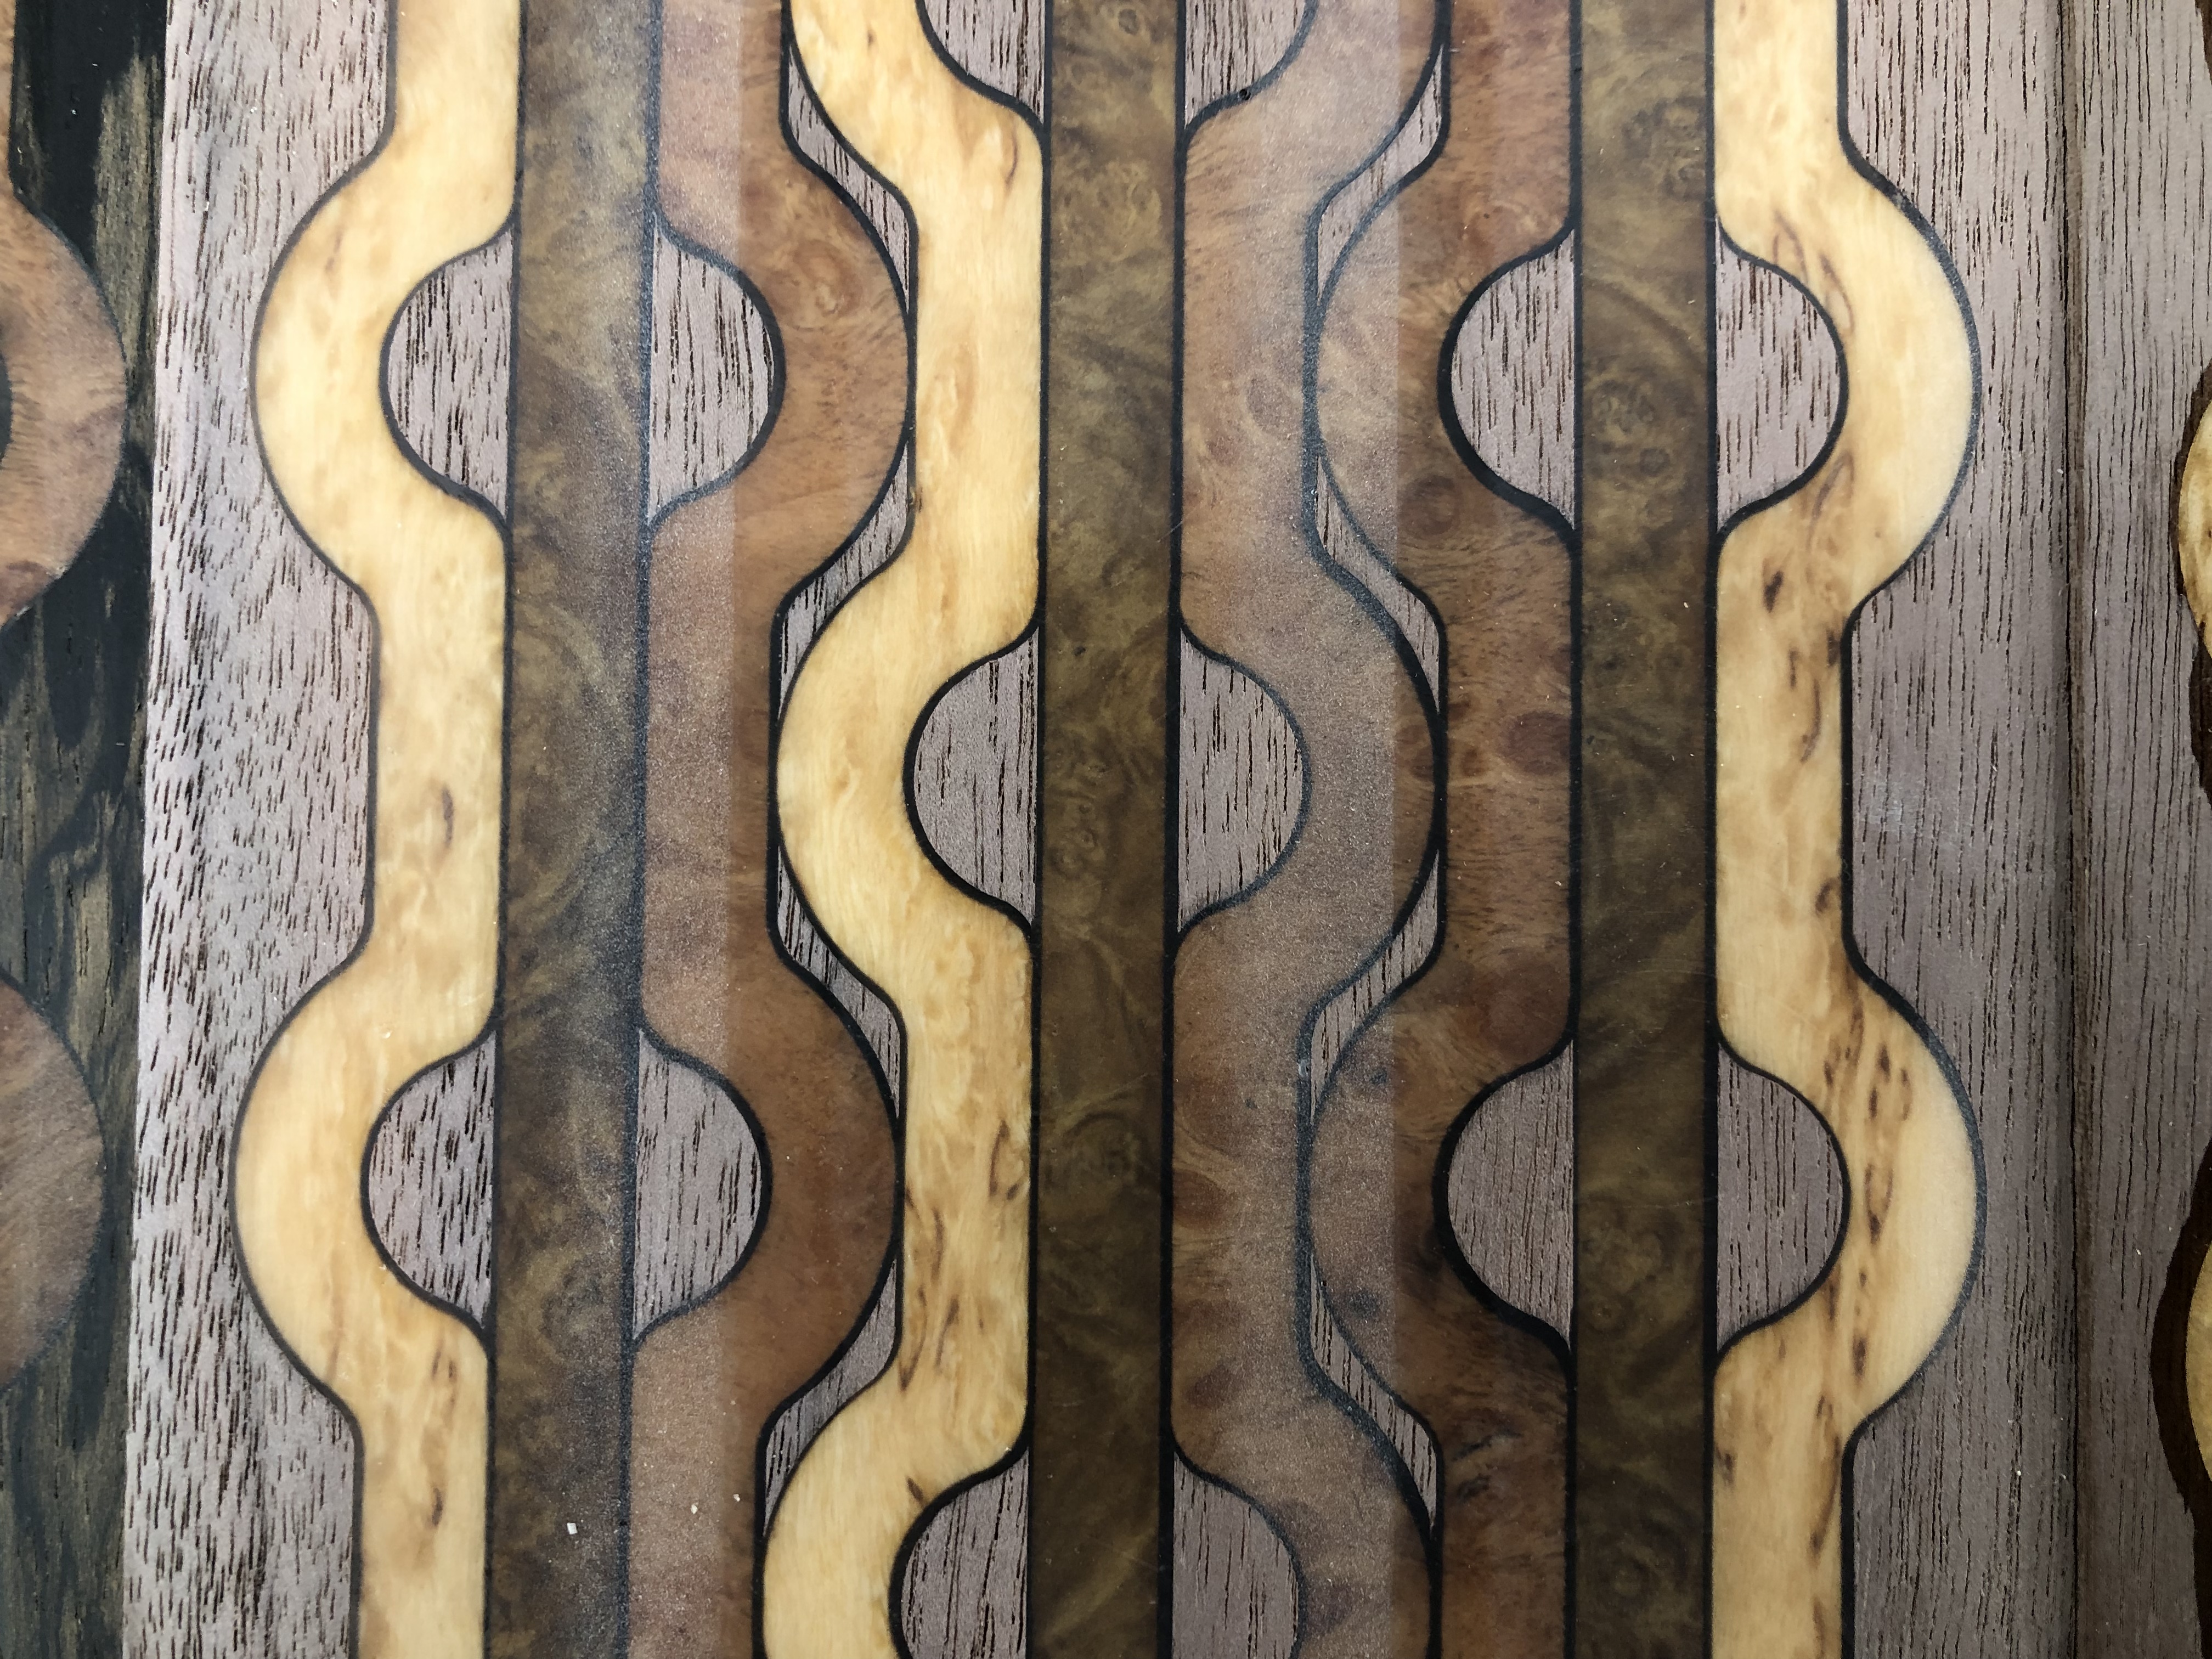
I’m in absolute love with the veneer inlayed results I’ve achieved and wanted to continue these features moving forward.
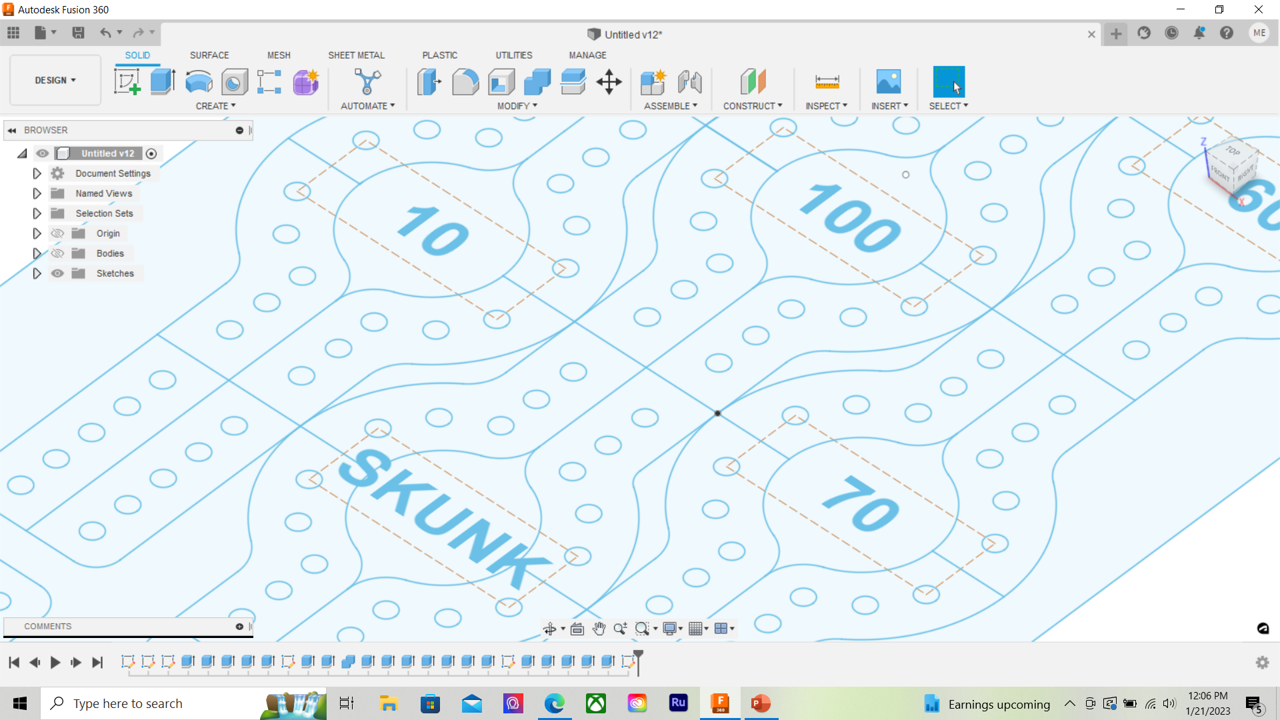
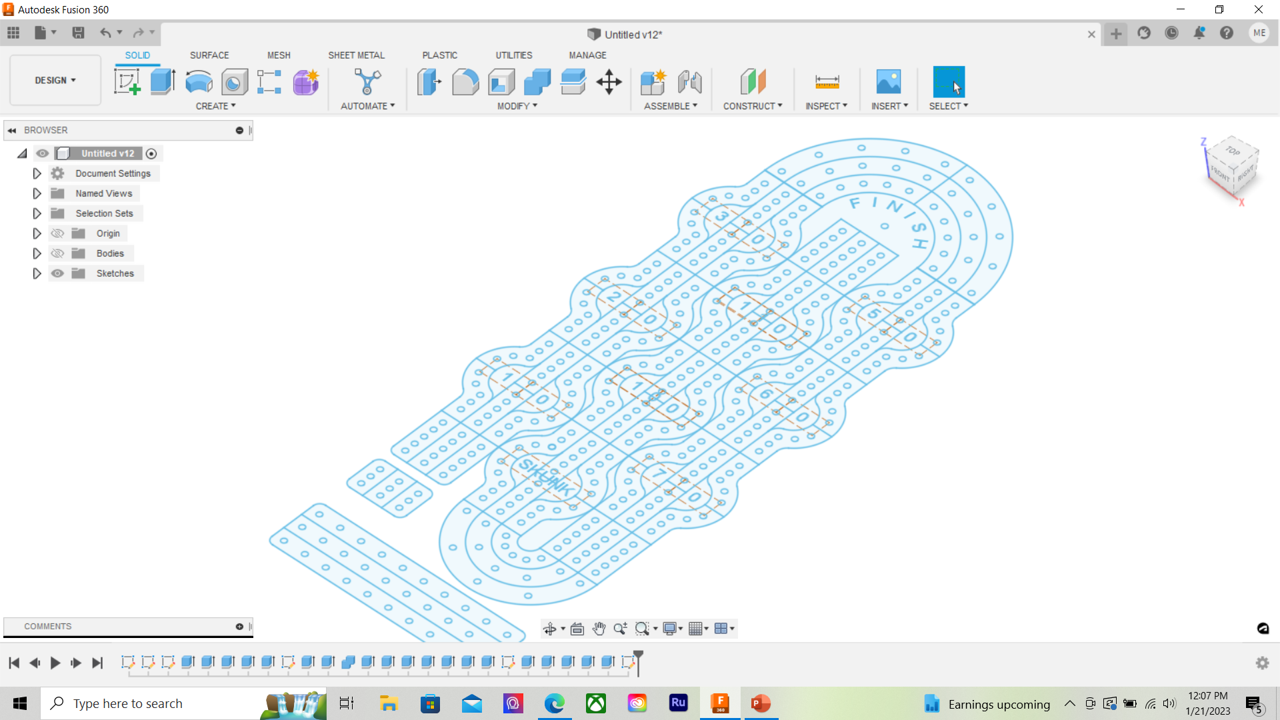
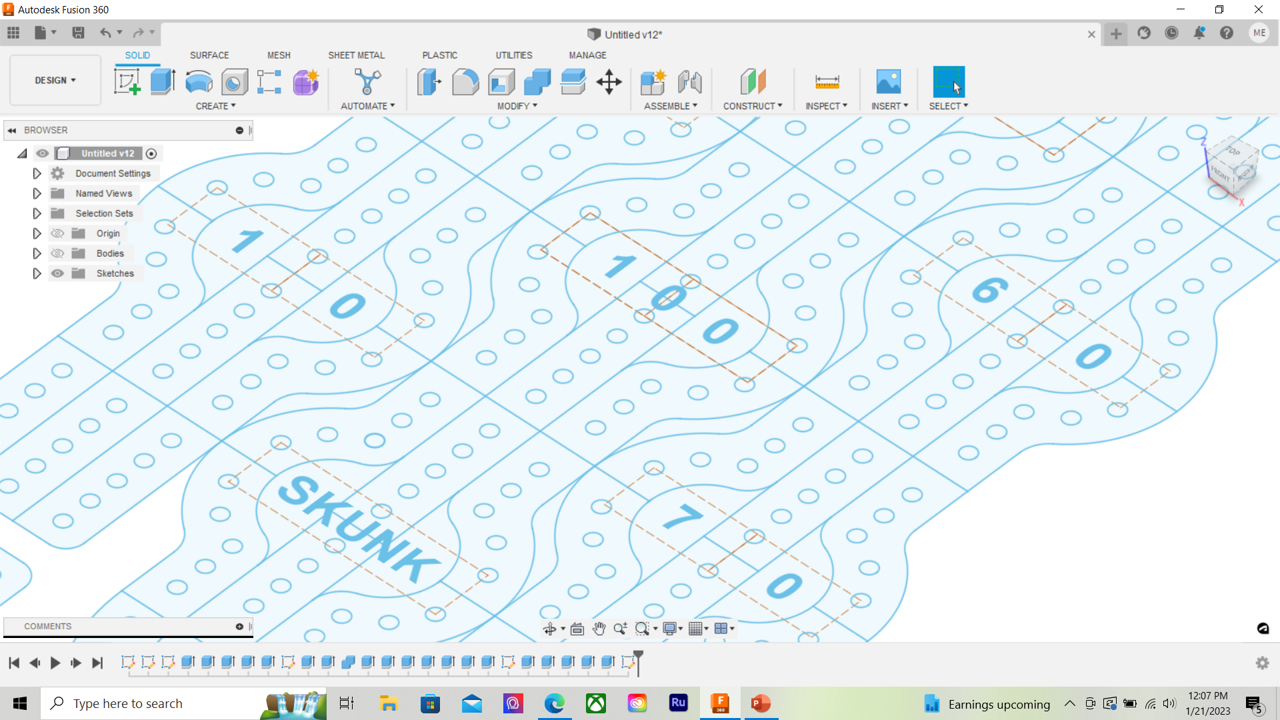
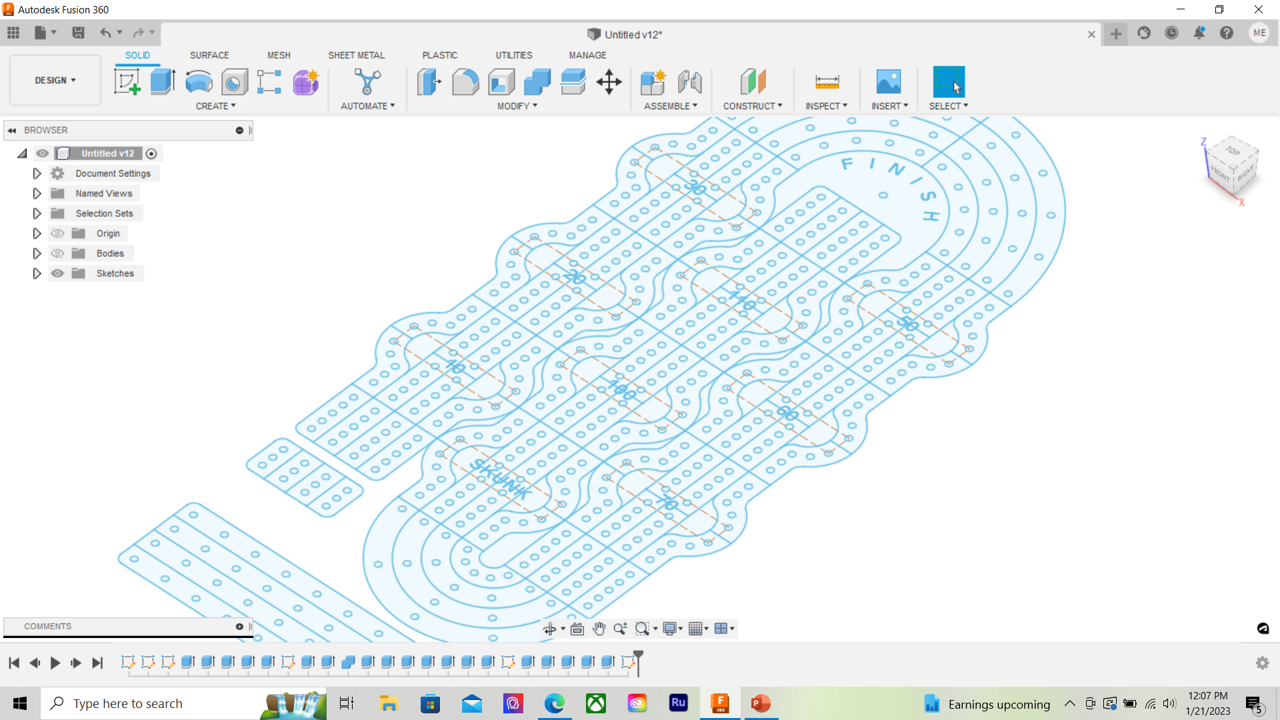
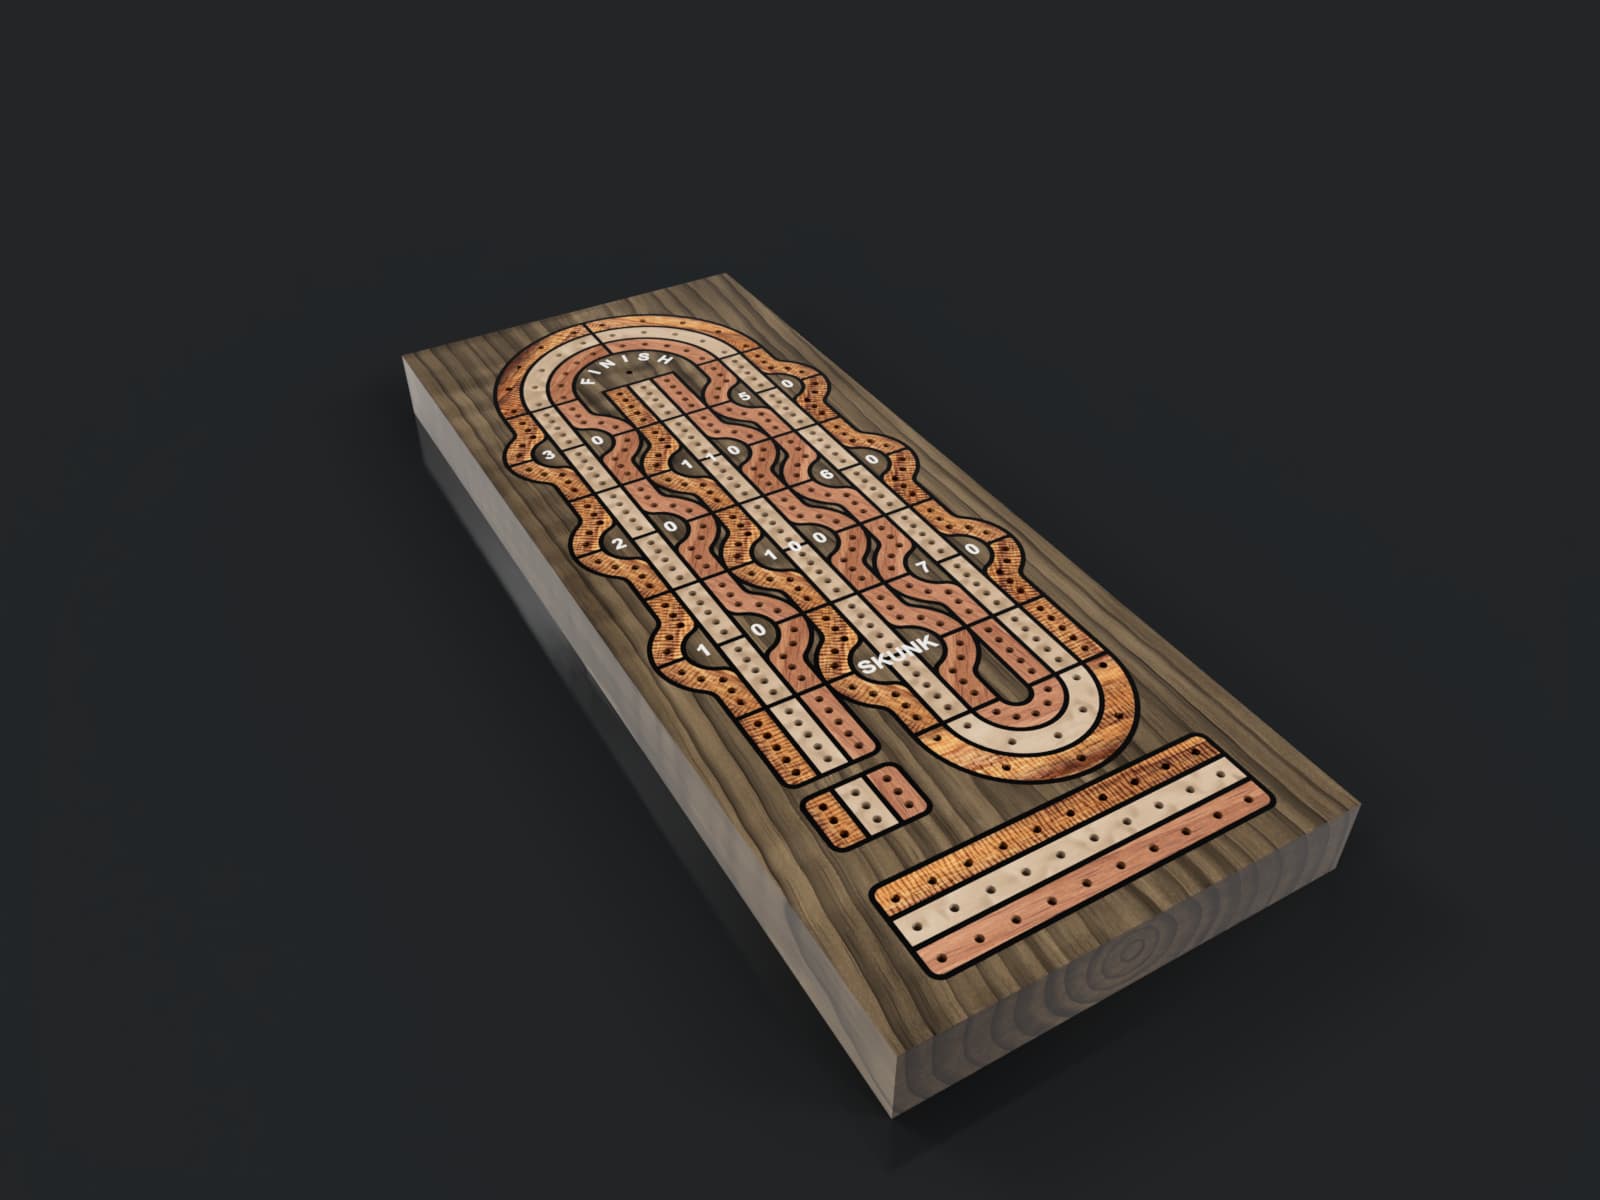
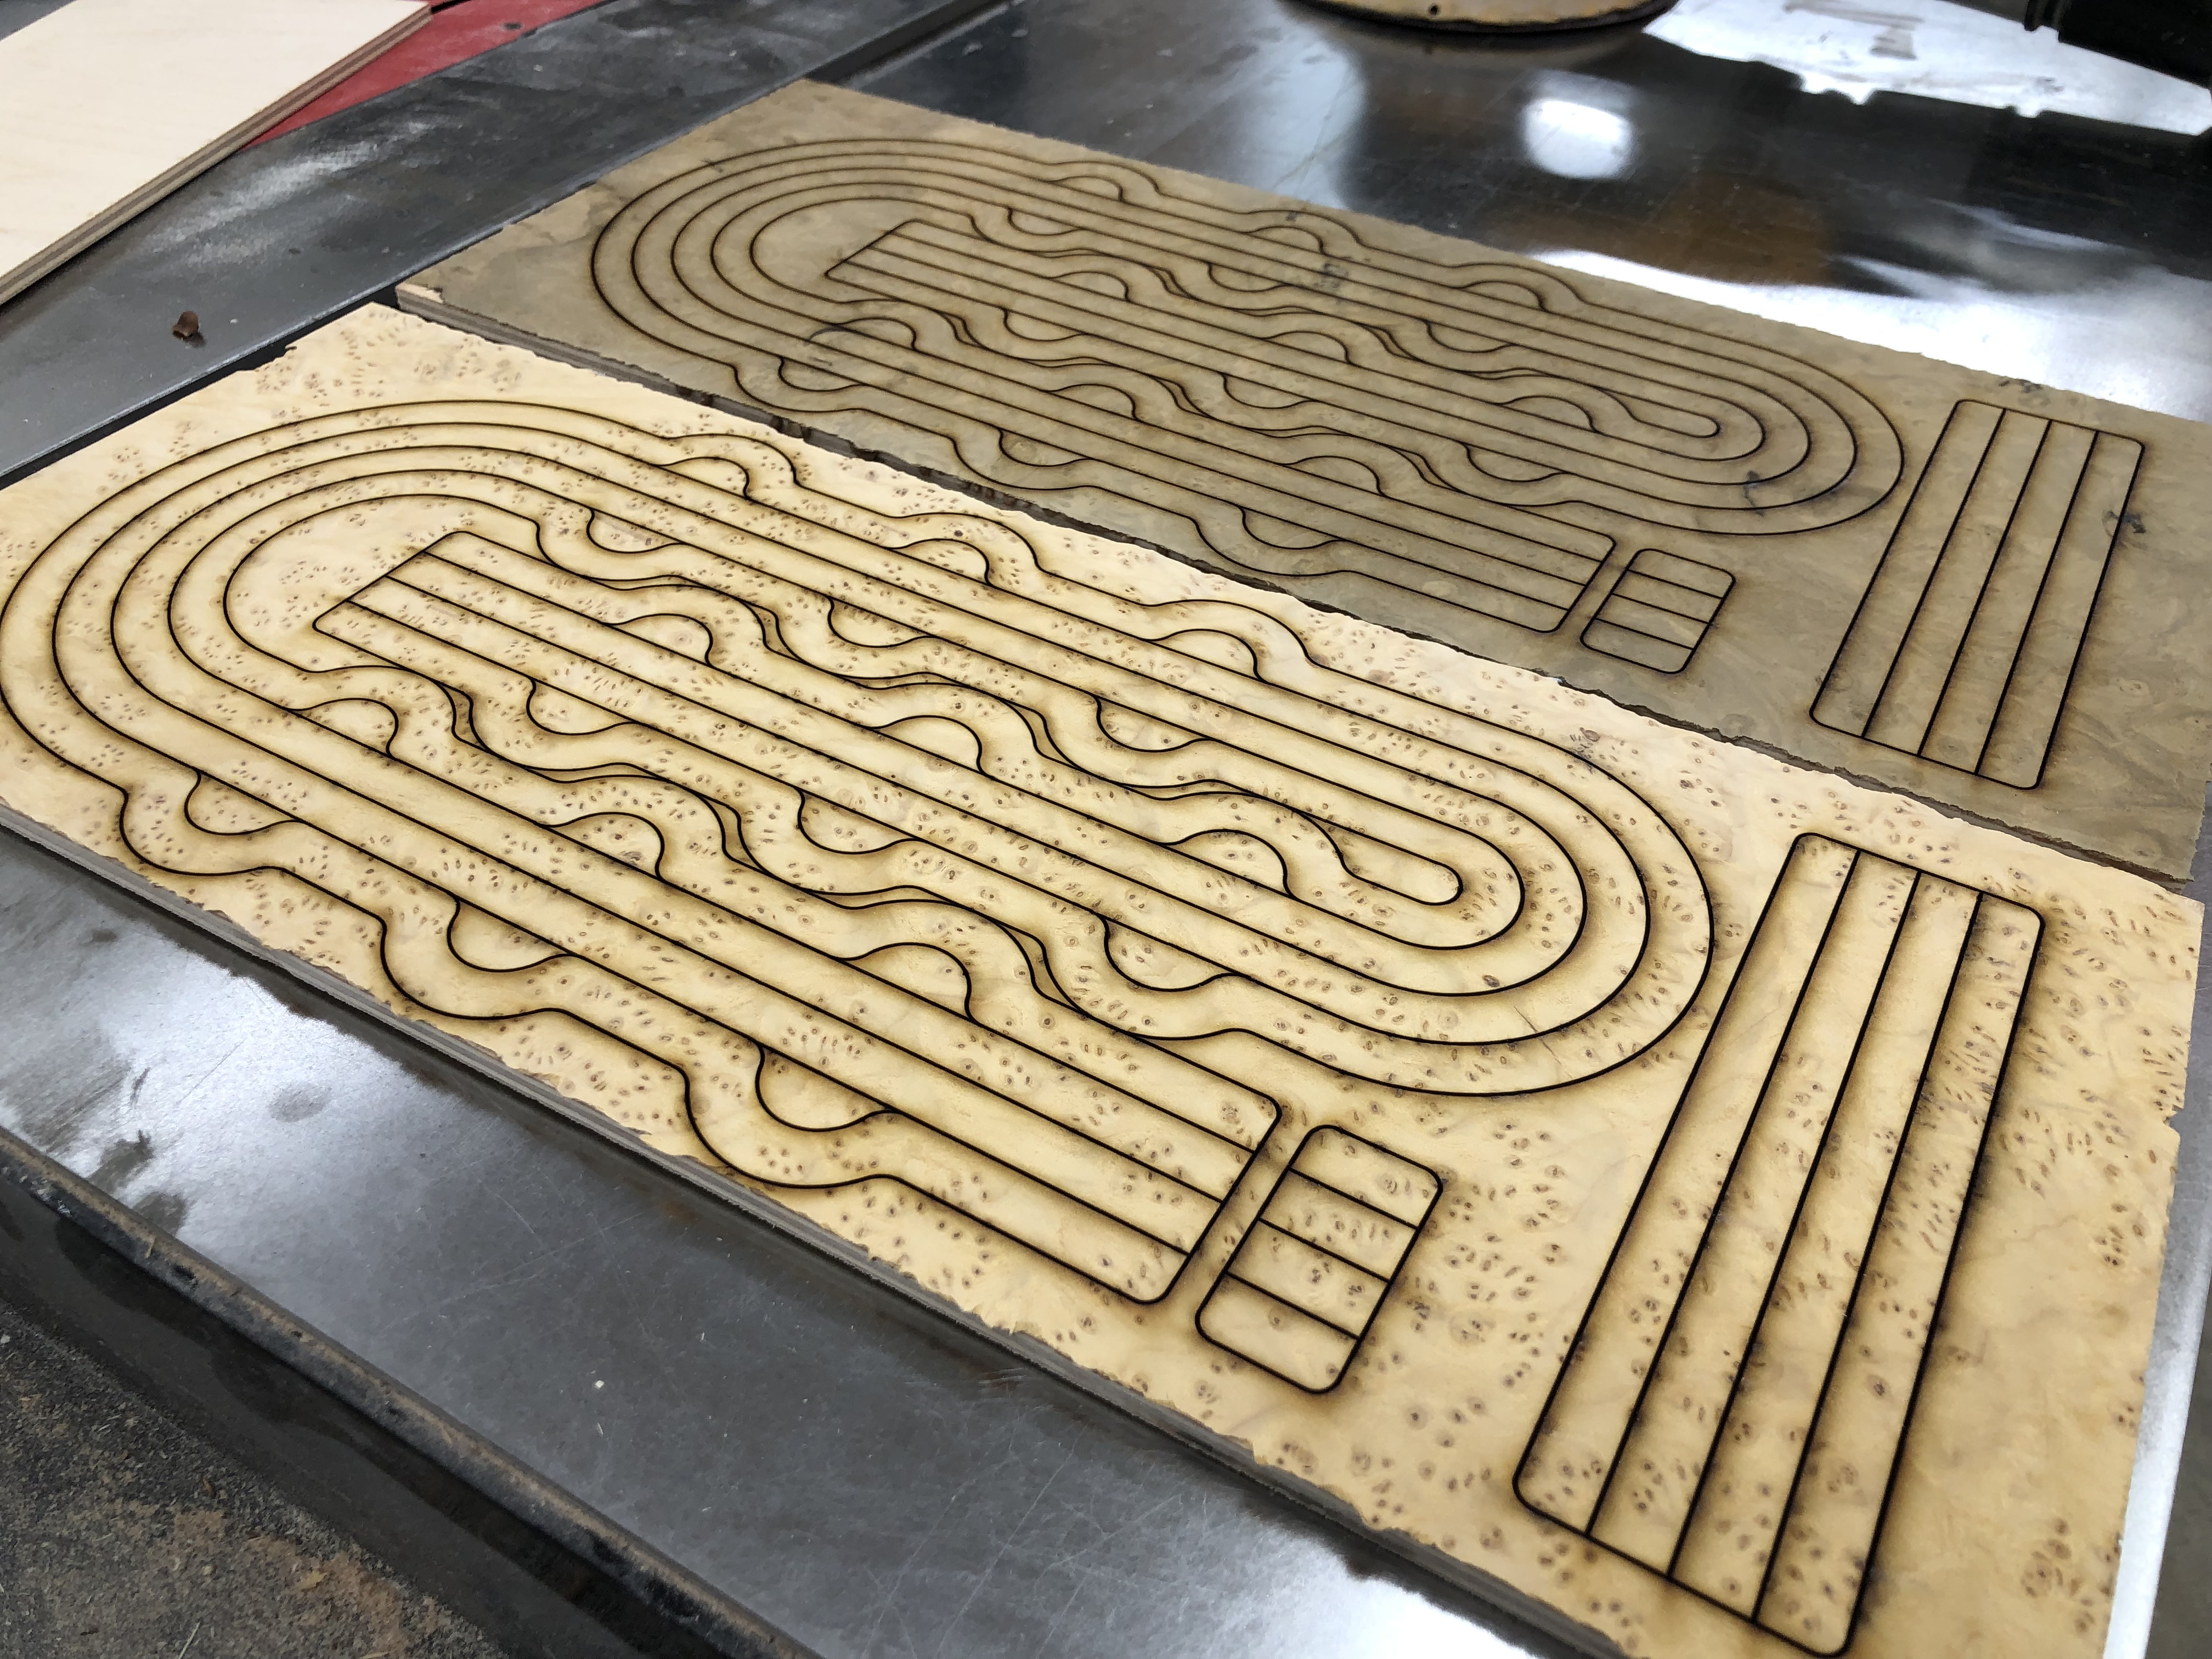
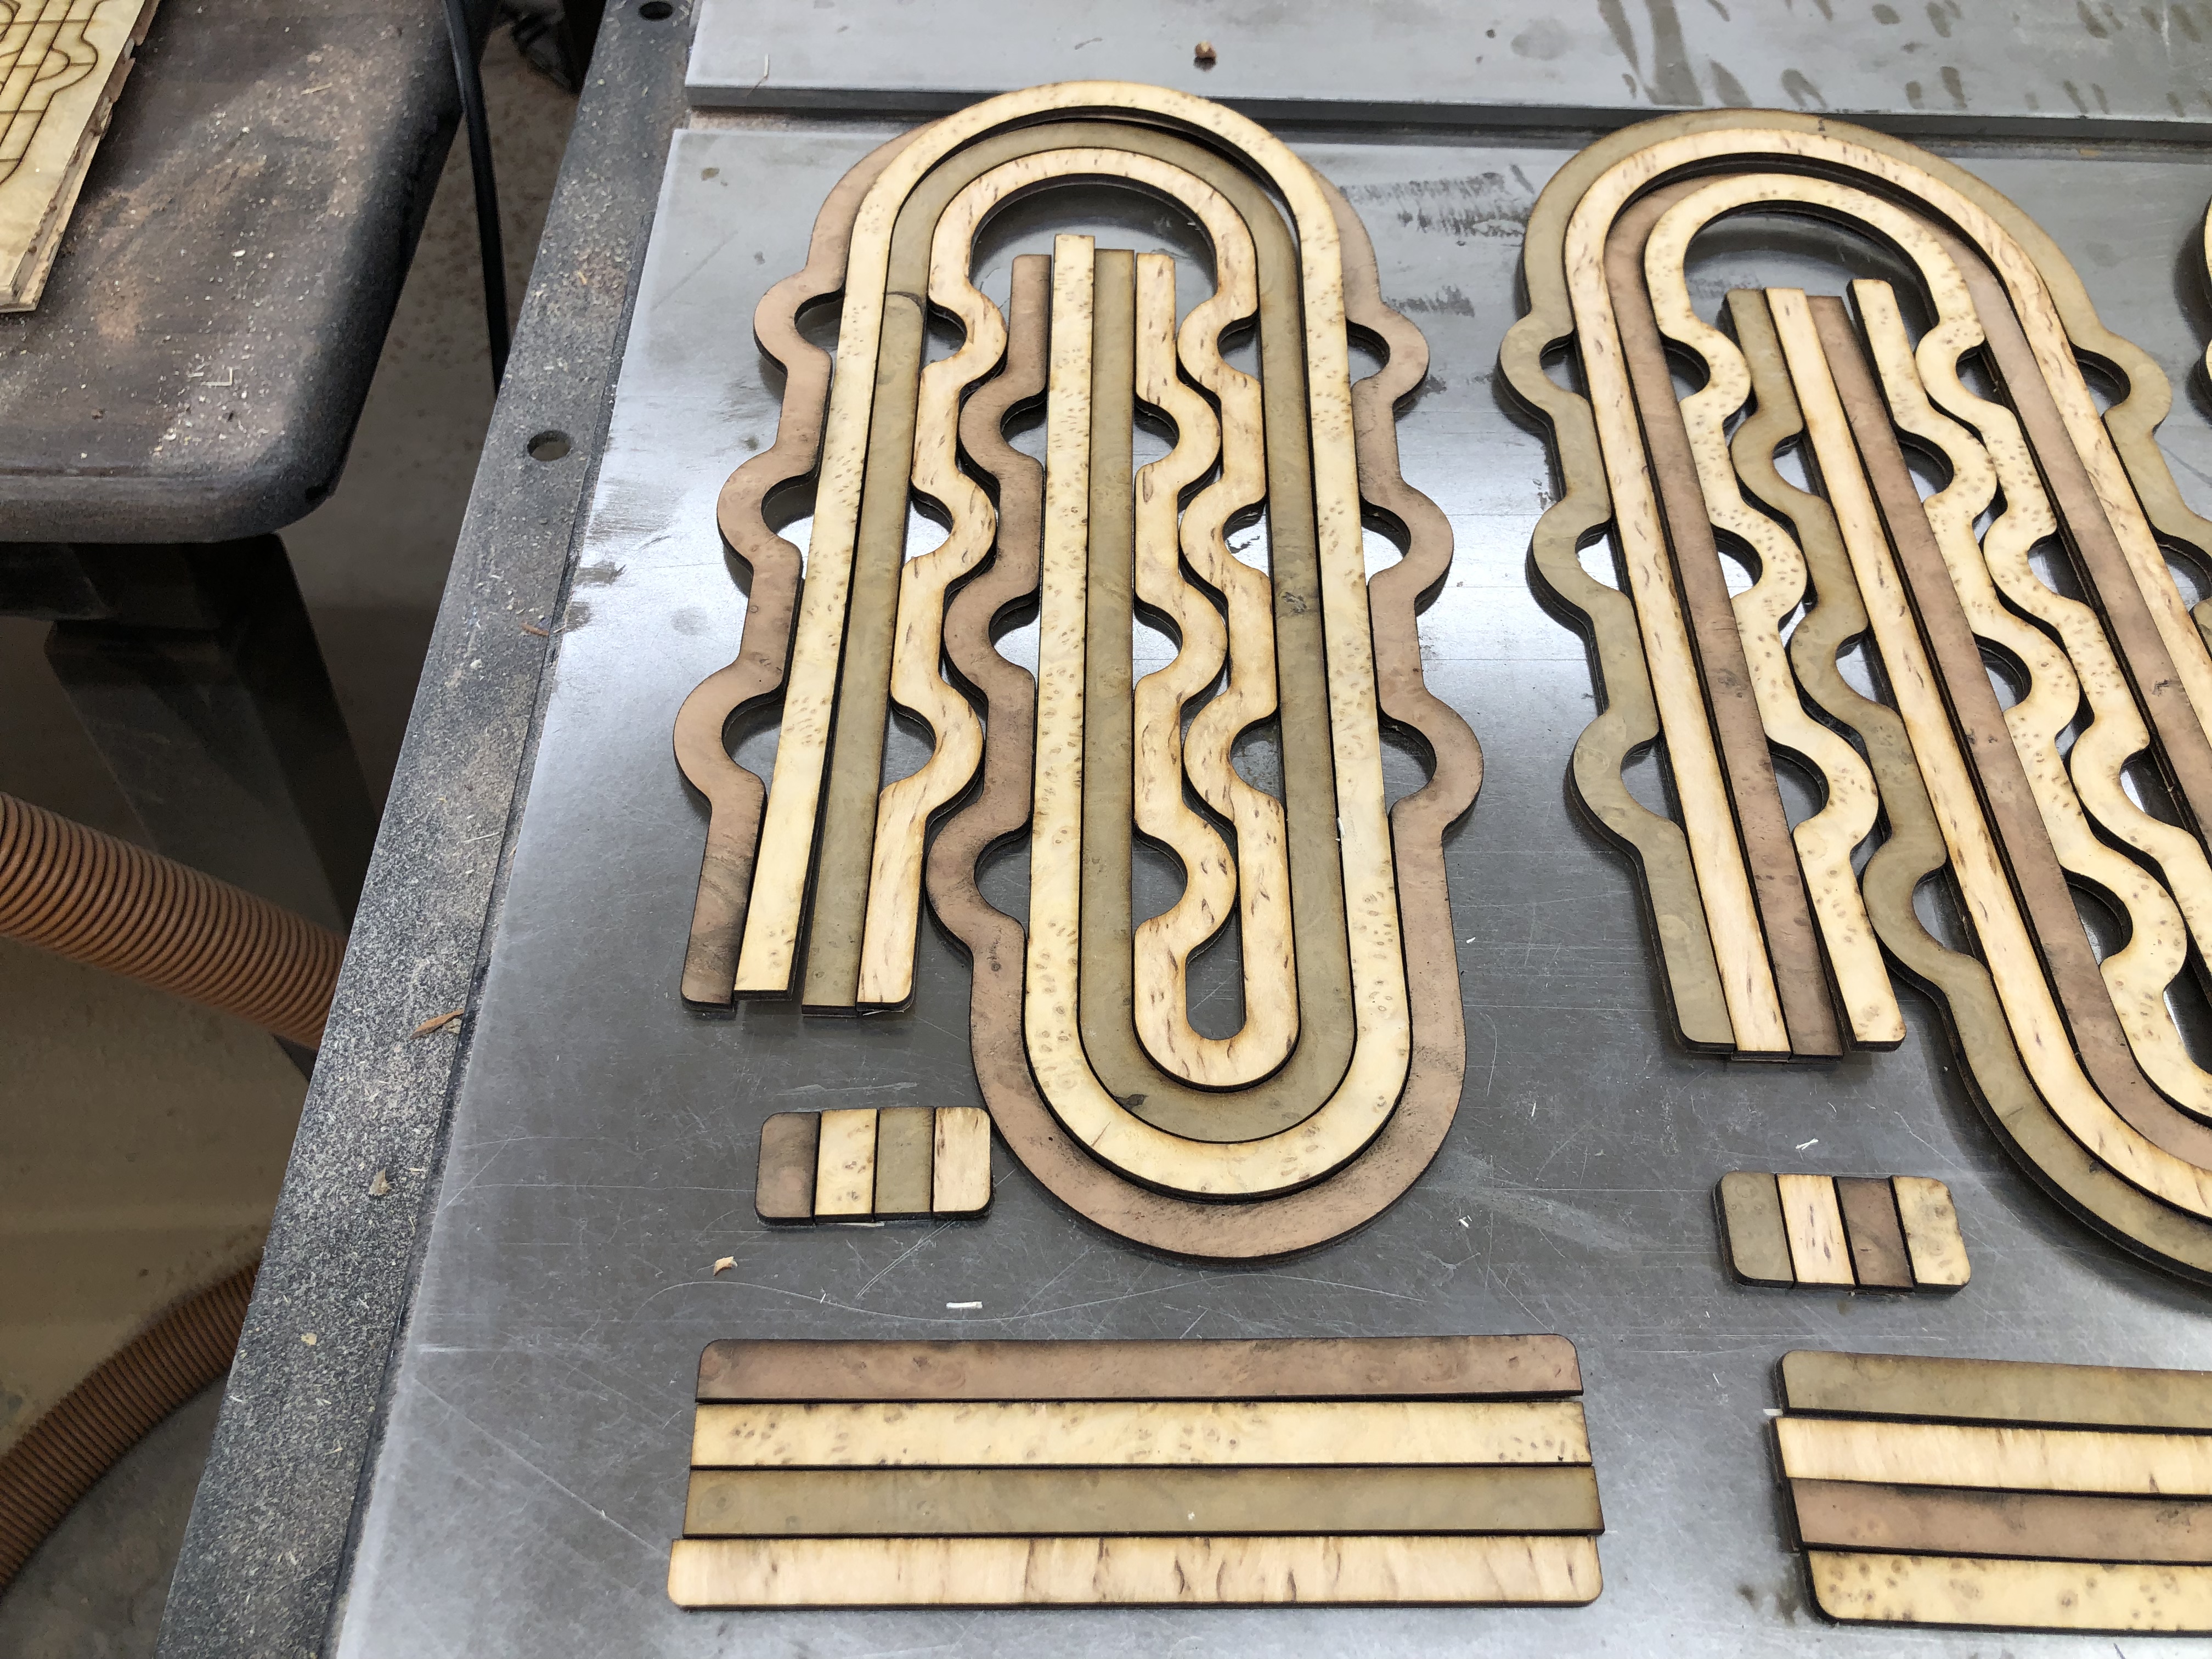
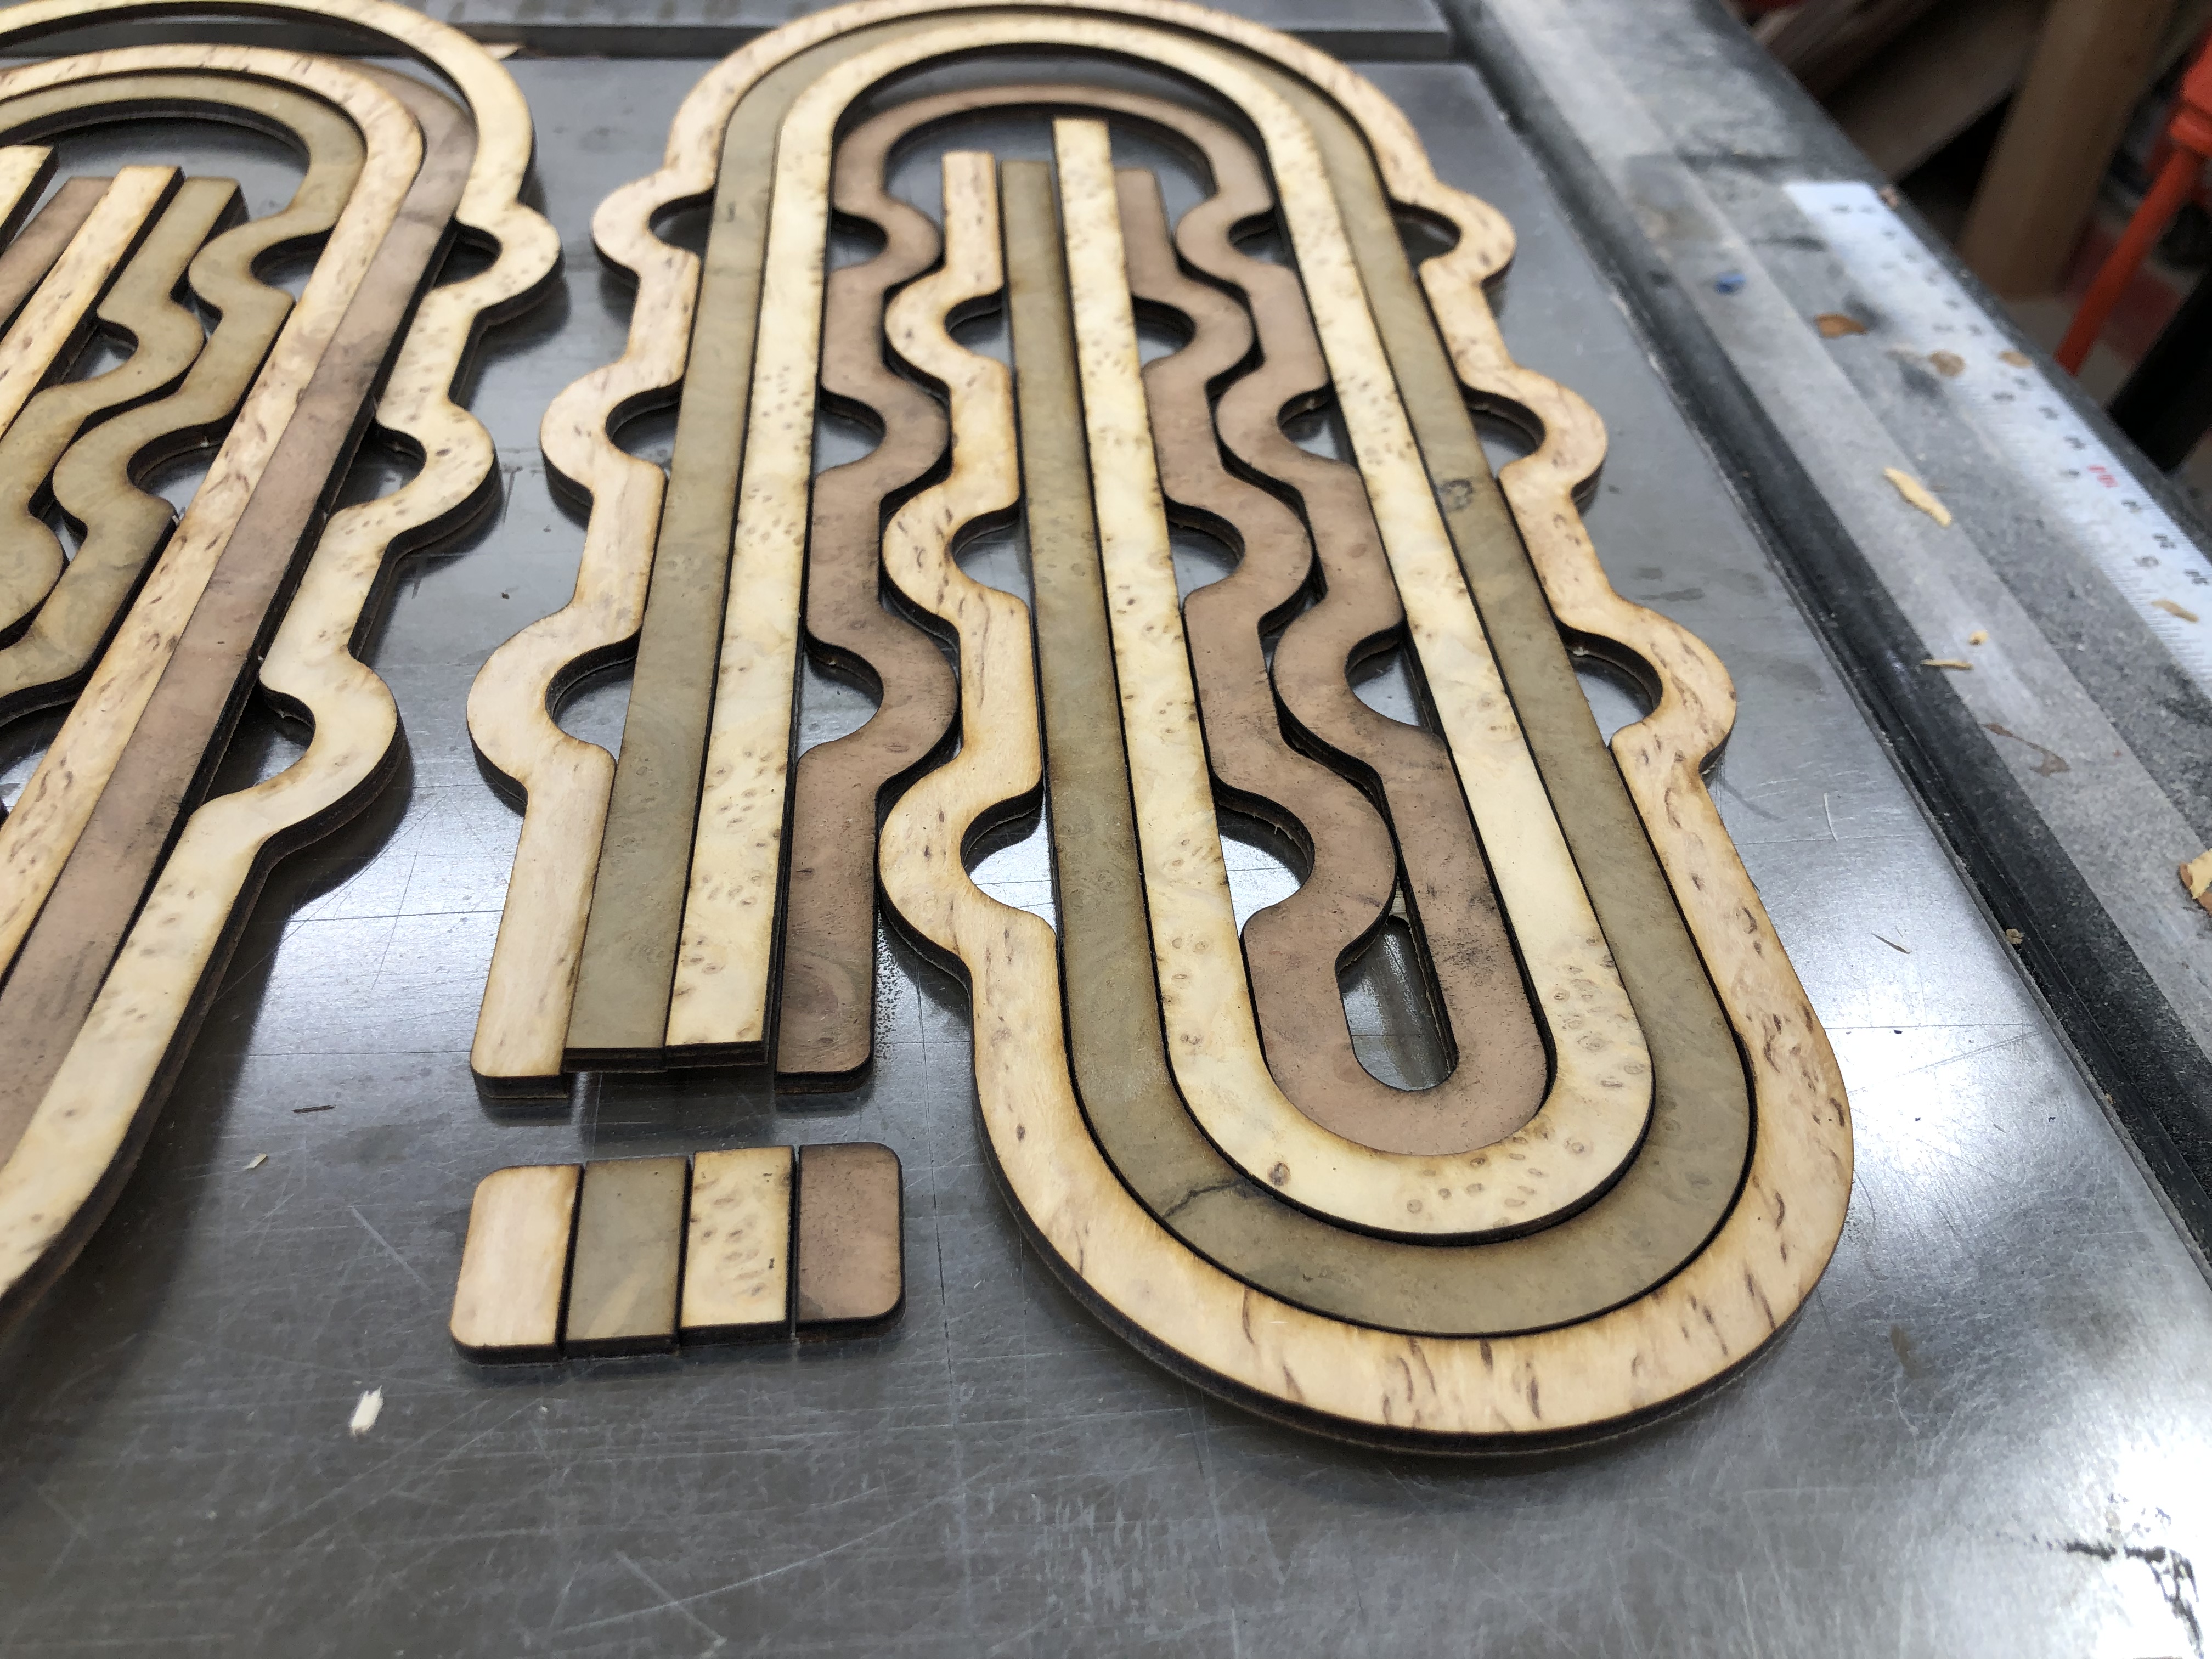
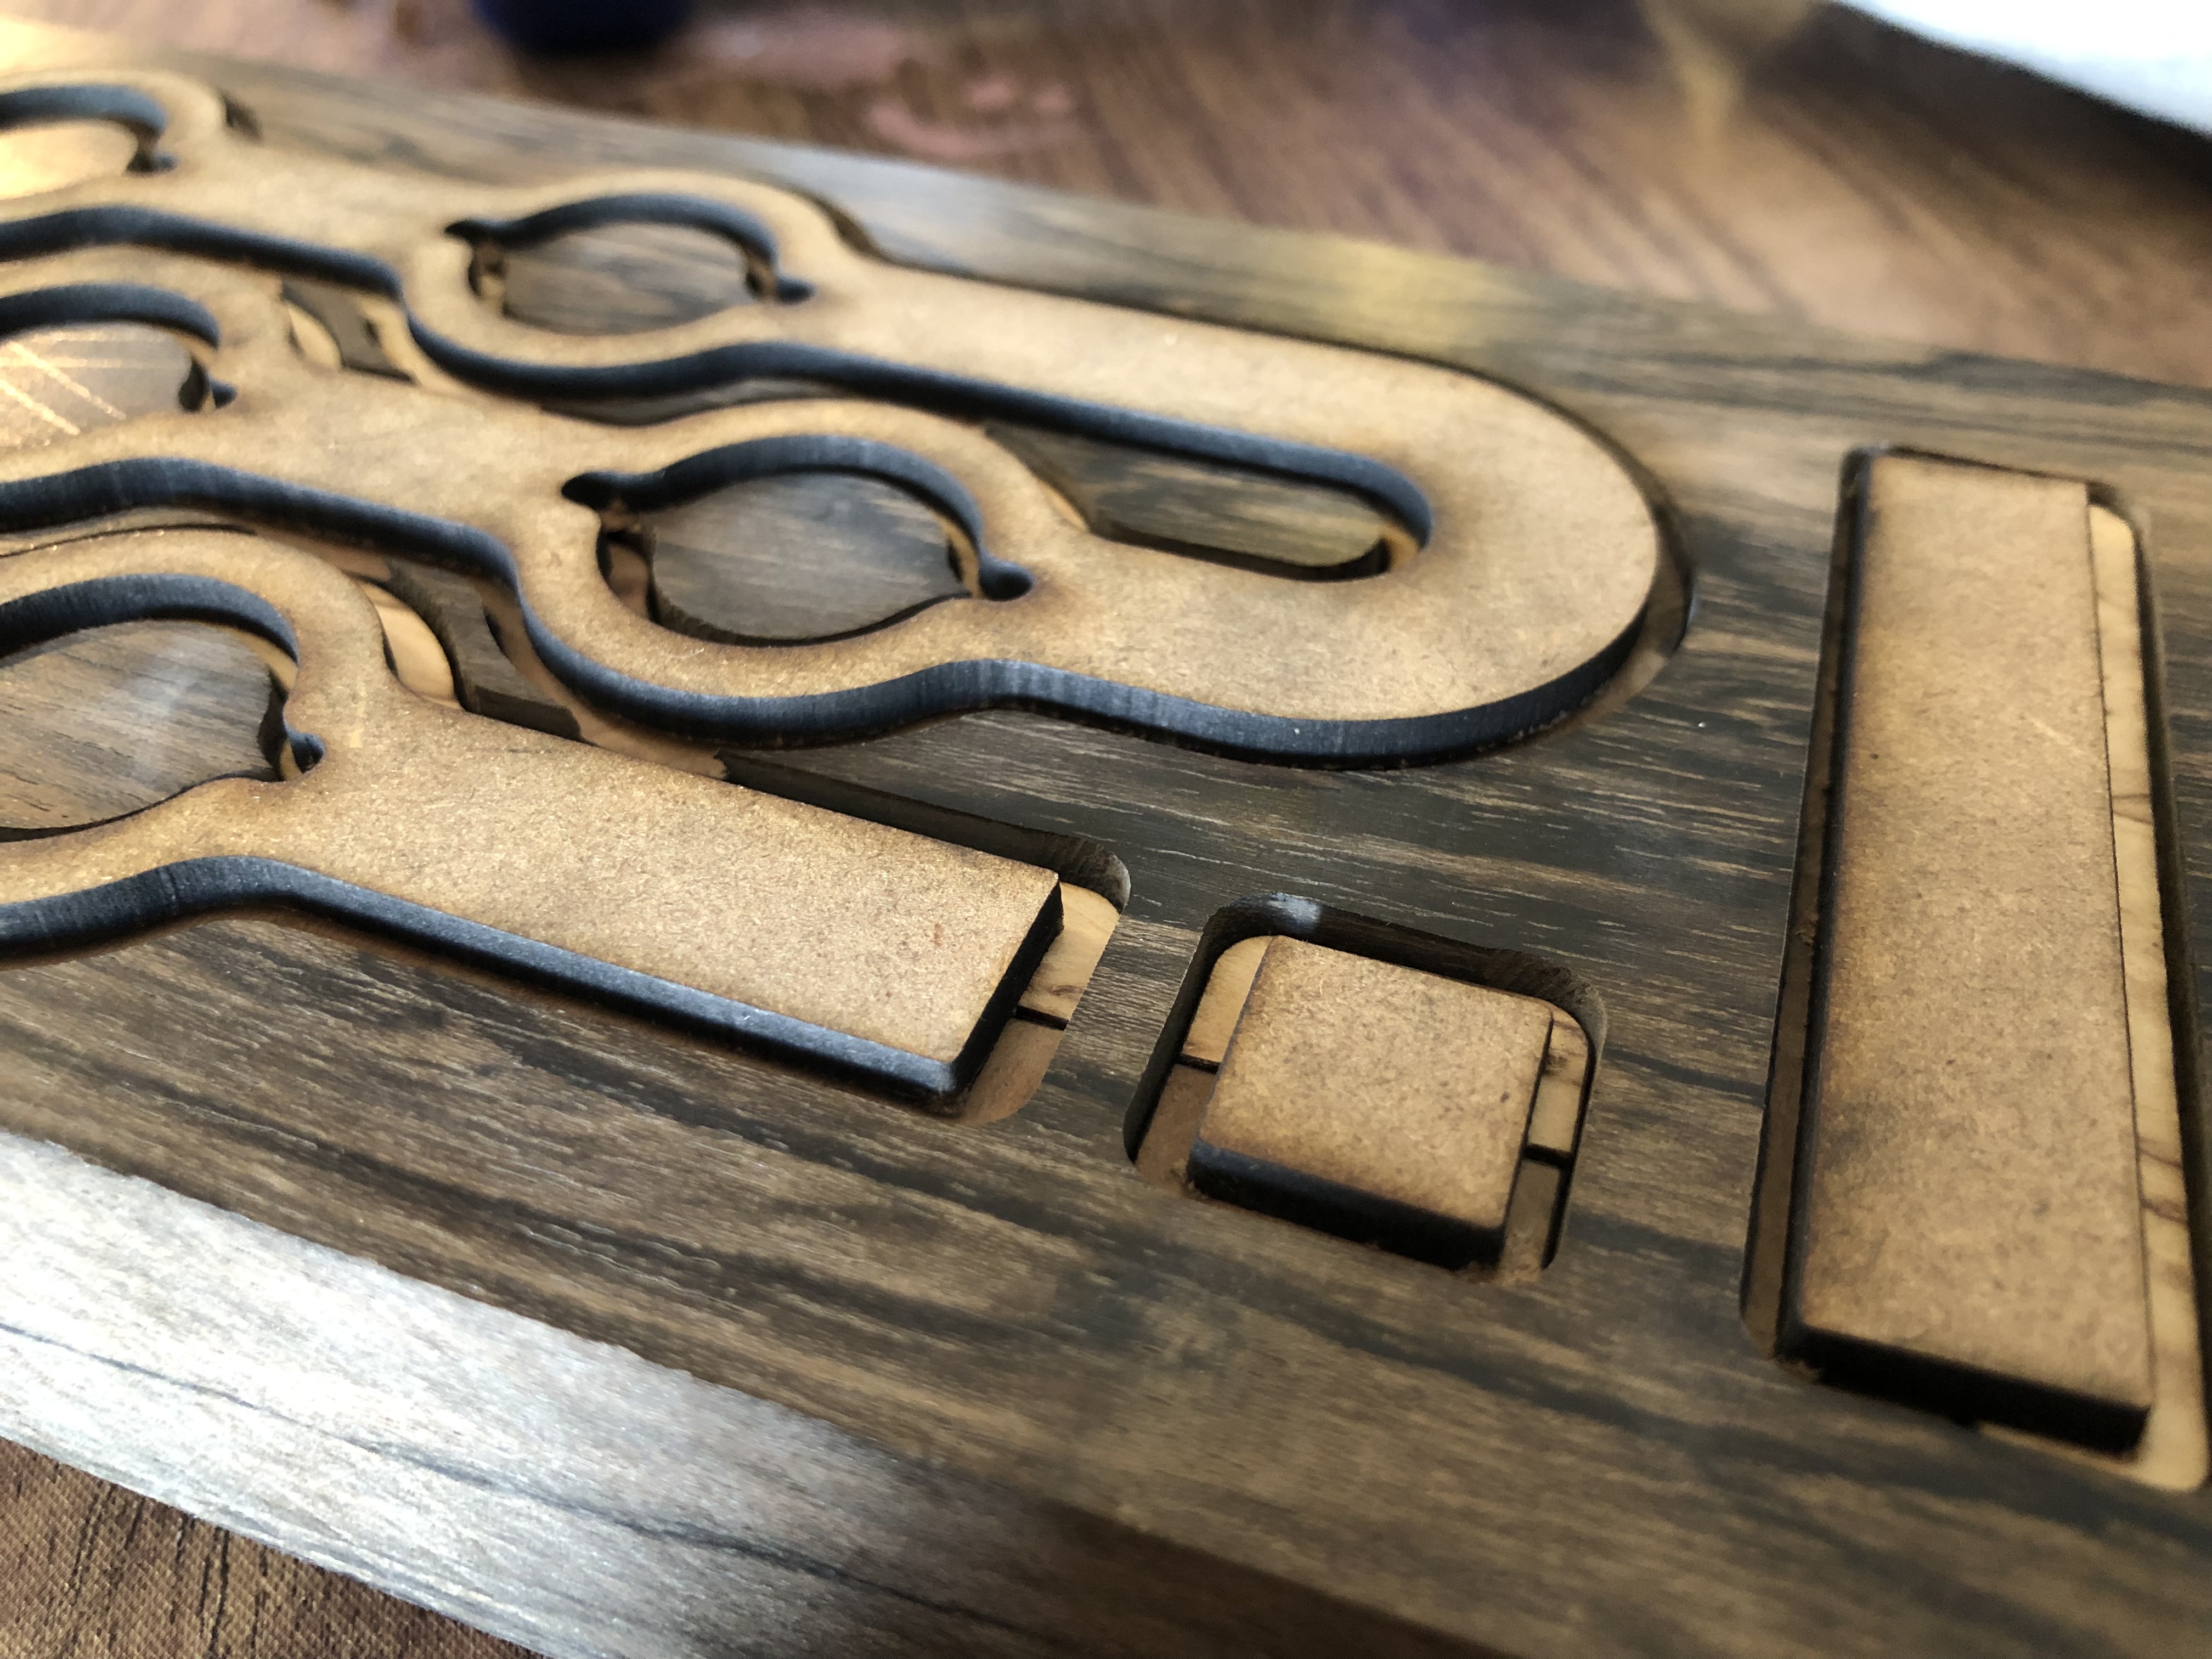
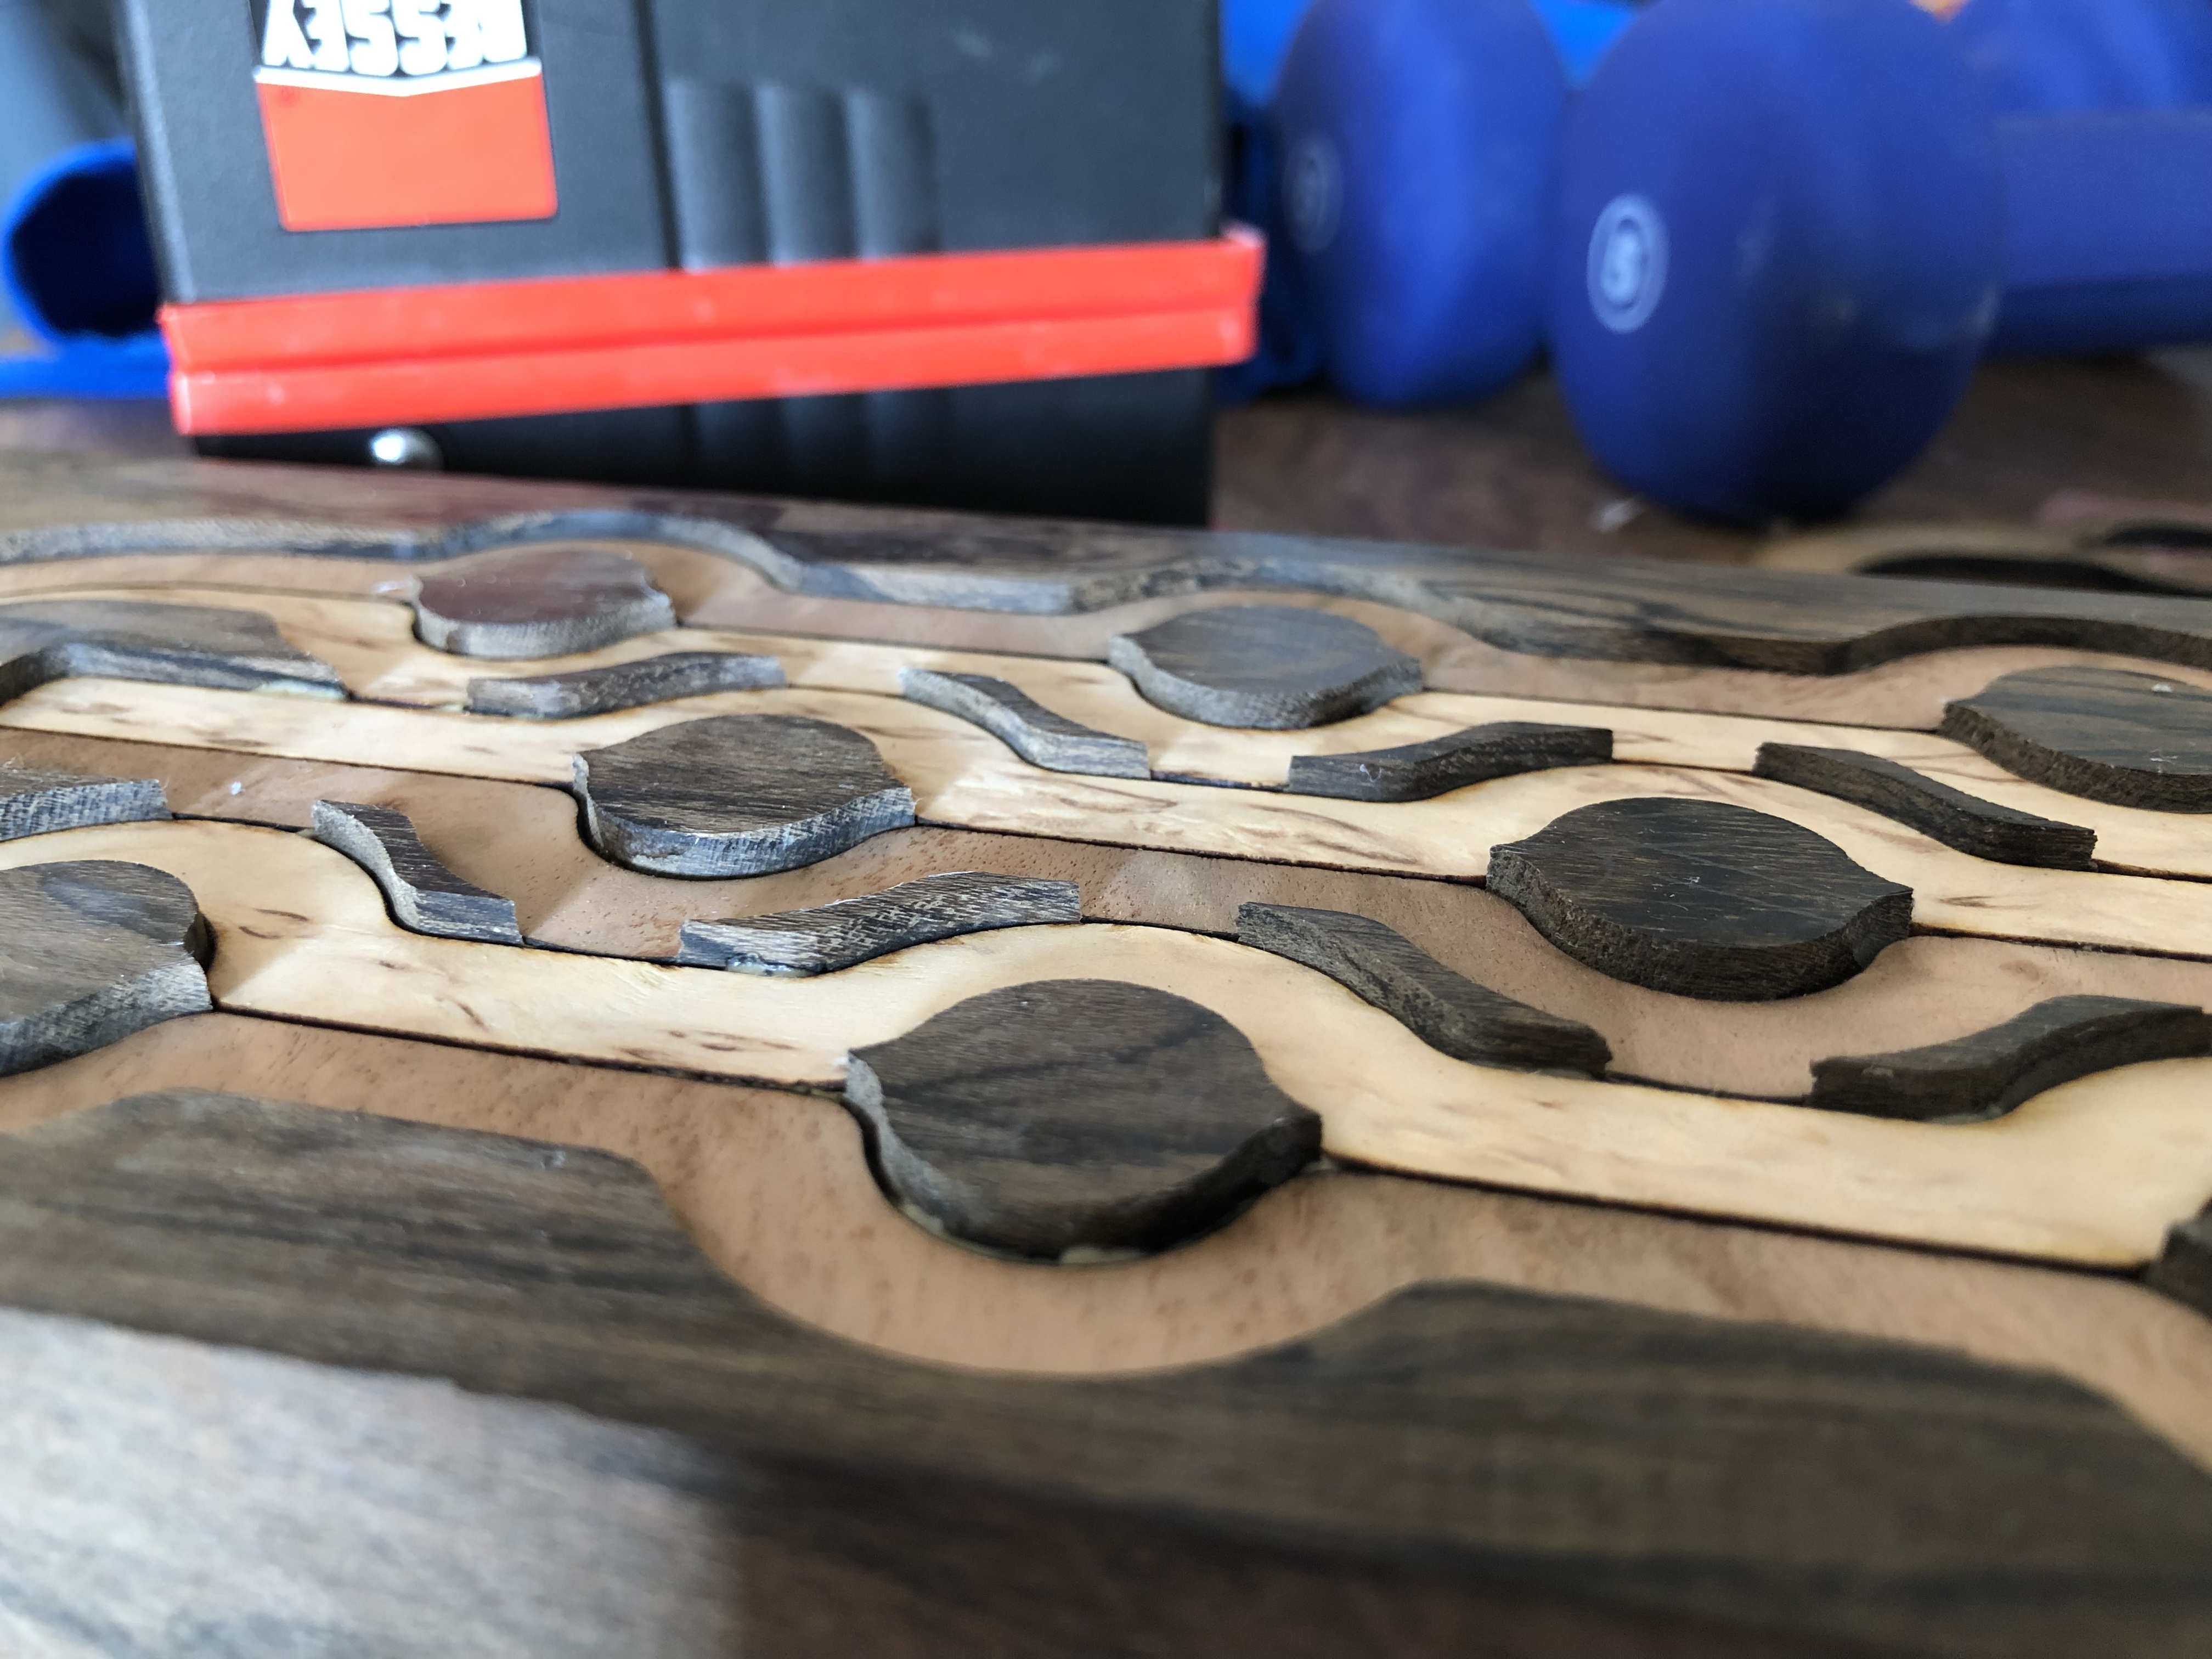
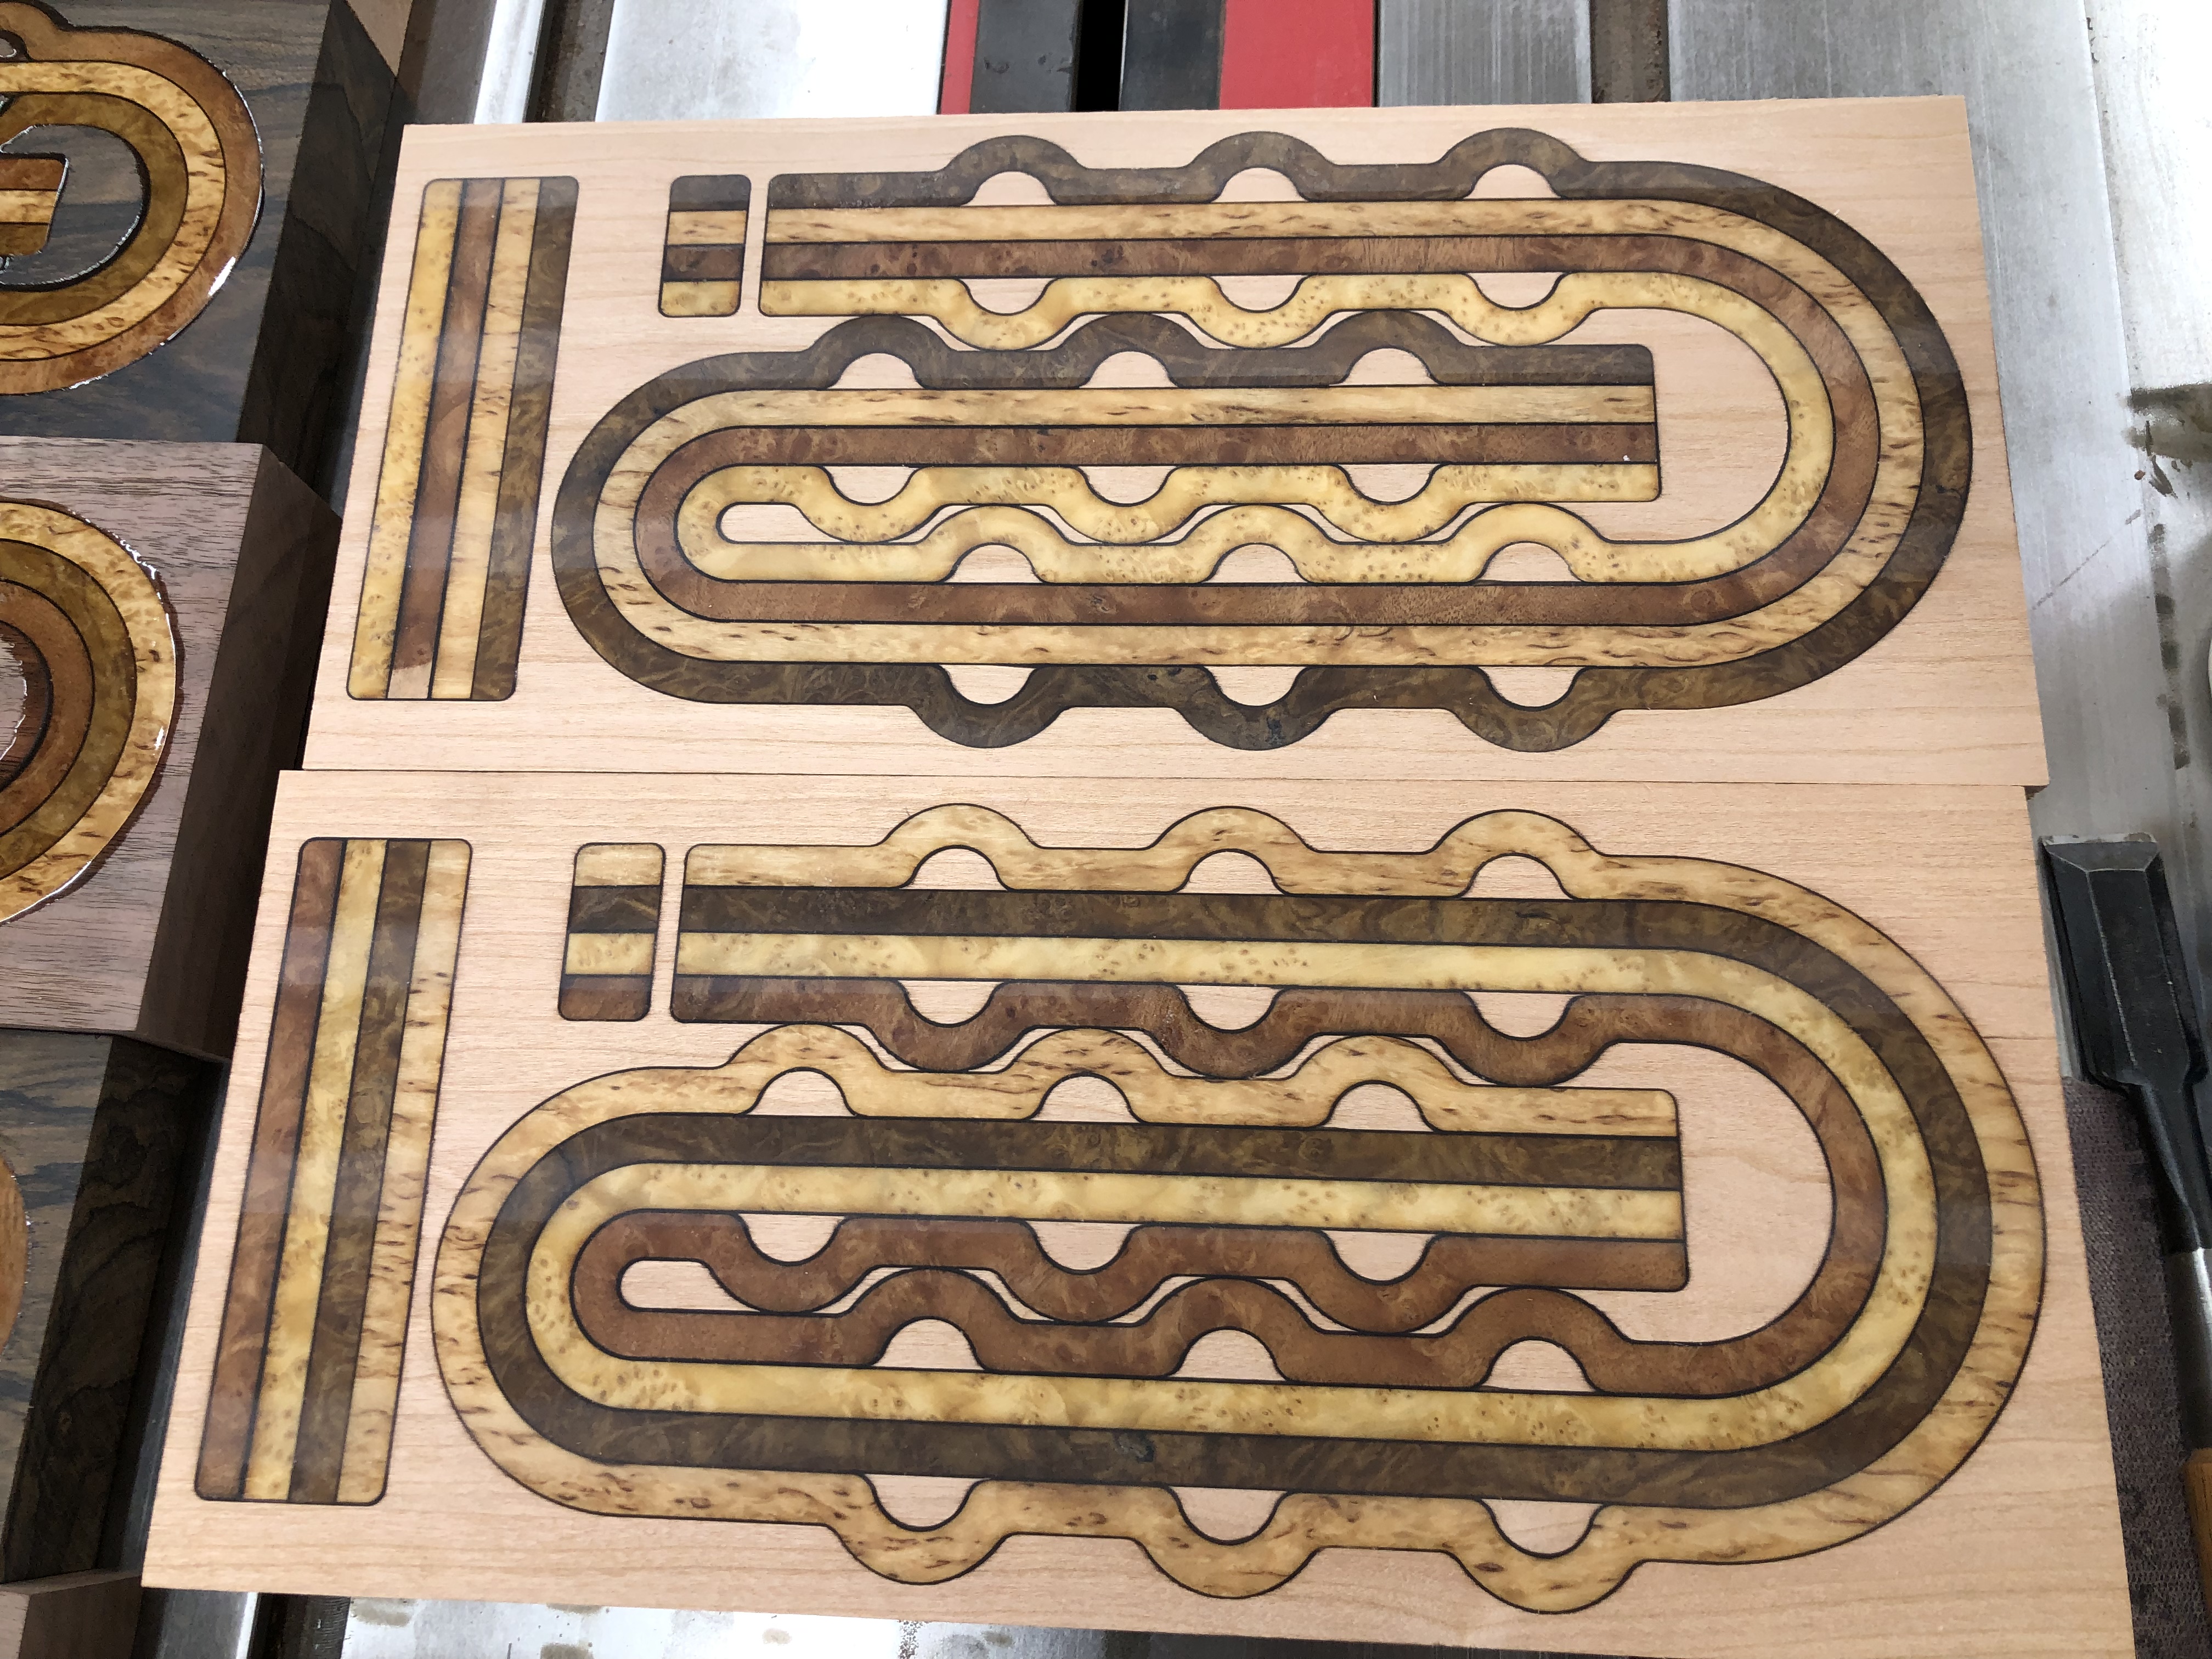
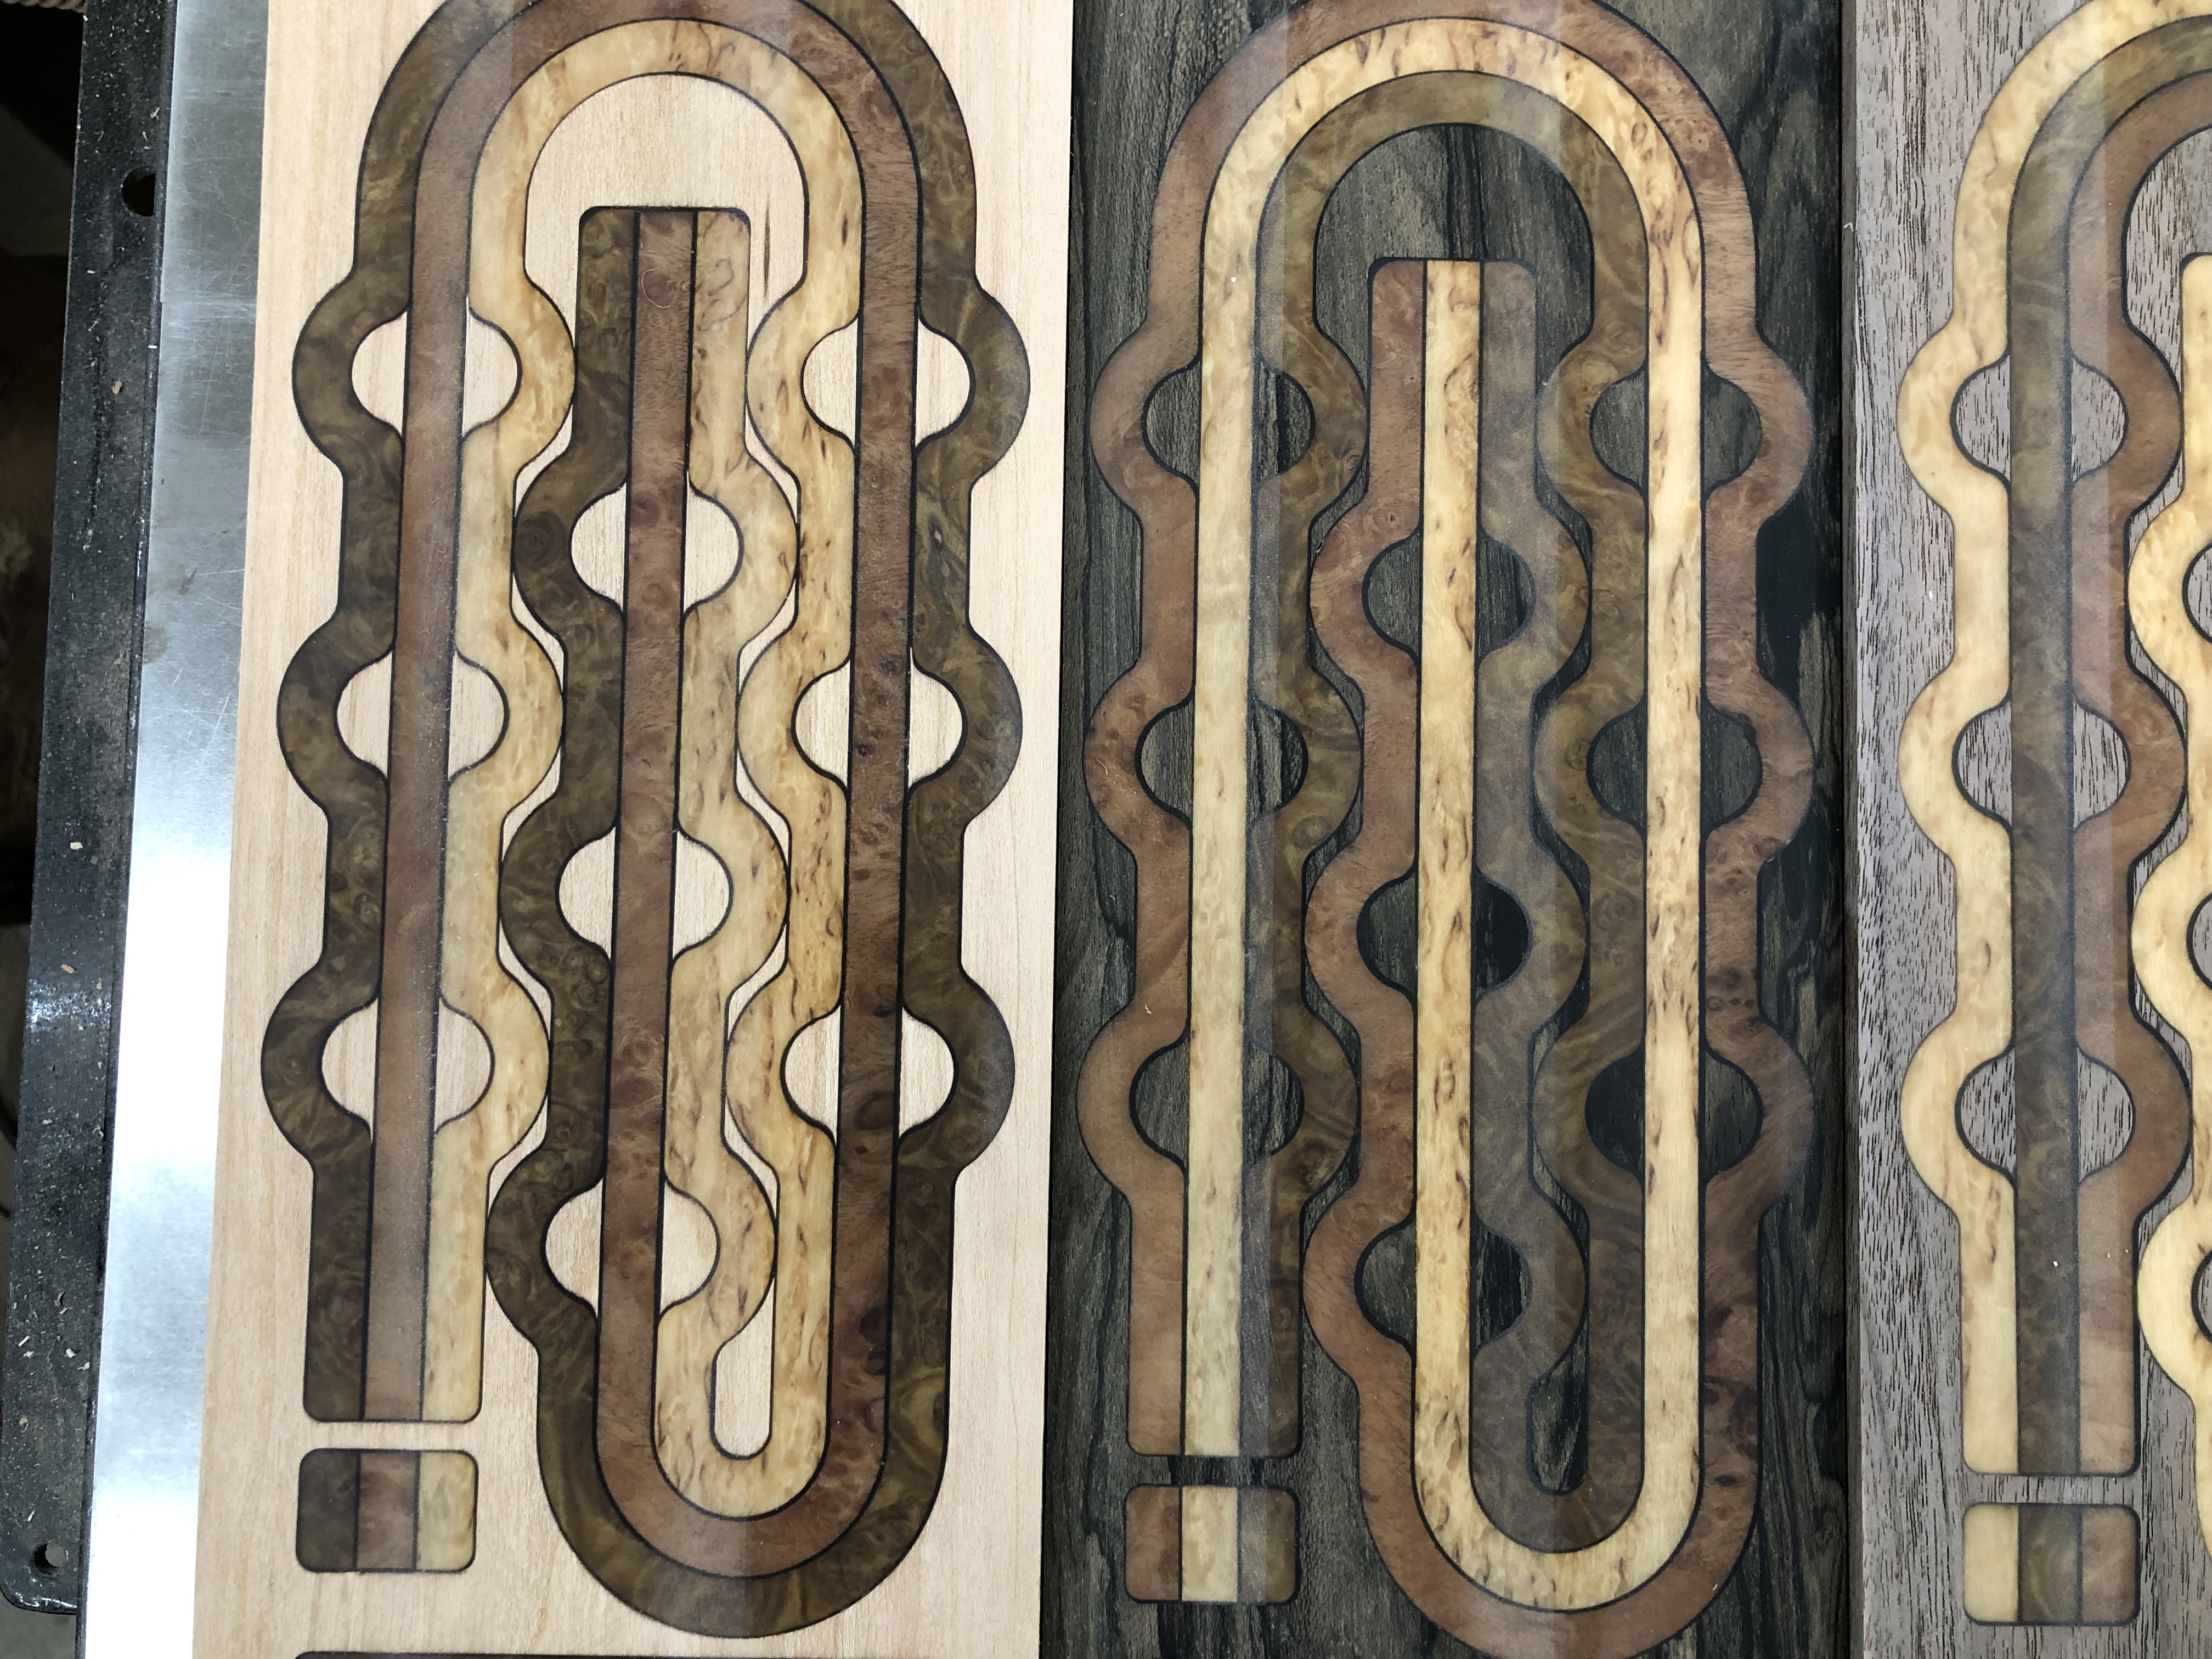
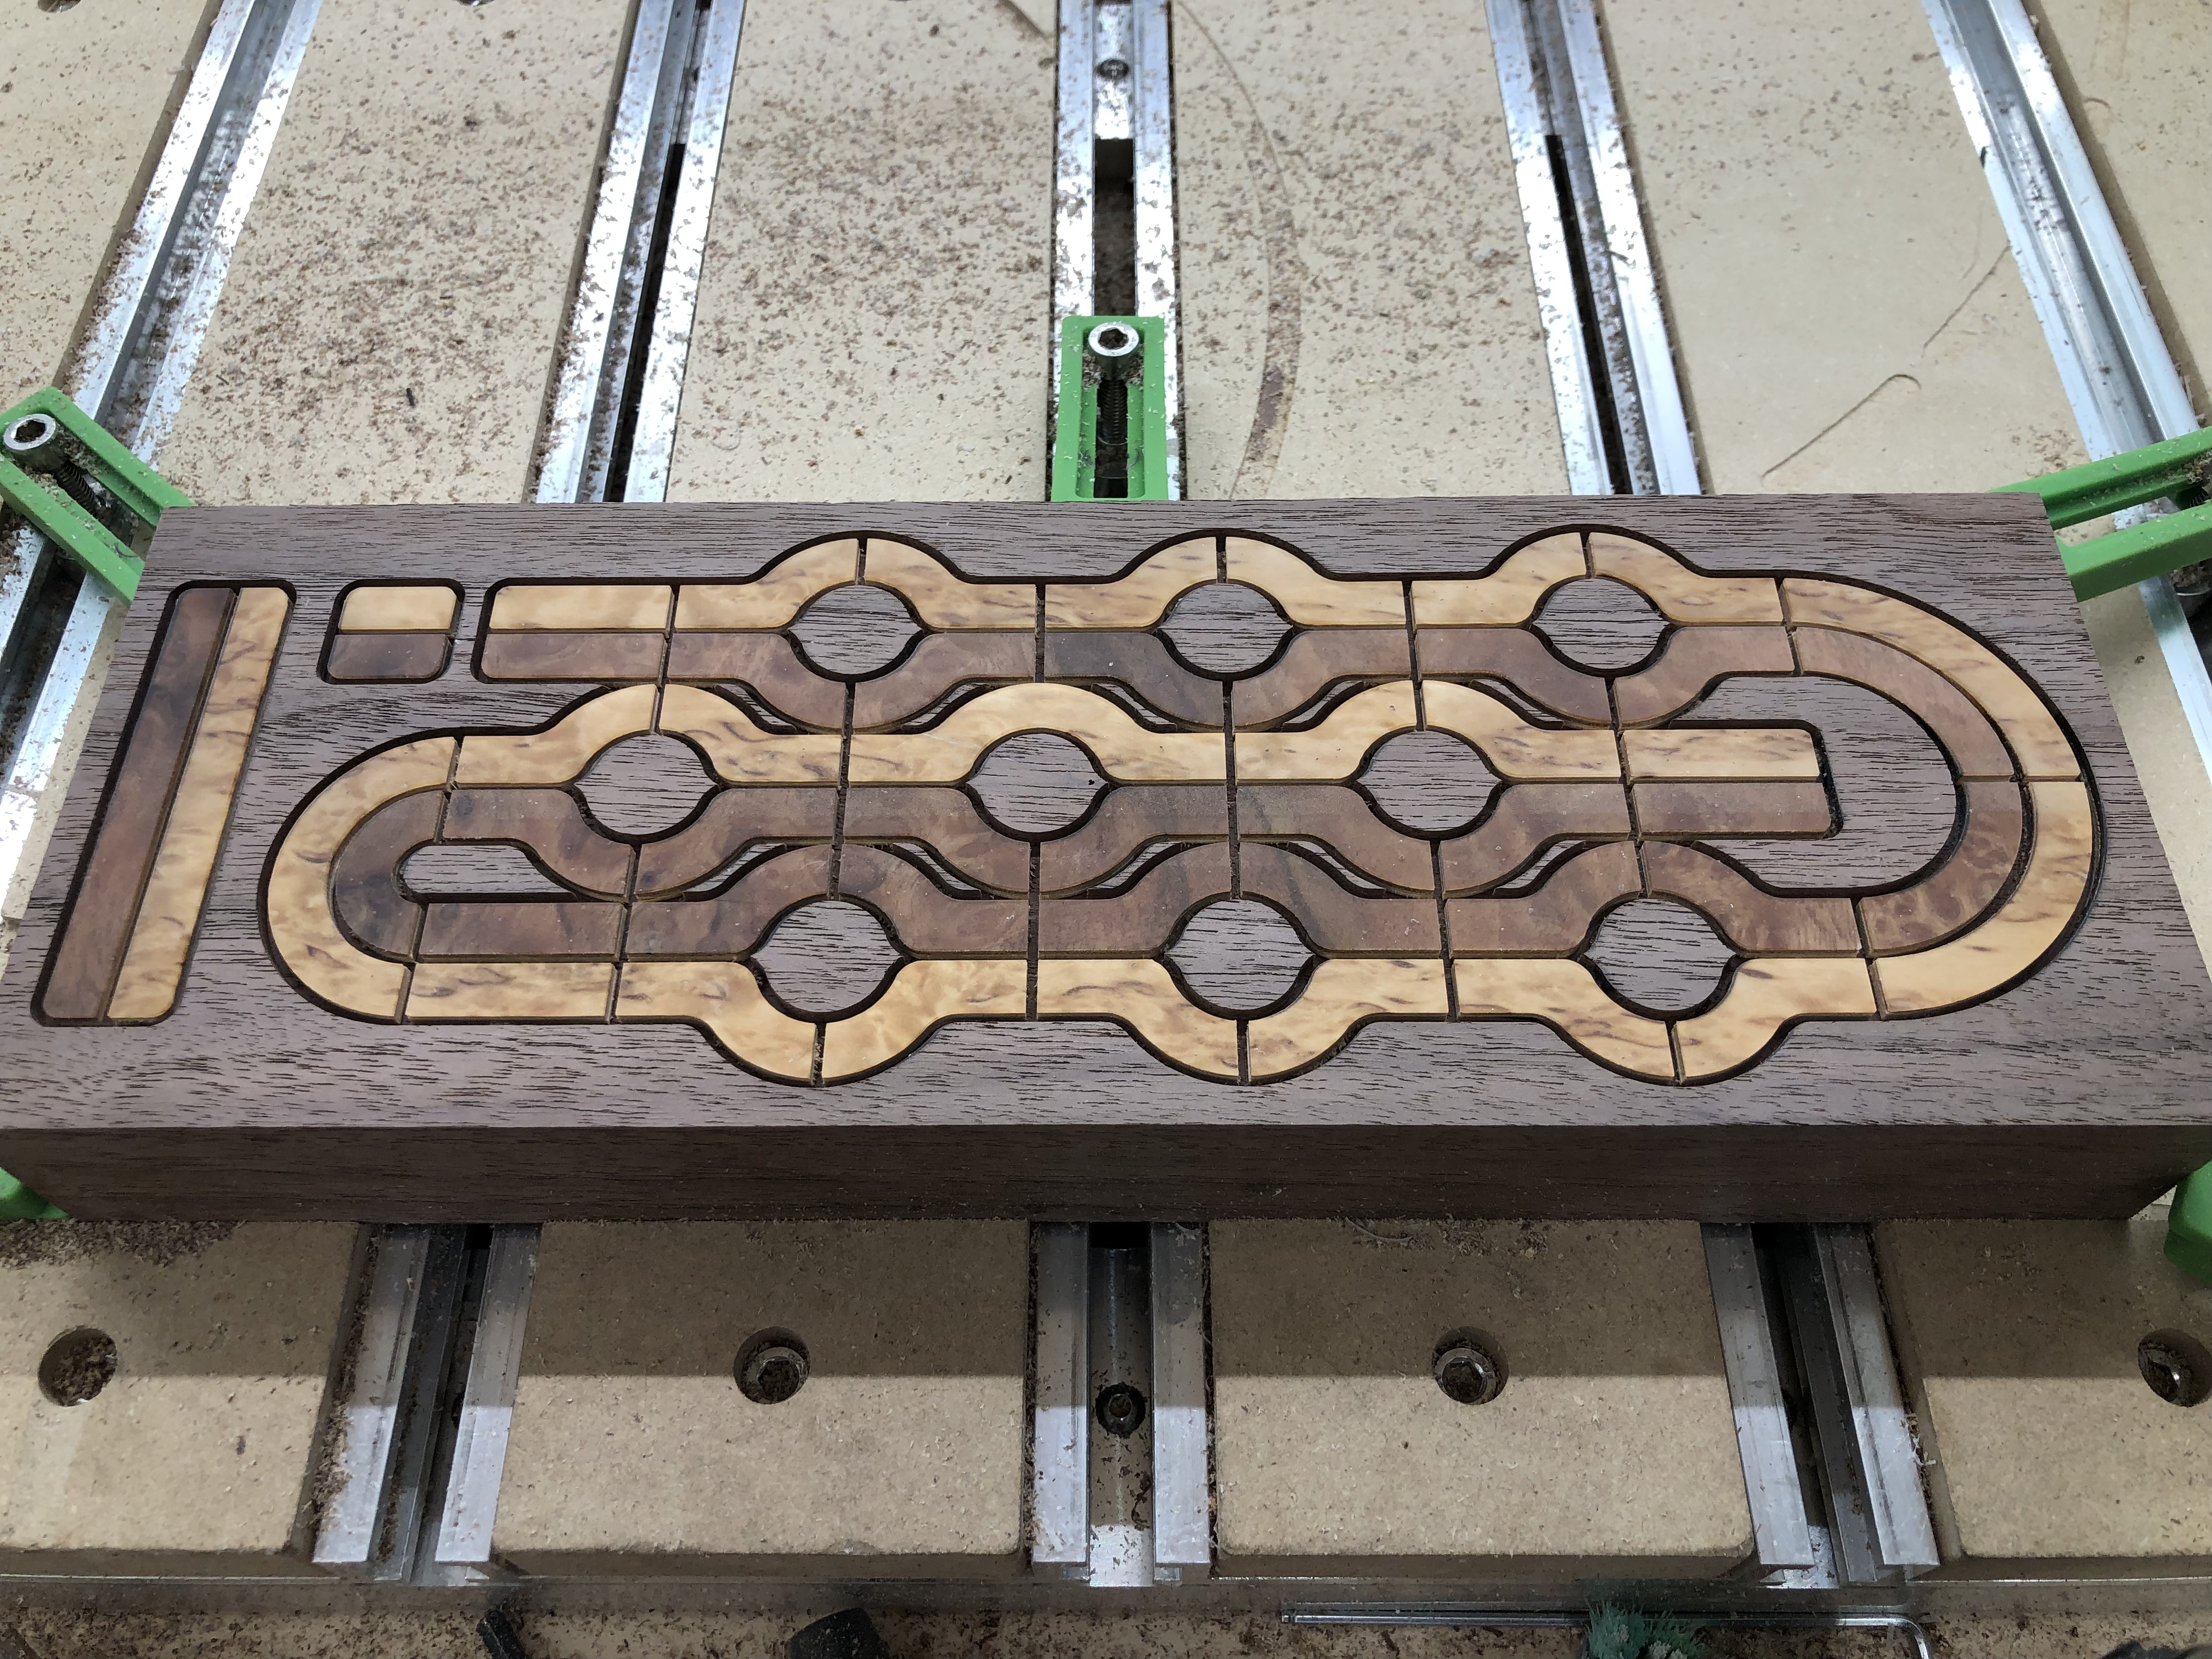
Over the next week, I’ll start making each board. The cool thing is, when I cut the diffrent veneer tracks, I’m cutting multiple boards at the same time. The 2 player veneer cut makes 2 boards, the 3 player veneer cut makes 3 boards, and the 4 player veneer cut makes 4 boards. Thats a lot of boards and looking over my material list…I have all the materials to even make the keepsake boxes for each board. Thats a total of 9 total cribbage boards and boxes.
The old saying “When life gives you lemons make lemonade”. Without failure you never achieve success. Everyone has failures the thing about them is how you react. It seems like you reacted well and bounced back. The thing about failure is you always need to learn something about that failure so you do not repeat that mistake. As a woodworker there will always be mistakes and failures. The mark of a true craftsman is not making mistakes but figuring out how to fix them and salvage your work. That said a true craftsman also knows when to drop the whole thing in the trash can and start over. That should be rare but always a possibility. Wood is an inaccurate material with hidden defects and can fool even the best.
I know this sounds like a lot of platitudes but they are true. Always keep reaching even after failing.
Are you planning on some marquetry, or will your design show the plys beneath? I really like the idea of veneer for cost and stability vs pure hardwood, but I don’t know how to make plywood look fancy.
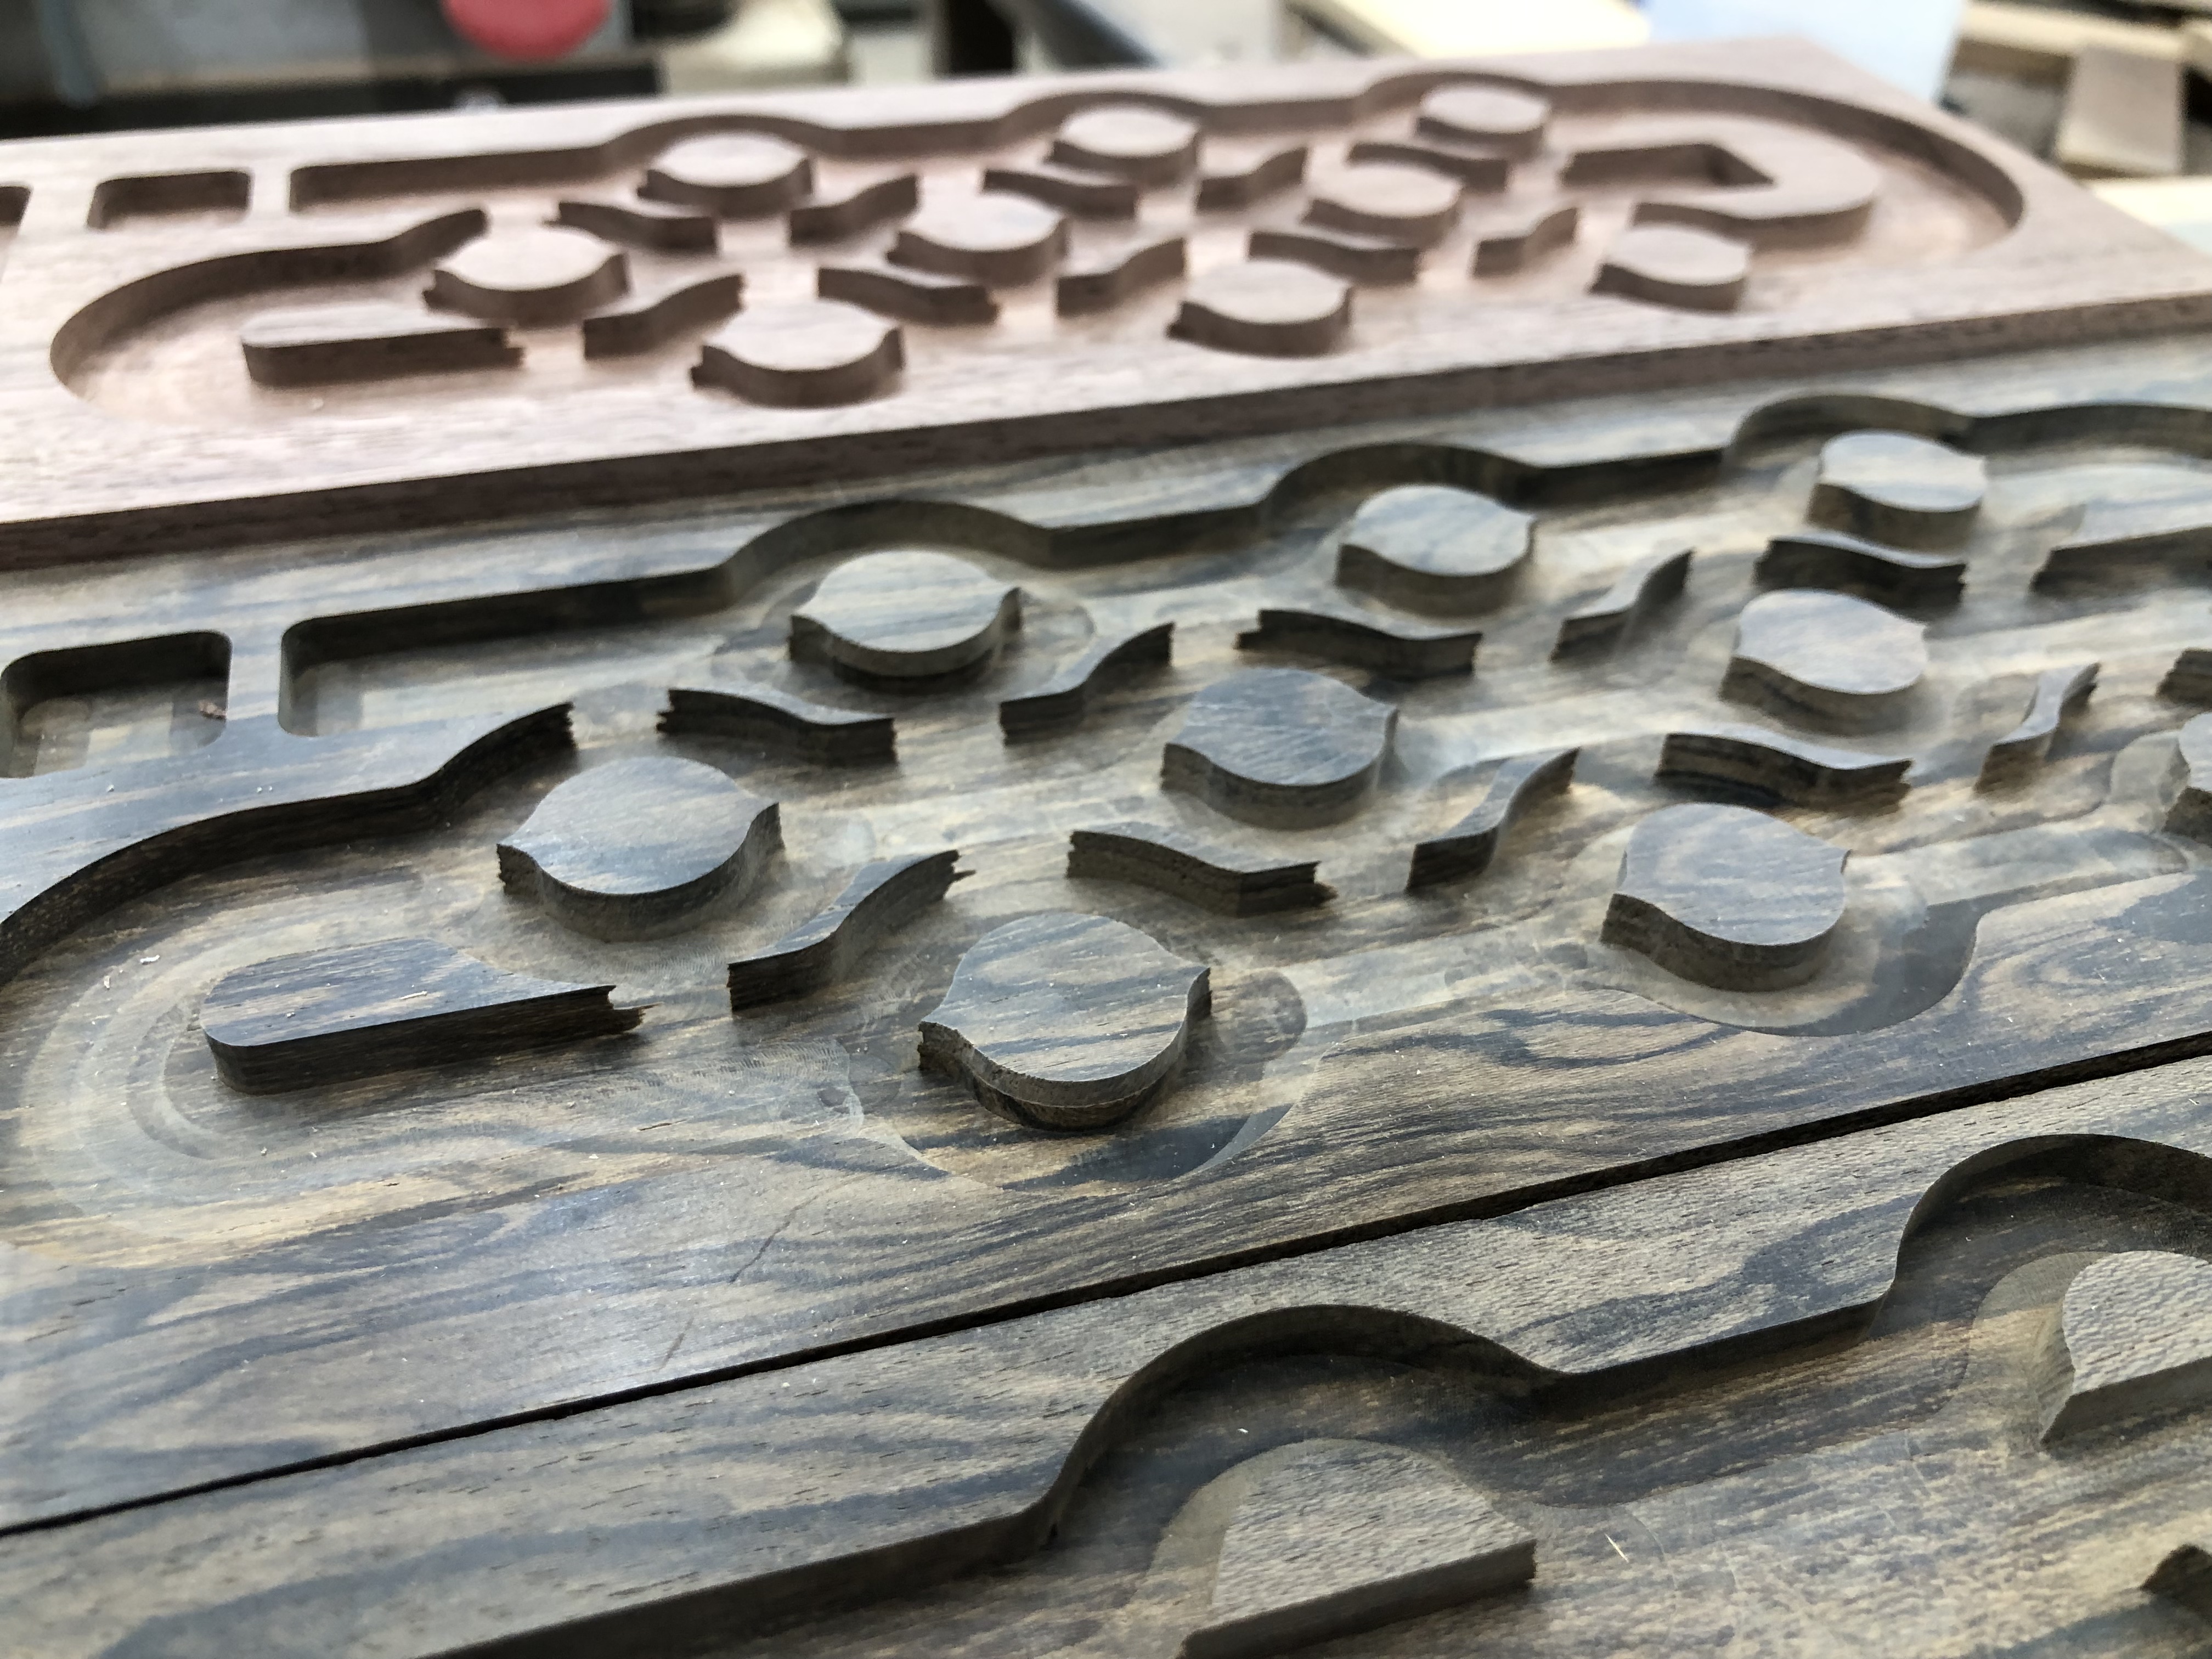
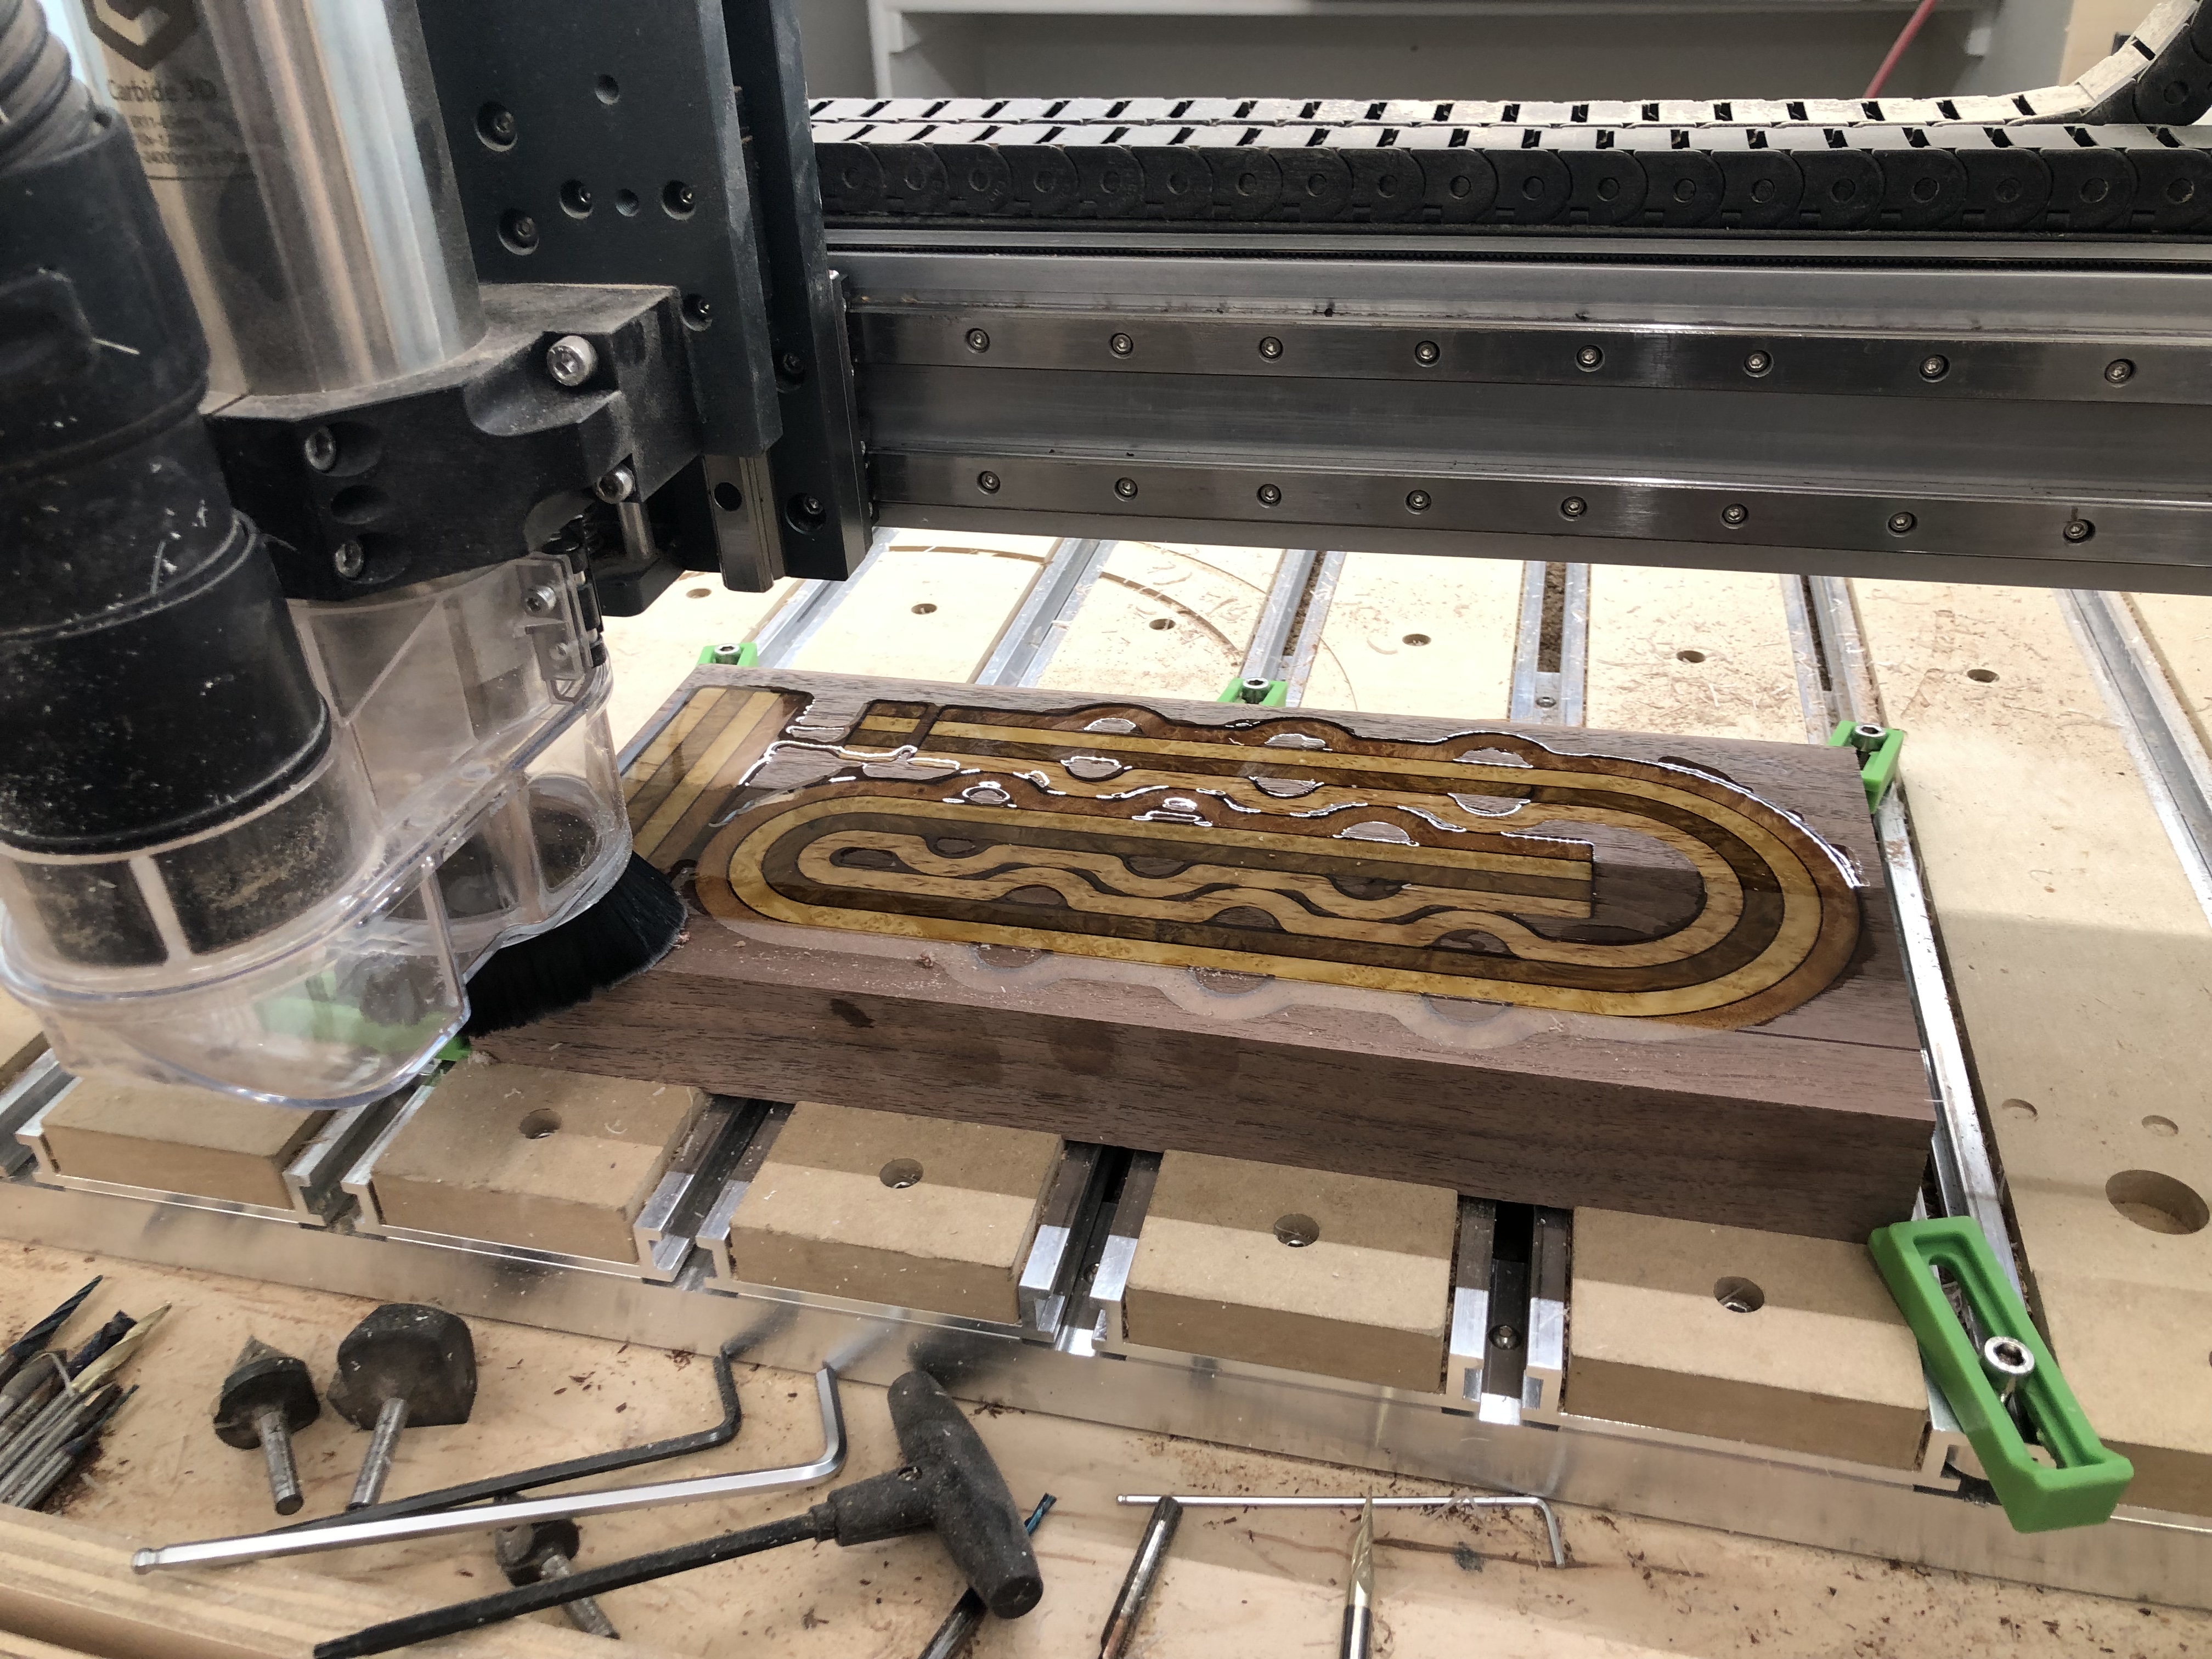
@dustmite Once the veneer is glued to the substrate, I’ll cut the design out and then inlay it to whatever I’m making. The trick is getting everything completely flat and even. Veneer is extremely delicate and you can instantly shave it off when sanding.
Even with marquetry, you are glueing it to a thicker surface for more stability.
The epoxy isn’t nearly as opaque as I expected. Did you route a channel along the track edges first, or are you just using the cut tolerance of the veneered pieces? I’m really enjoying seeing these come together.
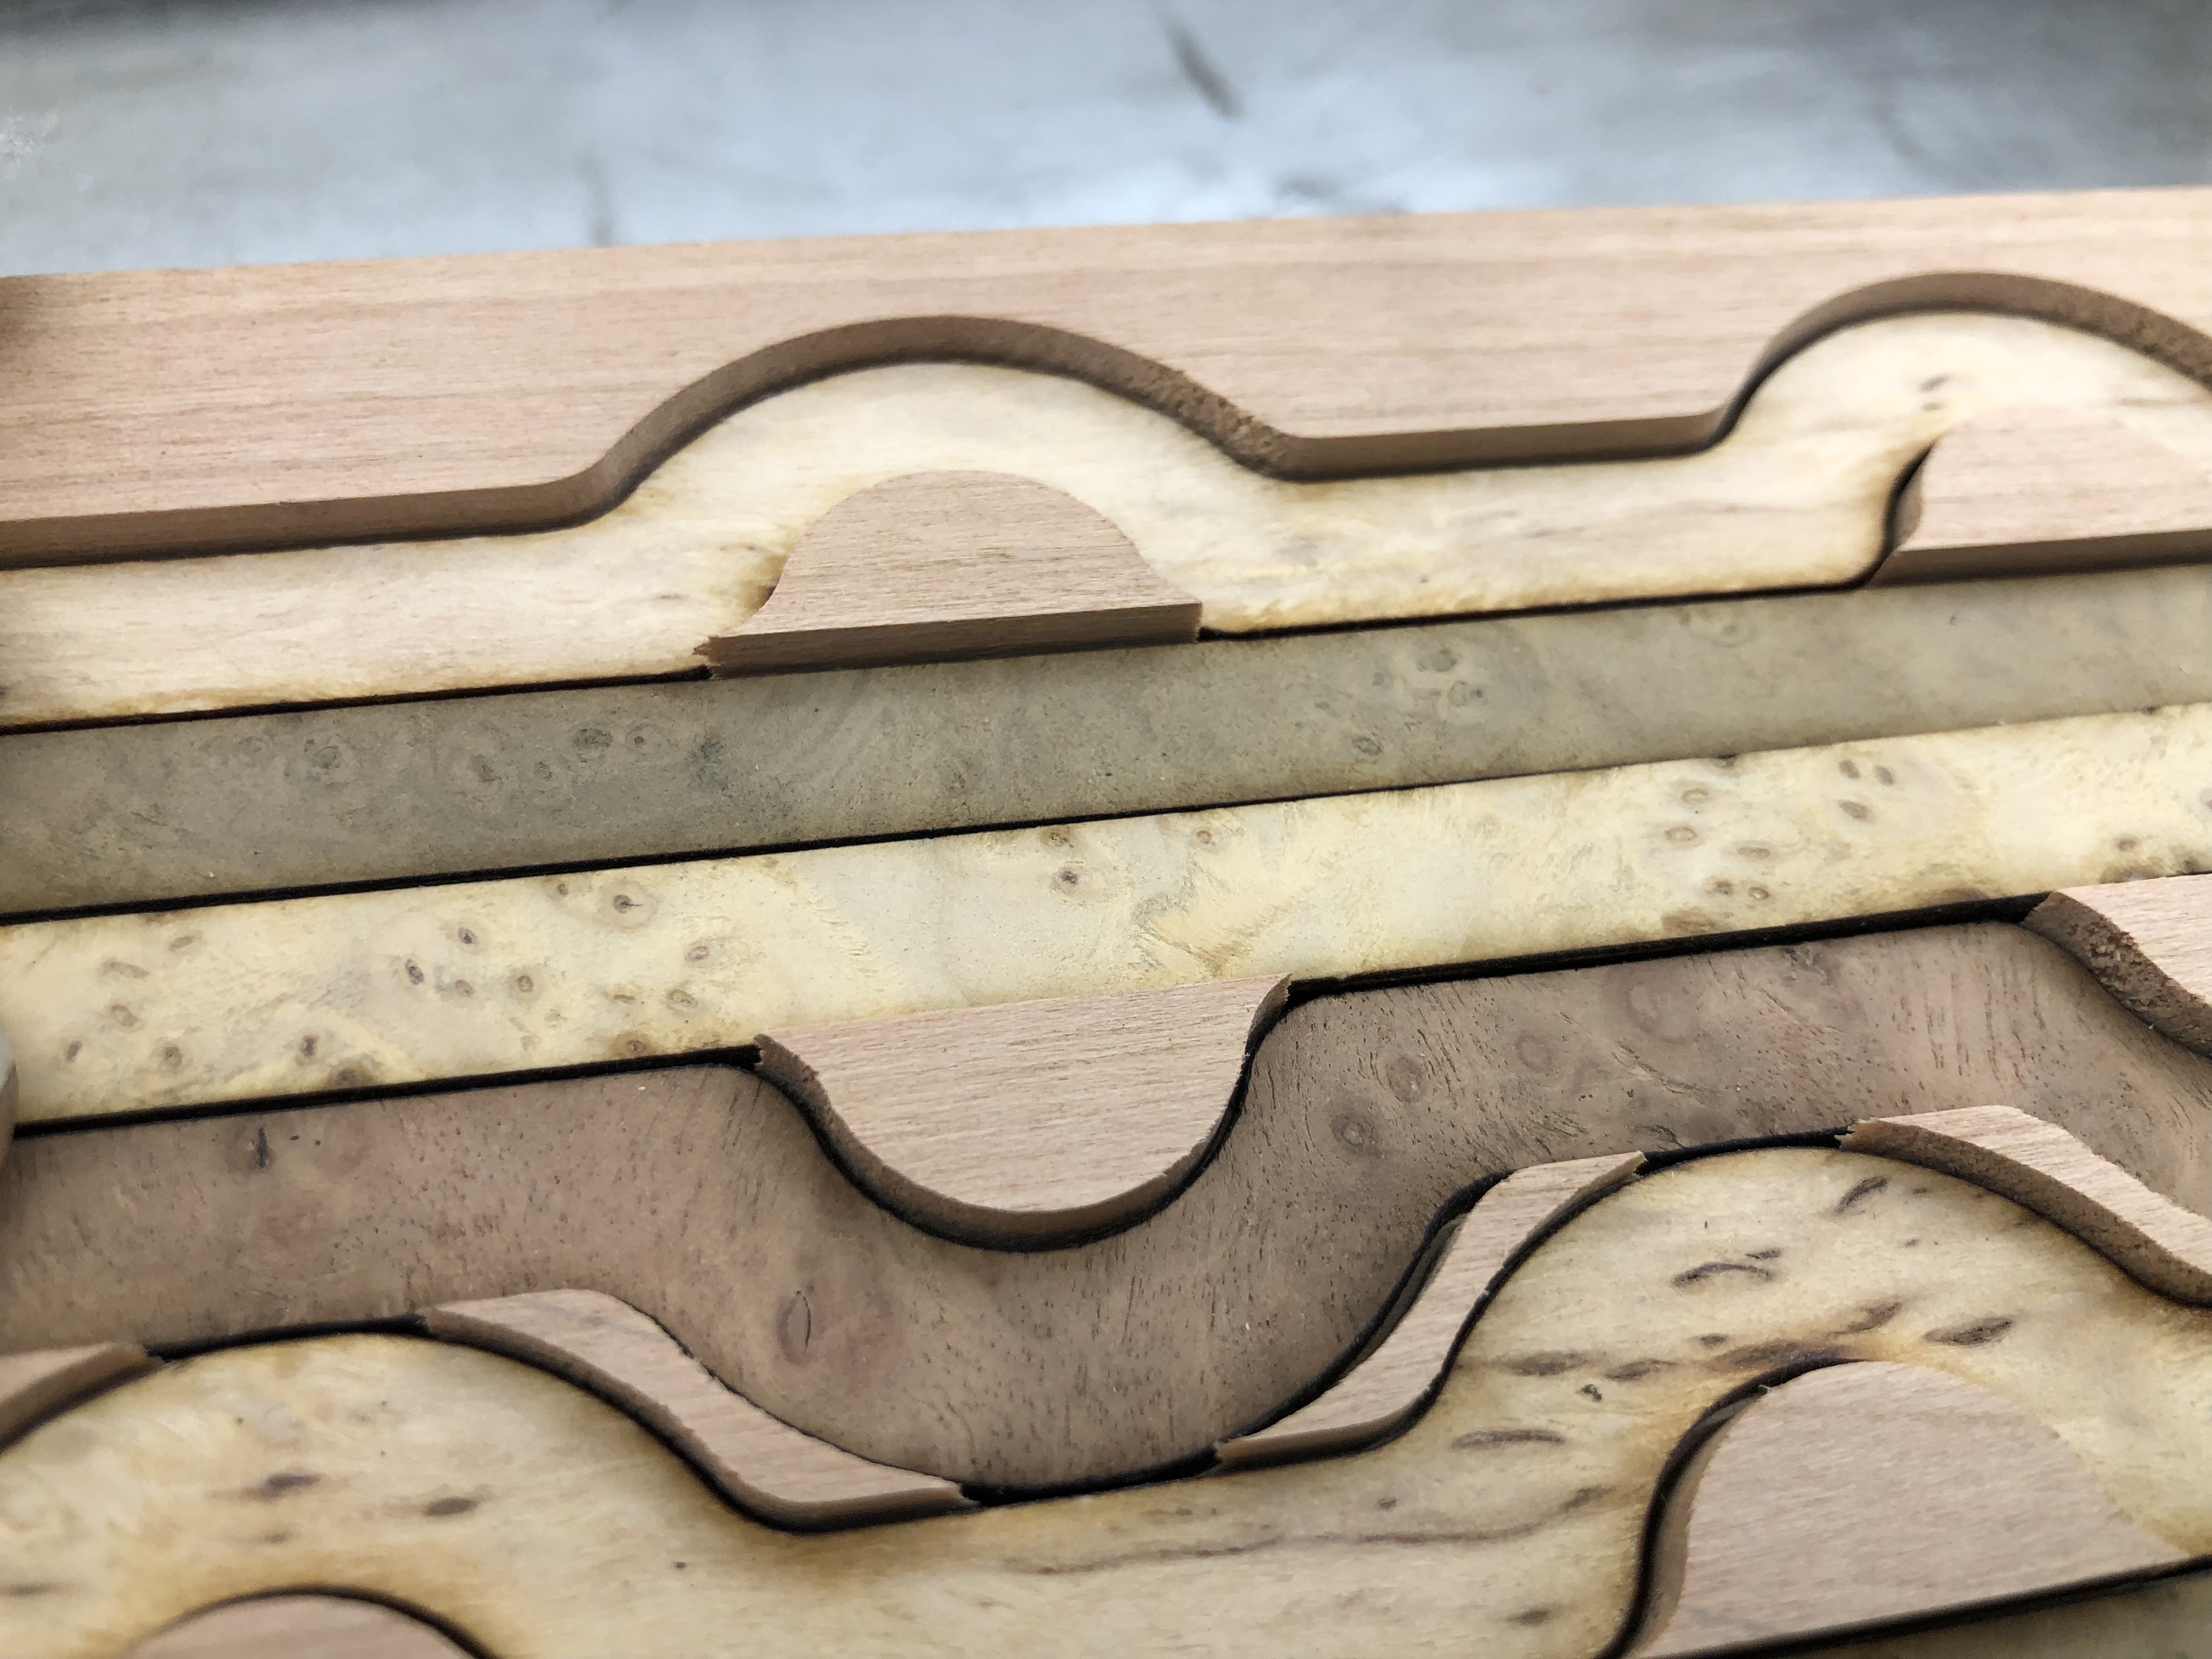
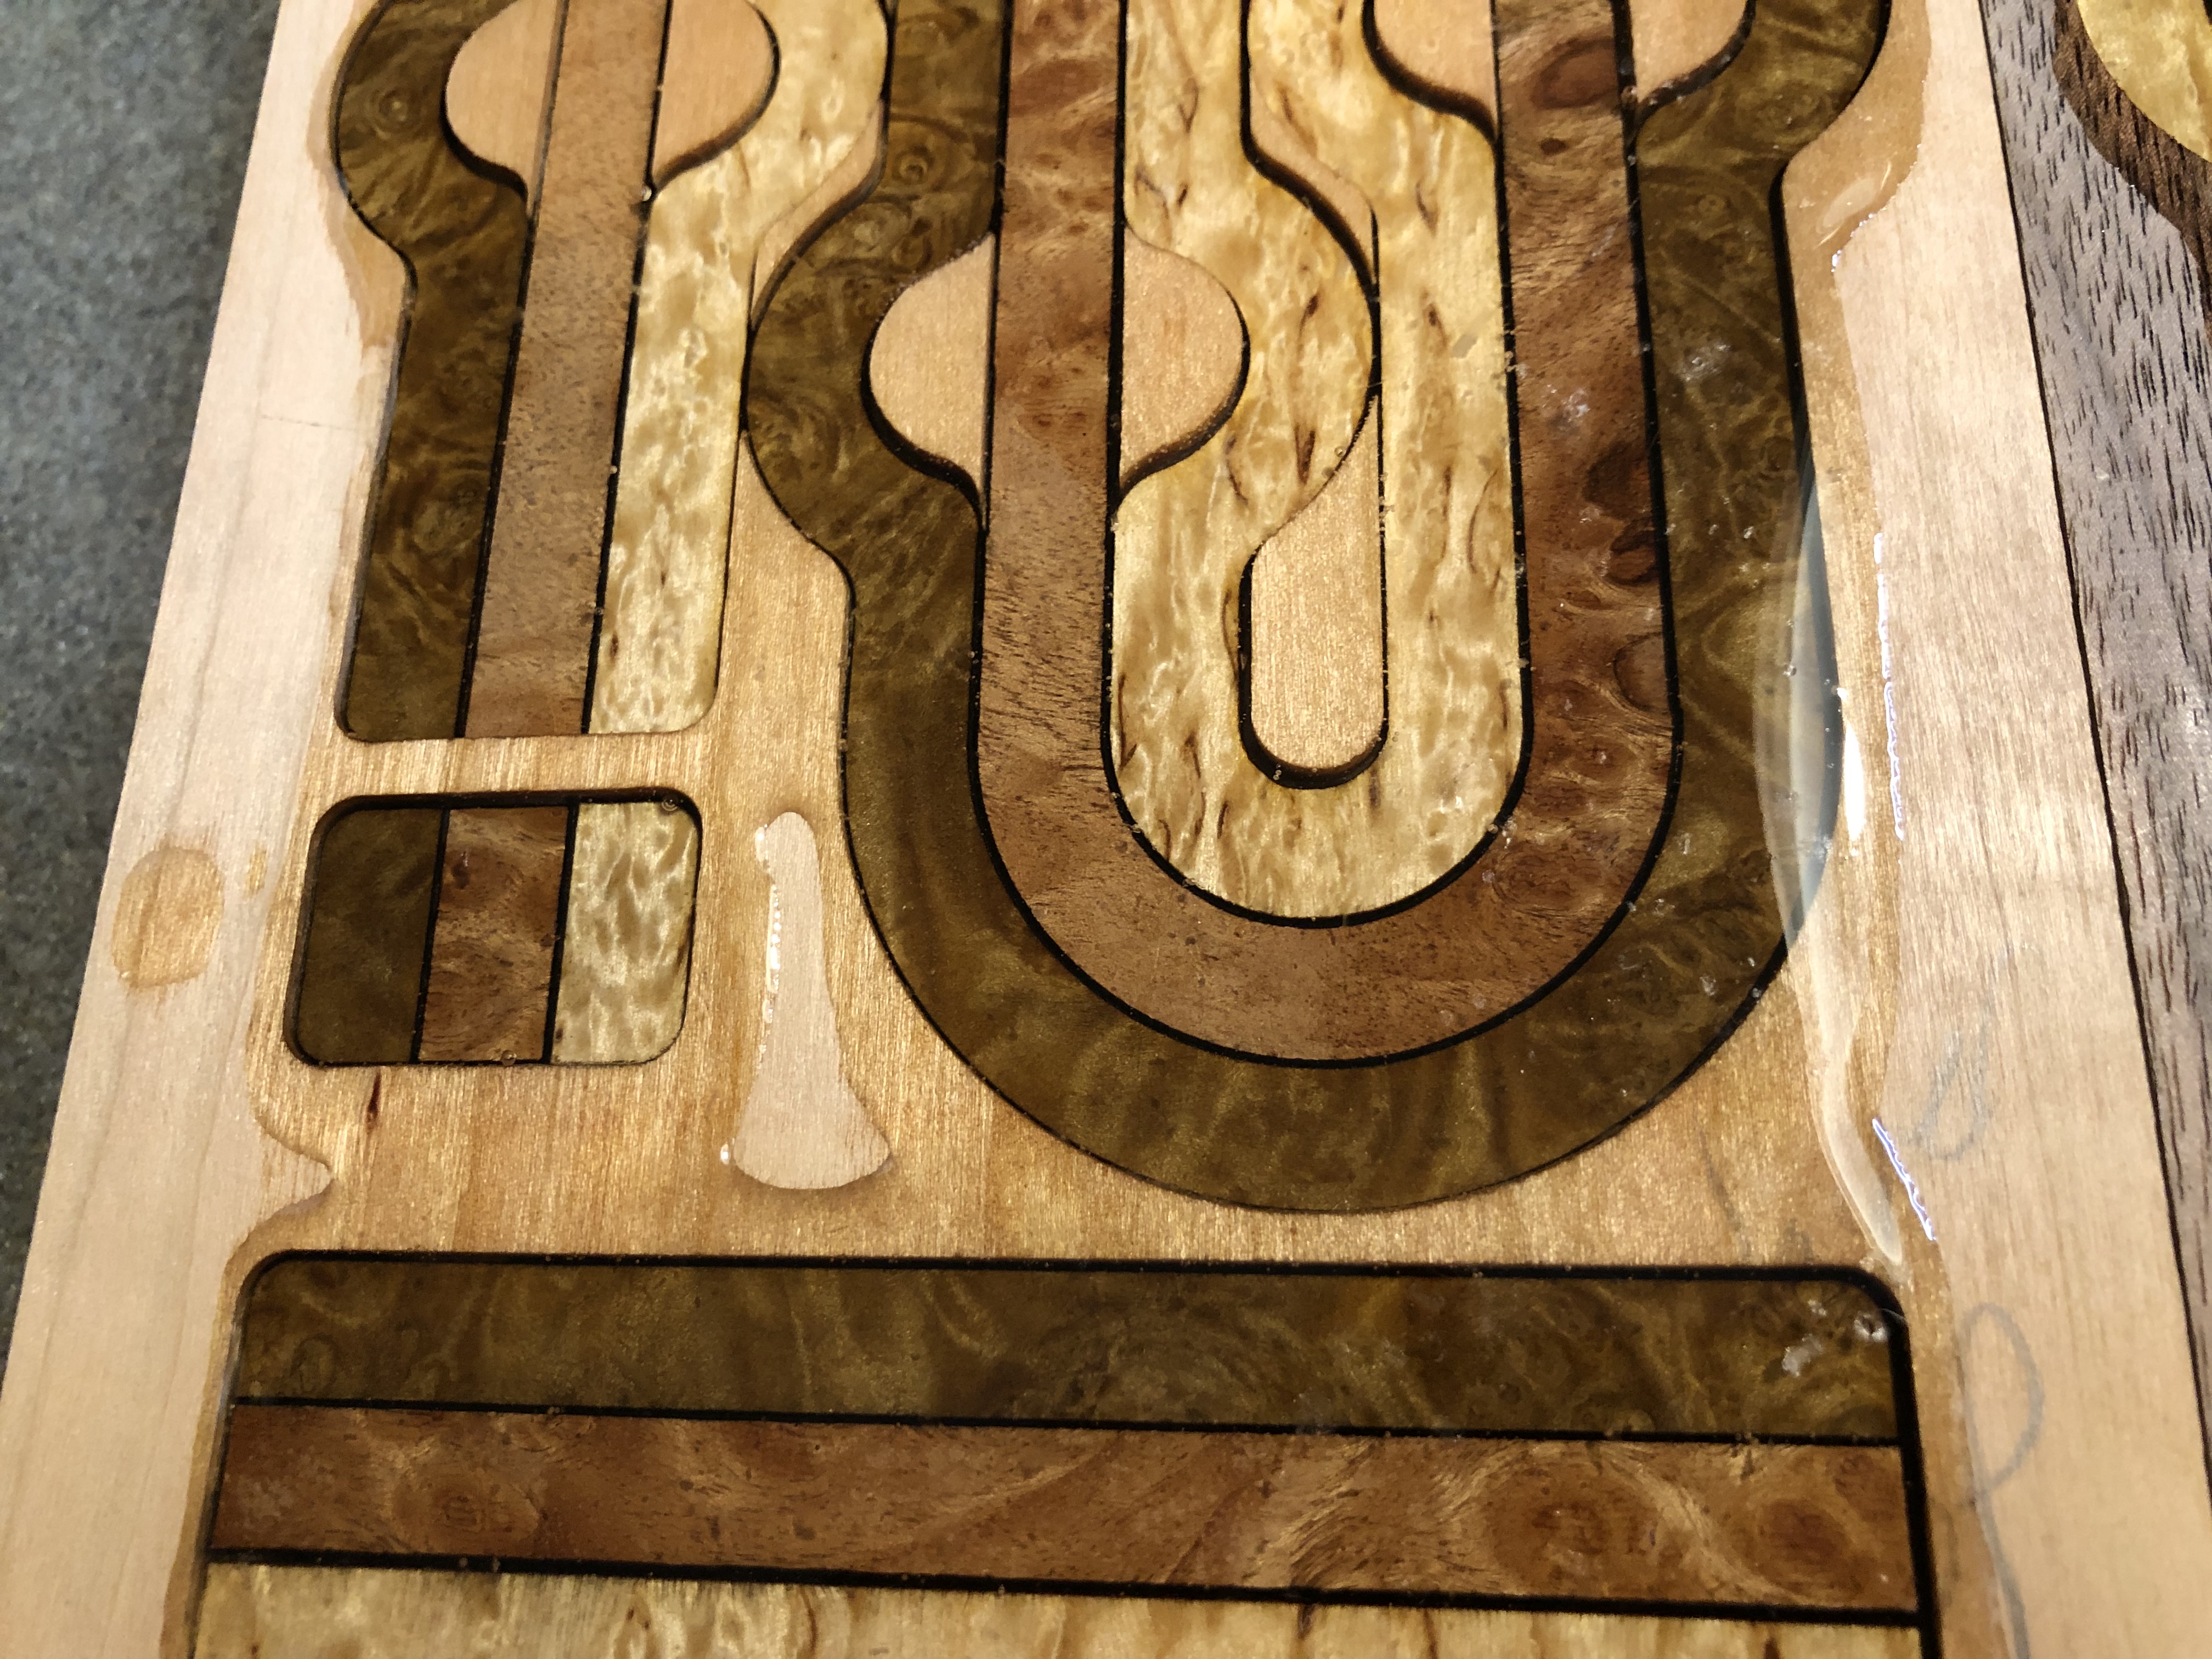
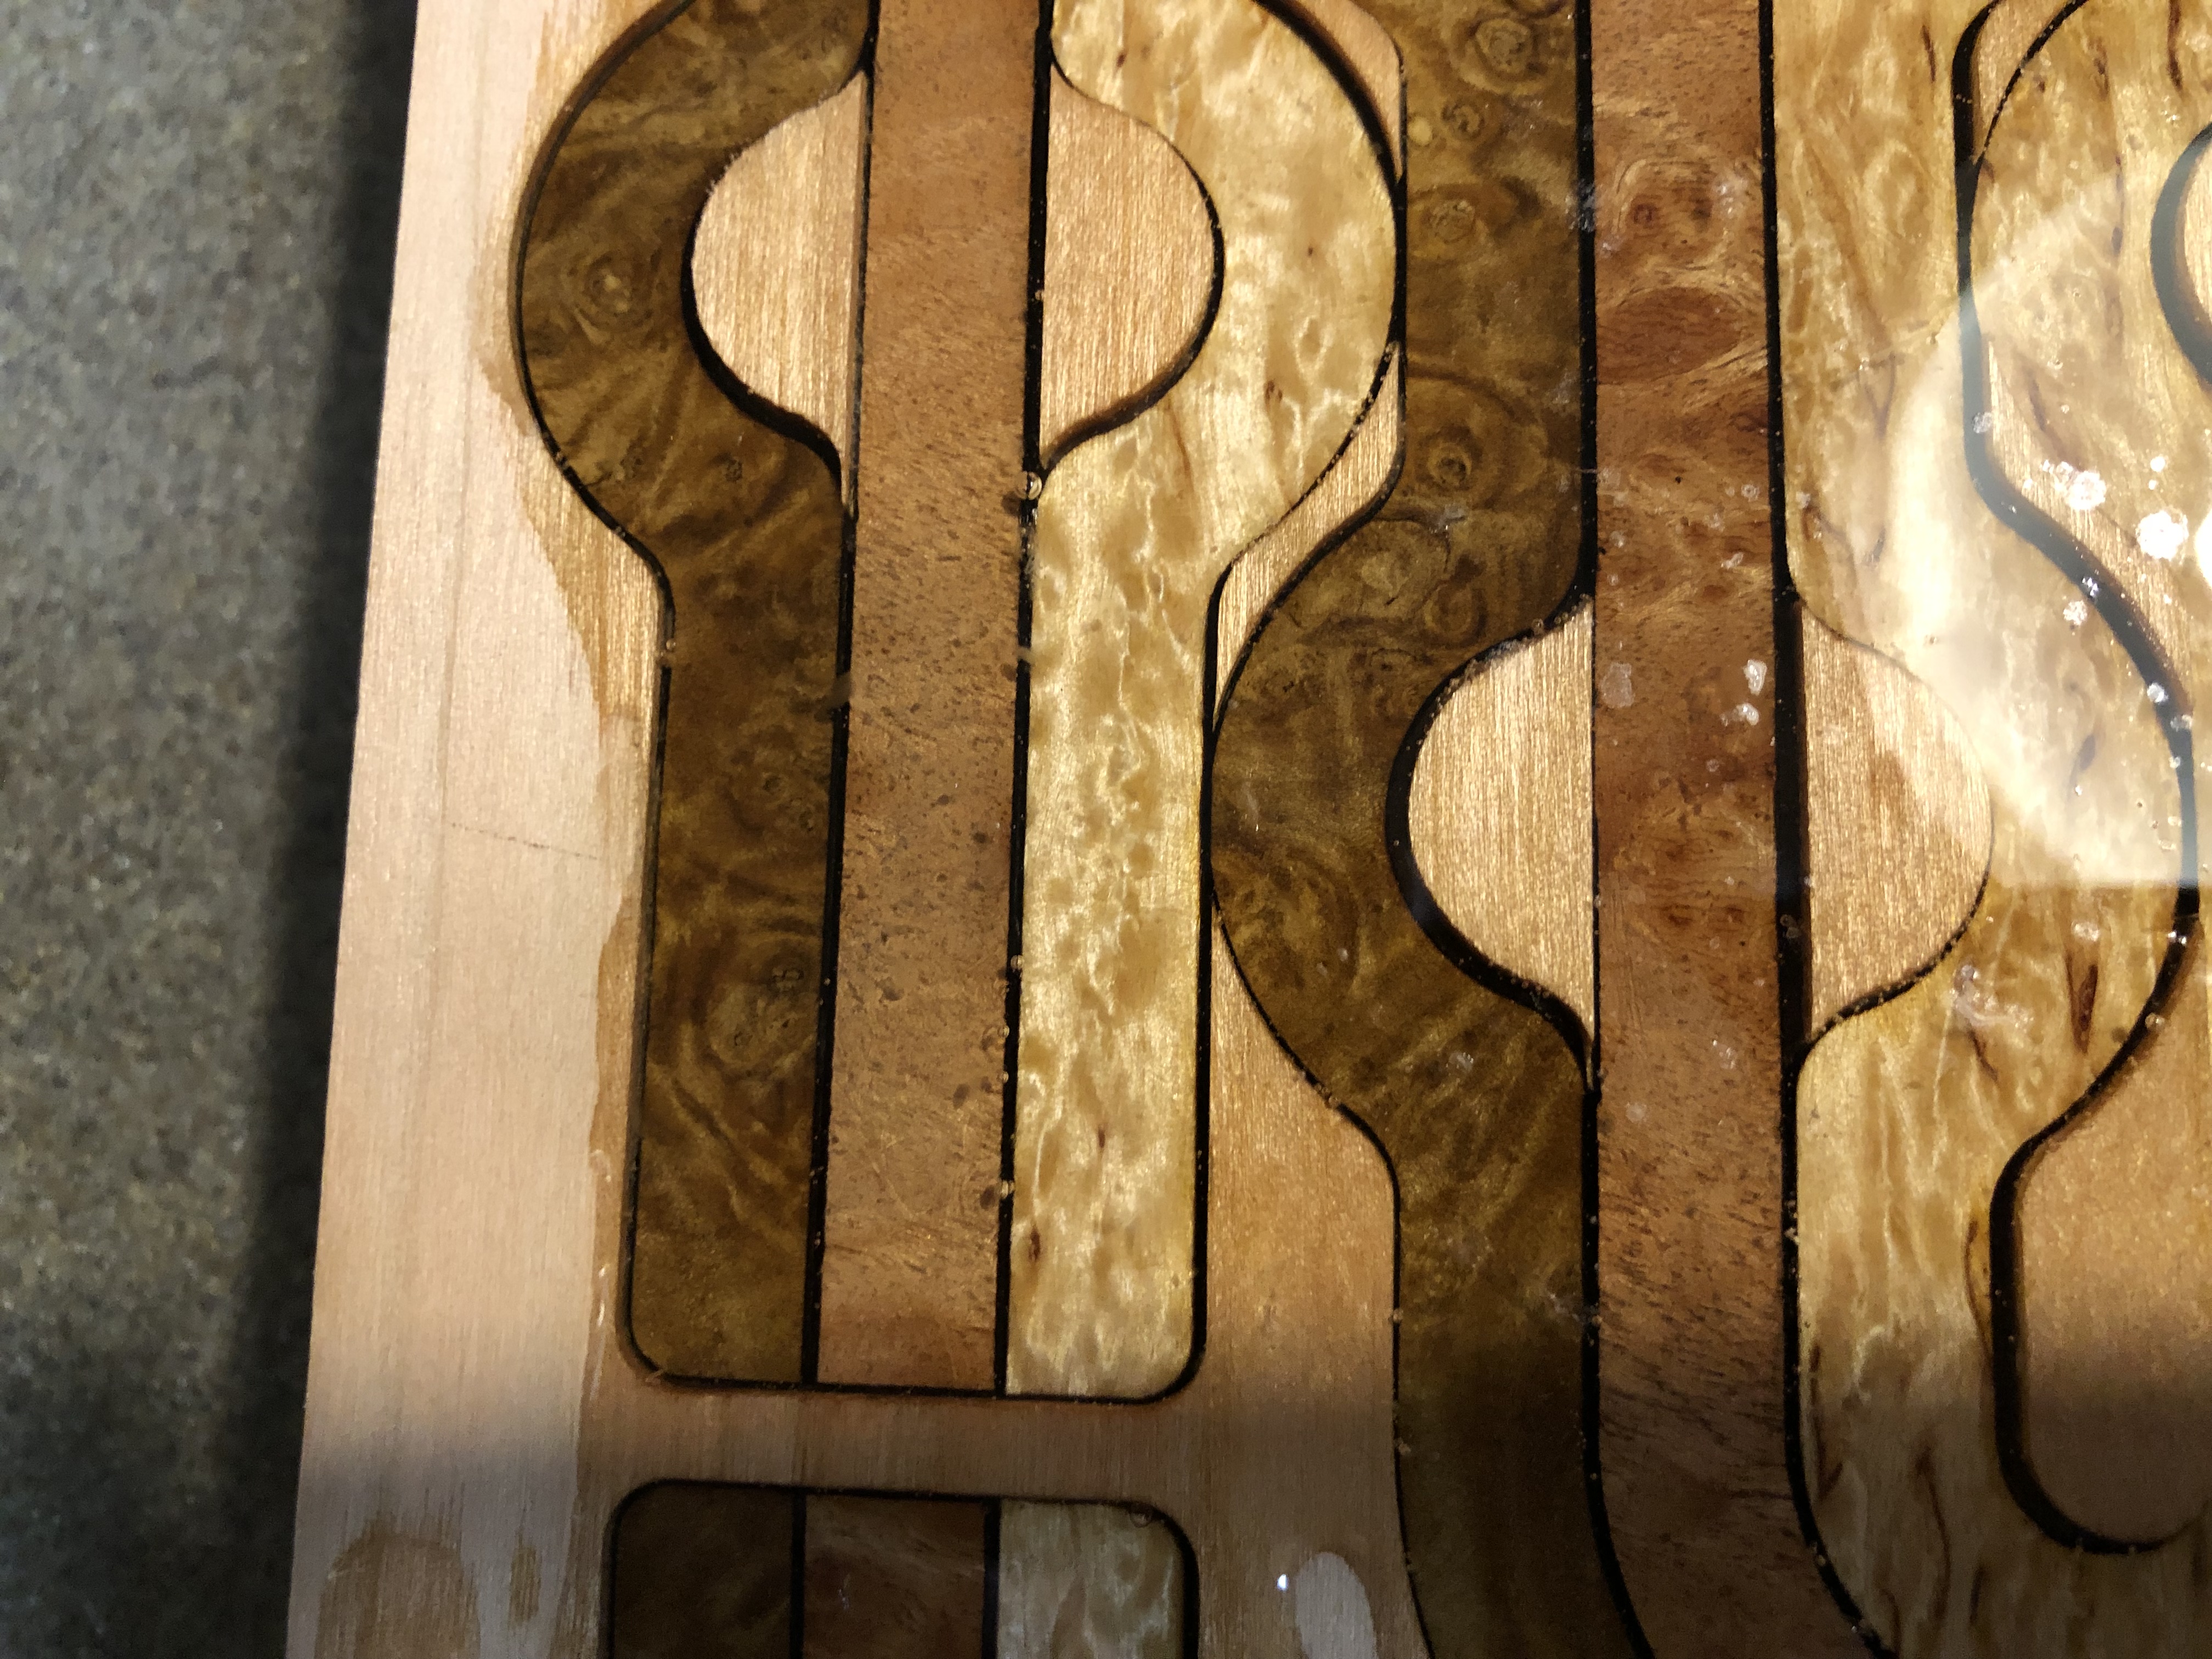
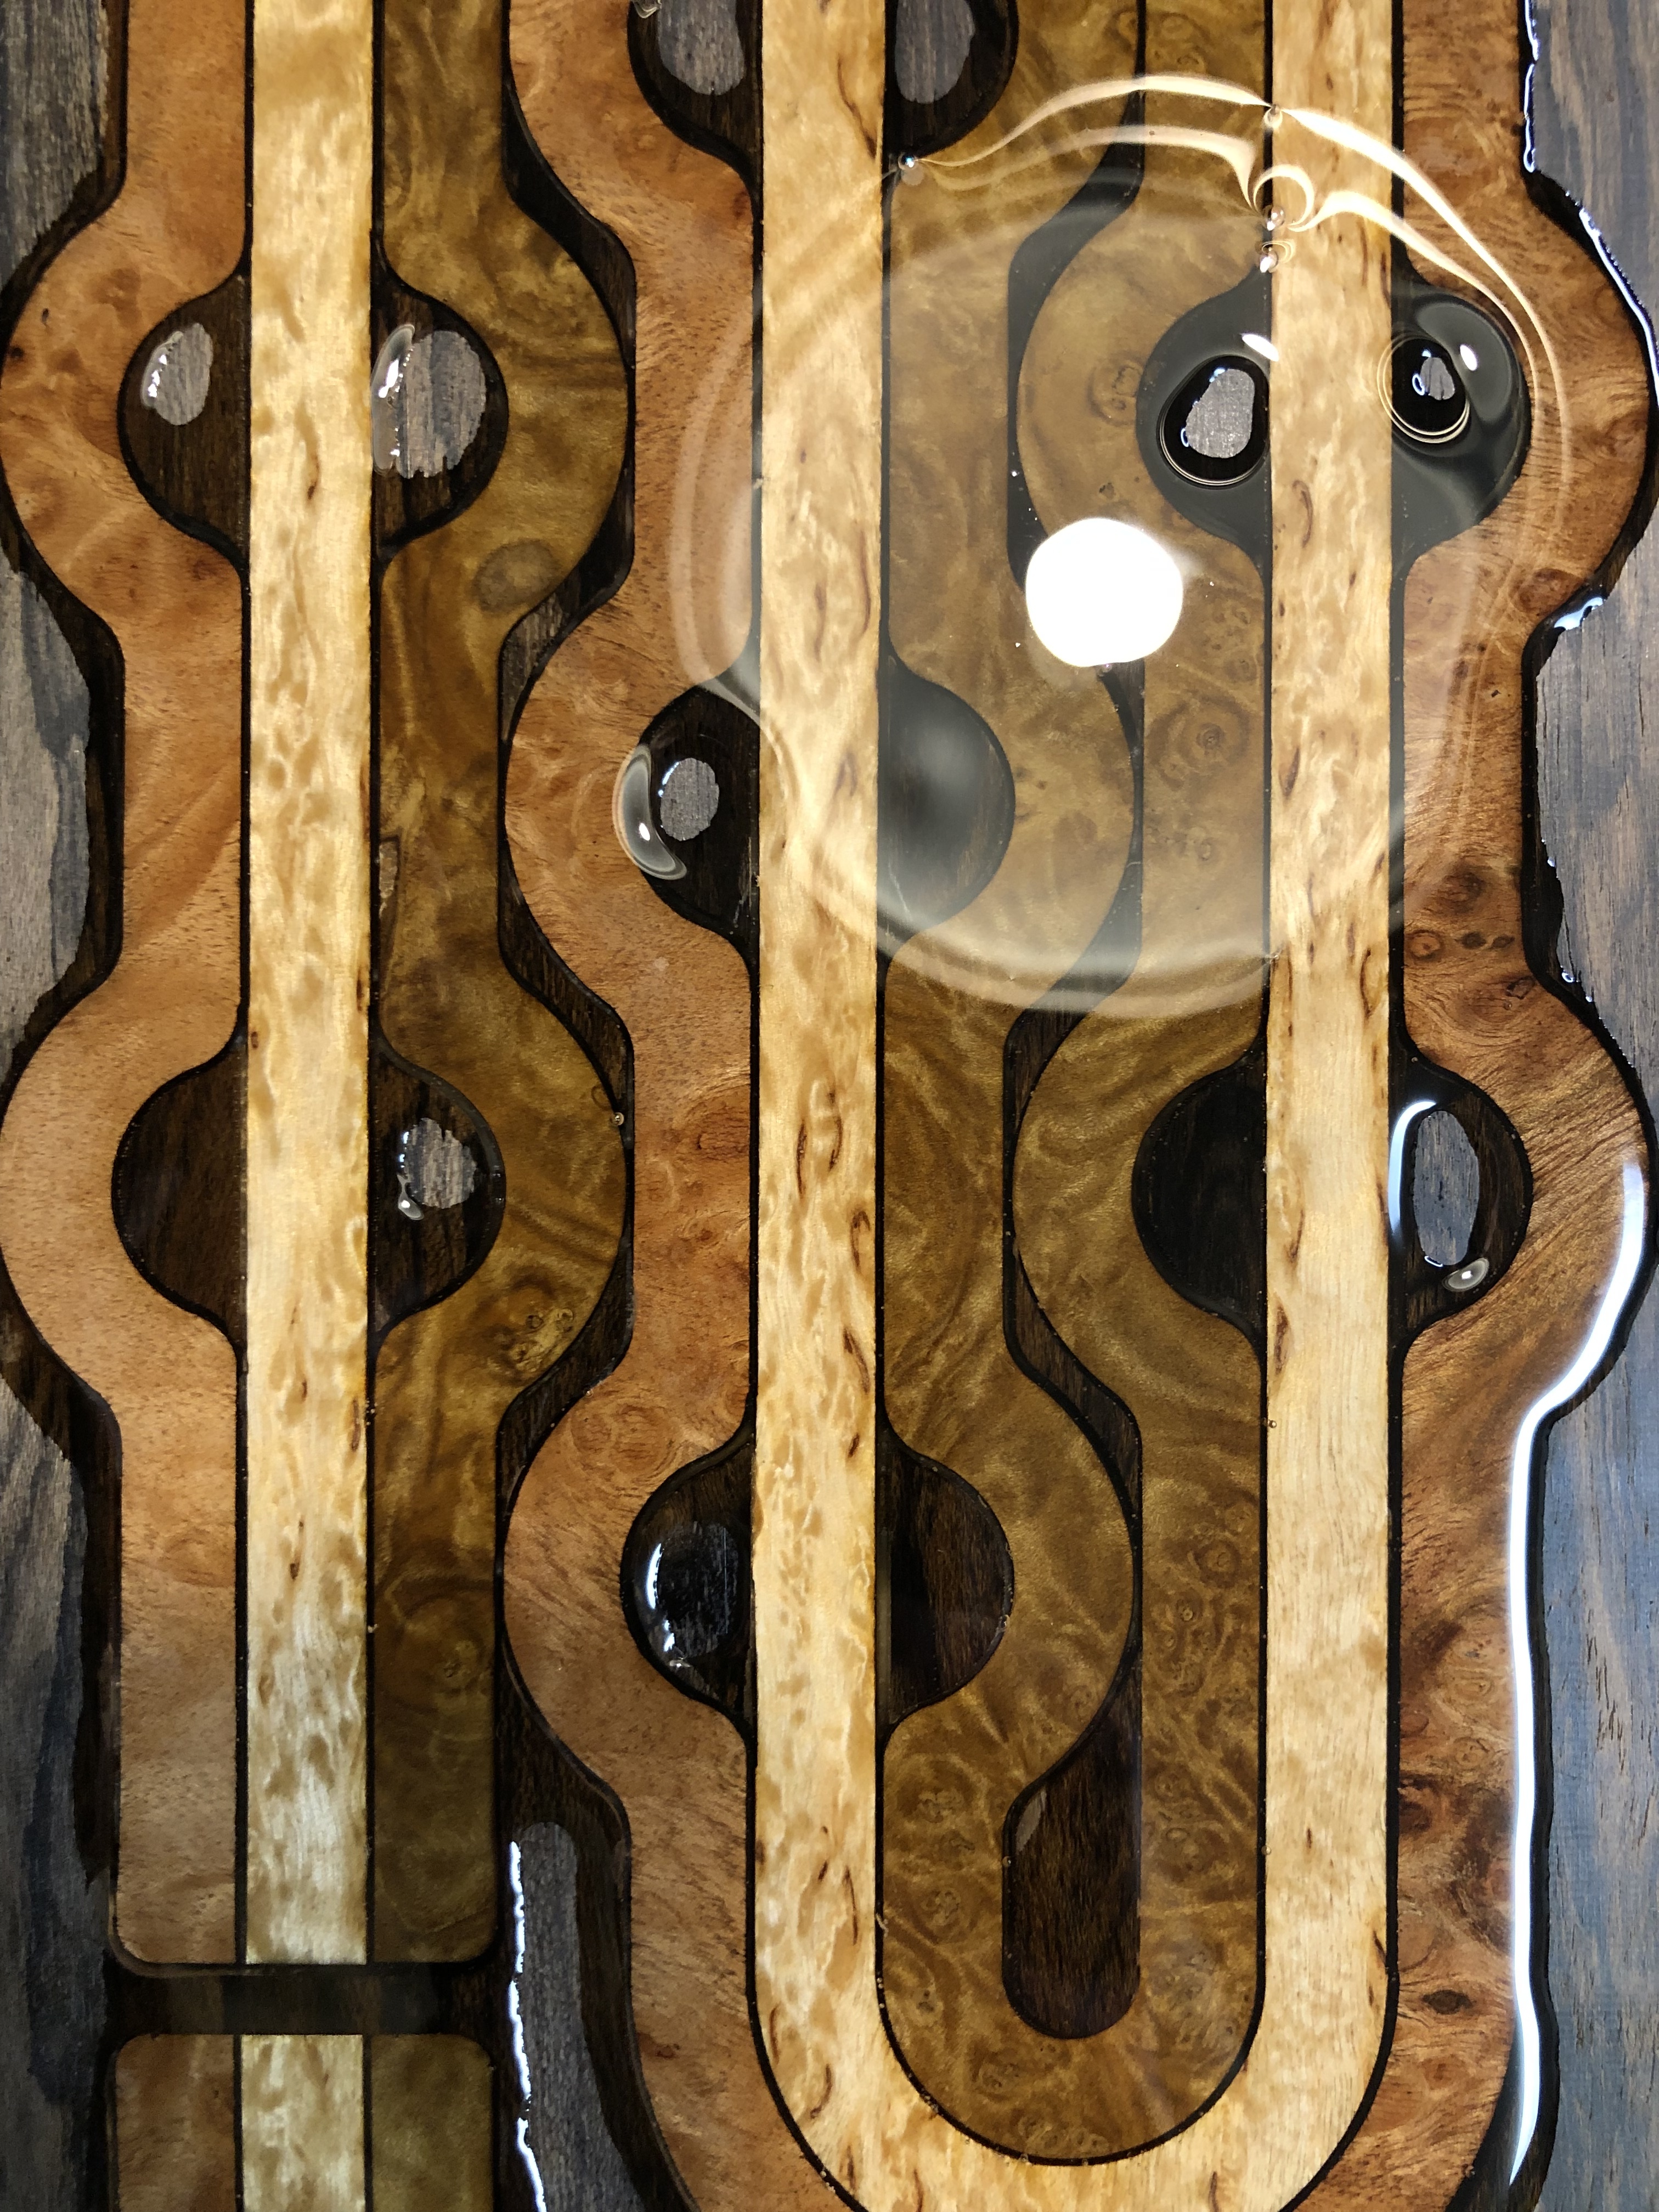
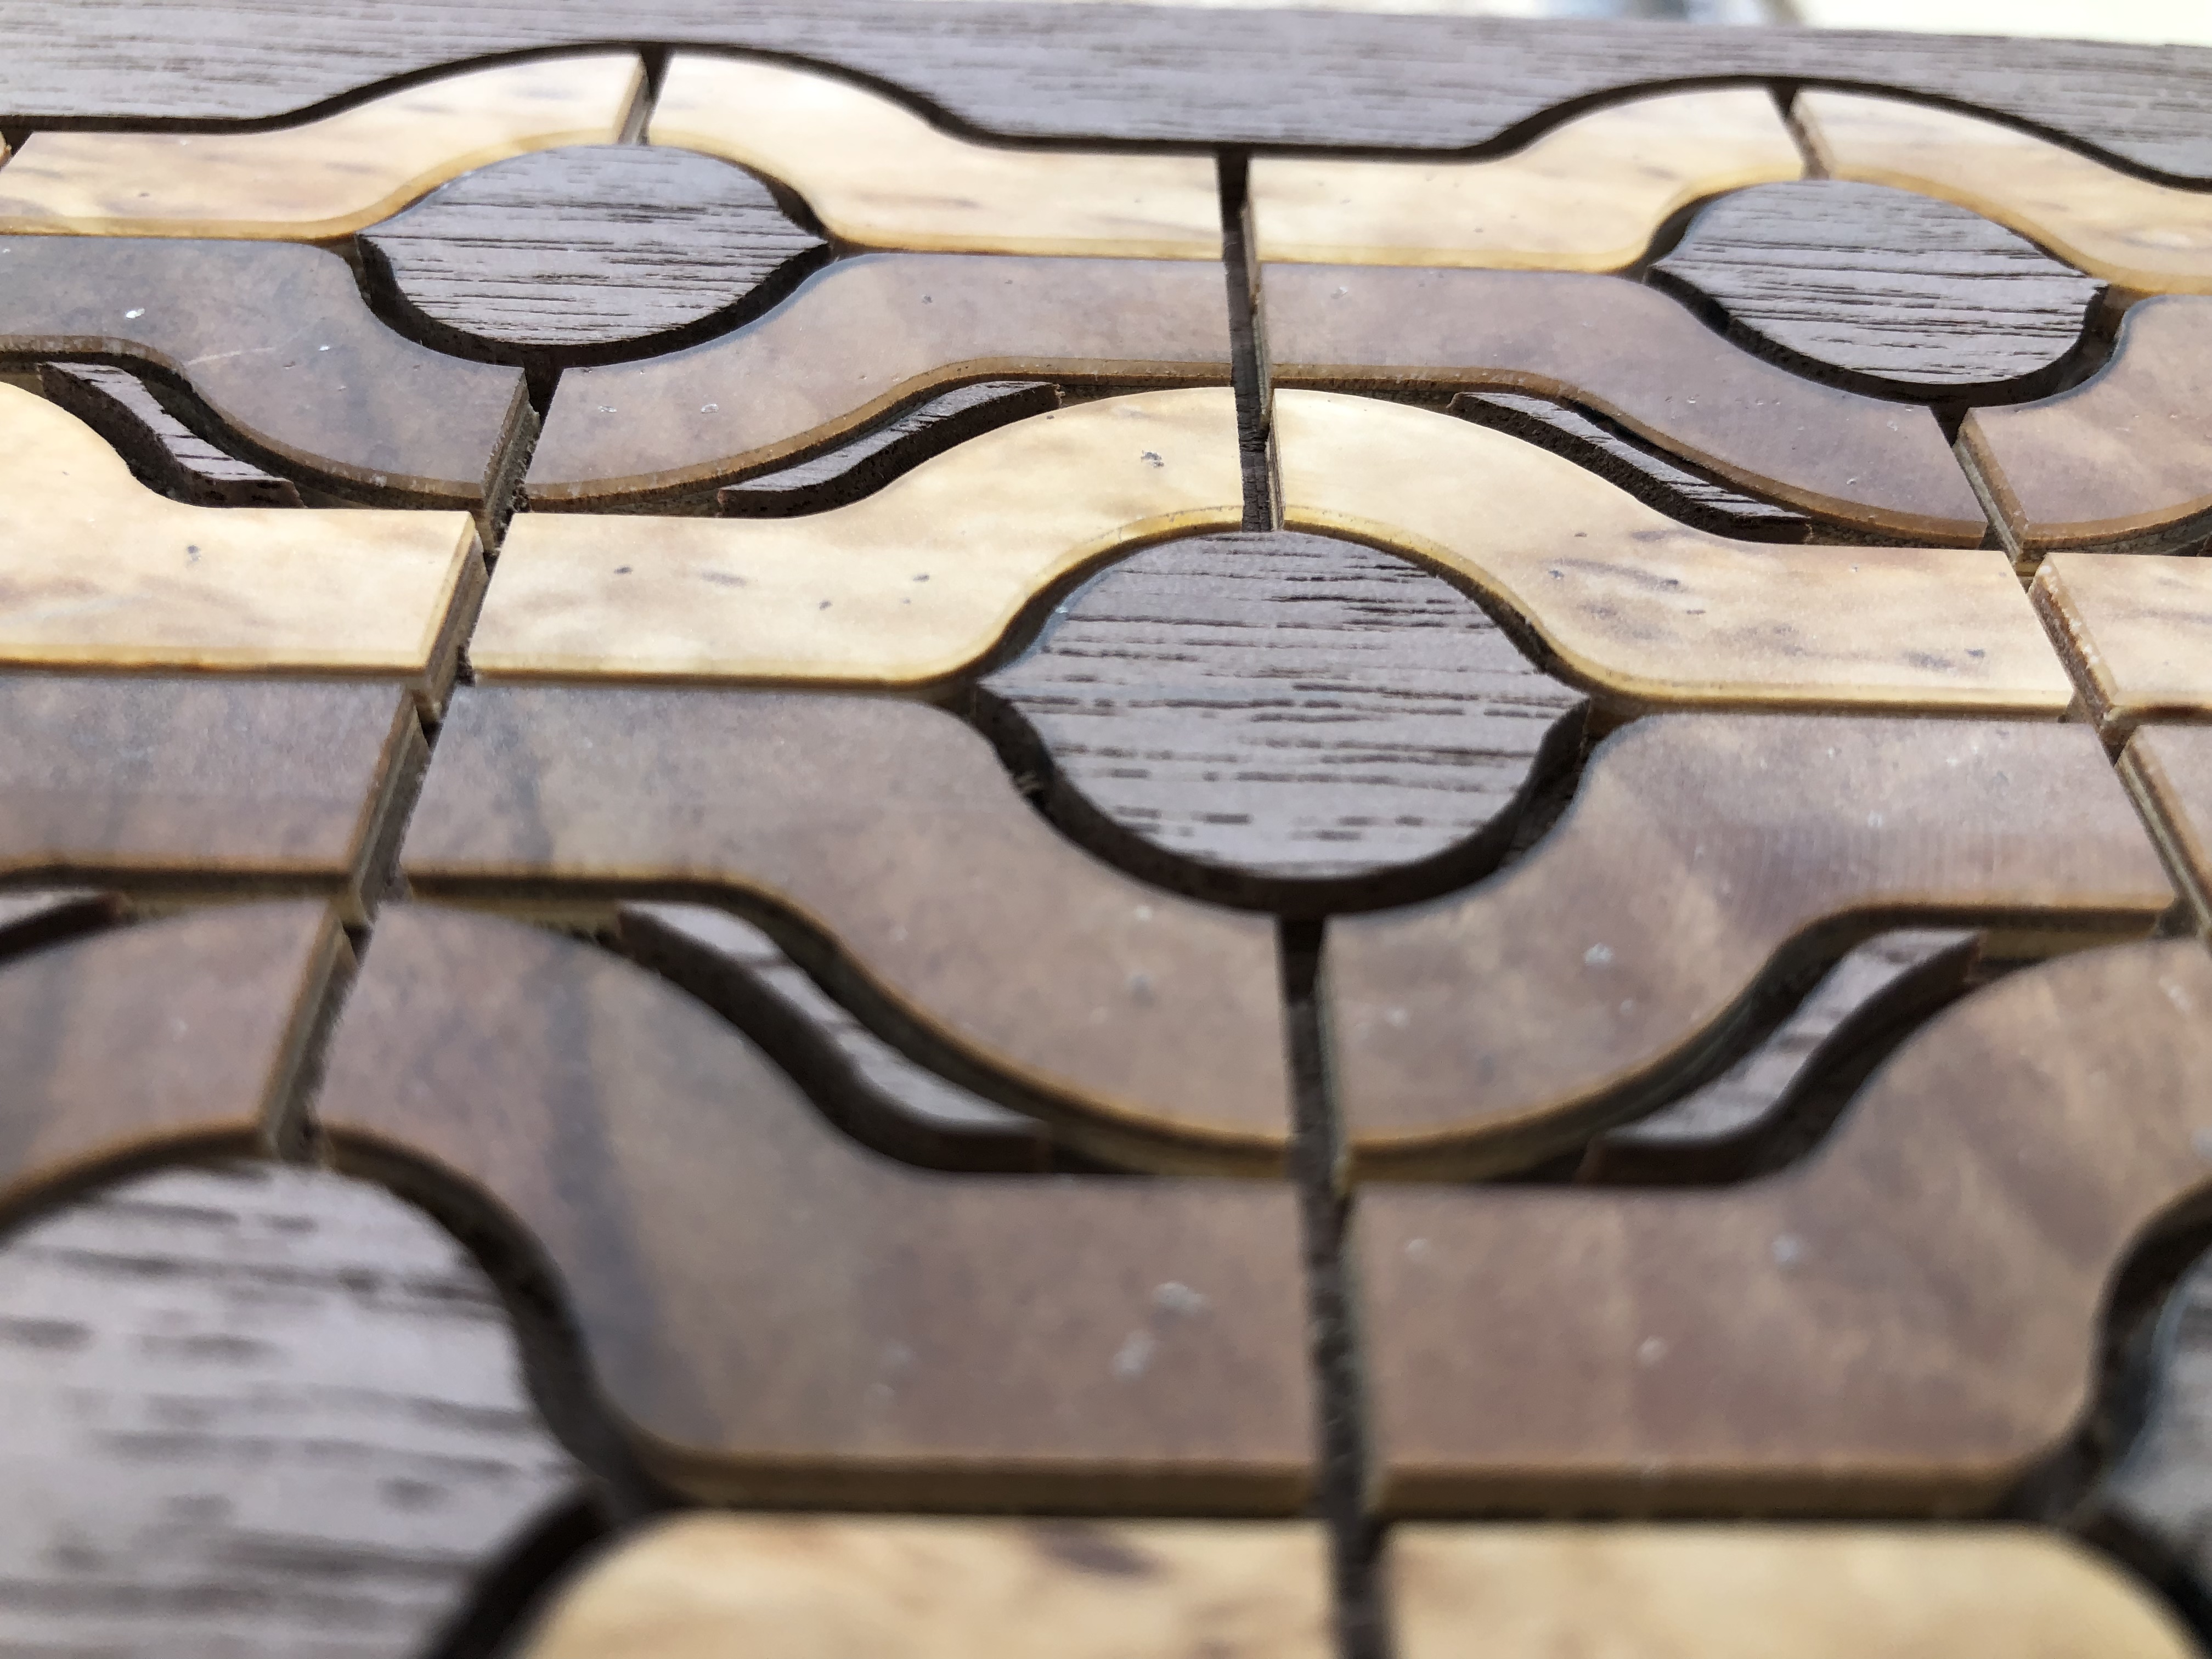
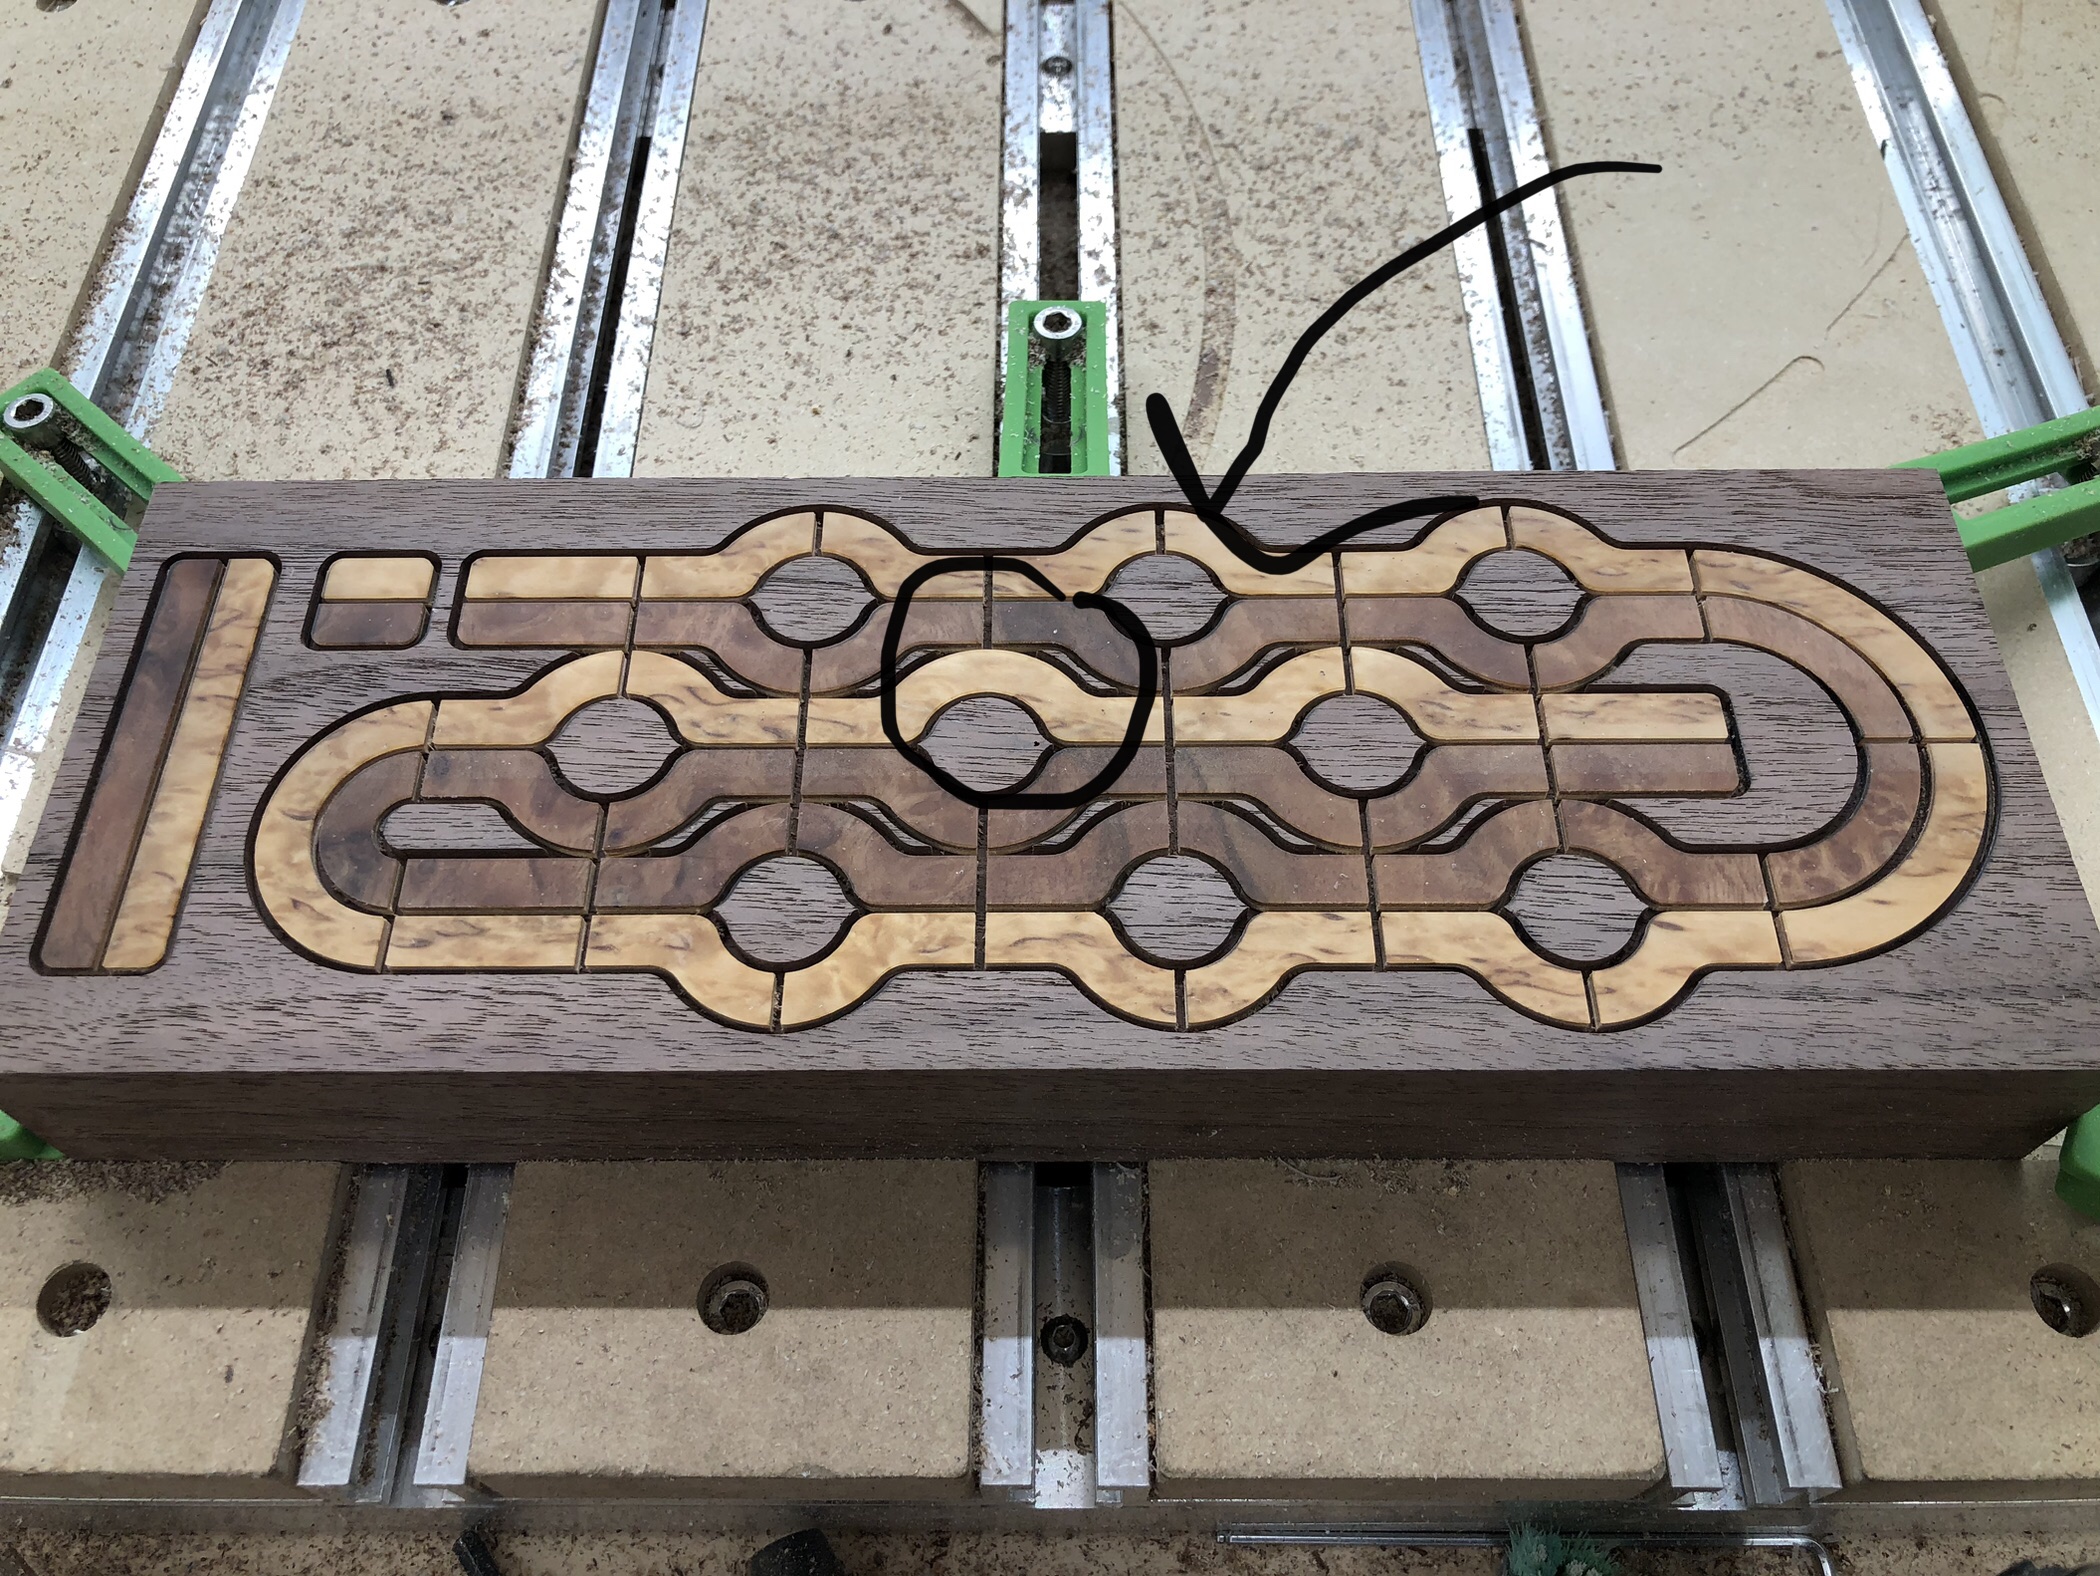
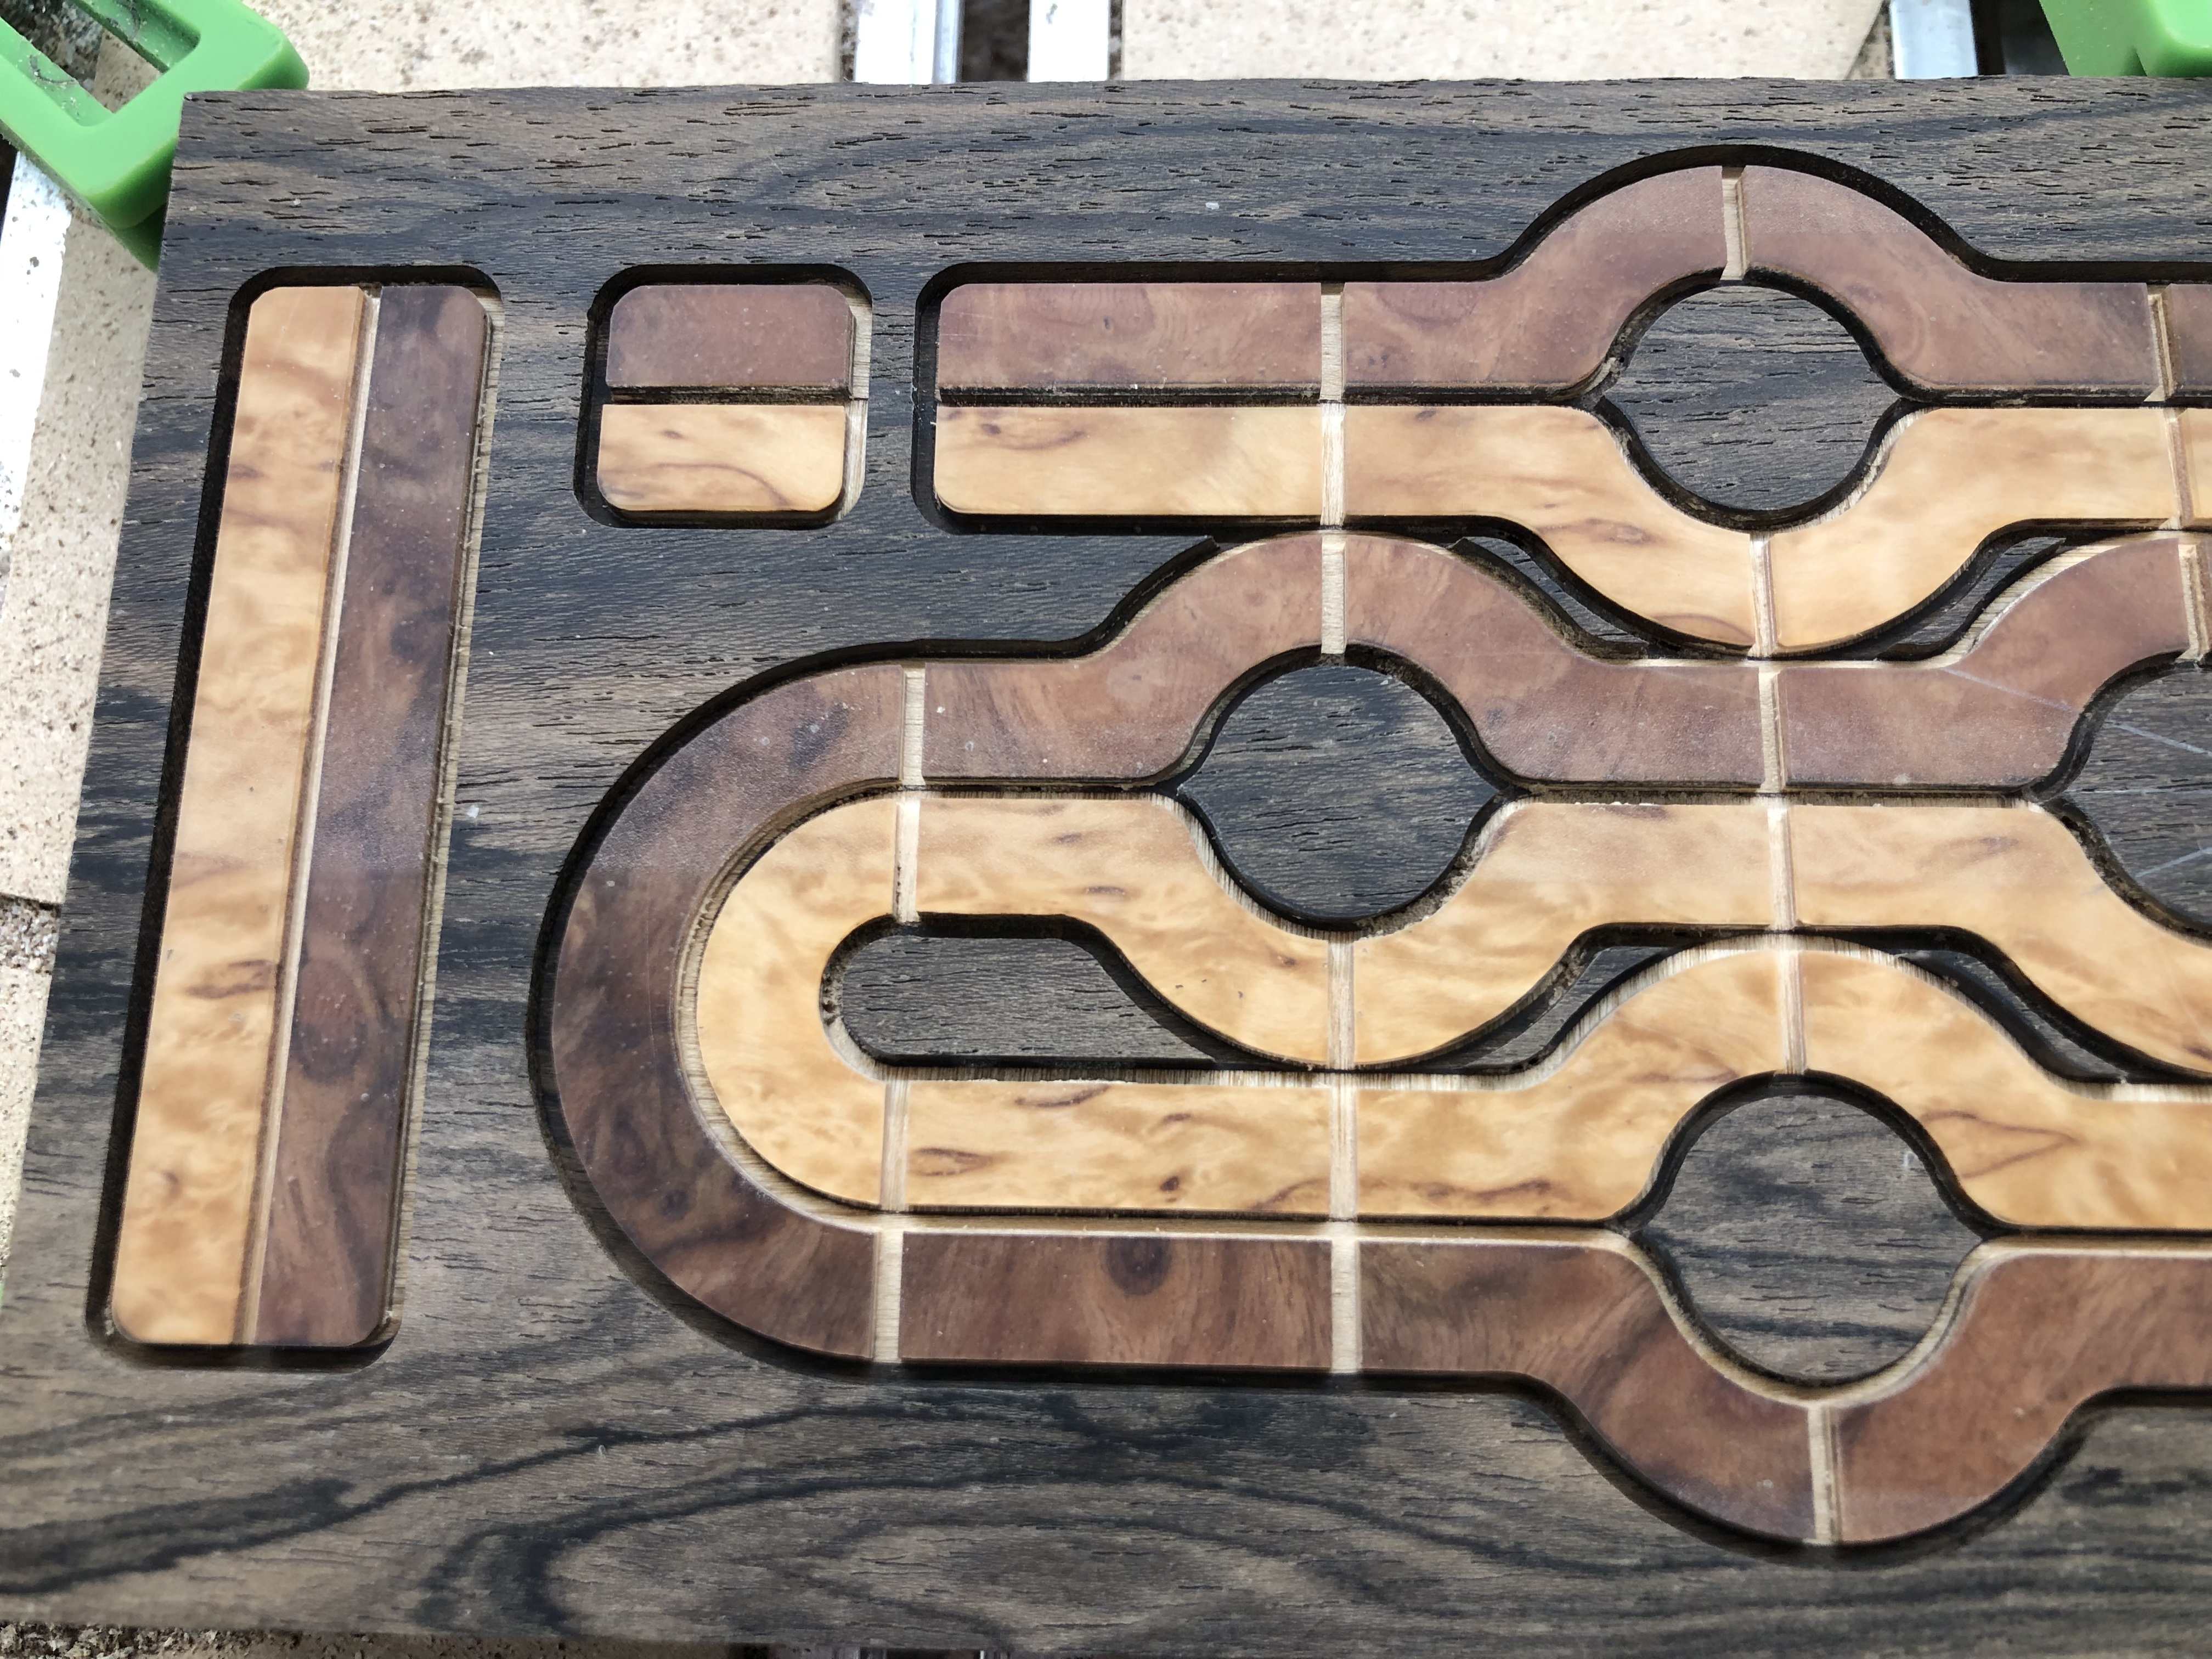
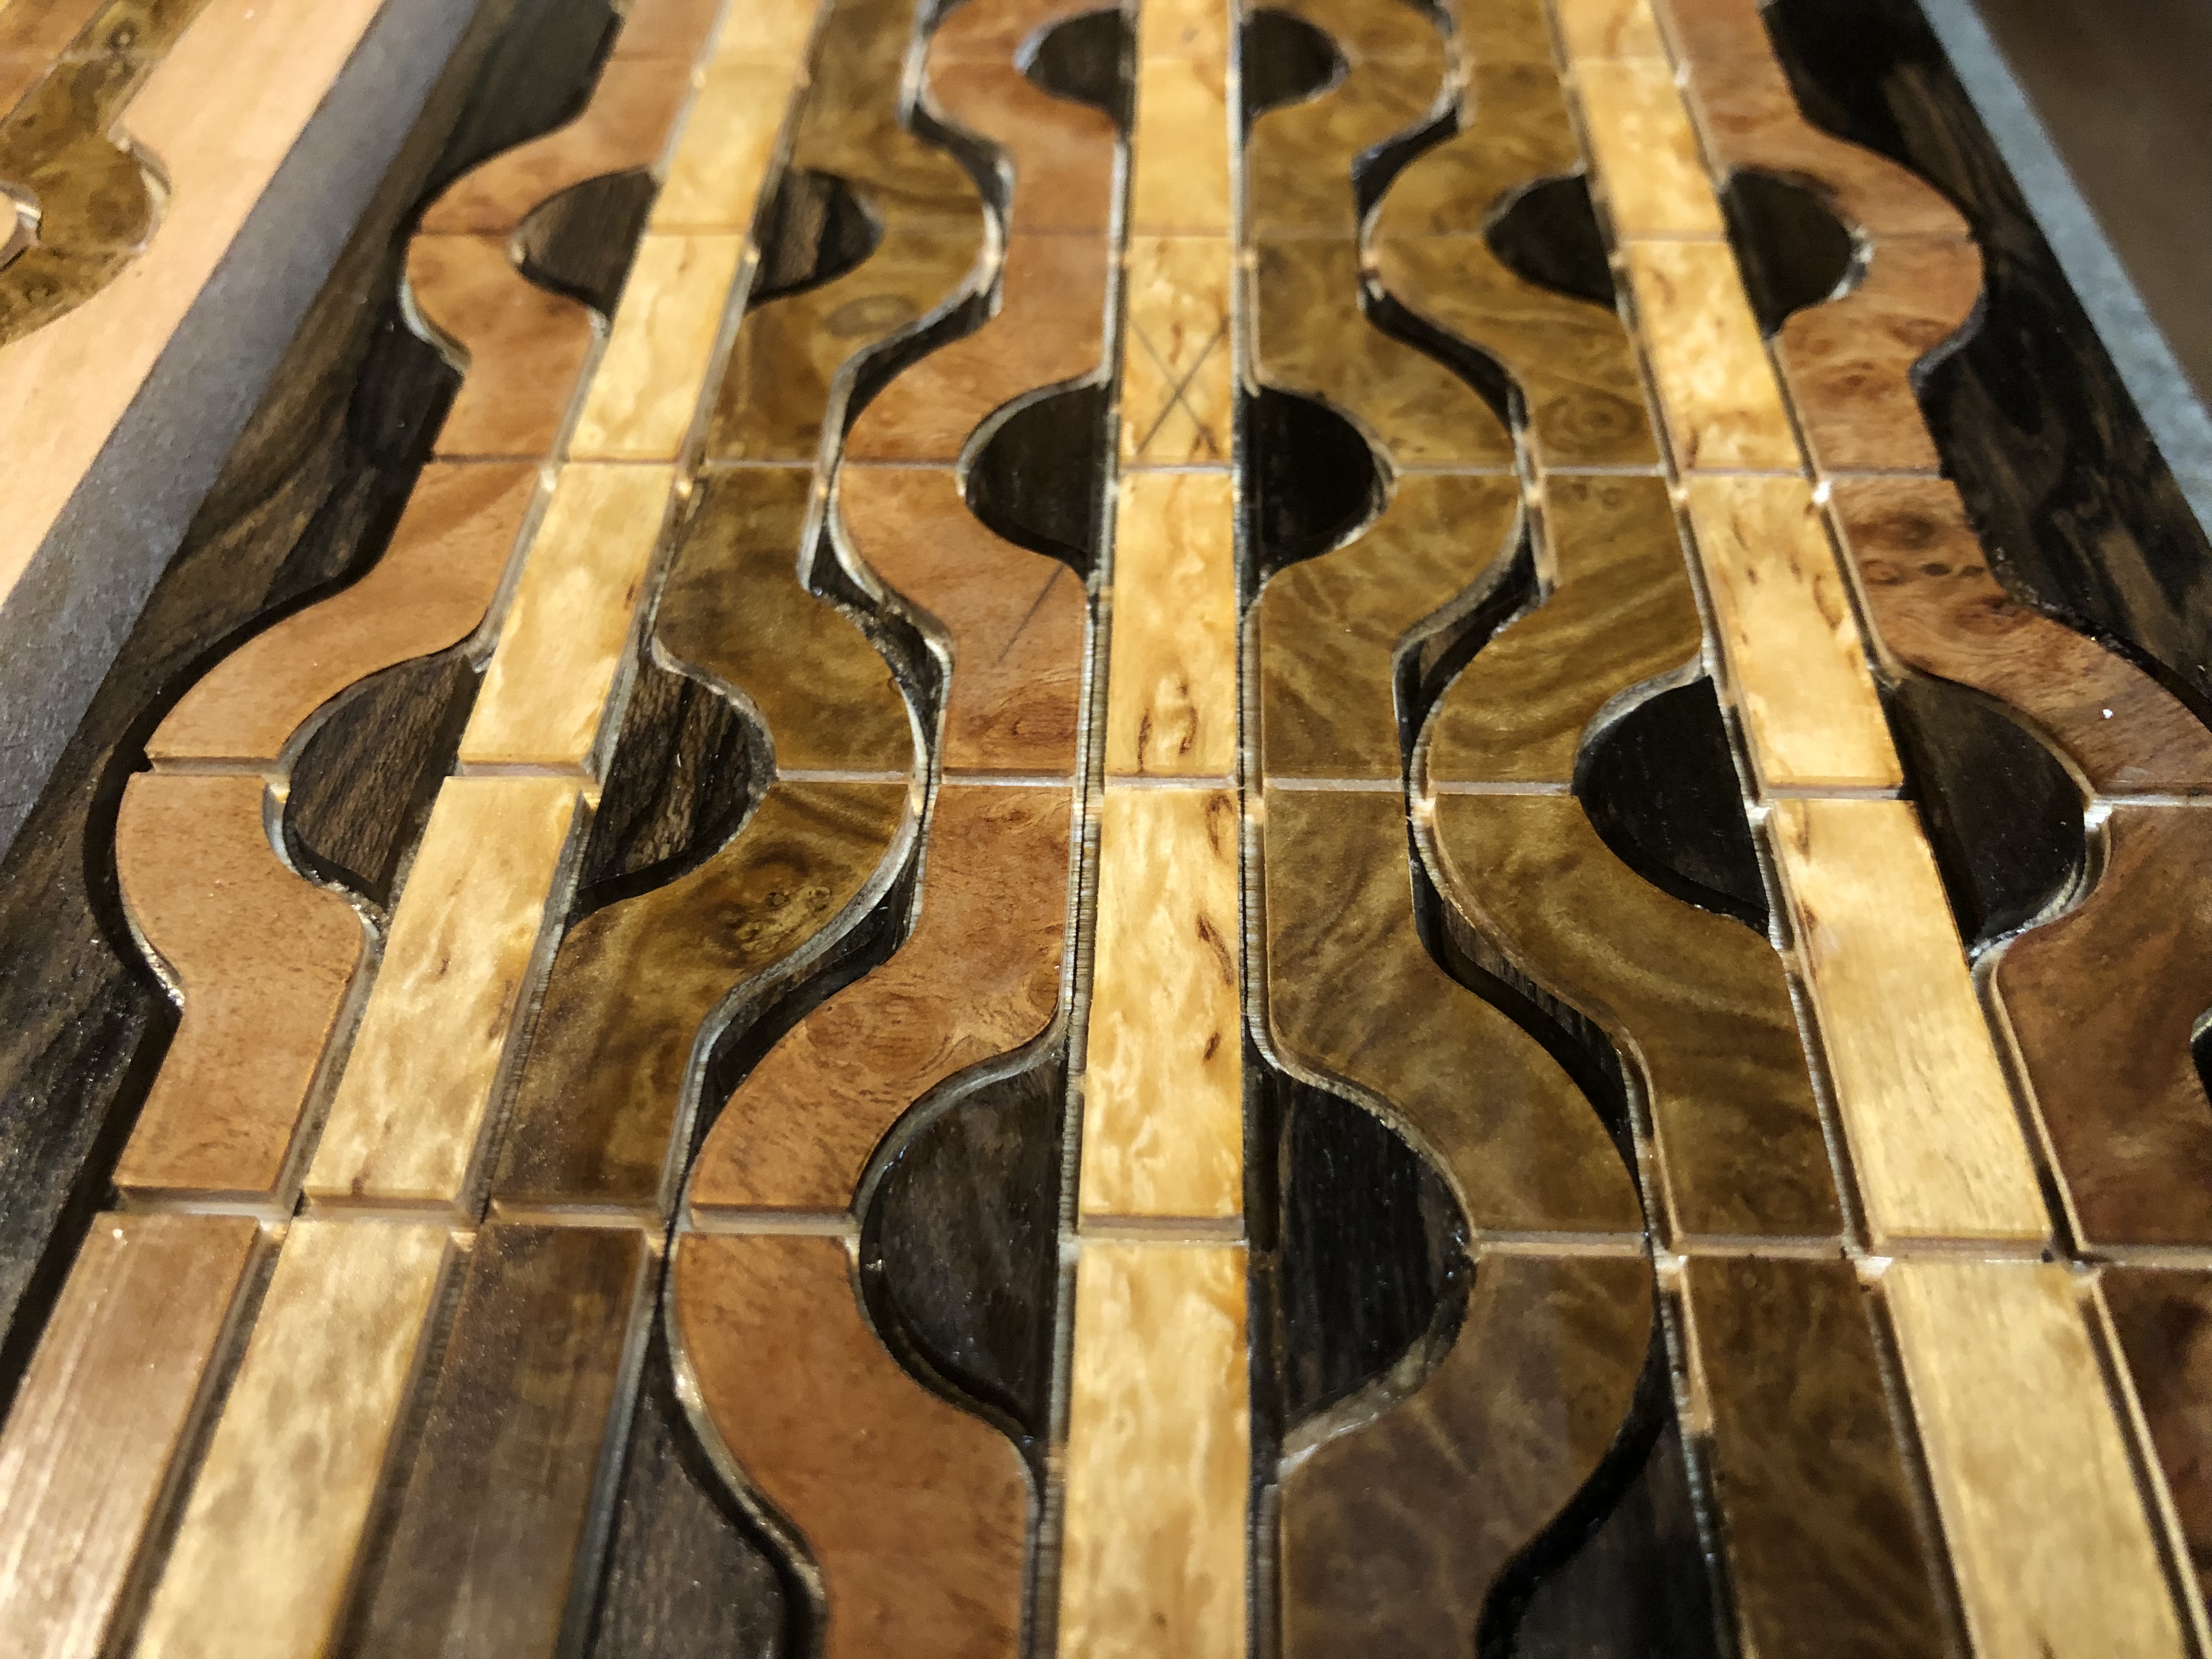
@dustmite I left .1” depth of the pocket to fill with epoxy. I’ll shave .05” off when I cut the black lines and numbers. This gives me a little bit to sand and polish.
This is what I was confused about earlier. I was expecting the crisp grooves for the black epoxy earlier. What is the purpose of the clear epoxy before doing the black lines? Are you worried about the veneer lifting? Or does the playing area actually have that deep of a clear epoxy surface?
@dustmite the clear epoxy does a couple of things…
First it protects the veneer so when I cut the lines, holes, and numbers it will prevent chipping in the veneer. The veneer is somewhat paper thin and it can easily chip out. Second, I applied a thin layer of glue and pressed the tracks to the pocket. There are some other voids that the epoxy will set the inlayed veneer into the walnut top, making it solid.
When I flattened the epoxy to the top, I left 1/32” of the epoxy to keep the veneer safe and will later sand and polish the epoxy to give it that clear and clean look.
There is a ton of sanding once I get the black lines and numbers put in, and it can easily kill the veneer.
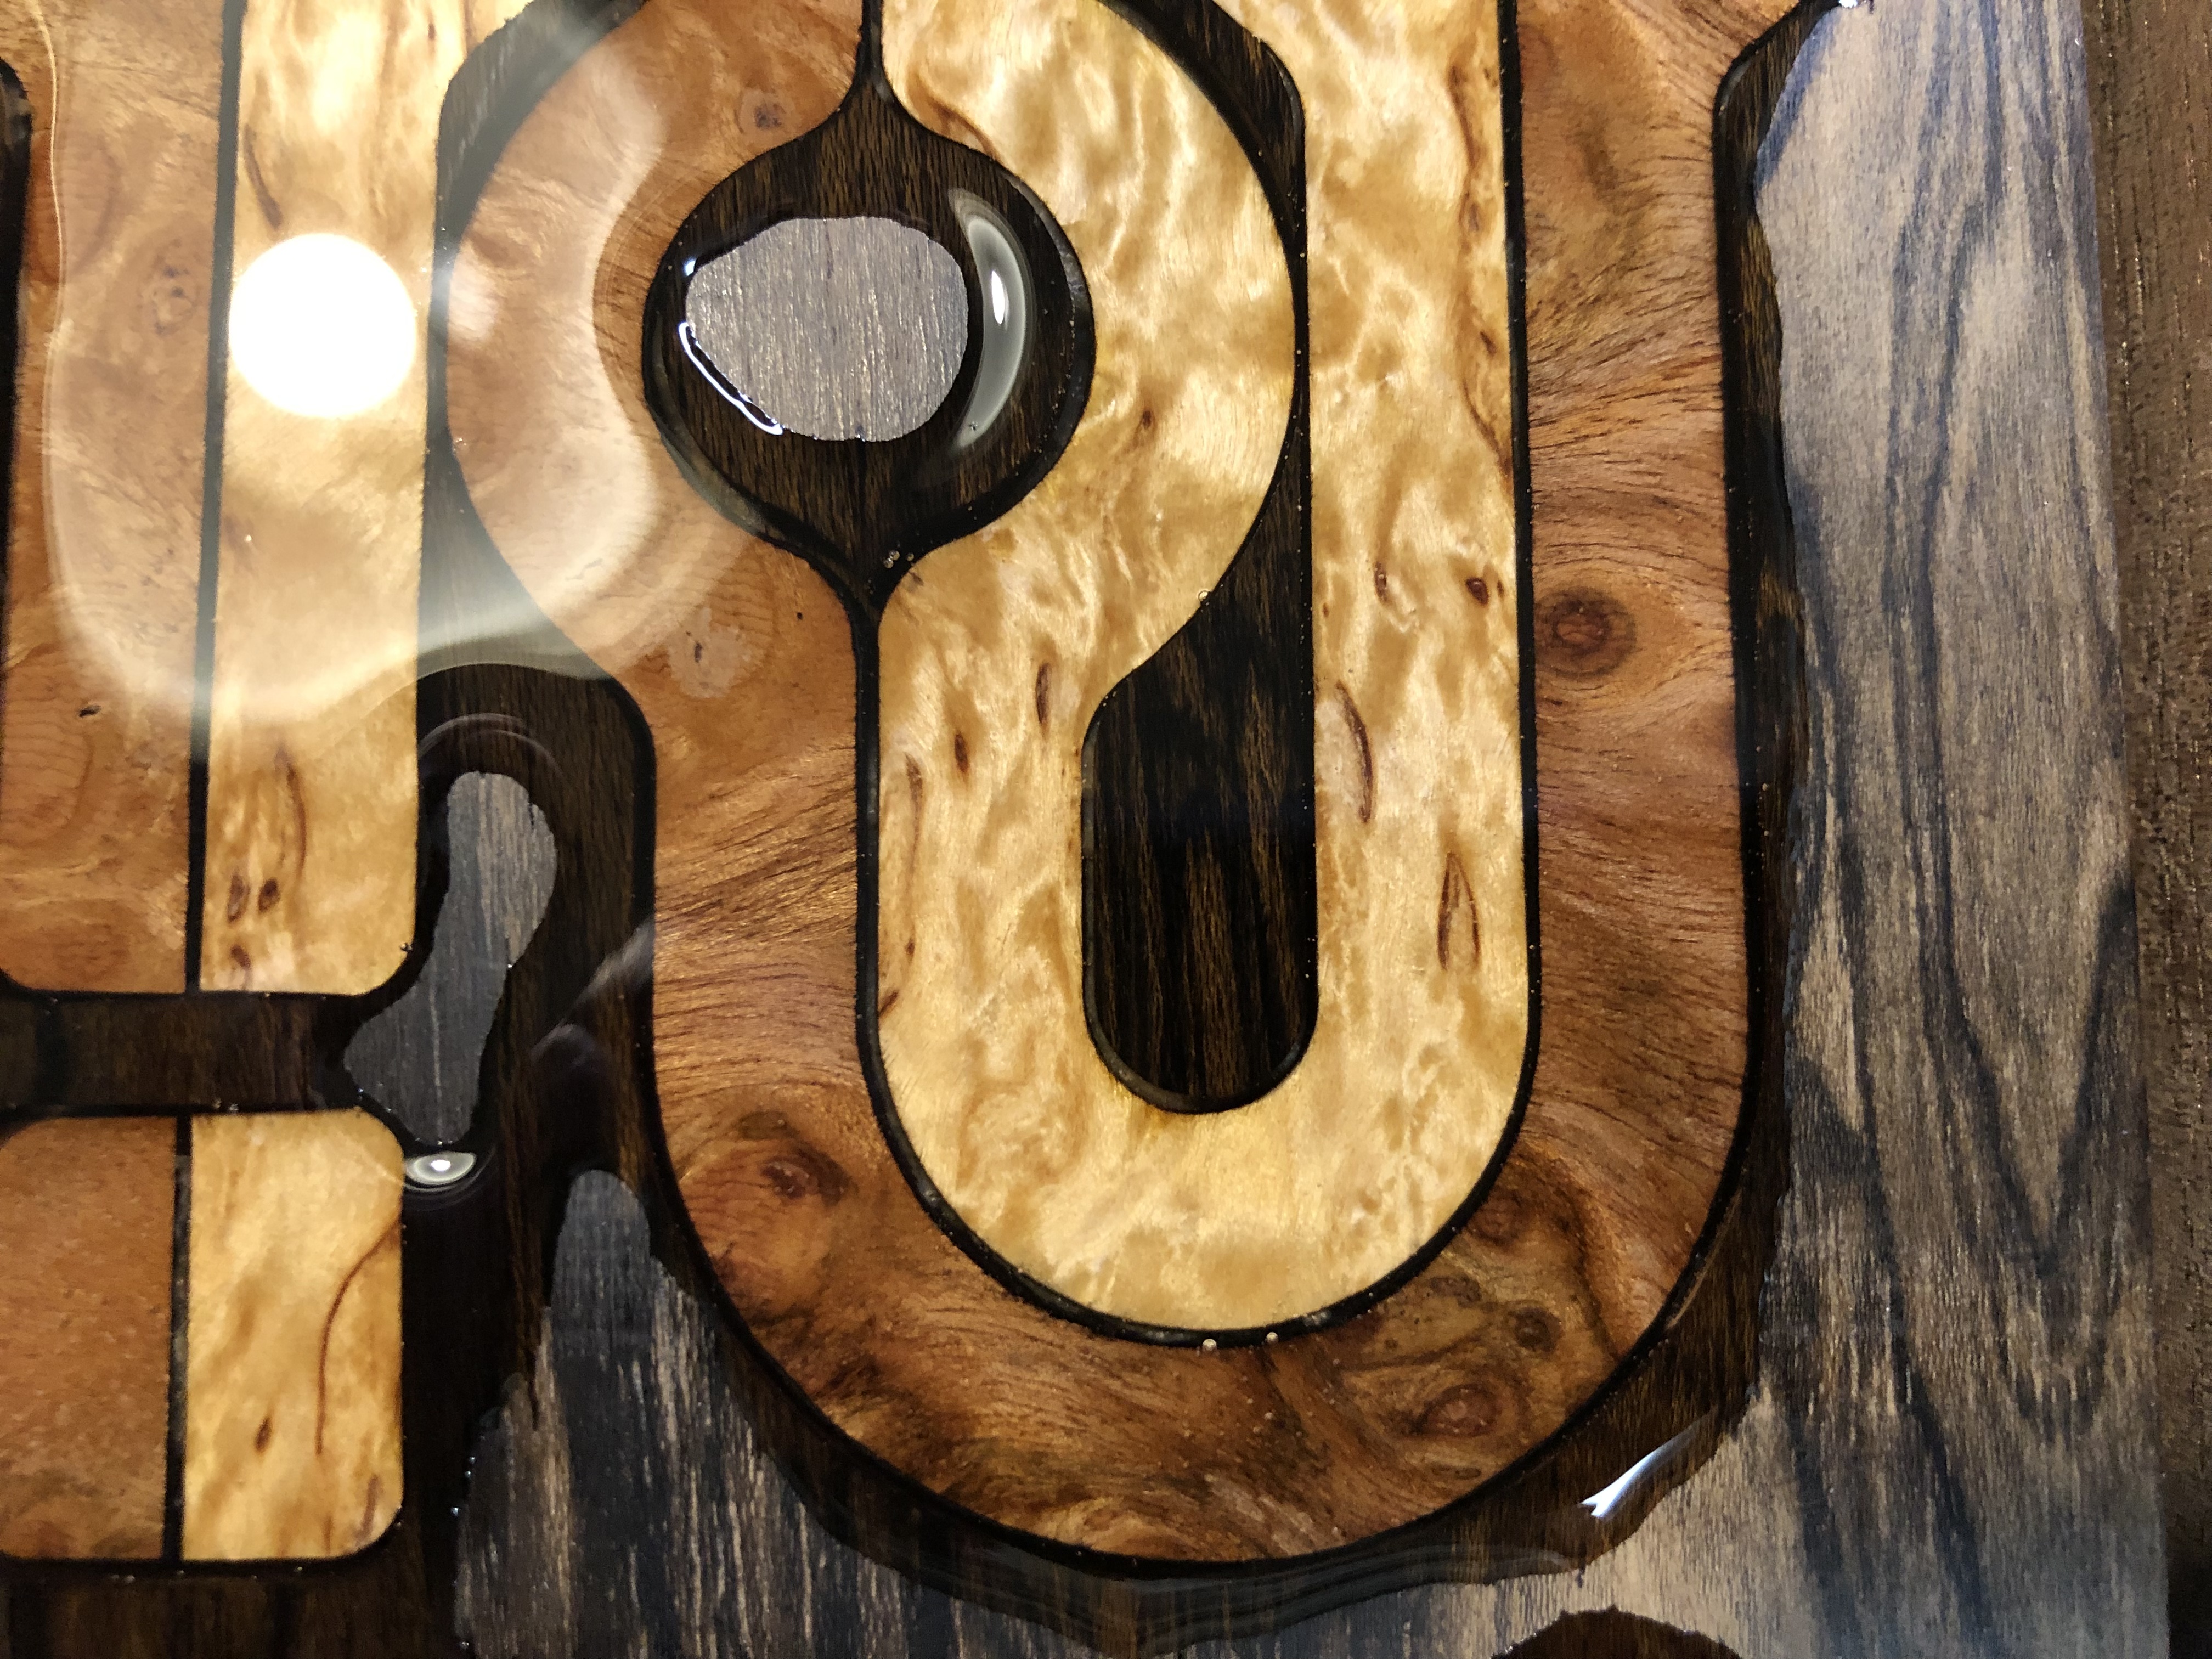
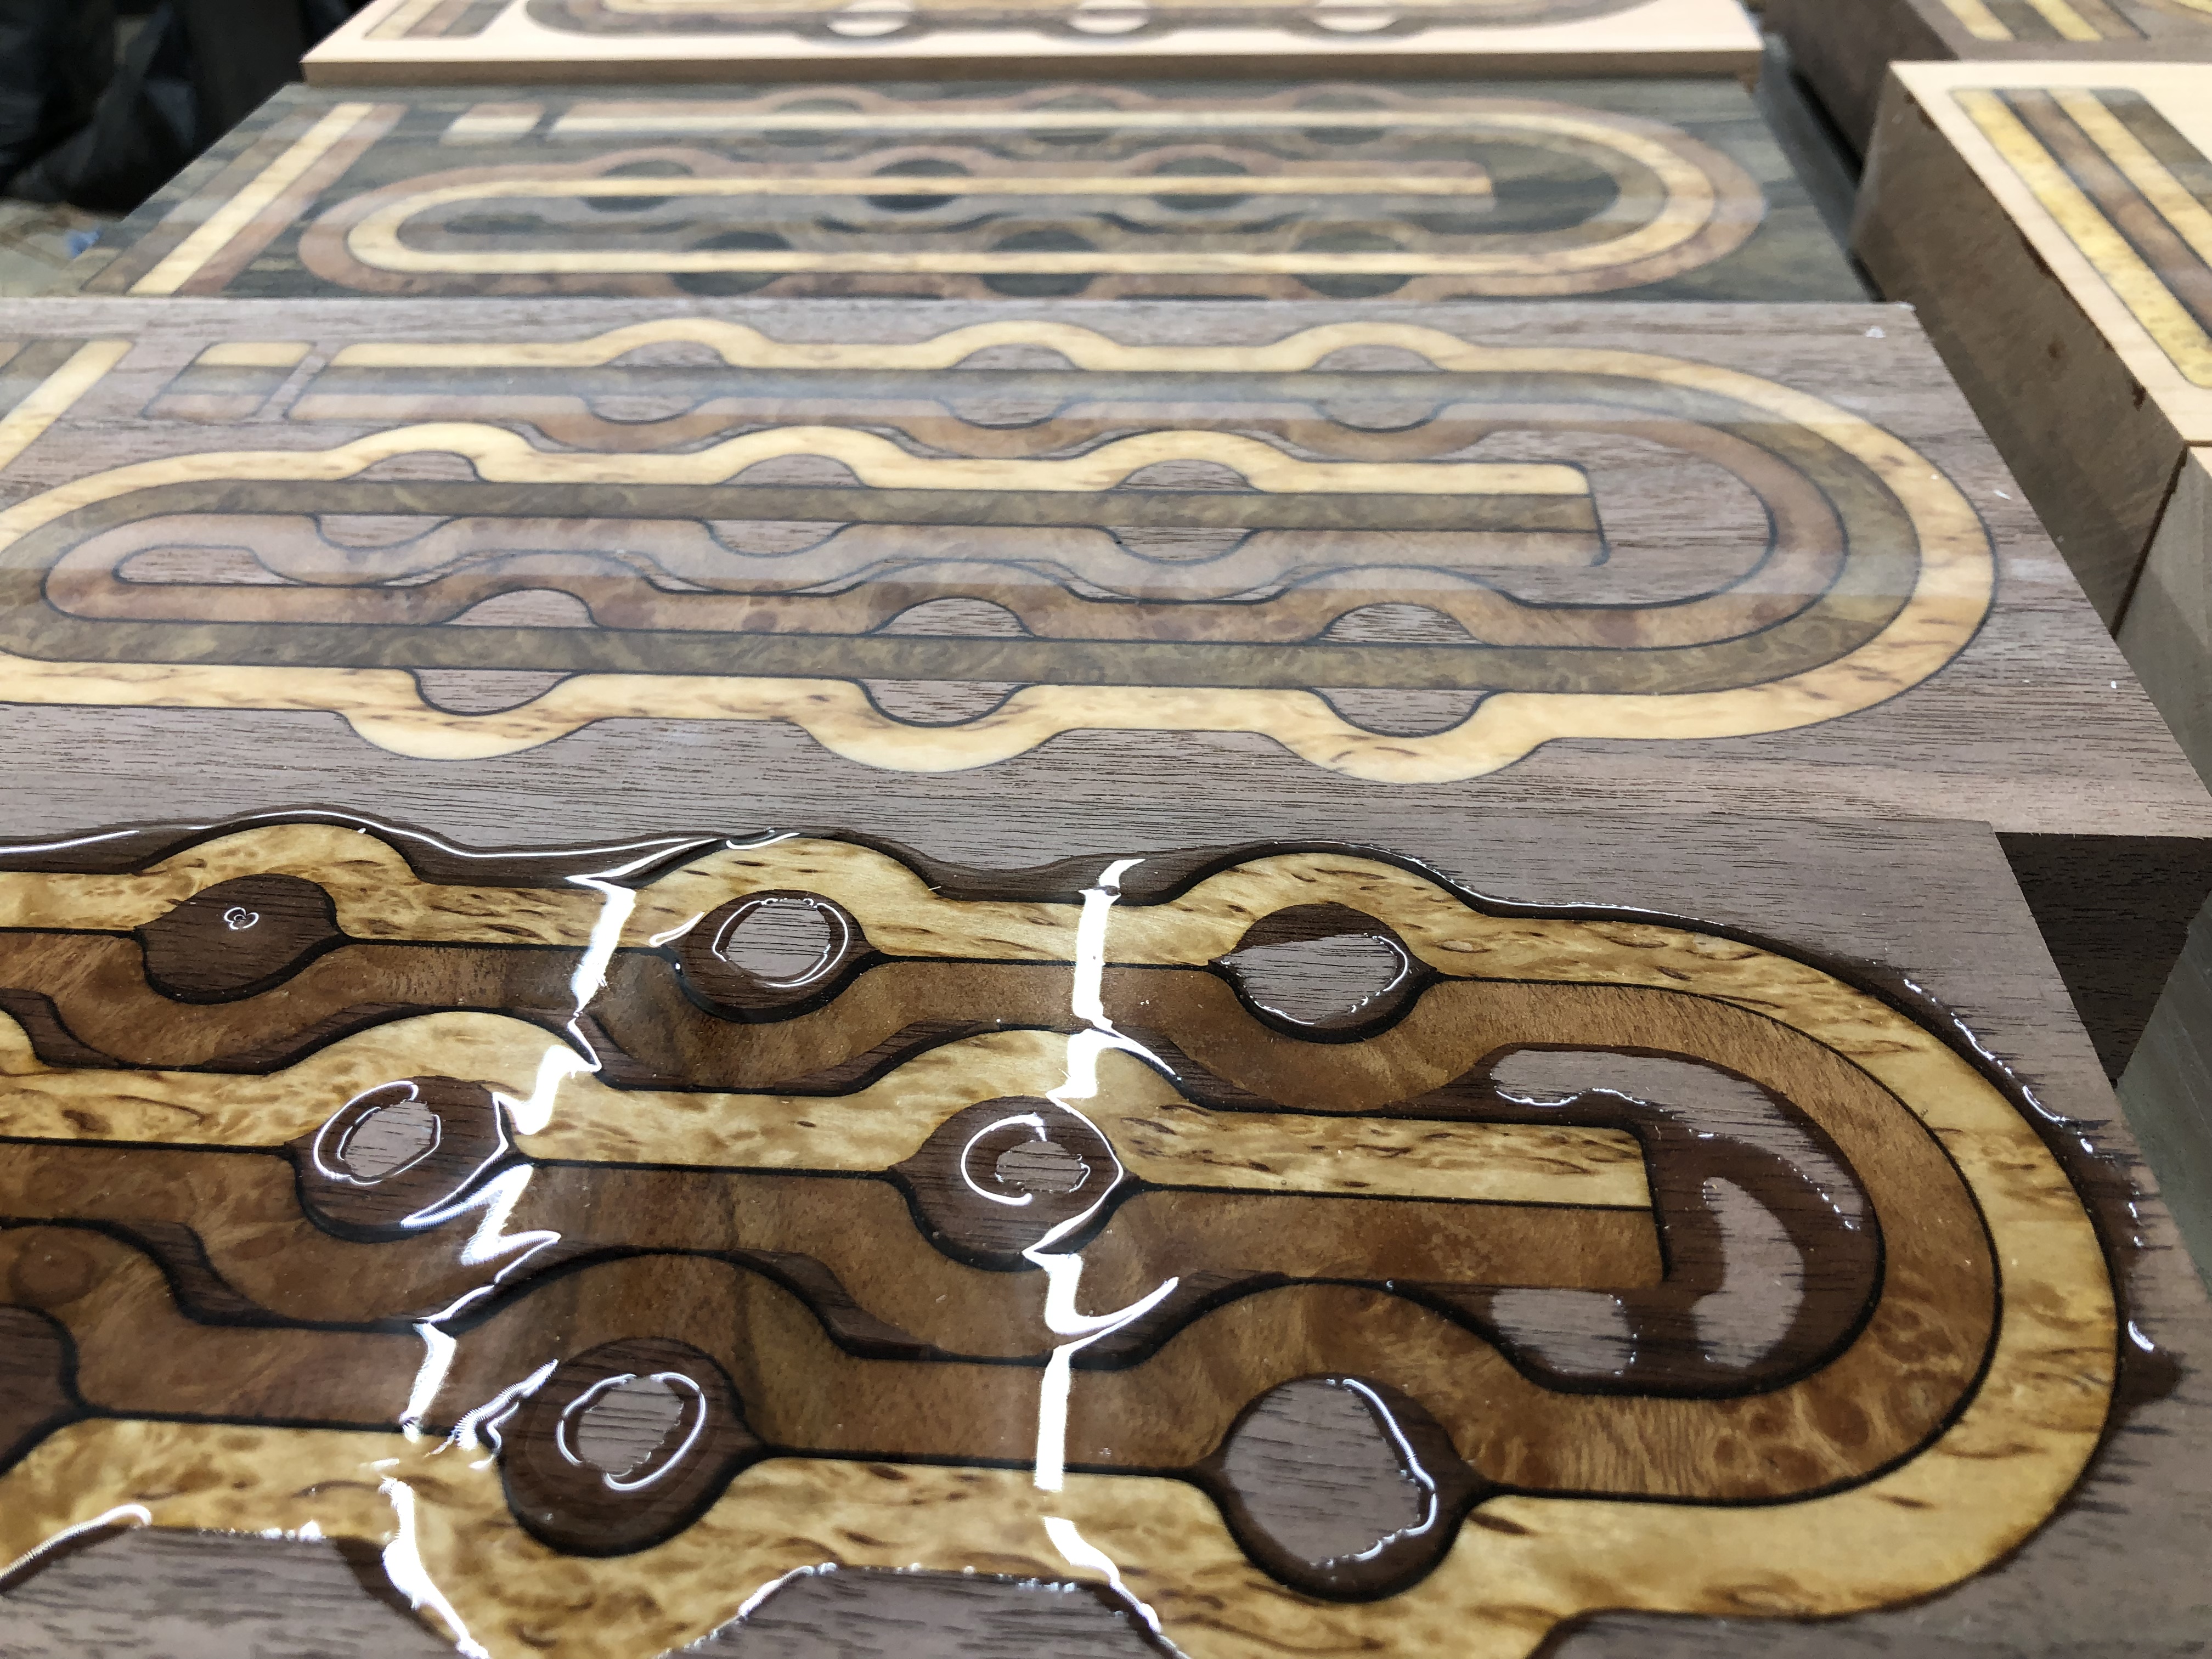
@DiscoJon for the bleed prevention, even though I put that top coat on, the lines that were cut can still bleed into the base, so I use sanding sealer for the machined area’s before I pour the black lines.
This process all might be to risk adverse, but this method has been the only way for me to get crisp lines without chipping and damaging the veneer.
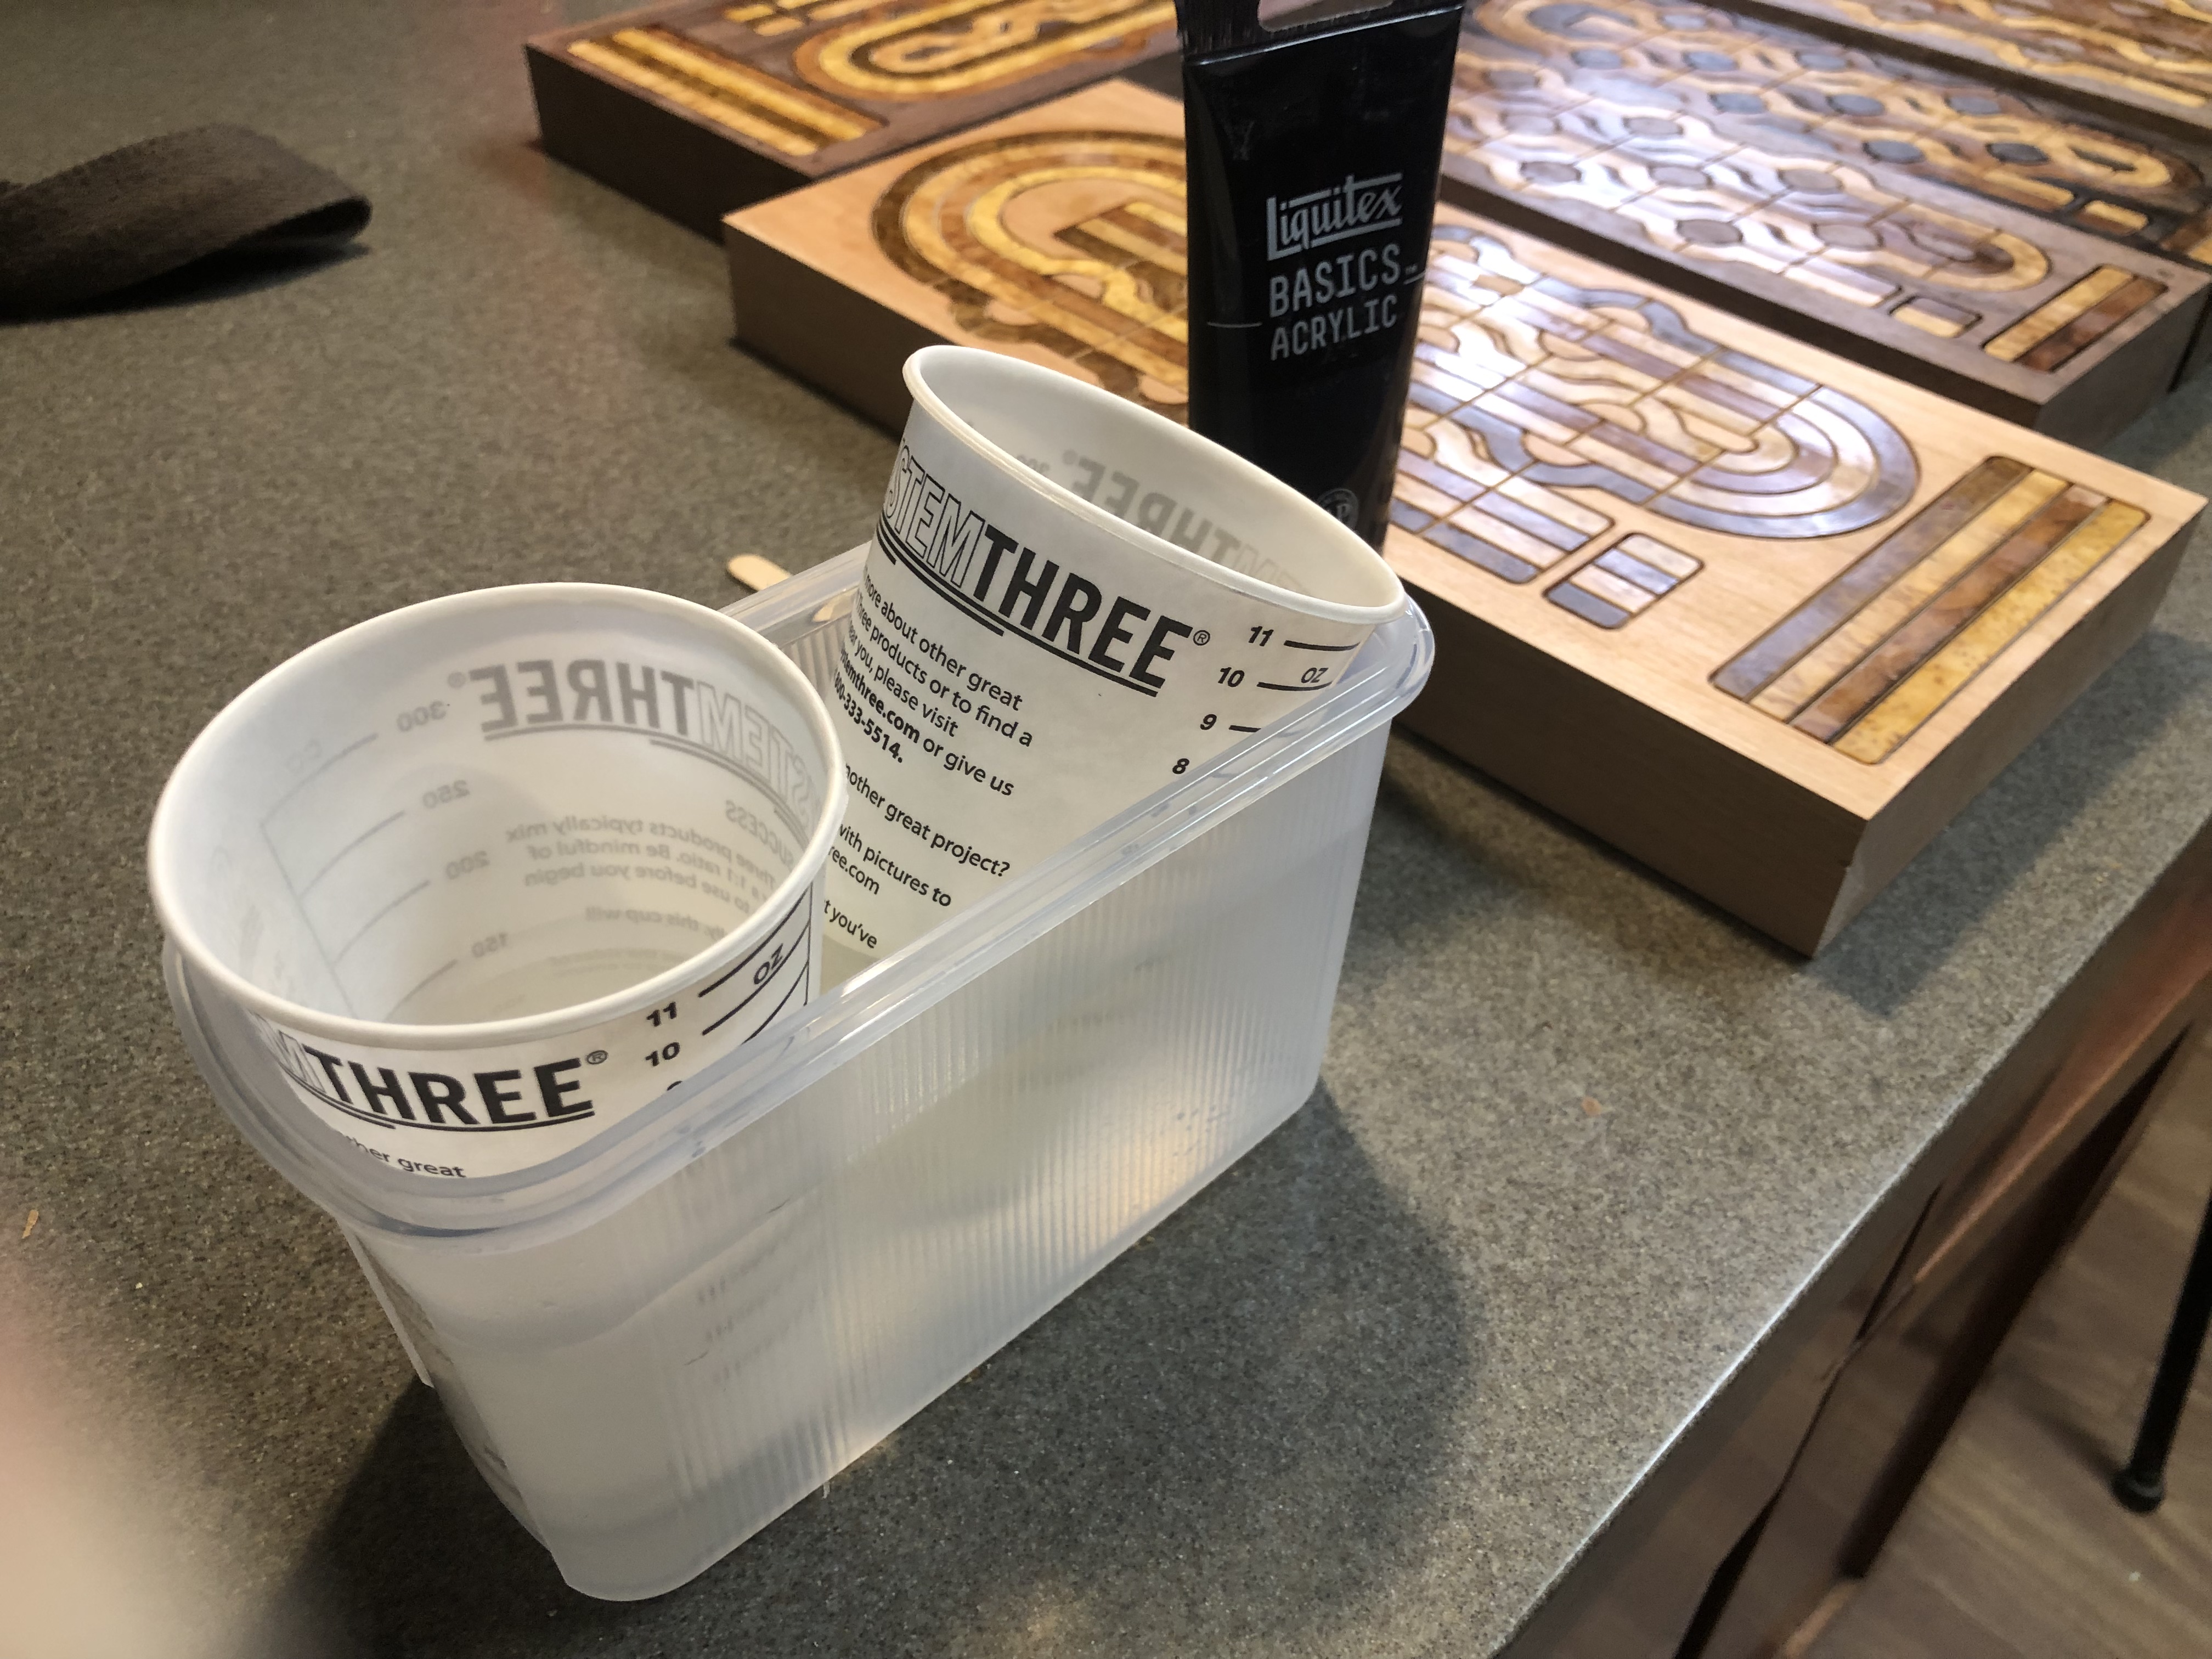
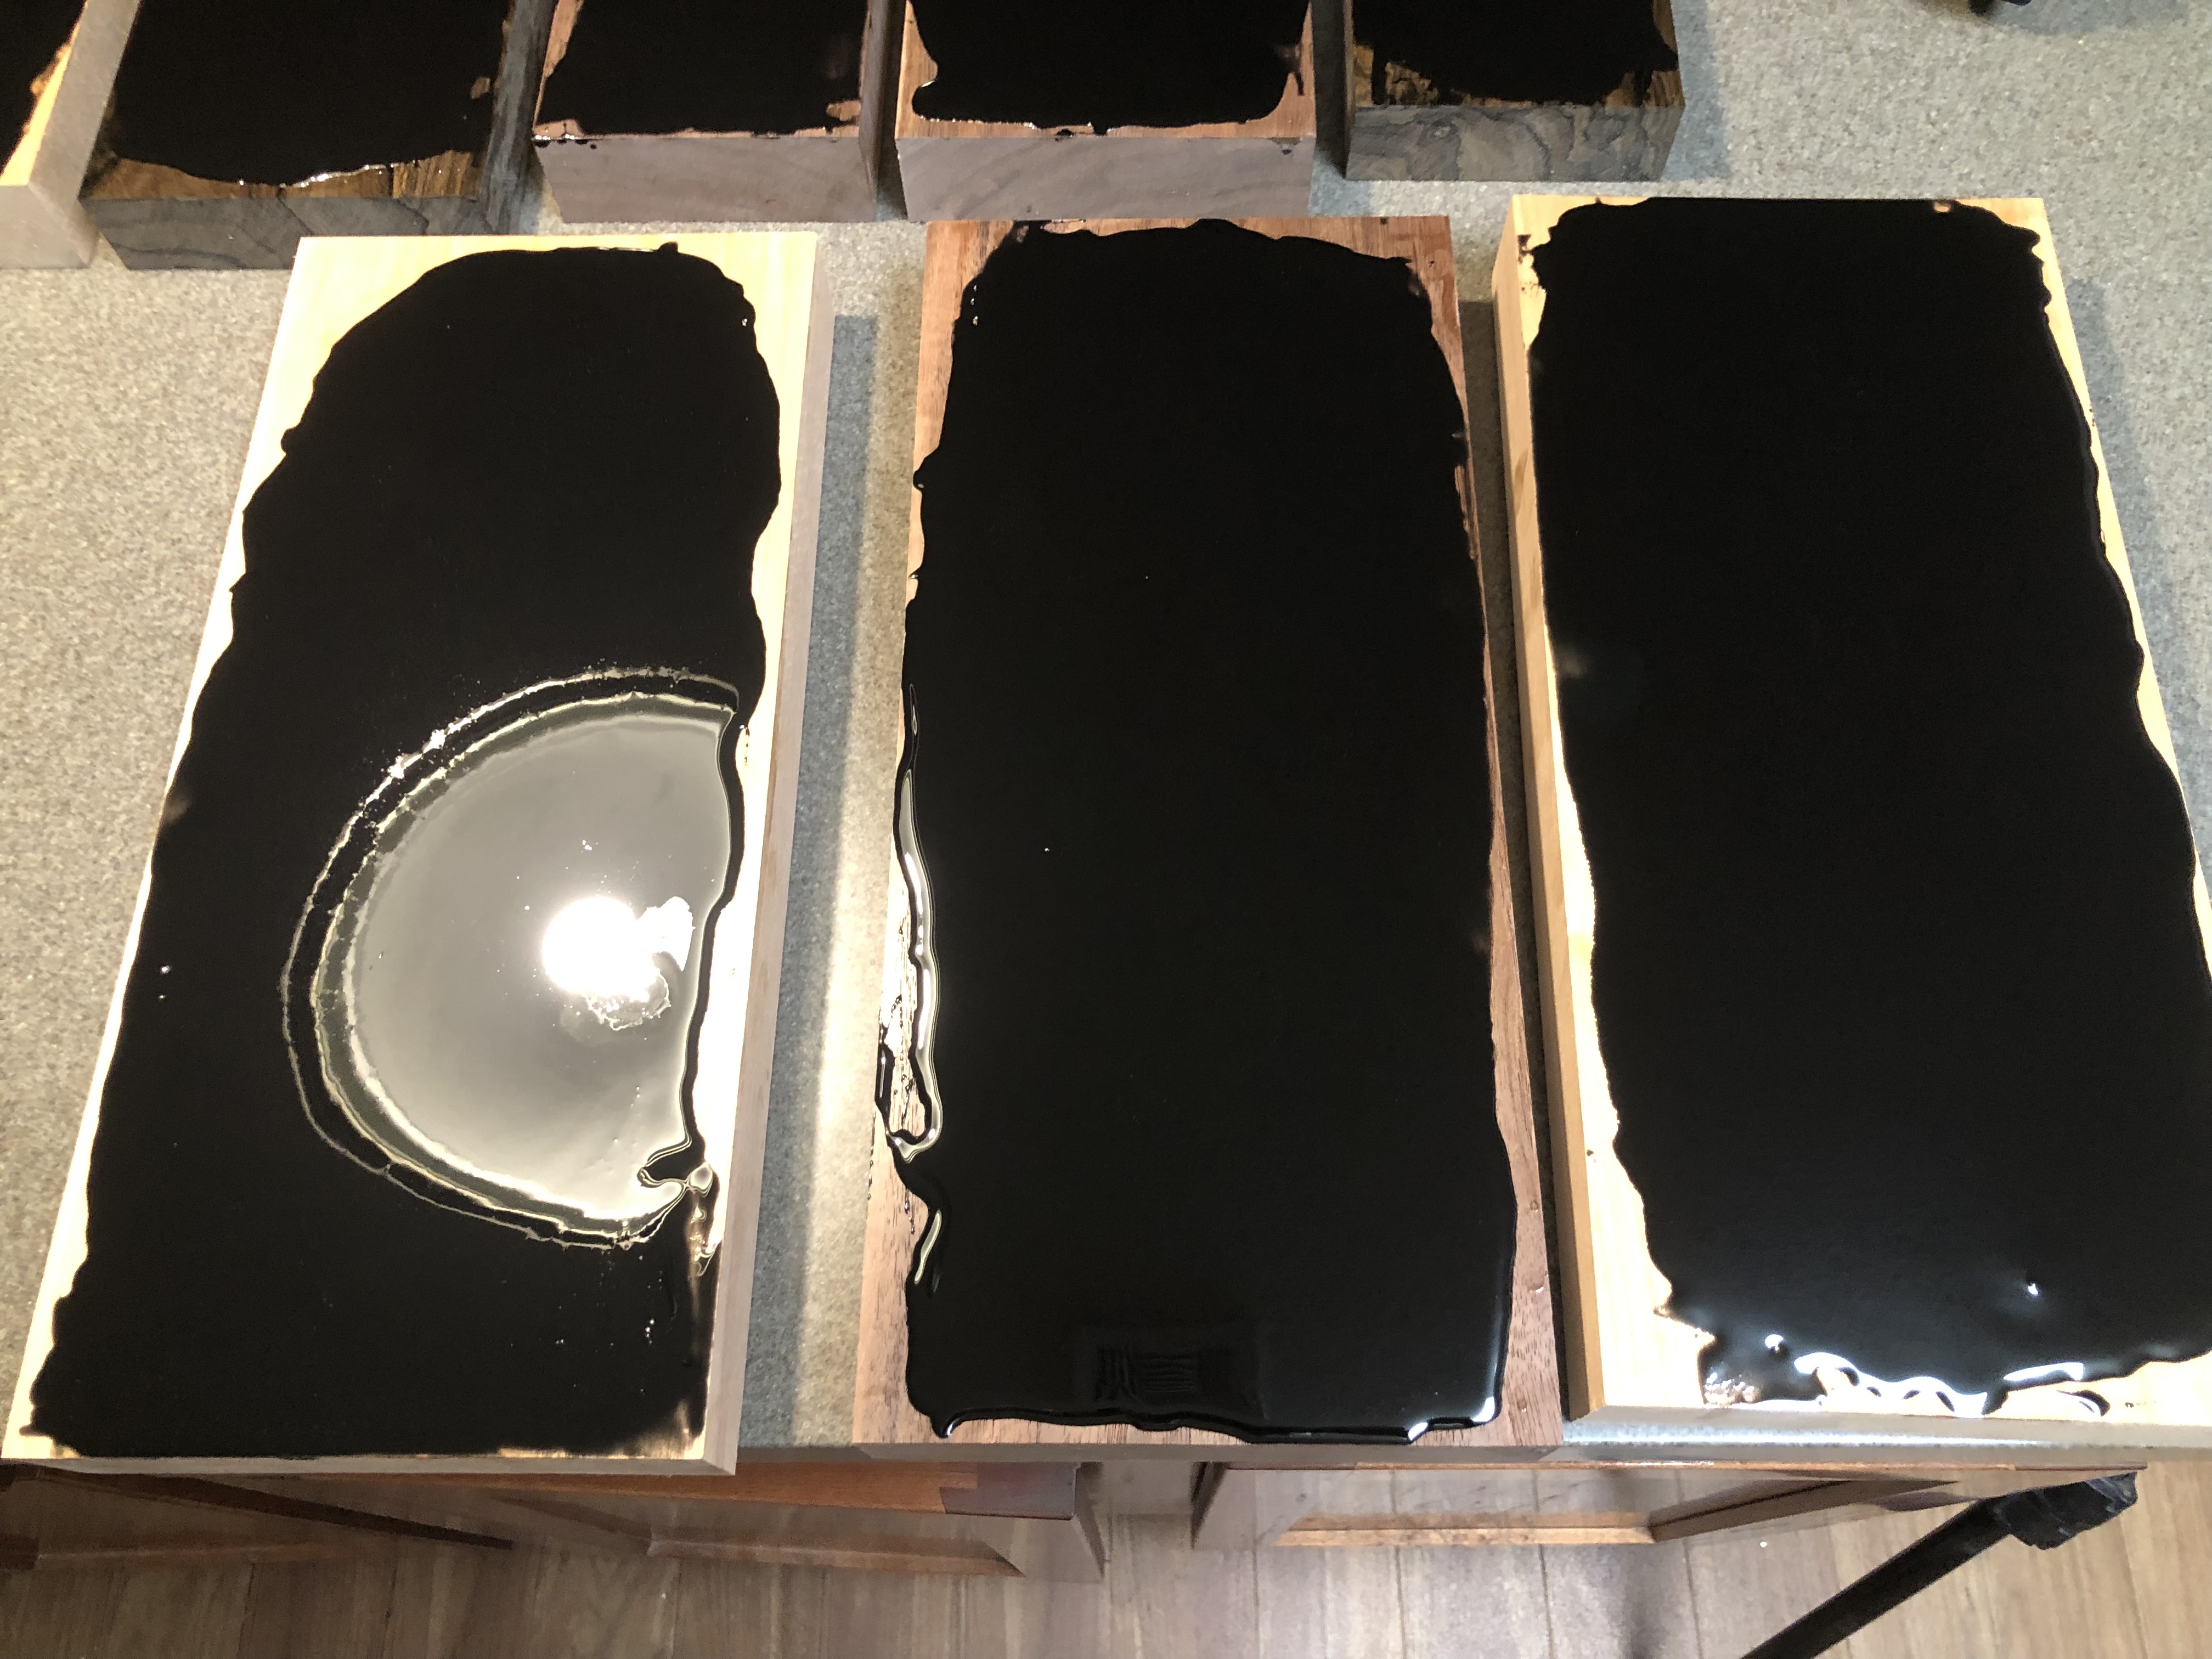
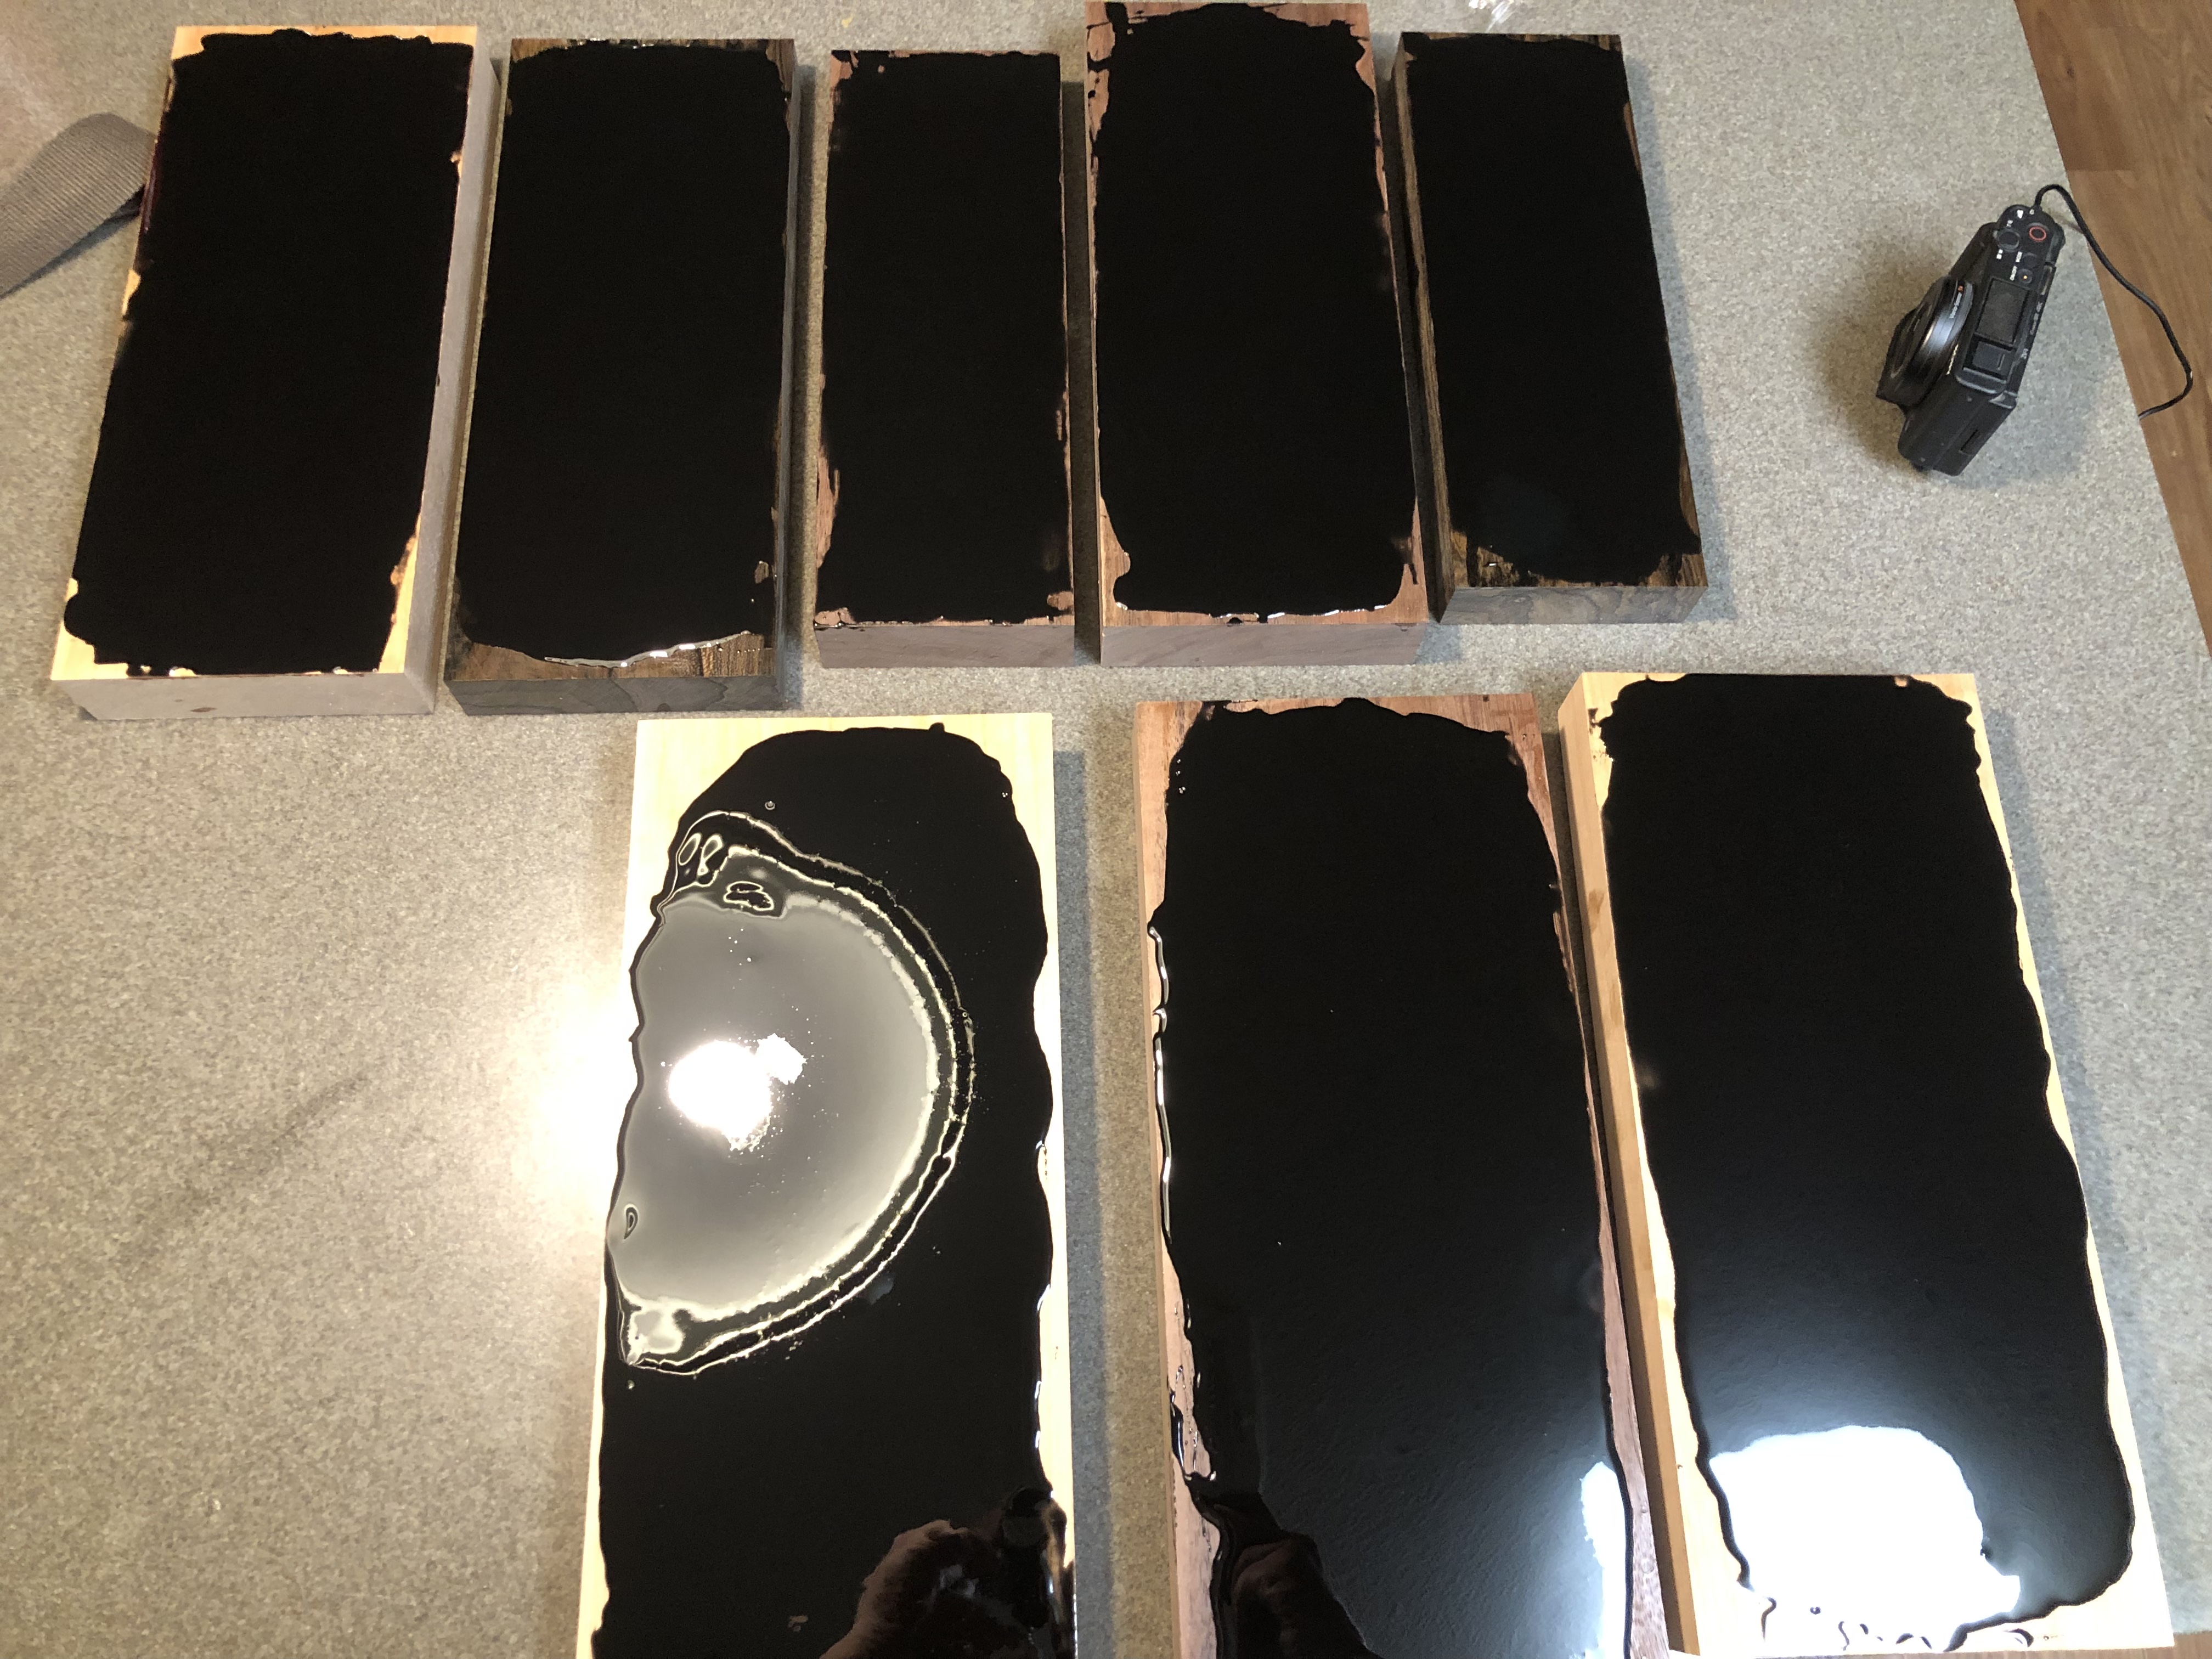
Poured the black lines. Had some problems with my epoxy, I used some old stuff that I wanted to use up. It was super thick which can cause air to get trapped in the pocket. I had a mess on my hands.
Before pouring, I used sanding sealer to seal the fresh cut, then warmed up the epoxy with warm water to help get rid of the bubbles and helps initiate the reaction…. and colored it with acrylic, 1-10 ratio.