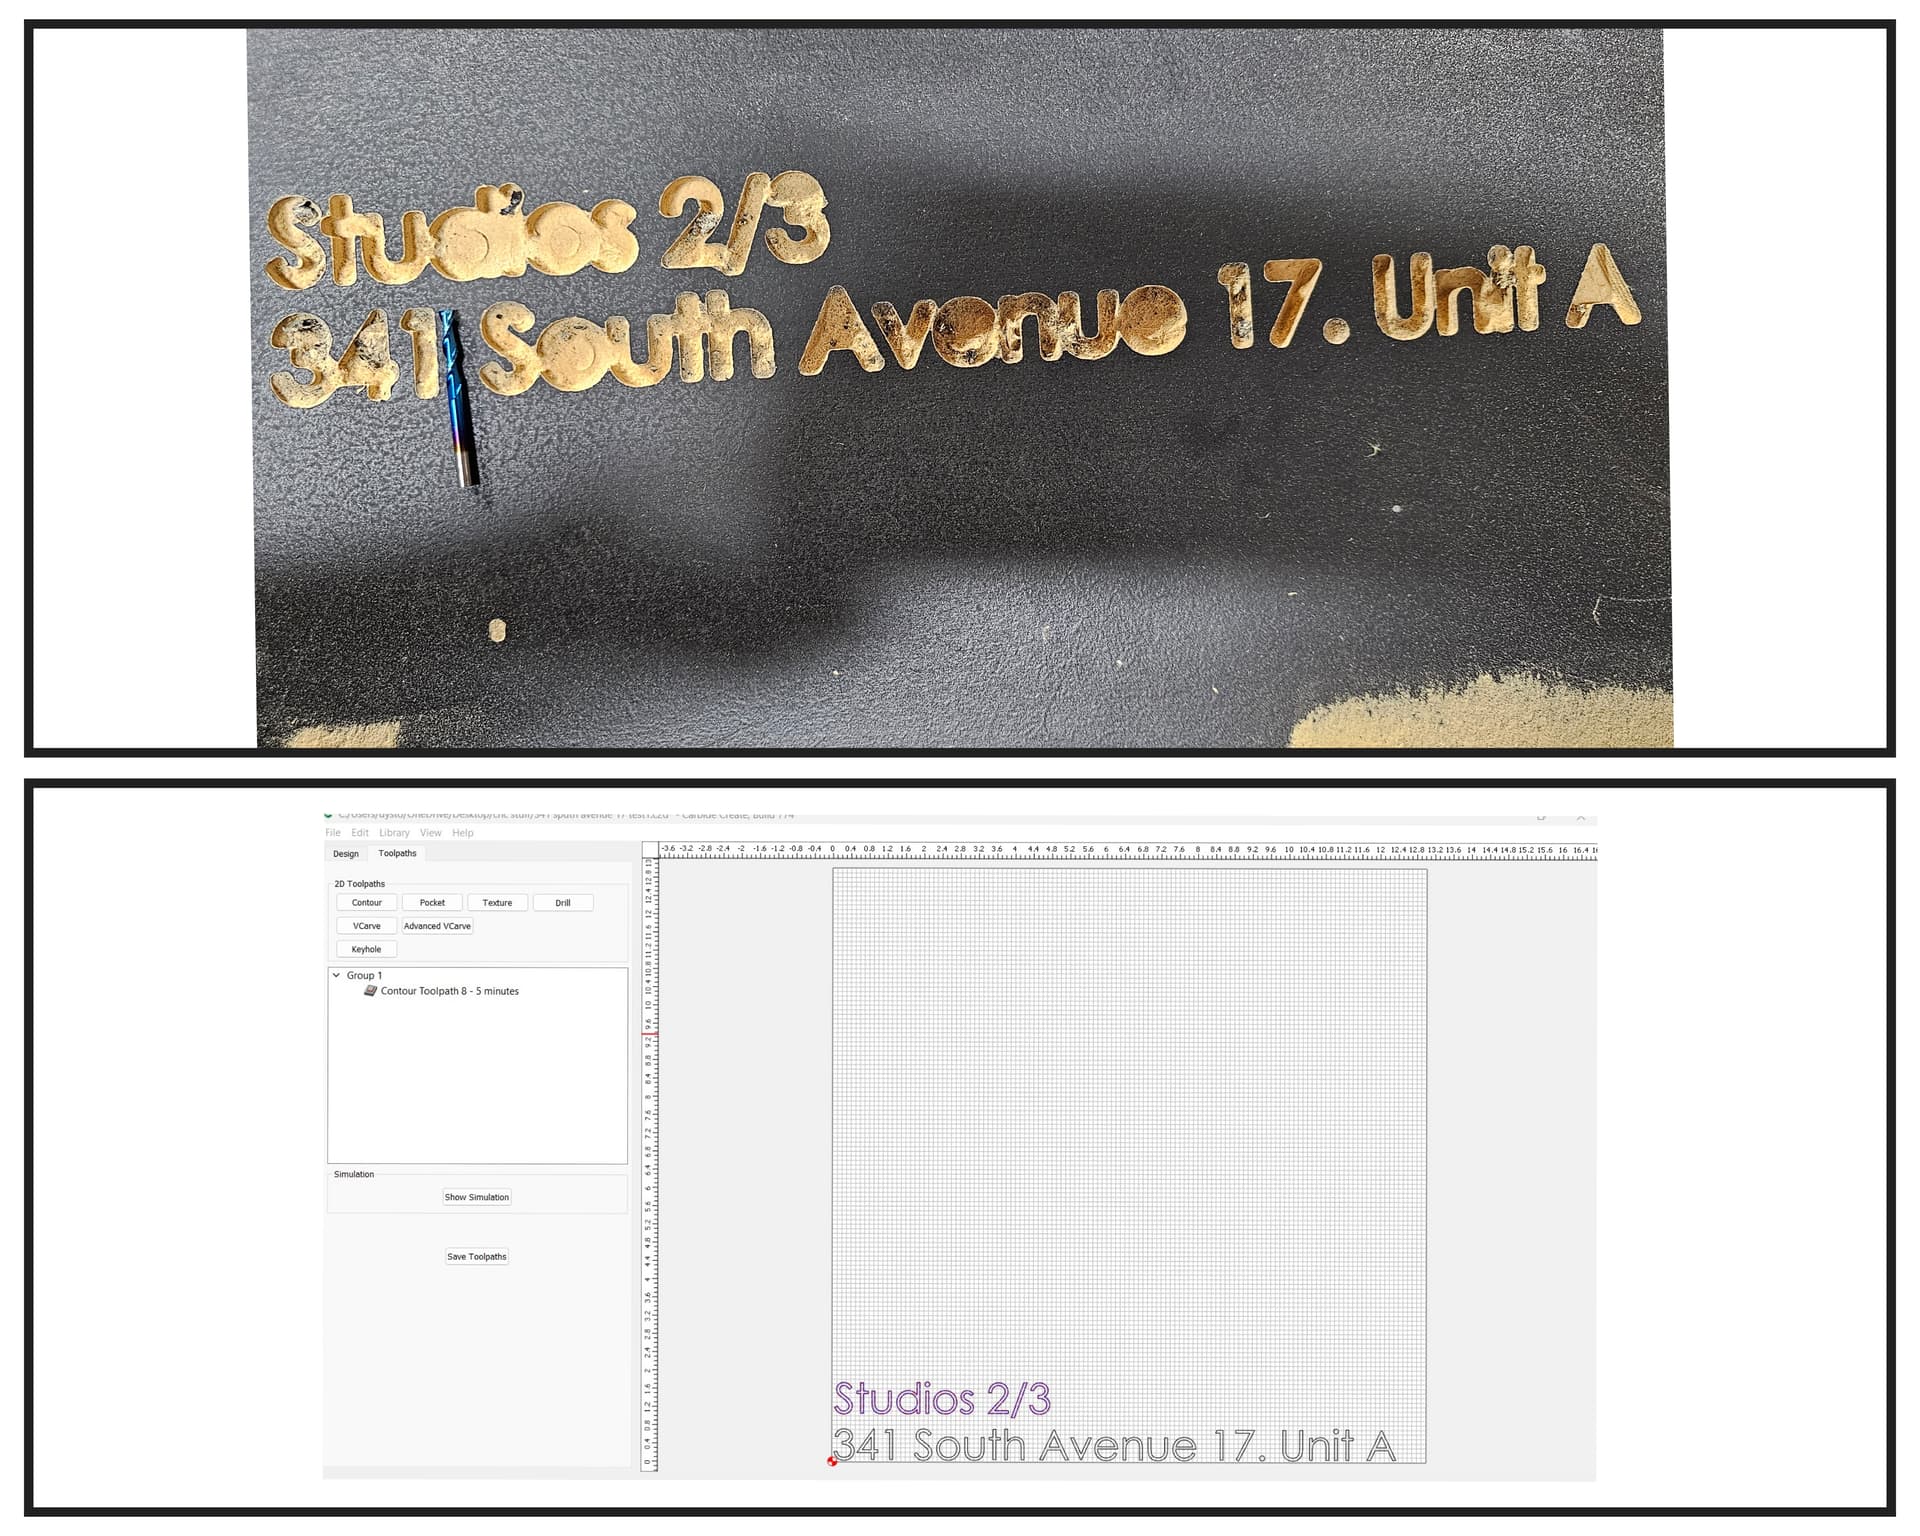
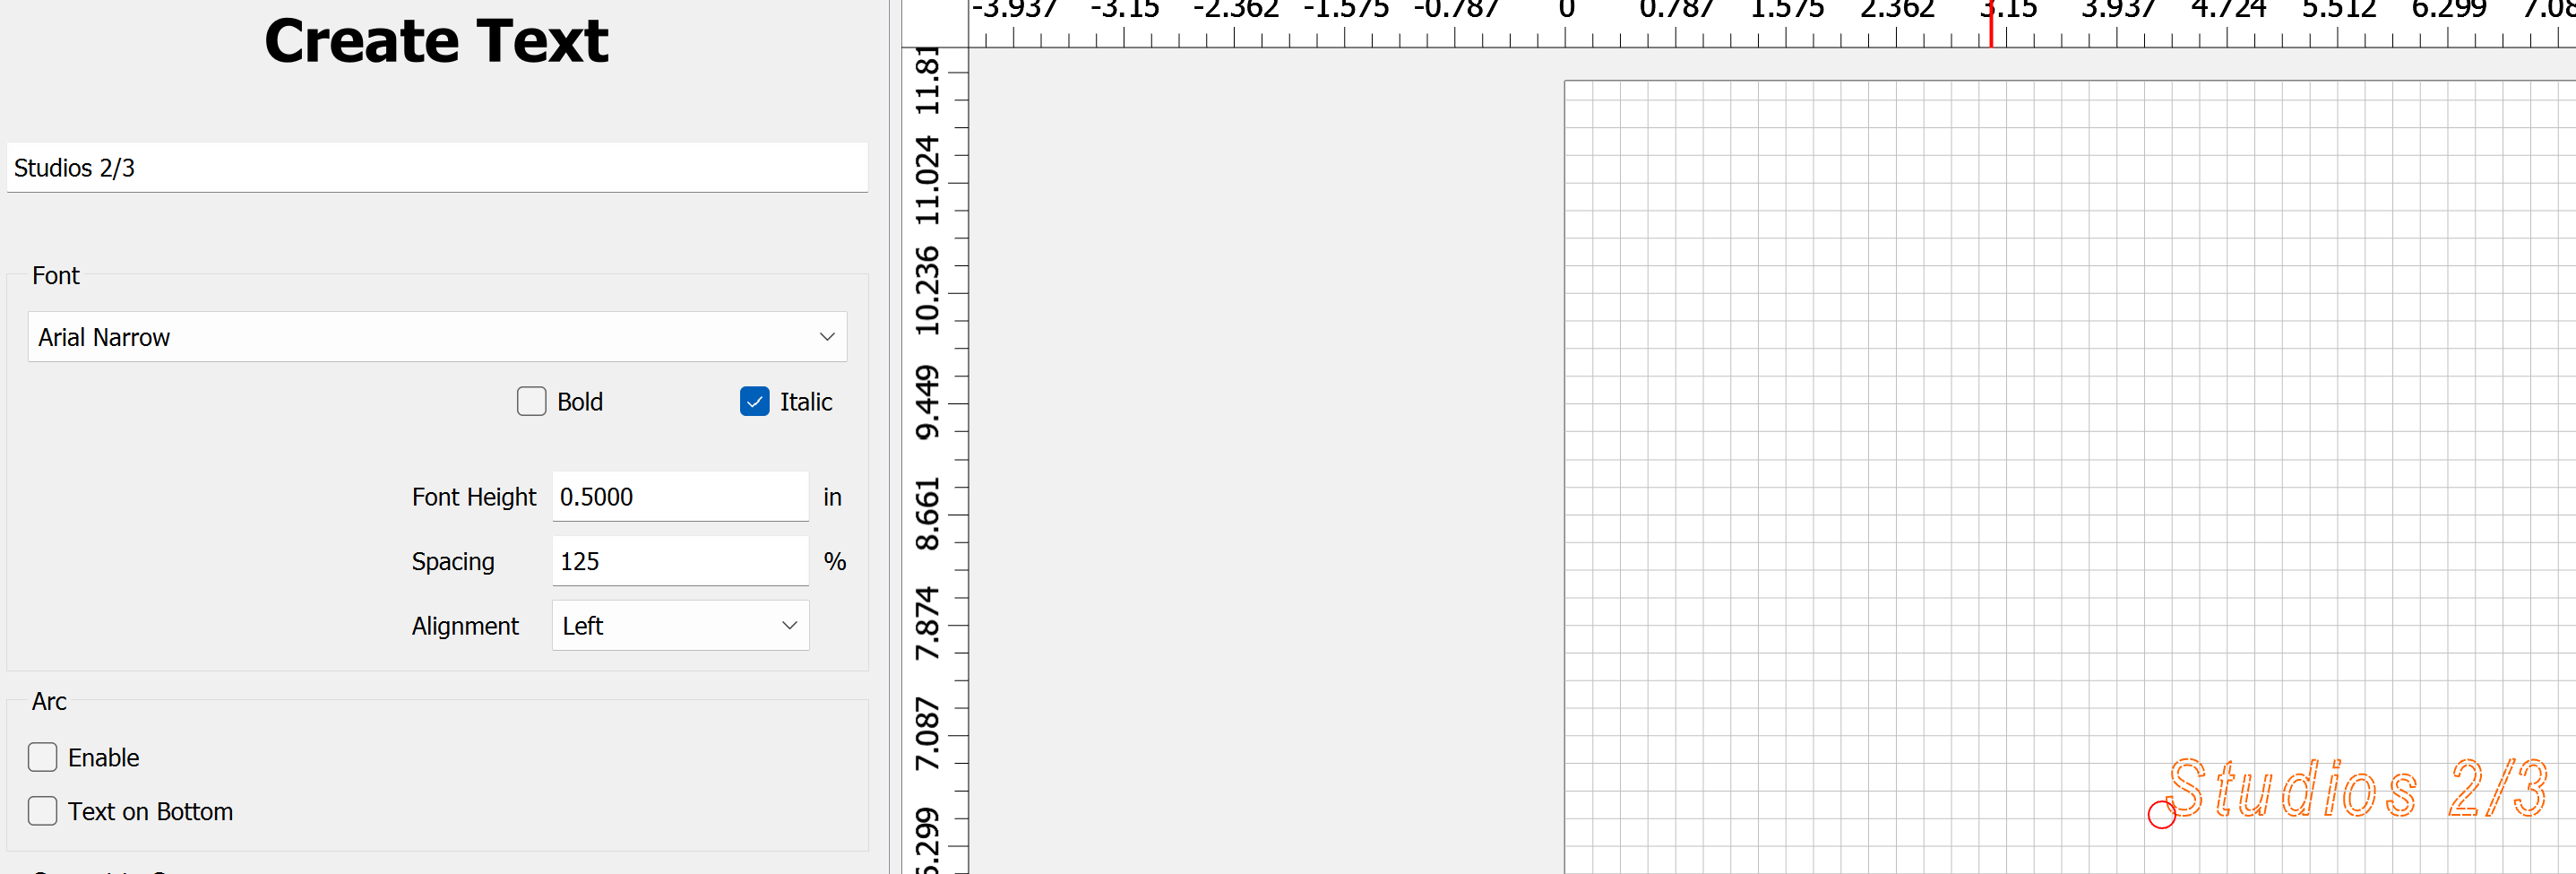
I’m pretty adept at pocket hole cutting boxes out of solid blocks of wood, but I decided to do my first letters for a sign…and it is not working. I want to cut out the text exactly as showing in Create. I’m trying to make then 1/4" deep in MDF. It would not let me create a pocket toolpath, so I used a contour. It looked fine in Create, but the finished result cut the letters twice as wide as the 1/8 endmill. So the letters run into each other, becoming a blobby mess. How can I cut out the letters so they look thin and crisp as they do in Create?
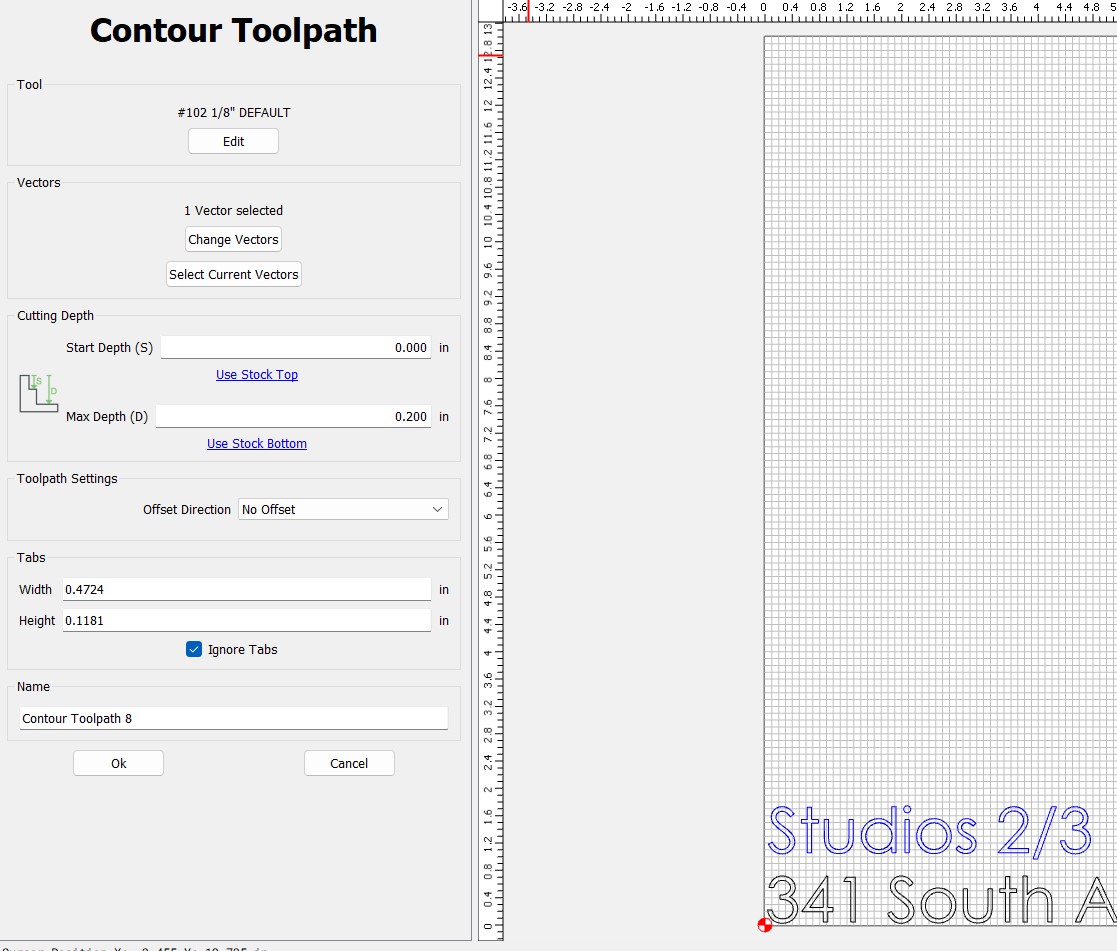
This is the settings for the toolpath. I don’t use contour toolpaths with my usual work, only pockets. I also tried a V-Carve with the 1/8, bit didn’t work either.
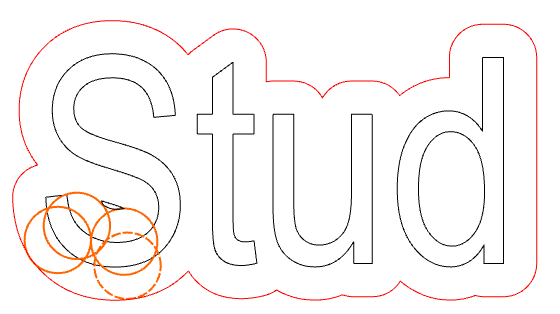
Try offset inside. If it’s following the lines (can’t tell without the file) as in no offset, the bit will just trace the lines centered on them. Offset to the inside and they’ll probably do what you want. EXCEPT for letters that have interior lines (think inside a lower case a or e - the little cutout would also do an inside offset and likely remove it altogether. You could select the outside lines and do an interior contour, then select the interior bits and do an outside contour - as long as the removed bits are as wide as, or wider than, your bit.
The easiest way is to try an advanced v-carve so you can set your depth. It looks pretty good with the 60 degree v-bit, or you can get a smaller v-bit to make the sides less sloped. I use a 20 degree v for some inlays with fine details. CC does the math but if you’re set on depth, that’s the easiest.
Thank you, I tried doing a inside offset, but it came out as “empty.” I was hoping I could just do this with a 1/8 #102 without buying a new endmill, but maybe that won’t be possible. I’m trying a few different fonts, but the results all seem the same.
See:
You’re cutting letters that are less than 0.1" wide with a 0.125 cutter. And you’re using “No Offset” which means you’re adding another 0.0625" to each side.
Go with a 1/16" cutter (or 2mm) and cut Inside/Left. Or use a Vee-bit as Dave suggested.
I actually had to go with a 1/32" cutter

Or a vee bit

1 Like
You should check the simulation. It will almost certainly look as ‘blobby’ as the real-world product.
When you create text you may need to space out the letters more. Not sure about your material but looks like plywood and that is tiny layers that can be chipped off. Spreading out your text will give you more meat between the letters.
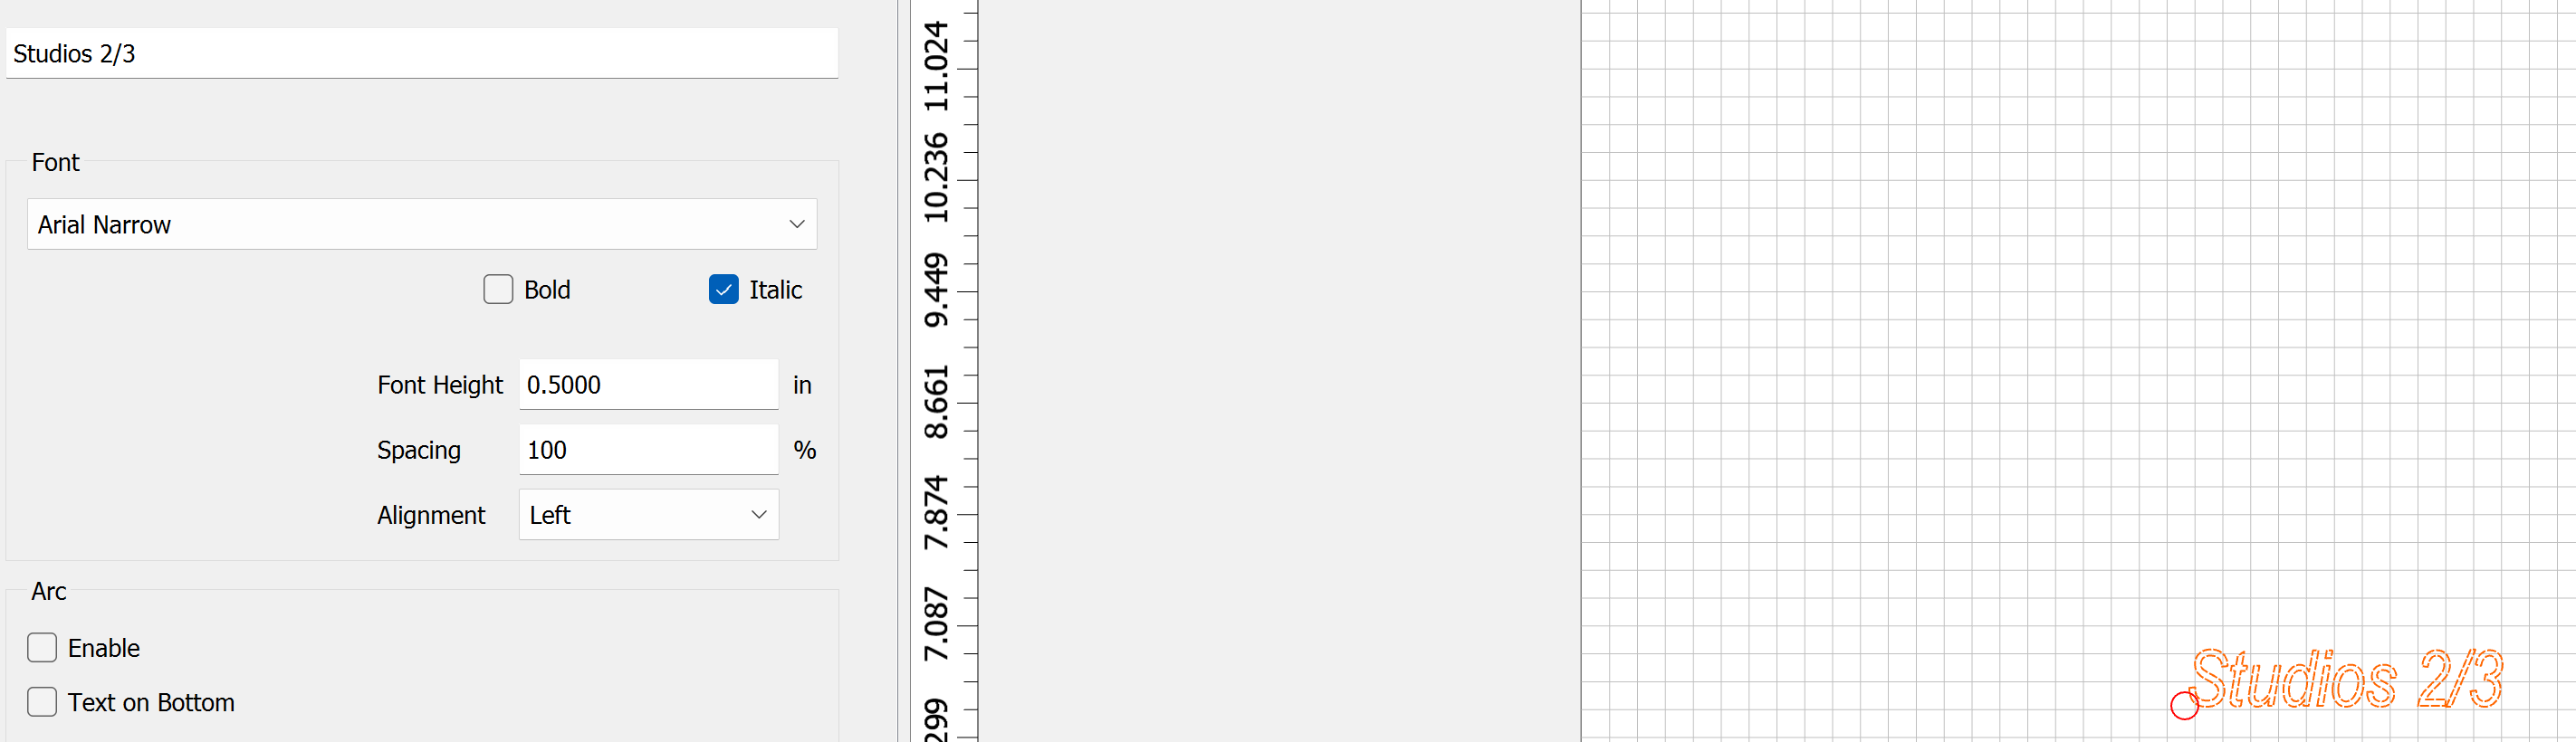
In CC under create text it is “spacing” it is also called kerning.
This topic was automatically closed 30 days after the last reply. New replies are no longer allowed.