I am trying to cut a ramped area in a tray without success. I have tried to program the ramp in 3D - did not work. And I have tried to elevate the tray on one end so that a straight cutting toolpath ends up cutting a ramp. This sort of worked, but I cannot get a smooth transition from the ramp to the flat surface.
Any ideas from you more experienced woodworkers?
Thanks
Steak plate 4.c2d (304 KB)
Here is a link to the file I am working on. I am trying to have the juice tray ramp down from the restaurant name area which is flat and the flat area ramps down to the bottom of the plate to .25" depth. shallow ramp from flat to 1/4" deep.
Hopefully that makes sense.
David
What machine? What tools will you use? Do you have a drawing, sketch with dimensions, or a c2d file?
Are you using CC, or CC Pro?
Please see:
If you’ll post the file you are working on and the specifics of the difficulty we will try to walk through this with you.
It is a Shapeoko 5 pro
I attached the c2d file above
Thanks
I have the Carbide create Pro version
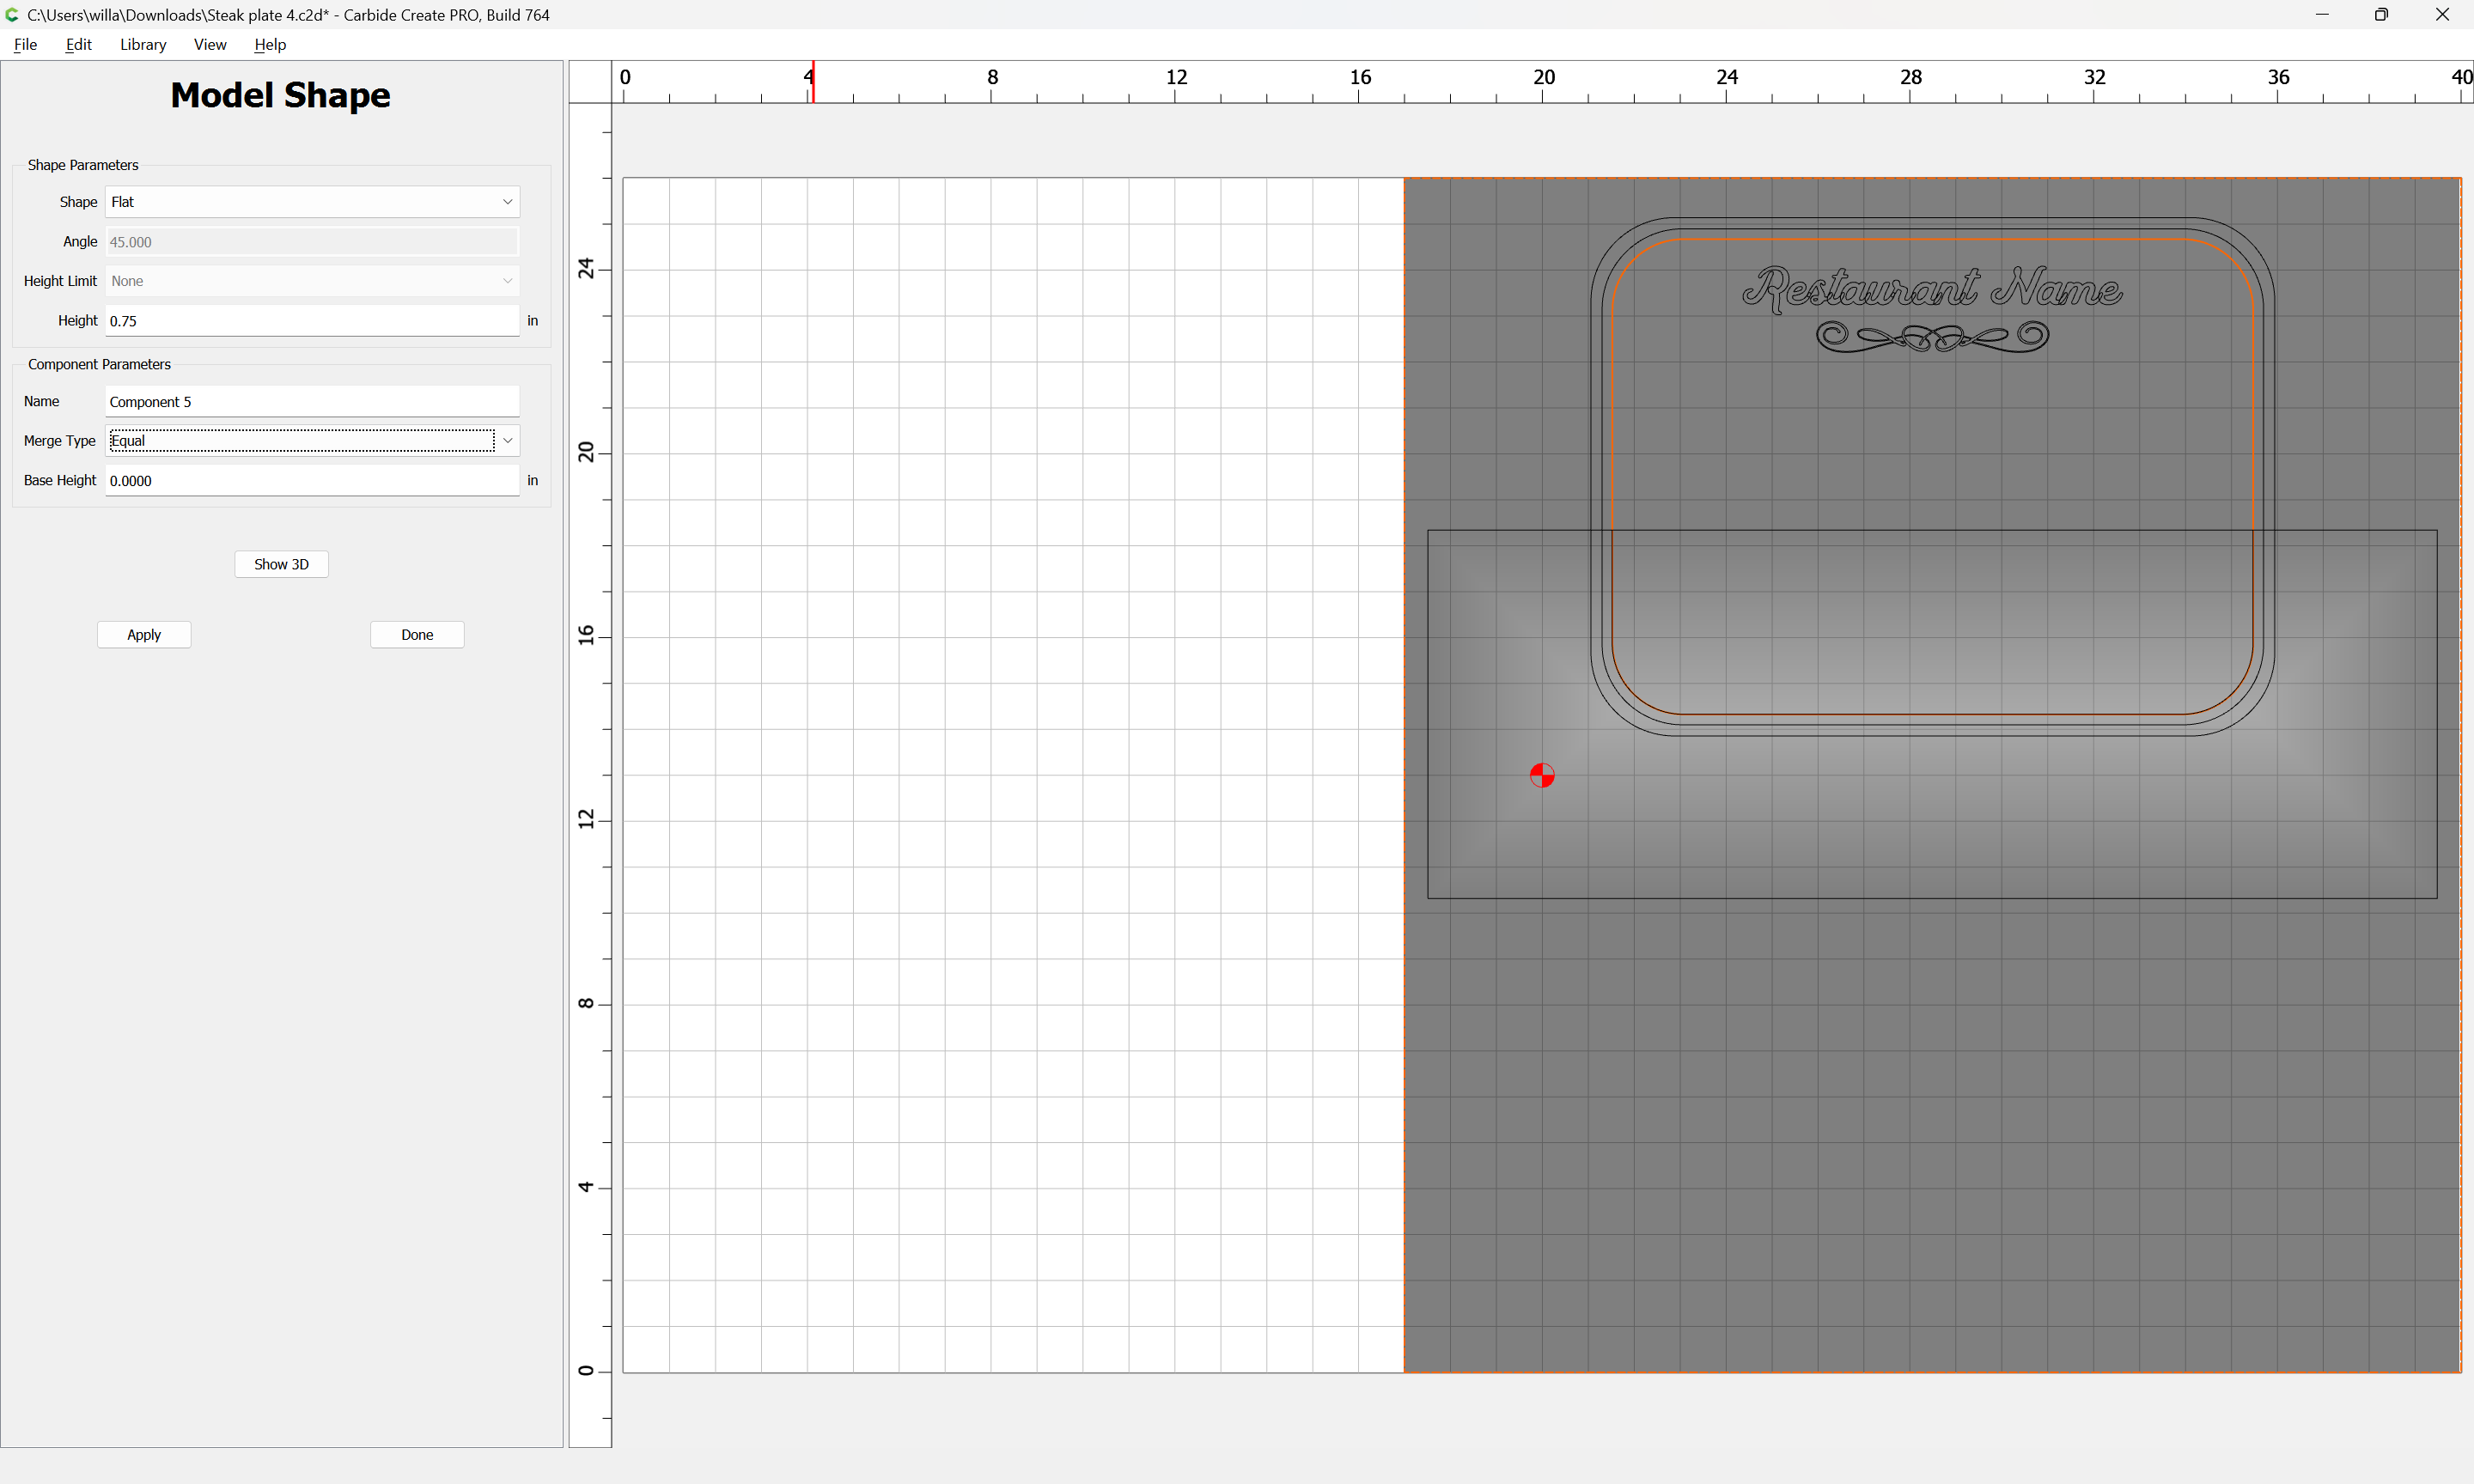
You will need a larger stock area to make this model:
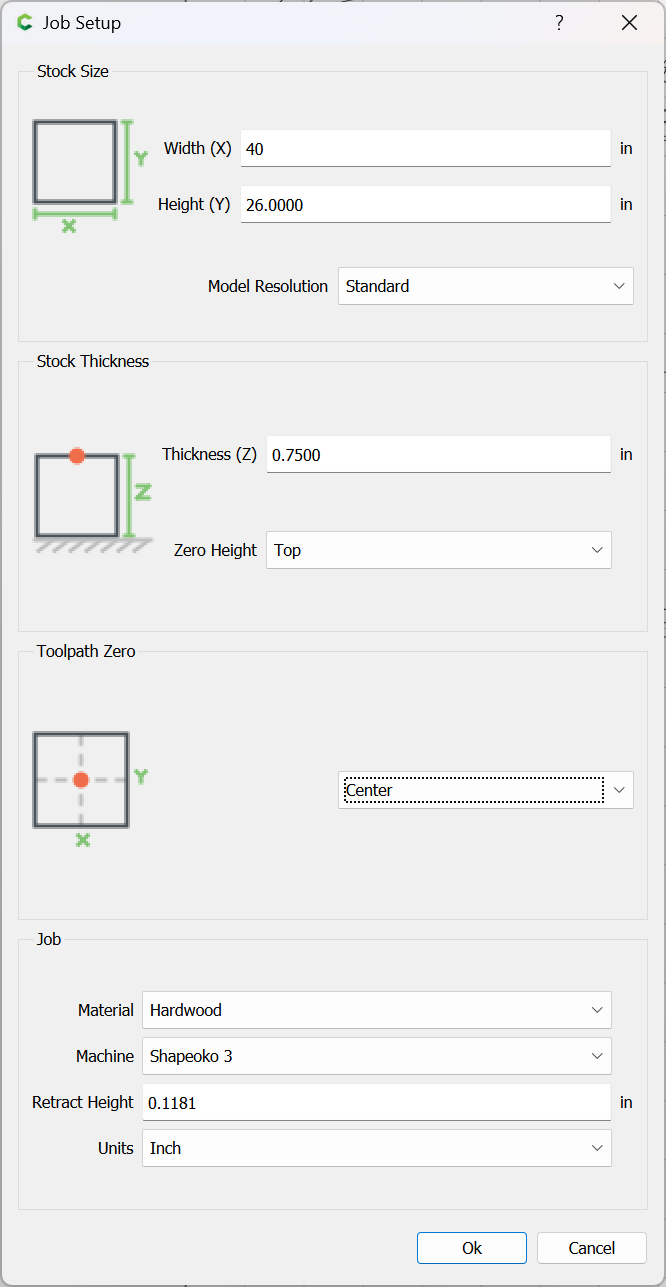
Model the stock (and a bit more)
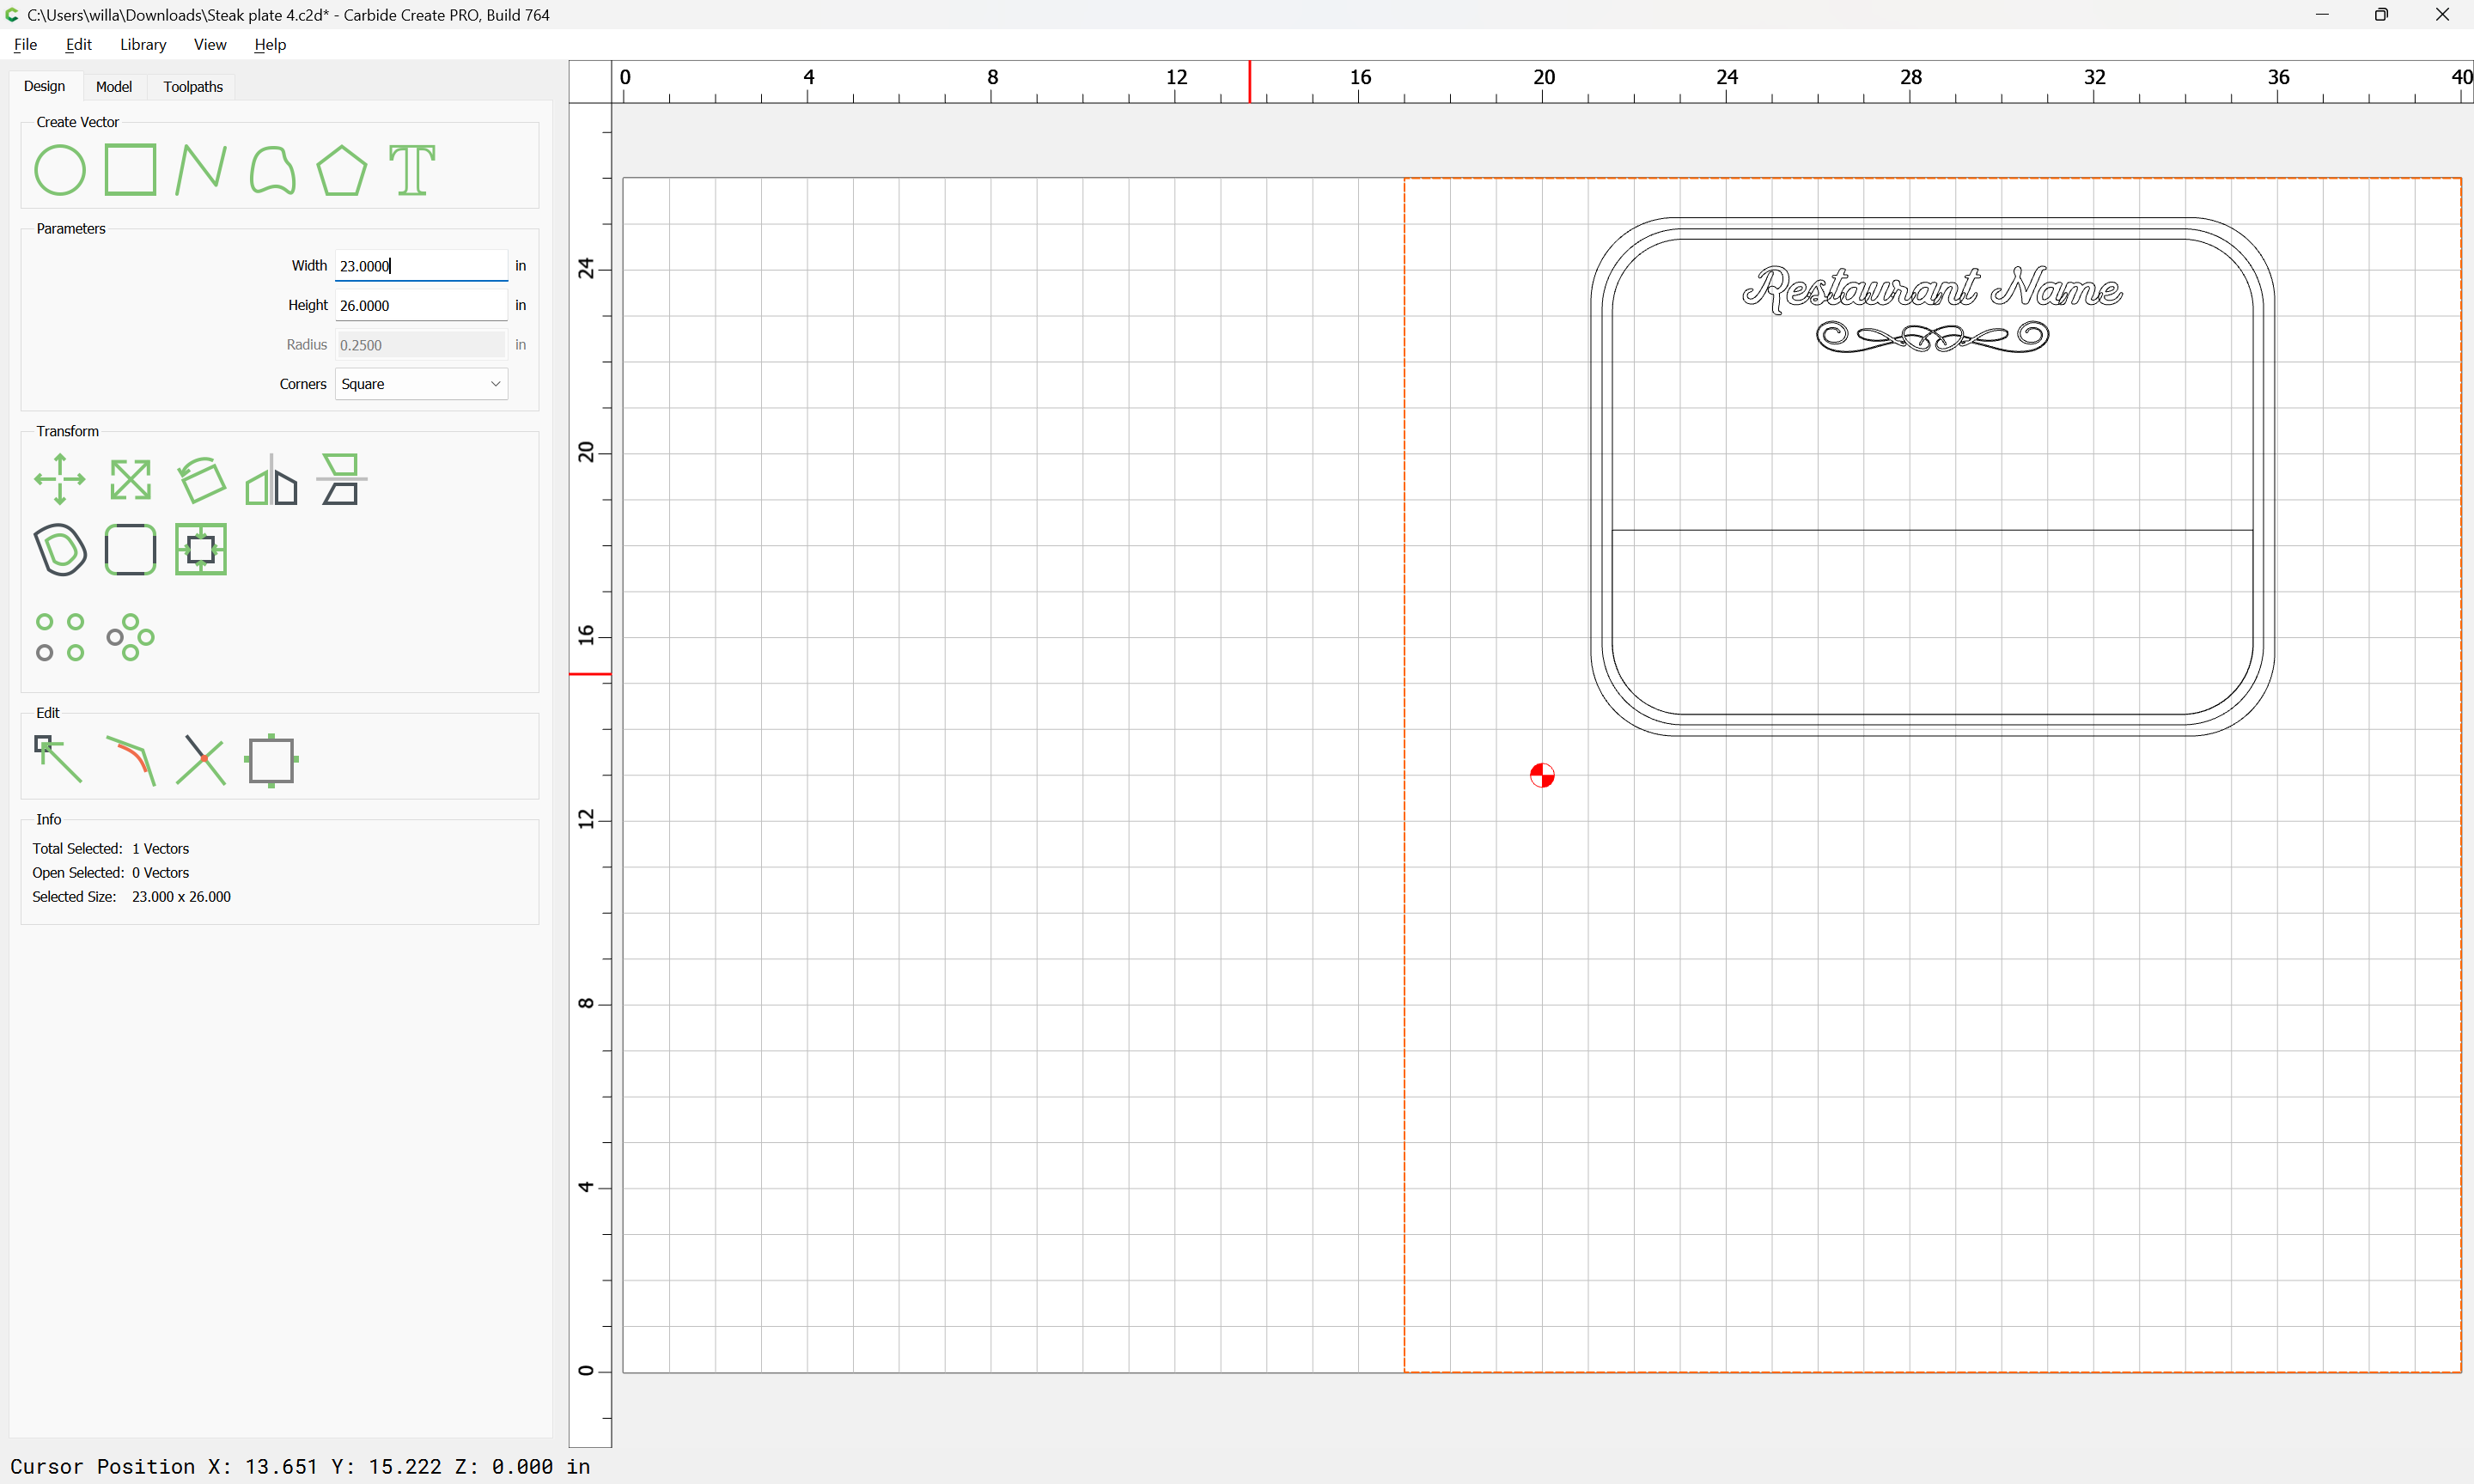
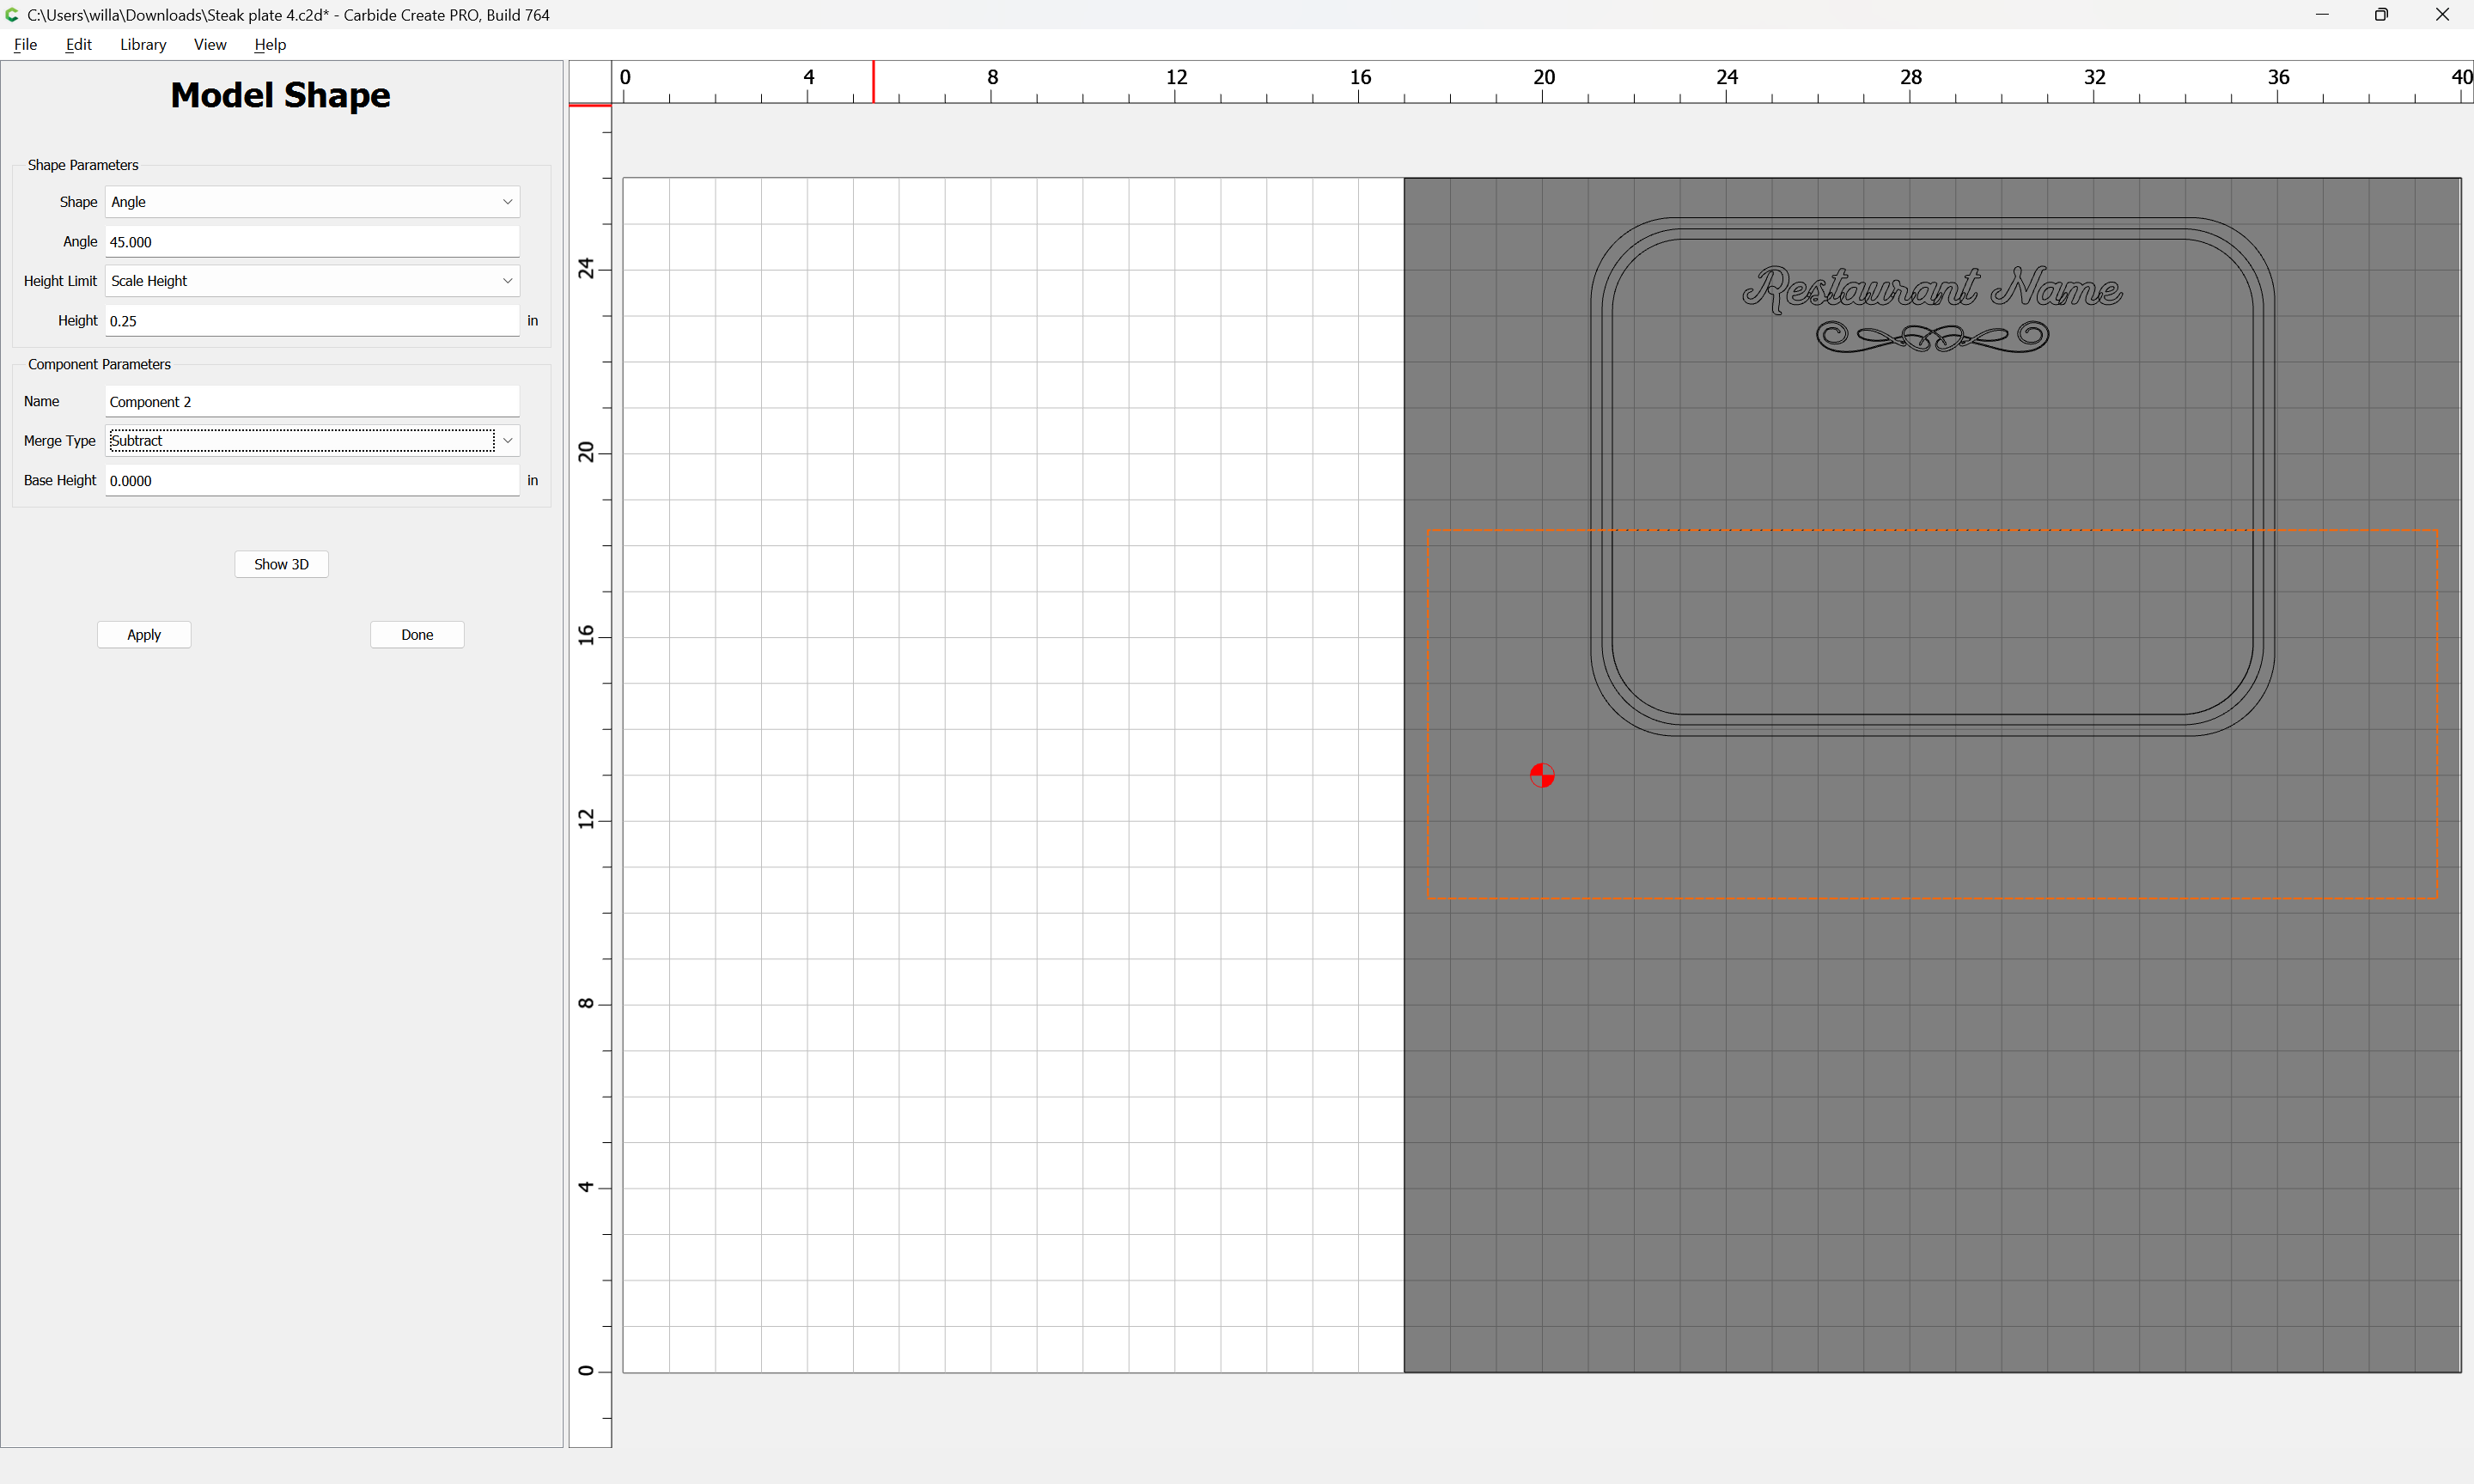
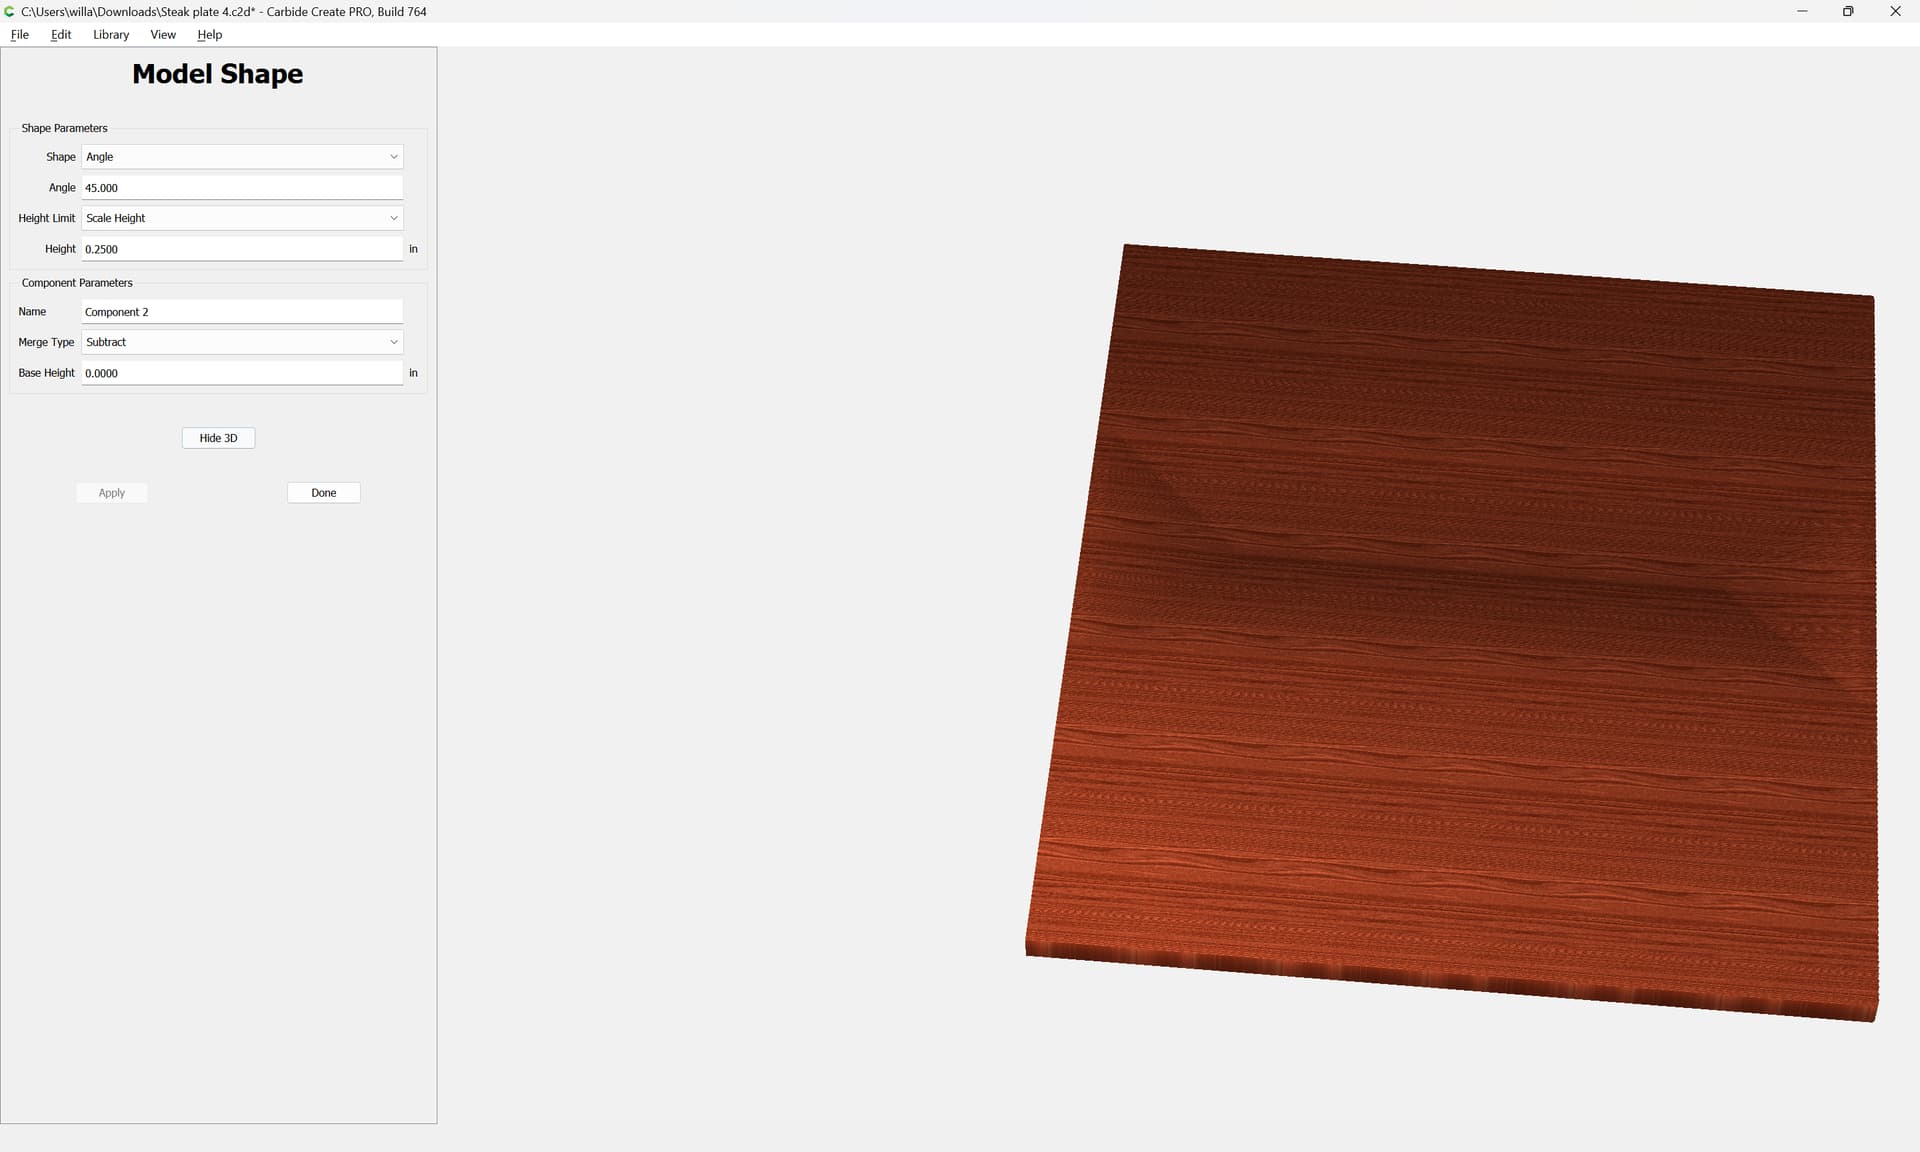
Make geometry which is sized and placed so as to model the desired angle:

Set the parameters to remove the desired angled thickness:
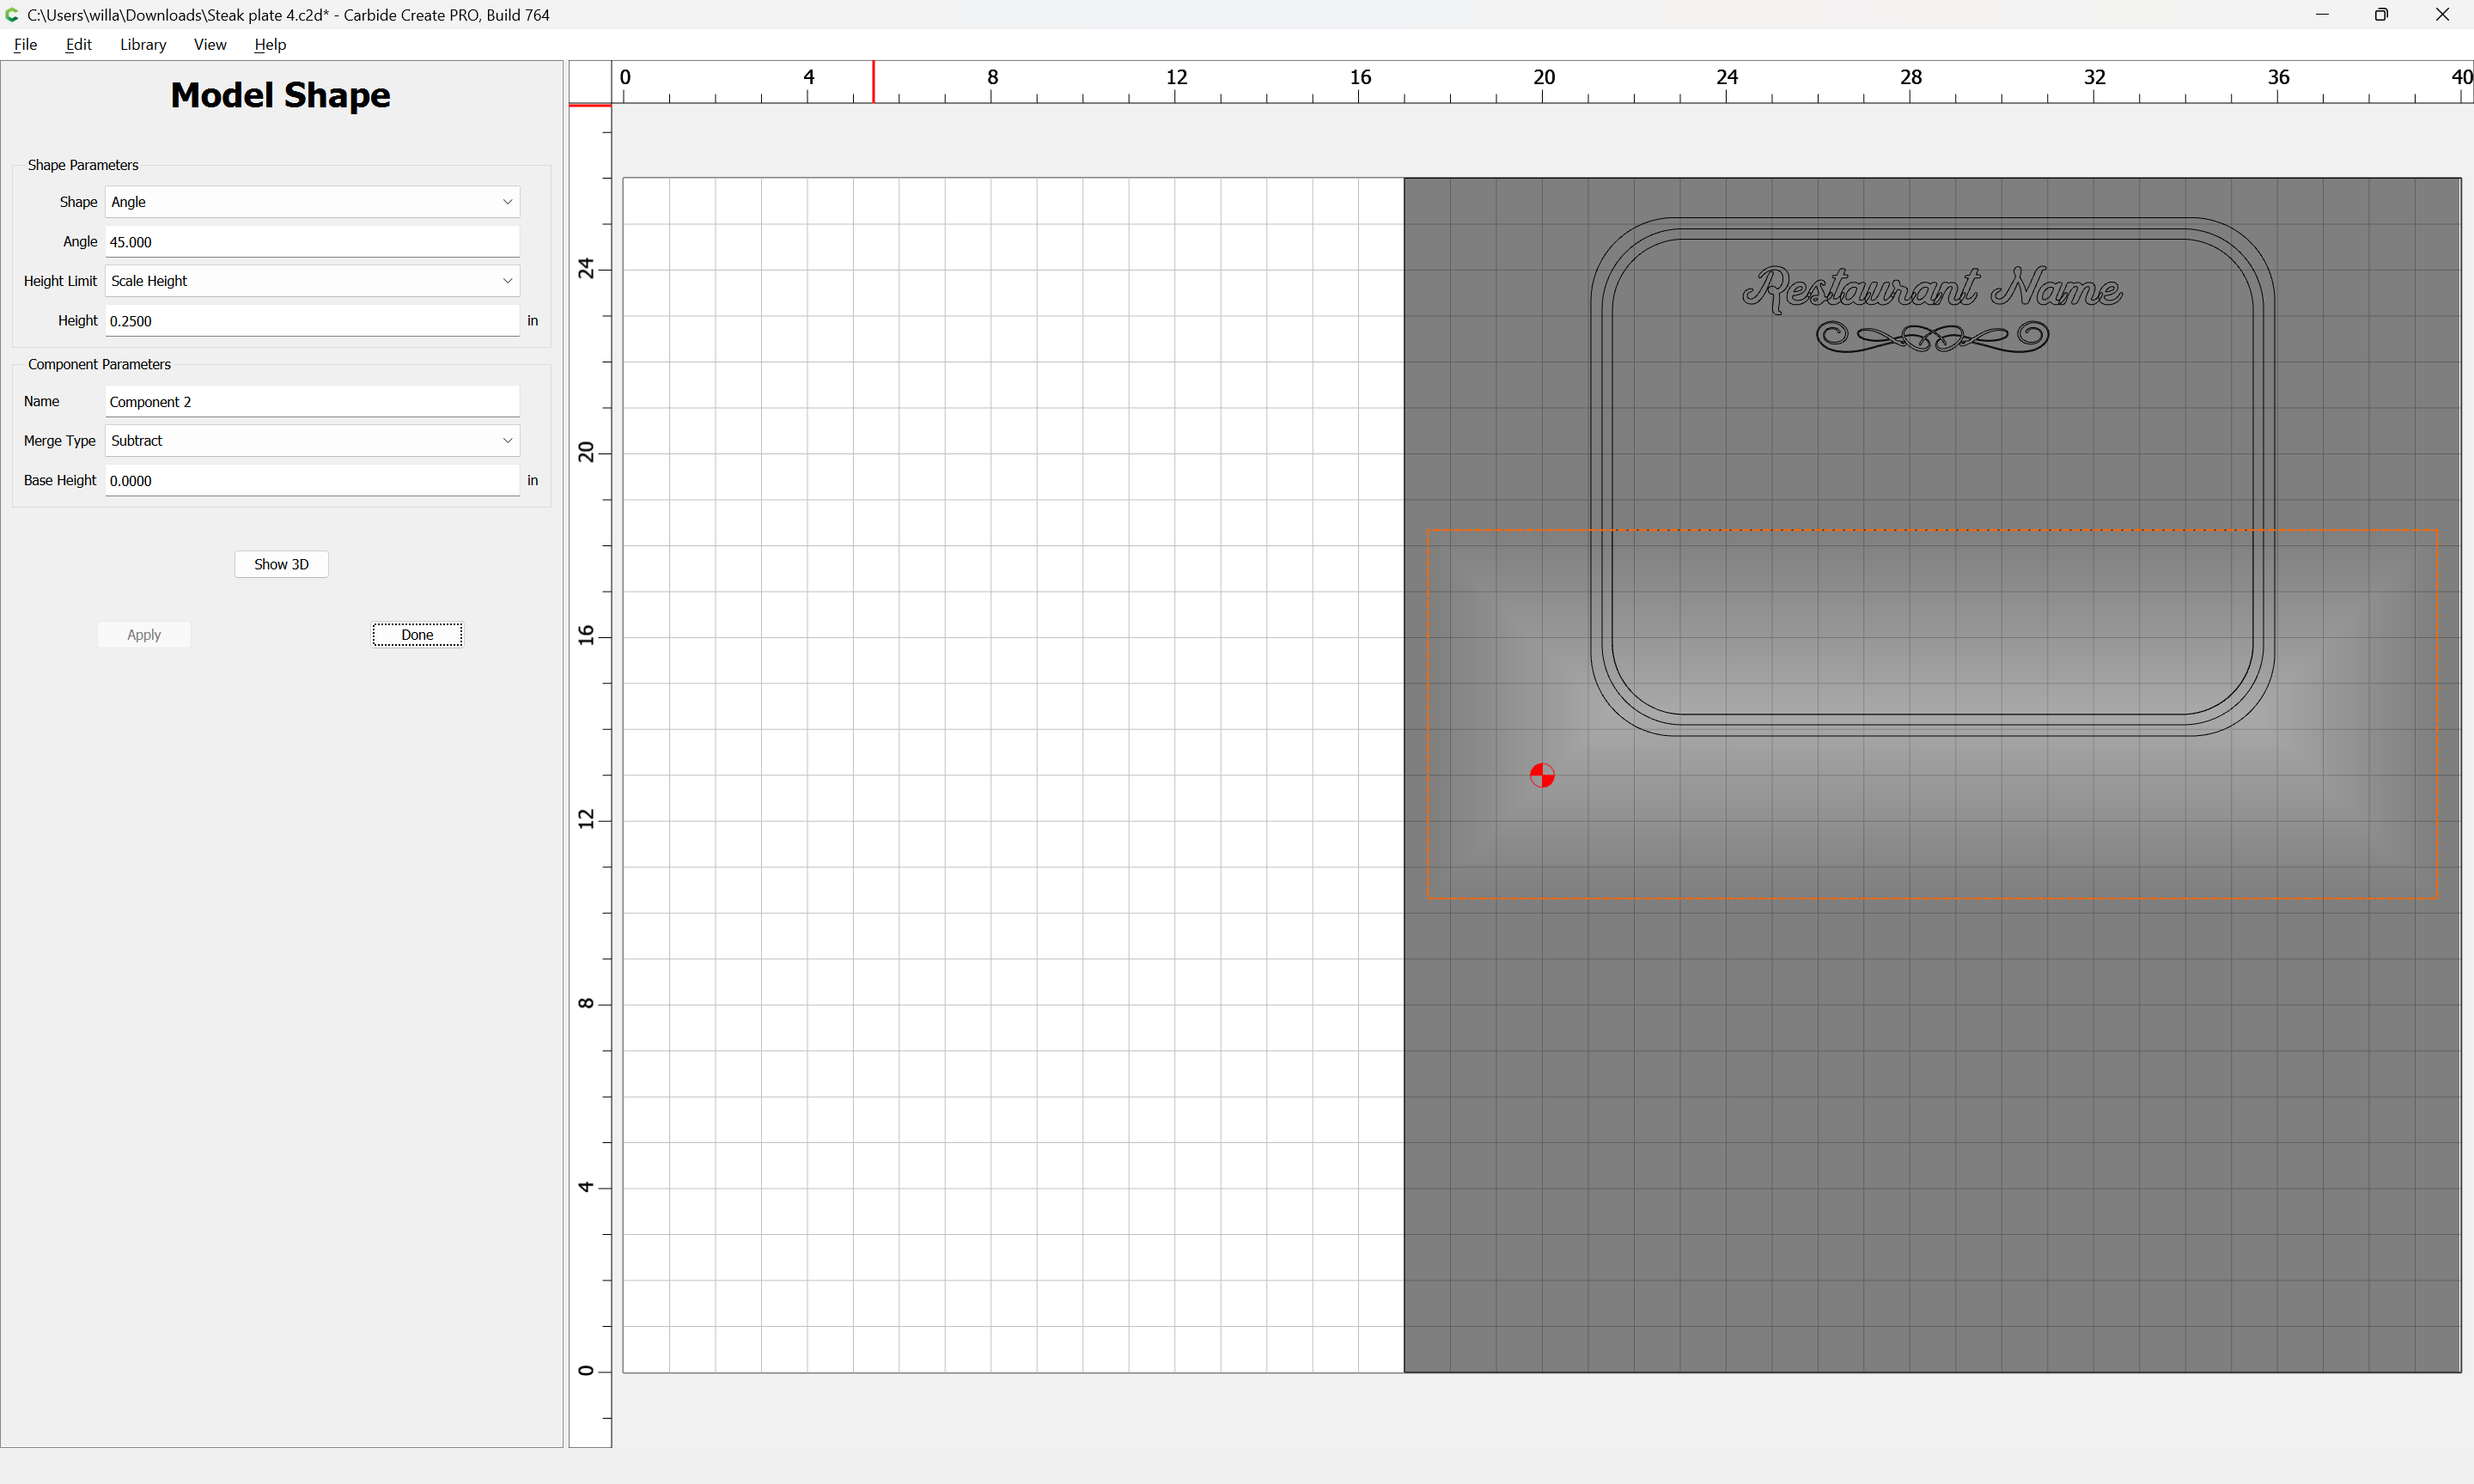
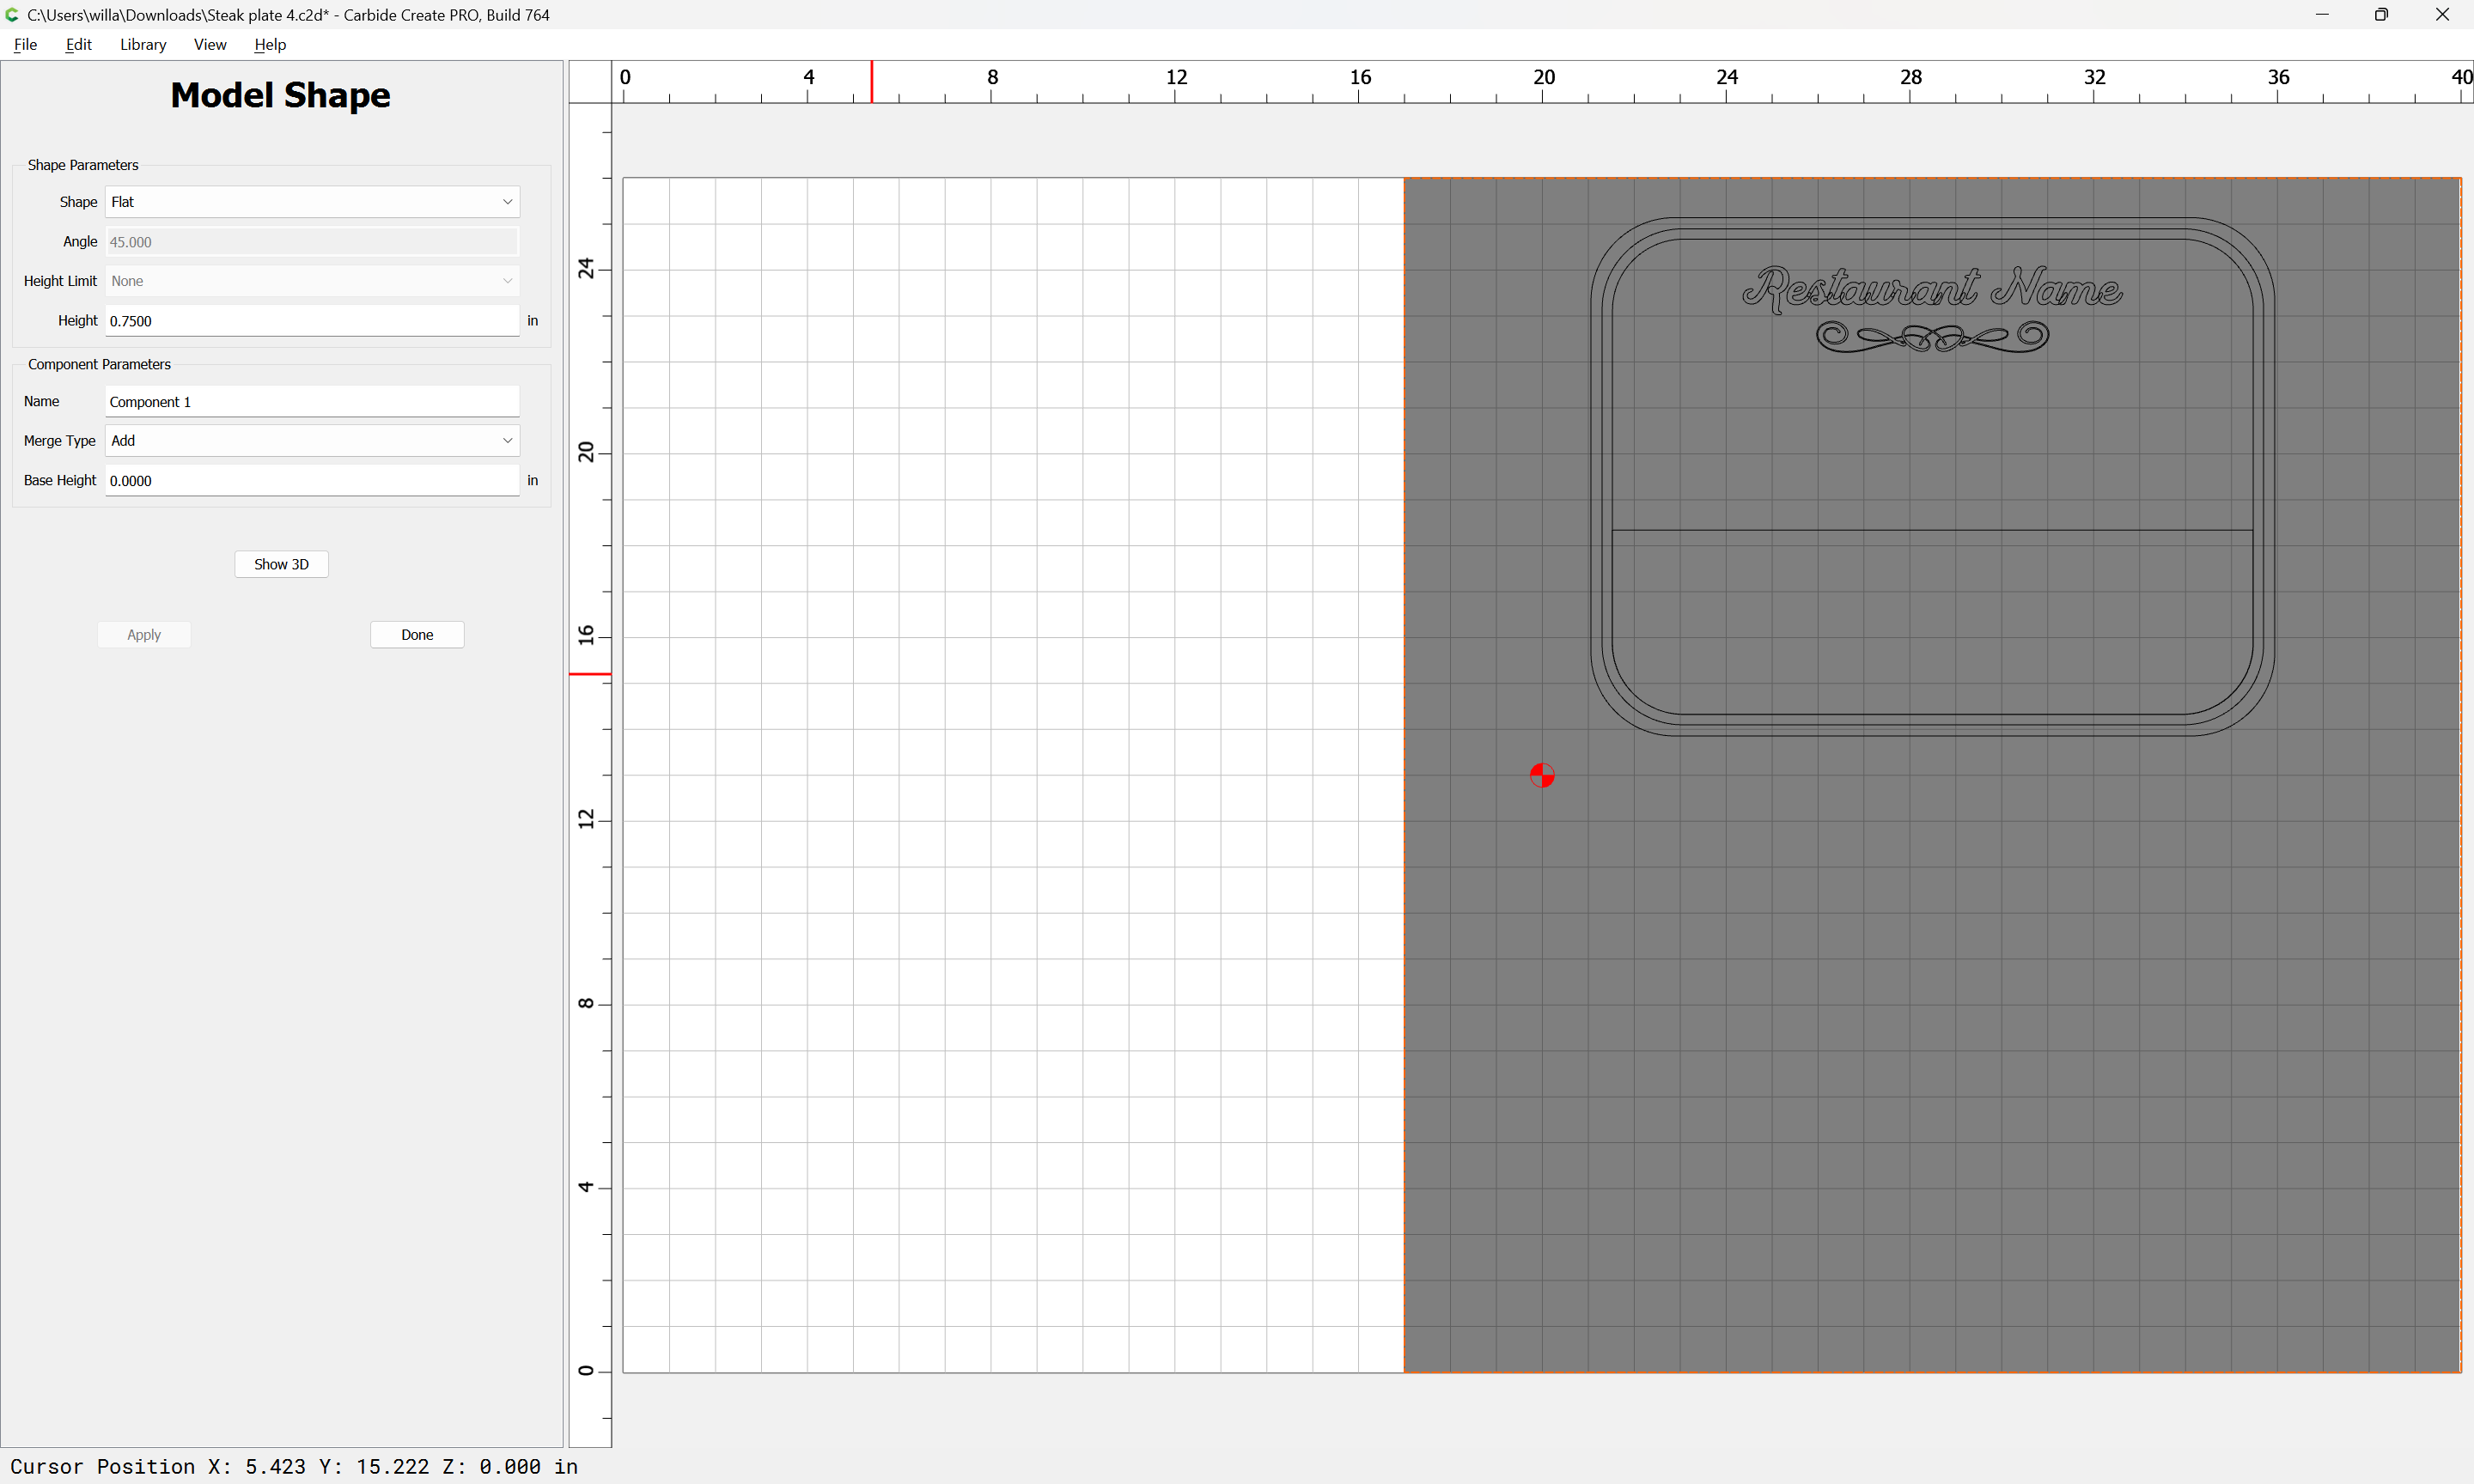
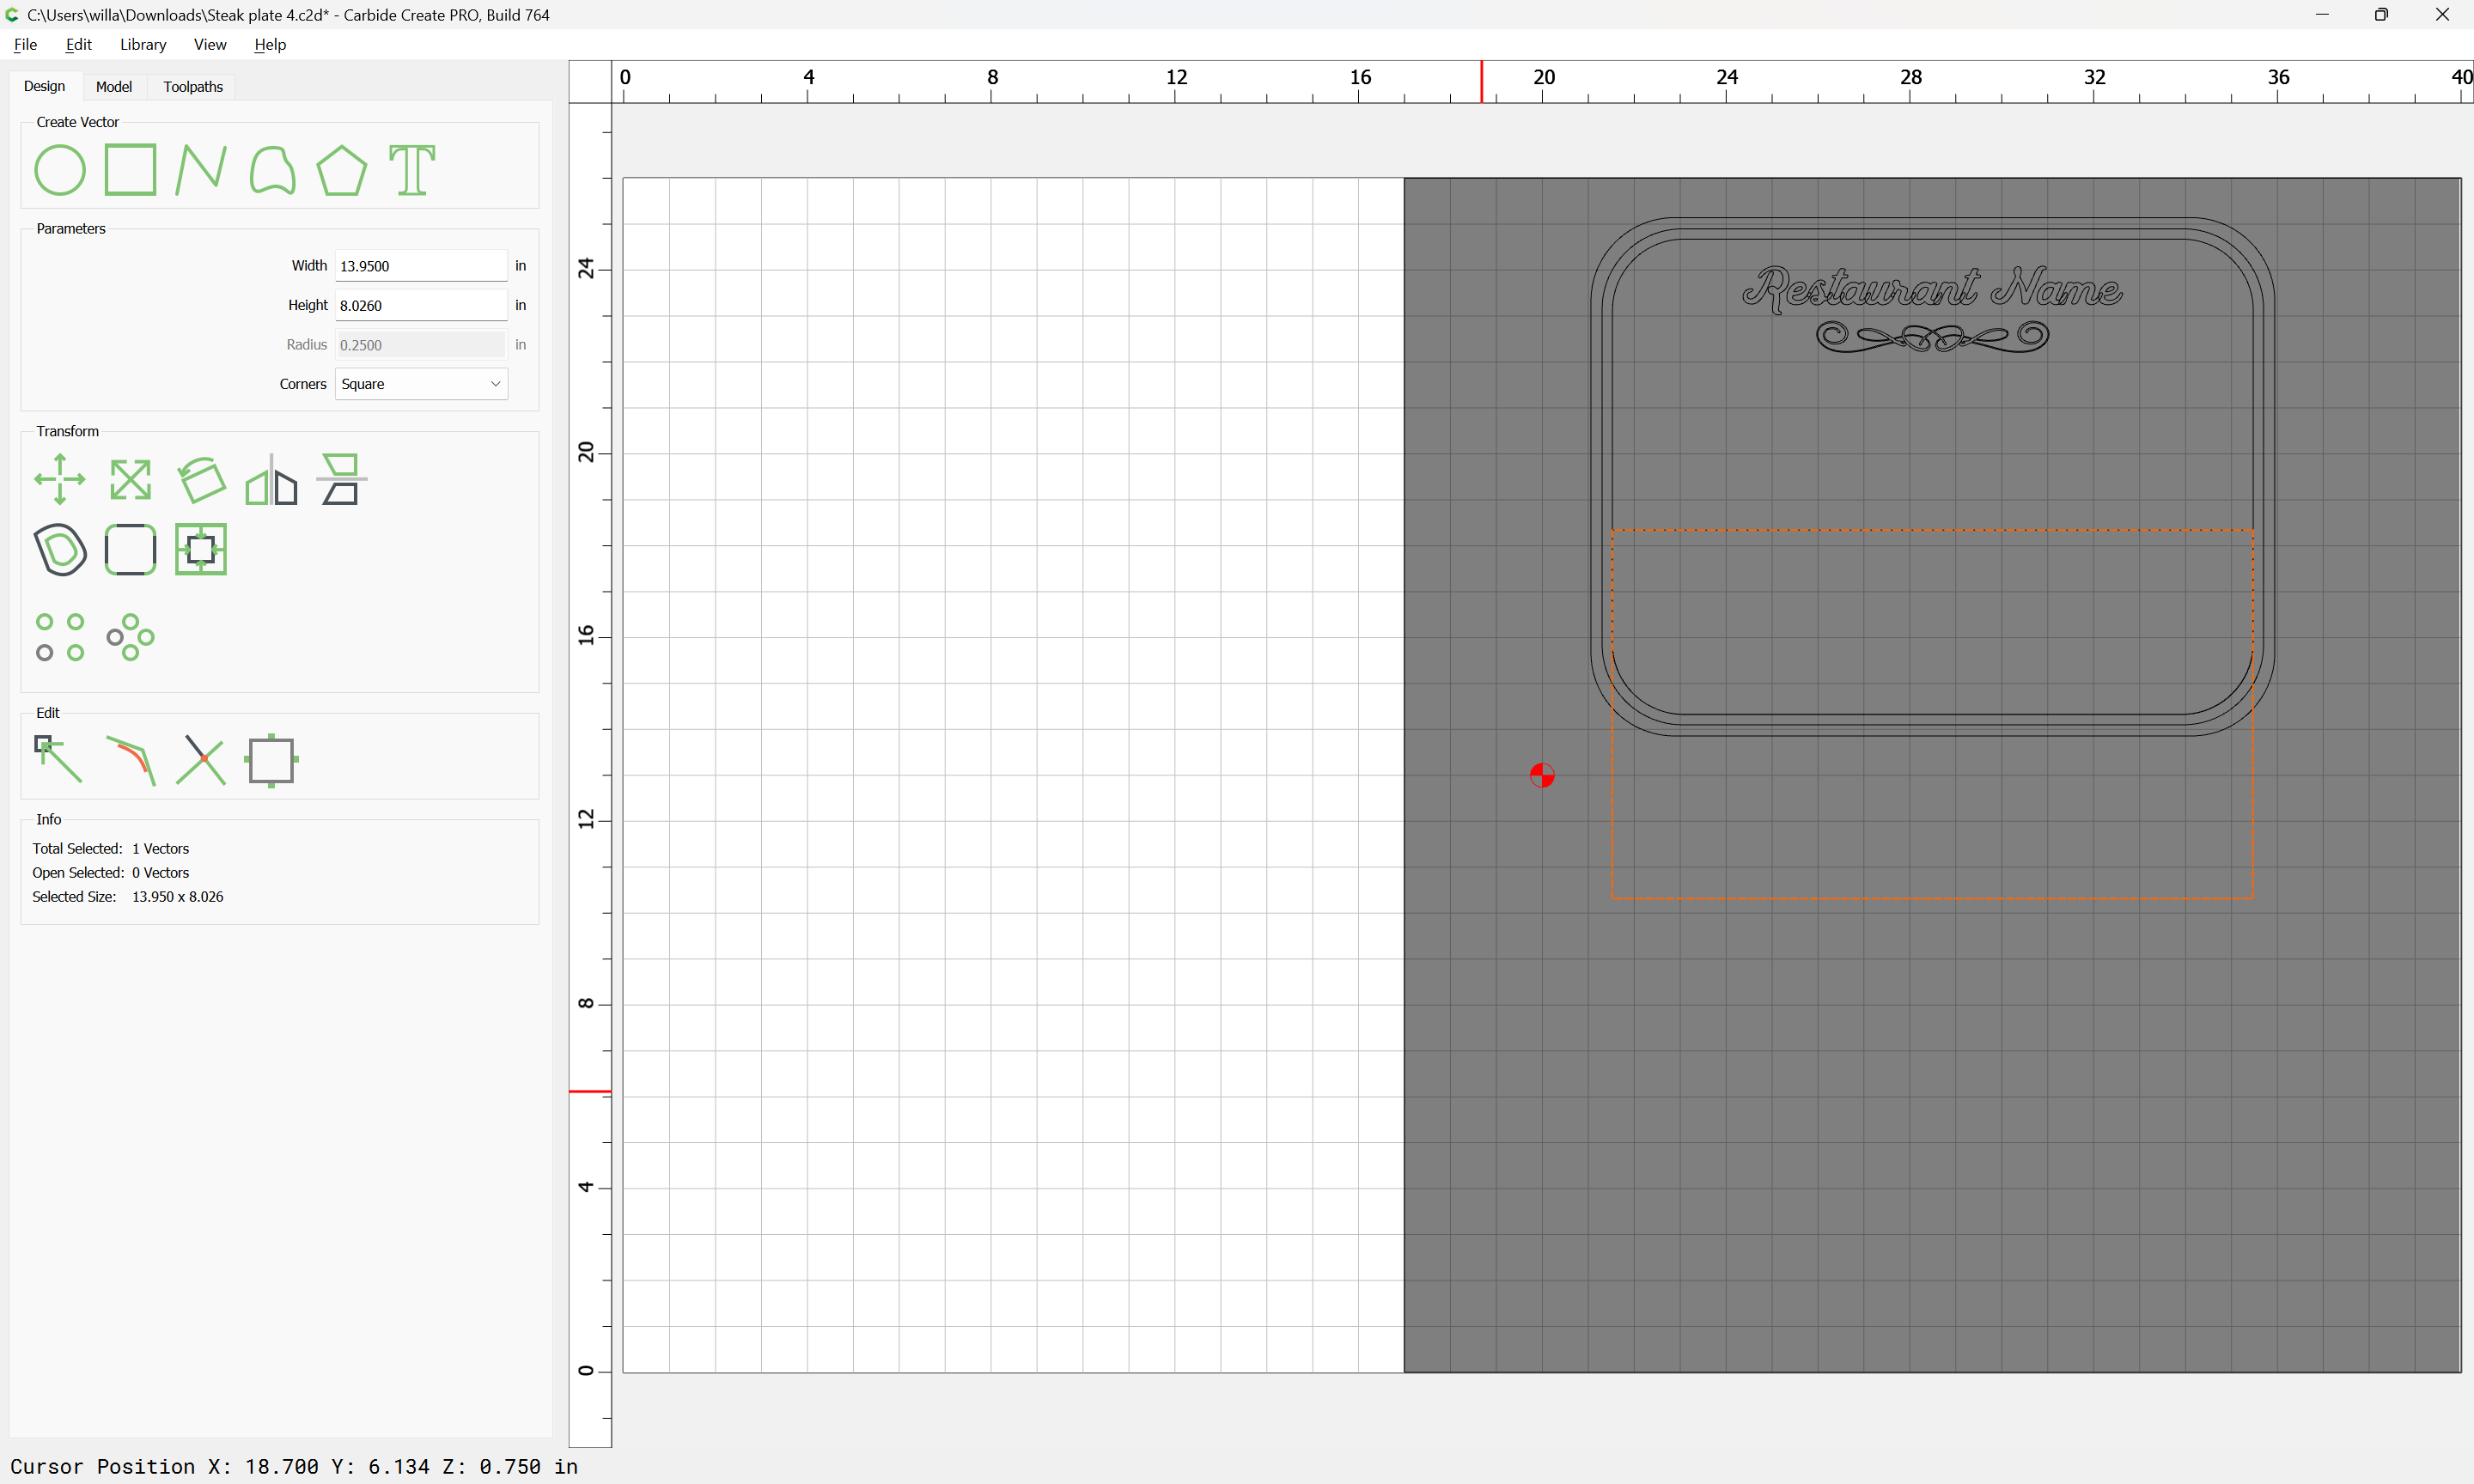
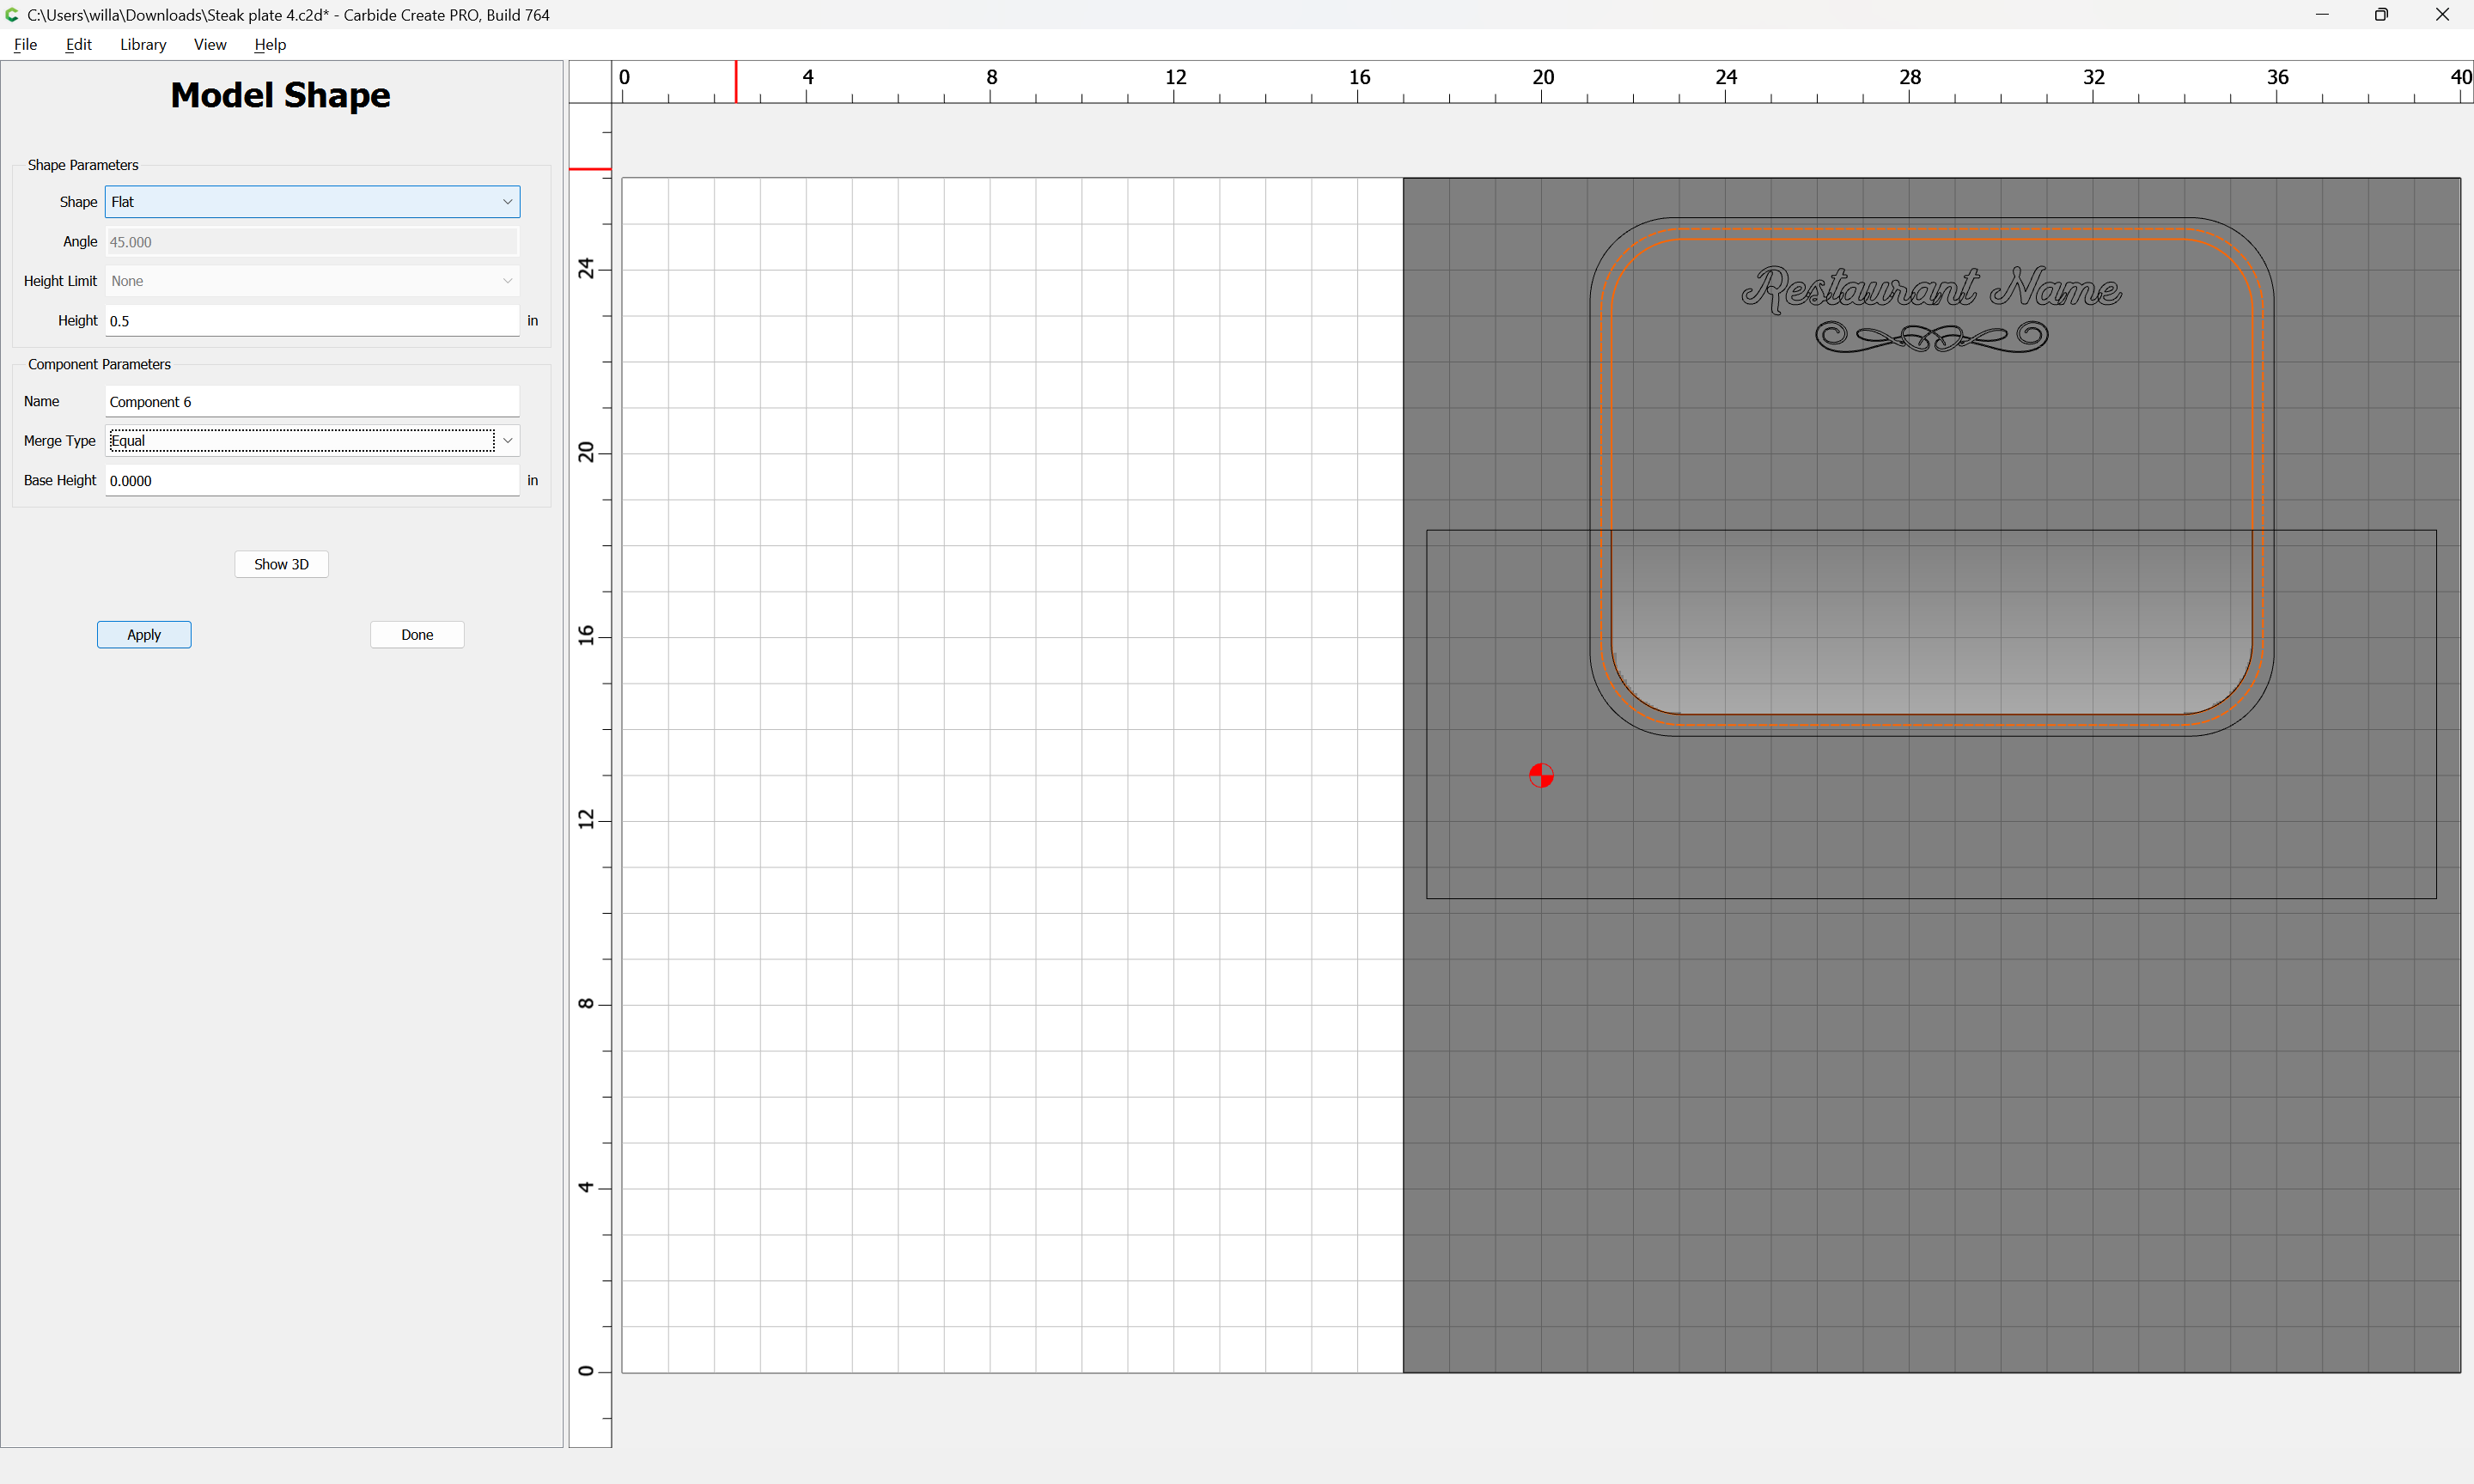
Restore the balance of the stock:
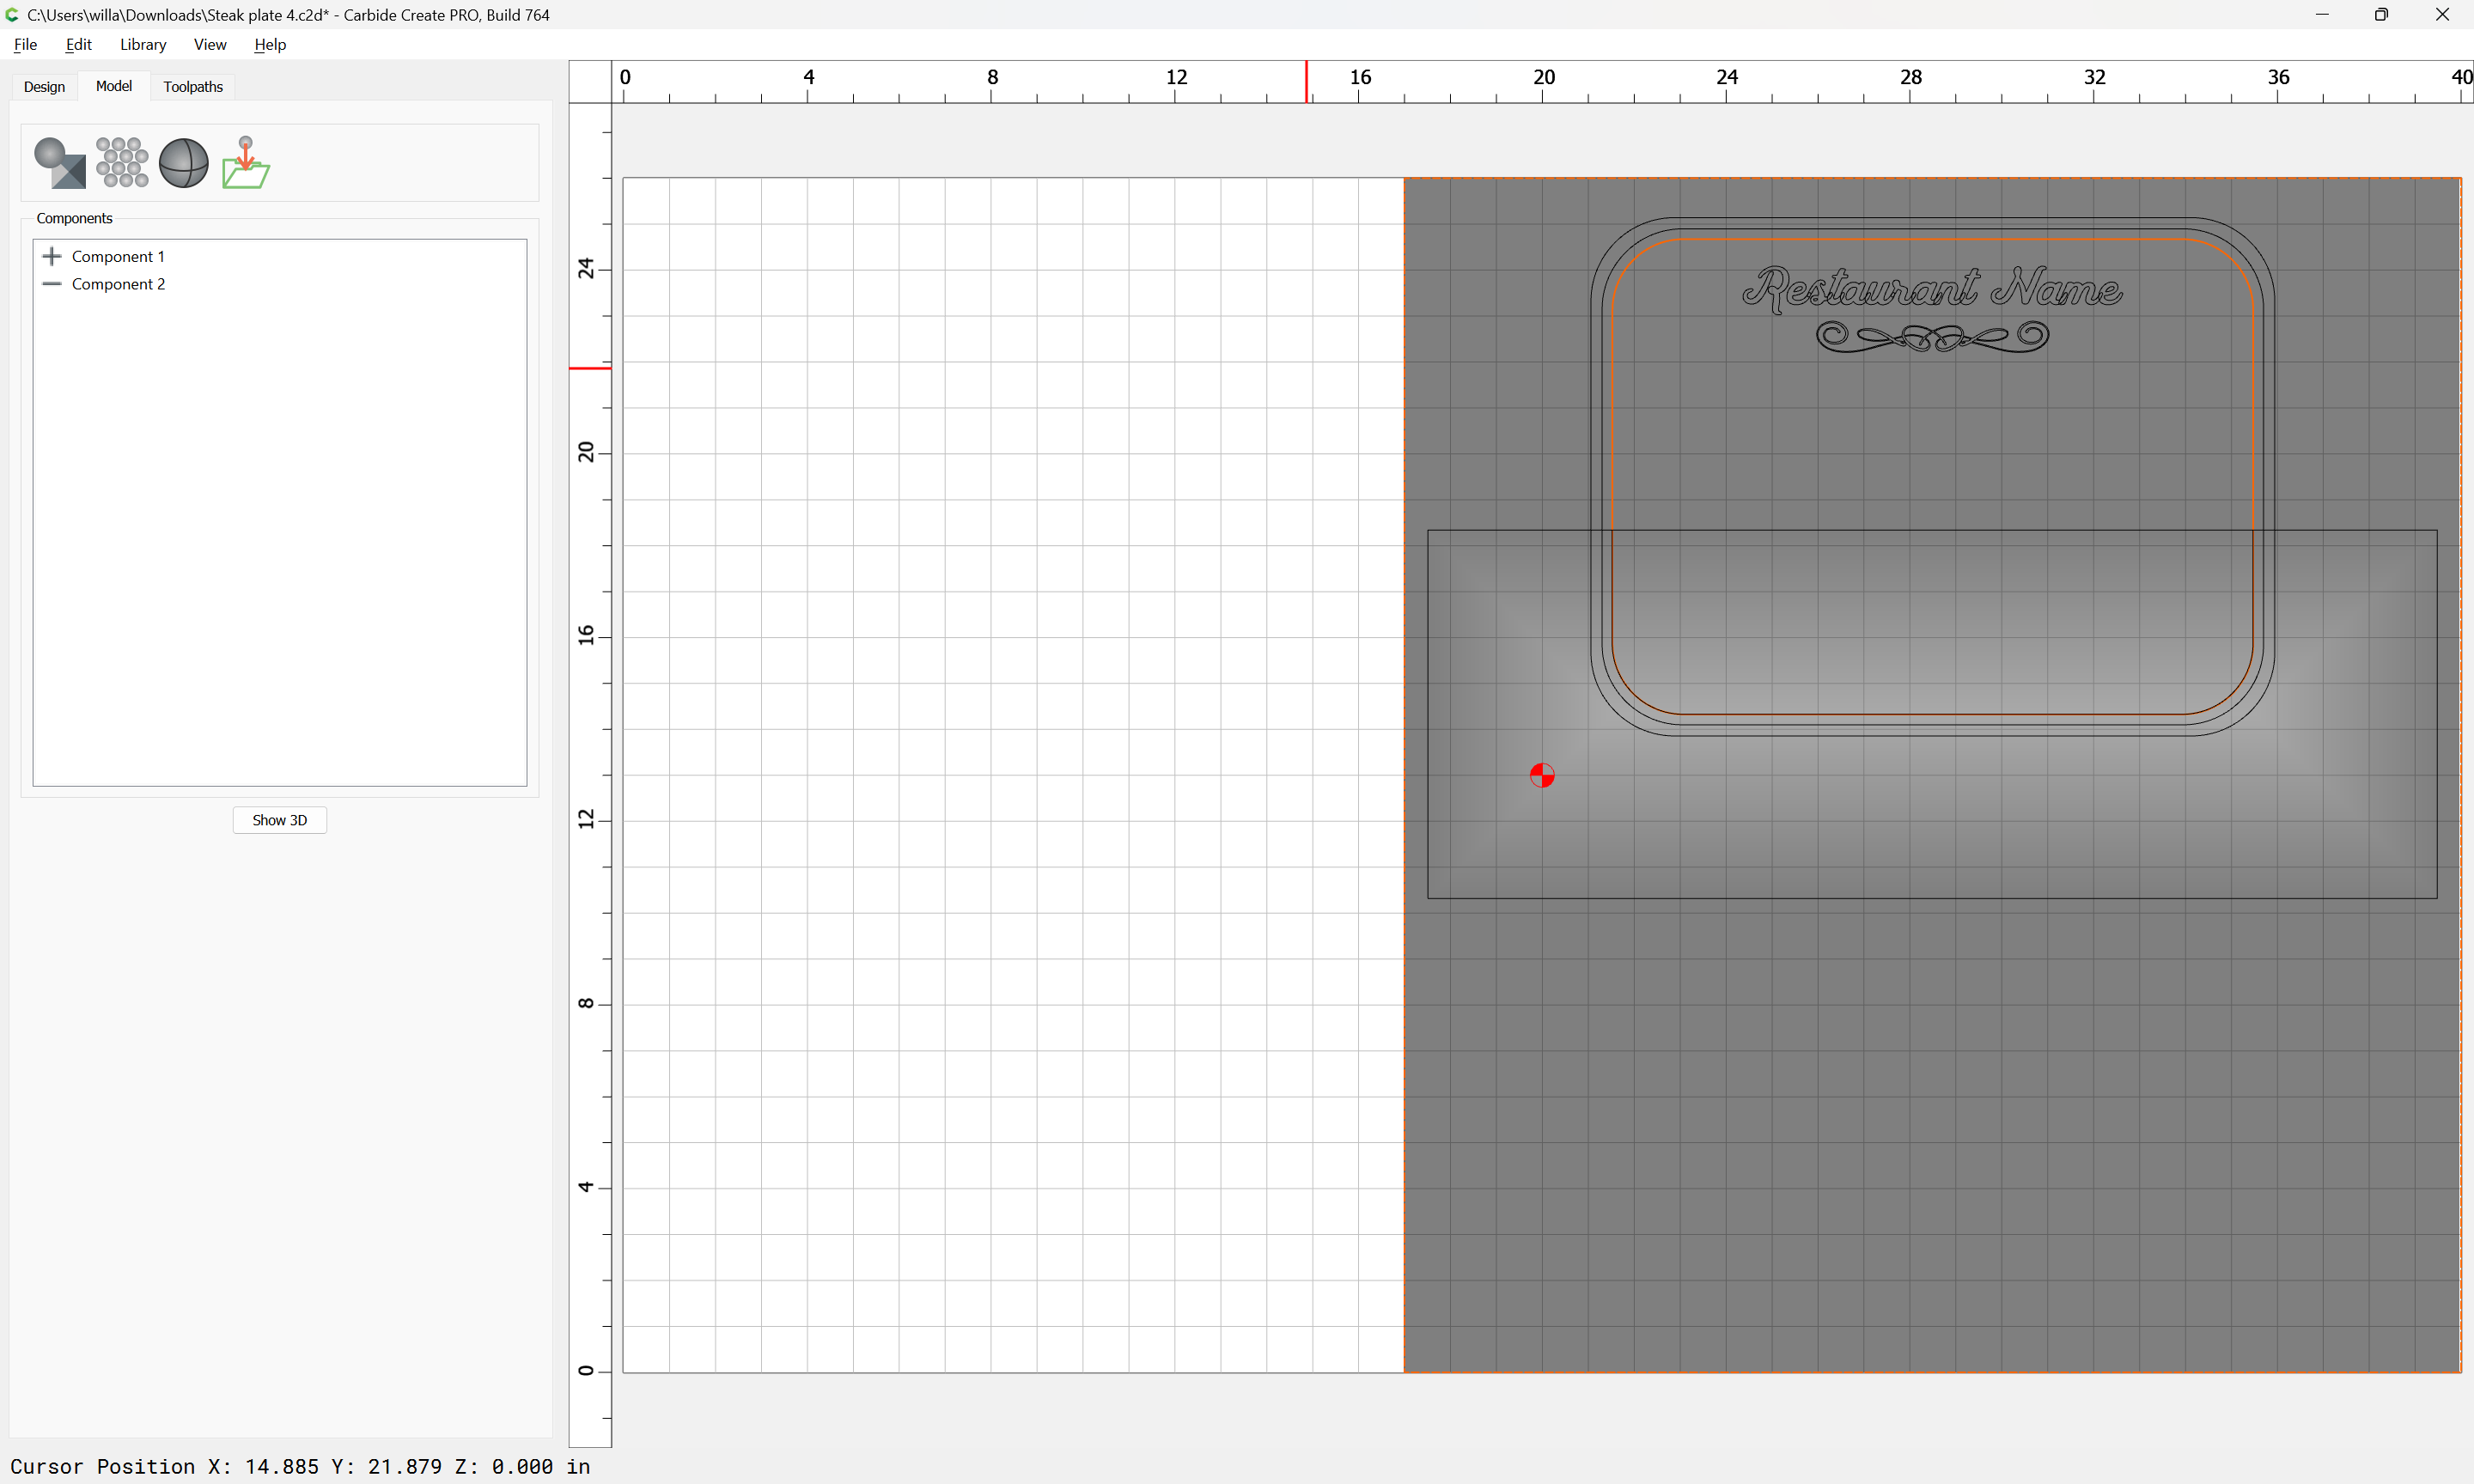
Model the juice groove:
Apply 3D toolpaths:
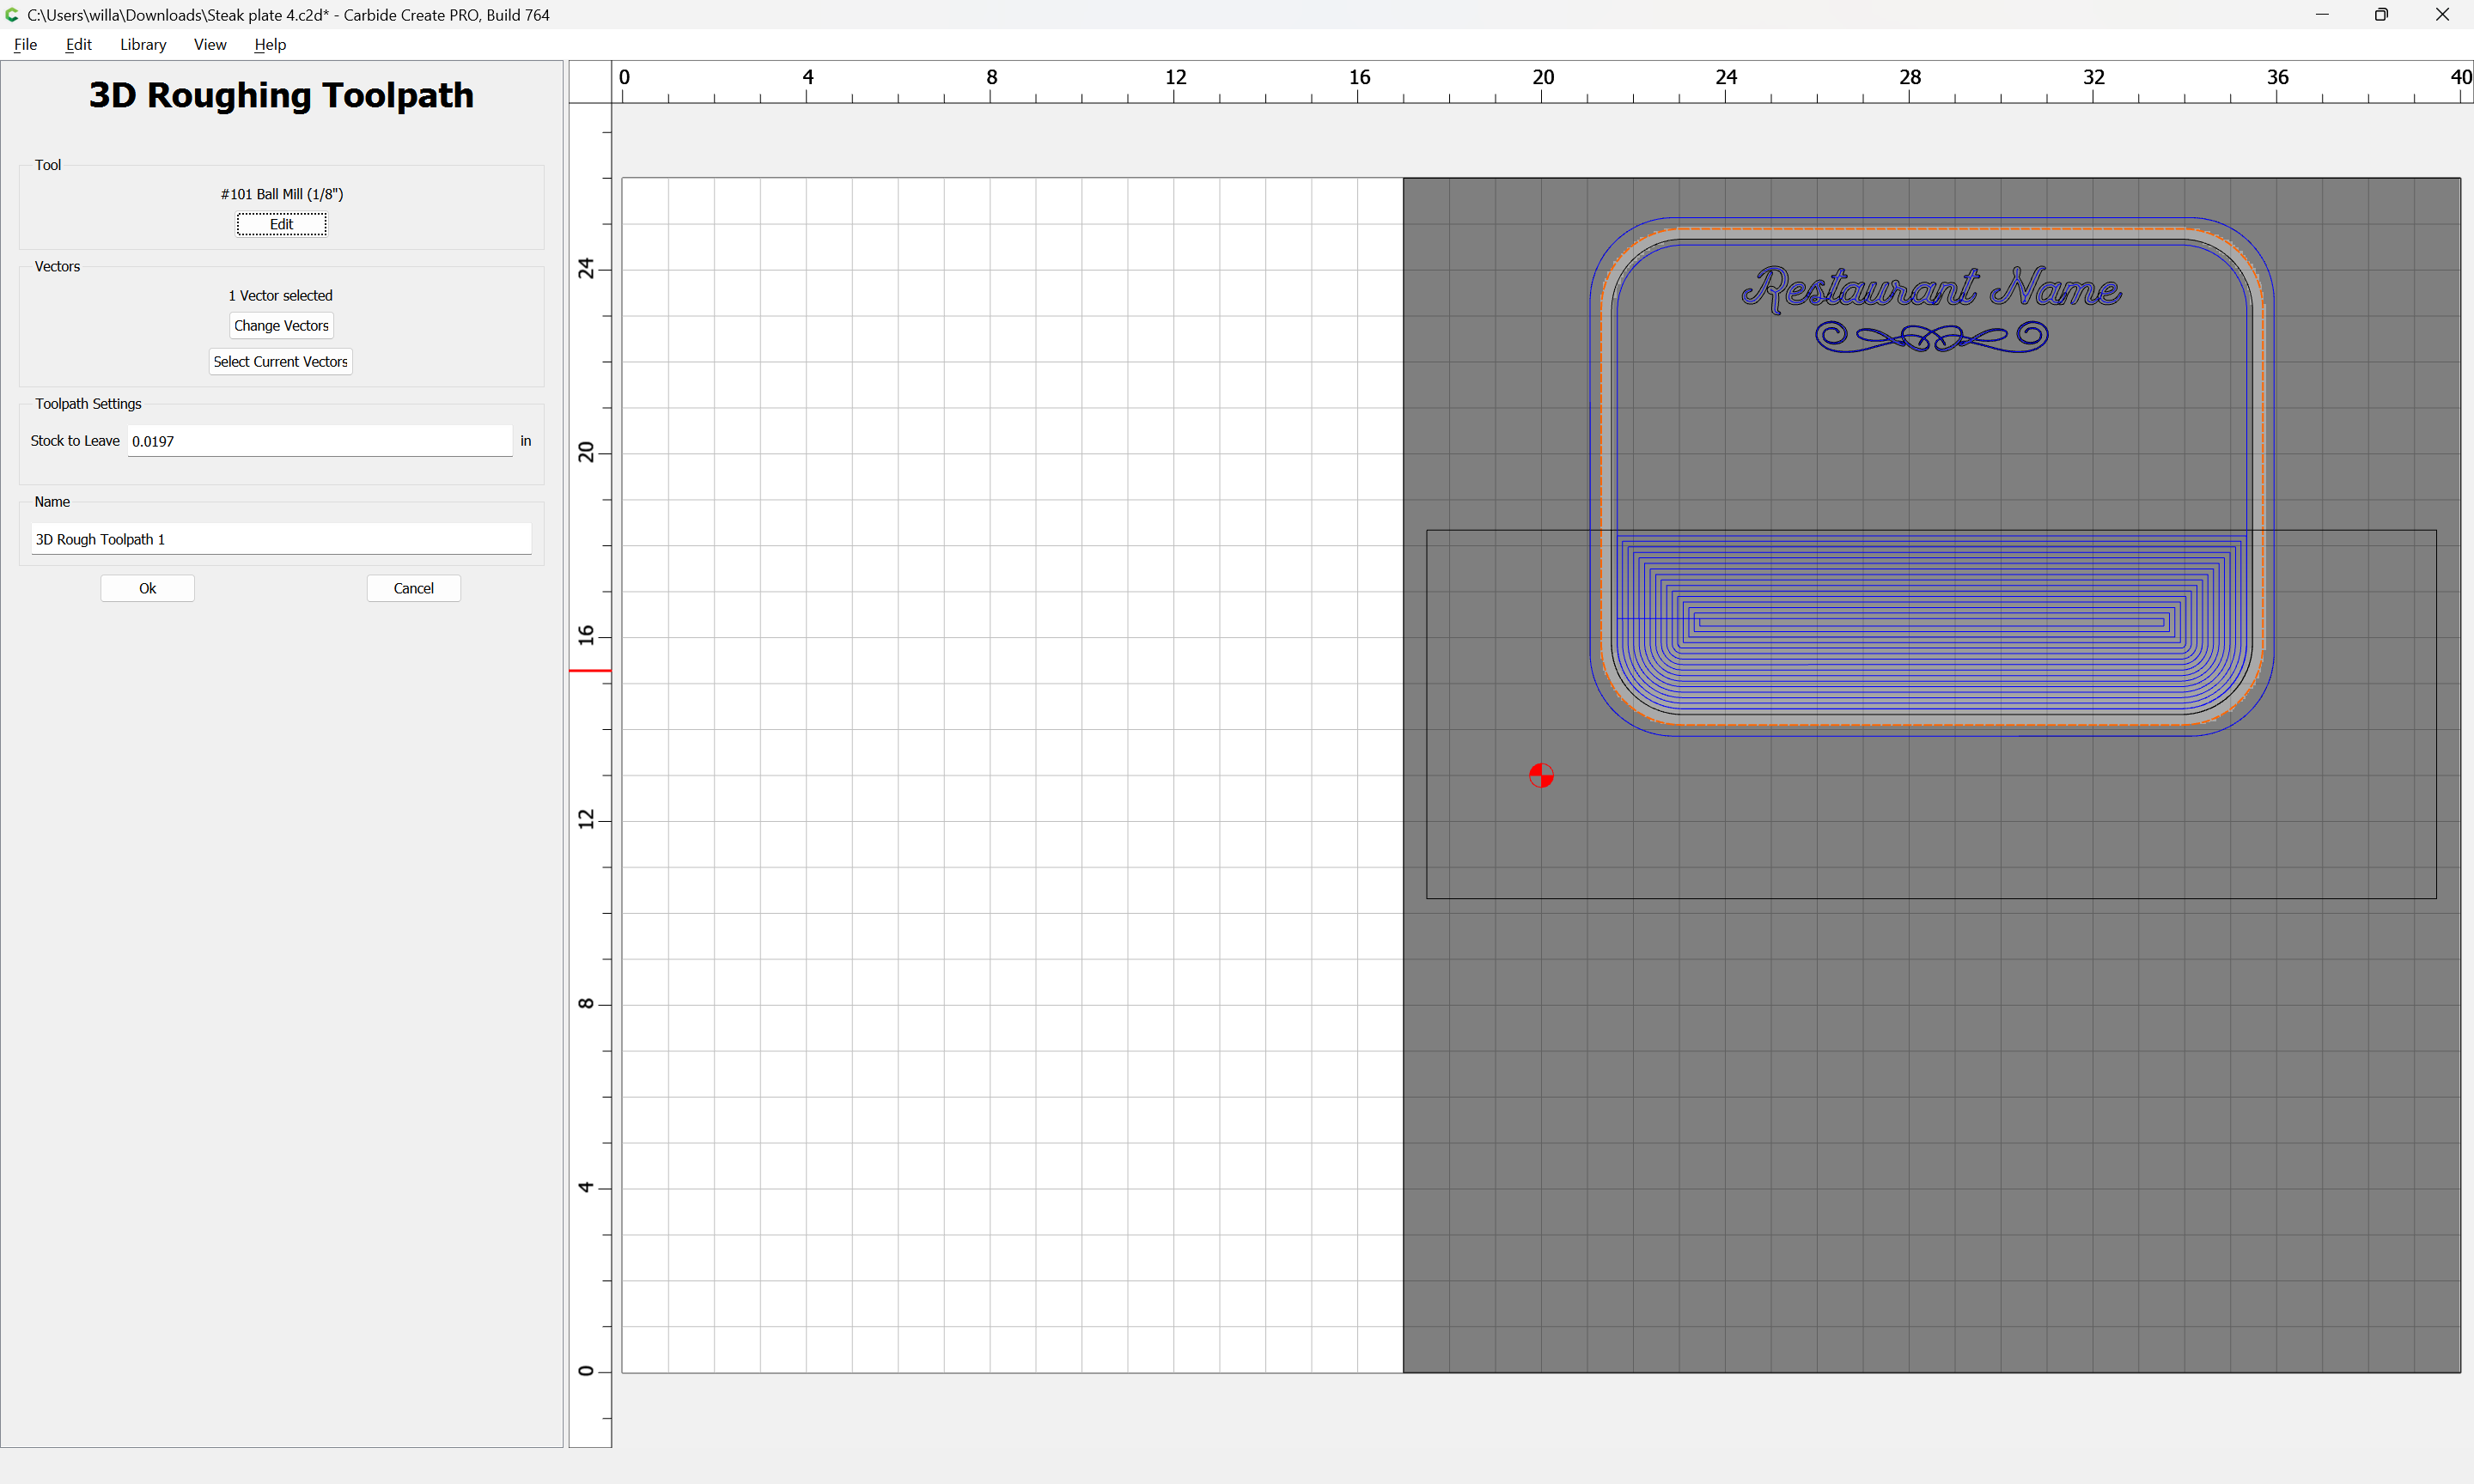
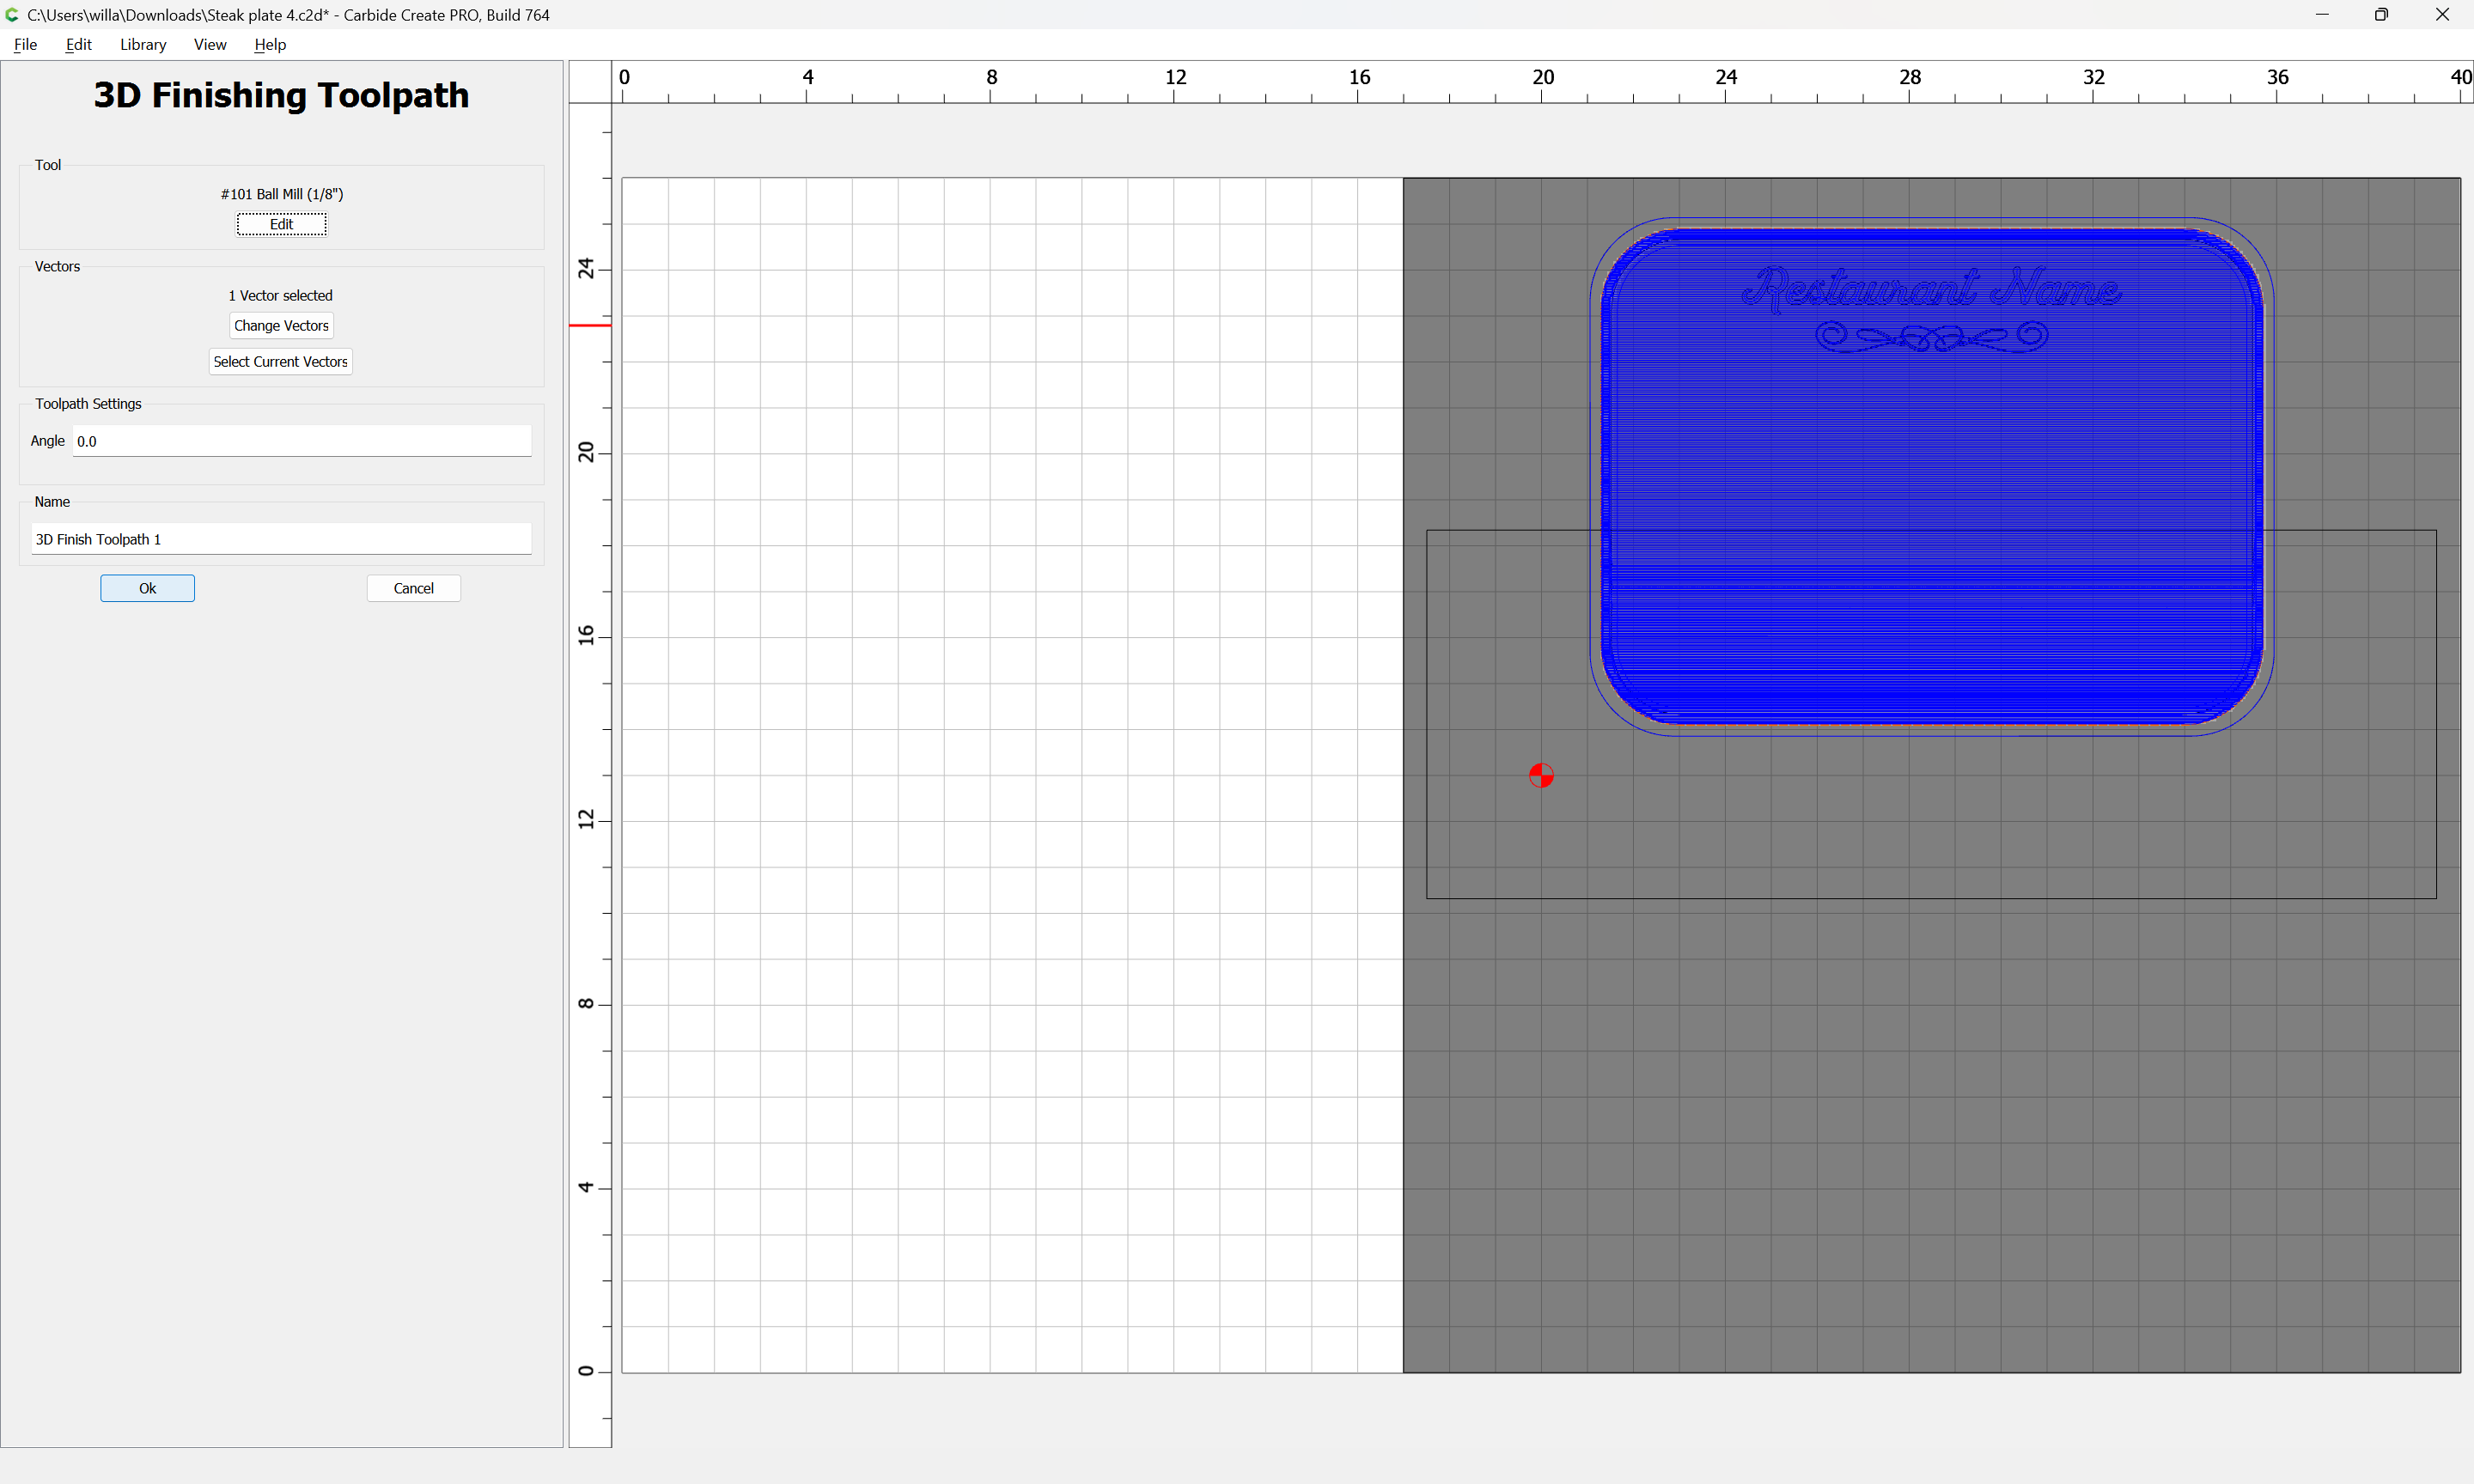
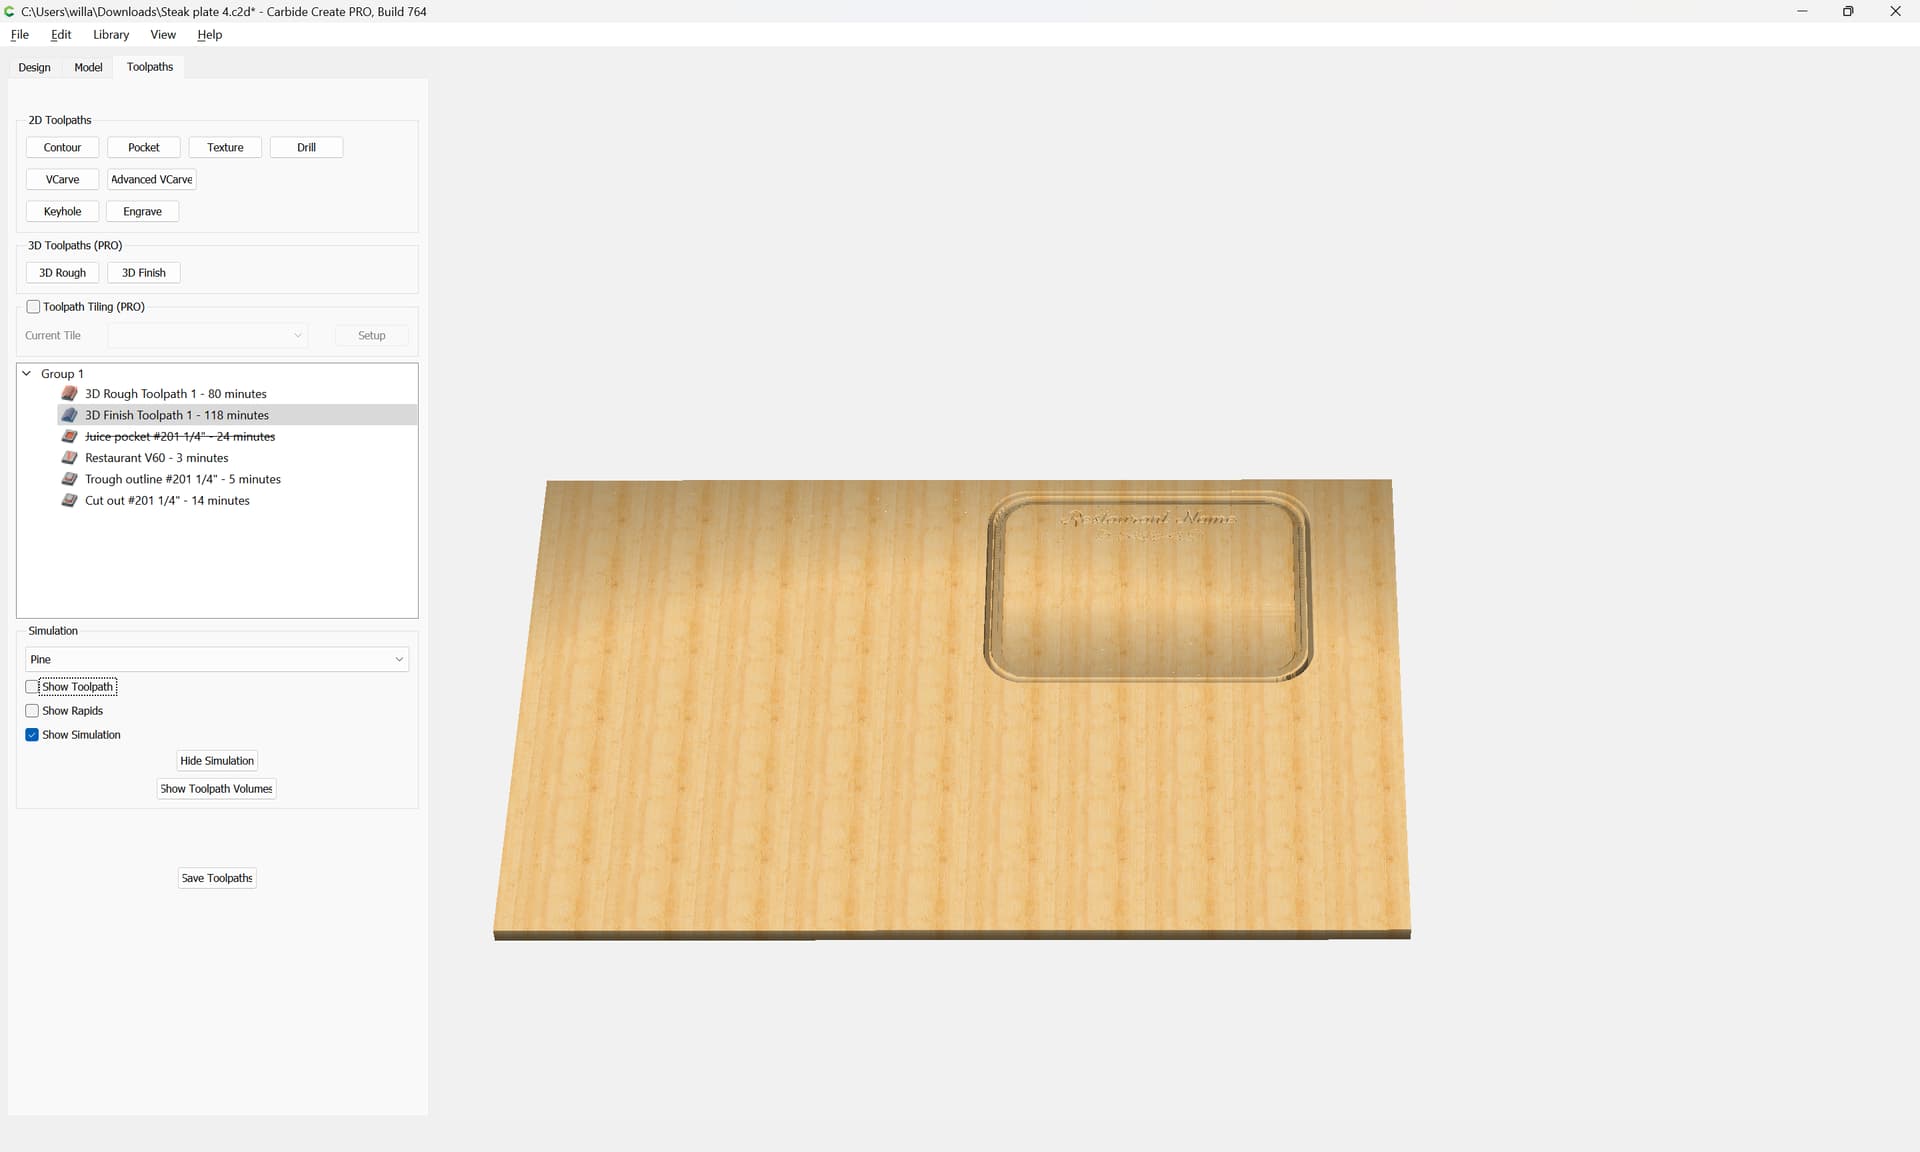
Note that it will be necessary to adjust the 3D toolpaths so that they are limited to just the angled area/do not overcut the 3D model.
1 Like
Thanks - I will give this a try. The customer wants 200 of these steak plates so I will have to figure out if I can cut the carving time per plate. ![]()
David
One strategy might be to make a ramped holder sized to hold each plate blank at the required angle, then machine the ramped area is if it were flat.
So you would machine each plate out without the ramp, then place it in the angled holder to machine out the ramp.
2 Likes
Thanks Joel,
I tried to elevate one end so that I am cutting a flat pocket on an angled board. I am getting closer but still missing the flat transition to the ramped pocket.
Thanks for your help
David
Post your file?
Another approach would be to make a pixel image and just use that for modeling the angle.
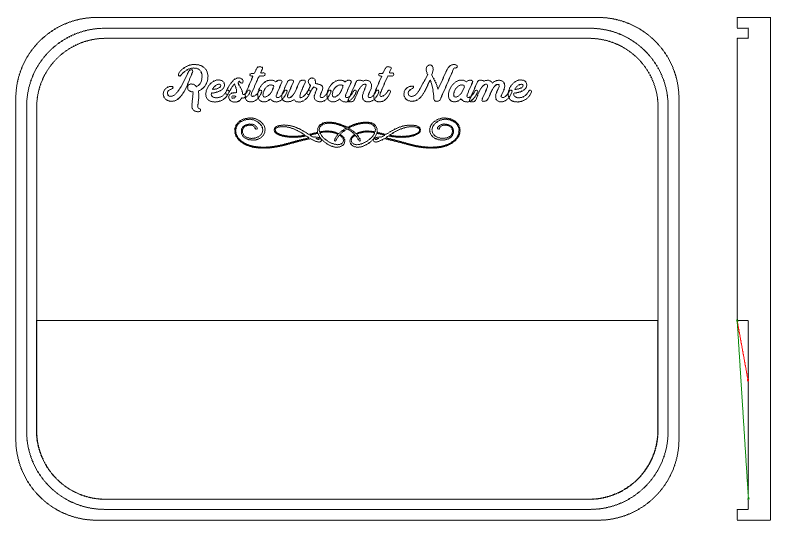
It’s still not clear exactly where the ramp goes. Or what the extra vector below the design is for?
Something like the red or green ramp I drew in the side view?
2 Likes
I am certainly a very unpracticed new person to CNC routers. However, Garrett Fromme has a video showing how to make a pizza peel with a “ramp” using Vcarve. He goes through the process step by step and says it’s very easy. I haven’t tried it, yet, and I don’t know if I can do it using cc. I suppose if you search his name and pizza peel, the video should come up. I will also try the method described above.
What angle is the ramp? Could you use an “extreme” v-bit. Like might be in a panel raising set?
You would have to figure how to do the edges of th ramp but it might reduce cutting time
John
A large oblique V tool won’t allow having the vertical surfaces around the edges.
I was thinking something like the Whiteside plunge panel bit https://www.highlandwoodworking.com/whiteside-plunge-panel-router-bit.aspx which is 1.5 inch diameter. You could have the ramp in two axes for the edge treatment. By my estimation from the drawing the ramp is 13 inches by 4 inches
I couldn’t find the angle or length but cut most of the ramp as you would expect with a v bit making a ramp, and then clean up the edges with a straight ramp down like a v carve. Wall won’t be vertical but it might be easier to clean in usage. (or alternatively use a bowl bit around the edge and a ramped path.
Just thoughts.
John
Another way to do this would be to manually profile using a series of lines each cut to an appropriate depth:
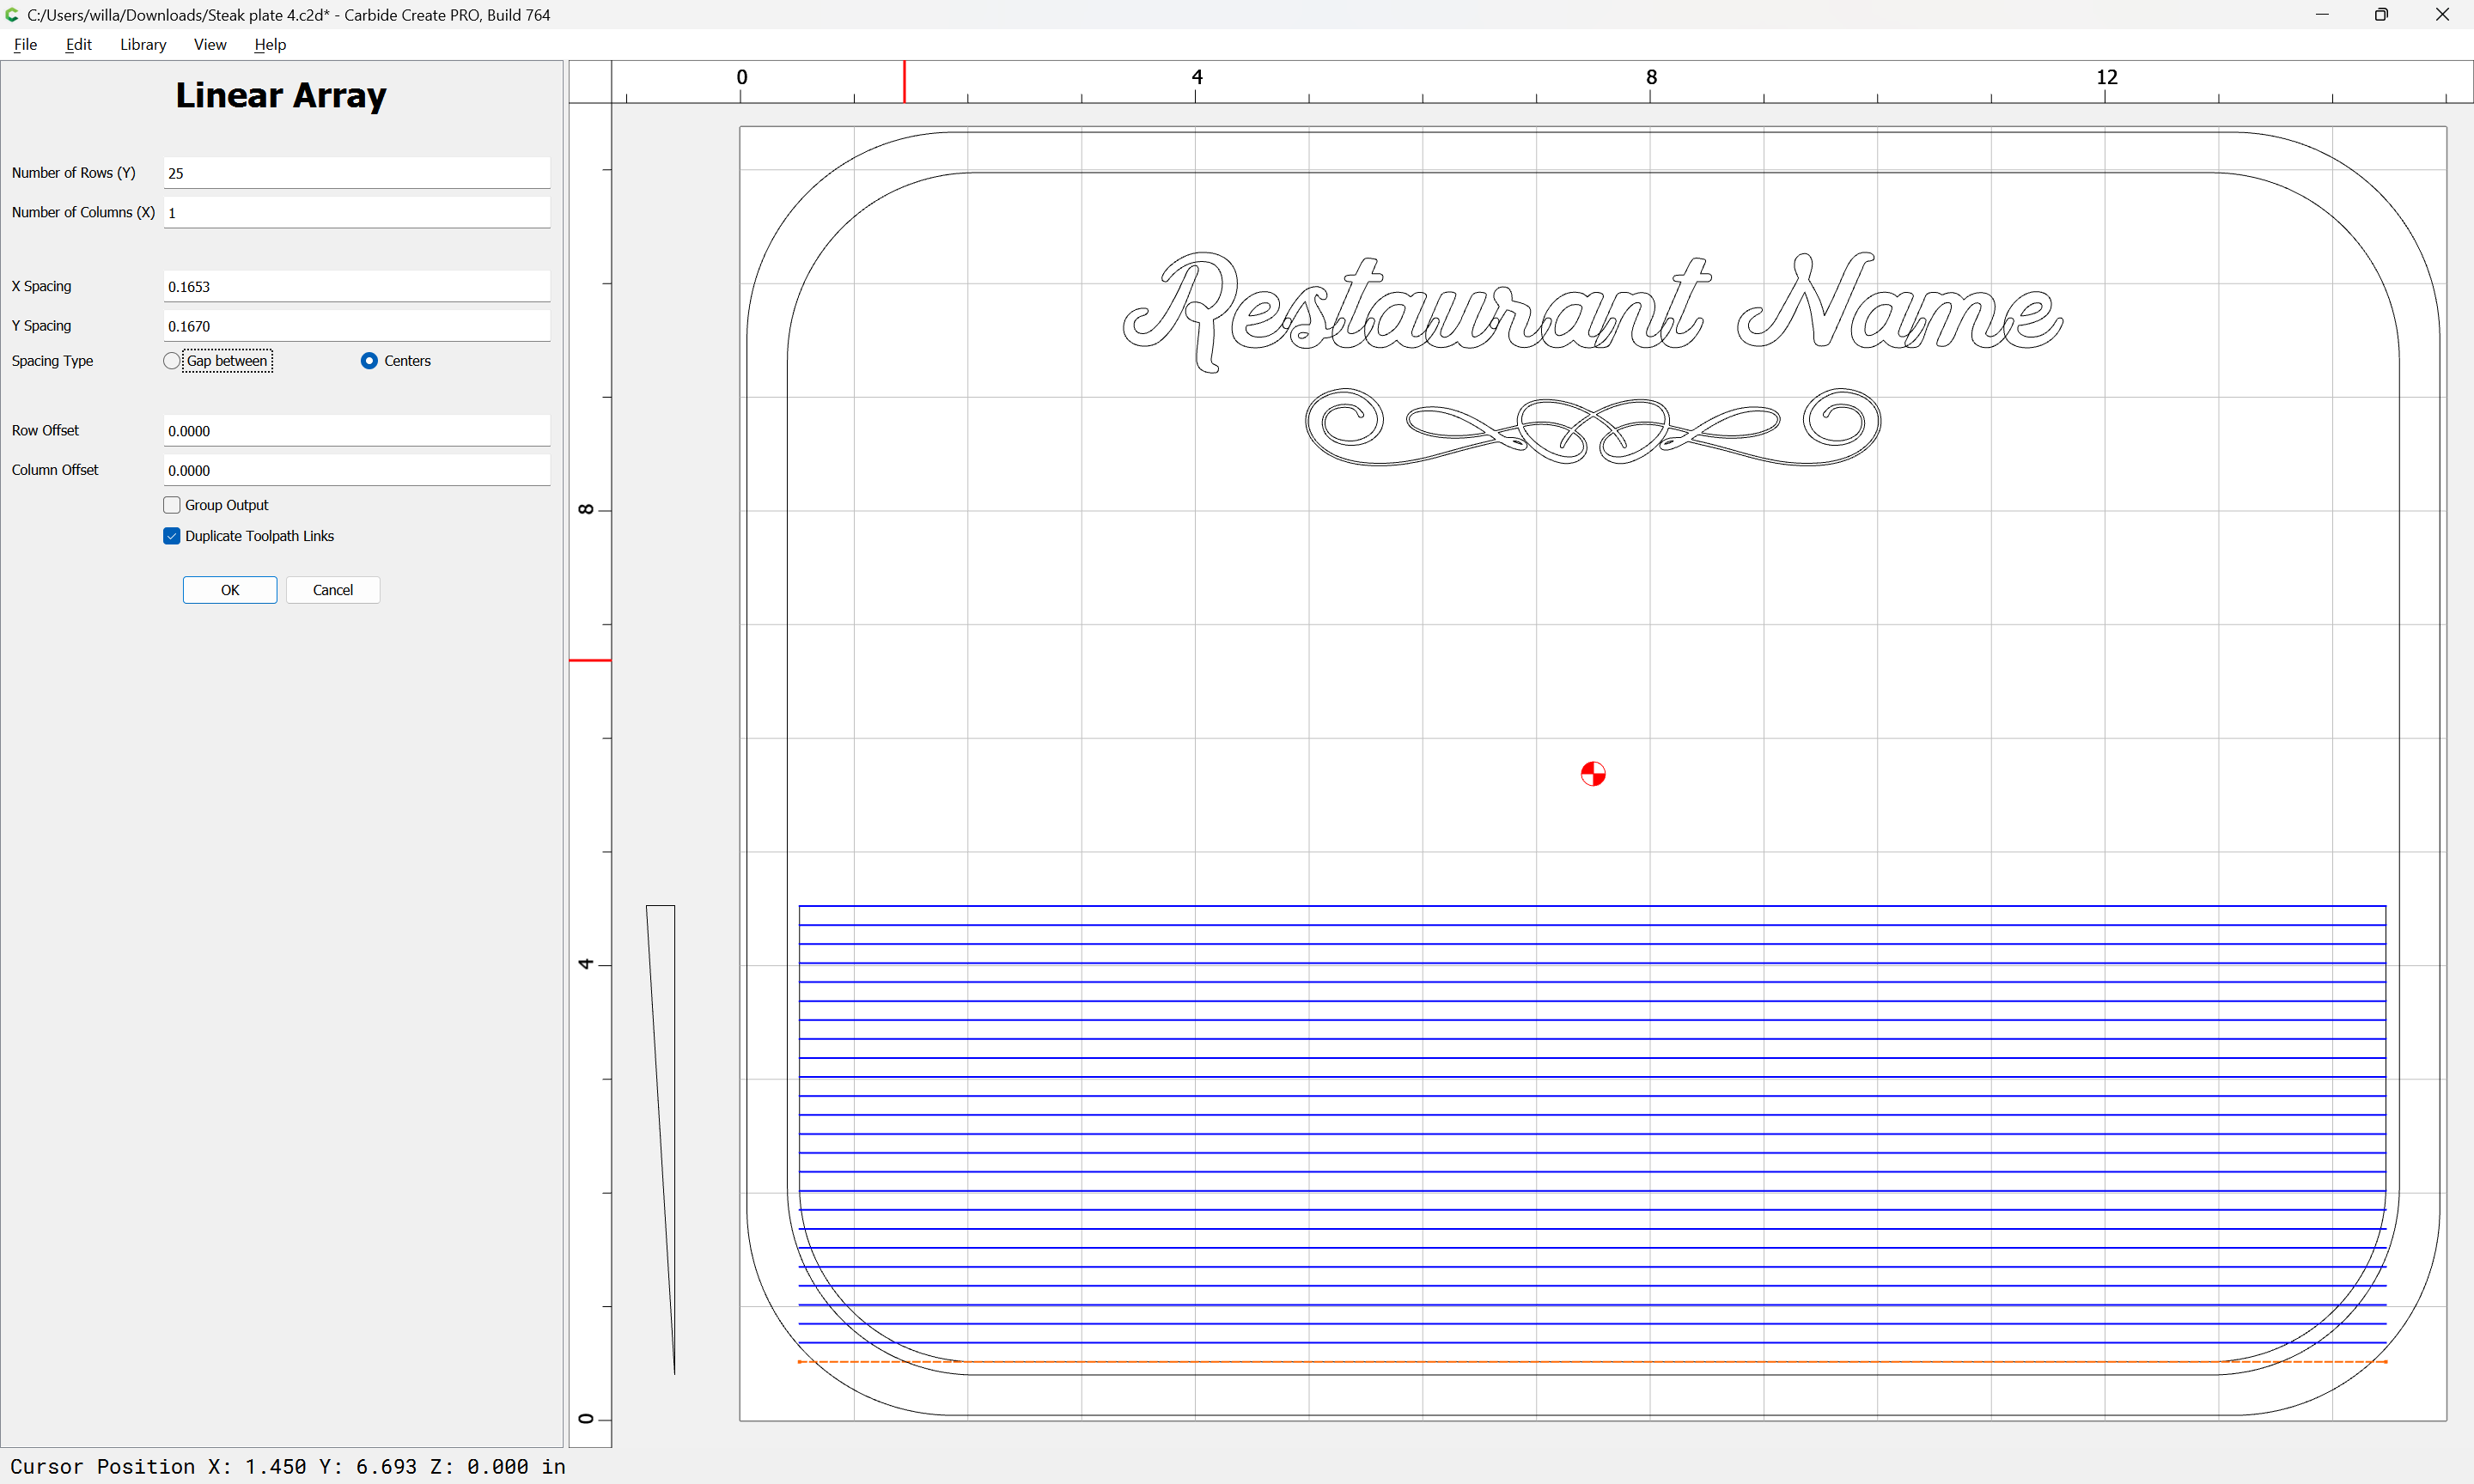
Use Trim Vectors to remove what is not wanted:
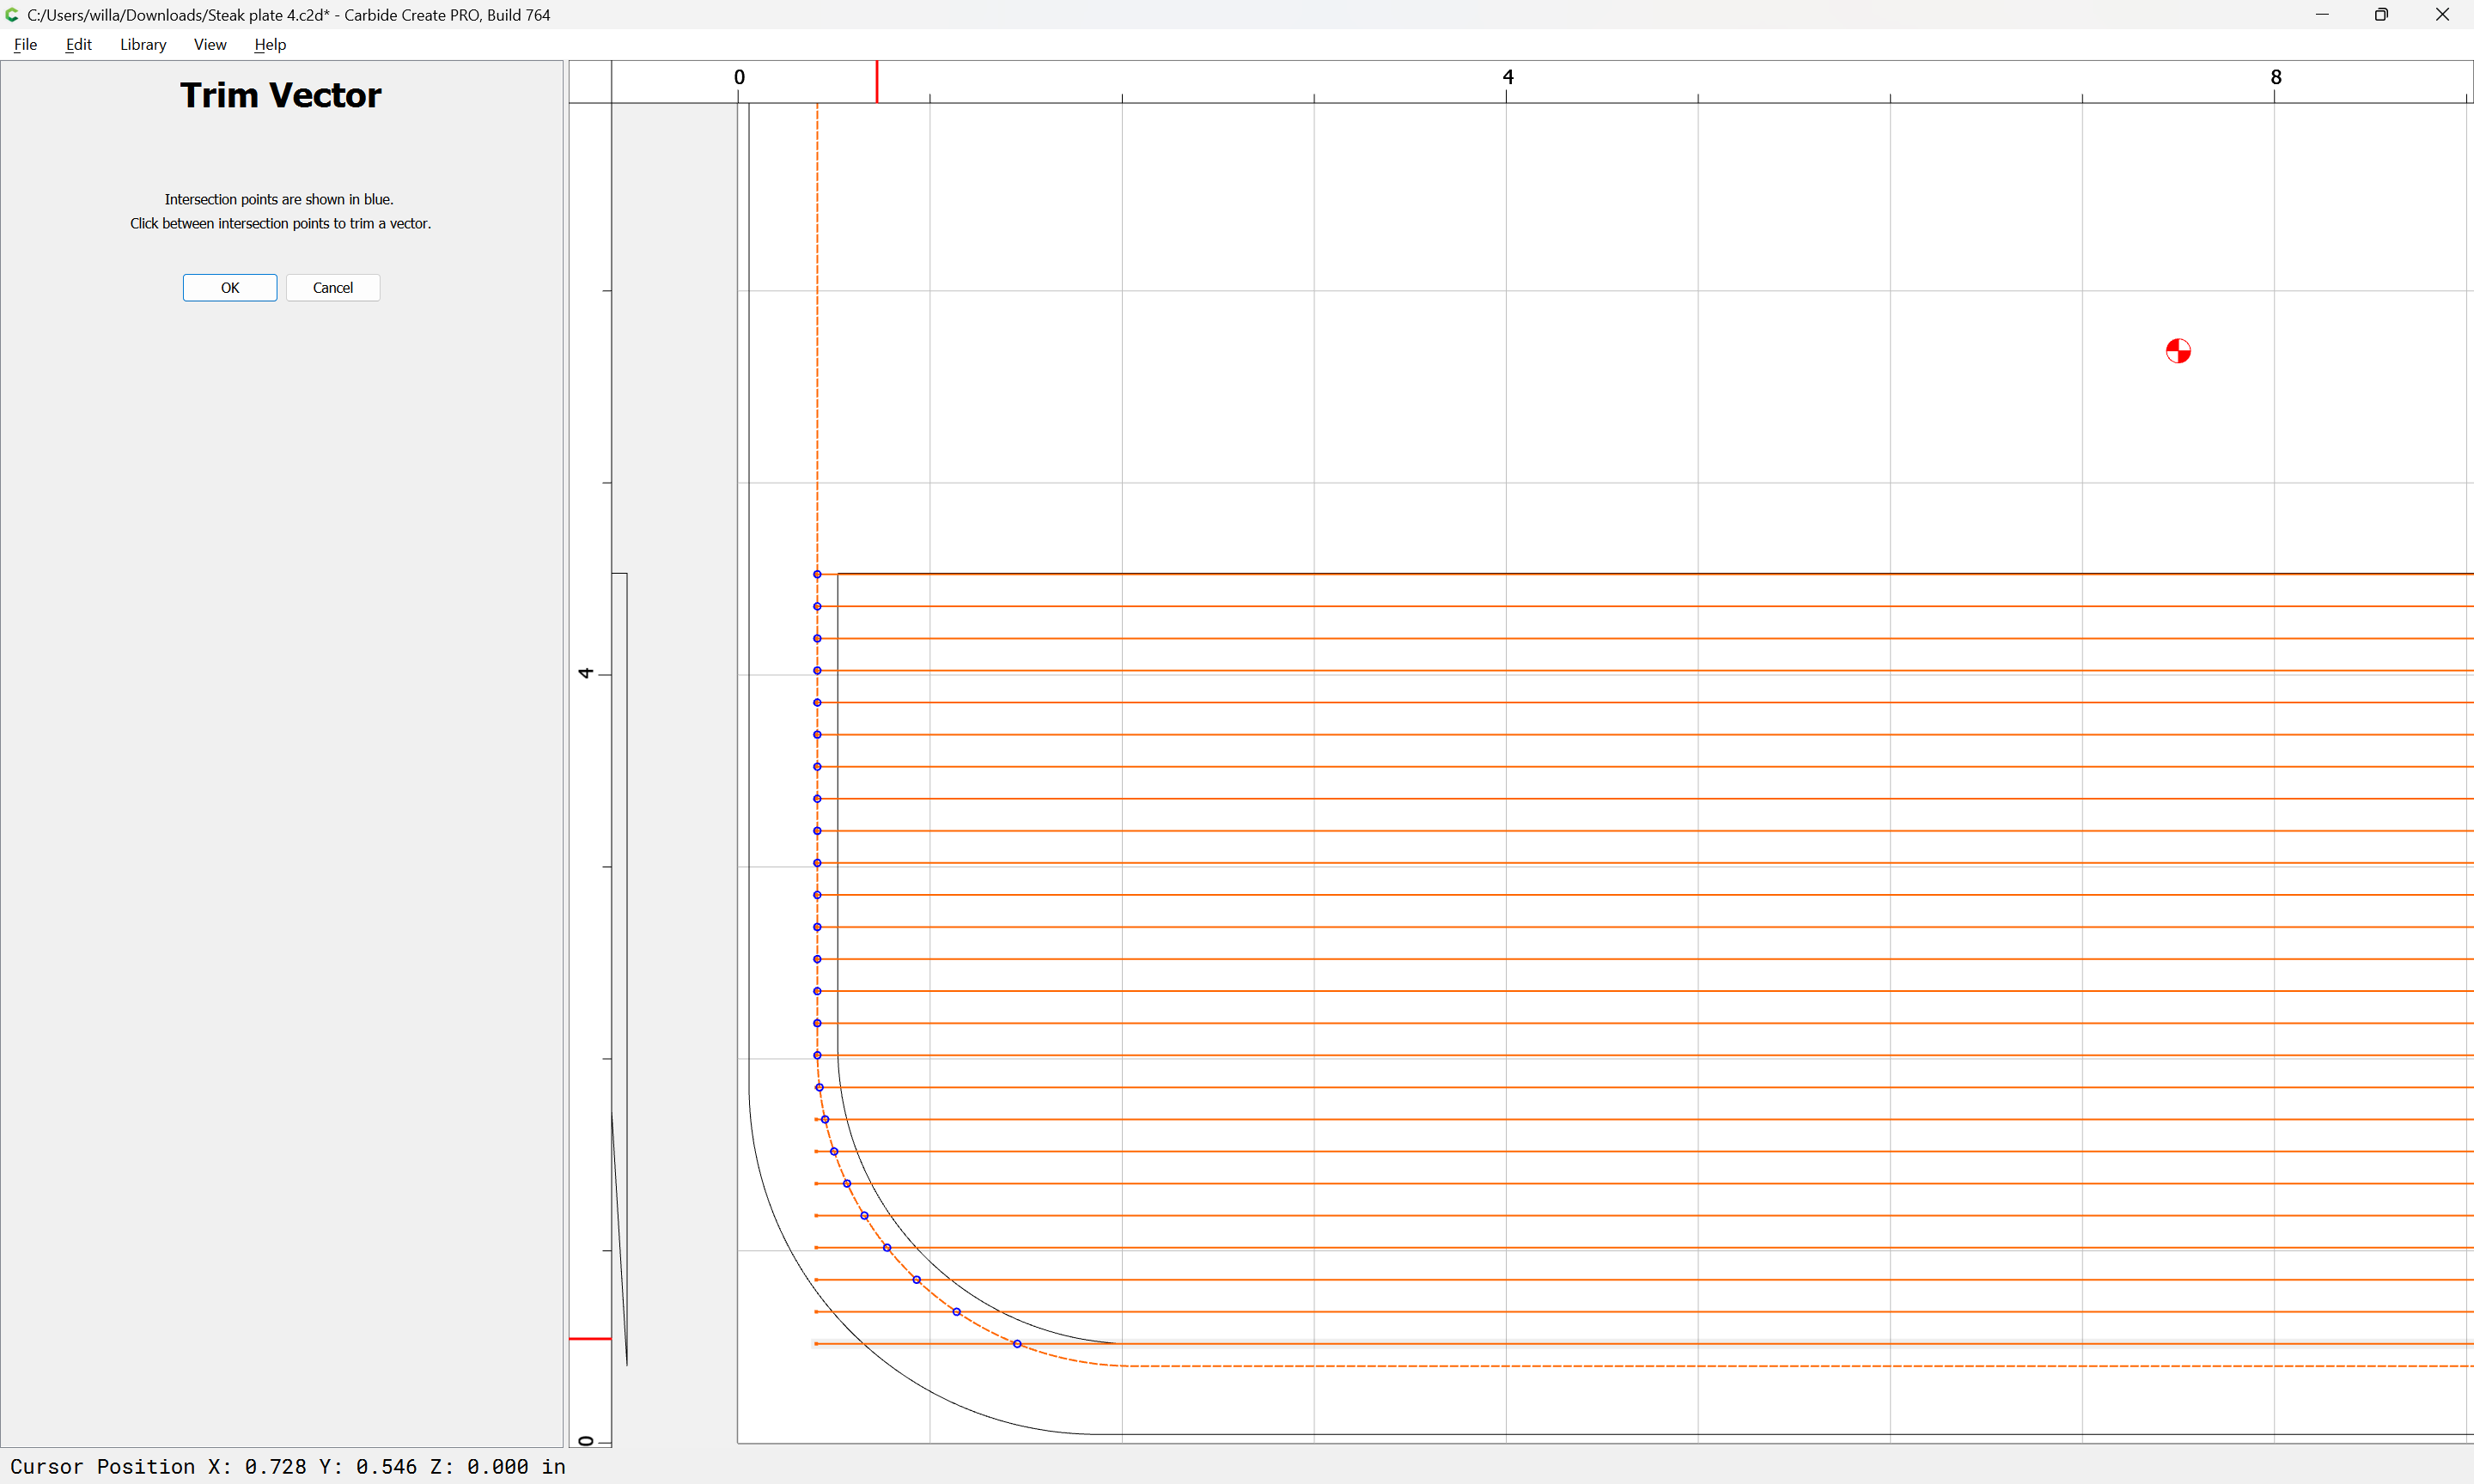
Then assign toolpaths, from top-to-bottom:
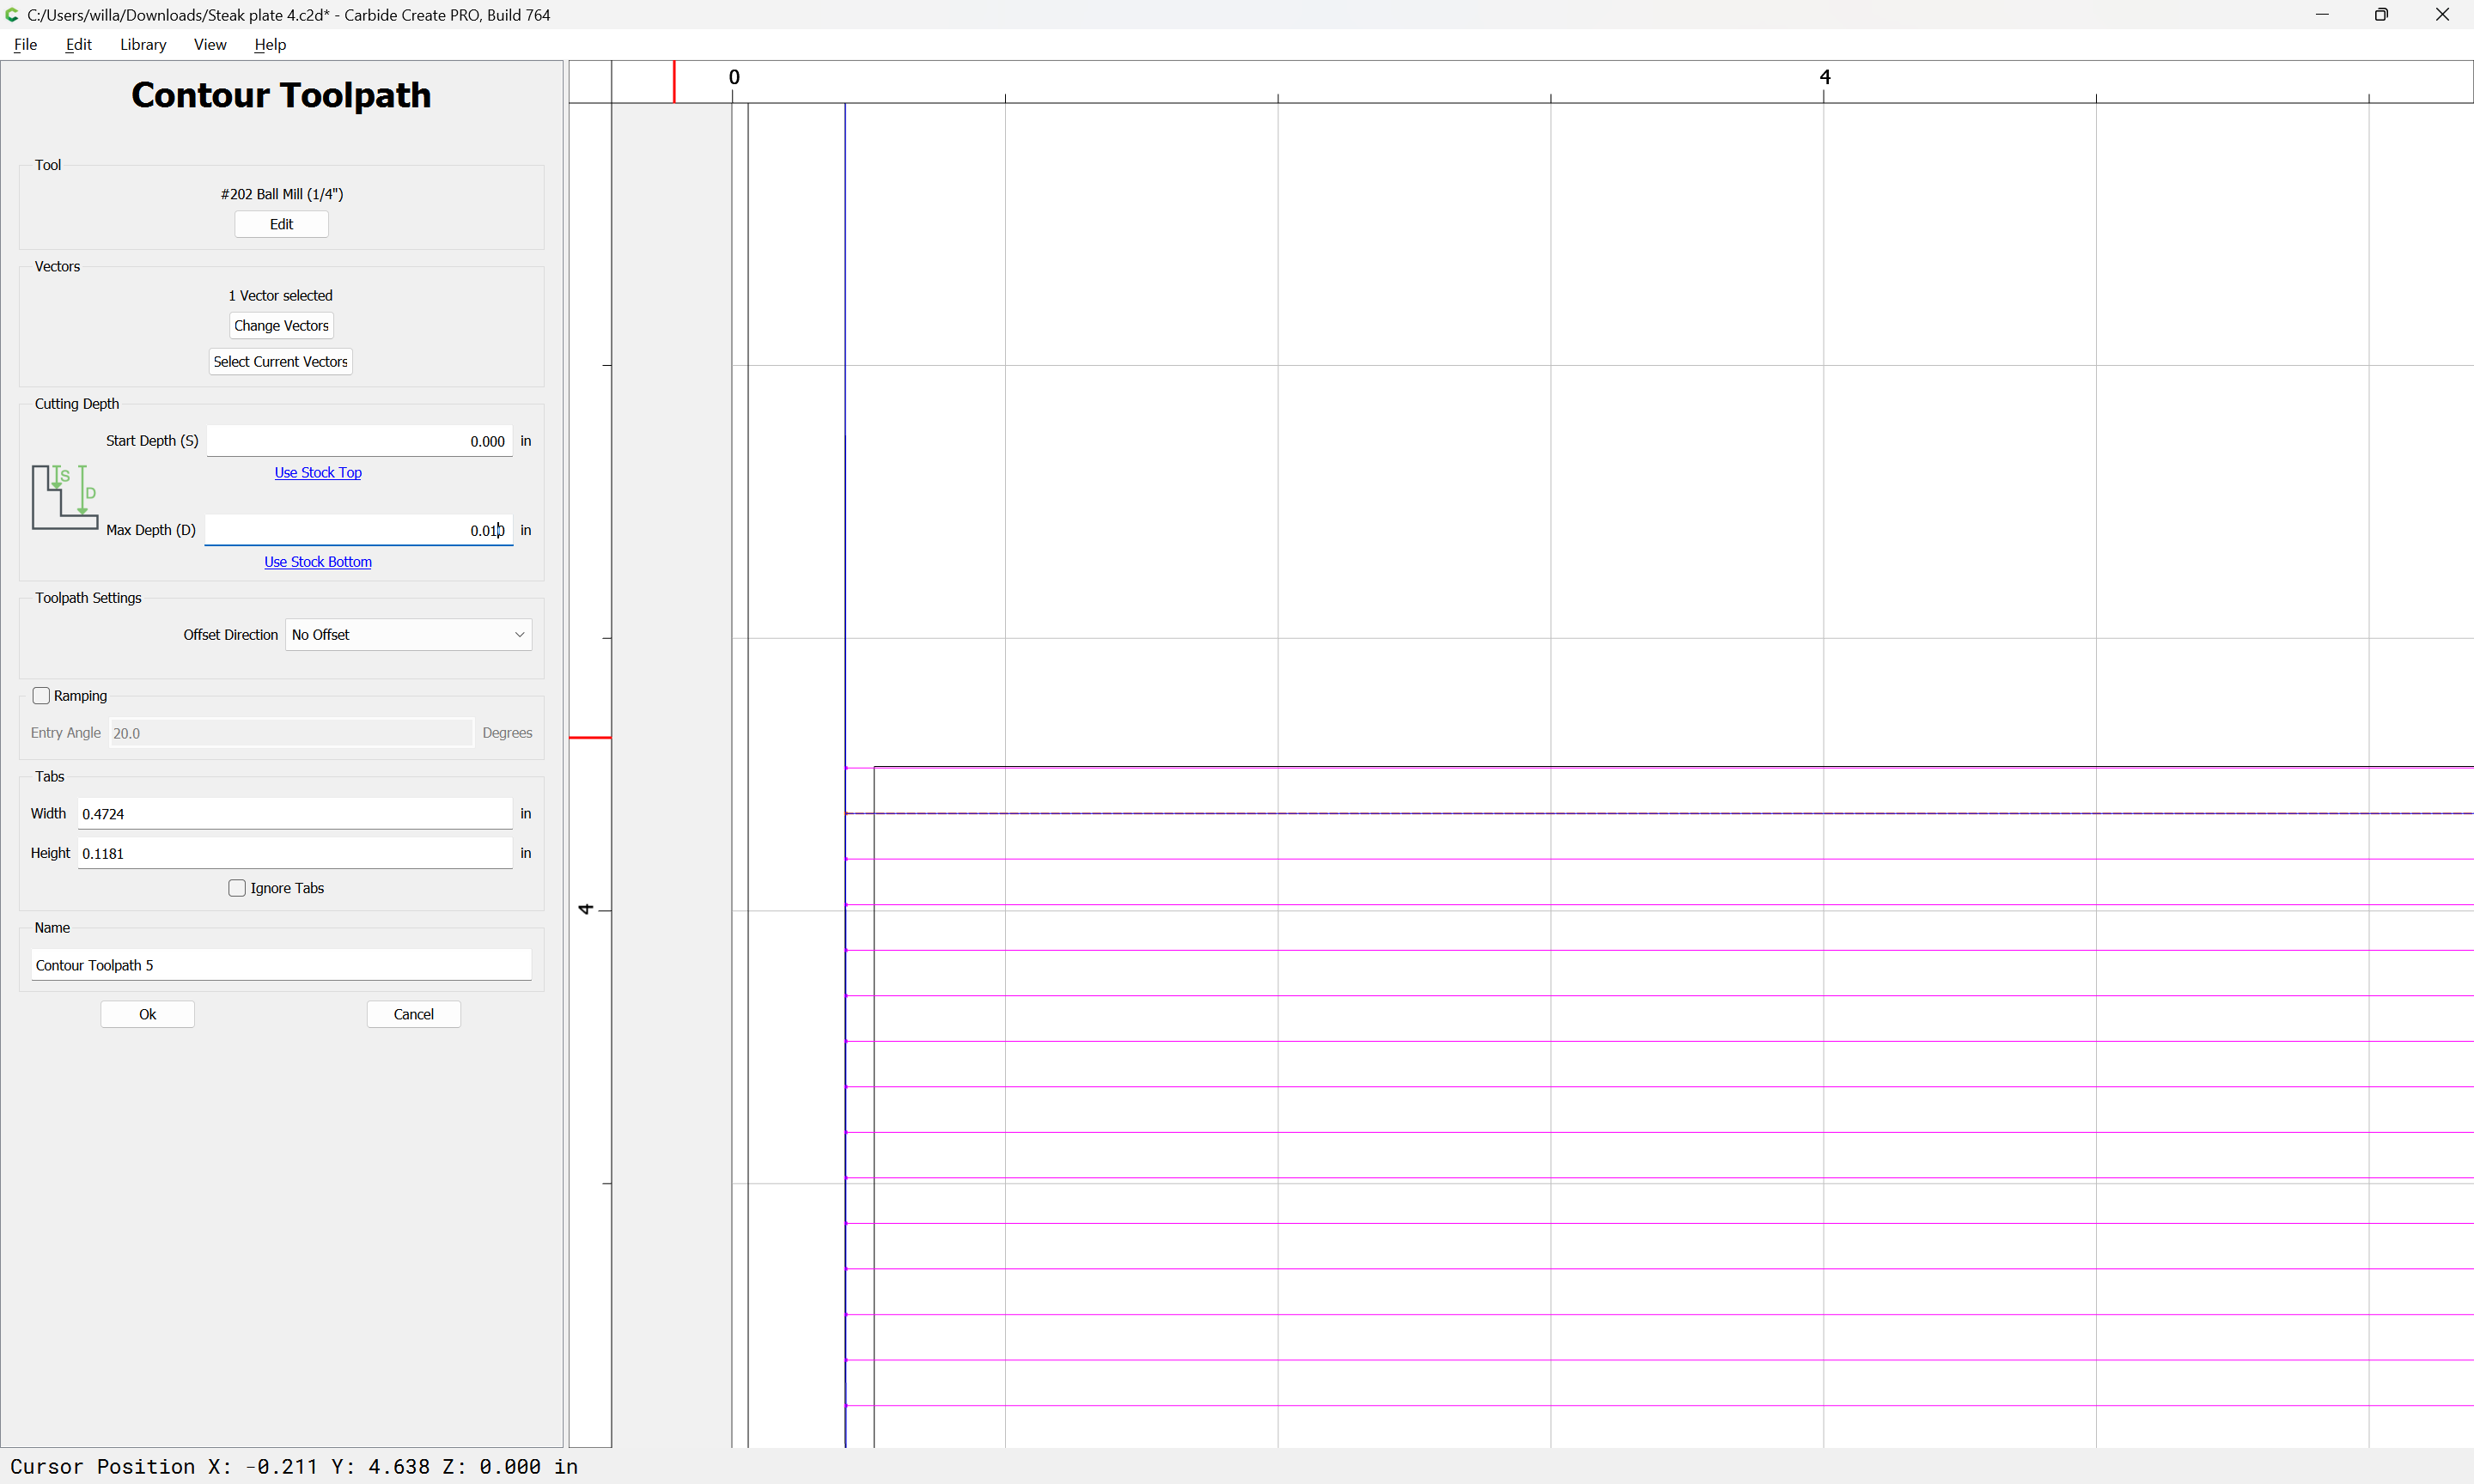
increasing the depth with each:
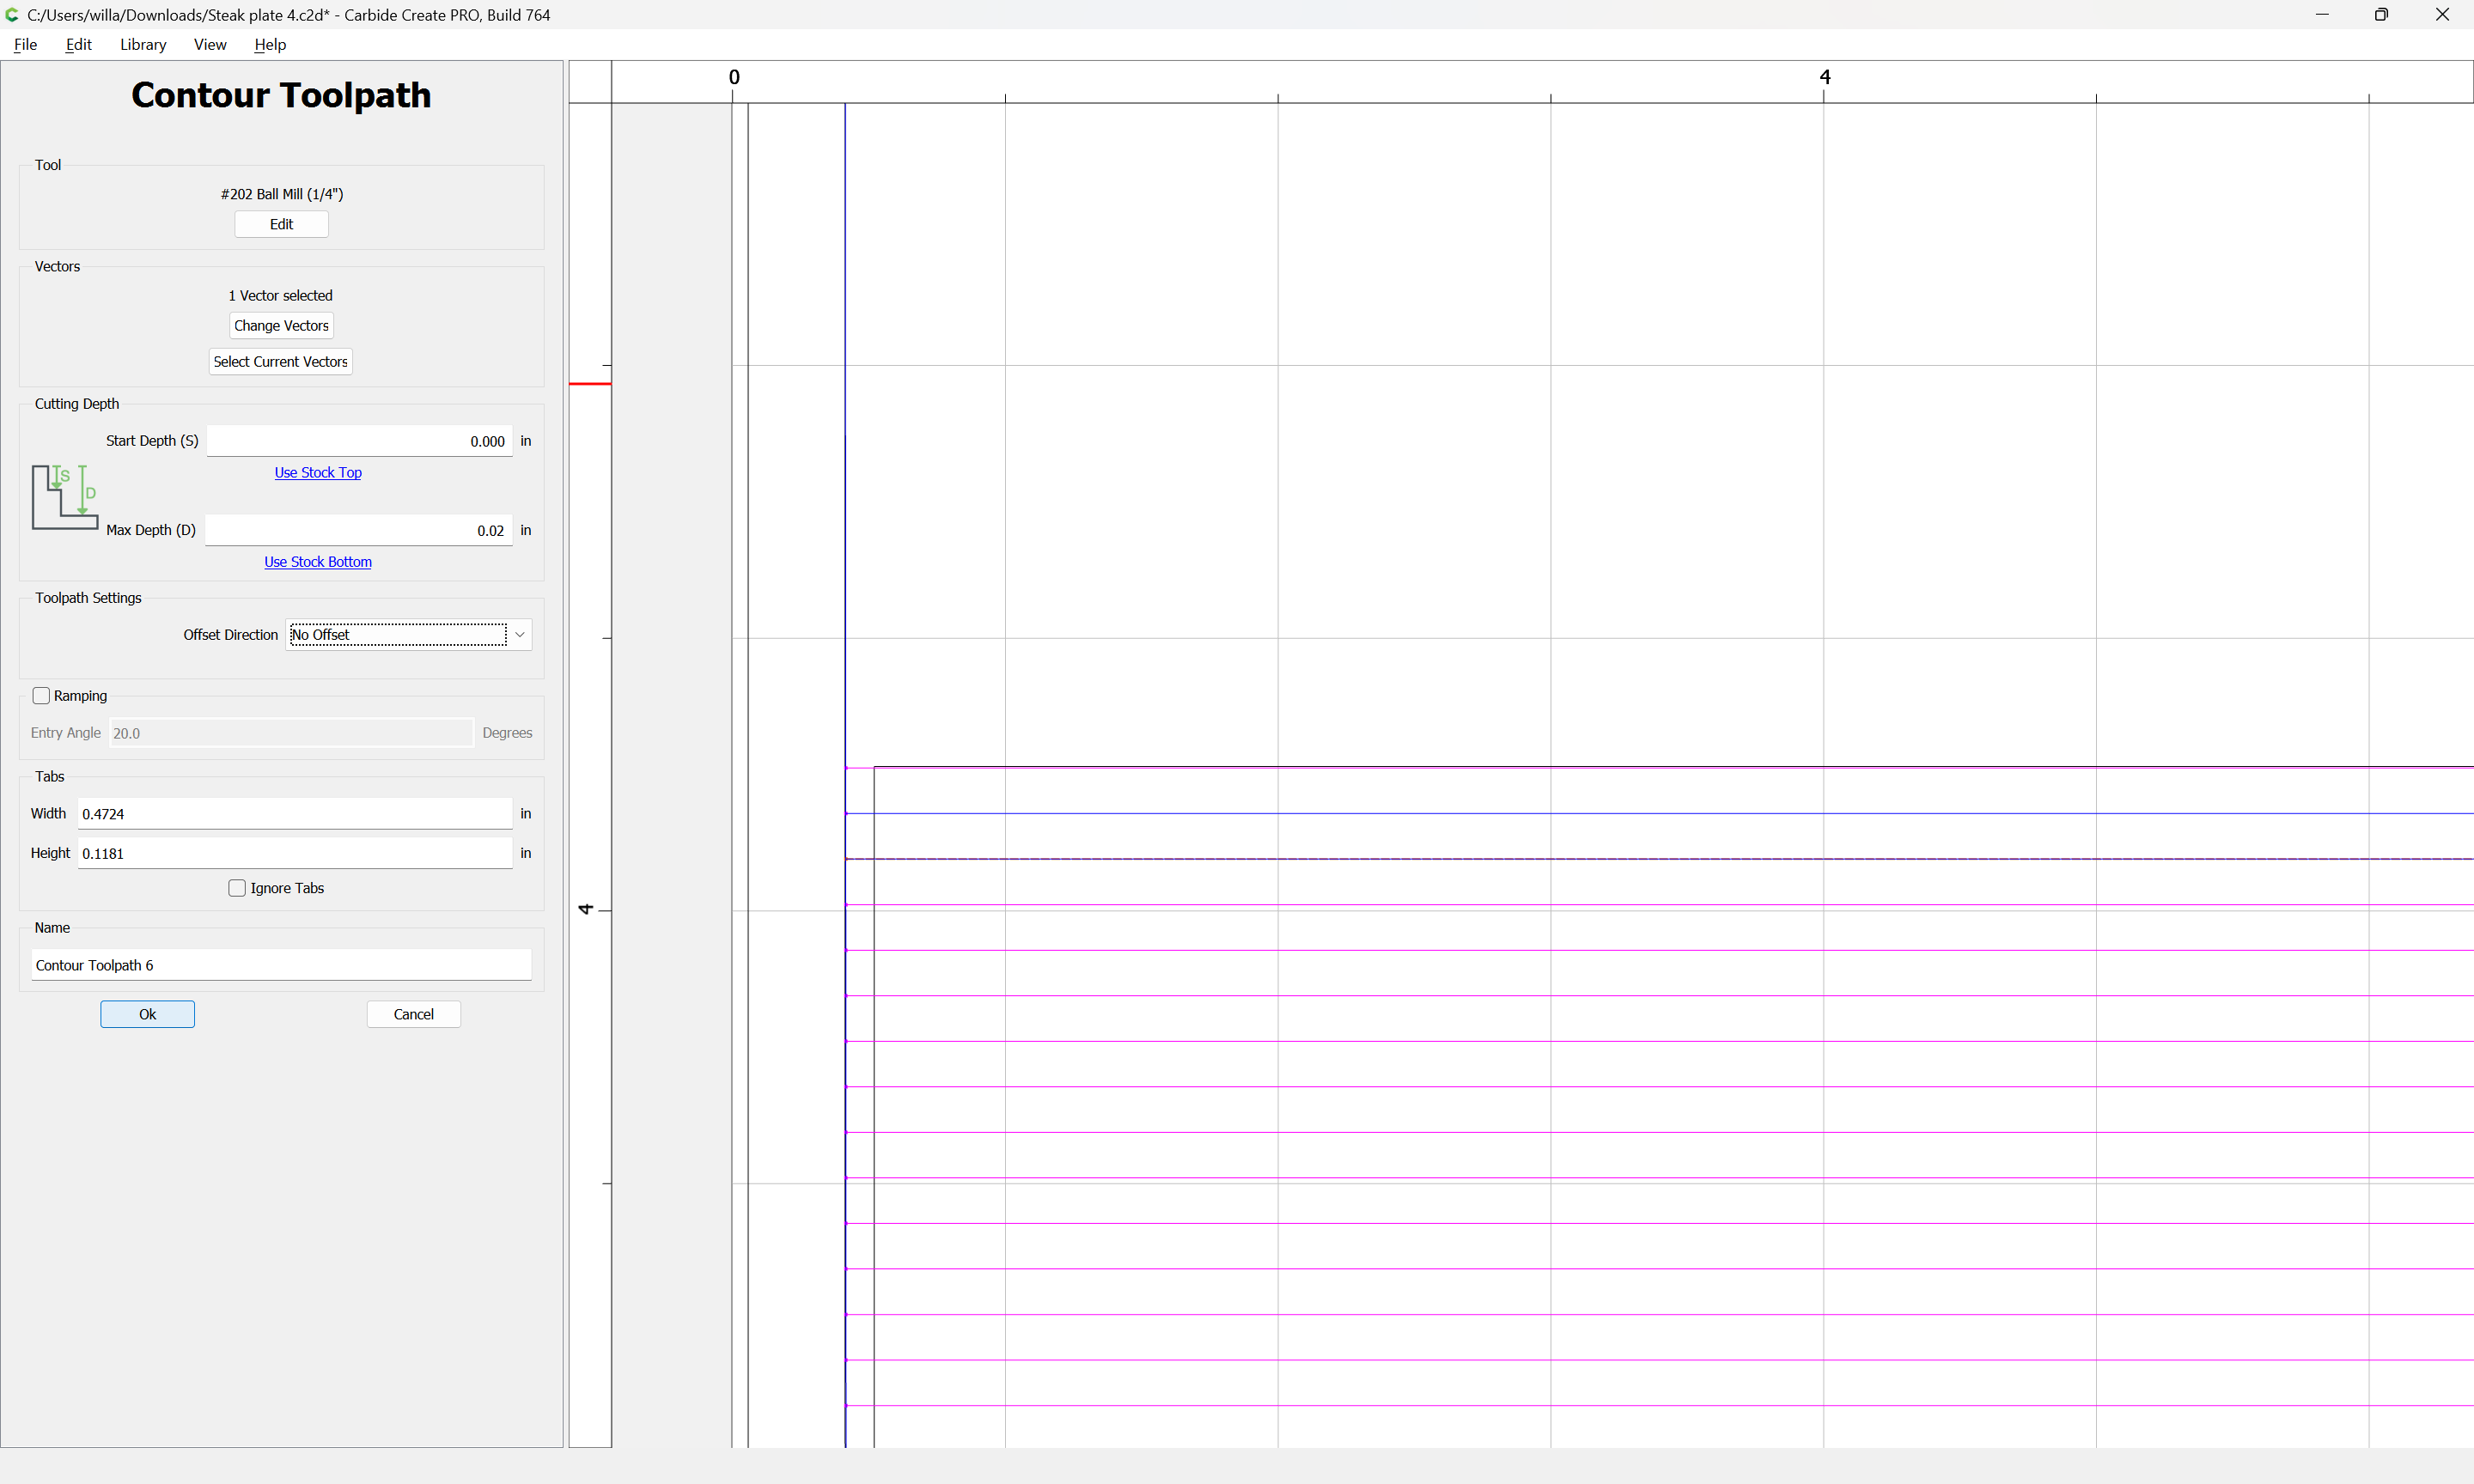
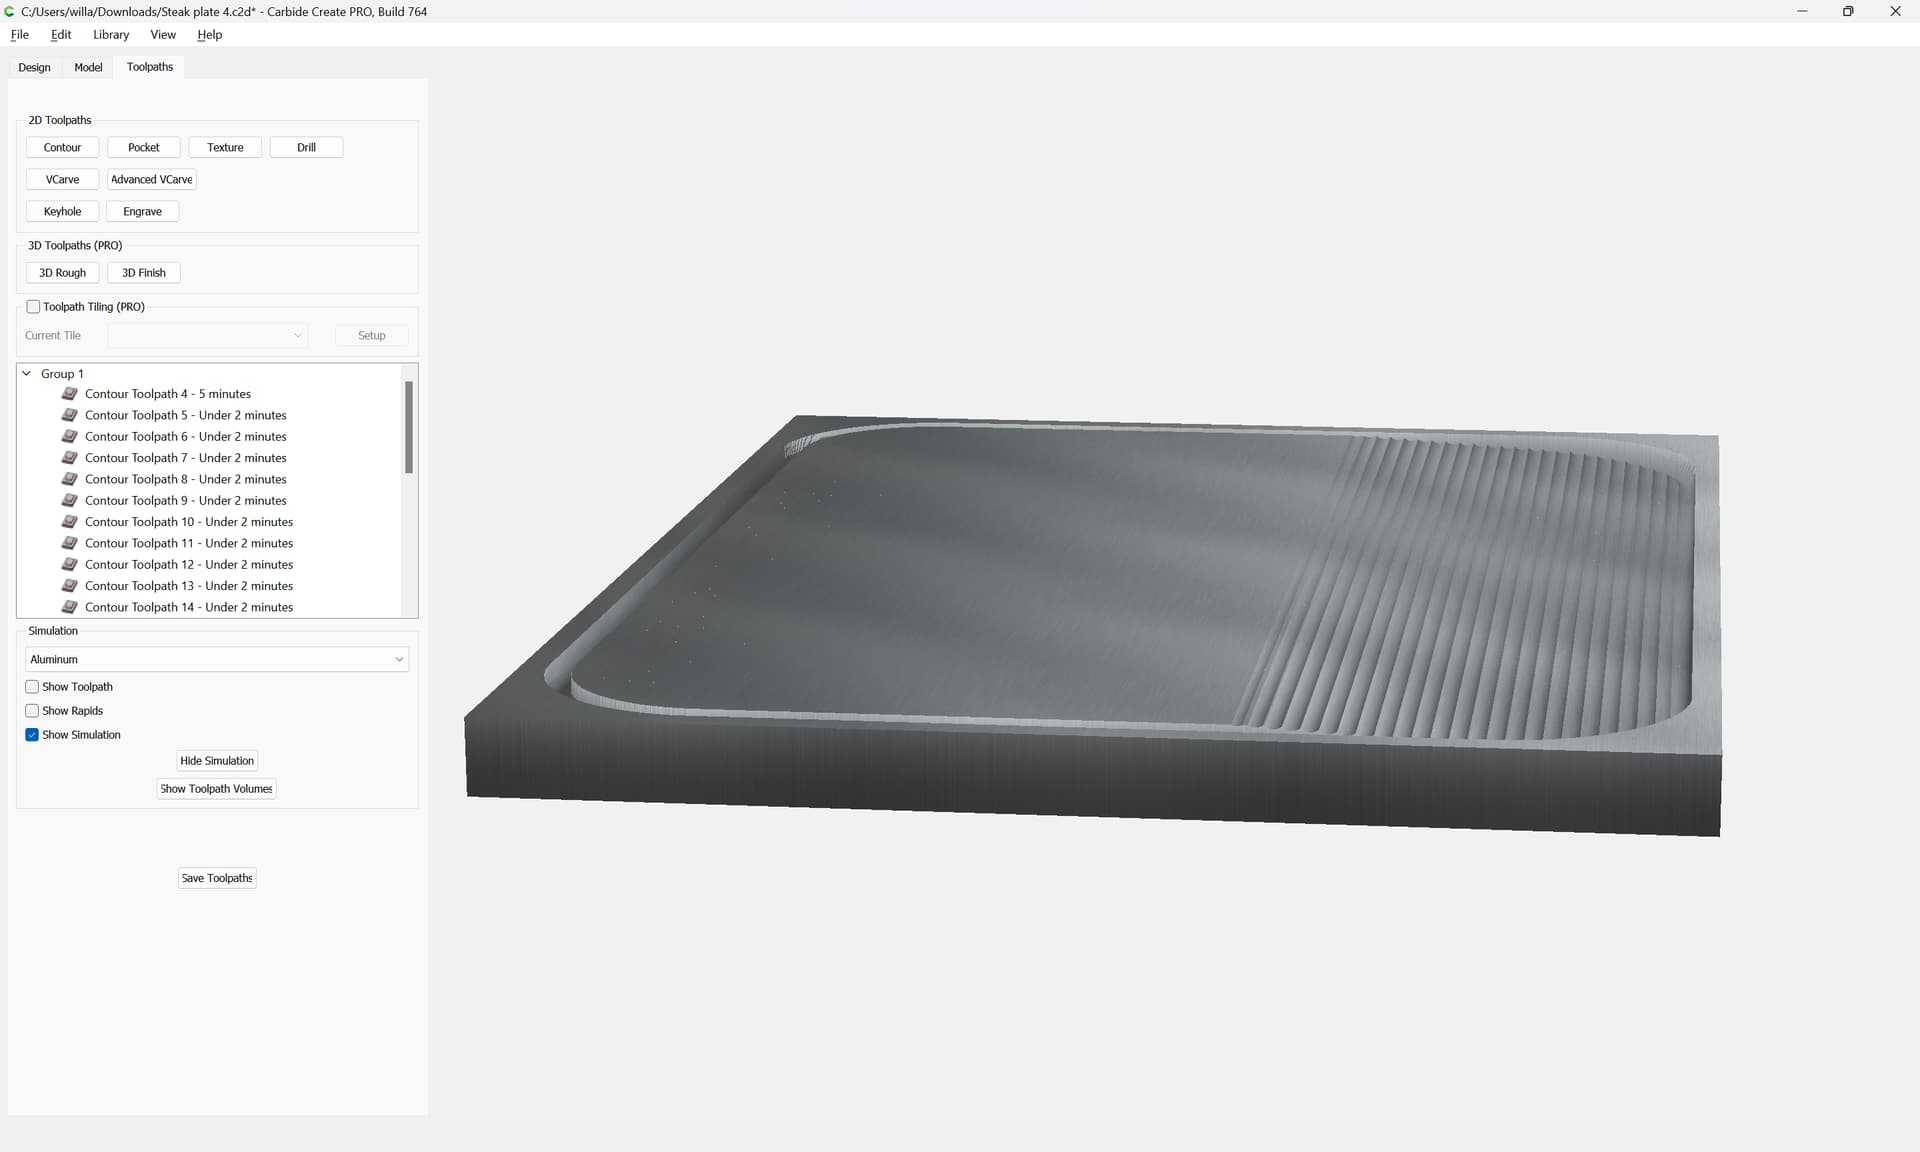
but you’d probably want to increase the number of lines.
Steak plate 4_lines_v7.c2d (268 KB)
1 Like
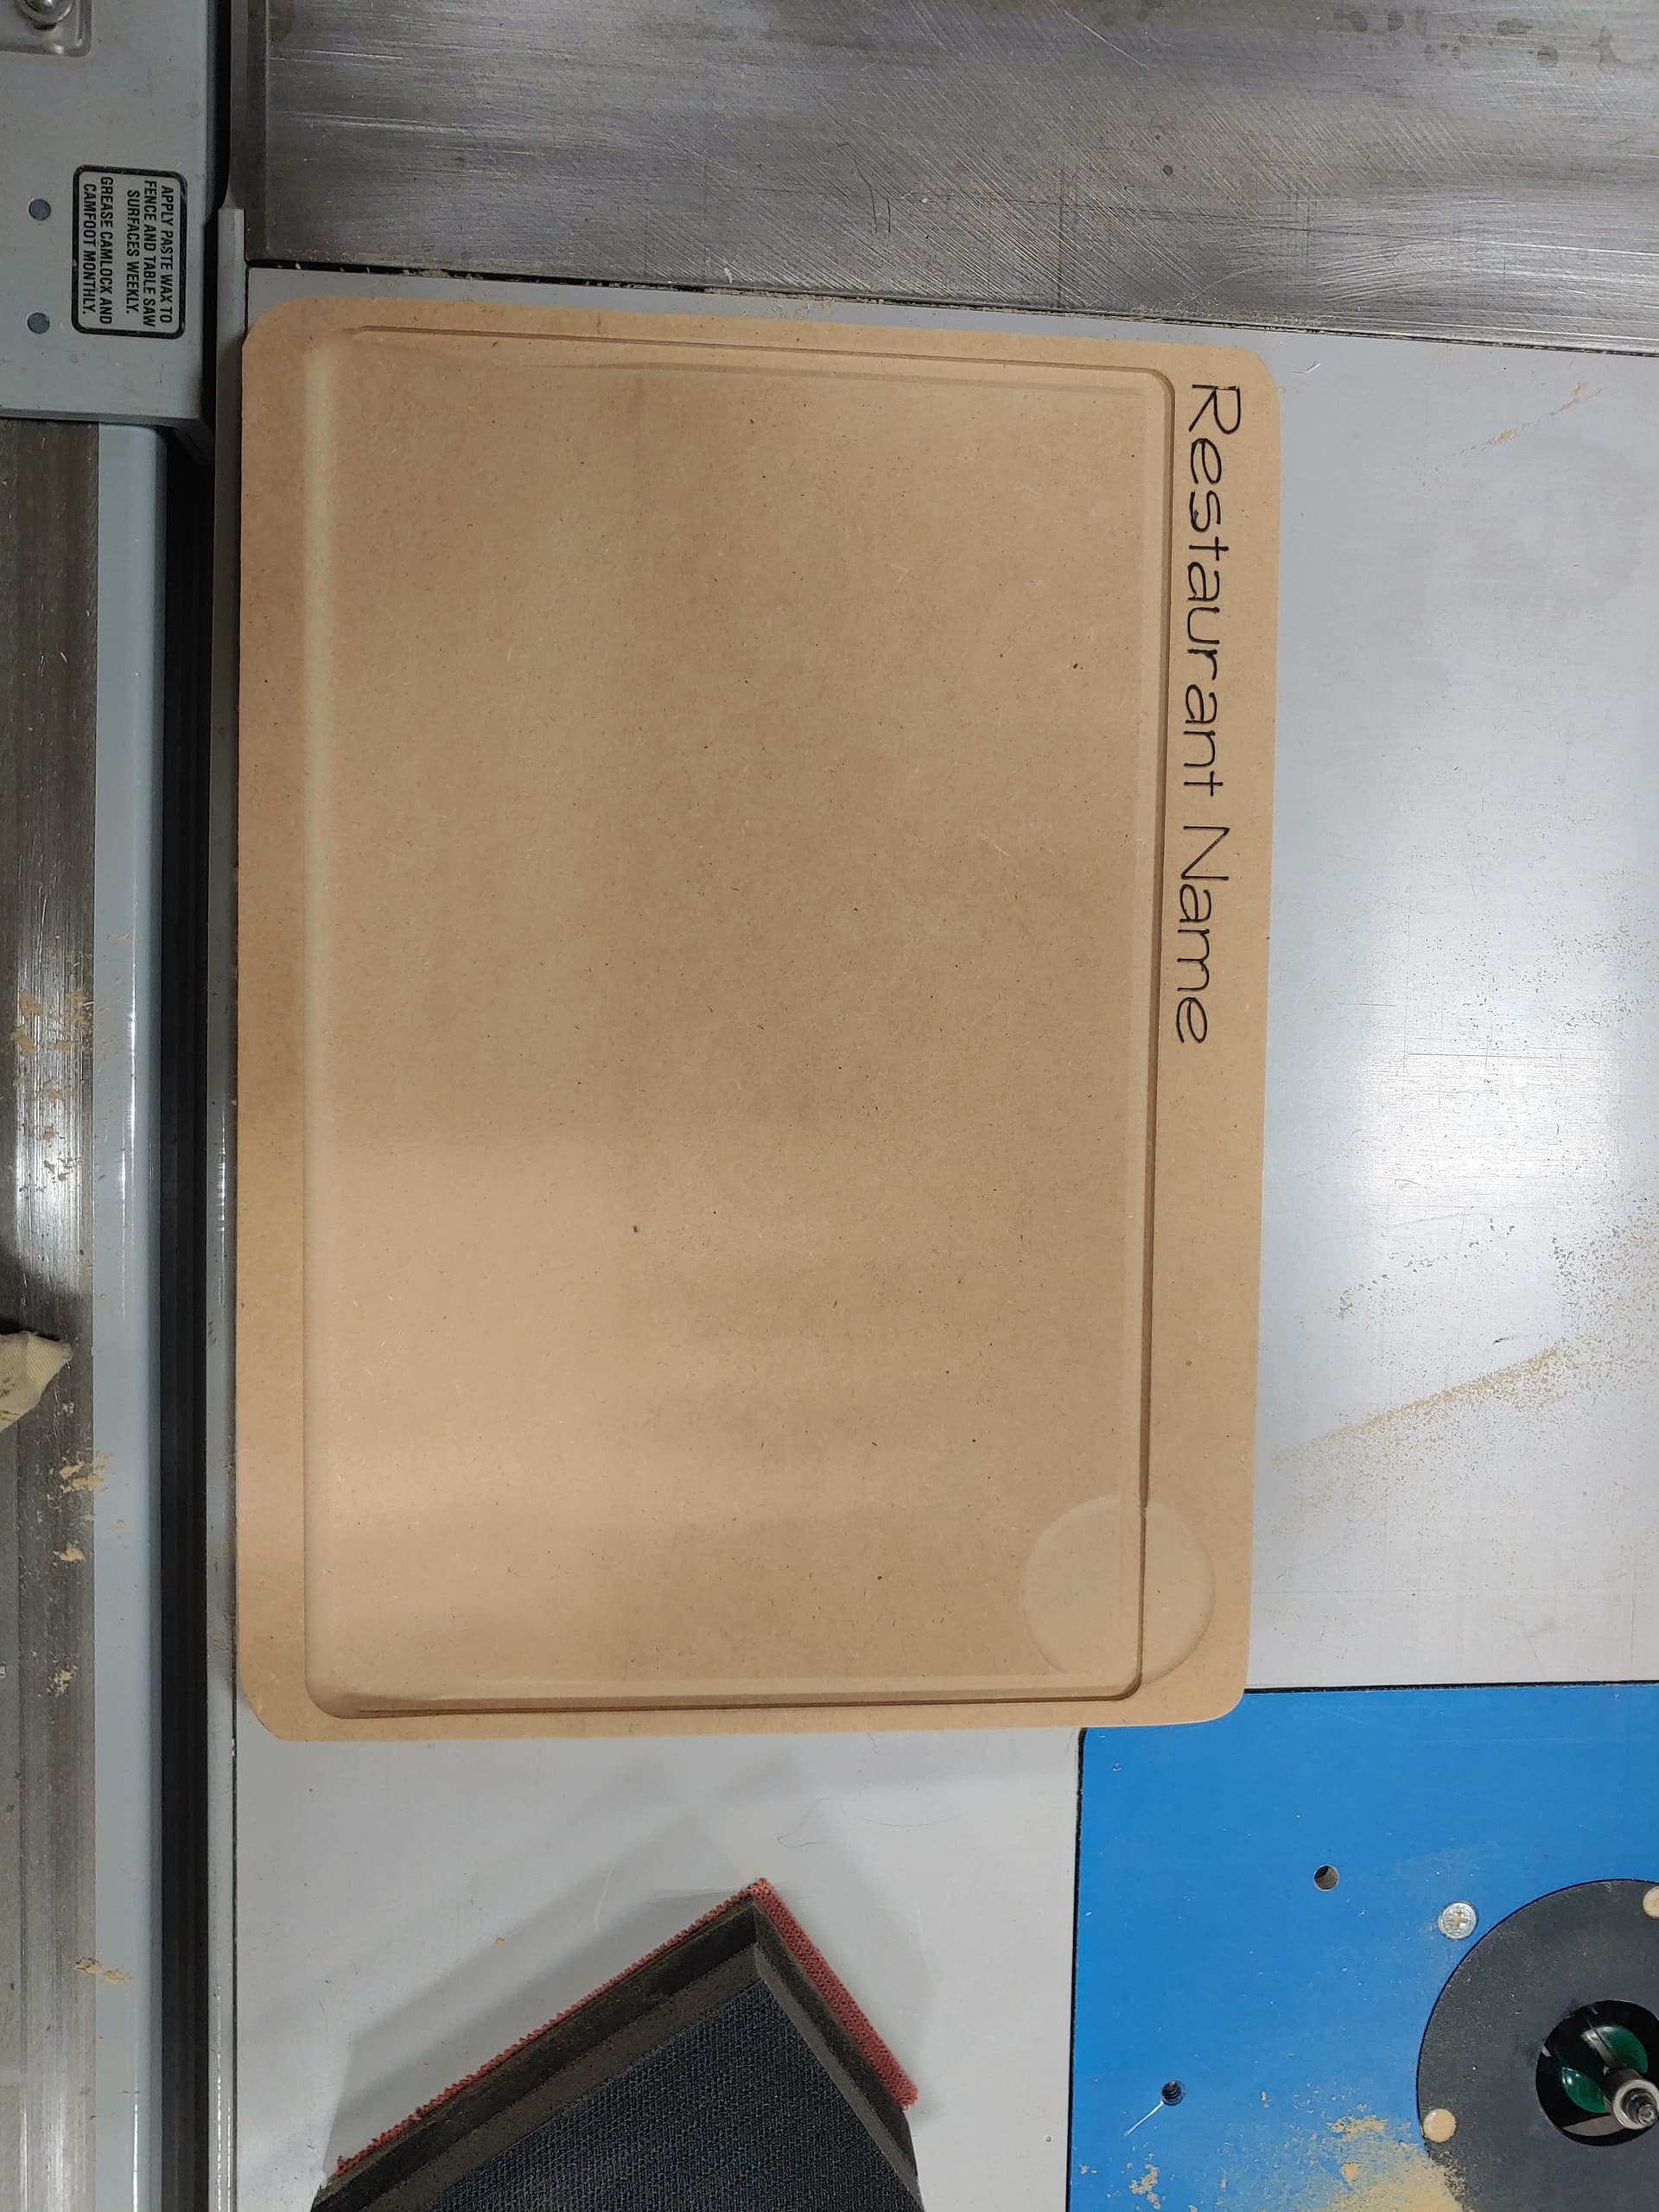
Thank you all for the ideas. I ended up putting a 1" spacer under the front edge and clamped it down such that the entire board was angled. I used a 3/4" bowl and tray bit and cut a pocket in the juice tray area. I tried various spacer heights - 1/4, 3/8, 1/2, etc. until I found that I got the ramp results I needed with the 1" riser. The pocket took 9 minutes to carve, then I removed the riser, clamped it flat to the bed and carved the restaurant name, round cup holder and a 1/4" contour around the plate for any juices that ran to the side.
It is not so easy to see the ramp in this MDF mockup picture, but I showed it to the client and they liked it. Then he threw in an additional challenge and wants these done with live edge boards. ![]()
Thanks again for all the help
David
5 Likes
This topic was automatically closed 30 days after the last reply. New replies are no longer allowed.