as requested on support…
Given a design which wants to be cut at different depths:
one would work up multiple pockets which will achieve the desired effect.
as requested on support…
Given a design which wants to be cut at different depths:
one would work up multiple pockets which will achieve the desired effect.
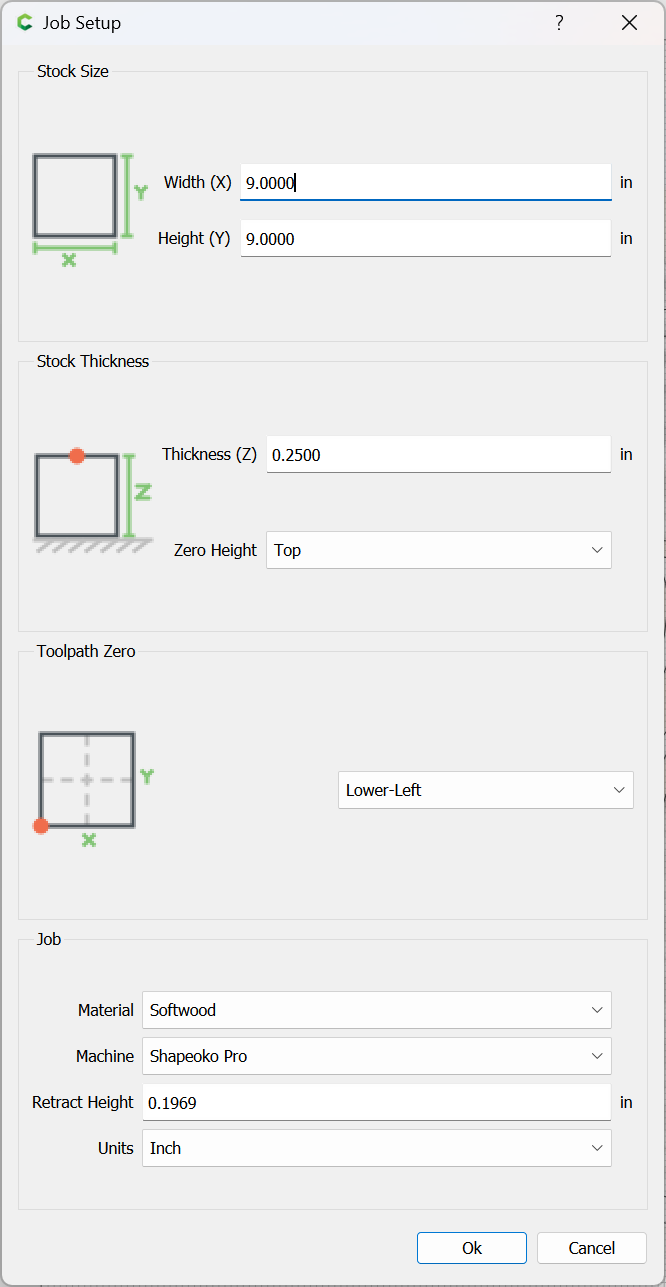
First, set up the job:
we will use 1/4" stock, and cut the various pockets to half that depth.
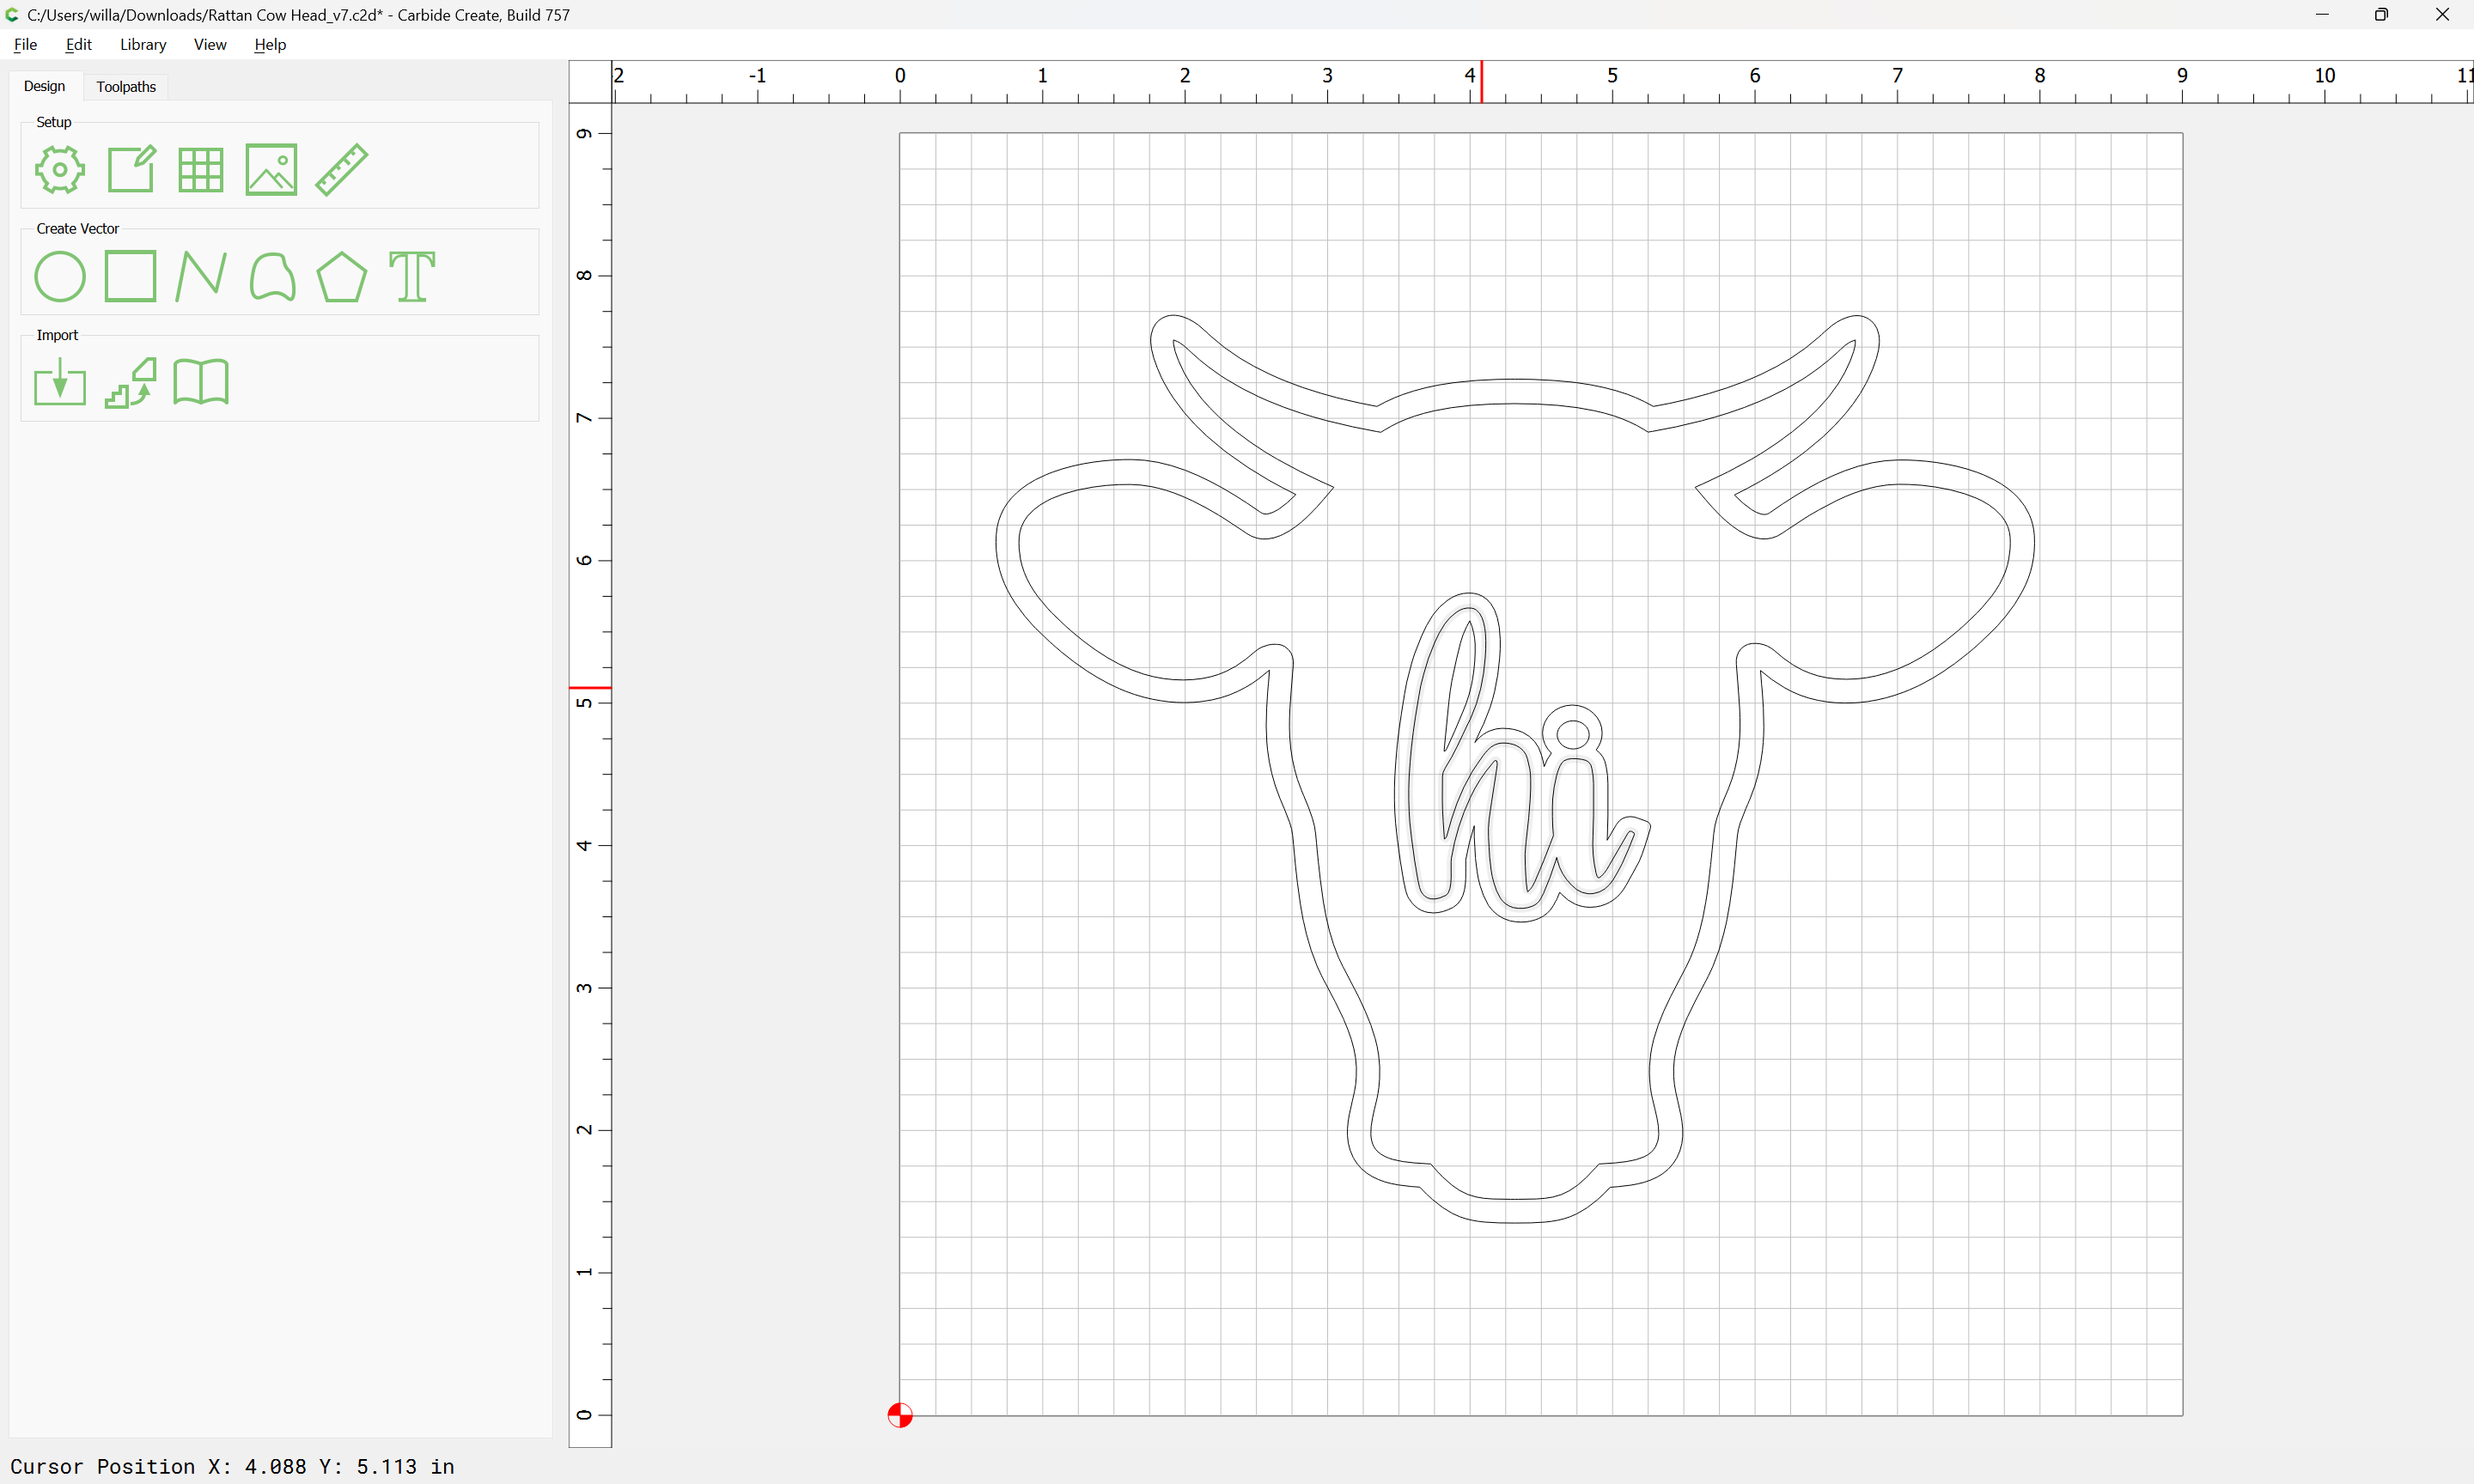
Then import the geometry:
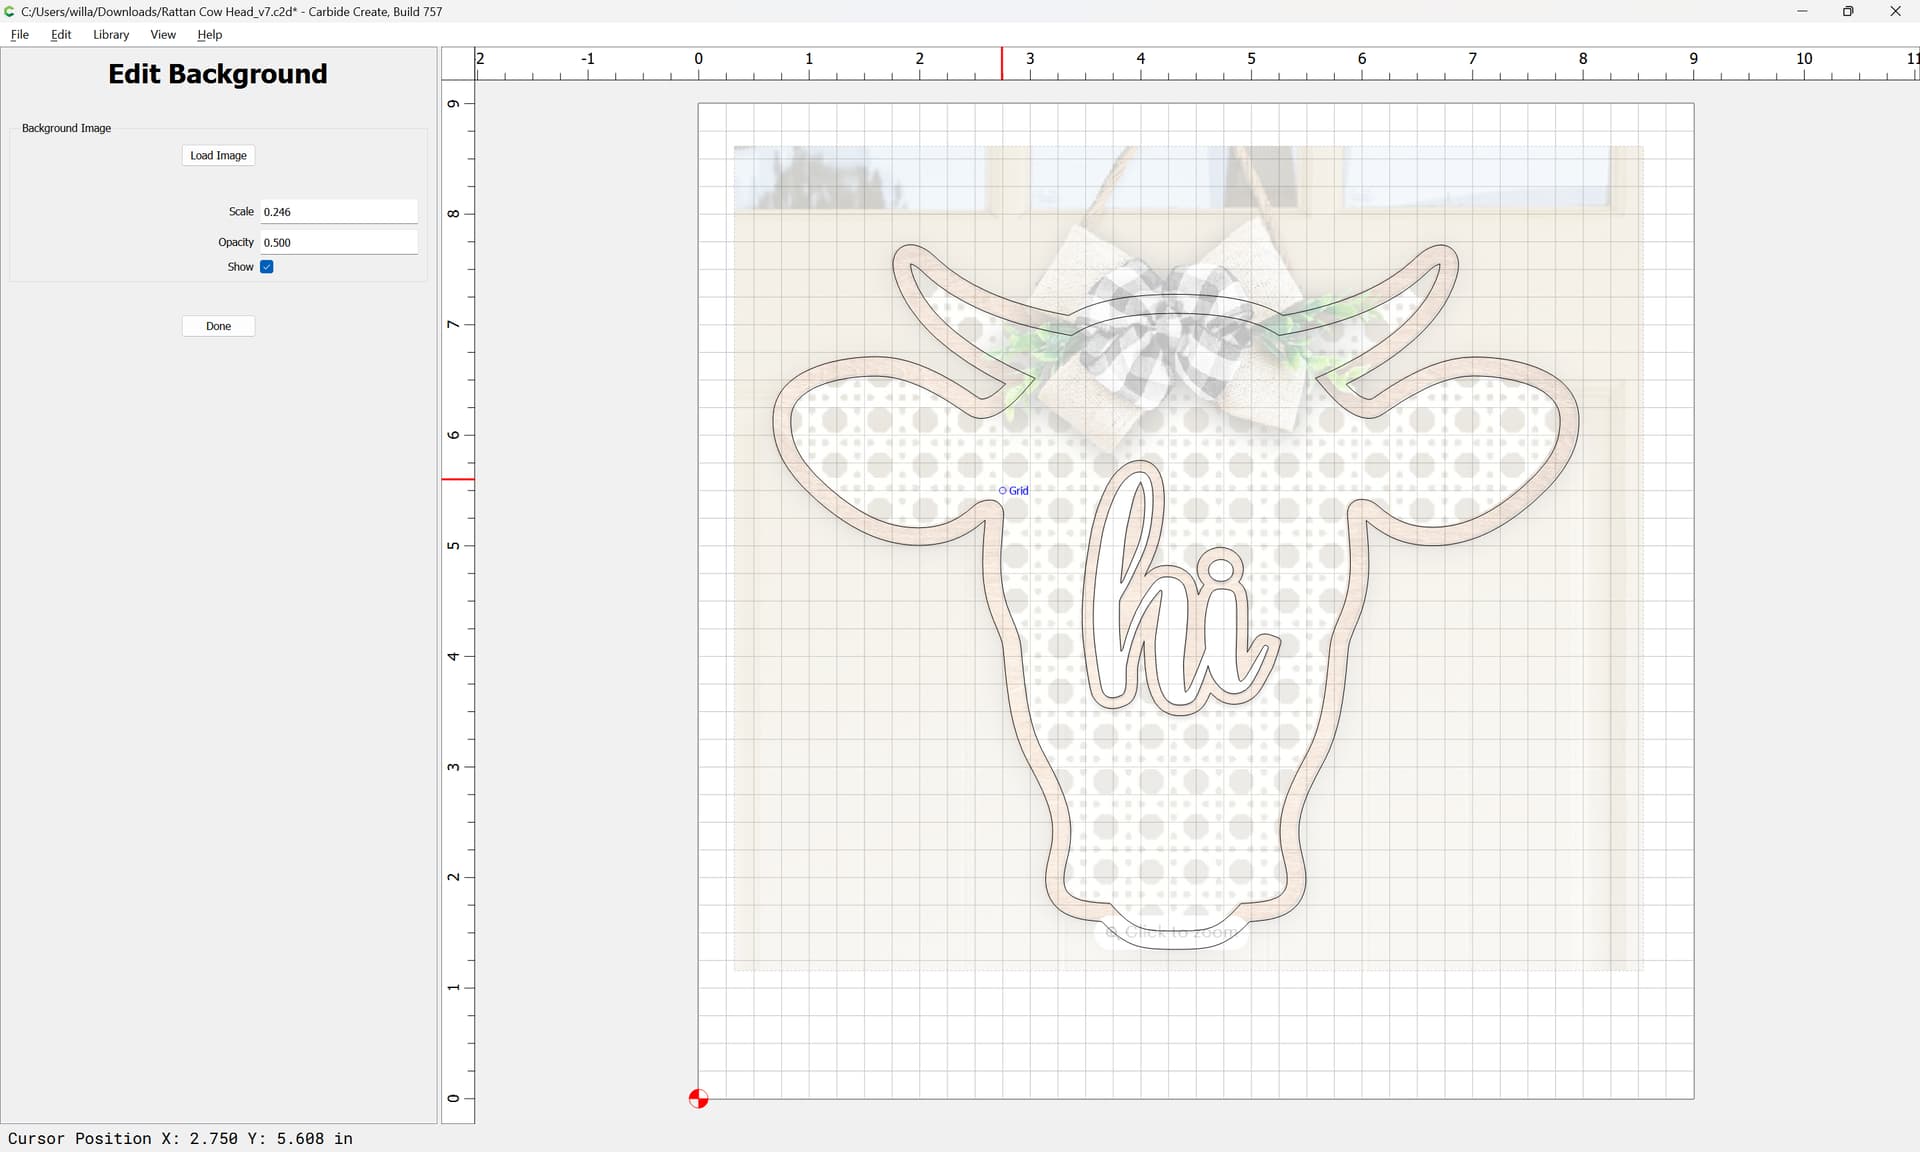
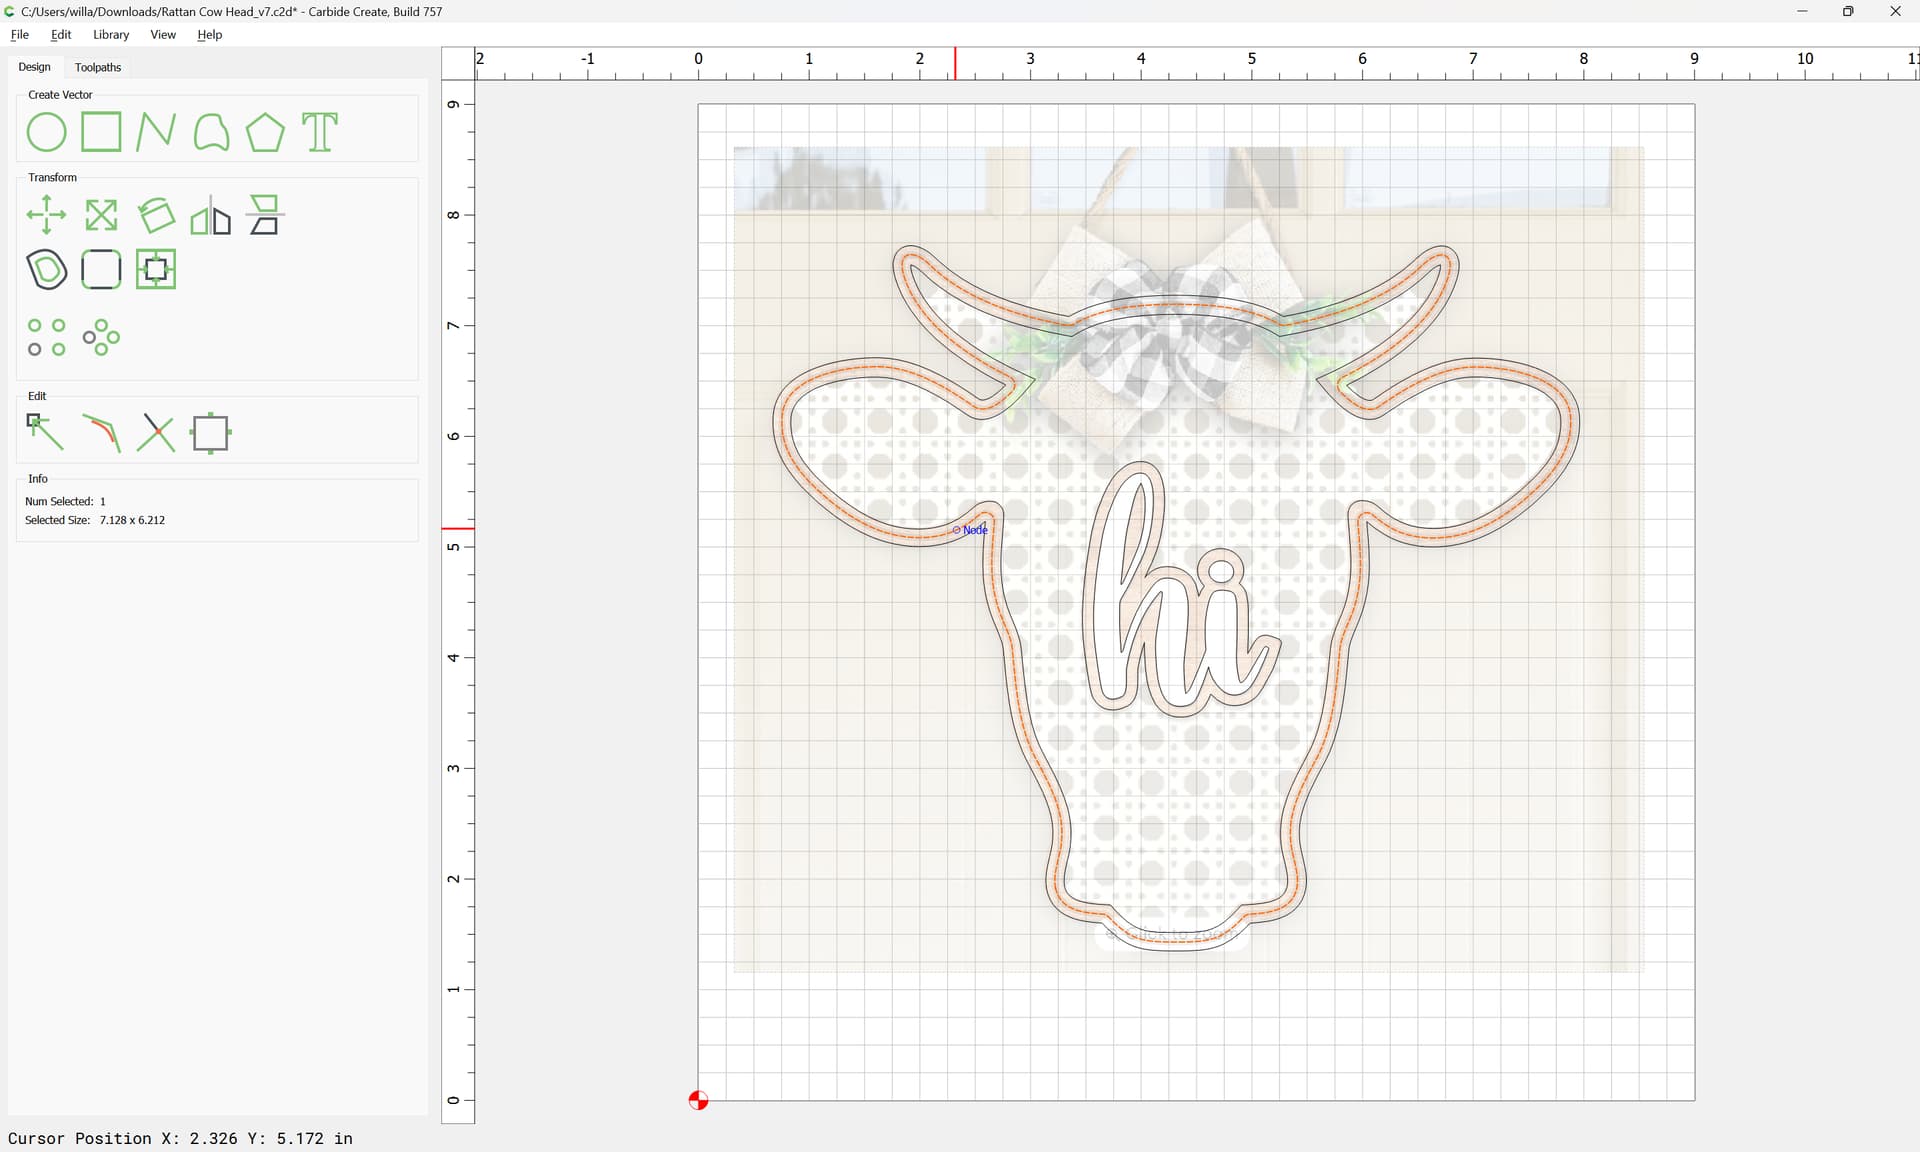
and if desired, set the image on the background for reference:
One can see the necessary two levels in the text object, but the rattan background should be let into the back, so we will need to add geometry for that — fortunately the design is symmetrical, so we can do this on the same side that we do the text on and just flip during assembly:
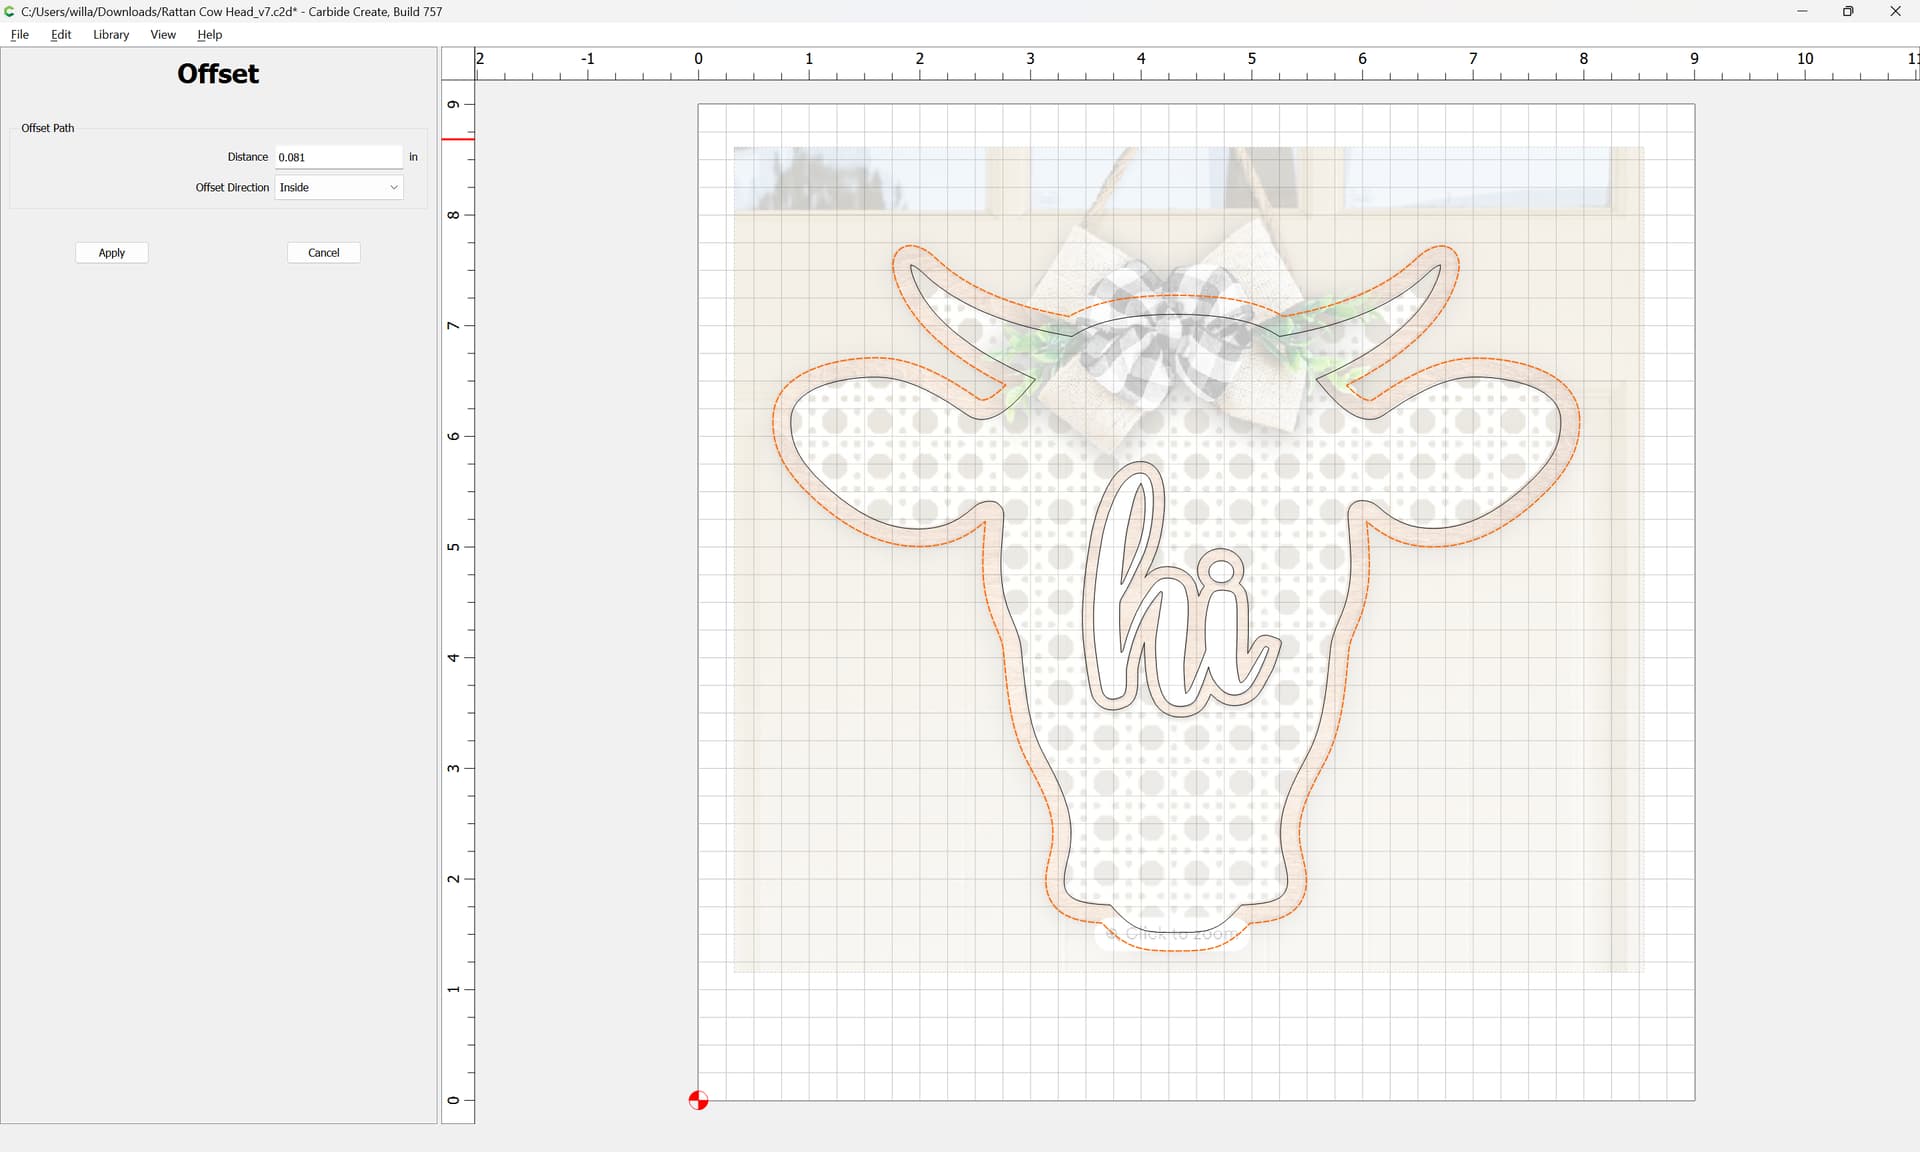
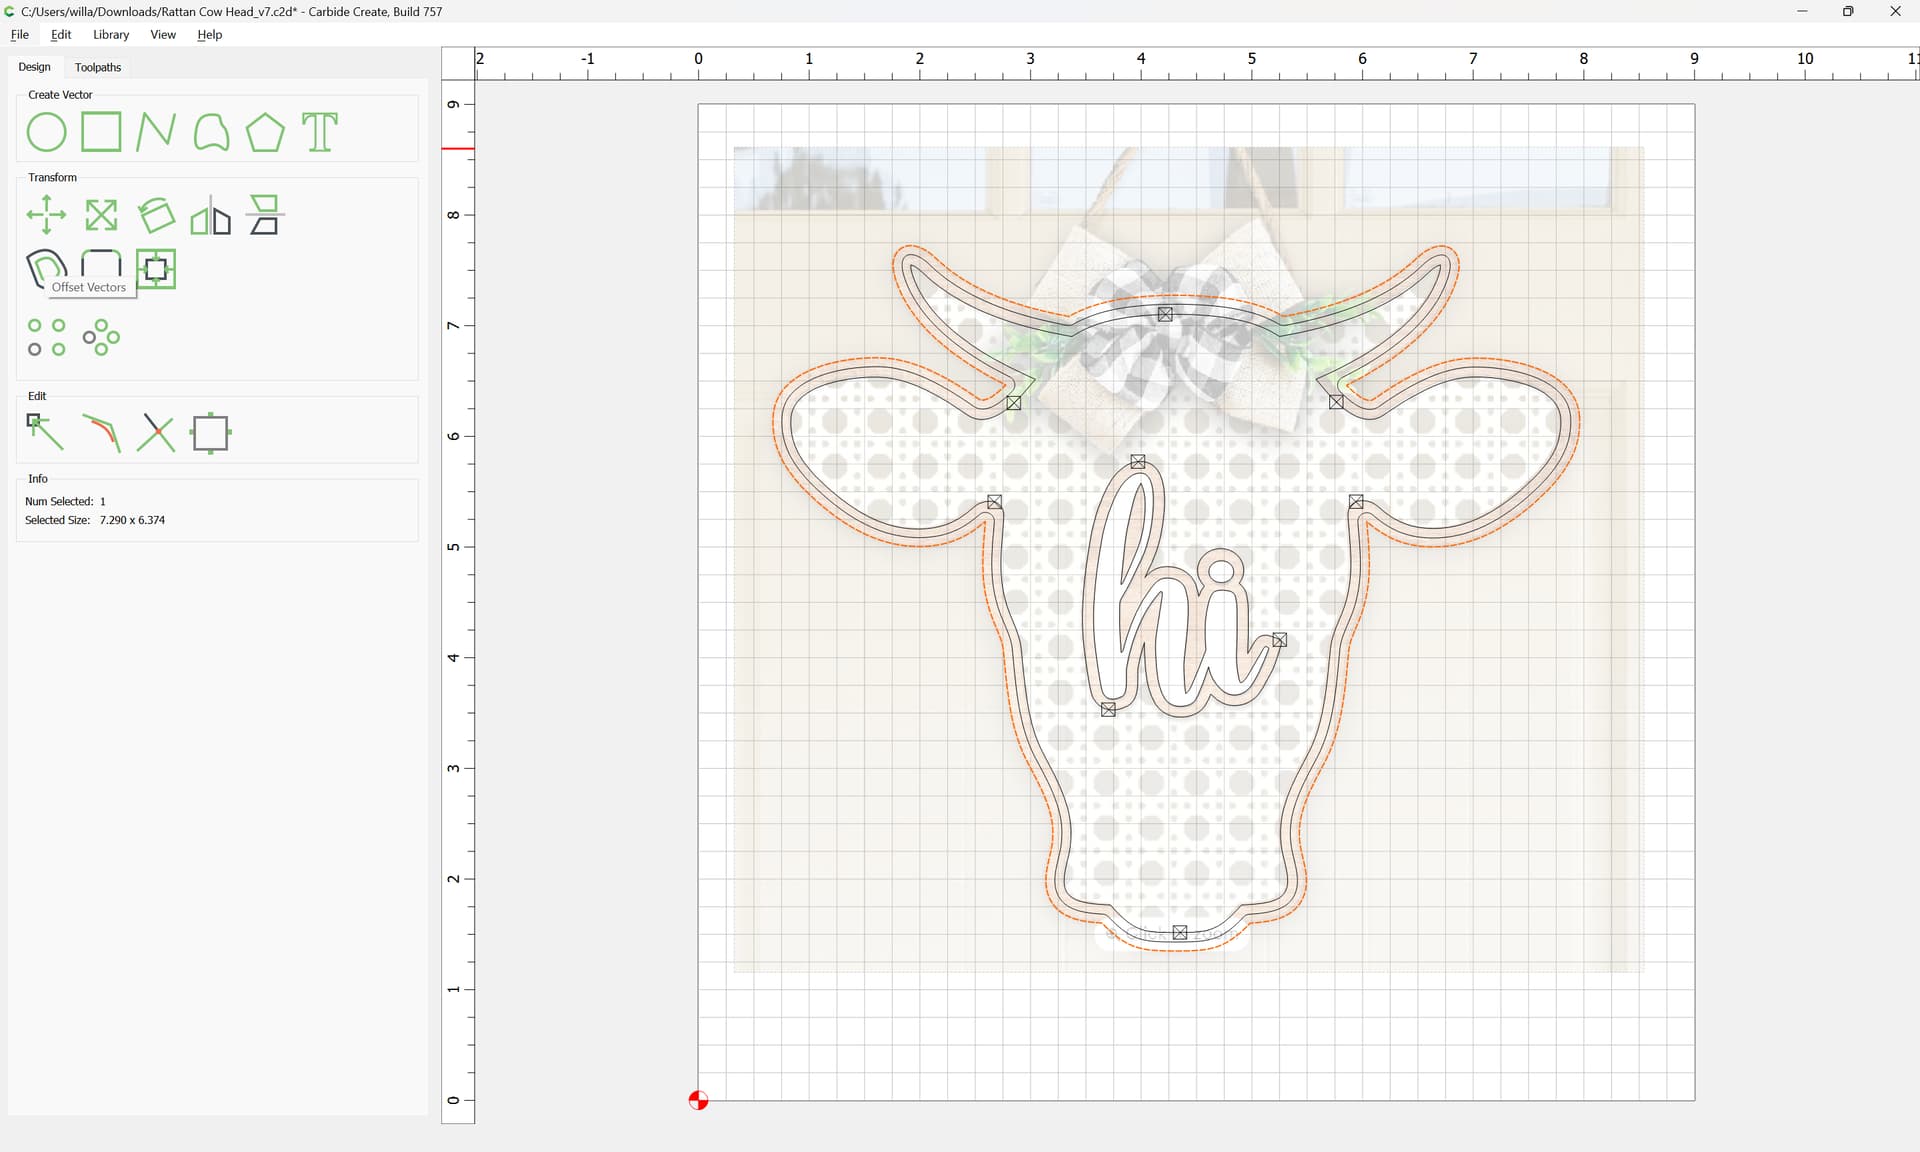
Choose “Offset Vectors”:
and set it to “Inside” and a suitable distance:
Apply
We then cut the inside features first:
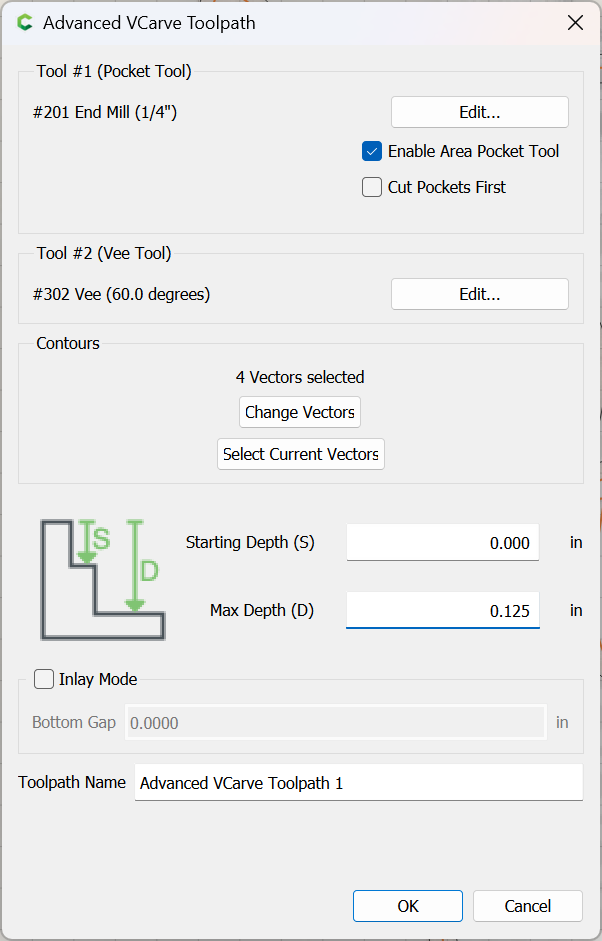
There are multiple possible approaches — one can use a medium size tool which allows balancing detail against material removal rates, or cut as an Advanced V carving with pocket clearing, since that will capture all of the detail, or cut with a large and a small endmill, using REST machining to as to get sufficient detail — one could also combine these techniques.
First, the advanced V carving — when creating toolpaths, be sure to use the “Edit…” and then the “Select Tool” buttons to choose a material/machine combination which is suited to your setup — if need be, edit any settings as needed:
If you don’t understand a setting or a term, check the videos at:
and see the glossary at:
and if need be, check in at support@carbide3d.com
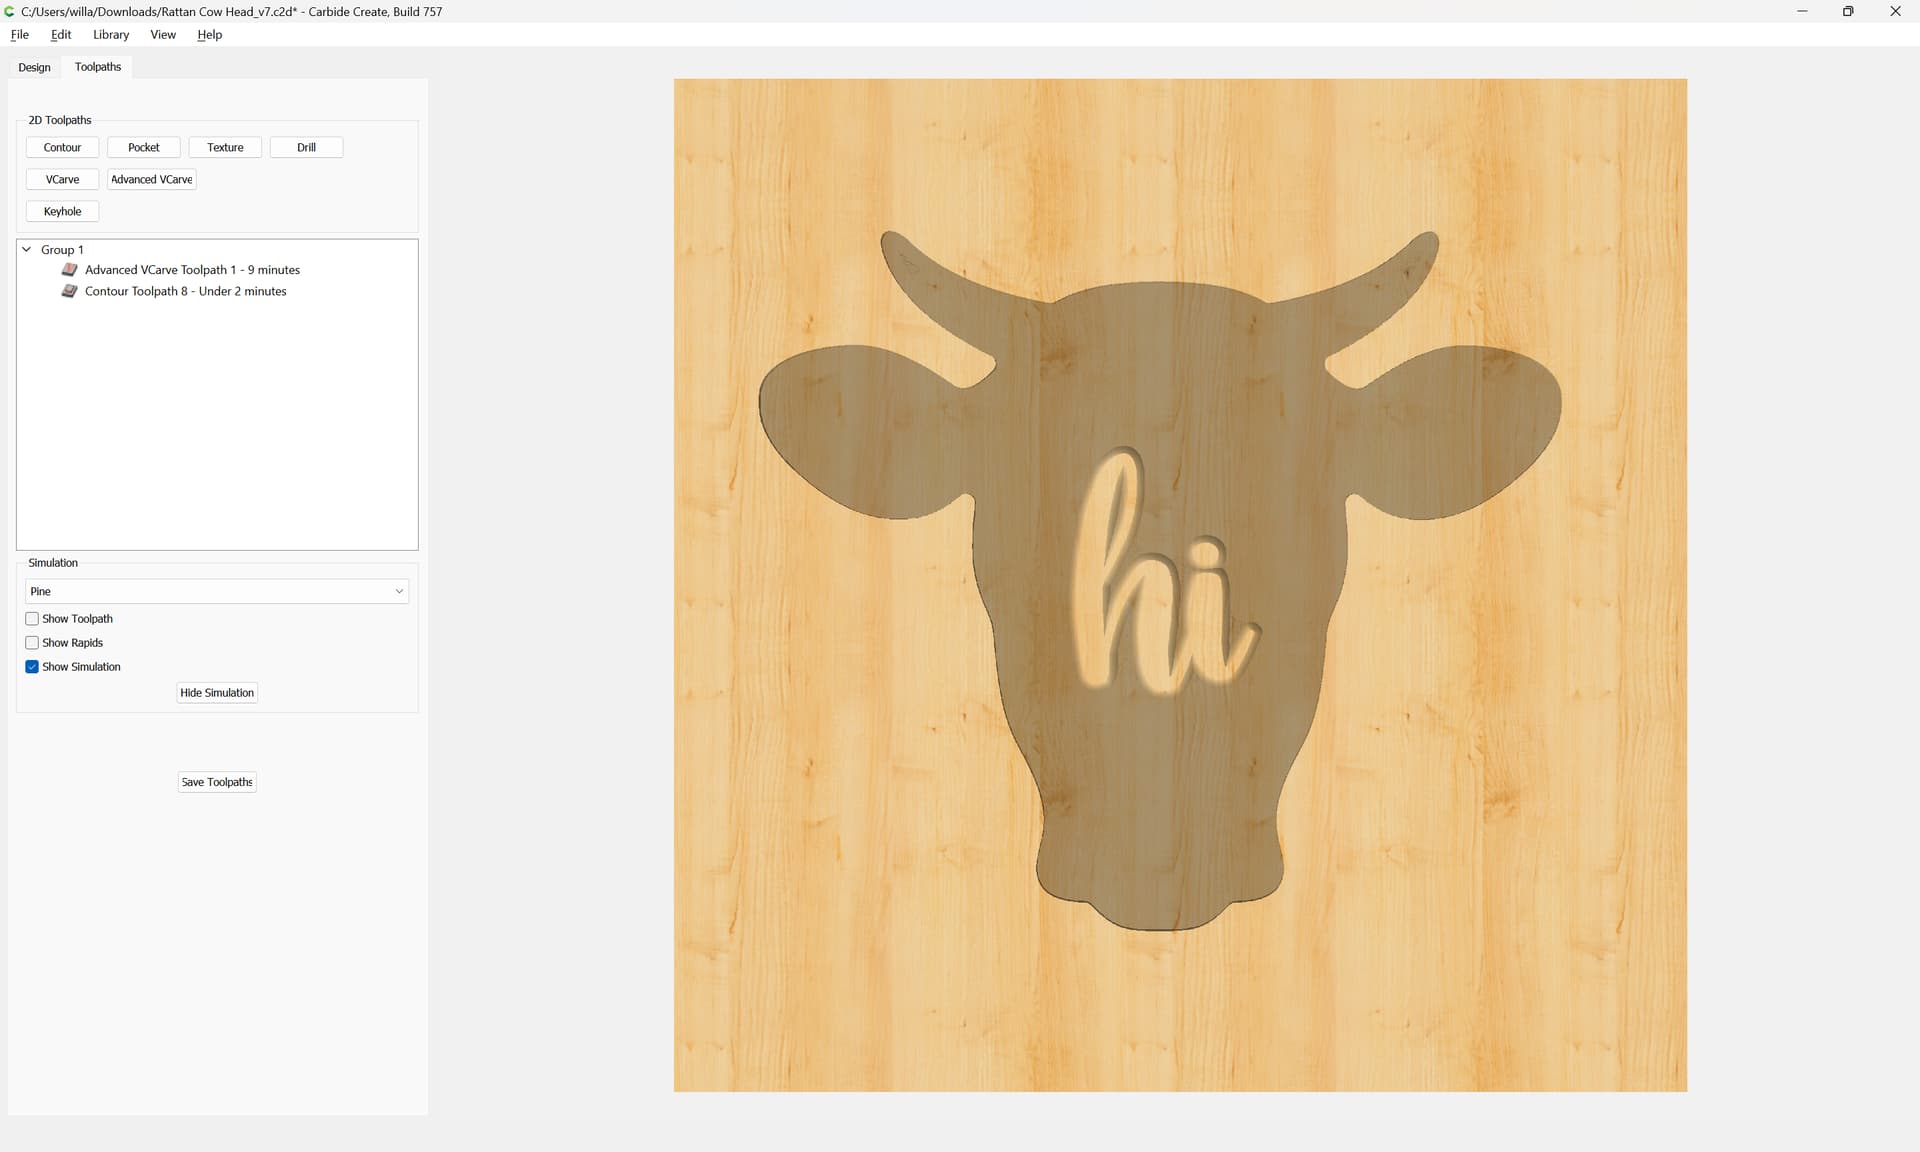
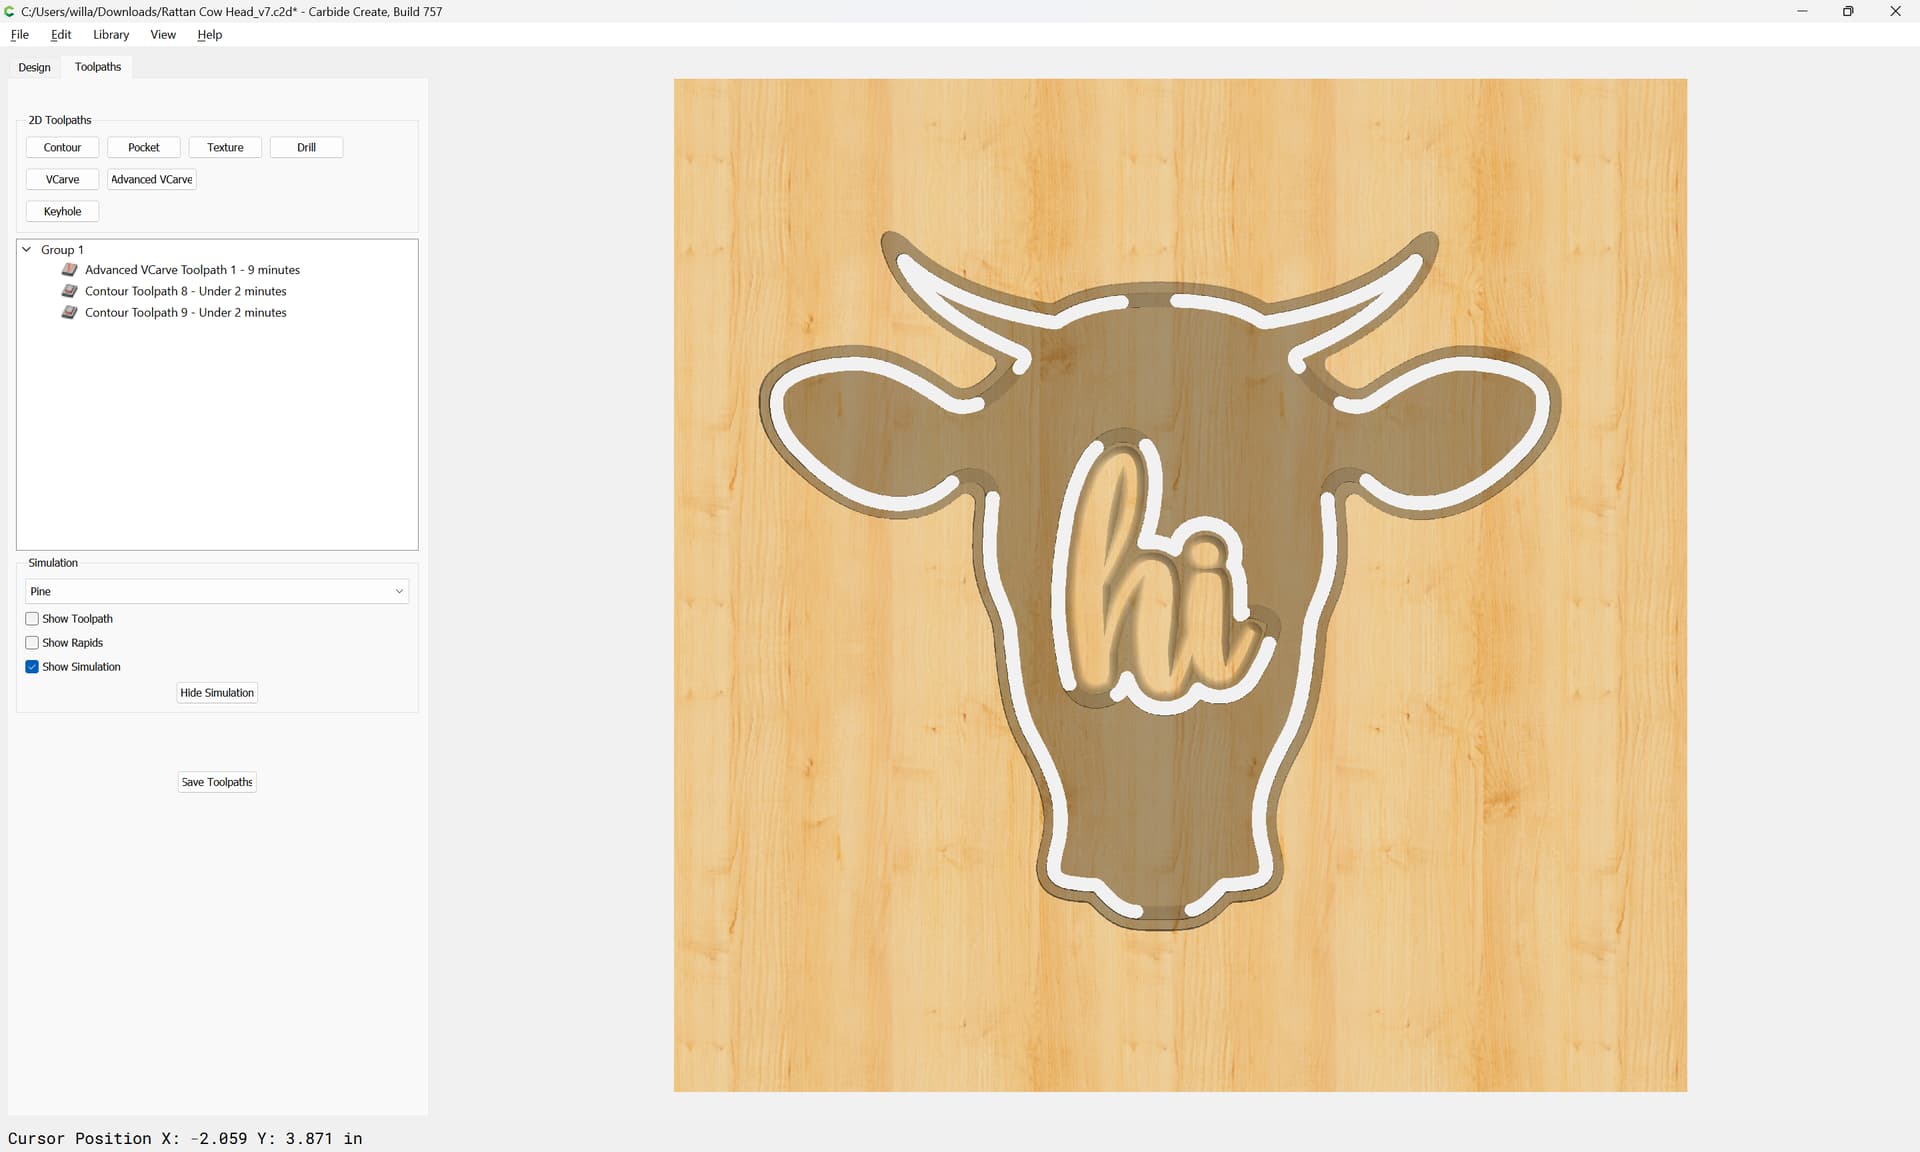
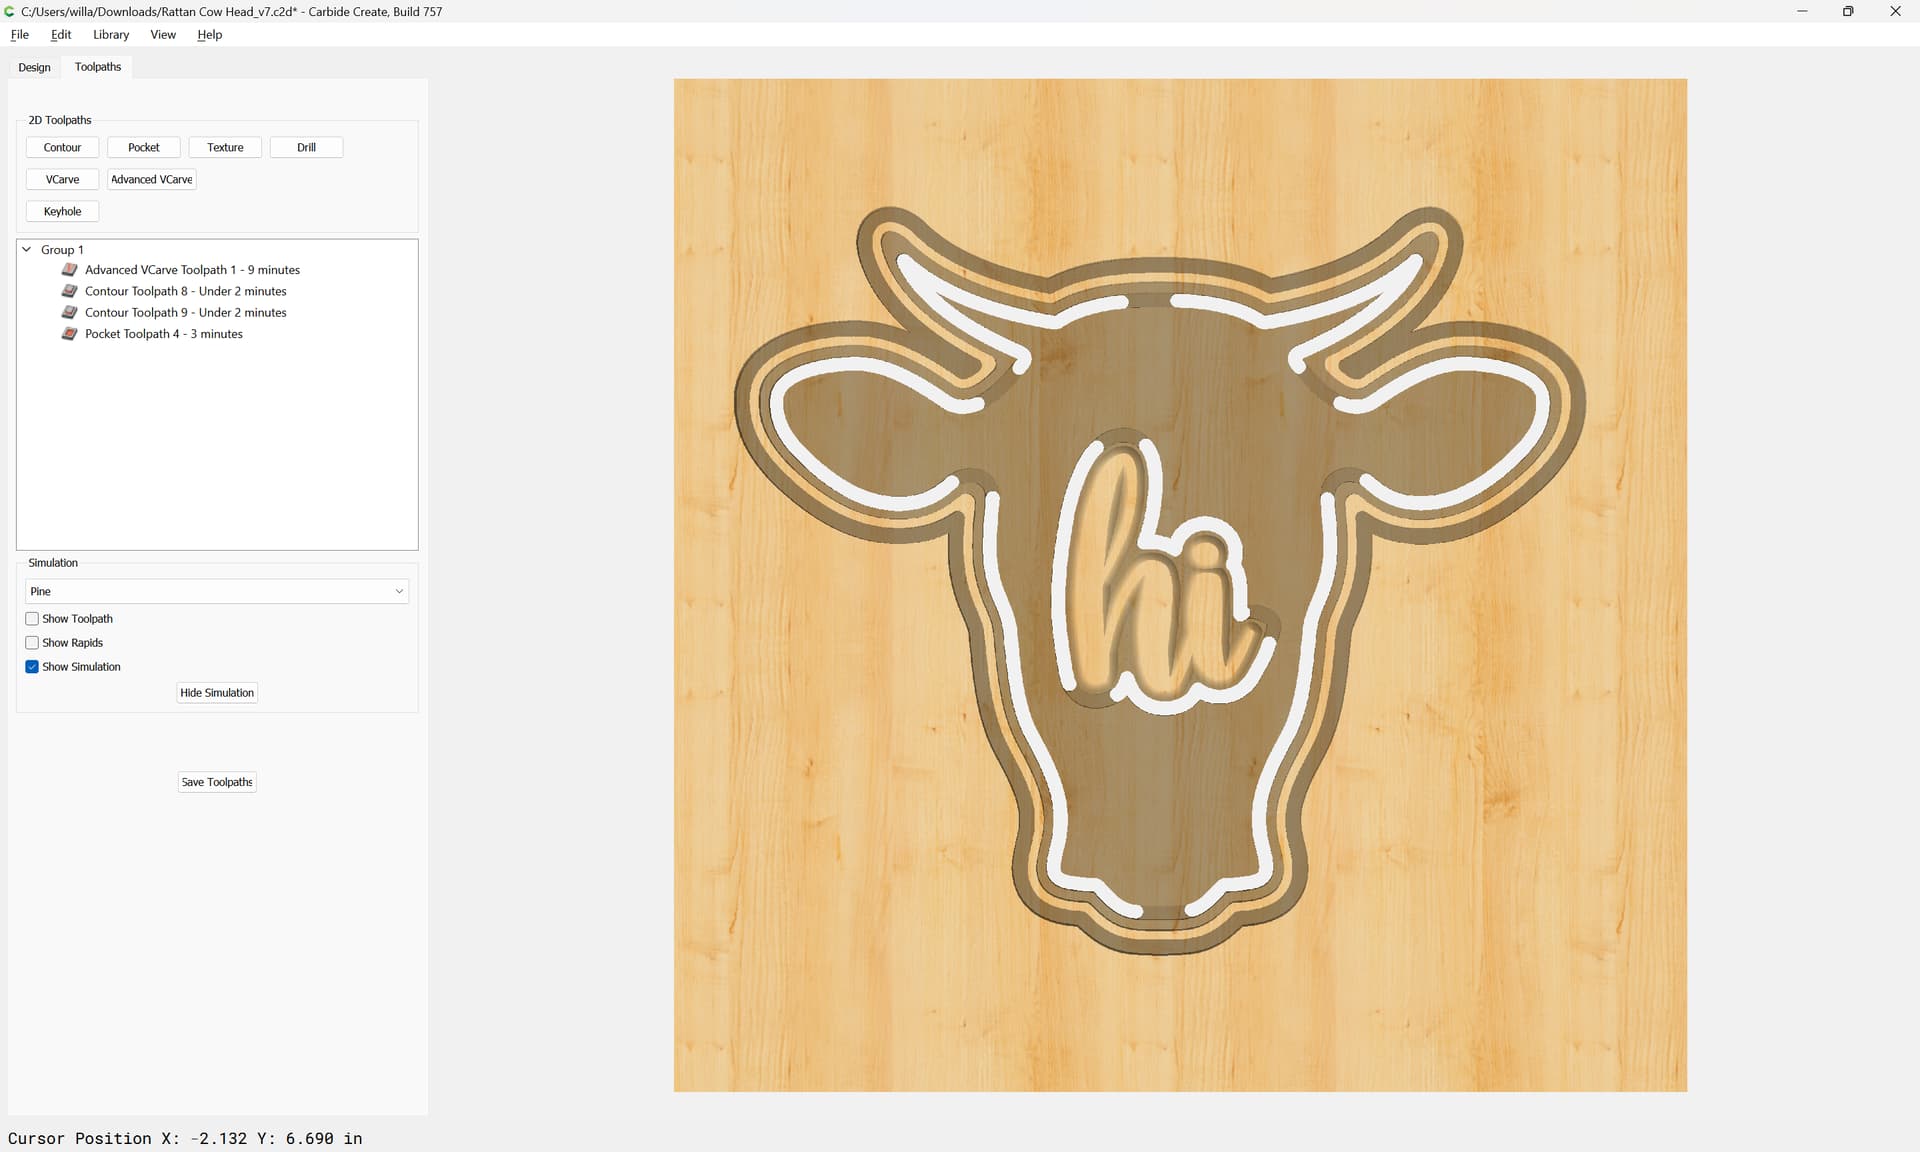
Once the toolpath is set up, check the 3D simulation:
and if need be, iterate.
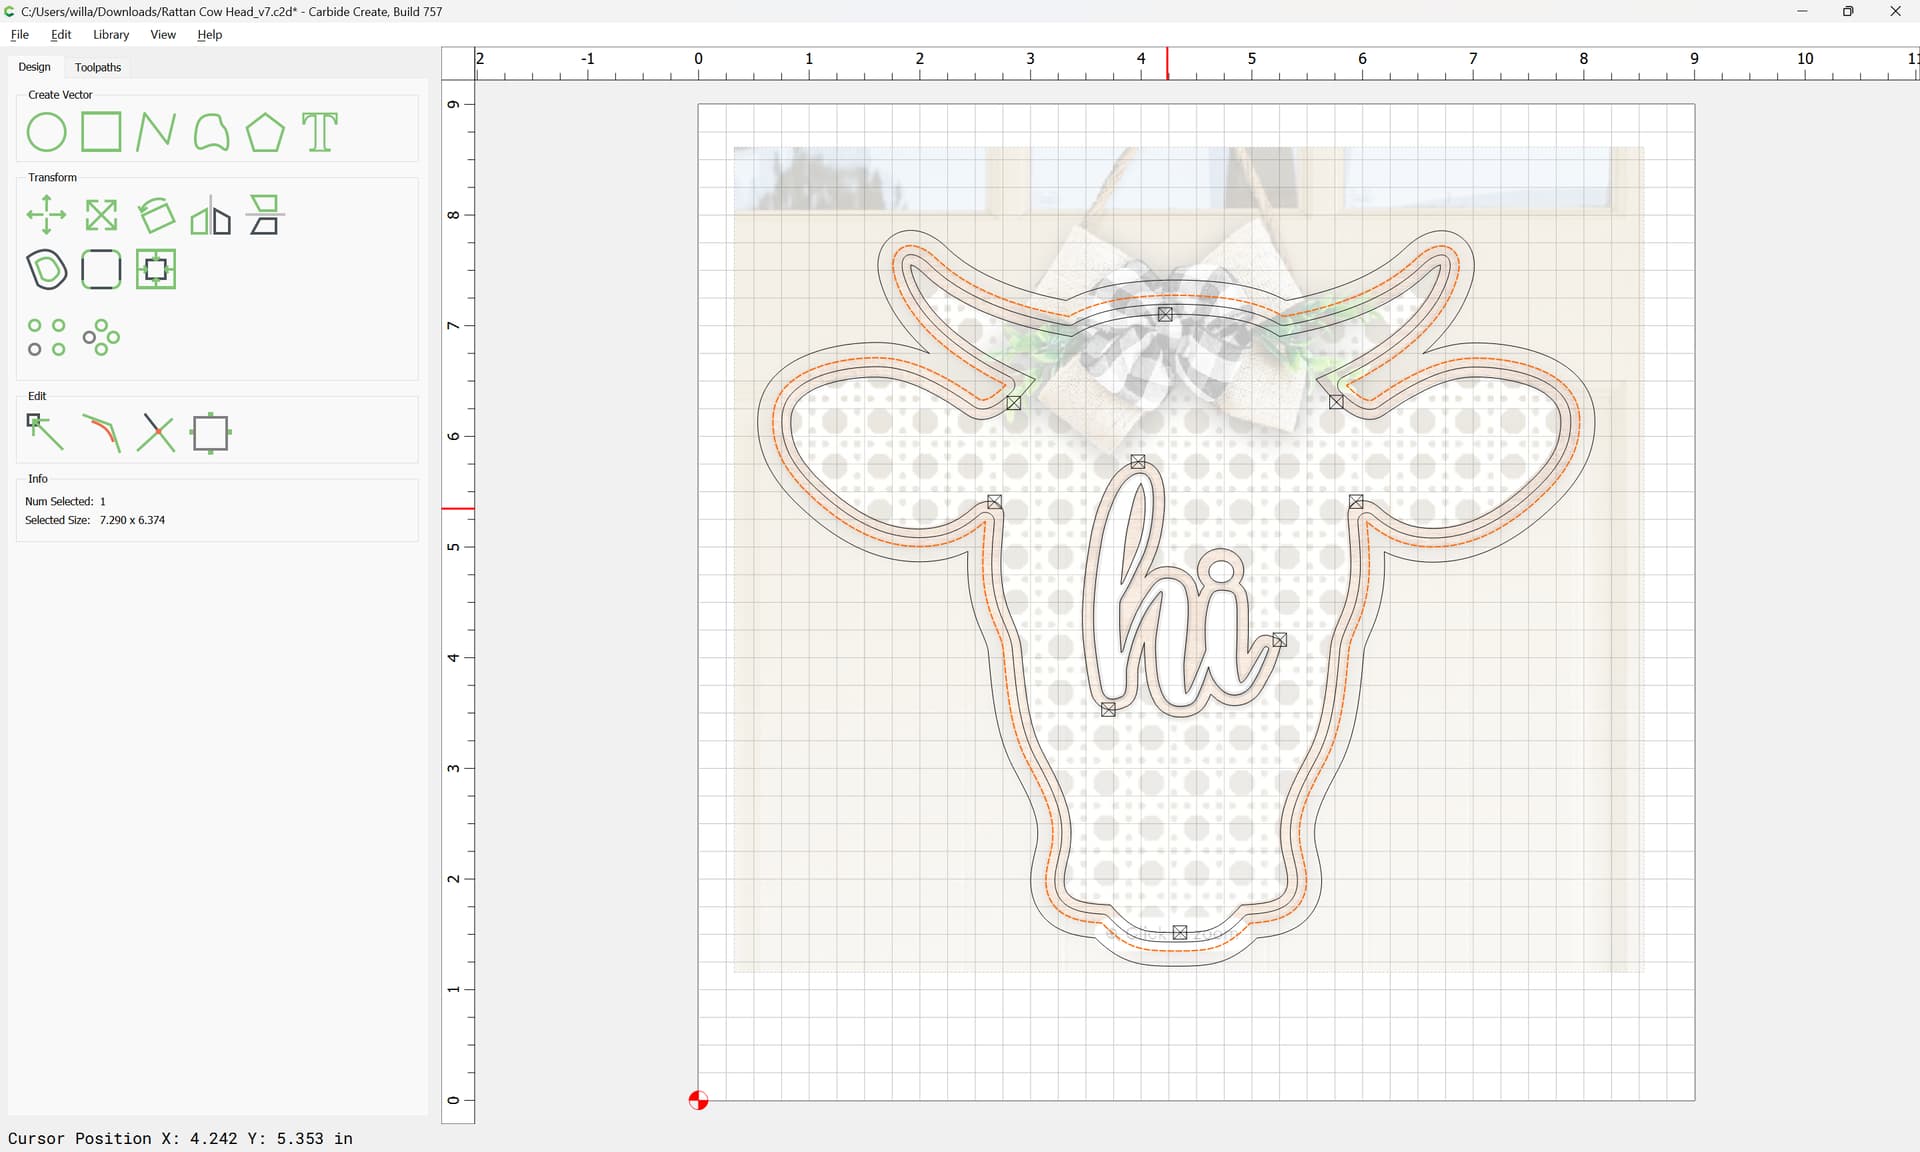
Since the slope of the V carving will reduce the area available to the rattan, we go ahead and to an inside contour along the outer design only:
using a tool which is small enough to fit everywhere along the design:
which previews as:
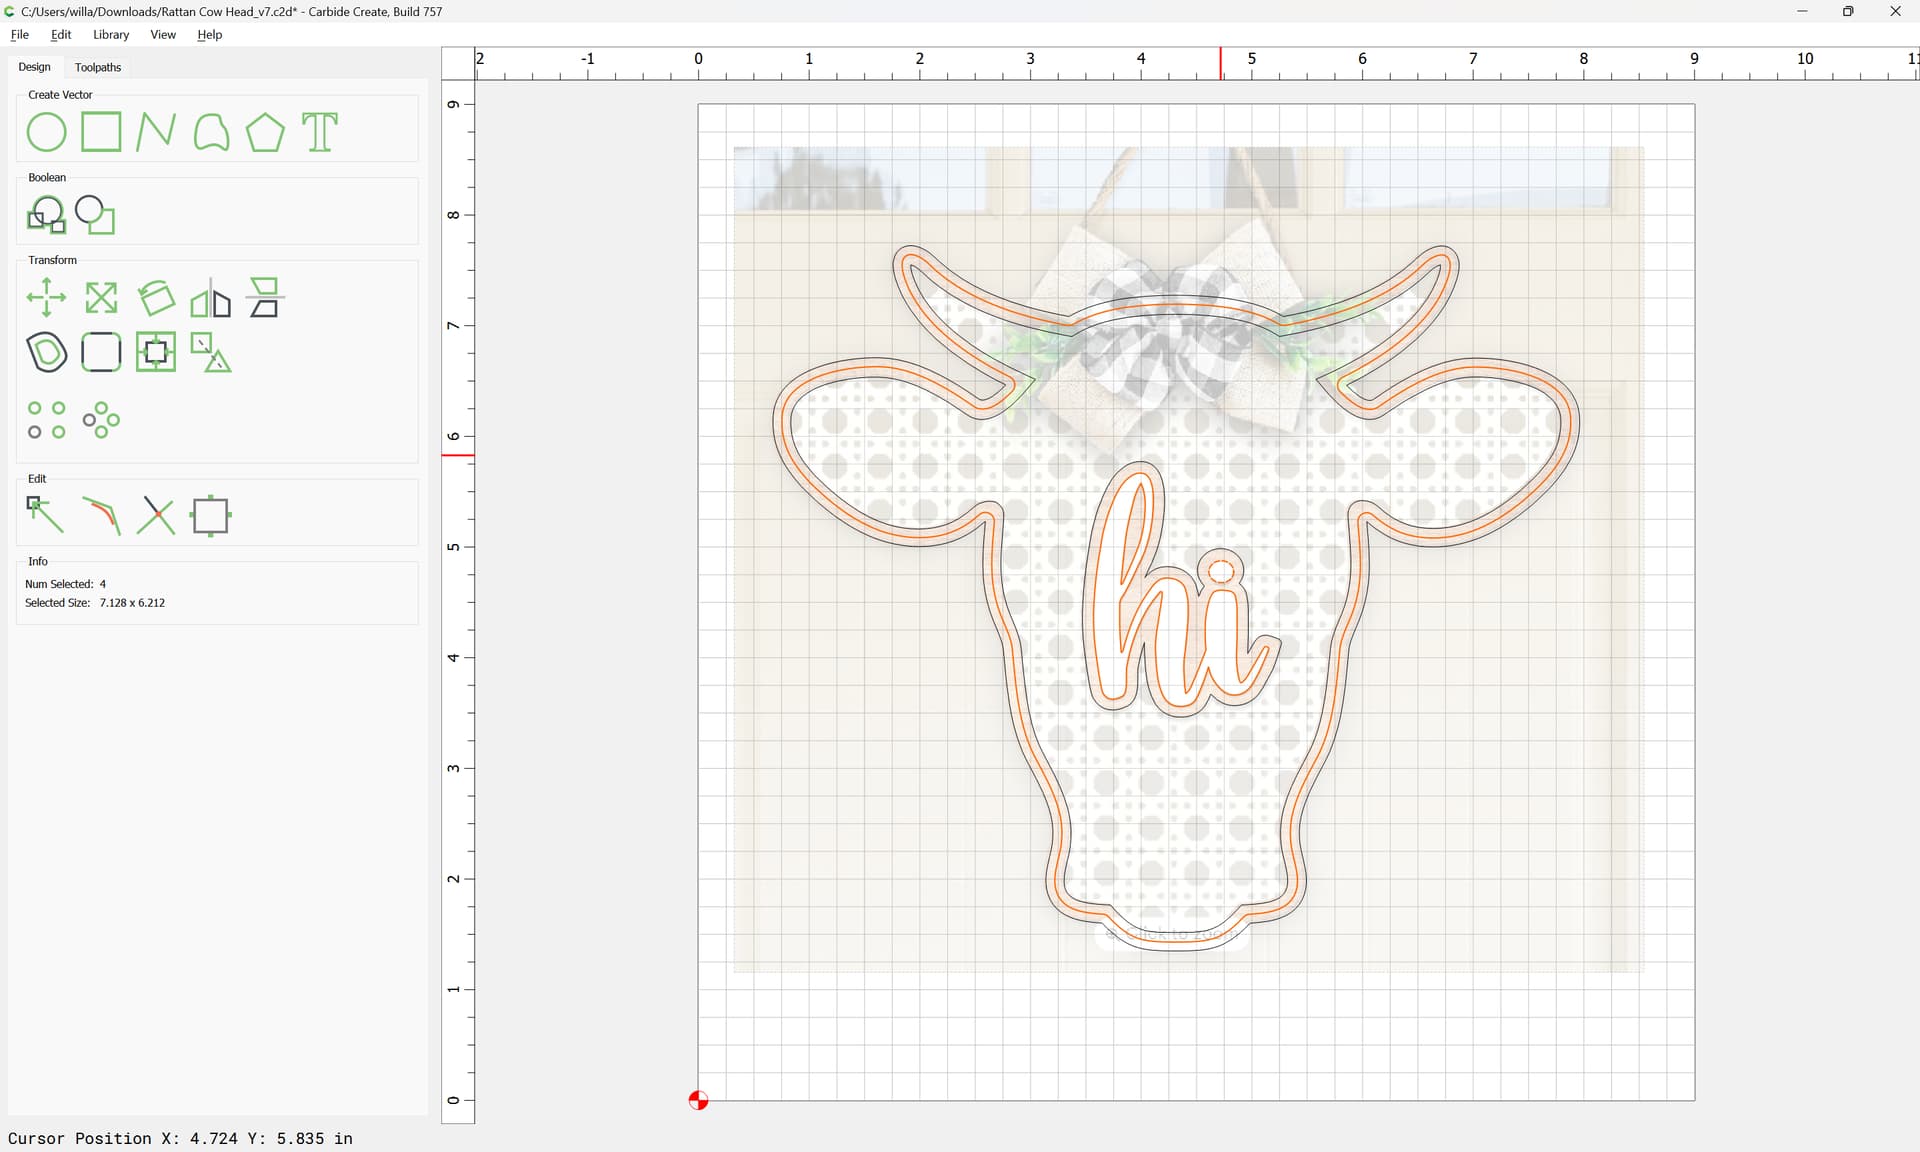
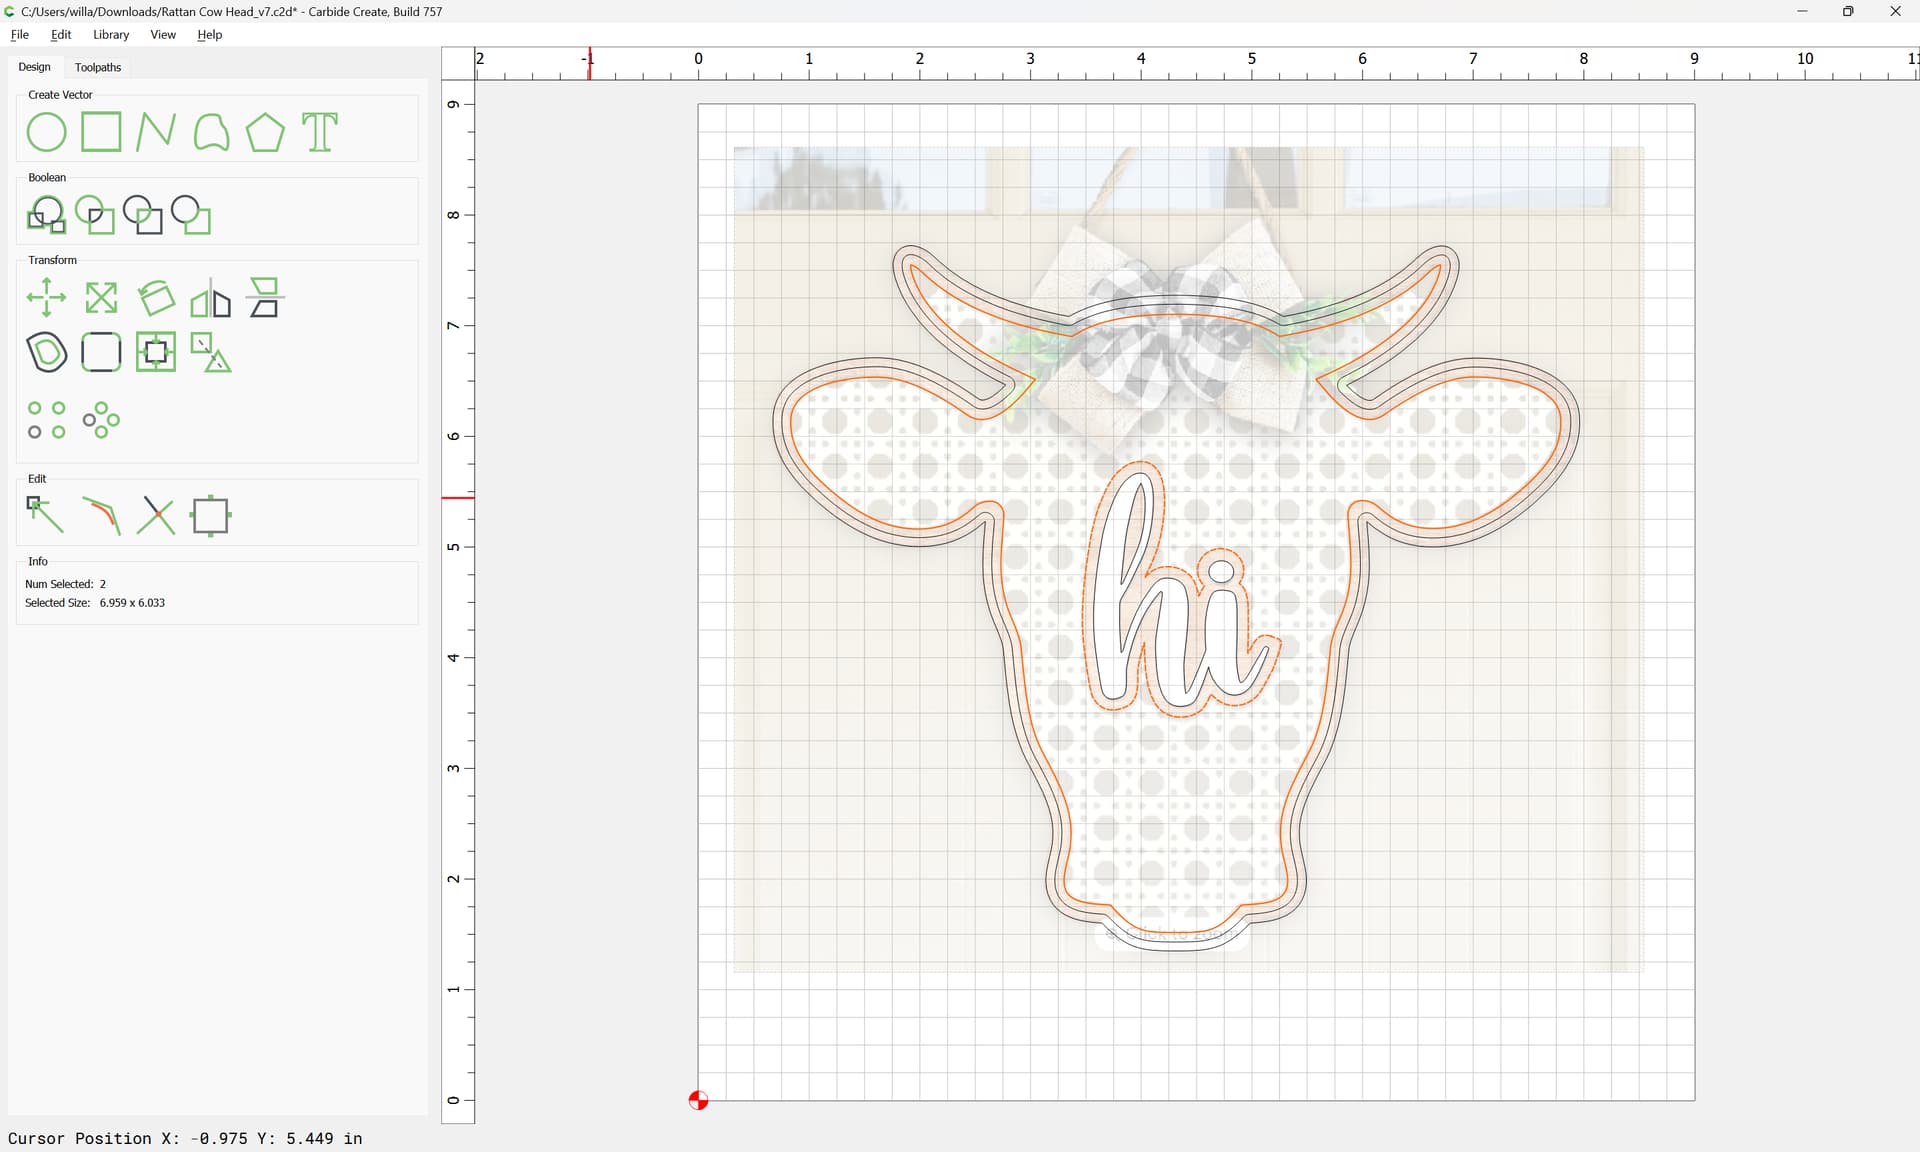
We then cut out the interior shapes:
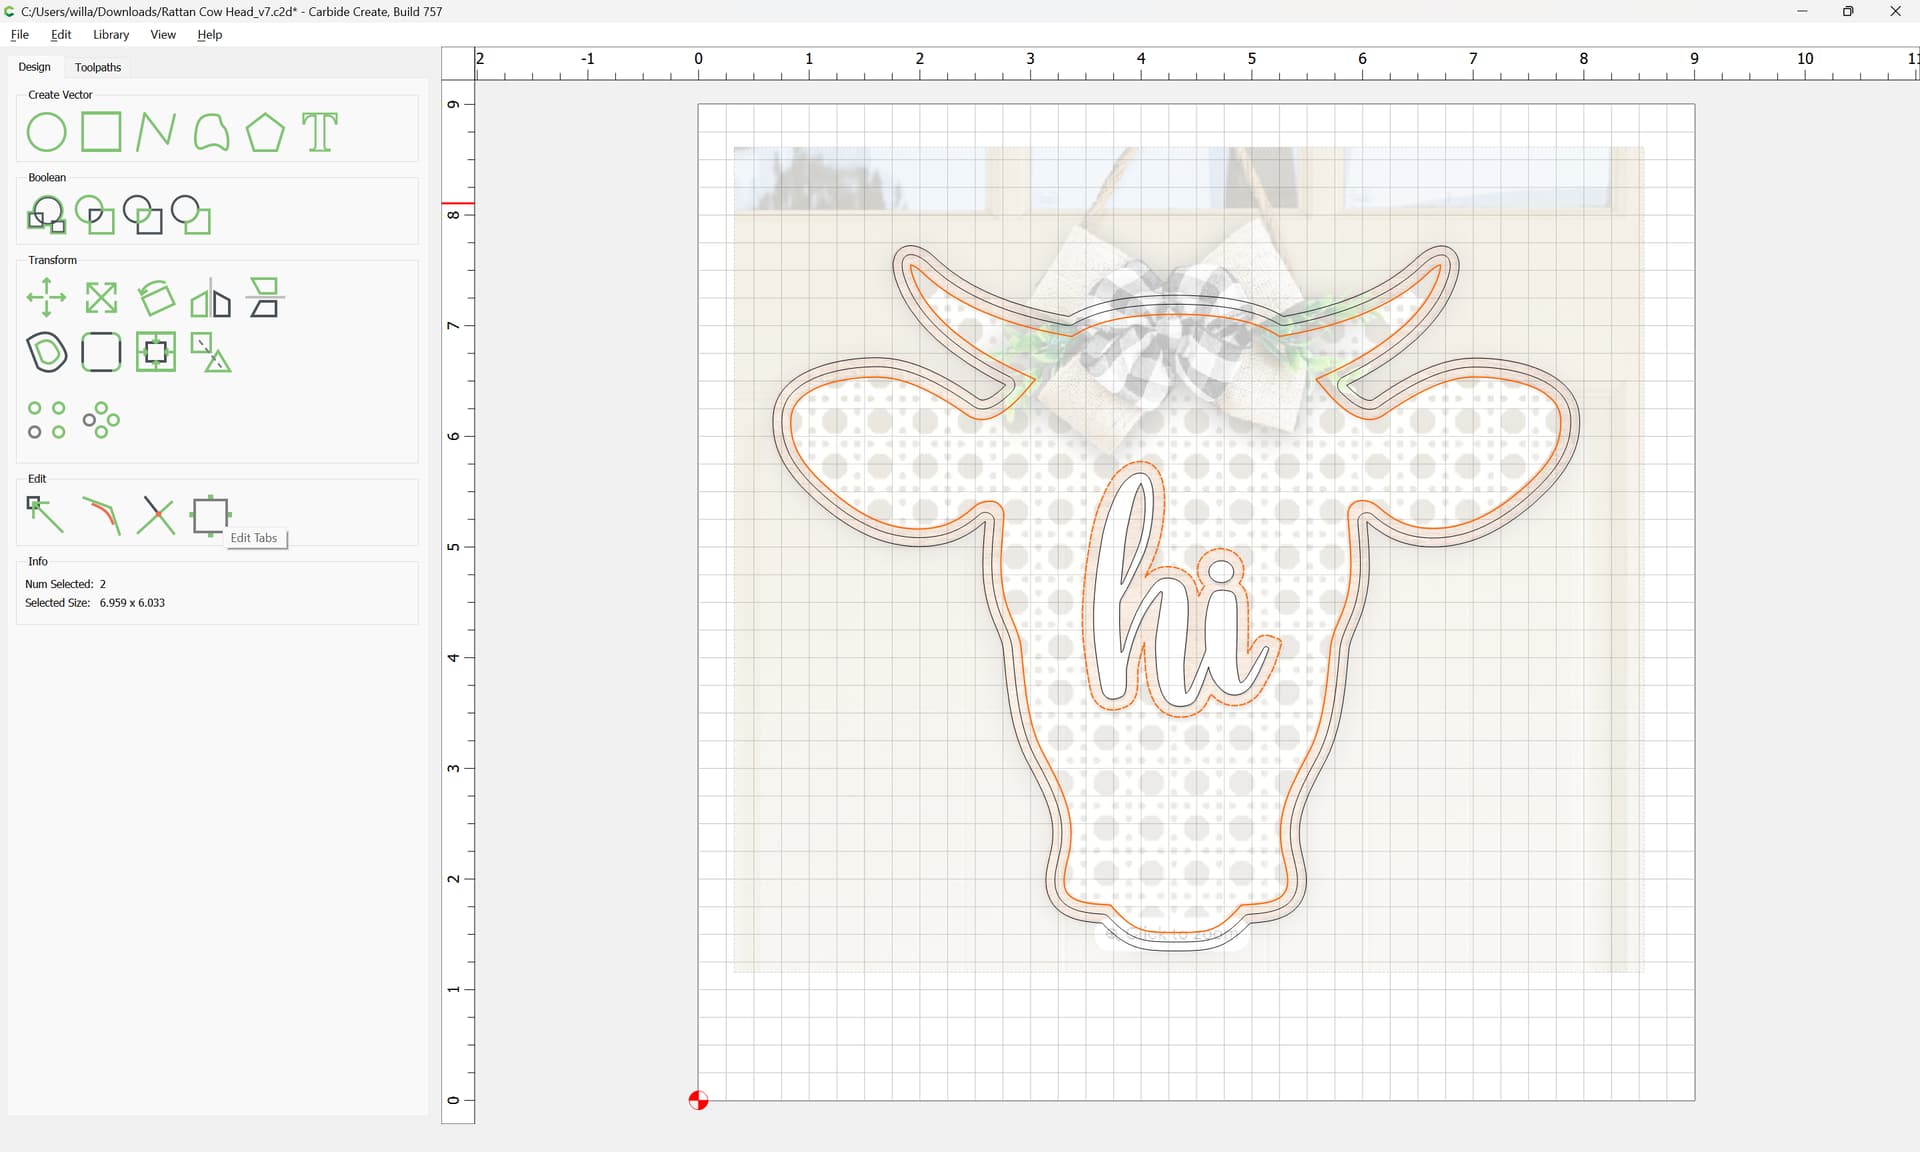
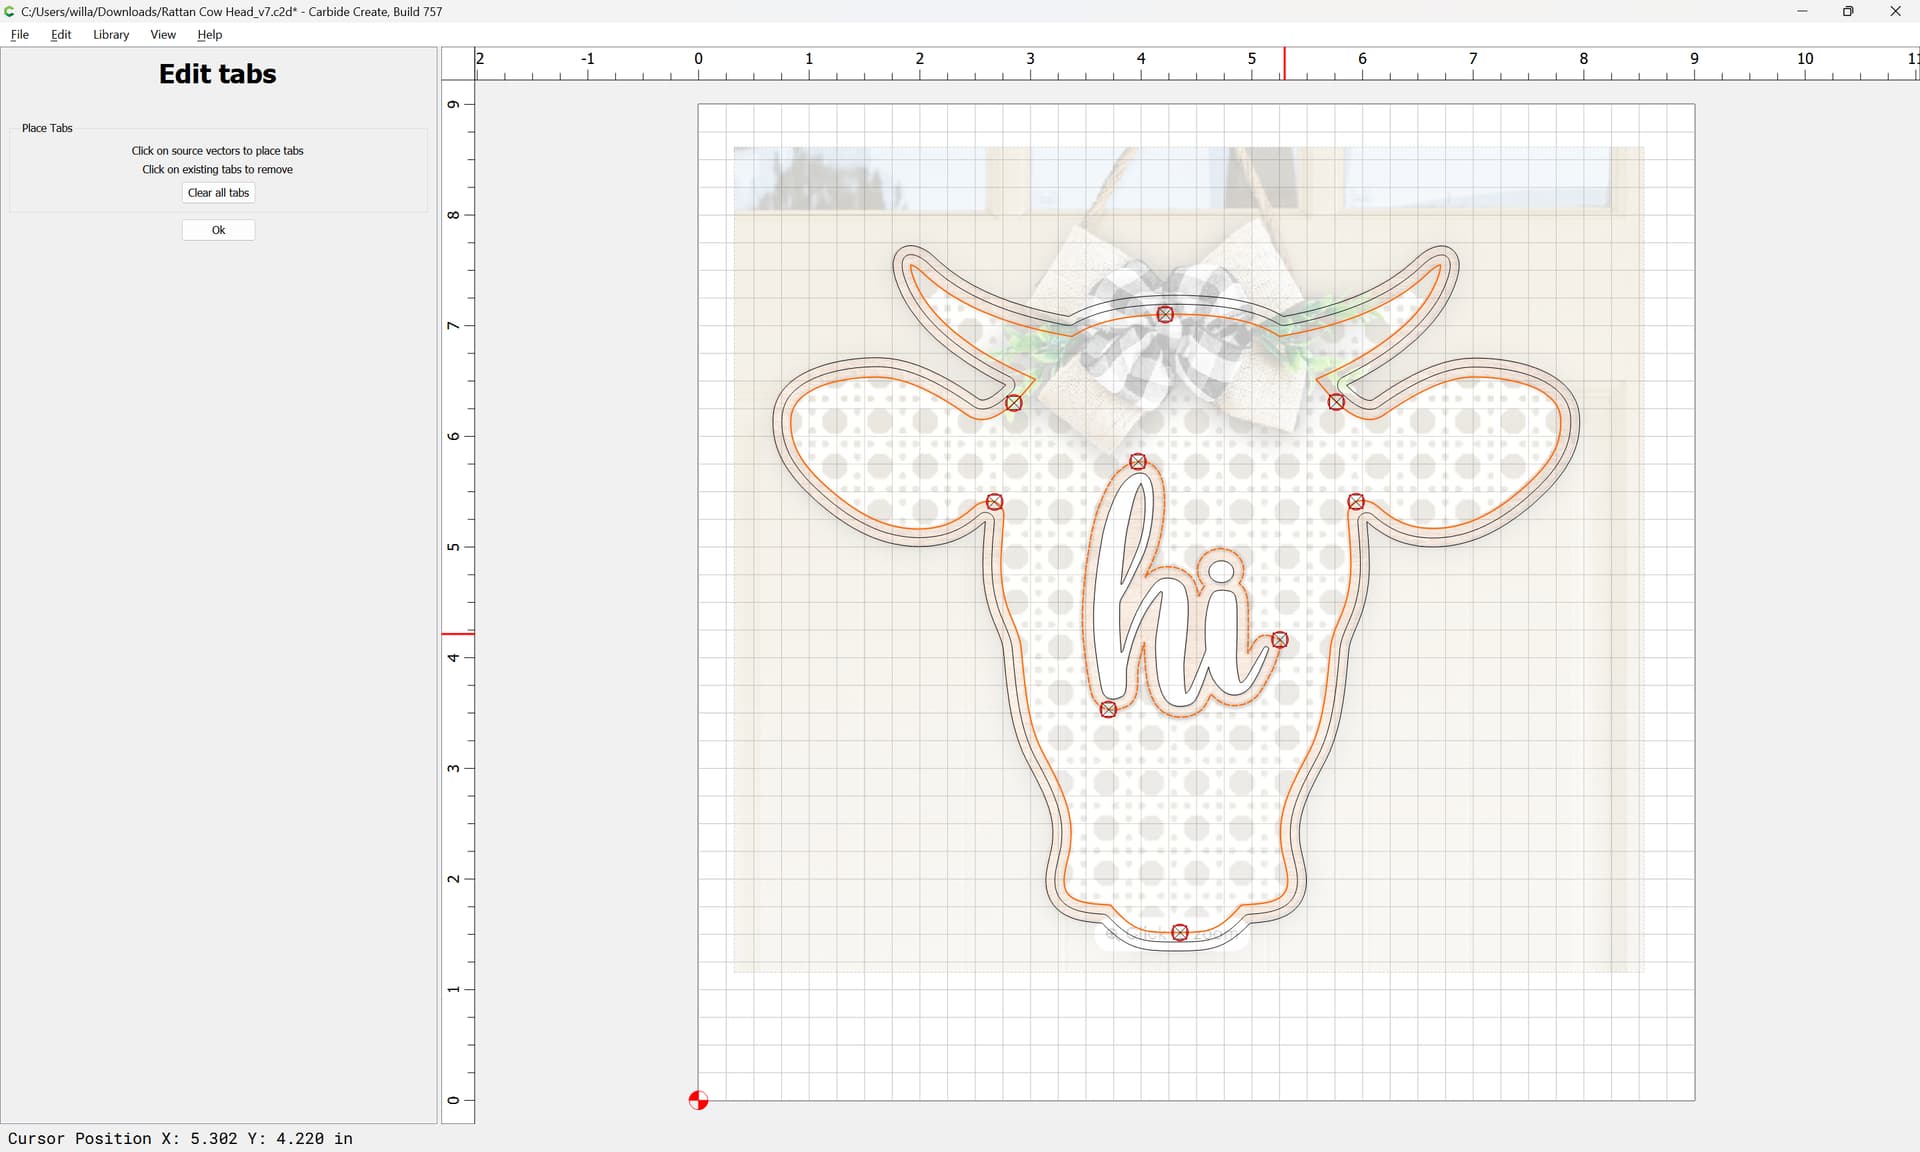
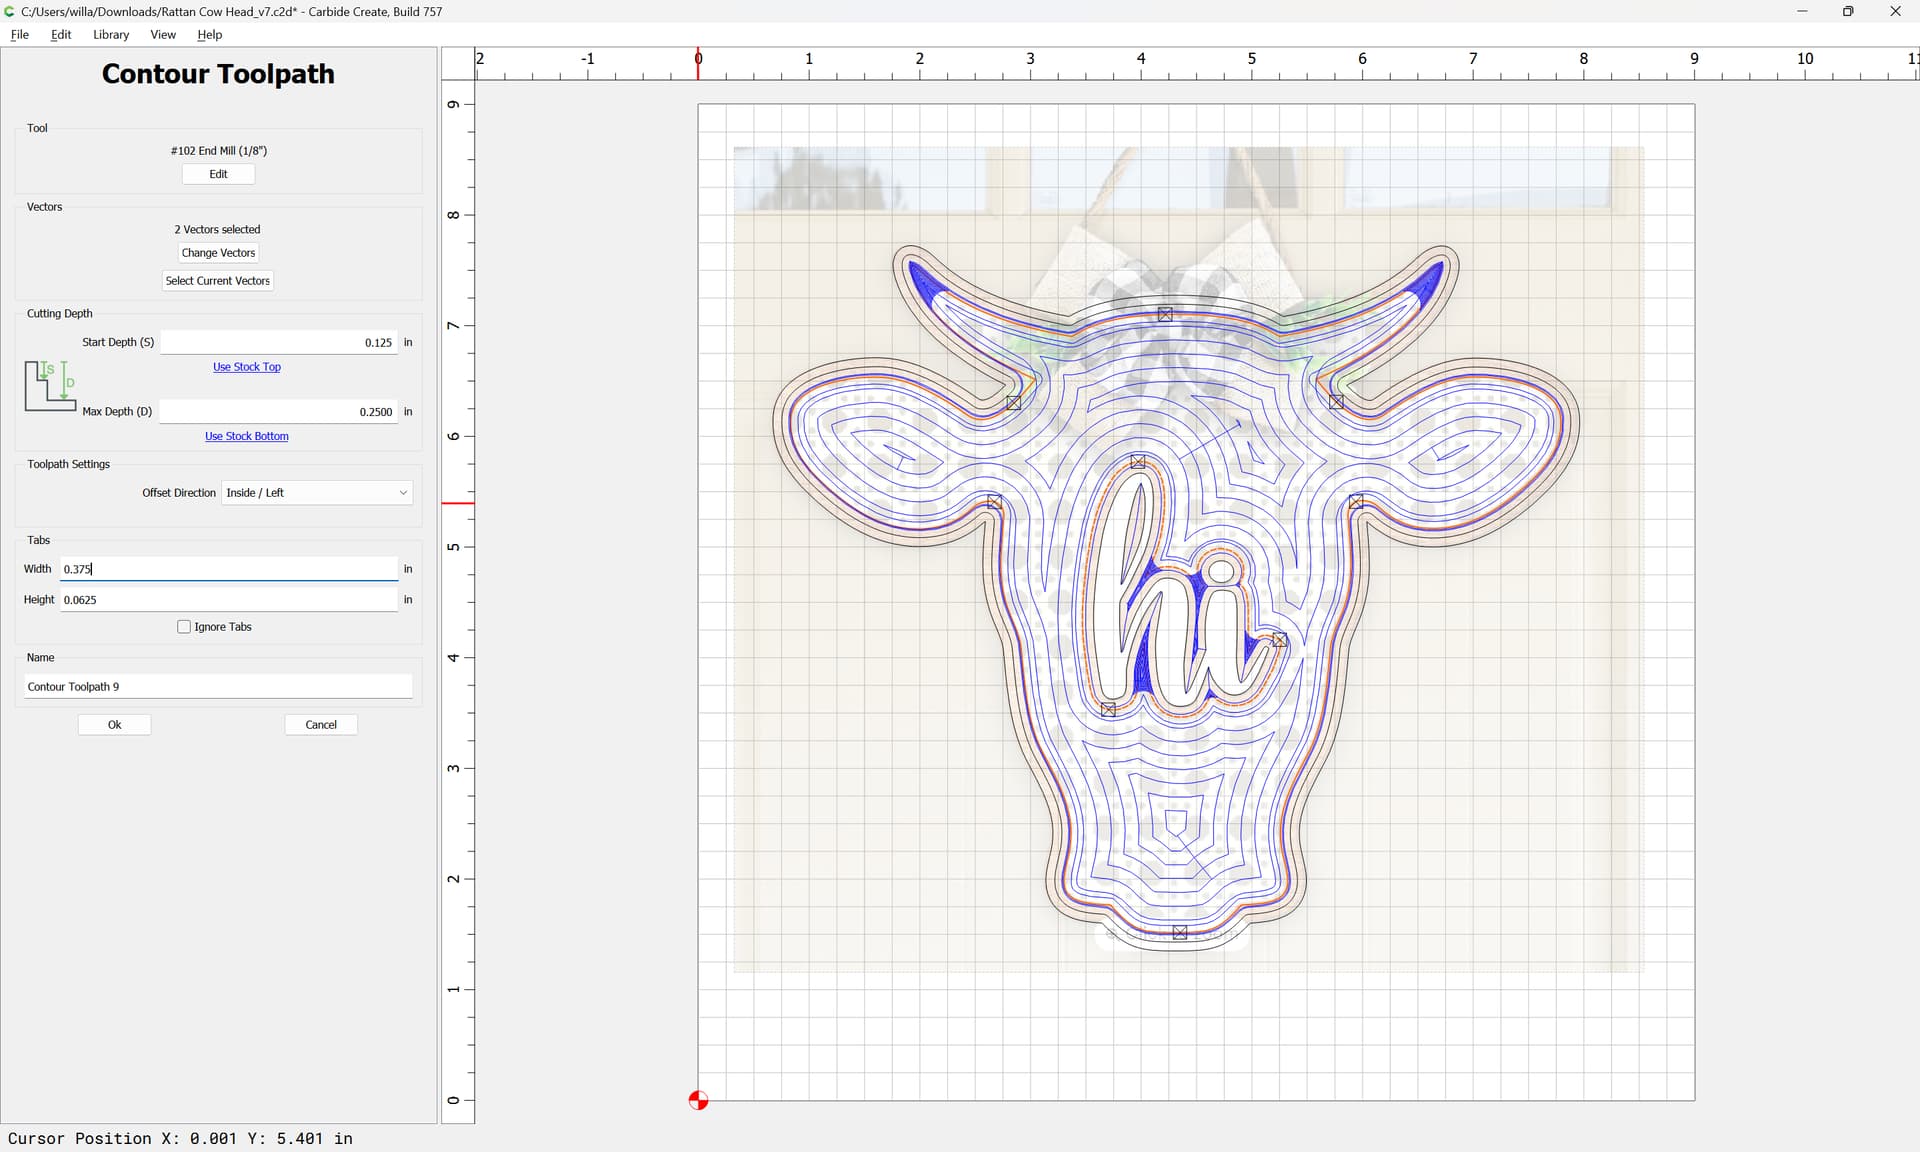
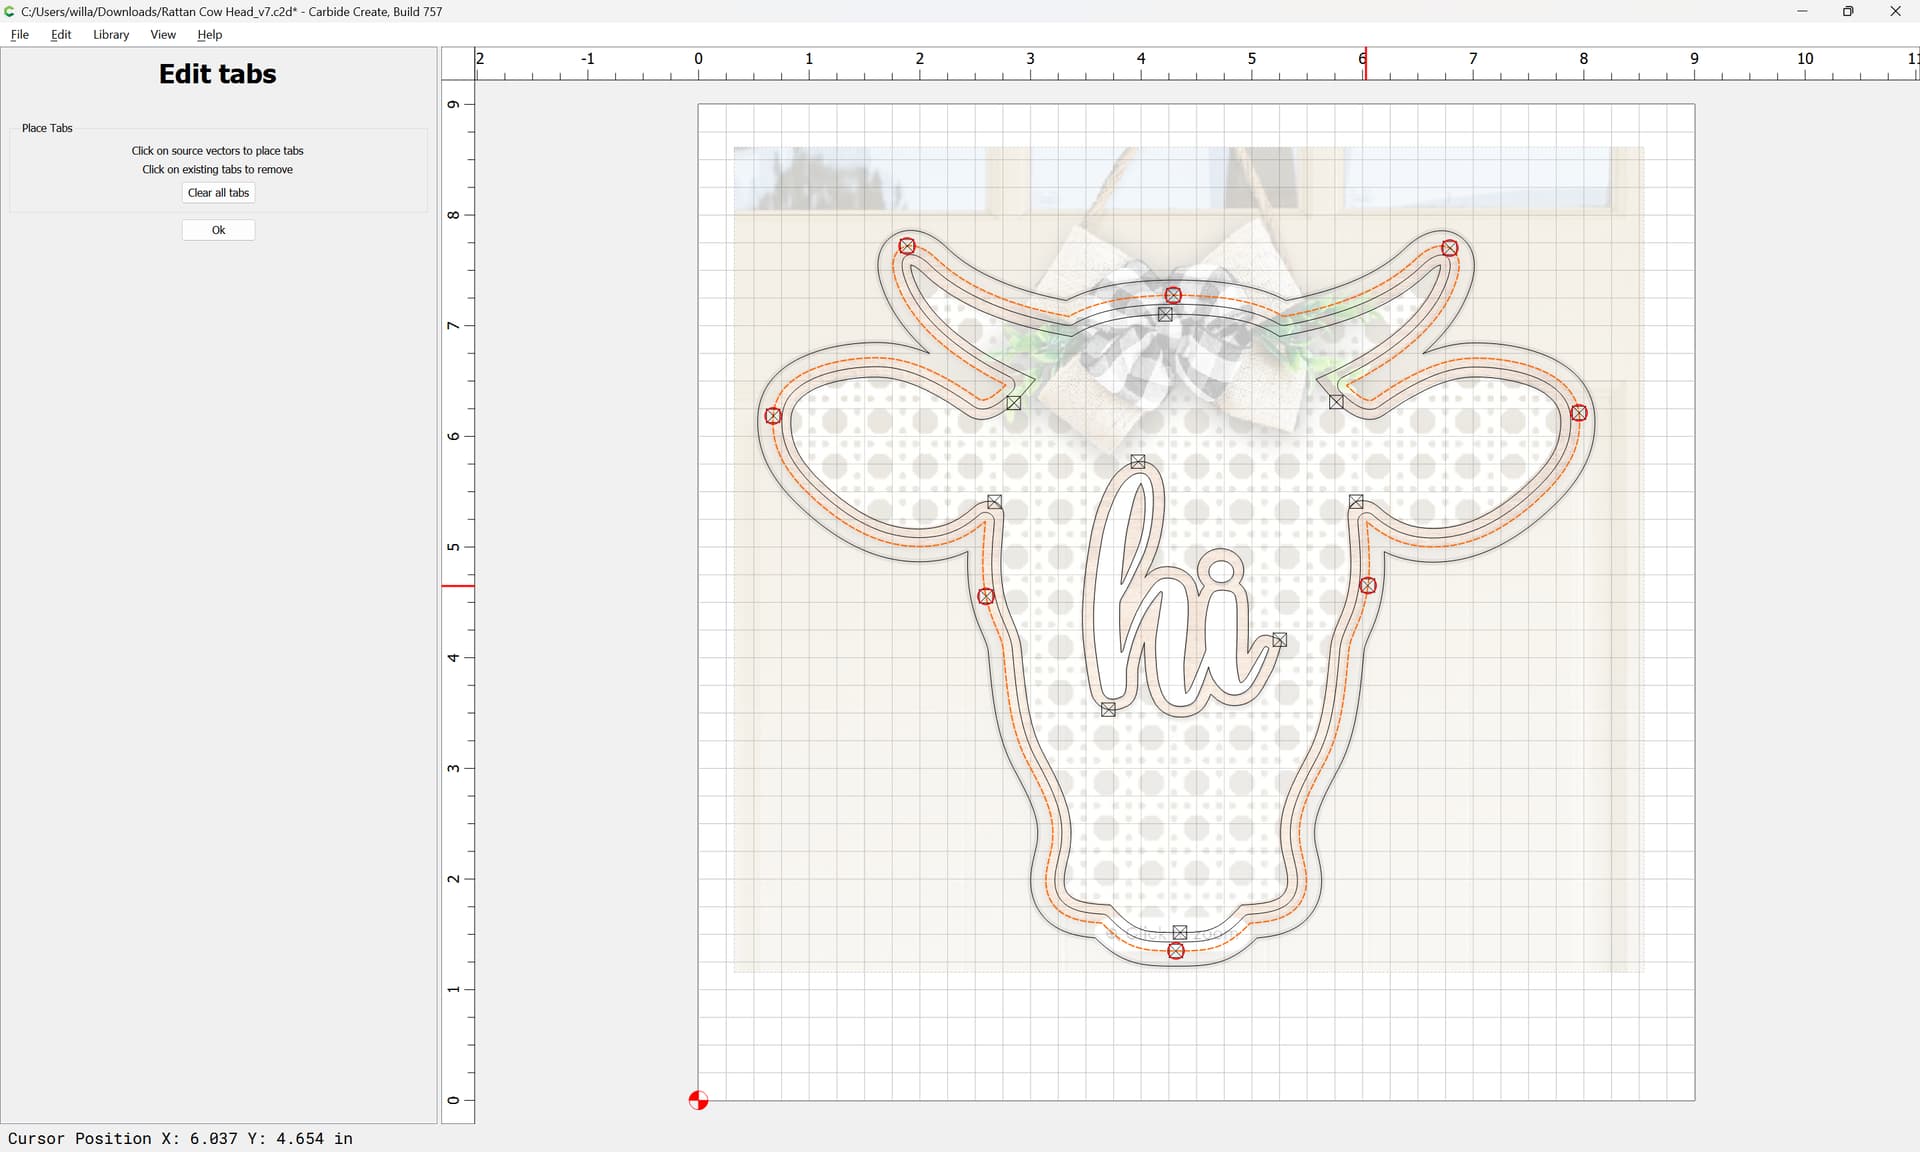
which might need tabs — if they do, add them:
placing them where they will be easily cut away.
Ok
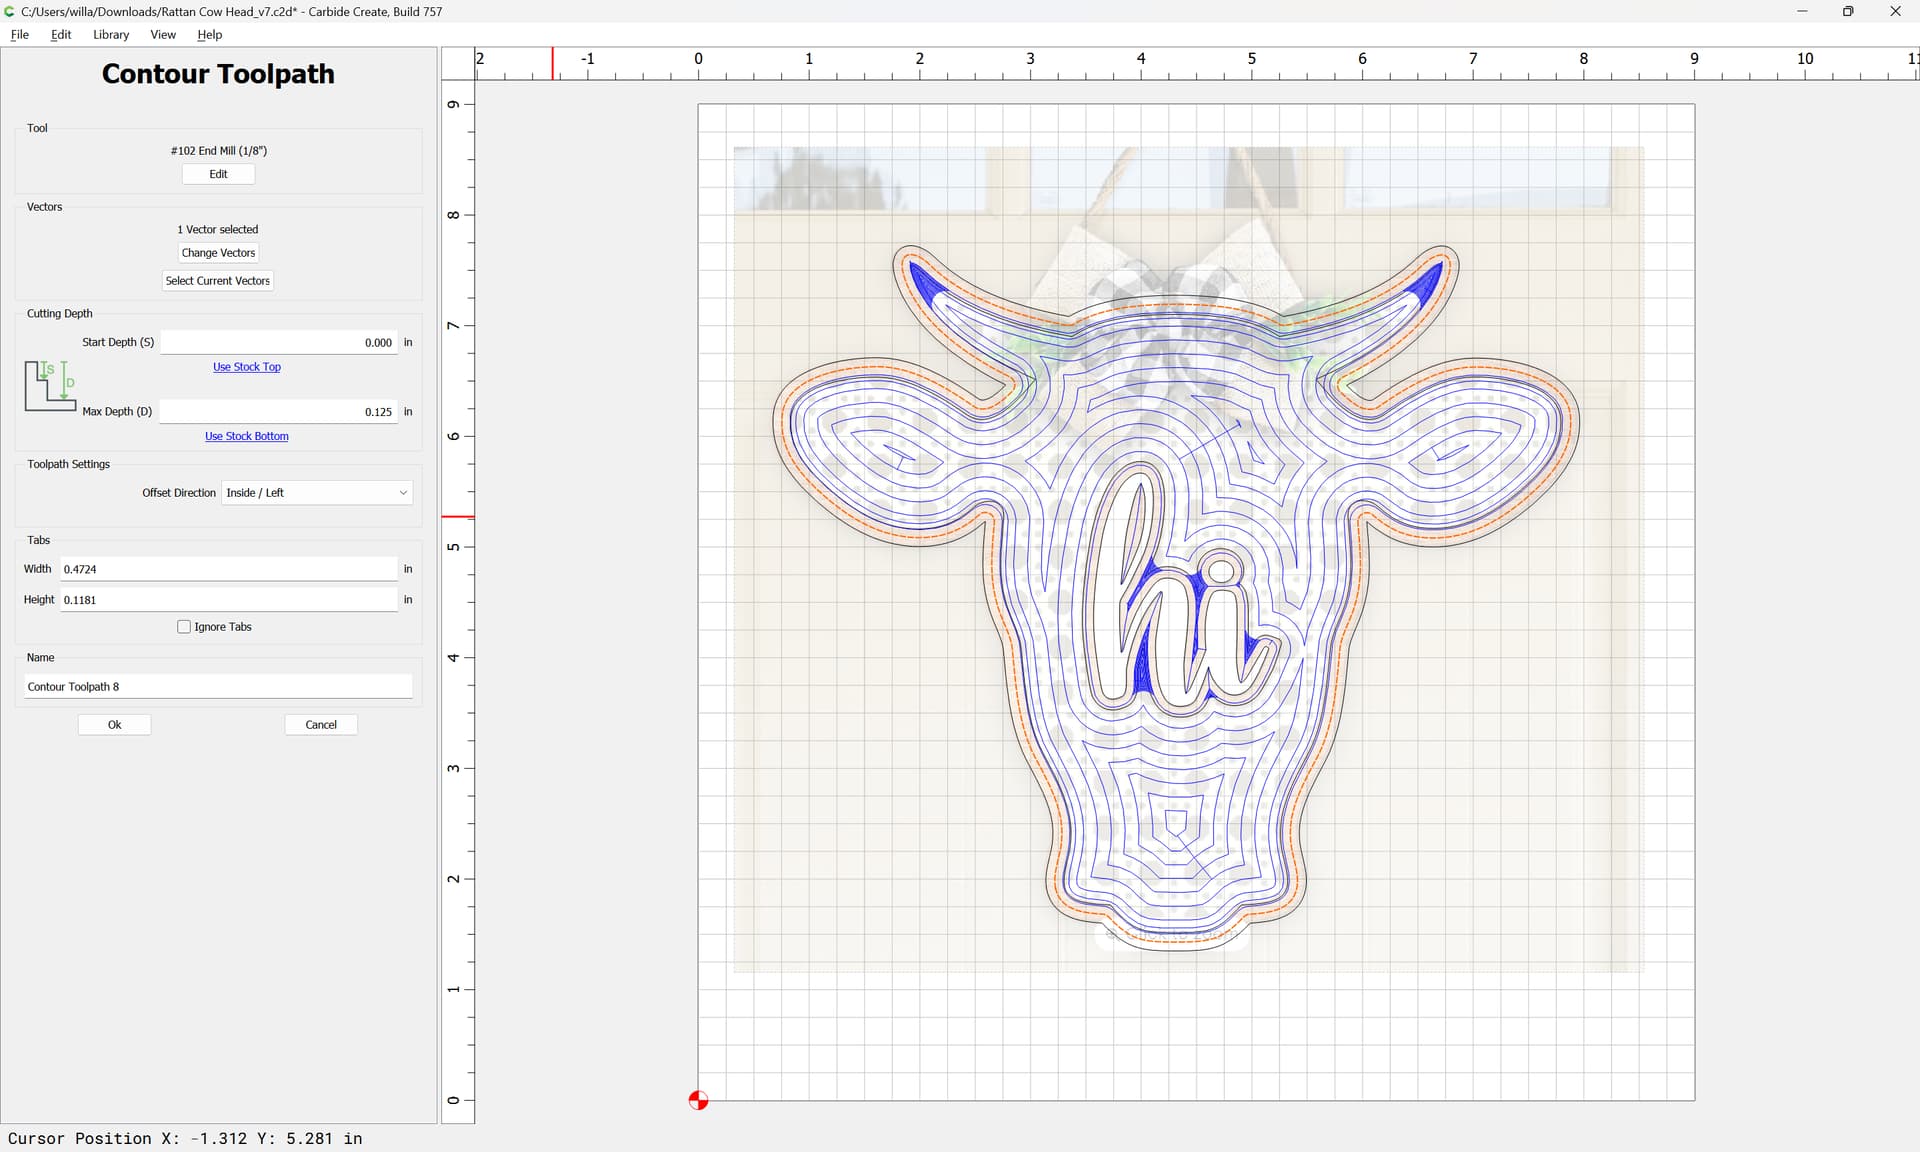
Then assign an inside Contour toolpath which starts at the bottom of the previous pocket and cuts to the full depth — since the depth of the cut is equal to the diameter of the tool, it should be workable to just cut the slot:
which previews as:
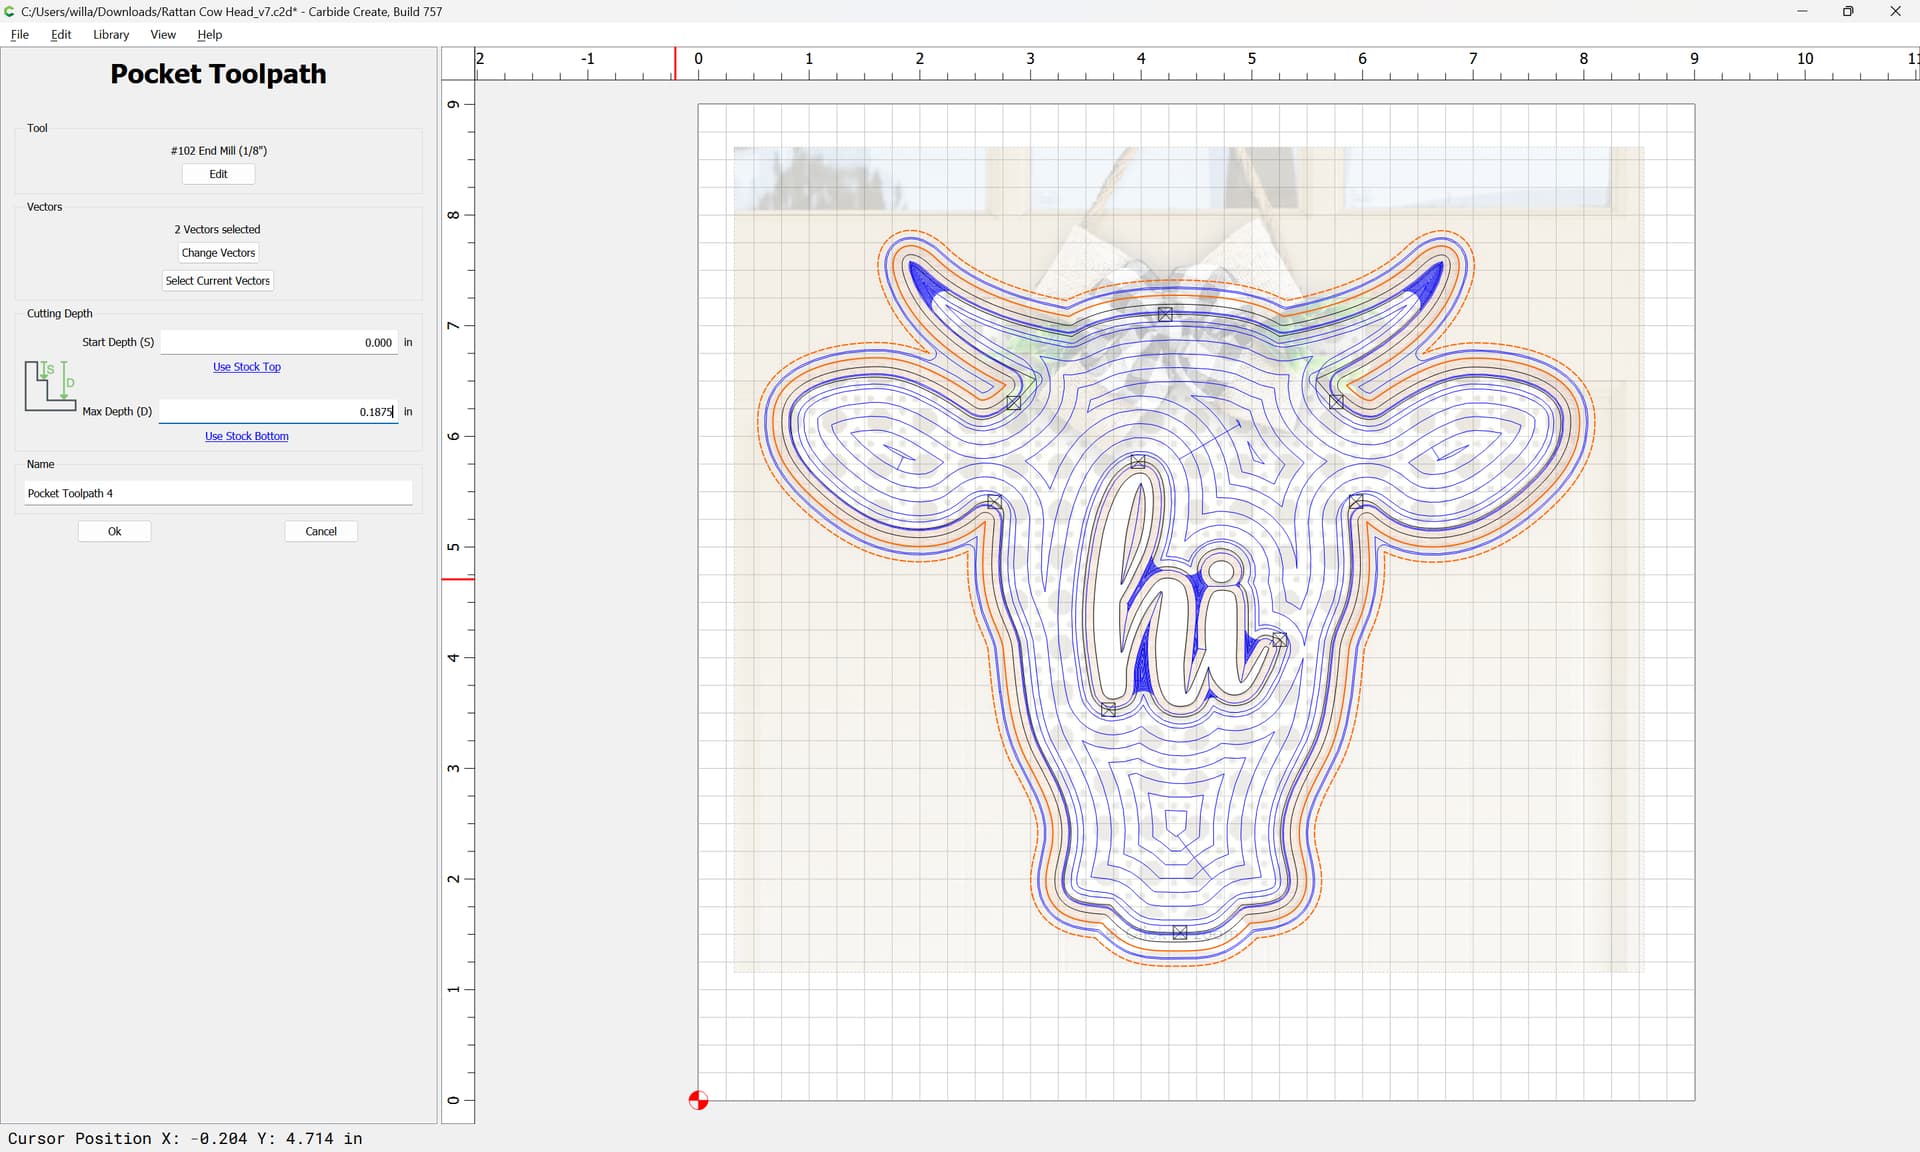
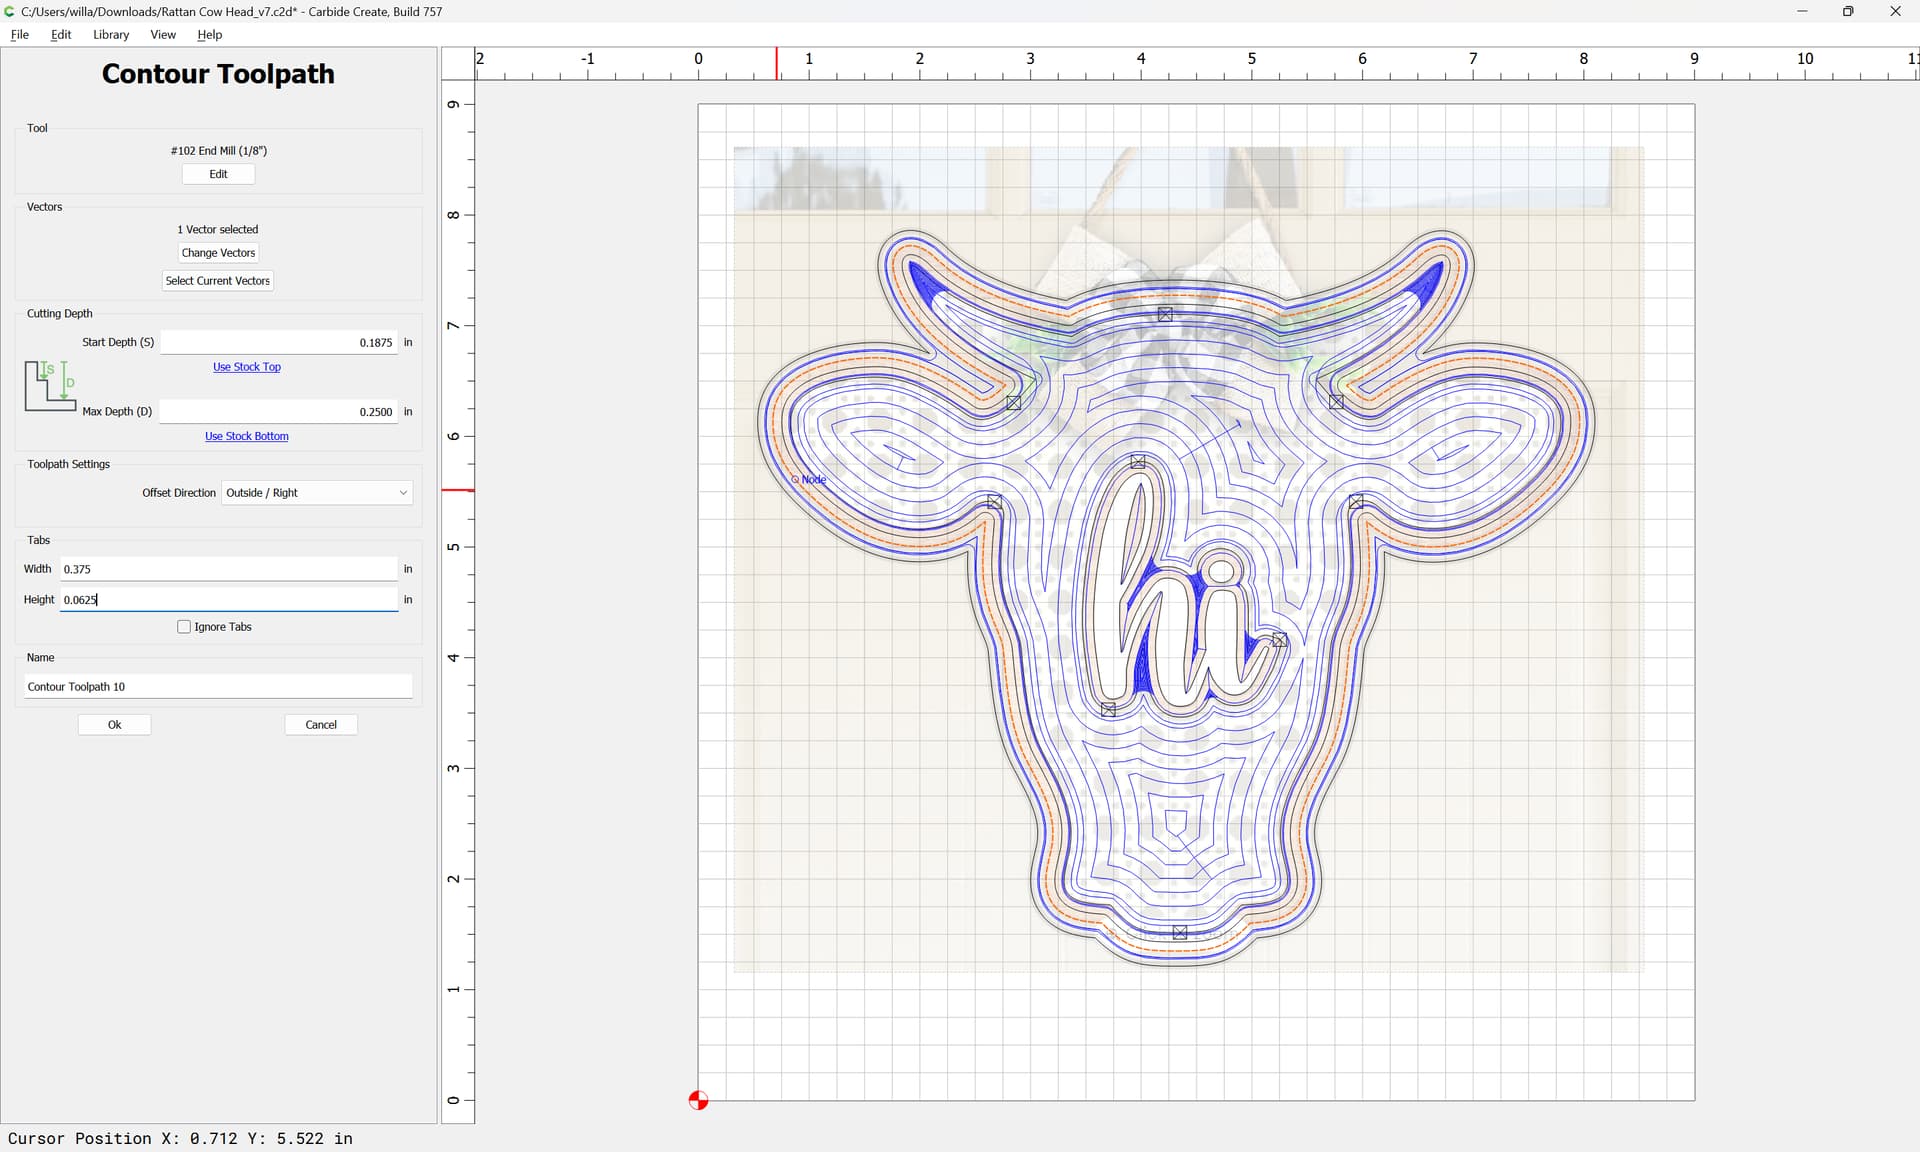
Lastly, we cut out the larger outer part — since an 0.25" tool won’t fit into the finer details, we use a 1/8" tool, since the depth of the cut will be twice the diameter of the tool, we need to add offset geometry and cut as a pocket down to tab height (0.0625"):
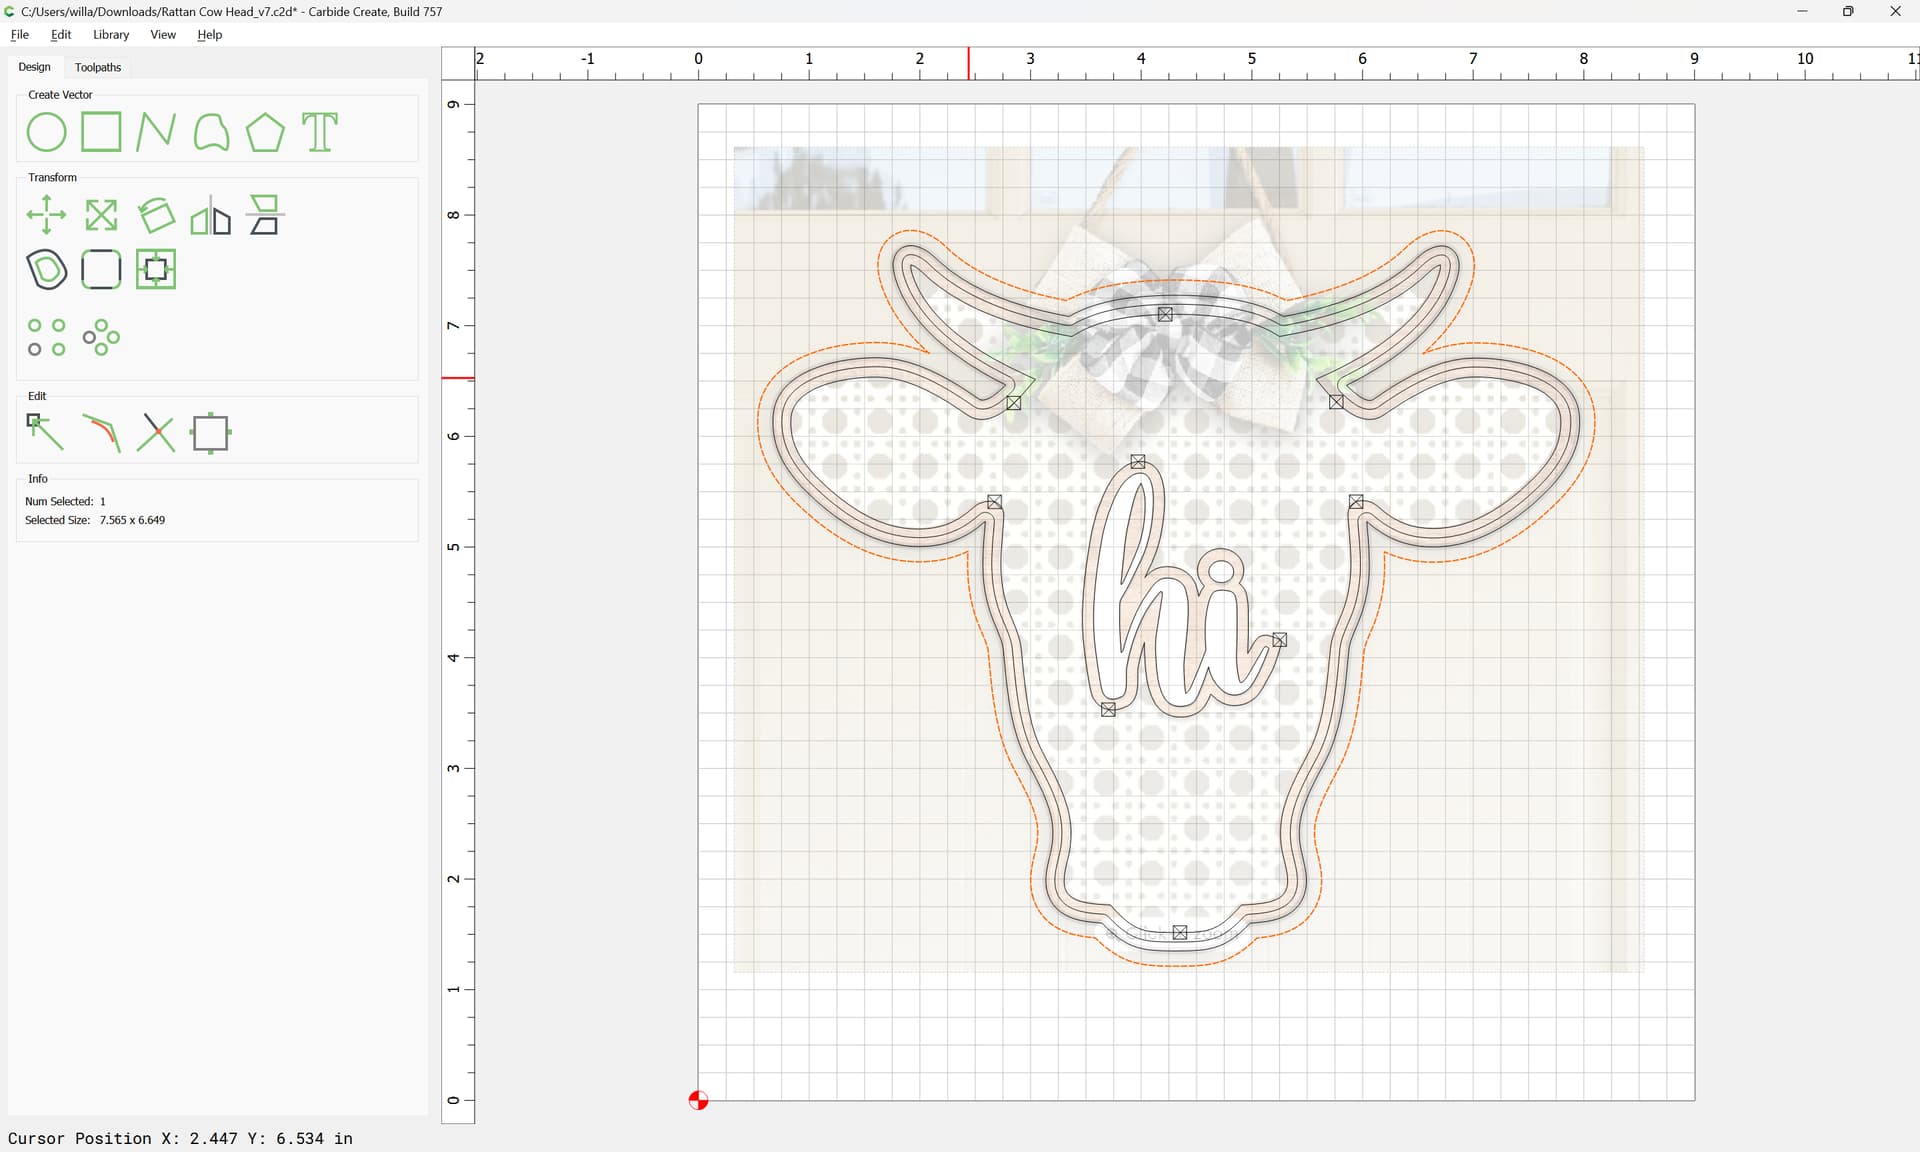
Offset Vectors
offsetting to the outside by endmill diameter plus 10% or so
Apply
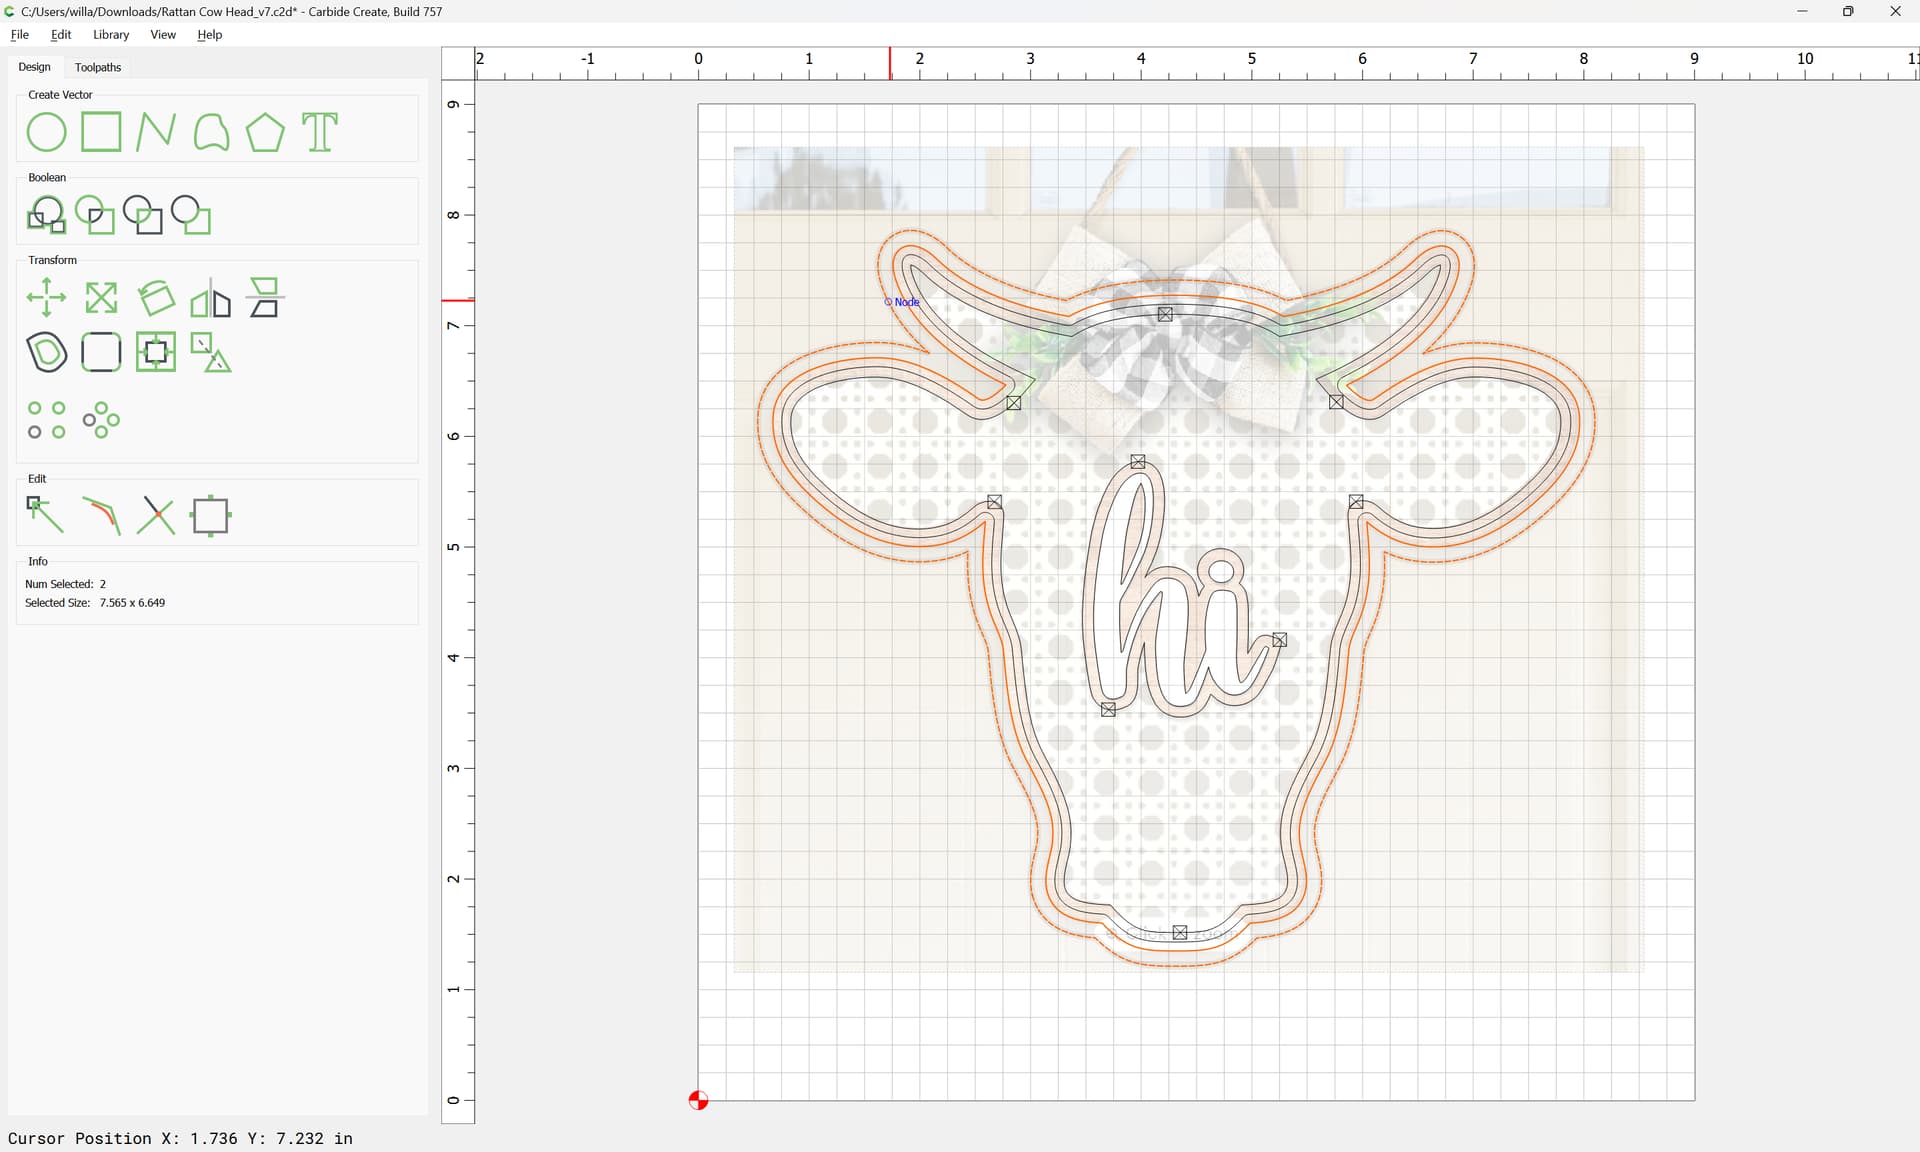
Select both the offset and original geometry:
and cut as a pocket down to tab height:
which previews as:
and we add tabs:
Ok
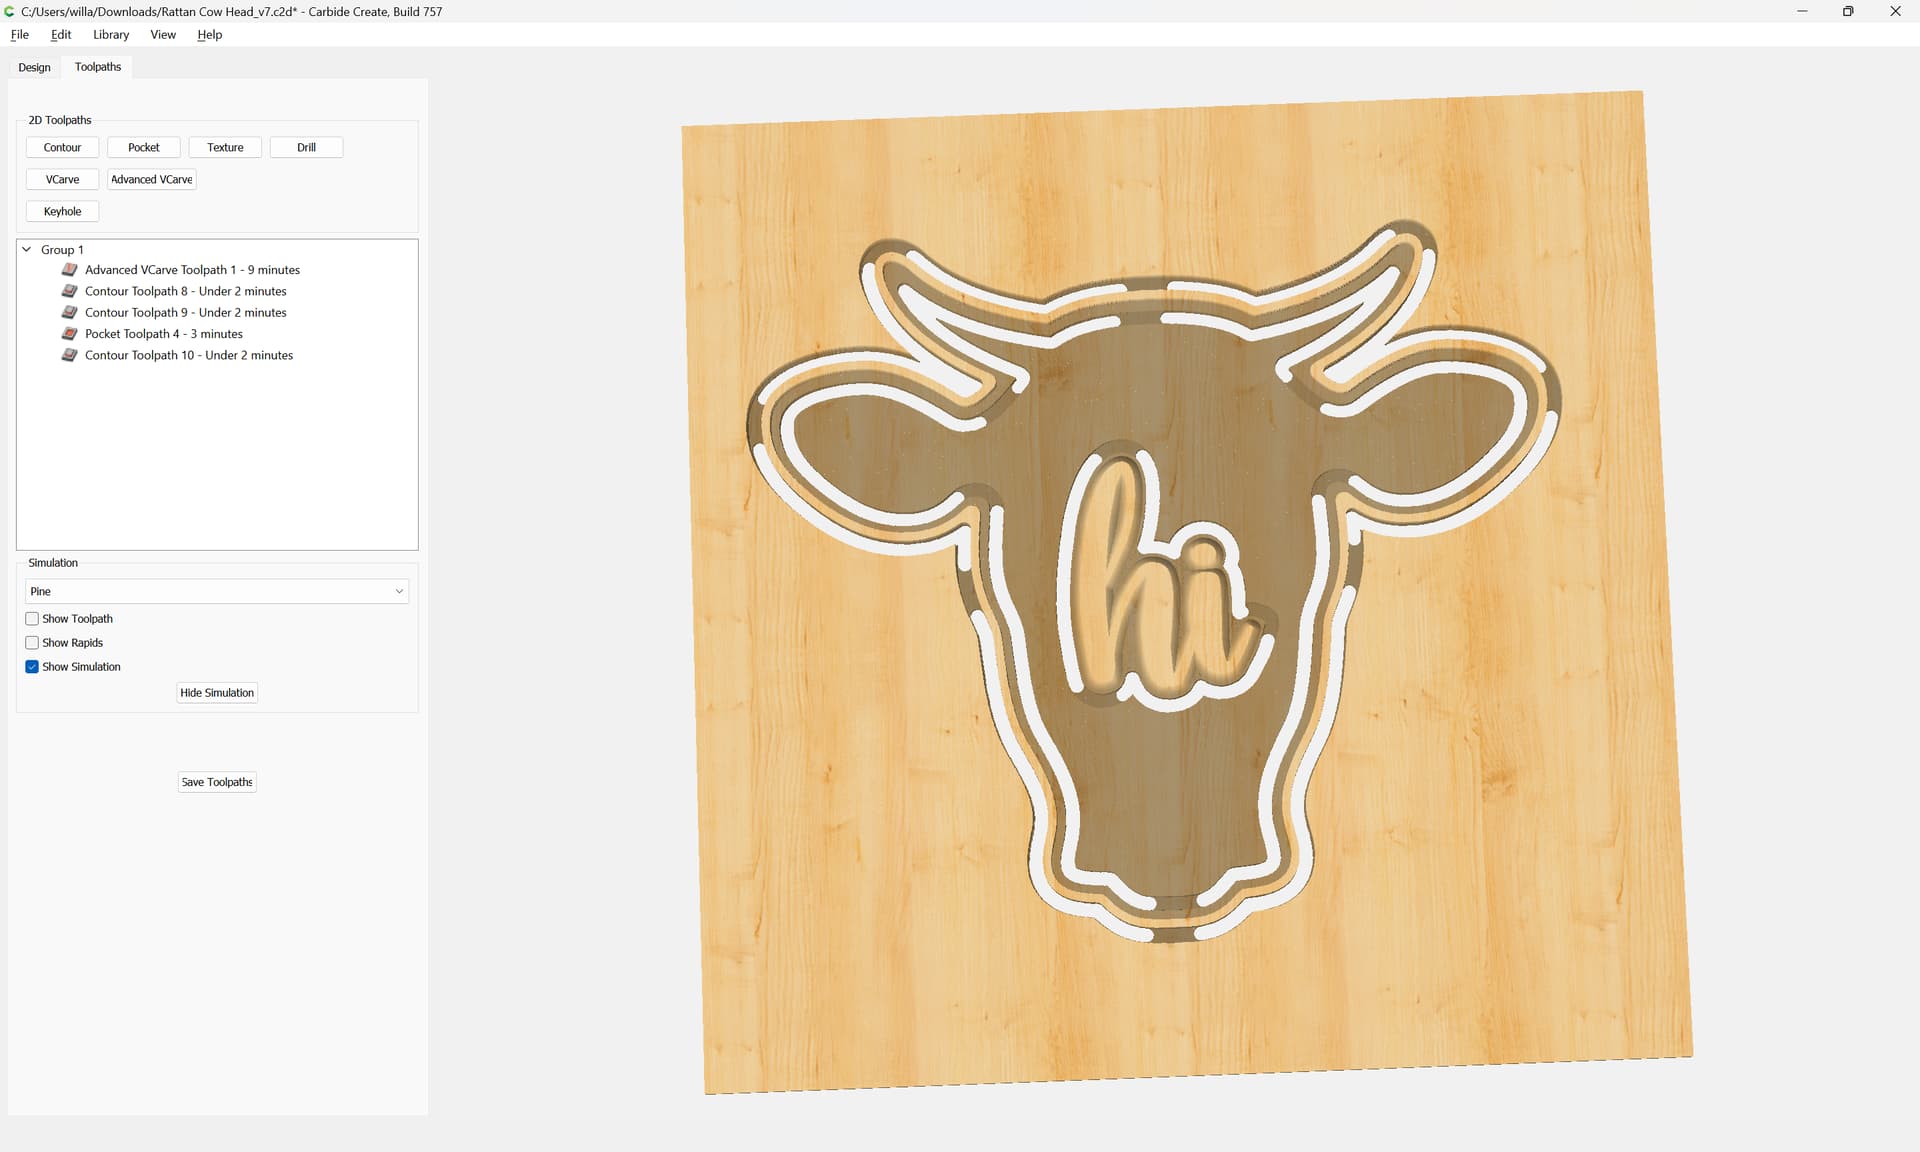
lastly we assign an outside Contour toolpath which starts at the bottom of that pocket and cuts the outside of the original geometry through, leaving the tabs:
which previews as:
and should cut to match.
Thank you so much for sharing this!
My pleasure!
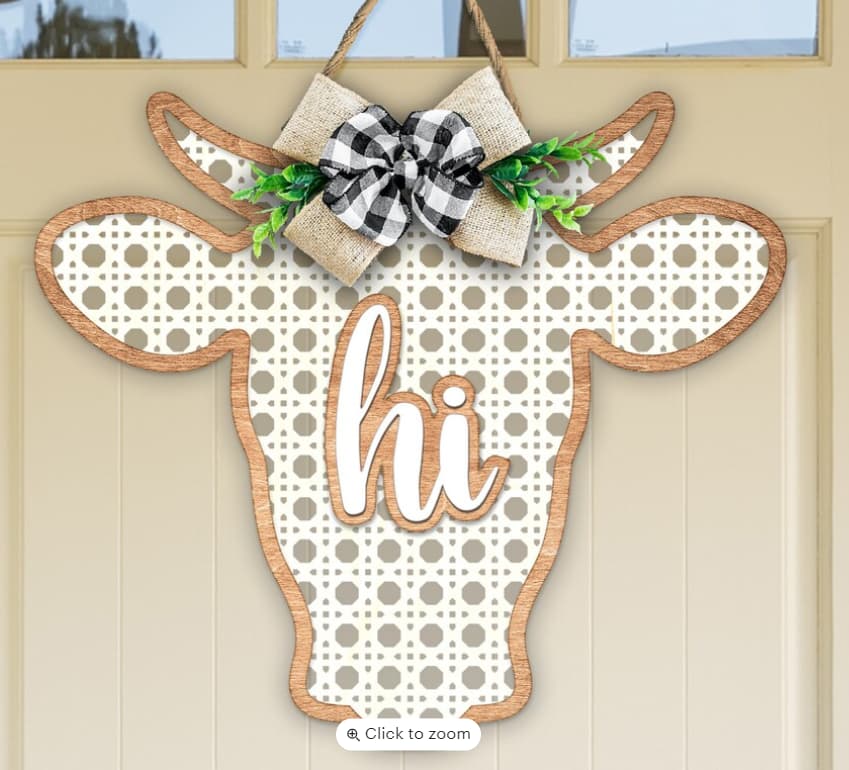
One thing which was left unstated/assumed is that the larger part would be flipped over after installing the rattan/backing so as to hide the seams/edges.
This topic was automatically closed after 30 days. New replies are no longer allowed.