Cutting (trying) Aluminum with Shapeoko Pro

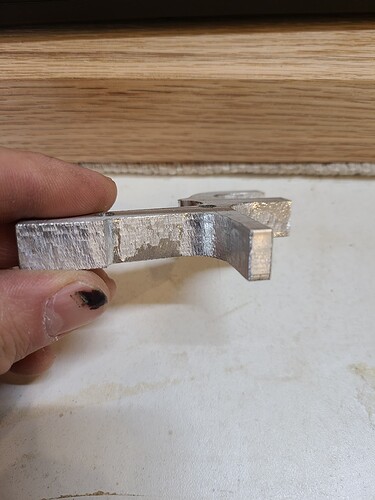
Hi there, question about this results (picture)
I’m trying to cut aluminum using:
1/4Dia 1 flute endmill
PassDepth 0.04”
Stepover 0.1”
FeedRate 30 inch/min
PlungRate 15 inch/min
RPM 16000 (guess in Makita 2.5 knob)

The plate is 1/2 thick 6061, I got this setup from the internet, I have try some variations but none end up cutting well.
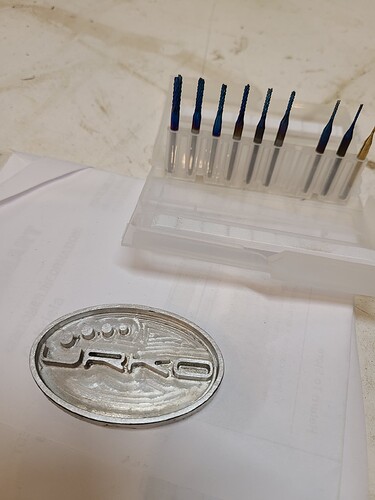
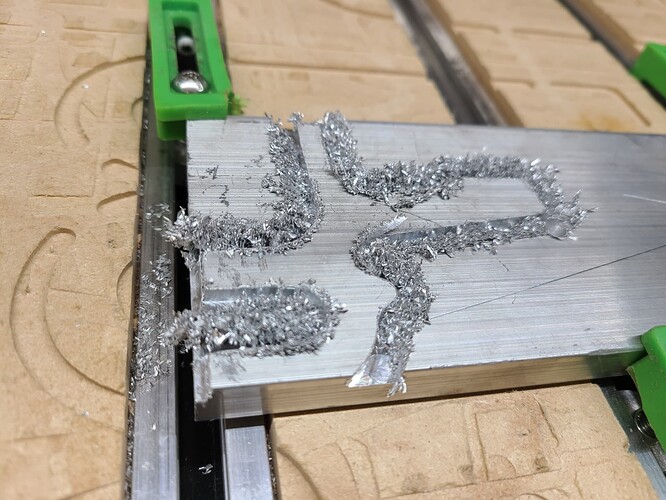
The one that I was able to cut looks terrible.(picture)
Where is the mistake? what is going on? I figure for sure someone with more experience had have this problem before and can point me in the right direction.
Thanks


What CAM tool are you using?

I was successful in similar plate using the (very conservative) feeds and speeds in Carbide Create w/ coated single flute tooling:

It looks like you are slotting so stepover = 0.250. In that case, 0.040 is a bit too high a depth. Drop that to 0.020 and 16ipm for slotting. Also lubrication might help.

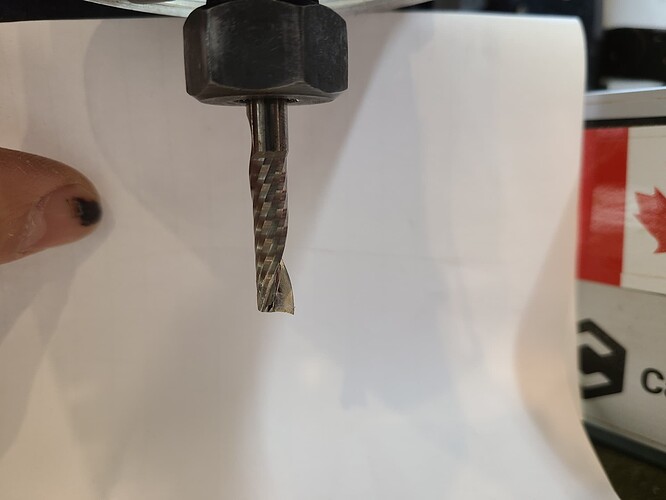
What does the end mill looks like? What did the cut sound like?

2 Likes

Hi
Thanks for the quick response

Will
That plate looks awesome and the cut pretty clean, that is what I want to achieved.
I’m Using C.Create pro 514.

Vince
I will try those settings and some WD40
The cut sound ok I think, not that different that when I cut some hardwood, just the plung each time that depth increase sounded bad.
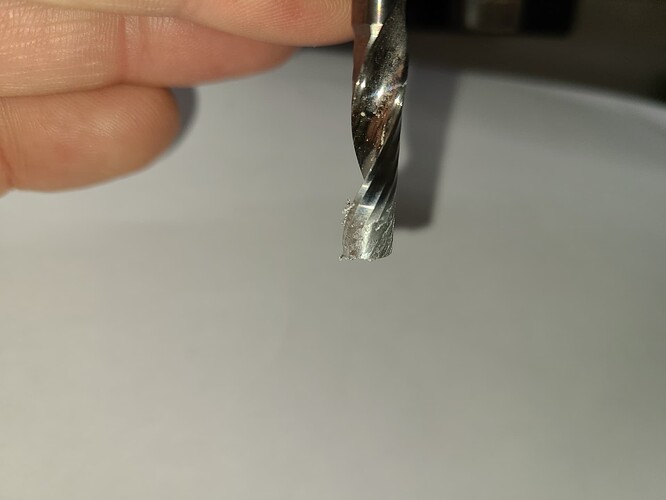
The endmill looks a little clog with aluminum but not sure if it is that bad (picture)

I would go with Vince’s settings, also, try to not plunge directly into the aluminum. Endmills do not like cutting straight into a material. You can get away with doing that in wood but it becomes a problem in aluminum.

1 Like

Thank you for the all answer
Today I have time to test the recommended settings and WD40, however it didn’t improved, the cut still “dirty” and the bit start to get clog, much more than before.
Is the 0 flute bit the best choice for cutting aluminum?
I use spetool brand endmill , they are from amazon, it is that the problem, low quality endmill?
I know there are better but this are well price and when they brake I don’t mind that much.

single-flute are usually un-clog-able and the easiest to use to cut aluminium, but:

  • did you do these latest tests with a fresh endmill ? If you reused the ones you showed in the picture above, it may be blunt (from the previous failed attempts). If you have a loupe, you could try and inspect the edge. The ebook has an example of how a sharp (new) and blunt (worn out) cutting edge looks like. If you don’t have a loupe, (carefully!) running your thumb across the cutting edge is another way to have a rough idea of whether the cutter is still sharp. When in doubt: try a fresh one. There is nothing as frustrating as trying to get good cuts from a worn tool.
  • are you positive you are using 6061 aluminium? If you are not sure, and if it may be another alloy, then you could be chasing a ghost. Some aluminium alloys just don’t cut well (/easily)

I’m surprised you clogged a single-flute cutter at 0.02" per pass though. Do you mind uploading picture of the cut/endmill, in case there is a clue for us to see there ?

Possibly, but more likely a wear issue. A fresh cutter, cheap as it may be, should work.
If you can, use ZrN-coated single-flute endmills, that coating helps getting clean cuts in aluminium too.

Understandable, but you will find that cheap cutters are hit and miss: sometimes they just work wonderfully, sometimes they are worthless, and there is way to tell before trying them. So it all comes down to optimizing your time. It’s not easy to break a 1/4" tool (besides the occasional mistake…we all do them from time to time) so I feel more confident buying an expensive 1/4" tool than a smaller diameter one.

Hi Julien
I used the same endmill, I only have that one in 0 flute, I already order one more.
I broke one in my first test but I think it was because the tool path start in the part and the feed and speed was to high ( that is a question for next time, how to start the cut off the part in a specific point with carbide create)
Yes maybe clogged wasn’t the right description, it is all cover in aluminum now, like welded all around

The aluminum is 6061, I bought it in a metal shop (http://www.metalpros.com/ by the way if anyone need metal in Ottawa they are a good place to buy really small quantities)

The whole aluminum thing started because I was able to carved a part with small endmill and a lot of passes so I though I got it, clearly it was just luck.

I believed the conclusion is I need more practice, tools and tests to cut aluminum, I played a lot with soft materials but I need more experience to start with alloys.
In any case thank you for the information, really appreciated

Ah, that makes more sense now. Yes, that residue on the surface is normal of milling aluminum. If you are holding your parts down with tape, some of the adhesive may coat the surface of the endmill and chips will stick to it. Also, some aluminum will get stuck to the surface even if you don’t use tape. Soaking your endmills in a <1-molar solution of sodium hydroxide will take it right off and be good as new.

1 Like

Success in cutting metals depends on:

  • suitability of the alloy to being machined
  • chipload being adequate for a given tool
  • suitability of the tool for cutting that material at that chipload
  • spindle having sufficient torque at the necessary speed to power through the cut
  • toolpaths being arranged so that the tool is presented to uncut material and doesn’t rub
  • the rigidity requirements of the cut being w/in the structure of the machine
  • adequate chip clearance or dust collection to prevent recutting chips

The geometry on that endmill probably isn’t the best as cutting aluminum, I’ve had the same thing happen with cheap ones.

2L makes some pretty good ones that are decently cheap, $25 coated

3 Likes

You can also possibly salvage that mill by soaking it in lye

1 Like

1/4" tool at 16,000 rpm is ~1050 SFM. 600-1200 SFM is the recommended range for carbide tooling in aluminum from littlemachineshop.com (I like to consult their values since they are likely geared toward hobby machines), so you’re definitely in the upper end of the range there. Dropping down to 10,000 rpm would be ~650 SFM.

1 flute at 16,000 rpm and 30 IPM is almost 0.002" chipload.

Material buildup on the cutting edge is obviously bad. Now instead of a sharp (assuming the cutter isn’t dull) carbide edge shearing material off, you’ve got a blunted glob of aluminum ramming/smearing its way through generating lots of heat and force, the latter of which could be deflecting your cutter in different directions as the single flute alternates which of the two walls of the slotted toolpath it’s engaging.

My suggestions:

-get a 2-flute carbide upcut cutter
-start at 10,000 rpm; 30 IPM will give you 0.0015" chipload or 20 IPM gets you 0.001"
-(to echo a previous suggestion) get some WD-40 or other light oil and put it in a trigger sprayer with an adjustable pattern nozzle; adjust to somewhere between a mist and stream and spritz it into the cutting zone every so often to help prevent material build-up on the cutter
-or, use compressed air (doesn’t necessarily need to be full-blast from a blow gun) to clear chips from the cutting zone and help dissipate heat
-make sure the material is held down adequately and doesn’t have a long span cantilevered out past the last clamp or large bow-able spans between clamps

1 Like

Single flute cutters are by far the easiest tool for aluminum on these machines. If you are having trouble with a single flute, I would not switch to a 2 flute. The room for error is even less. I routinely run take a 0.003" per tooth chipload with my single flutes. The single largest contributor to clogging a cutter is chip recutting. Some form of chip clearing is a must. I use a decent dust collection setup. I don’t use any lubrication. Both Carbide 3D and @Vince.Fab have made some good videos on cutting aluminum. See below:

5 Likes

2- and 3-flute cutters are fine in aluminum. Carbide3D has a video with parameters for 3-flute 1/4" here:

https://youtu.be/RH4AXz_rtPo?t=2m24s

3 Likes

(I guess the point was that single flutes are more tolerant to newbie mistakes?)

3 Likes

Singe flutes are better for newbs and people that don’t care to clear chips, plus its easier to keep the overall balance of everything. You can also run a 5 Flute Kor 5 in Aluminum but i don’t recommend it :sweat_smile:

6 Likes

Yes. There is just way less room for less than perfect chip clearing and speeds & feeds. A beginner will usually have a better time starting with a single flute. I have also found that I get more accurate parts with single flutes because I can slow the machine down more without compromising on chipload.

3 Likes

I have to admit that I’m biased coming from a knee mill / VMC background, where a 2-flute was the lowest flute count one would use unless you were talking about a fly cutter or a boring head, but those aren’t end mills.

Being able to use a lower feedrate makes sense.

1 Like

Usual preface, I’m with PreciseBits so while I try to only post general information take everything I say with the understanding that I have a bias. Probably going to be extra “general” here as this relates to cutters.

I agree with Vince for the most part. Single flute cutters are easier to calculate for and have a lot more flute volume. Additionally, you don’t have to worry as much about runout changes as you are only really dealing with it when you engage the material and in some direction changes (not counting dimensional accuracy just chip and forces). In multi-flute tools especially with low chiploads and/or small diameters it becomes a much larger issue. This is mostly due to the fact that you can have variable chipload per flute where runout is added or subtracted based on the location of runout relative to the flutes. Helix and pass depth complicates it further…

The flute volume is the amount of room you have in the inside of the flute. The more flutes you have the more this has to be scaled back to leave enough core to have any strength left in the tool. The more flute volume the faster you can cut without choking the tool and the more you can tolerate uncleared chips. Doesn’t solve the uncleared chip problem though, especially when multi-pass slotting.

One of the problems with all tooling including single flutes is that there are a wide swath of geometries for them (helix, rake, margin, core, etc). Oh, and an “O flute” label can be counted on meaning precisely nothing anymore. In my opinion it’s original meaning (type of chip, center, and high rake) has been lost in the marketing drive.

Core is a big one to watch for in this case and potentially part of the issue. This is basically the percent of blank material left from the nominal cutter diameter. The problem is that it’s a lot easier to just cut a huge chunk out of the blank to make the flute than to compensate for everything else. This has resulted in some tooling so extreme that I personally refer to them as ribbon cutters (because they look like a twisted ribbon of carbide). Those will cut soft material fine…most of the time. But move into metal or tough composites and it will deflect a lot more than tool with more core left.

Rake and helix can also be an issue as they effect both the strength and sear of the tool

Unfortunately, all of the above basically means the single flute tools are good from a simplicity of cut calculation, and tolerance to runout and uncleared material. However, they are just as complicated when it comes to everything else. So you can still end up with a tool that will work great in one material and horrible for another.

My stab at this specific cut, without knowing the tool geometry, would be to run the tool at a minimum of 0.001" chipload and scale back the per pass to whatever is needed to minimize deflection. RPM will be more dependent on geometry but the worst I’ve ever seen for carbide in 6061 is 600 SFM (9,168 for 1/4"). Assuming a decent edge and enough rake you should be pretty good to 800 SFM (12,224 or 1/4"). Good geometry with good edges will depend on what they are targeting for. At the very least also clear the chips between passes. I’d also switch to blue tape and CA or hard clamping for hold down. I’m probably a bit bias there though with as many issues as I’ve had with flexible mounting allowing material to move while cutting.

One last thing I would change is to split the pass depth into even passes. I primarily recommend this as the deflection is linked to MRR. So if you have a final pass that is less than all the previous ones you will deflect less basically rubbing the tool to one side. How much this matters depends on the system, total deflection, engagement time, etc. But it’s an easy step to avoid a potential issue.
11 Likes