As a relative newbie, I’ve learned some lesson that have served me well in the workholding department. Being material frugal, I go with the tape & glue technique as it gives me access to the entire material.
Please bear in mind I work mostly in wood, so this might not apply to other materials
I have two tips for workholding. First, buy a 1/4" flush trim router bit and don’t cut all the way to the bottom, leave a little bit. Kind of the same principle as a tab. This saves your waste board, use the 1/4" flush trim bit to clean up after. (basically it goes where your 1/4" endmill goes).
Second if you are patient, use carbide create to create an offset path about .3in from the contour you are trying to cut (different for different endmills). Then create a pocket between that path and our outer contour.
This will cause the endmill to traverse the outer contour twice, but each pass will only cut one side of the groove. I’ve found this relieves a lot of stress on the workpiece reducing the risk of the workpiece being pulled up.
I started milling small model rocket parts (some as small as 1/4") and this technique seems to keep things in place (even with sweepy, believe me a vacuum can easily suck up those small parts).
I’ll post an example of what I mean by pocketing a shape out instead of contouring.
I look forward to some pictures as I am totally a newbie. I don’t have a clue what or how you’re doing these. What are you cutting and leaving a little of? Is it the waste board? I’ll have to check the mycarbide3d and figure out how to do the offsets you mention. God help me, I think I’ll need everyone’s help and loads of Patients. Sorry people, please excuse my lack of knowledge and understanding. And of course, thank all of you.
First of you are where I was last year. About every weird little thing that went wrong did, but I played with the S4 for about 3 months straight and learned a lot.
The typical way someone cuts out a pattern is to create a contour outside your shape. Most people cut all the way though maybe a very small amount into the waste board below. If you are clamping from the top, you might create tabs in your contour which are places your router won’t cut all the way though. Once you remove your piece. You break it at the tab to release the work. Then sand or use a trim router to clean up the tab.
An alternative method to hold down is to put tape on your waste board and on your stock and superglue the tape together(makeshift double sided tape essentially) with that you don’t necessarily need tabs.
What I do is leave .02 inches about of stock and use the trim router to clean up. The other tip is to pocket rather than contour which I’ll explain when I can get some screen shots.
If you want to save your spoilboard (the name is spoil) you can change from the top of the material to the bottom of material. I replaced my SO3 spoilboard in October and have cut a lot of projects. I rarely use the top any more so my spoilboard is almost pristine. There is one spot that was my fault. I was cutting 1/8" plywood and had it set in CC as 1/4" so I got some cut into my spoilboard. The upside to using the bottom of material is you only need to check your zero and do not have to set it for every project. However you do have to be very accurate with your material height because if you are taller than the stated height the first cut will cut deeper than intended.
I too use the painters tape and super glue and it has worked well. I have a long L bracket I use to set up my project so it is straight. I put the L bracket on and use the jog function to make sure my material is square with the router. I place my project down and if the L bracket could be cut I simply remove it. Before removing the project I simply put the L bracket back in place and it keeps my project square.
long_L_bracket.c2d (296 KB)
Just modify the Long L Bracket for the spacing on your spoilboard. Mine is 2" Tee nuts using 1/4-20 bolts. Be sure to modify your material thickness and check the top/bottom for the material. Anytime you use someone else’s file you have to check every thing and never take anything for granted.
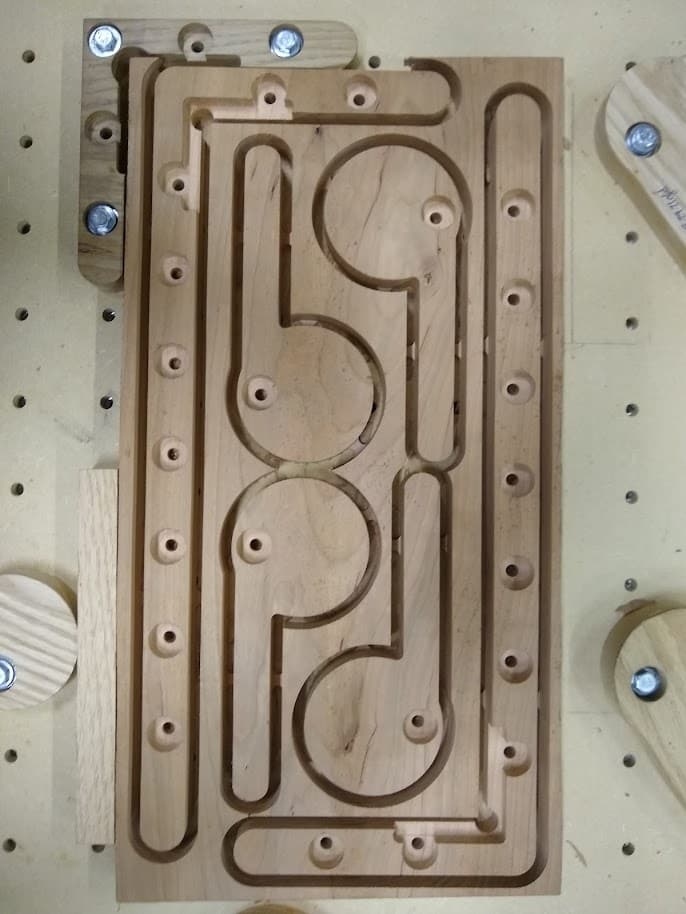
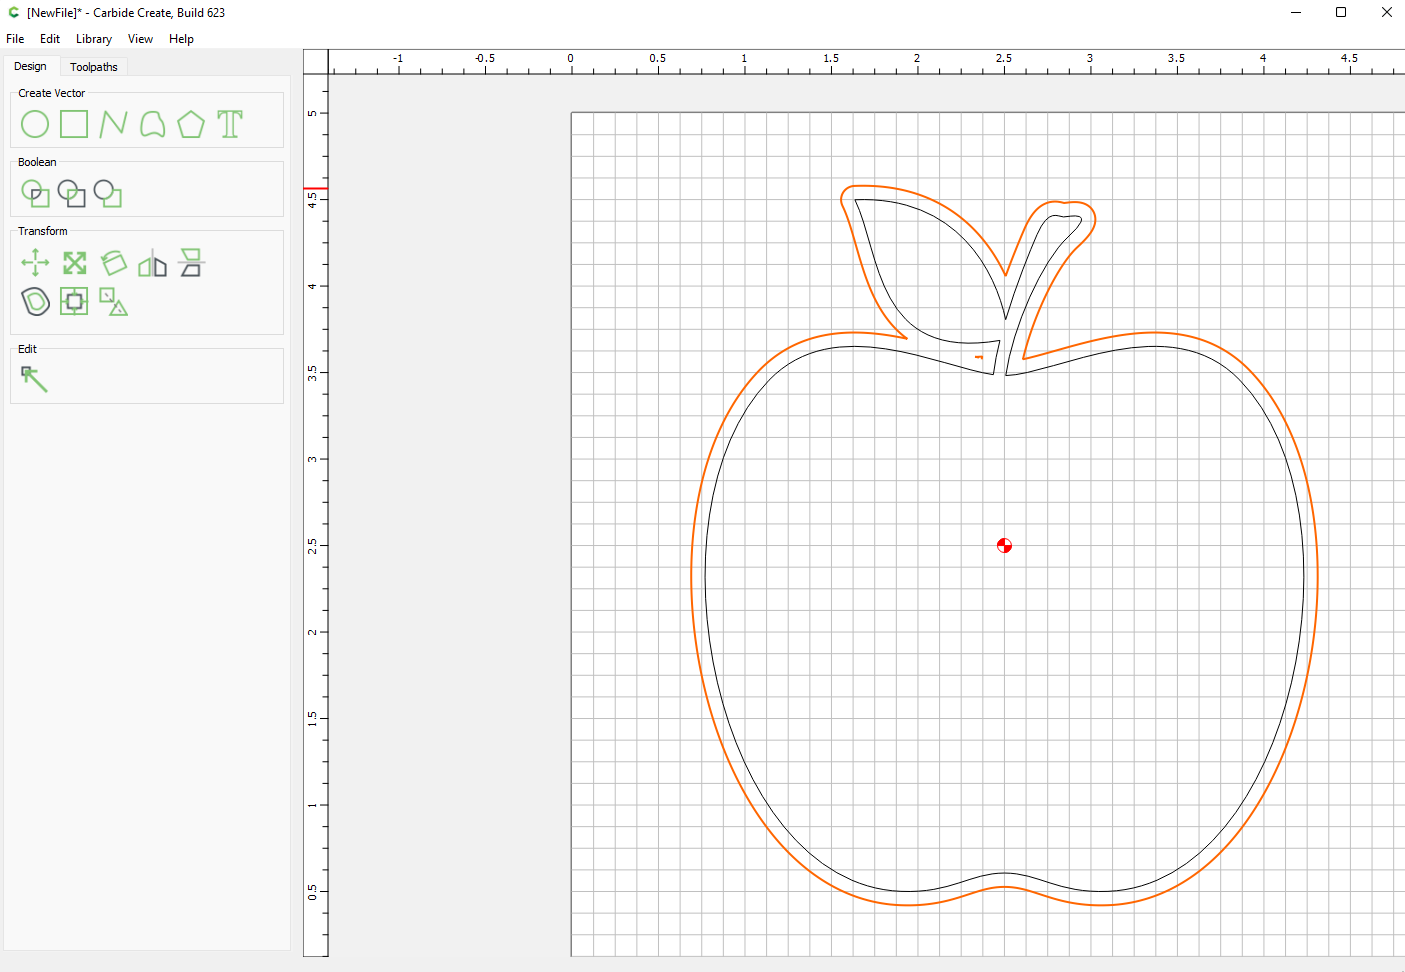
Here’s what I mean about pocketing rather than contouring. Typically, you might want to cut out your shape using a contour tool path, possibly placing critical tabs if you are cutting all the way through
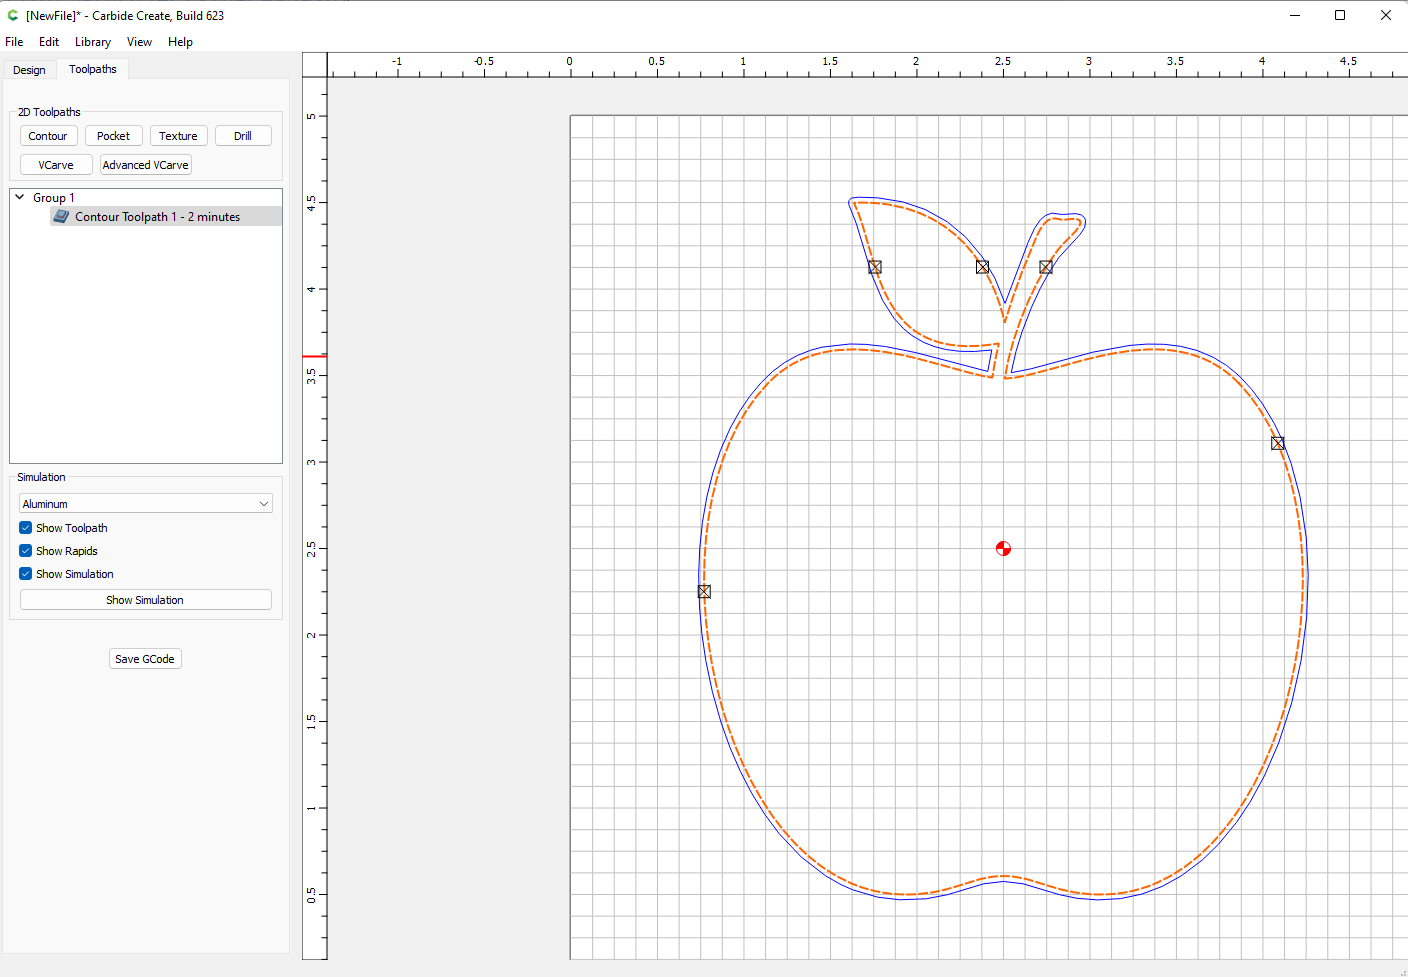
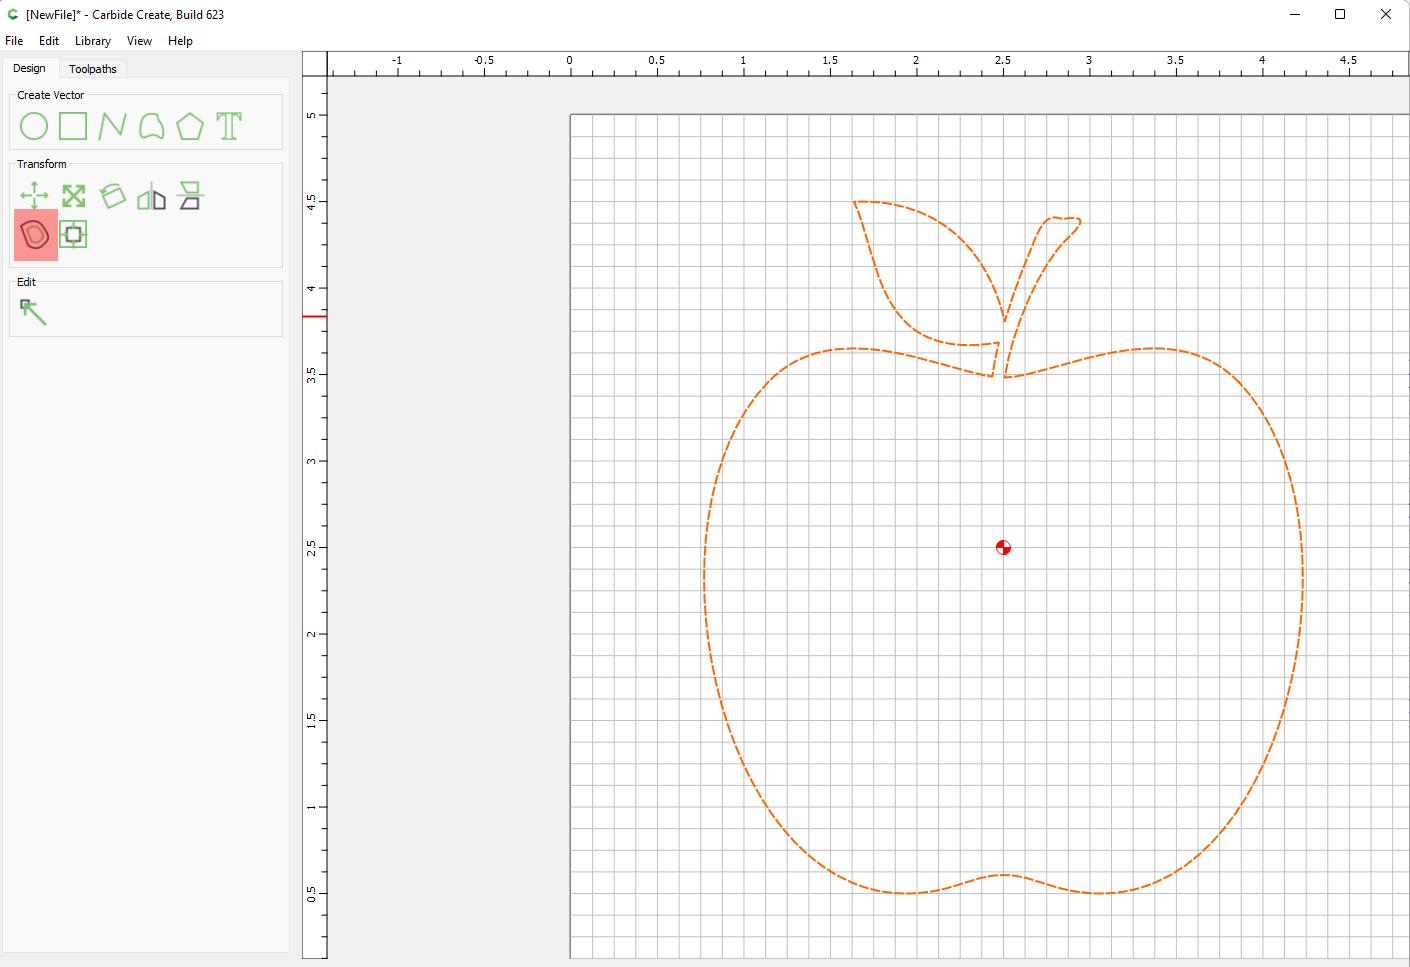
My alternative suggestion is to use the offset vector function (which is my new favorite carbide create feature. I saw it in V7 and discovered it was there all along.) I highlighted it in red here under transform
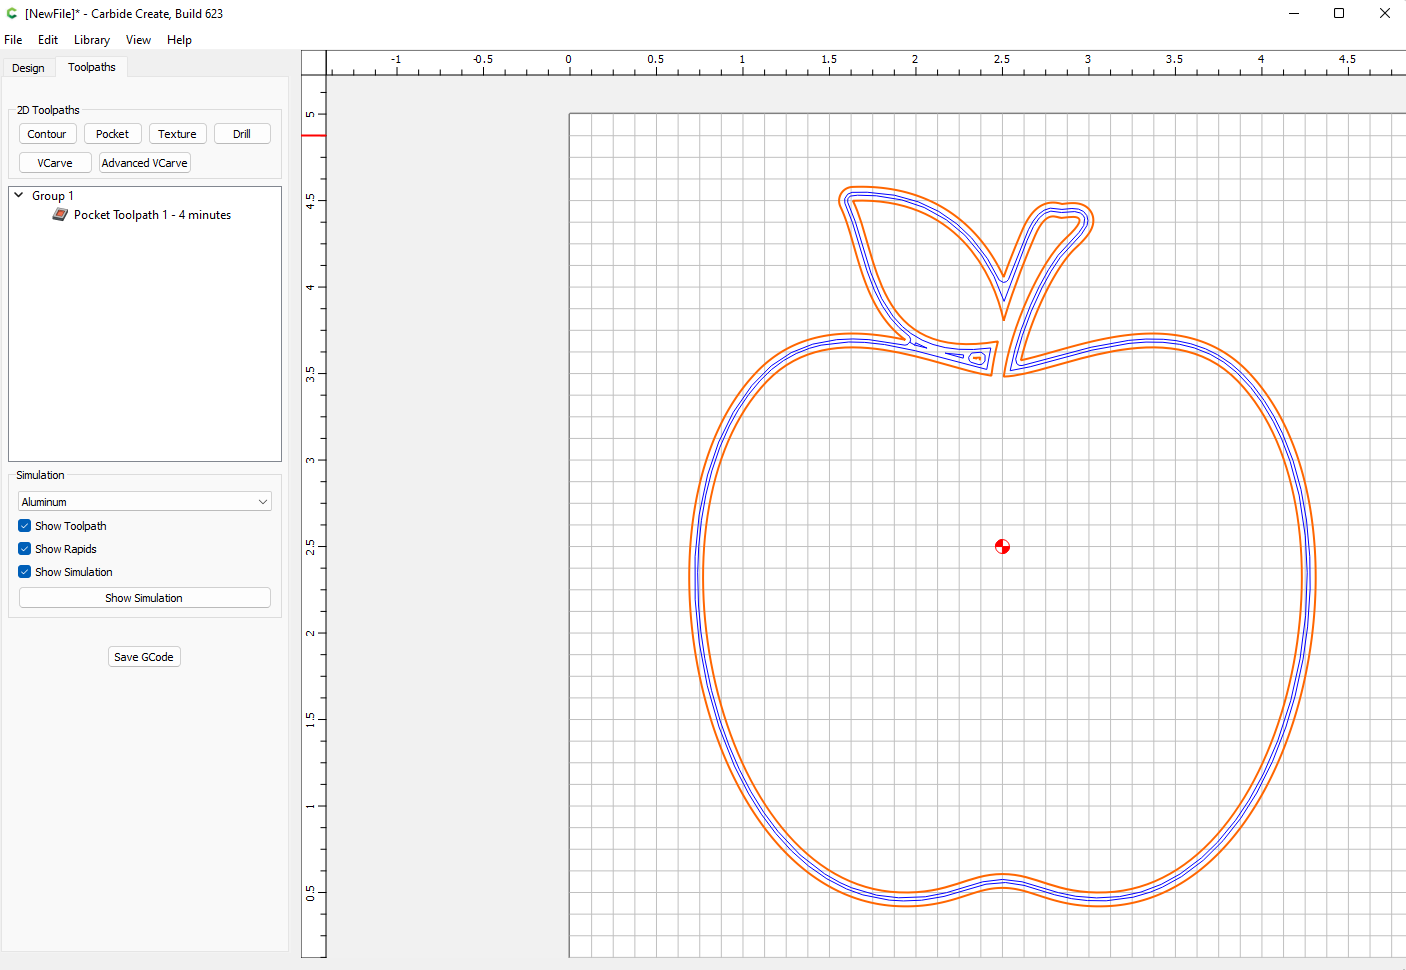
You’ll see that essentially the bit is going to have travel twice as far, but by creating a slightly wider contour, it enables better chip clearing and drastically reduces the odds of the bit grabbing your stock. The chances are greater the thicker your stock is so if you are contouring out a shape in thick stock, I definitely recommend trying this. While it will take twice as long, that’s less time than ruining your piece and having to do it again.
I think @gdon_2003 is pointing out that it’s named “waste” or “spoil” because it’s a consumable. Personally I measure my success on a carve by the number of blue tape layers I cut through (one is the correct value).
Yeah @gdon_2003 and I clarified everything in a PM. I think it was an ambiguous reading.
I think my point is why cut into a wasteboard when you don’t have to or even use one in the first place. Lost in all this was the tip that you don’t need to cut through all the way especially if you normally would leave a tab. A veteran CNC guy taught me to just use a flush trim bit to clean up tabs. I started following this time, but discovered if you get a 1/4 flush trim bit (with a top bearing) you pretty much can go anywhere your CNC can (with a 1/4 inch bit) so rather than contouring and leaving tabs just leave a little all around then use that 1/4 inch bit to cleanup. (Especially if you were going to do that to clean off the tabs).
@neilferreri I was a little terse in my reply to @CNCNewbie. I sent him a PM to apologize for being rather short.
My point was using the bottom has helped keep my spoilboard from being cut up. When I used to use the top of material I would somehow miscalculate and cut up my spoilboard. Since October after replacing my SO3 supplemental spoilboard I only have one boo boo and that was totally my fault. So using the bottom has been quite handy. The only down side and that is the change of routine. That is hard for an old dog like me to get in the flow but now it is working quite well. I still use the top for some projects but mostly the bottom.
I broke my own rule about responding too quickly for what I perceived wrong. I like to help keep our forum cordial and polite.
I think I had two key points on workholding on delicate situations and perhaps did not articulate it well. My delicate situation is that I had things to cut which 1) were small so not a lot of surface area for tape to grab onto and 2) did not want to waste material so I couldn’t clamp outside the work area adhesion from below was really the only option. The key to this is to reduce stress on your workpiece as much as possible.
First tip:
Don’t cut all the way through us a 1/4’ flush trim bit to clean up. It has the added advantage of not using up your wasteboard, but that’s not the main reason. When you cut through 2 things happen first you may cut through your tape if this happens it reduces your workholding ability. If the tape is intact you still get workholding even if your piece sits over a spot you missed with the glue; second anytime you hit an interface (top of stock, bottom of stock) there is a little more stress.
Second tip:
Pocketing rather than contouring (at least for wood). When you cut wood, there is a little compression which can expand on subsequent passes also vibration can misalign ever so slightly. So as you go deeper, the edges where you cut can apply a little friction even though they got cut. With an upcut bit this will tend to pull your stock. If you contour, the tool will brush both sides of the wall. The extreme case is when drilling even if you use pecking where all sides grab your tool. (Don’t believe me try drilling 40 holes then touch the tool after it has stopped. It can get hot.) If you pocket the way I described, it will only brush one side reducing stress again. (Plus if you use tip one, it gives you a bigger channel for your flush trim bit.)
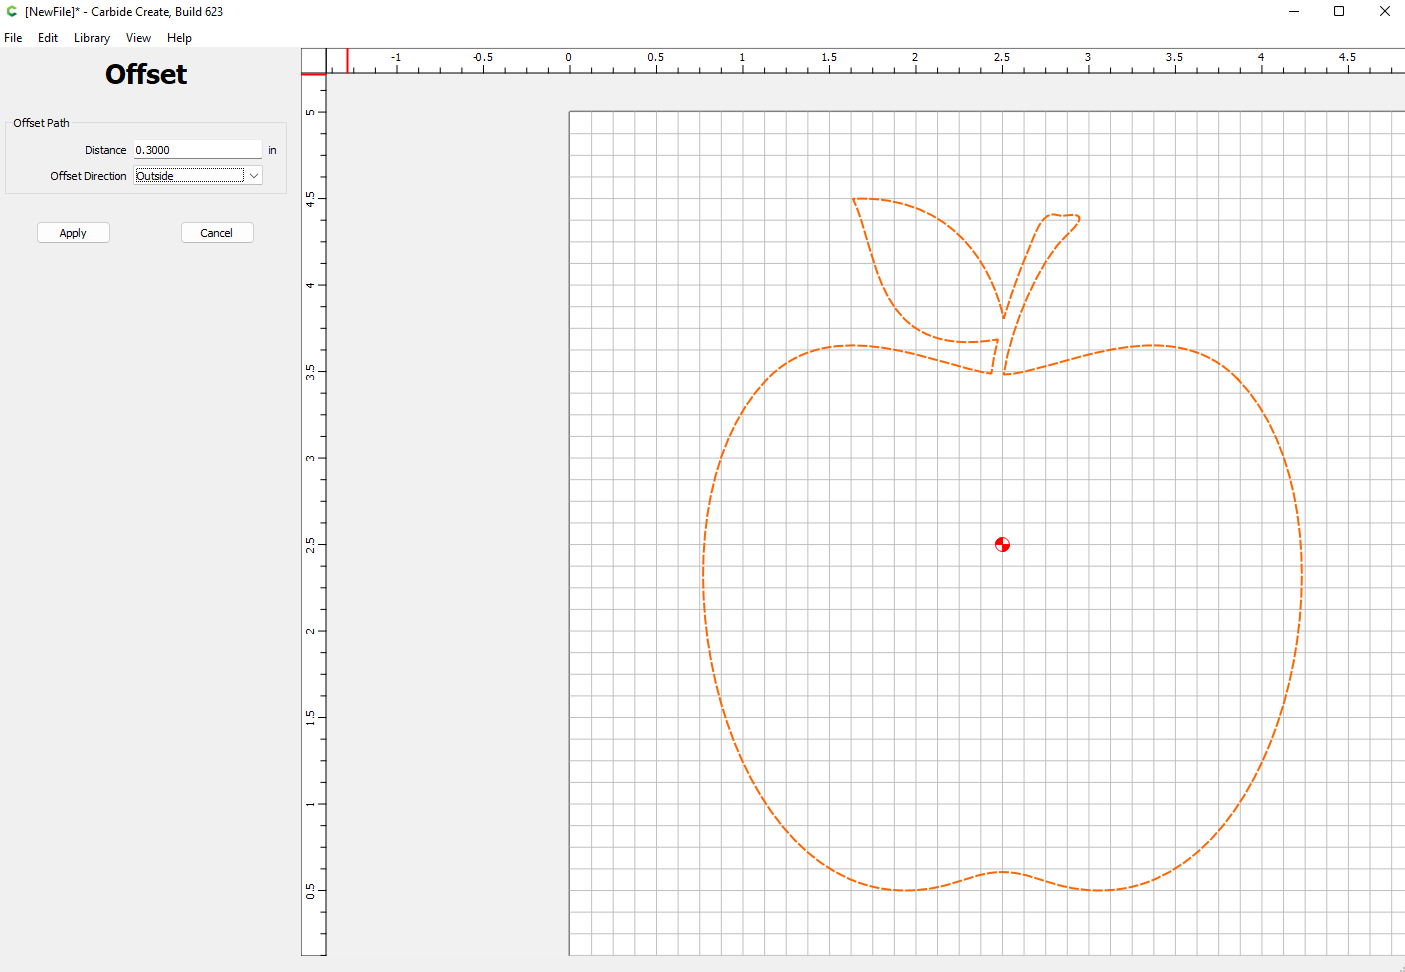
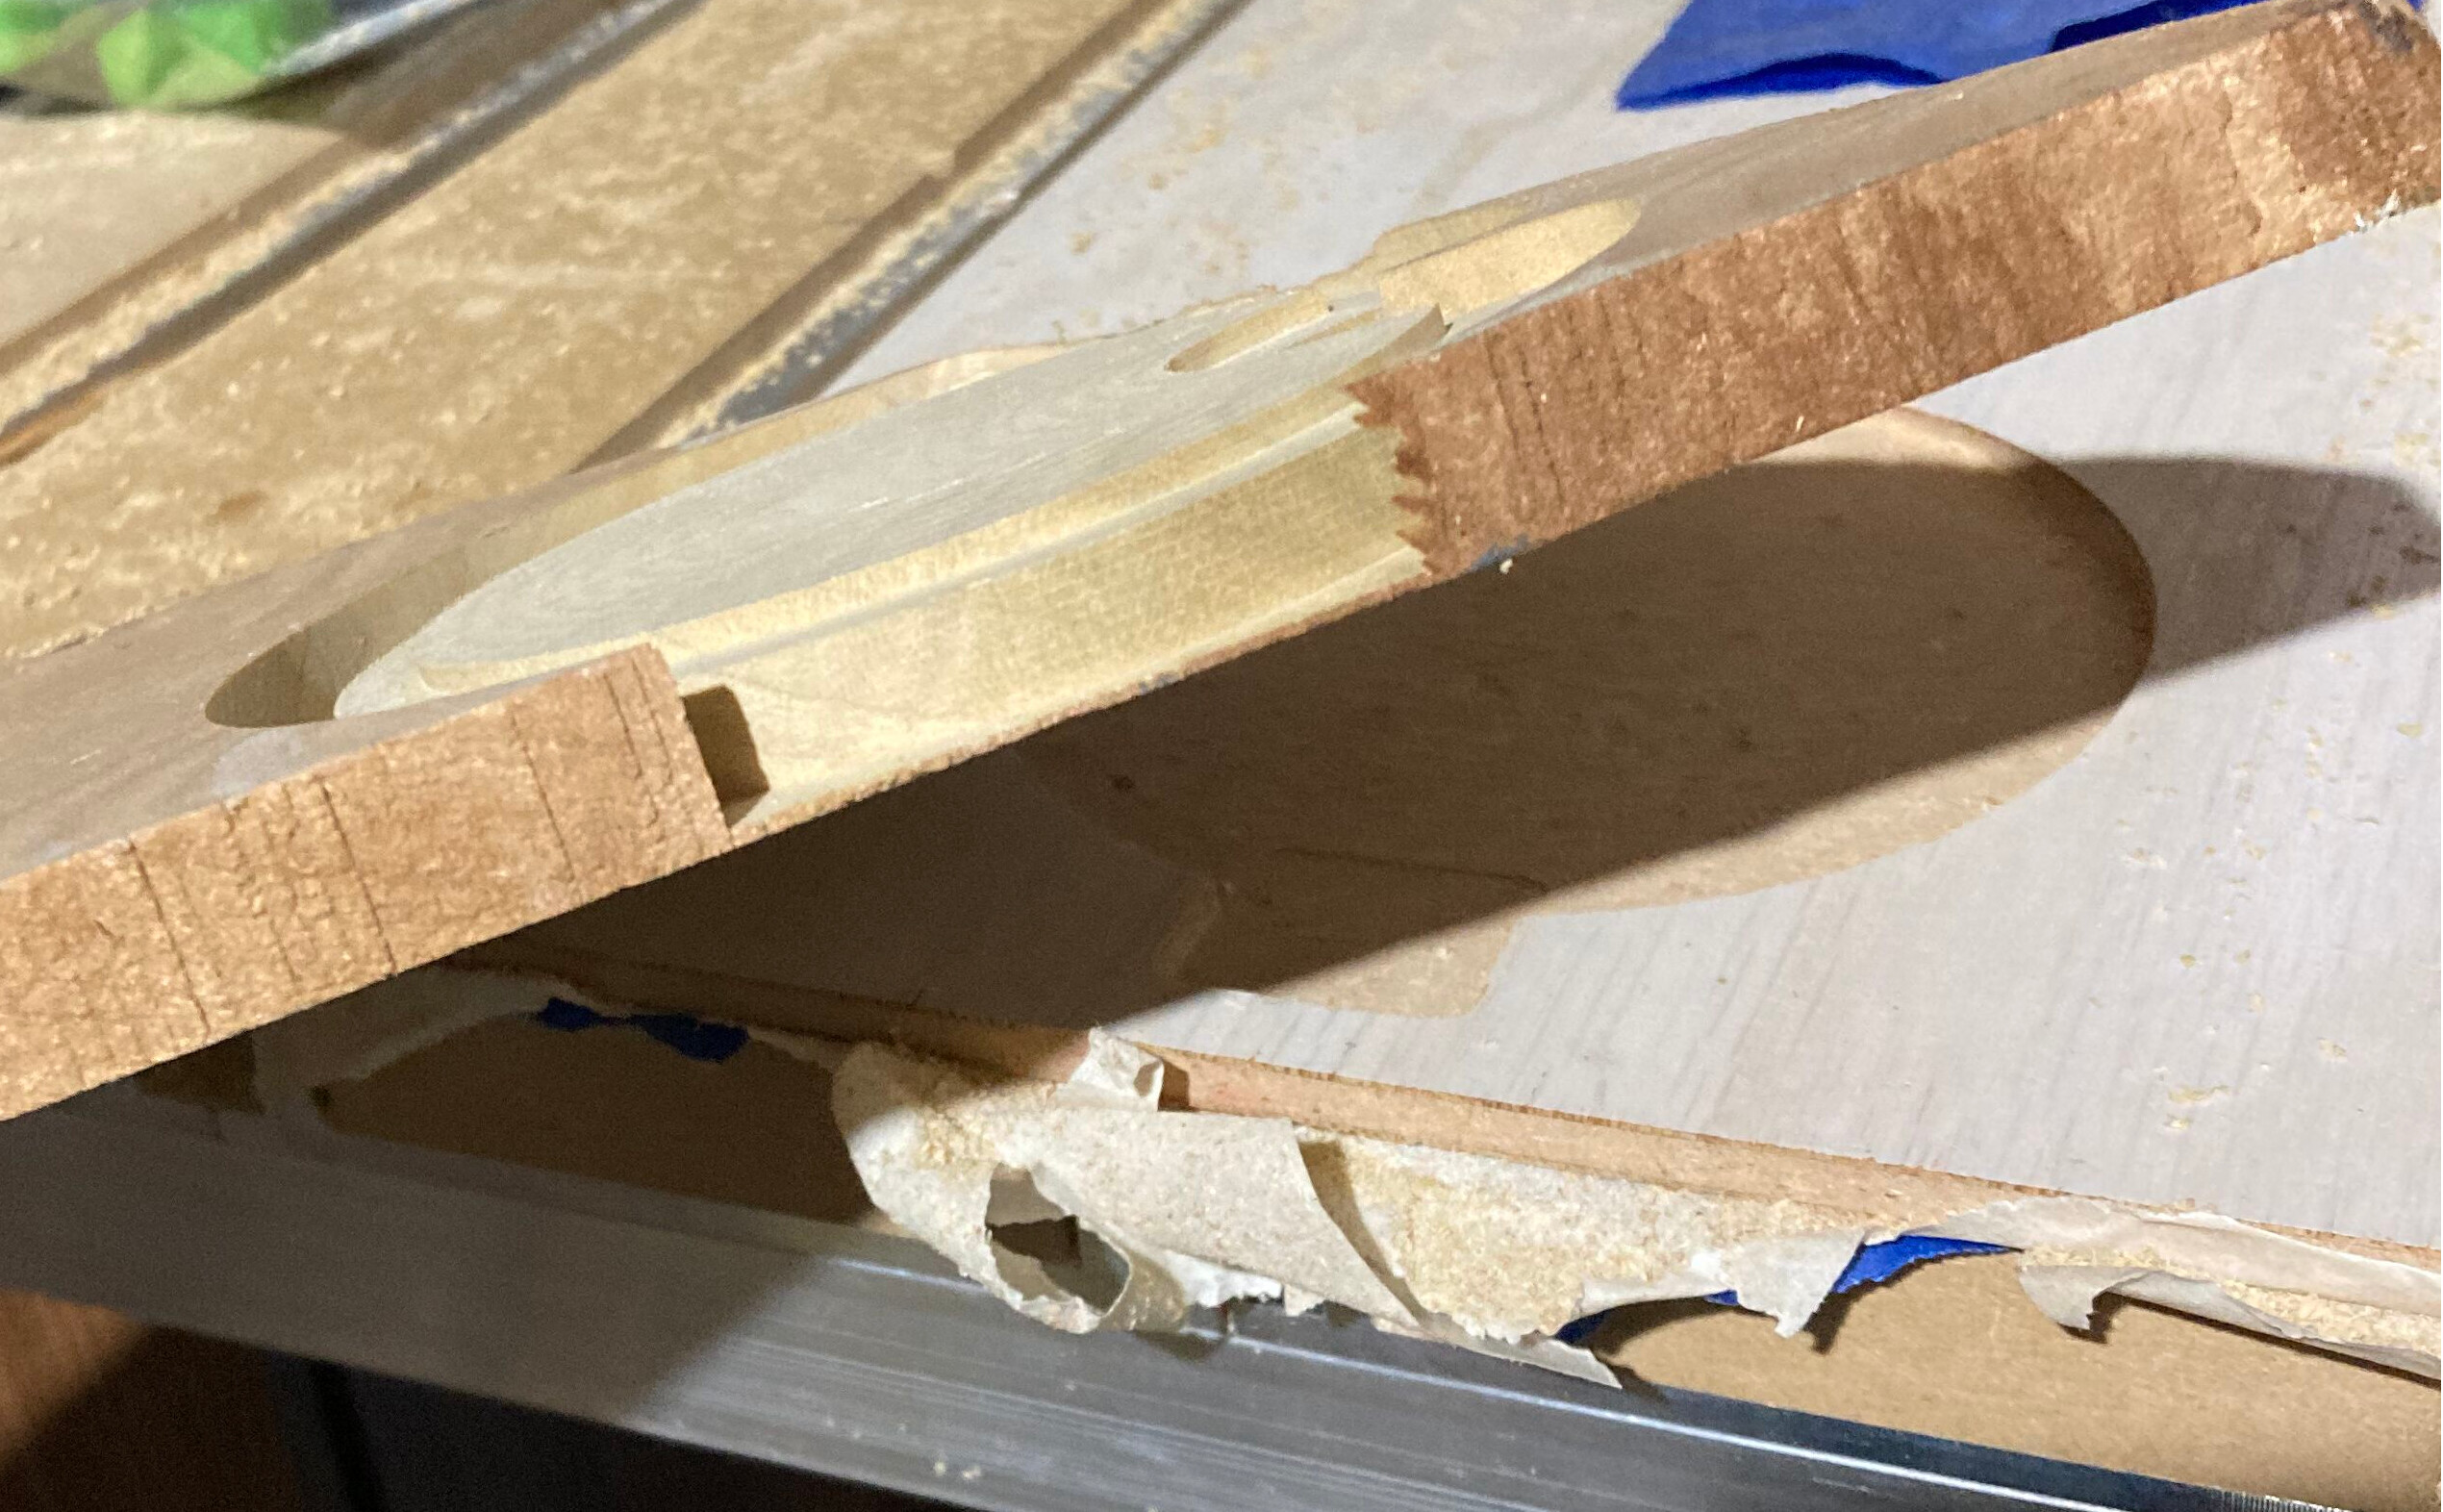
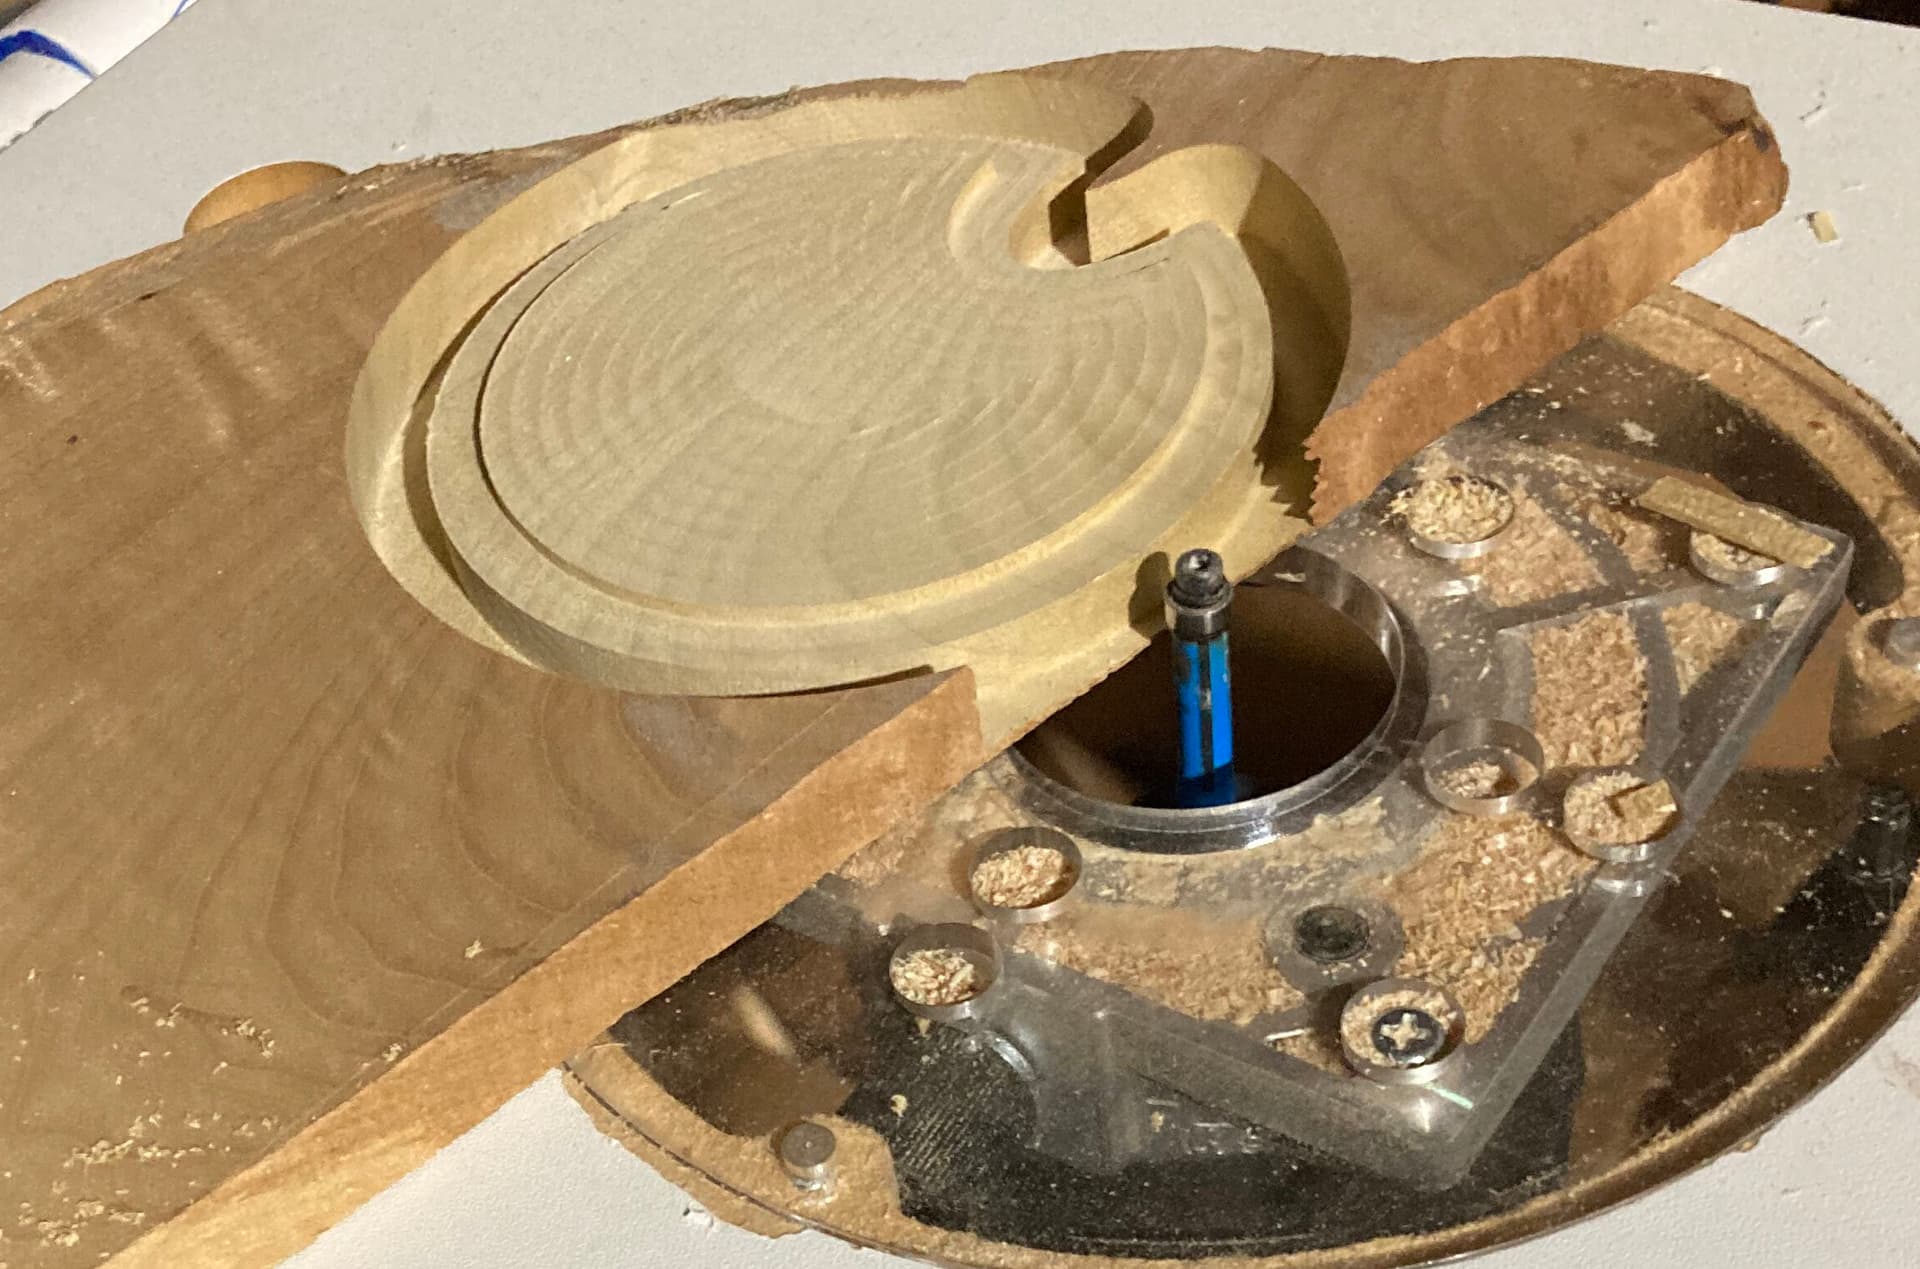
Here is a recent example of both, as you can see I left maybe a 1/16 of an inch
. For this piece of stock it wasn’t necessary, but I’m so much now in the habit of pocketing over contouring I just do it. This is just before removing the piece. You can see the outside pocket looks like a 0.3" router bit contoured it, but it is actually two passes of a .25" bit as described above.
Re: drilling holes. Instead of drilling and pecking, I found it helps to use an inside profile toolpath with an somewhat undersized bit that plunges down in a spiral (helix). That way there is no rubbing on the sides. I do realise not all CAM software is supporting this though.
I wholeheartedly agree. Drilling even with pecking just heats up your bits. I made a holder for all my 6mm bolts of different lengths for hold downs (48 holes), used a conservative peck and still managed to heat my bit to where you could see the discoloration. It never cut as well again ended up buy a new but. Later I redesigned my bolt holder as my original design had the holes too close together. Instead of a 1/4" bit, I pocketed the holes with an 1/8". After the cutting, the bit was still cool to the touch. Big difference. (as it turns out using the 1/8" allowed me to make the holes a little smaller to match 6mm so overall a good move).