I like this iteration. Perhaps add another ring for shorter felt tip markers?
Can you 3D print those O-rings? If not then make a thorough search of standard O-rings and try to stick with those.
I like this iteration. Perhaps add another ring for shorter felt tip markers?
Can you 3D print those O-rings? If not then make a thorough search of standard O-rings and try to stick with those.
We’ve been working on this since last April. We finally have them in stock:
Should be able to with TPU.
That would be ideal, but I thought these would “lock in” a bit better.
@robgrz You’re not playing the game correctly. Of course there are easier ways to attach a pen, but we’re supposed to be discussing the design of the OP with his constraints. By the way, you guys should ship those with new machines (if you’re not already).
They ship with 65mm machines (Shapeoko 4, Shapeoko Pro, and Shapeoko 5 Pro) beginning tomorrow, including machines that are already in the shipping queue.
Believe me, we tried to overcomplicate it, which is why it took almost a year.
Well, you just got some more of my $$$, Actually a fair price! Thanks
Dang @robgrz i wish I knew that was coming.
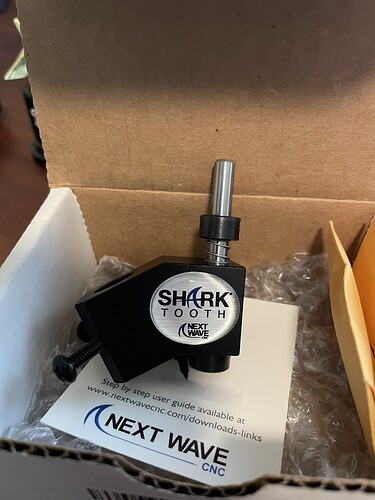
I ordered the Shark tooth and it arrived an hour ago.
It’s over 3 times the cost.
Although your version doesn’t appear to have the spring capability. Have you found that to not be necessary in your testing?
What’s the grace period on those? I got my 5 pro during the Black Friday sale! ![]()
![]()
Ps - any video up yet on this?
@rgbrobot You gave up at the first sight of that C3D green? What happened to the fitting the sweepy insert? The friction fit? The tool changes? The “no screws”?
![]()
Hahahaha. Well it’s a super simple solution! And I’m kinda mad I didn’t come up with it first!
But you’re right, I caved pretty quick haha. I think I’ll still plow ahead with my idea. Worth it for the design practice!
I think Kevin is putting a video together for next week.
For what it’s worth, my first inclination was to plug it into Sweepy as well, but I was the only one who liked that idea.
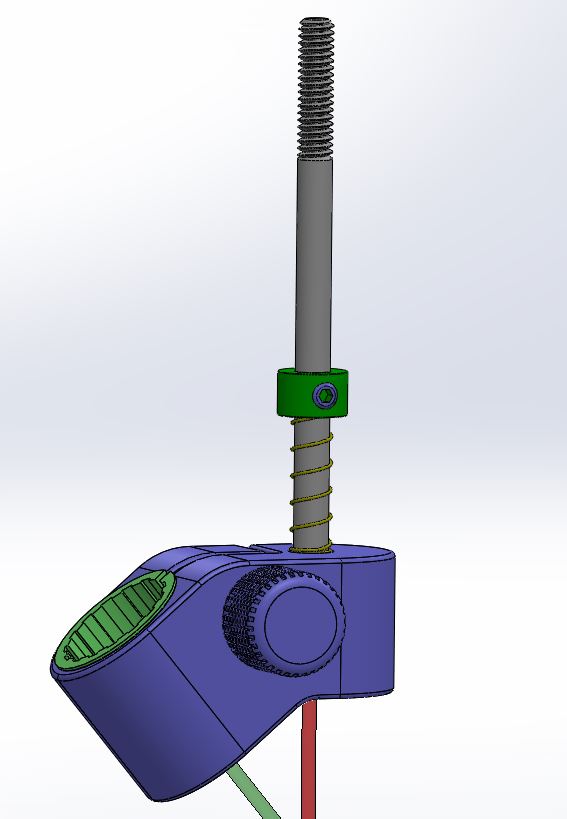
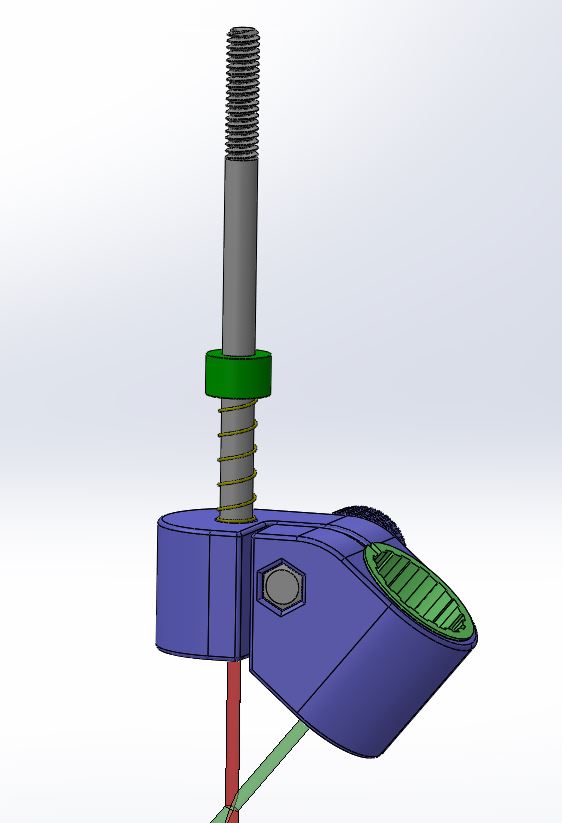
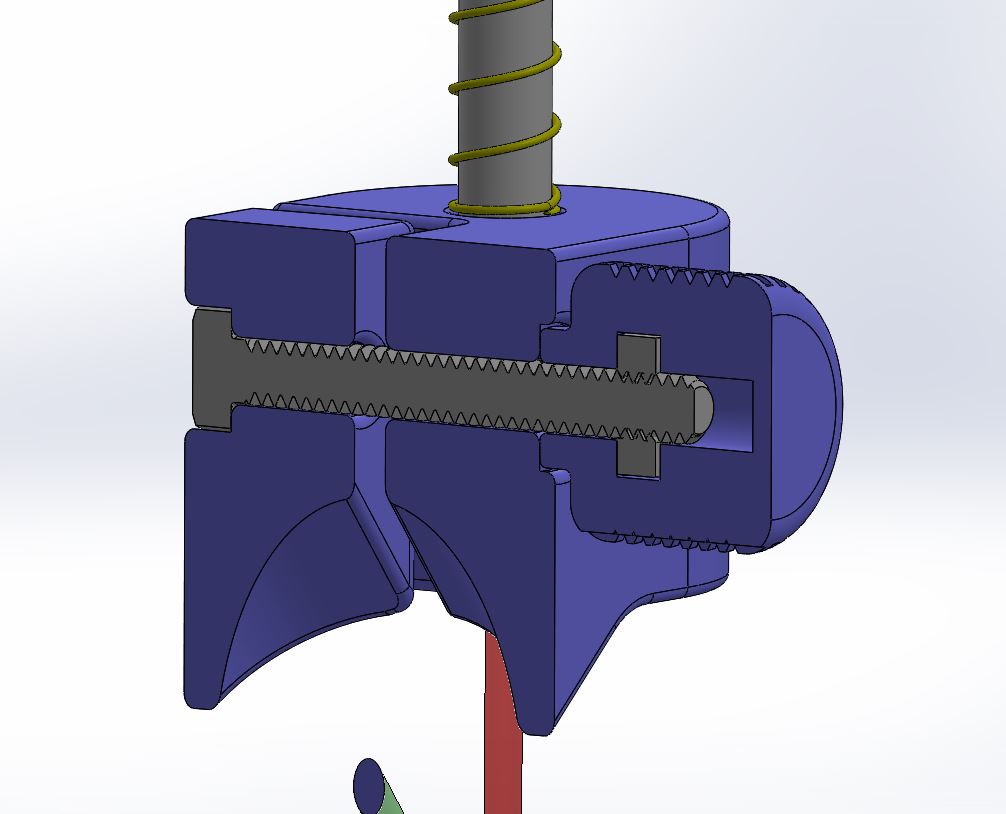
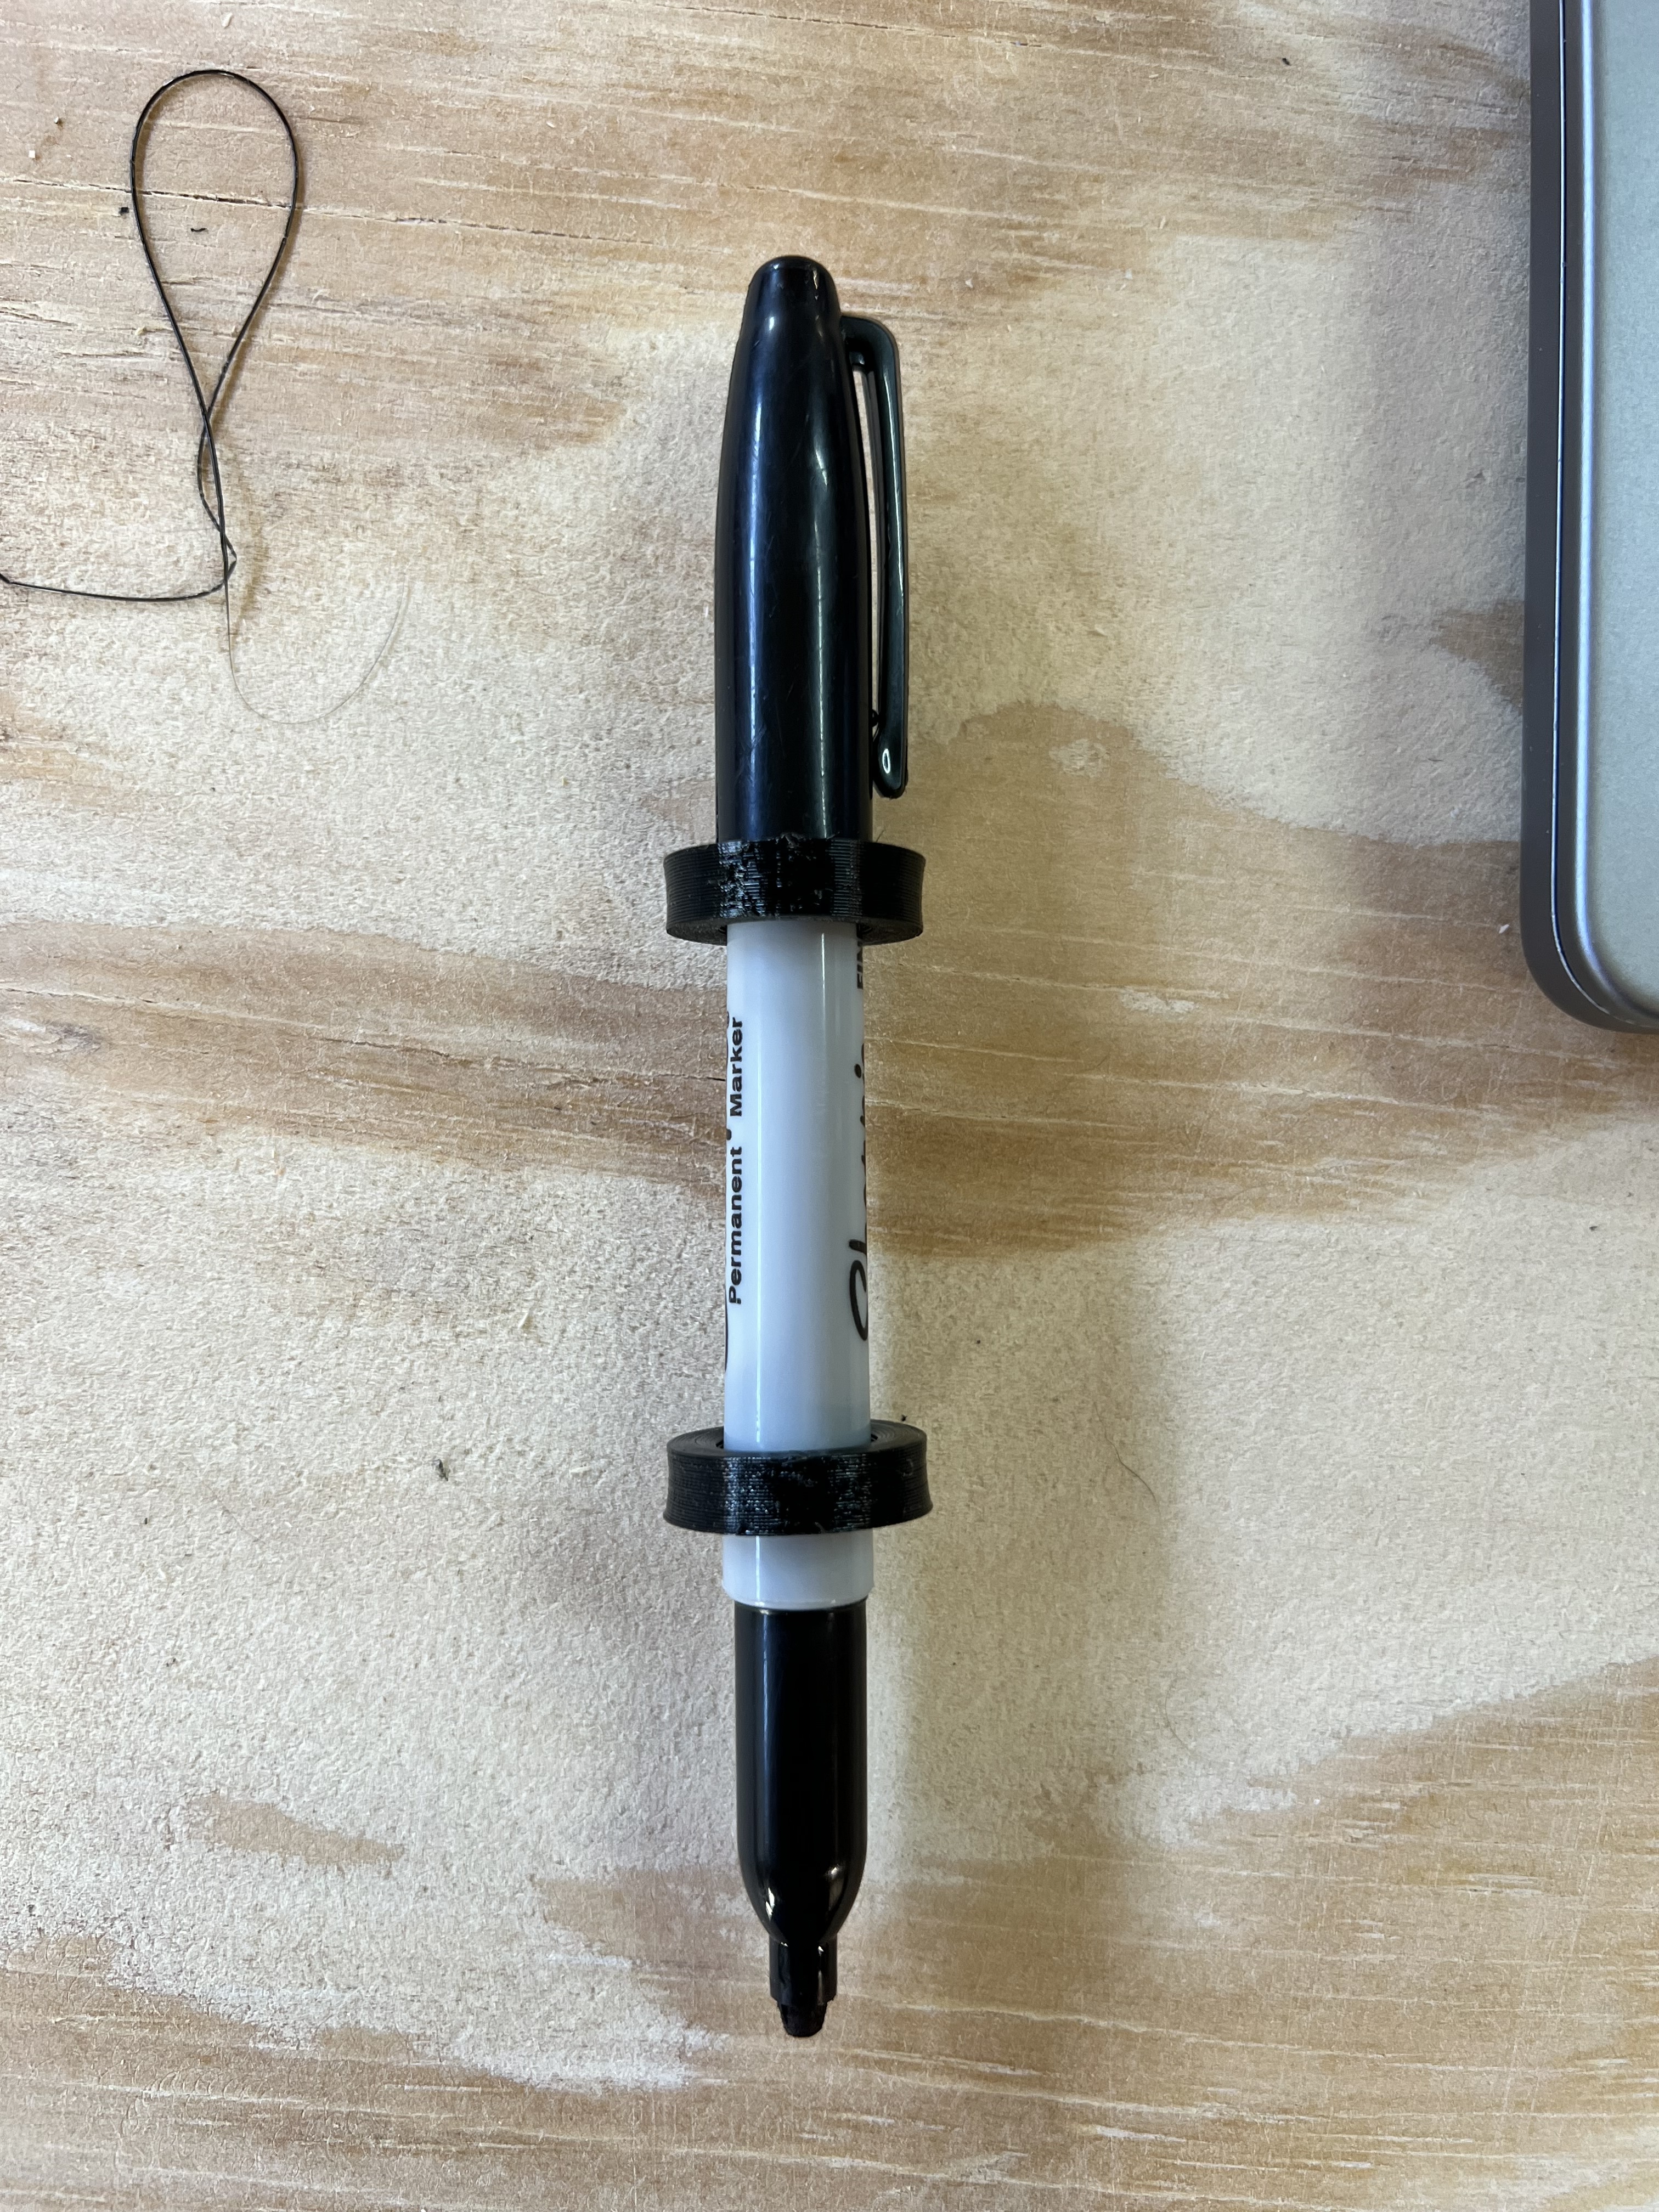
The material is nylon, so the low friction allows the pen to move just a bit. The O-ring/rubber band keeps it coming back to the correct point.
Well, I gave it a try and just did not like any of the designs I had for mounting in that adapter, so I went with a modification of a pen holder I grabbed from Thingiverse a few years ago that worked well. I then came here after getting a bunch of screenshots of it, and scroll to the bottom of the thread and see. . .
This thing that @CullenS posted!
Aaaaand then I figure I must have seen that Shark Tooth before, because the one I designed doesn’t look like I modified the one from Thingiverse. It looks like I darn near duplicated that Shark Tooth without (consciously) knowing.
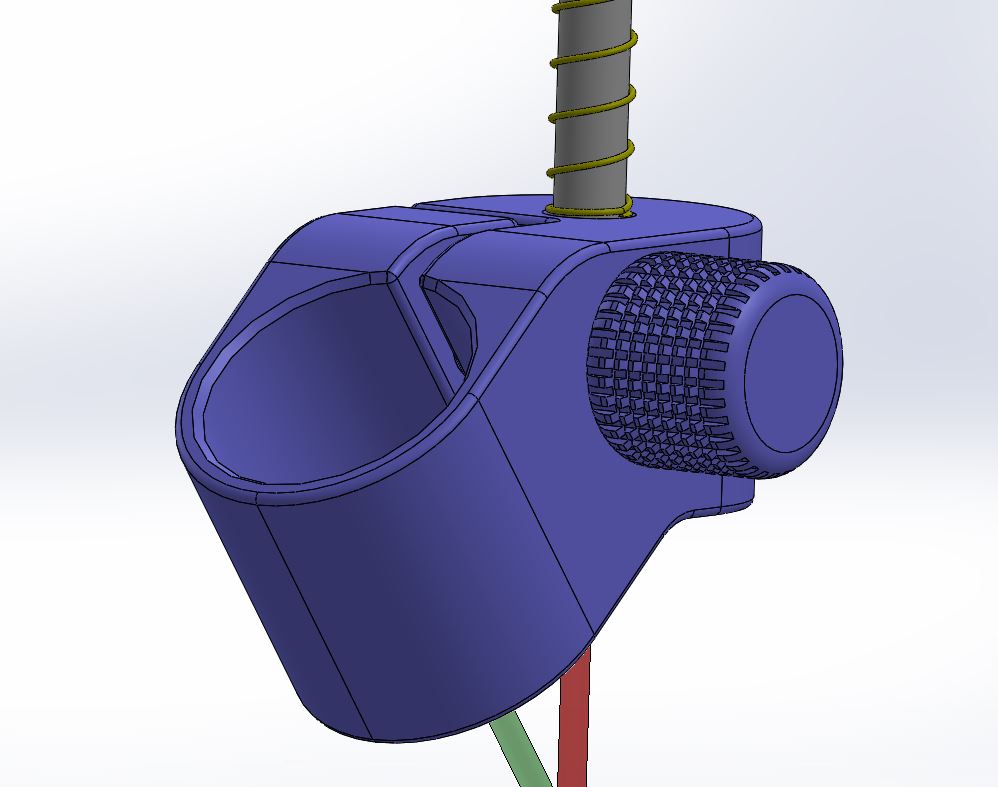
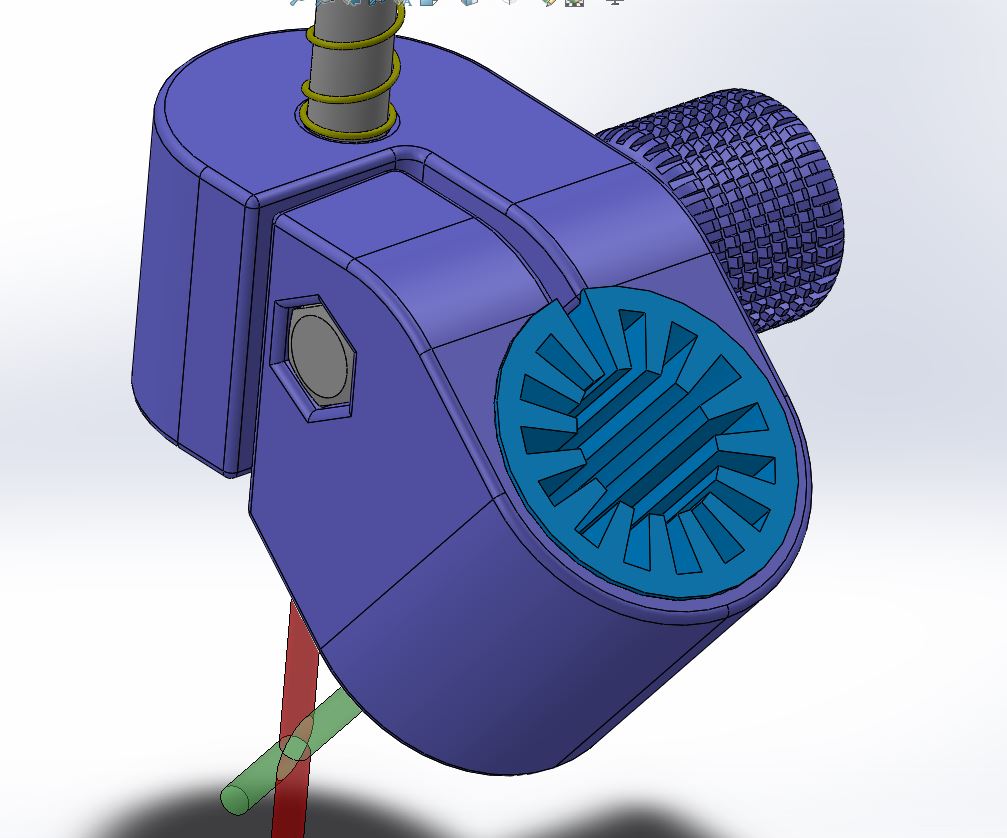
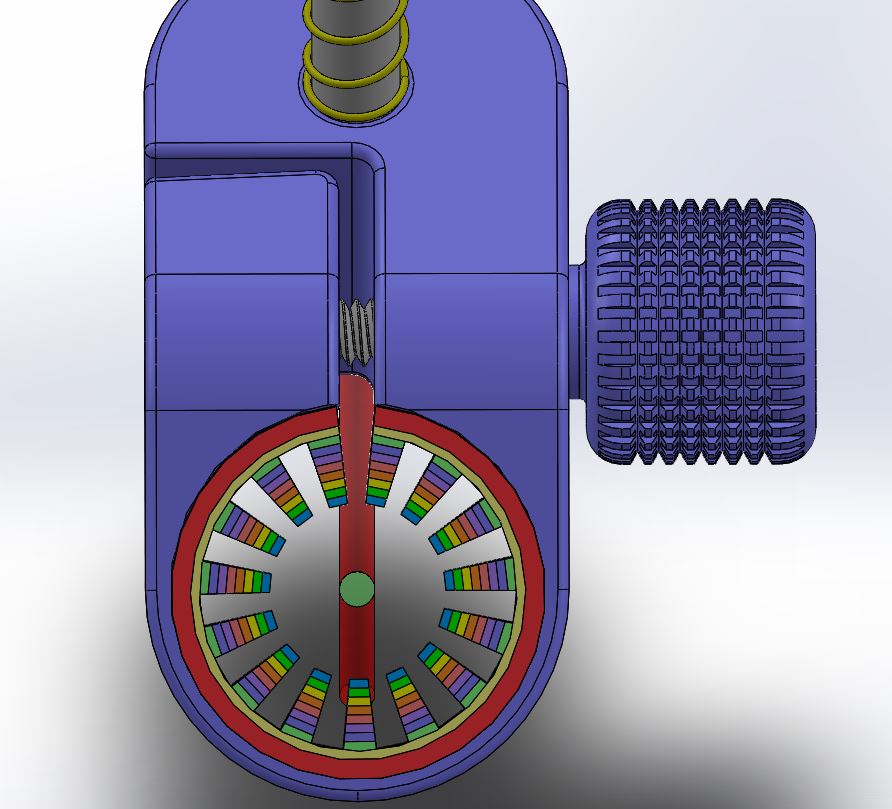
Anyway, here it is in all of it’s copycat glory. The red beam is the projected spindle center line. The green is the projected pen / writing instrument center line. Just wanted to make sure that you could get the pen to touch the work surface before the holder bottomed out.
The shaft is a 1/4-20 x 4-1/2" long stainless steel SHCS from McMaster-Carr. The bolt is #10-24 x 1-1/2" long stainless steel and the nut is inserted into the knurled knob during printing.
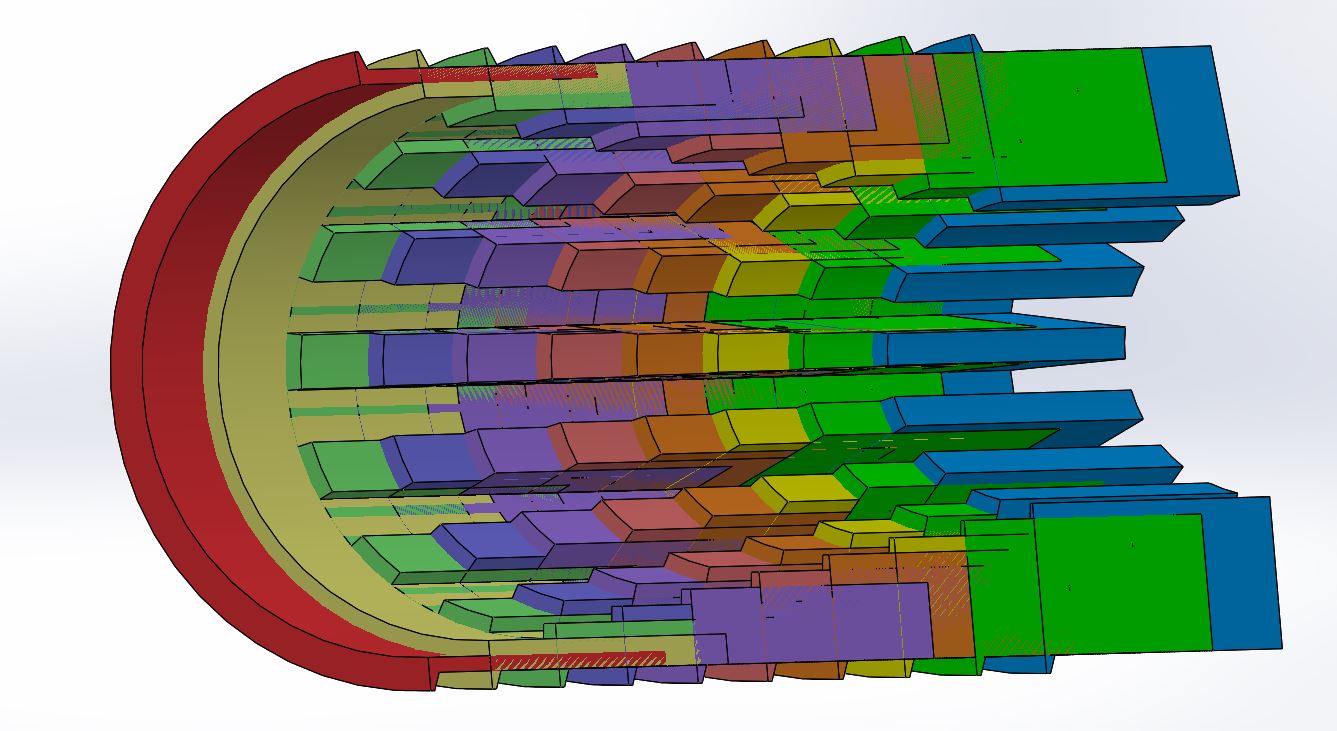
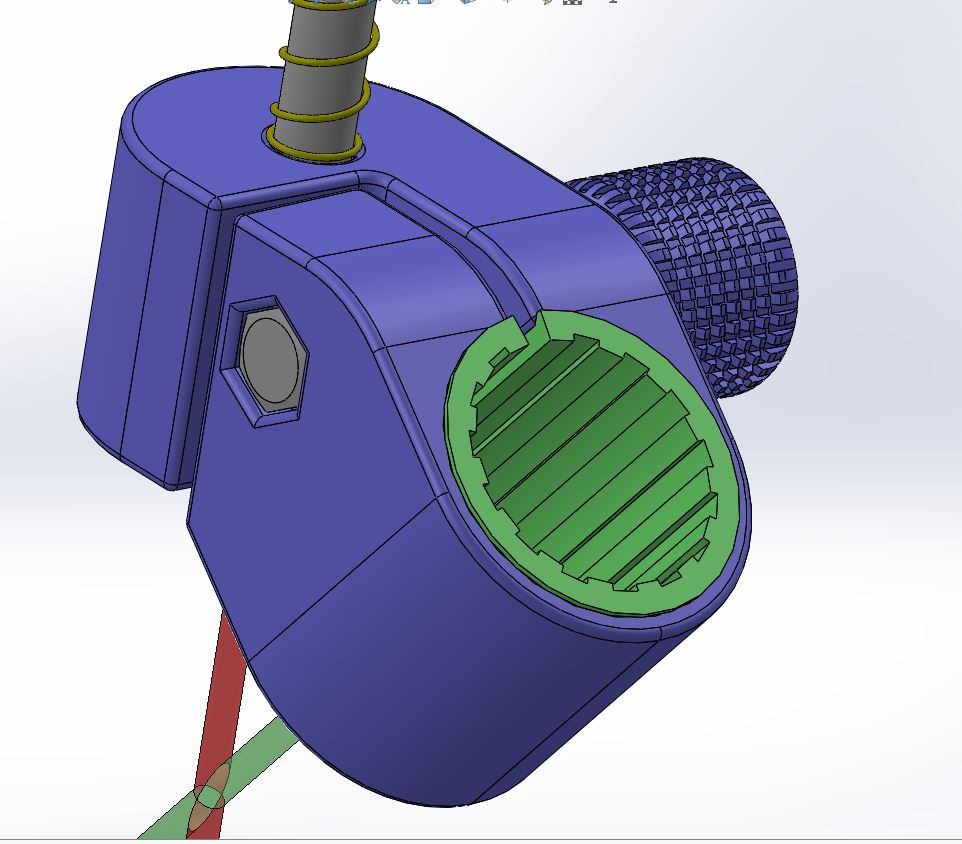
The tool has an 0.030" x 45deg chamfer to hold the inserts in, and without any inserts, the opening is 1" diameter. I created inserts from 0.950" to 0.500" in 0.050" increments. I’ll do more tomorrow, I just got tired of duplicating them and changing the ID and color for today. I went through 2 or 3 designs, and I would get 4 or 5 made before changing the design and throwing the old ones away and starting over.
I left the threads on the SHCS intentionally*.
*I just forgot to cut them off before getting screen shots.
I loaded and stacked all of the inserts together so you can see the different ID of all the inserts in their 0.050" ID steps.
Once I print a couple of the inserts and everything fits, I’ll put it on Thingiverse and Printables so anyone can grab them and print them. I will also make a metric version for those who spell aluminum with too many letters if anyone is interested. ![]()
@MadHatter Did you see mine on thingiverse? I did this one not long after I got my og Shapeoko 3.
No, sadly. I think that when I decided to try out plotting, I just went to Thingiverse and grabbed a model.
I like the idea of inserts to keep the pens somewhat centered when you do a “tool change”. I still prefer the vertical mounts after trying many versions though.
I have read that the shark tooth can be kind of fiddley to set the pen point in the middle. I assume your design would have the same issue.
I haven’t tried it yet but plan to measure from the base to the center of the rod used for the collet and then cut a piece or use a measuring block exactly that thickness and then insert until the pen point hits it.
I think if you are off then as they pin swivels it creates a circle instead of a point.
Any advice there?
Maybe move to an “off canvas” location where you can bring the pen tip down to touch, and then swap out the pen and adjust it to touch the previously made mark?
Good point. I was thinking the initial load before I even put the device in the collet but pen changes are important as well.
I was researching compliant mechanisms when I was beginning this project, and came across a spherical flexure joint. It might be irrelevant to the conversation, but it might be a way to keep the pen in one place. Though all input movement comes from the rear, not the front.
Side note: I would love a desktop pen-holder like this. It would be so rad.

Successfully printed the o-rings in tpu. I think I need to tweak the settings a little, but they fit a sharpie pretty well!
Speaking of sharpies, they’re on sale on Amazon right now!
What did you use, 95A, 85A?