I found this topic here: 3D Printed Parts holder for the Sweepy 2 65mm. And after much searching, I couldn’t find a decent pen mount that I knew would hold markers, pens, sharpies, crayons, etc. I couldn’t even find the files referenced in the topic.
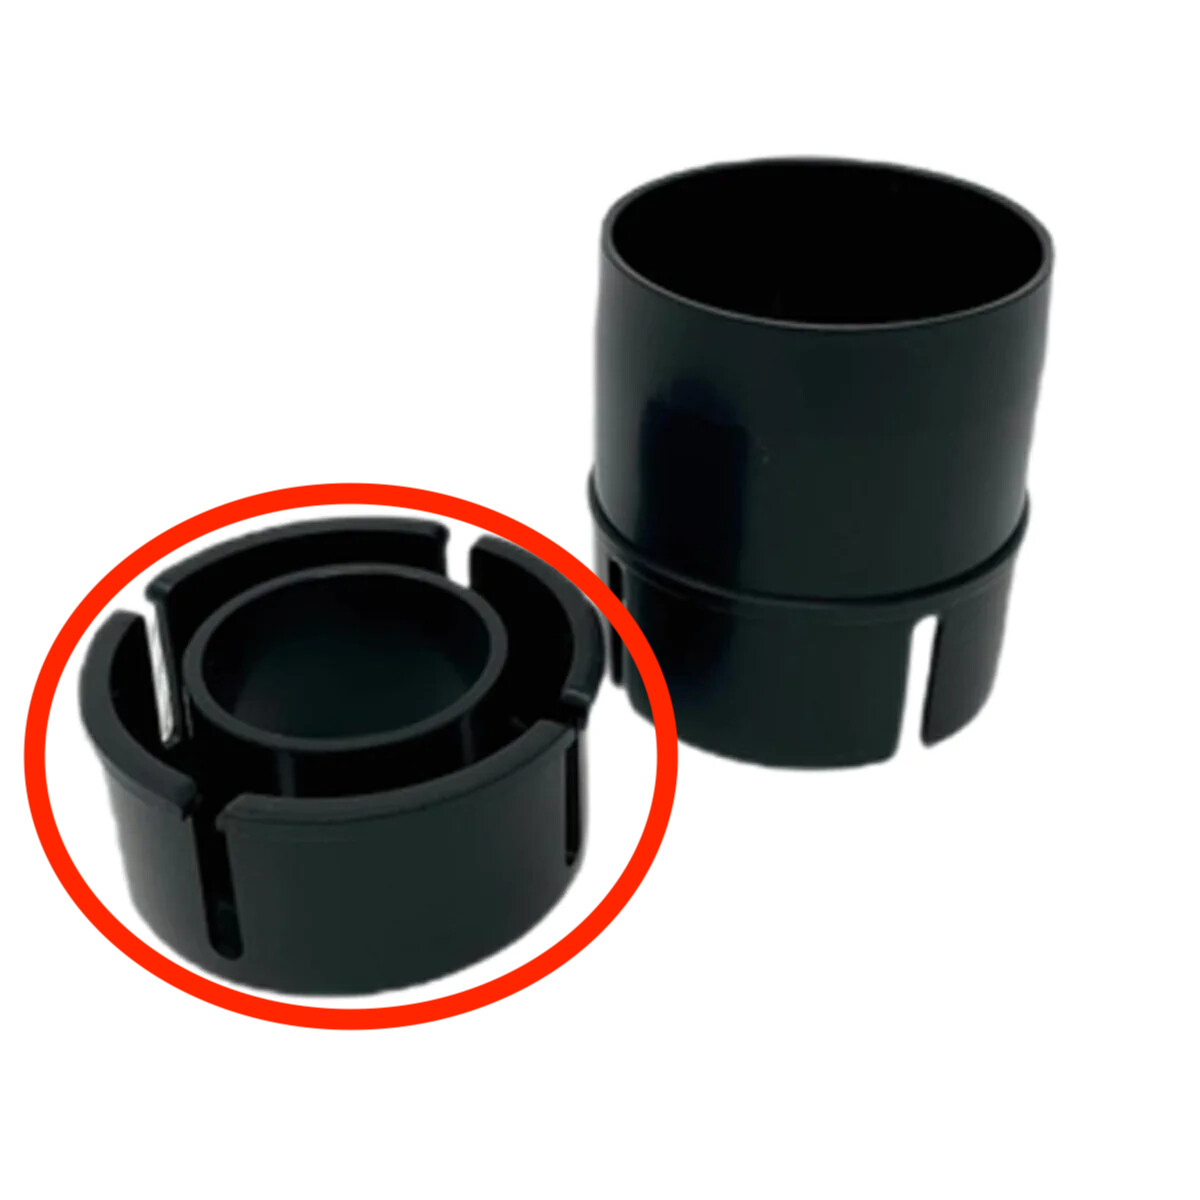
My sweepy 2.0 came with an alternate dust hose attachment (see image below). It’s the shorter of the two that comes in the kit. The central opening is 35.5mm at the top, and nearly 36mm at the bottom.
Factoring in the well around the opening, this leaves plenty of room to design a mechanism that will 1) look good, 2) accommodate a variety of pen diameters and/or lengths, and 3) allow for adjustable pressure to be placed on the writing implement, either through weight, springs, rubber bands, or 3d printed “Something”.
That’s where I’m stuck: I can’t begin to think how to hold the pen rigidly, while also allowing for free movement and adjustable pressure. Ideally, you’d be able to insert a fat sharpie or poster marker for quick fills, then exchange that for a ballpoint or fine line marker for details or various color lines, with minimal parts interchanging. I’d also love to minimize additional components, utilizing friction to hold the pen/marker etc without any additional set screws or whatever.
I’d love any input anyone may have!
edit - I realize there’s quite a few Things on thingiverse and other .stl marketplaces, but they all have a defined diameter for the writing element, require an additional mount made from wood or something, or require dedicated hardware/springs etc. I’d love it if all of this could be 3d printed instead of relying on finding or buying the right springs or screws or bolts etc. Feels like there’s a better solution out there waiting to be born!
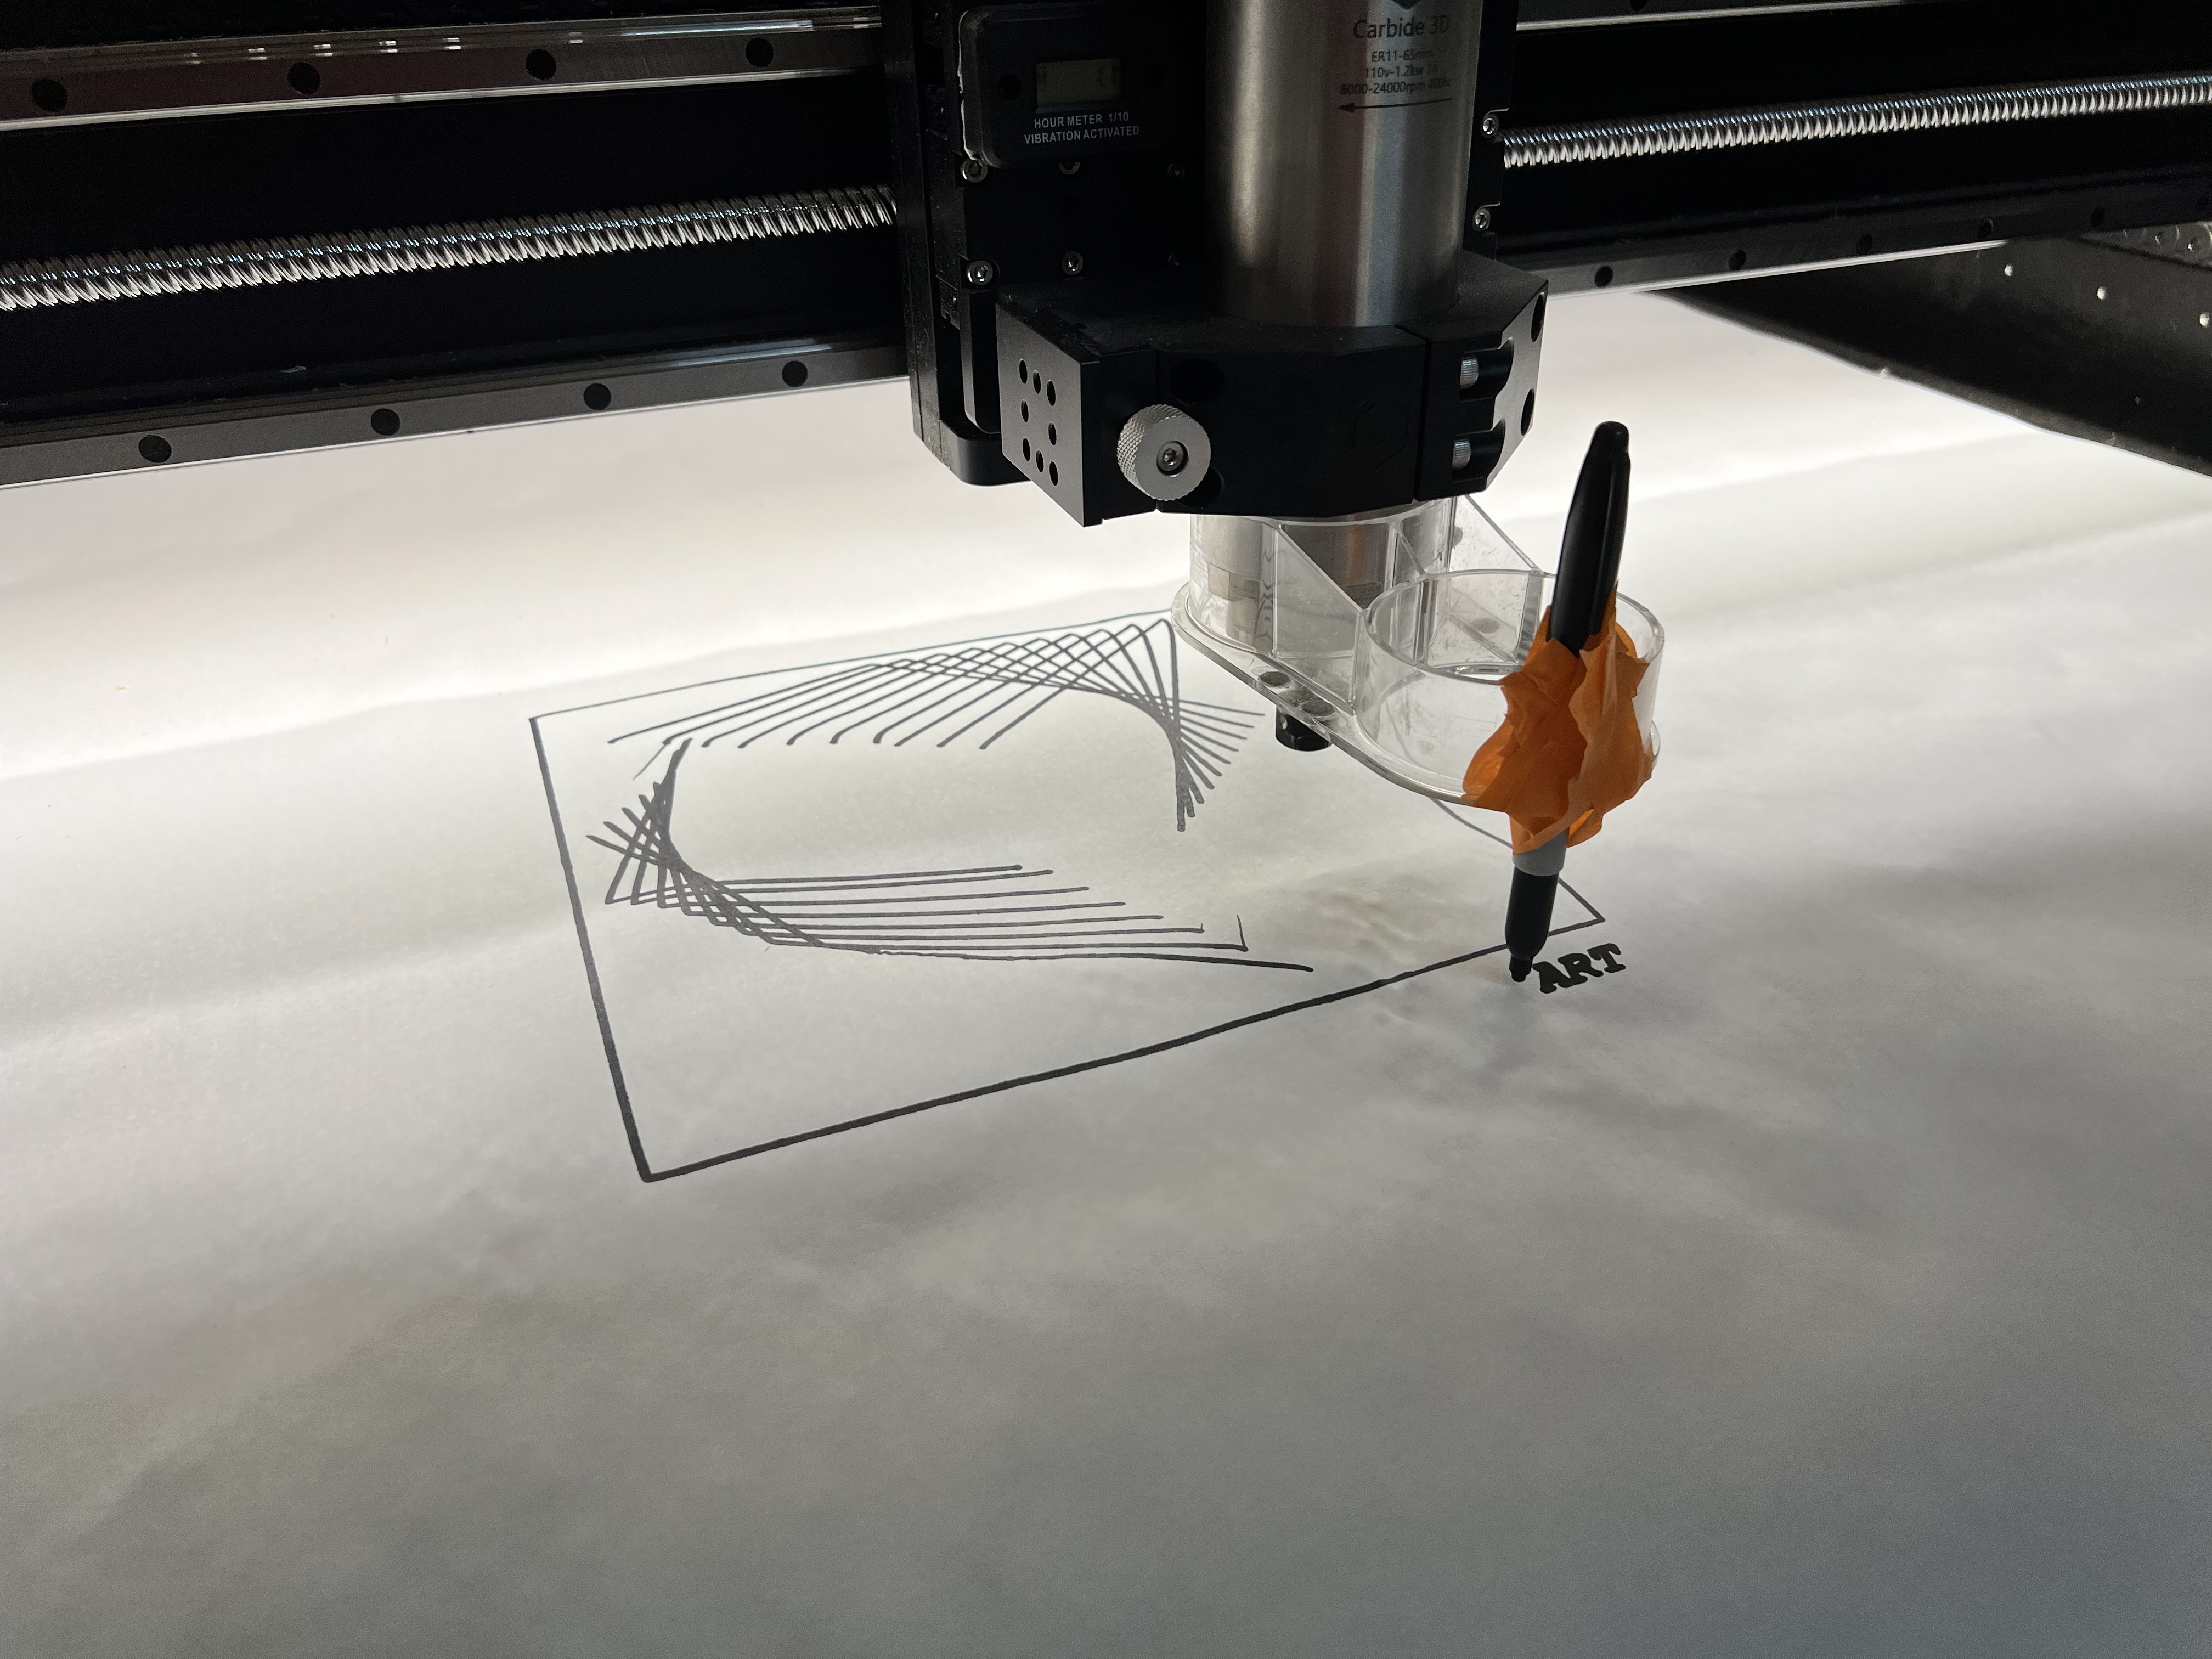
I cut this out of clear cast acrylic last spring in an attempt hold a marker for drawing with the CNC. Basically it clamps around a 75MM spindle/router and pinches a Sharpie in the other hole. It worked ok as long as you use a felt tip marker to where you could preload the tip with downward pressure just a bit. At some point I’d like to see if I can come up with some sort of spring loading idea for a pen or pencil. Maybe seeing this will give you a few ideas.
I have been thinking about this.
I know it isn’t home grown but I like the simplicity. Not sure about the allowable marker size but the picture shows a sharpie.
There’s lots of videos on youtube about cnc pen/marker builds. The key points seem to be finding a way to hold the tube directly below the collet, and having downward pressure on the writing tool, either from a spring or something springy like foam. I can’t find the video I really liked, just see a ton of alternate builds. I remember the guy had a simple tube that the marker fit inside, and he just added a couple weights above the marker, so that it could travel freely but always had downward pressure, with a stop at the bottom so it couldn’t fall out.
I’ve made a handful of pen holders for diy plotters, though I’ve never really felt a need to use my Shapeoko as a plotter. The best, most consistent ones use weight to keep the pen down, but can be lifted up using the z-axis. I’ve always used screws to hold the pen in place, but I’ve never tried to keep the pen centered in a mount as you want. Performing accurate tool changes might prove difficult with a friction fit requirement.
Designing anything for multiple tools starts with a fixture that holds a common size insert. Then one would adapt that insert to the various sizes of the tools in use.
You’ve started with that idea in the OP, but you’ll find fixtures that standardize the design for the commonly available tools instead; Sharpies, mechanical pencils, etc.
Lots of cool replies with great ideas. Thanks everyone!
I’ve been puzzling over this since I posted, and went down a rabbit hole of compliant mechanisms. It would be super awesome, but I think the best solution is a simple one.
A cylinder in two halves with registration pins to make sure they stay together.
A hole in that cylinder to let a sort of “piston” to move up and down.
That piston would have a variety of inserts to clamp down on the pen/marker, etc.
It would have a way to move smoothly, and also a “lower limit stop”.
Lastly, It’d need some kind of “bucket” or post on top to add weights to.
Still need to figure this out, and would love a solution without screws… time to think some more!
@neilferreri - yeah. I think a friction fit might be difficult, so my thought is making it longer (more of the pen is gripped in the mount), with tight tolerances, and making the print “grain” go vertical instead of horizontal (in the installed orientation), will help. Then using a drop in design for the pen holder, making it easy to swap out different writing elements or colors, simply by pulling out the old, and placing the new.
I’d definitely have to test this to see if my idea would work.
I remember proving out toolpaths on an old bridgeport with a tape driven controller using a pencil holder that was just a piece of spring steel, like the bands you might find on a pallet or around stacks of wood, with a bushing welded to the end and a thin rubber insert to provide friction so the pencil didn’t move.
The spring steel was rigid enough to not allow any X or Y movement, but flexible enough to allow Z movement. Pressure was controlled by Z height. The band was fastened to a large magnet that you could just stick on the bottom of the spindle housing.
I imagine something similar could be 3D printed with a material of the right hardness & flexibility, and then fitted with some kind of cam lock to allow different size pens.
There is no reason to restrict the position to directly under the collet other than if you want to attach to the collet for some reason and rotation cannot be locked plus you may lose some range of motion. Several successful examples can be found on the internet.
I’ve been toying with something similar, the trickiest part is, as you put it, the downward pressure. Some designs have used rubber bands.
Look at the video by John Clark POV CNC from about two years ago on You tube, that pen holder is about as simple and straight forward as can be. he does some real good work with it.
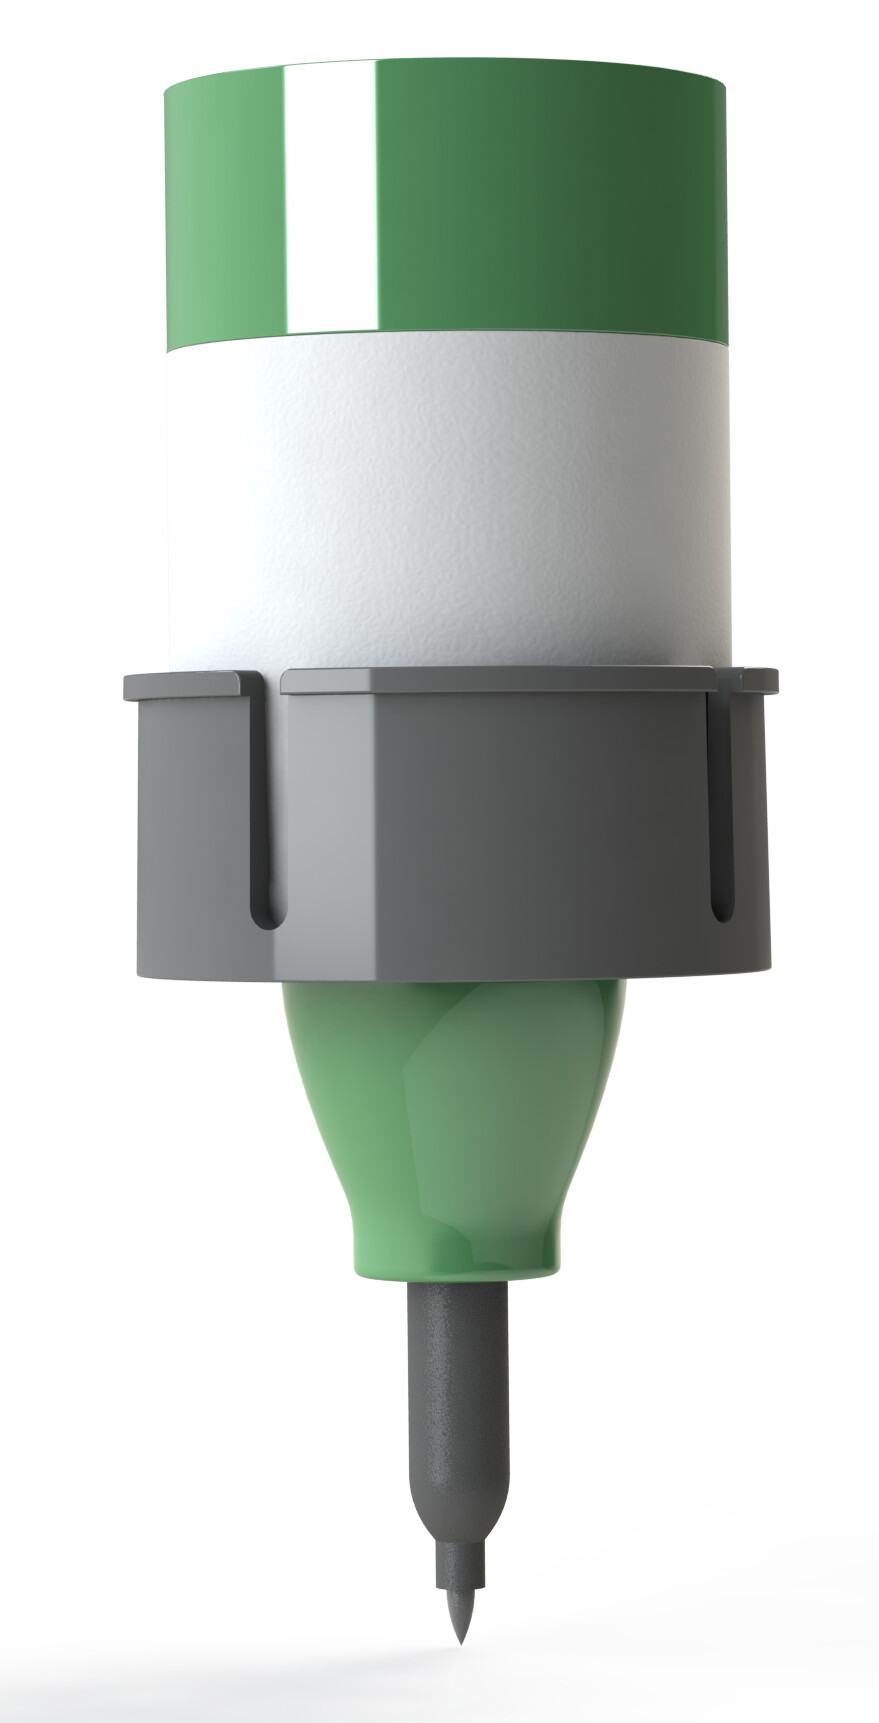
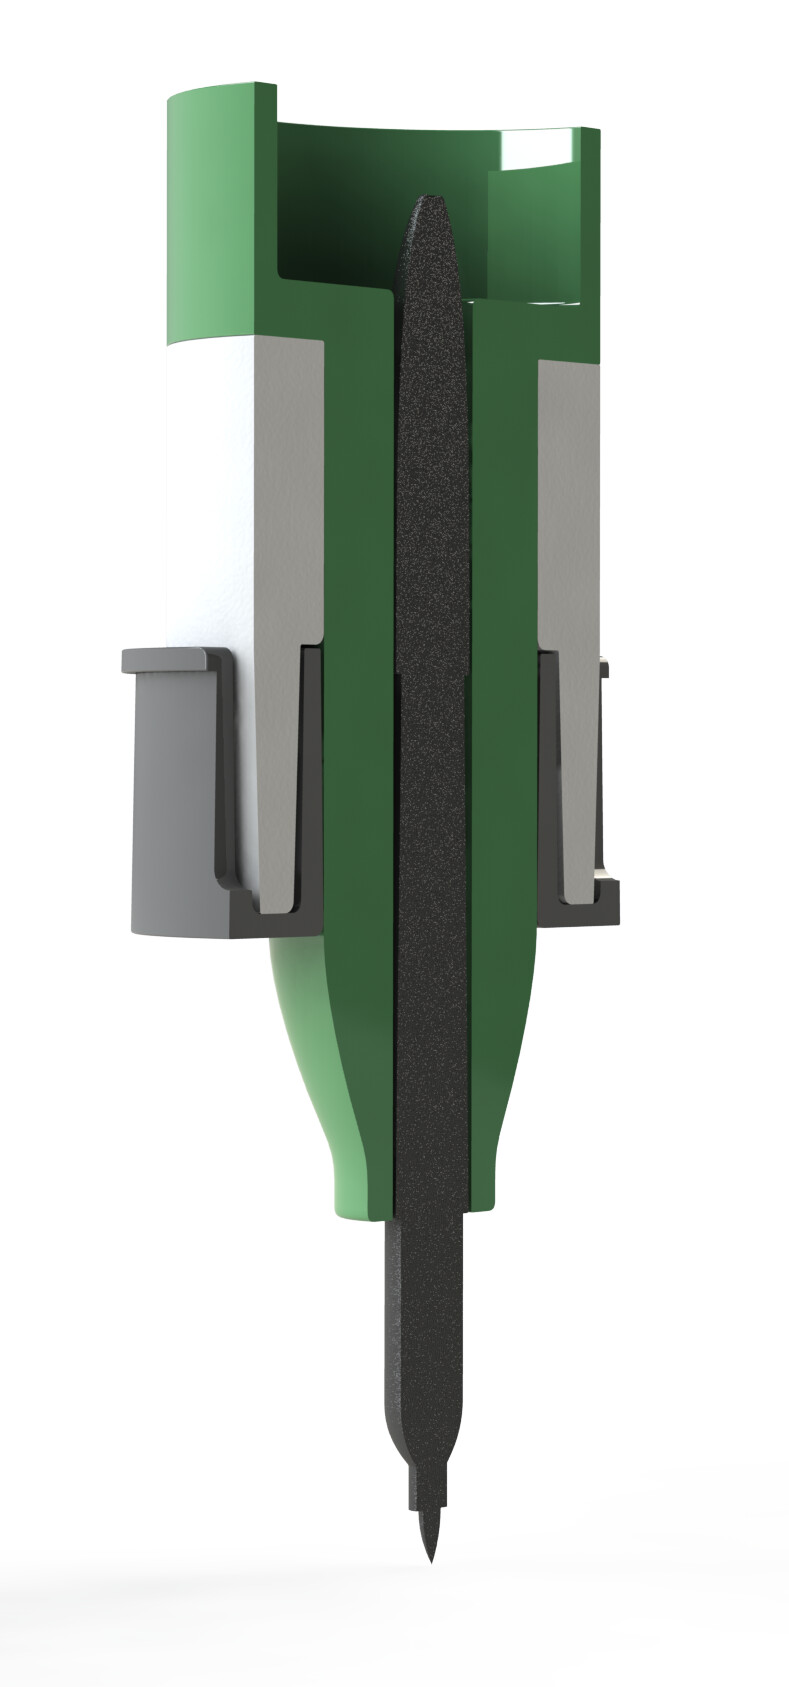
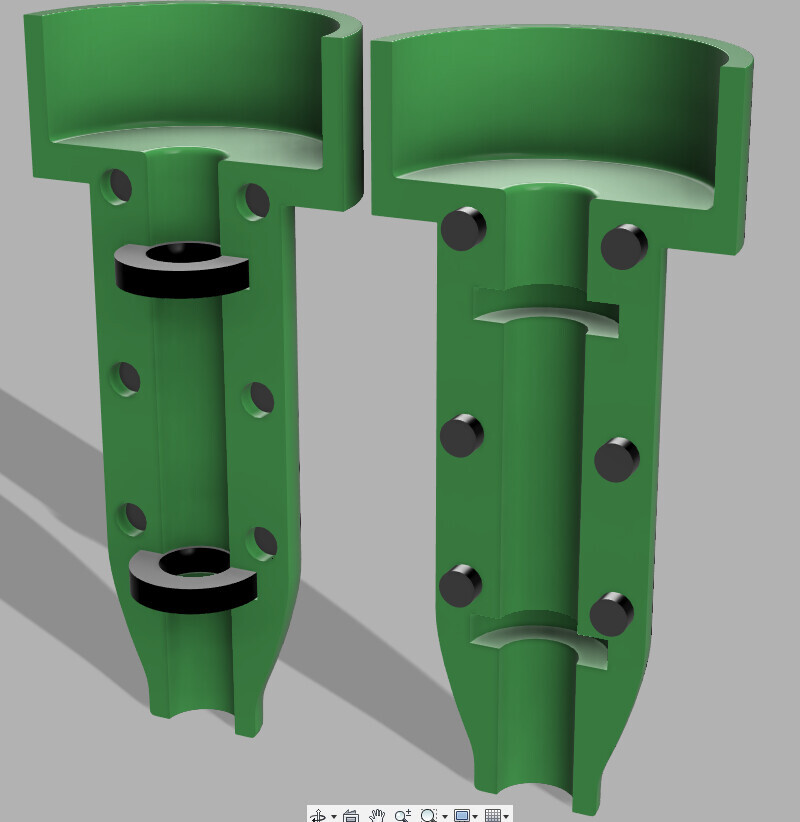
thoughts on the design? The jig (white) fits into the vac adapter (black). From there, individual “collets” (green) would just slide into the jig. Gravity would keep it in place, and you can add weights at the top to increase pressure on the writing surface. different sized collets + foam would allow for “thin” writing tools (ballpoint pens, pencils, etc) vs “marker” sized tools (sharpies, crayola markers, etc).
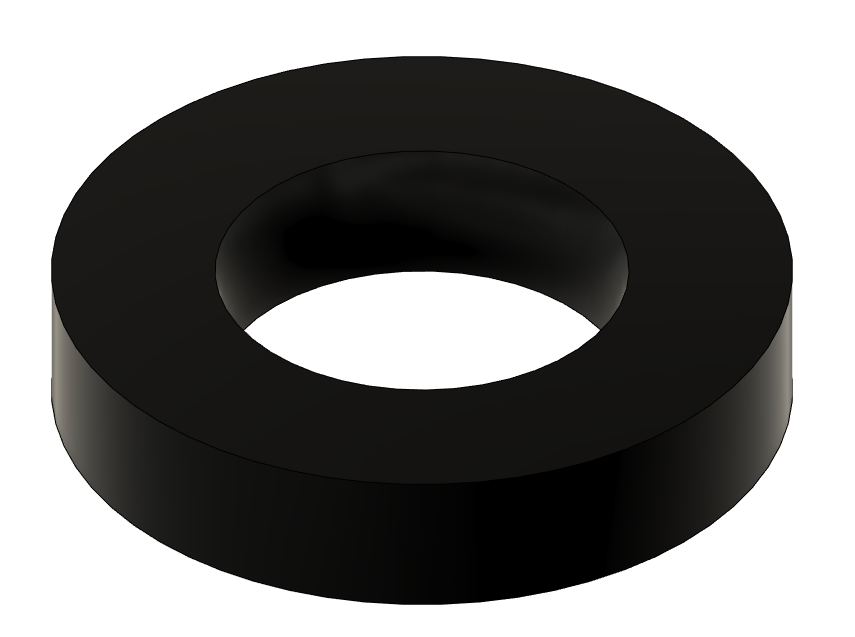
The collets would split in half (not shown) to insert the pen. I was thinking of using magnets to secure them together, but I don’t know what type of magnets would do the job. If you happen to have ideas let me know. Once I can figure out how to secure the collets together, i’ll 3d print my prototypes and try it out.
I did put some draft in there, I think on some part of the jig. However the intent is for the collet to slide freely up and down within the jig, to maintain a more or less consistent pressure on the pen.
In the future maybe I’d look into utilizing the z height to do that, but that seems more complex than I’d like to dig into right now… I think I’m doing the “working harder, not smarter” bit now so I can simplify the plotting phase.
On the other hand, it doesn’t hurt to have another prototype to show off to potential employers.
Edit: oh yeah, forgot to address the slip prevention. I wanted to do this all from 3d printing, but I think a better design would include some sort of thin foam to grip the pen.
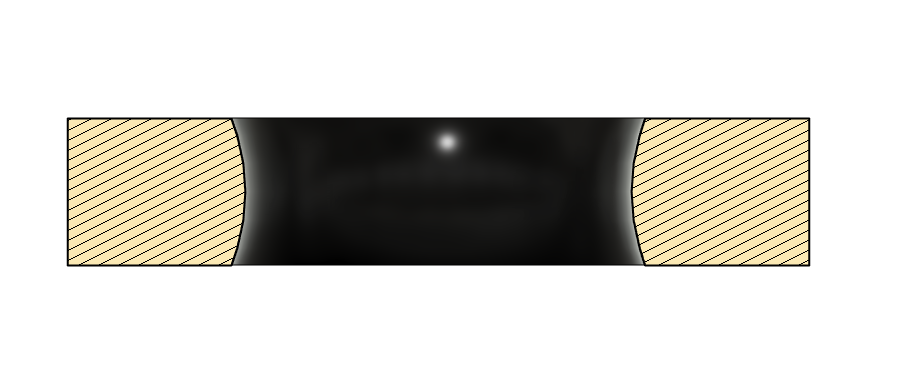
I don’t think you want to split the collet. You want tension on the inside to hold the pen, but no tension on the outside (slip fit) so the collet will freely slide up & down in the housing. I like the foam idea. You’ll have to trial & error how much oversize to make the hole in the collet to get the pen to fit snuggly, but still be able to remove & insert the pen. That will also account for slight difference in pen size.
man… that would make it tricky to get the pen and foam into the collet. I could do a friction fit, but I feel like that would make it more difficult to get a consistent height and grip… after a while the foam would break down from forcing a pen in.
two solutions I see:
Go ahead with the split, and either utilize strong magnets (as was my original plan) to secure the two halves together, or
make it a true collet, with a screw on nut to tighten down little clamps on the writing utensil. The outer diameter wouldn’t have to change, and I could add back the mass towards the tip (around the curvy bit) to help with structural sound-ness. If the physical size allows it, I could even make that the main way to swap different sized pens, with an actual collet for #mm-#mm and another for #mm-#mm (larger).
I shared this with @rgbrobot, but the hive mind will poke holes in it faster.
Starting with his basic design, I thought he could make custom TPU o-rings that would tightly fit on the various pens. Those would slot into a universal pen mount, so the little o-rings would be the only changed part. Seal it all with registration magnets and draw some pictures or forge some signatures.