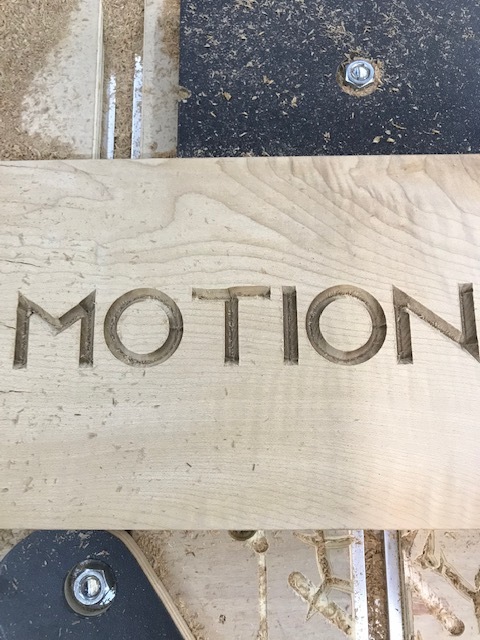
when carving horizontally, there’s strange deviations. I noticed it
when carving text. The tops of these letters are all perfectly straight as a font but the carve makes them kind of snake like. I tightened all the v wheels and brushed off wood powder that got on them. Last week I made a clamp that the Y plate ran into, stuttered, them stopped. I ran the homing and it seemed fine. It’s difficult to pin point the culprit when there could be so many. Any thoughts on this would be greatactually it only did it on the T in this picture. All the other letters seem to come out fine which is odd to me
If all your V-wheels are tight, I would try:
- checking for any wiggle in the X/Z plate / router that might have been introduced during your earlier machine crash? (I would grab the tip of the endmill while the shapeoko is turned on i.e. with stepper motors locked, and try to move it along Y)
- checking whether both your Y belts are nice and tight ? If your try to move the carriage back and forth along Y axis with the machine turned on, do you feel any play ?
This is probably a matter of deflection caused by toolpath movement — most likely it cuts the left bar of the T first movement is constrained by surrounding wood, then does the lower stroke, then moves up to cut the right bar, moving into a the already cut area, so doesn’t deflect (as much, if any), then cuts the balance of the letter.
A quick cut with a chisel should address it, or you could just re-run the V carving toolpath.
Weird. I see it in the top of the M too, one slopes down and the other appears to go up.
First, I’d check to see if everything mechanical is ok and your machine is square too.
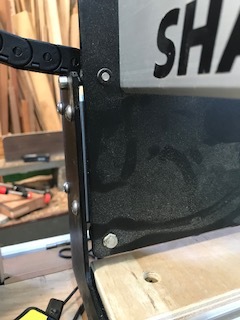
there’s no wiggle on the z/x plate. As far as trying to move it along the Y to feel any play, with the machine turned on the gantry doesn’t budge. Everything seems to glide smooth but I just ran the vcarve twice in a row to test and it did the same thing. Horizontal wavy line on the text’s T. There’s a small gap on the circuit board side of the Y rails. I tried:
- tightening the belts.
- Then tightening one more than the other.
- putting a shim in front of the right side Y plate, clamping the left side flush to close the gap, loosening the belt and repositioning it on the pully wheel where it would grip it in the corrected clamped position. When I unclamped it just popped back to the 1/4" gap it has.
- loosening all 16 bolts for the Y rails, loosening all 8 bolts for the X gantry, pushed it flush and it stayed that way. So then I clamped it flush, retightened all the bolts, then unclamped again and it just popped back again with the gap.
I’ve been working on it for 6 hours now and nothing has helped. I’m starting to wonder if I got a lemon or should’ve just gone with an Xcarve. I roped my father into it figuring since he’s an electrical engineer and machine mechanic we could solve it but nothing is fixing it.
If the machine checks out mechanically, then it’s a matter of toolpaths and feeds and speeds.
(The X-Carve is essentially a Shapeoko 2, w/ some cosmetic changes, and the addition of Wide Makerslide in lieu of working up a suitable technique to join extrusions for a double X-axis — given same feeds and speeds it might do as well, but would be more likely to have problems and require reducing feed rate to keep forces w/in the load limits of Makerslide)
What CAM tool are you using?
What feed and speed settings?
What is your depth per pass set to?
If you’ll post your file, generated G-Code, and notes on your material and endmill we’ll gladly do our best to help you puzzle this out.
I’m just using the standard carbide create and carbide motion. Here is my file. It’s a simple text carve for a physical therapy office who’s slogan is ‘motion is lotion’. The material was hard maple. I used MDF on the second try to see if I needed to slow things down due to the janka rating of maple but it produced the same result in mdf. lotionv60.nc (21.8 KB)
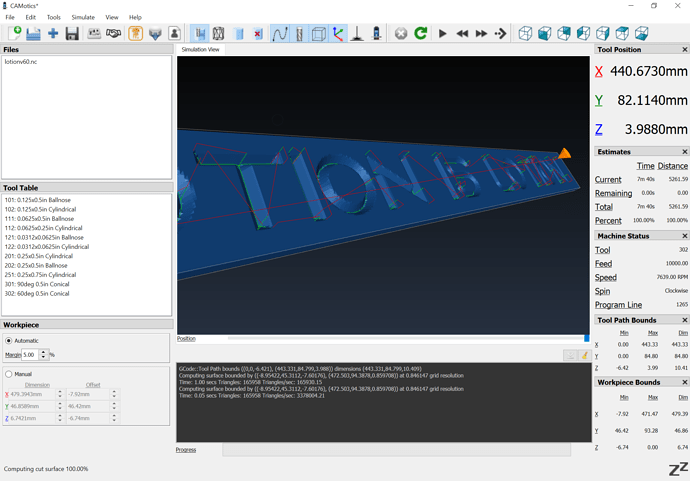
You seem to have your depth per pass set high enough that the machine is only taking one pass:
Please test with smaller values for that.
ok. is there a general rule of thumb for depth per pass limit ?
For normal endmills it’s less than the diameter.
For V carving, I’d suggest testing it by dividing — measure the max depth of cut and start by halving that and test — if it works, great, if not, divide by 3 — repeat until you achieve a depth of cut which works.
I’ve only noticed depth of cut shown when choosing a contour path. When vcarving, it doesn’t tell you how far it’s going to cut, it just decides on its own when it knows the thickness of material and the width of a line it’s carving, correct ?
I understand how to adjust depth per pass in vcarve. I’m just wondering where to find out how deep the max depth will be. If you’re supposed to cut the depth per pass in half of the final carving depth, where does it show what the max cutting depth will be on vcarve ? it only shows the final max cutting depth for the contour option.
as a start use 0.1" or 2.5mm… that works well for me at least, and the feedrate in inch-per-minute less than 50
Do the math (or draw up) for how wide the cut will be.
See: Carve letters depth
Something you should consider is that your F&S are not appropriate for the project especially if you rely on Carbide Create defaults. It was mentioned many times on this site that the F&S are not appropriate for the Shapeoko. Maybe you could provide your F&S including the speed you have your router set at and the one in the CC toolpath. If you are too aggressive for example, the router could more erratically off the toolpath.
Hi William,
I don’t think you got a lemon, it just takes time to learn the ropes and tune the machine and the cutting parameters so that everything comes out the way you would like (regardless of whether it’s a Shapeoko, an X-Carve, or any other CNC)
I agree with Will/Arjan/Luc that you should first try adjusting feeds and speeds, and here’s my take on this:
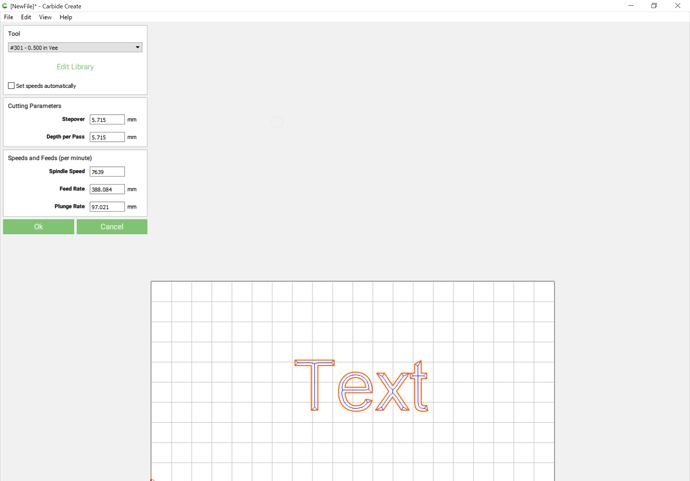
- Carbide Create has this slightly annoying limitation that it uses an RPM range that is not suitable for the Shapeoko, to generate the recommended cutting parameters. For example, in your CC project the RPM is set at “7639”, but in reality this is impossible to achieve on the Shapeoko with a router that has a min RPM of around 12.000 (Makita/CCR) of 17.000 (Dewalt). The problem is, the optimal feedrate is directly linked to the RPM, so if your RPM is say twice the one that CC thinks it is, the feedrate will be wrong by a factor of two.
- so assuming you are using the lower end of the router RPM range, you should double the feedrate in CC compared to that 582mm/min
- depth per pass: I agree with Arjan about trying 0.1" per pass max while VCarving hard wood.
Once you have sorted out this feeds and speeds part and get a good carve, you can go back the other (unrelated) issue of that small gap on one side: this is a small squaring issue, that you can fix with shimming, just not how you think (I did the same mistake/head-banging of trying to fix it by “just” loosening/tightening the bolt a certain way, it won’t get your there). I have written a bit about shimming the X rail here
You may be running off the bottom of your z-axis. Take the bit out of your router, move the router to the z-height where it would be if your cutter was engaged. Check to see if it wiggles. If so, look to see if your v-wheels are now no longer engaged. Post a picture of how your router is mounted on your z-carriage.
Solution is to lower your router in the mount, or raise your workpiece.
I spent a few weeks stumped on a similar problem
This topic was automatically closed 30 days after the last reply. New replies are no longer allowed.


