OK. I’ll take a closer look at the set screws again. I’ll be out of town this week, so I won’t get to look at it till next Saturday. I just didn’t want people to think I was ignoring the replies. Thanks for the suggestions and I’ll let you know what I find…
Judging on how long this simple fix has taken…I think I’m going to drive over to his house and do the 2 minute fix myself.
1 Like
Sorry you keep getting sent back to check the screws but it’s just the most likely cause. Loosen both, rotate the geared piece until one is perfectly lined up with the flat spot, tighten that one. Tighten the other until snug (it’s not on the flat so it’s less important but don’t want it falling out)
2 Likes
Rich and Dan,
I work full time, so I don’t get many chances other than the weekend to try and work with things. I had already adjusted the set screws (or so I thought), but I will be taking a look again. Have to head out of town for business this week, but I’ll be back on Friday. If I still don’t make any progress, I’ll post my address and wait for Rich to show up!
3 Likes
Shapeoko party at Gregs 
2 Likes
OK. Back from out of town. I took off the X-axis motor. It looked like the set screw was lined up with the flat, but it may have been off just a millimeter or so. I loosened it, made sure it was lined up, and tightened it up. Made sure the other set screw was also tight. I also checked the set screws on the y-axis motors, and they appeared to be lined up with the flats and tight as well.
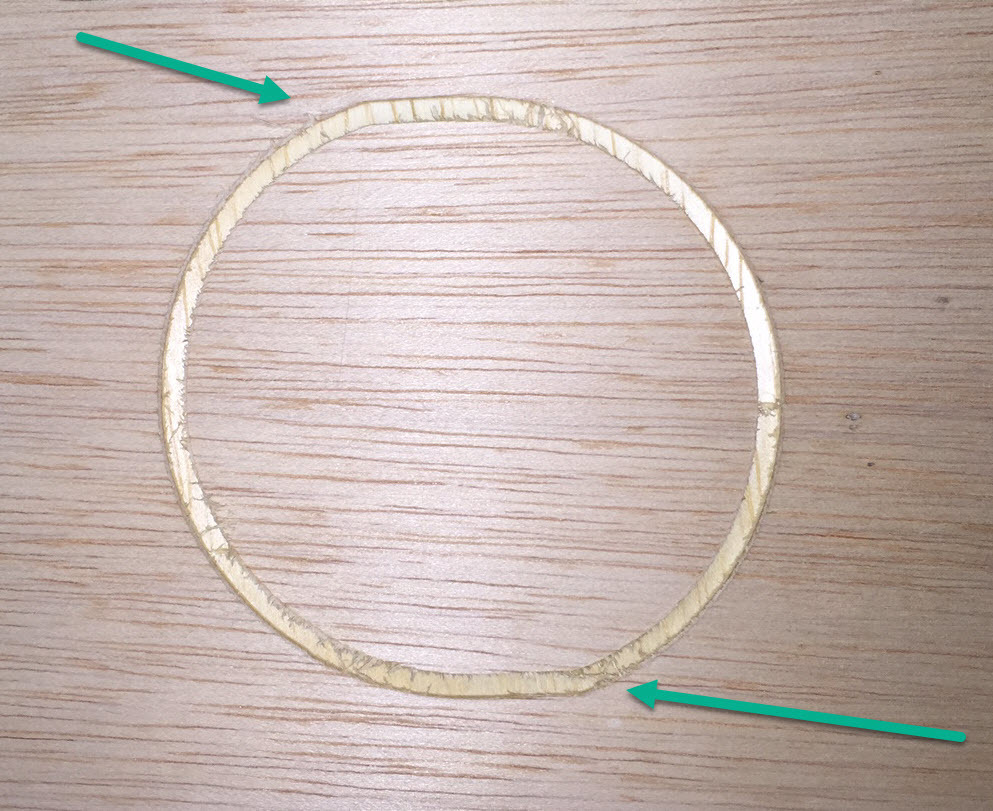
So, I ran another test of a circle, and still seem to have the same basic issue. There are areas toward the top left and bottom right that still are just off.
Last weekend, Rich was threatening to drive over to make needed adjustments himself. At this point, I would welcome it. Seriously – is there anyone in the Washington, DC / Northern Virginia area who would be willing to come over and consult? I’d be willing to pay a consulting fee…
Otherwise, I welcome any other suggestions. The stuff I want to work on will involve curves, so until I can get this issue worked out, I’m going to be stuck…
Given that it only happens along the one axis, if the pulley and set screws are okay, my assumption would be loose or bad belt, or loose bolt/nut.
The other thing to check would be V-wheels.
Please try watching the machine and see if you can identify what aspect of it is yielding — I’m almost suspecting a single loose bolt, say for a spindle mount which allows a small shift which is magnified along an angle.
How was that piece oriented in the machine? Those flat spots are where it kept moving left/right and stopped moving up/down as the picture is oriented. Was it setup in the machine like that? If so It would actually be the Y axis that is misbehaving.
1 Like
Motor shafts are straight and not bent?
Dan,
That is how the piece was oriented. It appears that the set screws are on the flats for both of the y motors, but I’ll try removing them and giving them a closer inspection.
Mark – the motor shafts are straight and not bent, as far as I can tell.
One thing I notice when I am jogging the machine with Carbide Motion – when I am moving things with the “fast” setting, in both the X and Y directions, it will move for about 3 seconds, then pause for a fraction of a second, and then move again. Is that normal, or is that an indication of an issue?
Are you getting the same results over the entire table? Have you tried moving the stock location and see what the results are?
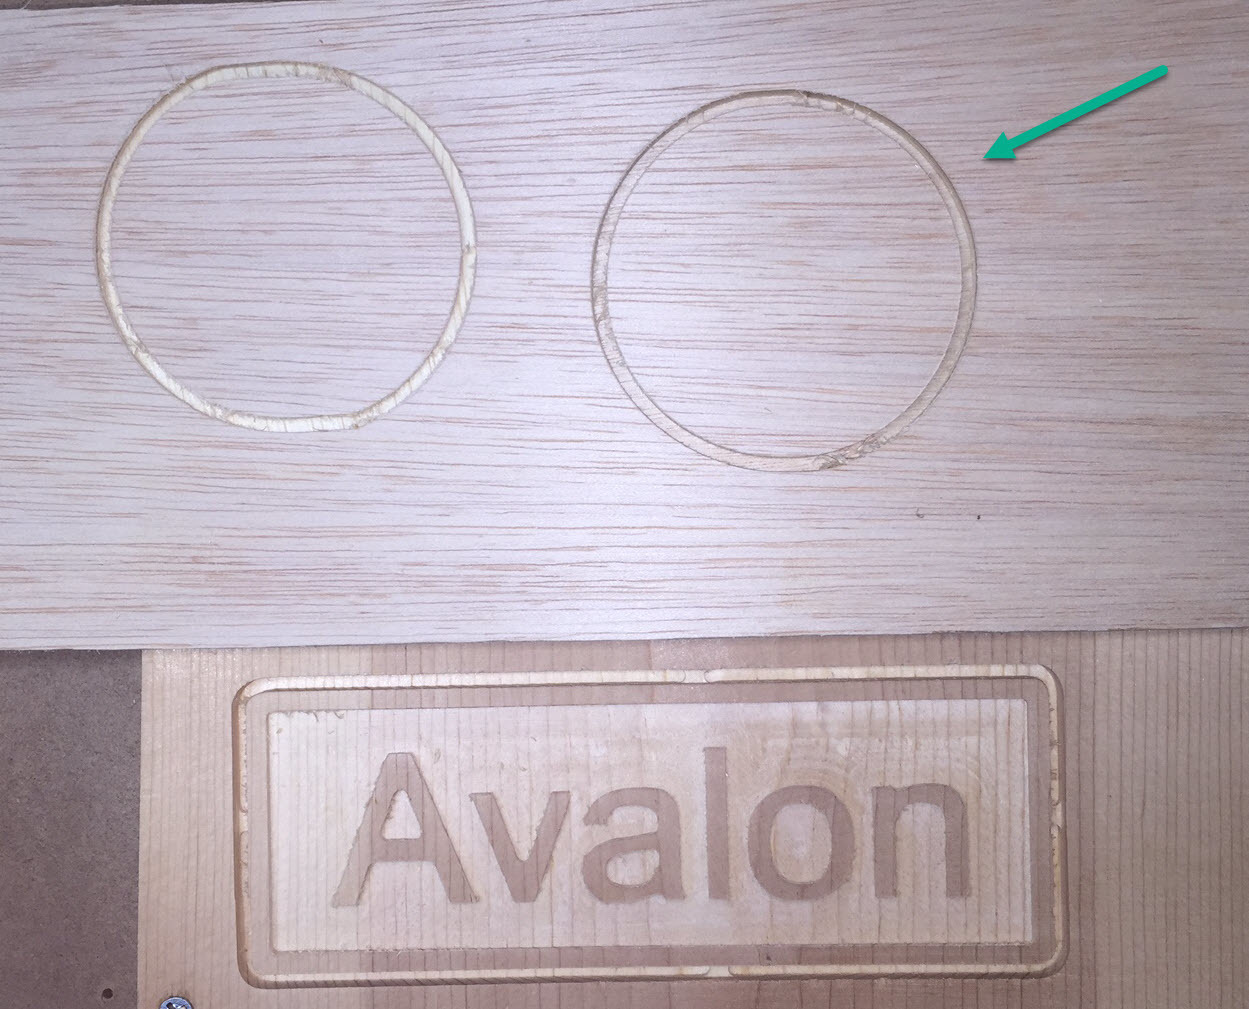
I think I have made some significant improvement! Based on Dan’s suggestion that it might be the Y axis instead of the X axis, I took off the Y-axis motors and checked them more closely. Even though it had seemed like the set screws were tight and on the flat when I examined them earlier (while they were still mounted on the machine), it turns out they were a bit loose. I tightened up those set screws and remounted them. I then cut another circle and it actually looks like a circle! I did the VCarve “Avalon” nameplate again and it turned out well, too!
I appreciate all of the time everyone has taken to give me feedback and suggestions. I’m sorry if I sounded dense at times – remember I’m just a newbie with limited time to work with the machine. I do appreciate all the advice and your patience!
1 Like
Hooray! And don’t feel bad. Scroll up and notice I posted the original thread only like a month ago when I first got my machine and had very similar problems. Took me a few times for it to sink in as to what I needed to look at.
Glad its fixed :)…
13 days for a 5 min fix. I clearly don’t have the patience for … Yeah.
1 Like
Personally I would recommend taking all the set screws out, applying red loctite, and reinstalling them carefully and tightly on the flats. Though at least if this happens again you’ll know how twitchy the little buggers can be.
I suspected the x axis because my own machine functioned remarkably well when only one of the two y-axis pulleys was properly secured.
Congrats on achieving liftoff.
I will add a +1 to new shapeoko users experiencing this problem with the new “partially assembled” machines. I noticed that when cutting circles they were always about 1.5 to 2 mm larger in the X axis. I’m using an XXL.
After scouring these forums, I found this thread, and 5 minutes later, fixed my machine. I was immediately able to cut a 100mm diameter test circle with accuracy ±0.2mm.
Next step is to try and improve that to ±0.1mm. If I can do that, it should satisfy all my accuracy needs.
Many thanks from the other side of the world!
Luke
1 Like
Luke – Just curious – What specifically did you need to adjust on your system that seemed to correct your issue?
Greg
Specifically, this is what I did:
Diagnosis:
I powered on my shapeoko, then held the shaft of my router and gave it a firm tug to try and move it.
I could see movement (it was loose) in the Y axis.
I looked at the drive pulleys and could see that the pulleys were moving/rotating slightly, but the stepper motor driveshafts were not.
Fix:
Using a 1.5mm allen hex bolt, I loosened the driveshaft pulley set screws, and reinstalled them carefully and tightly perpendicular to the stepper motor driveshaft flats.
I did the same for the z-axis which was also loose.
3 Likes