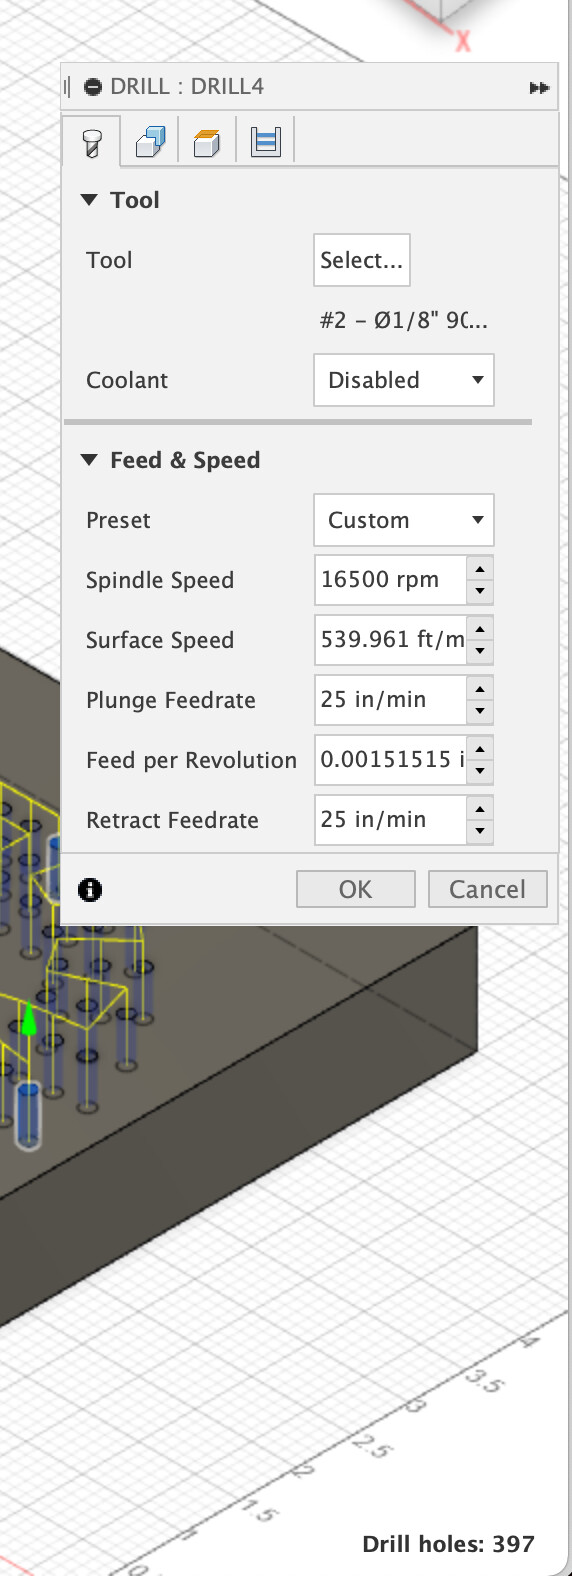
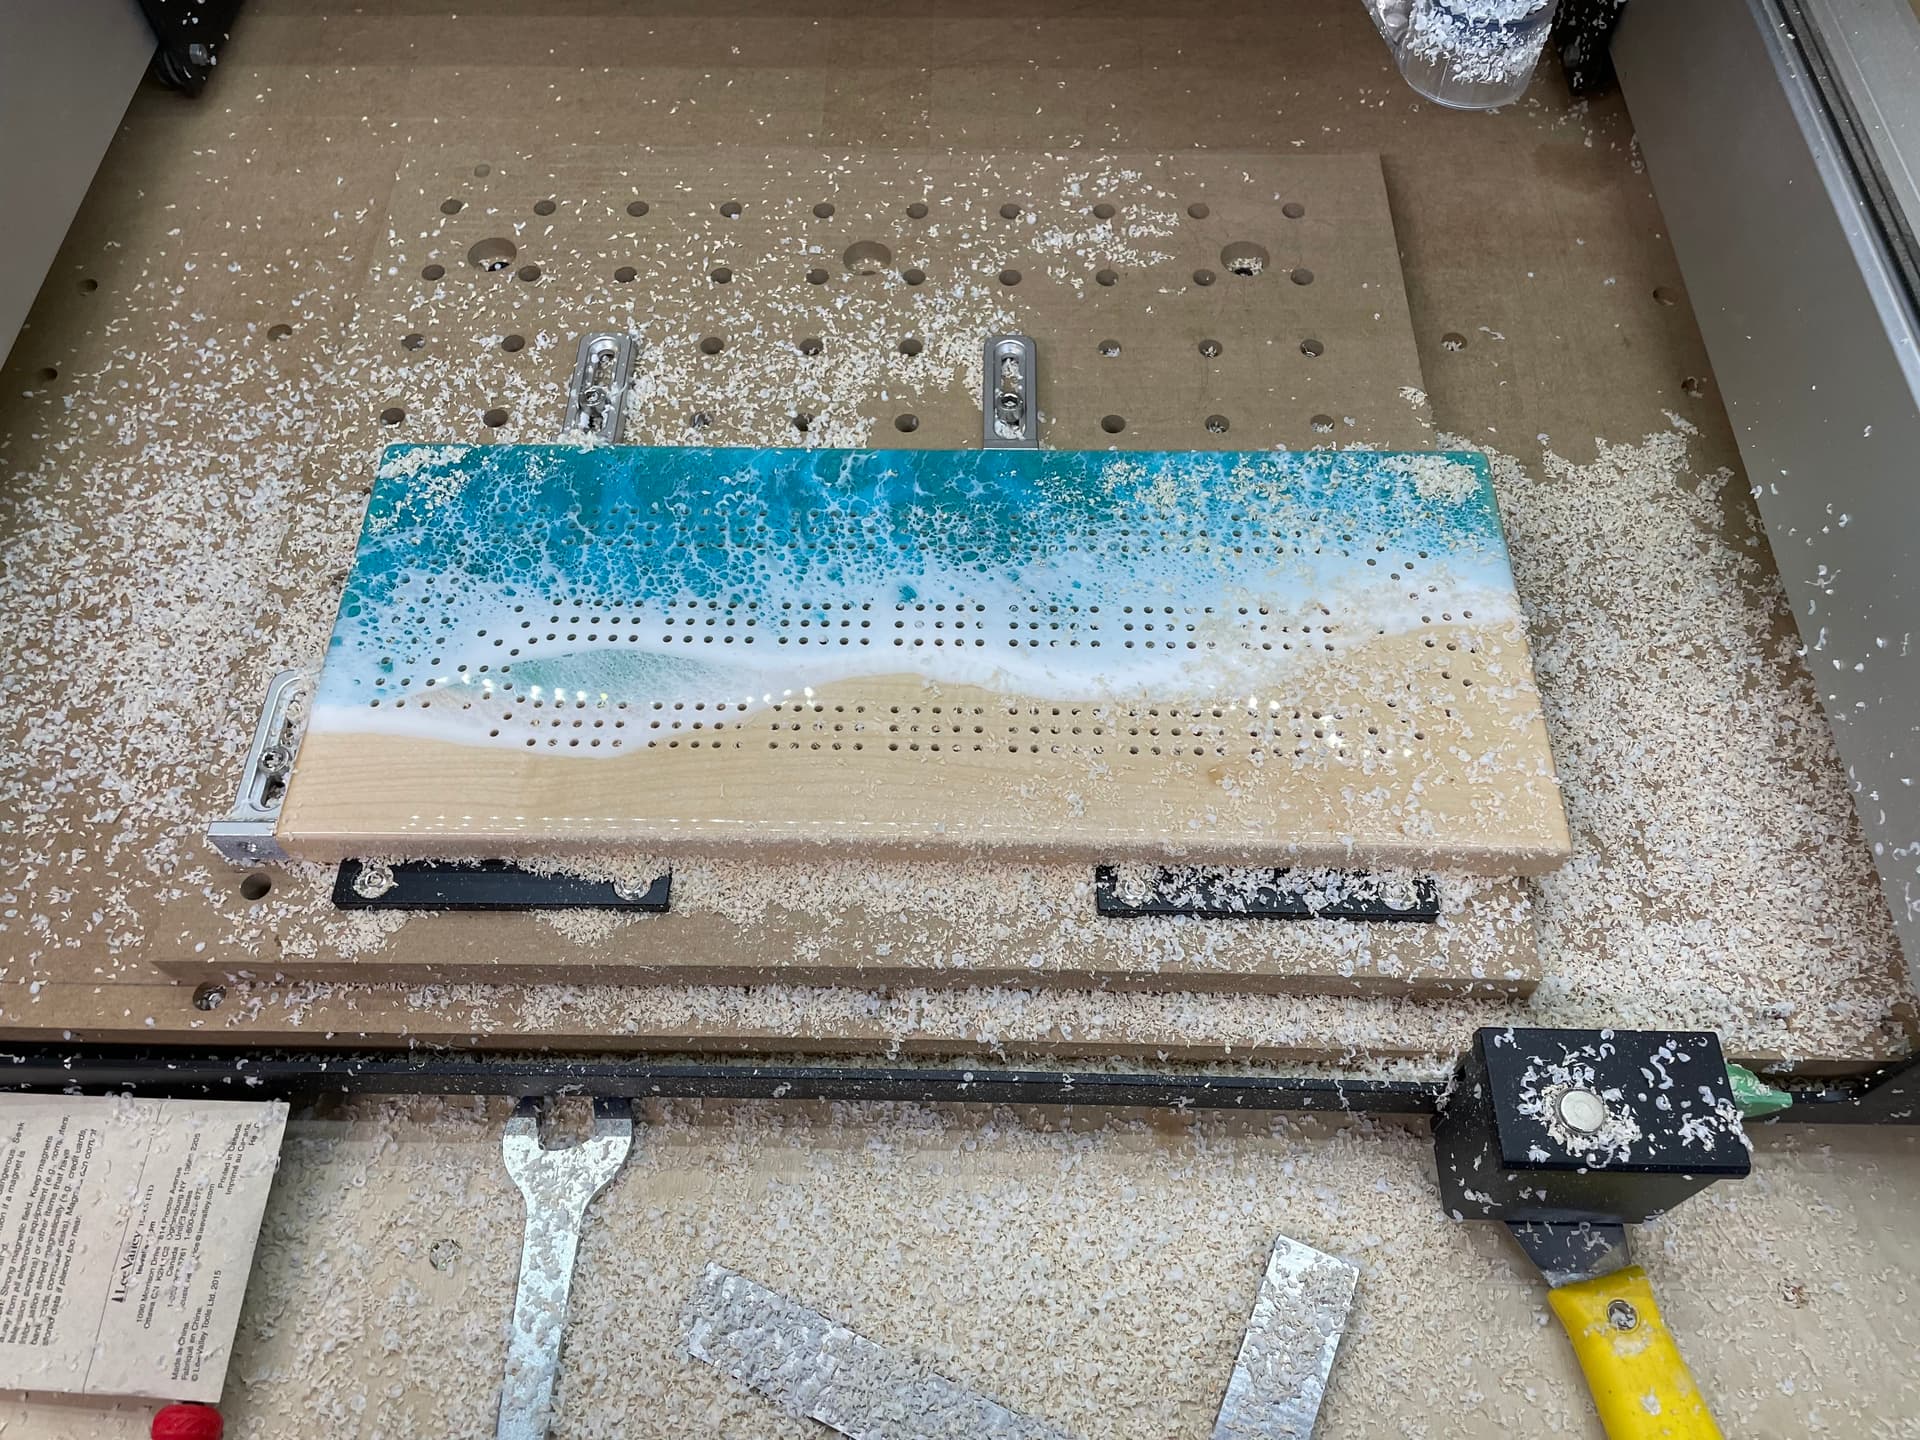
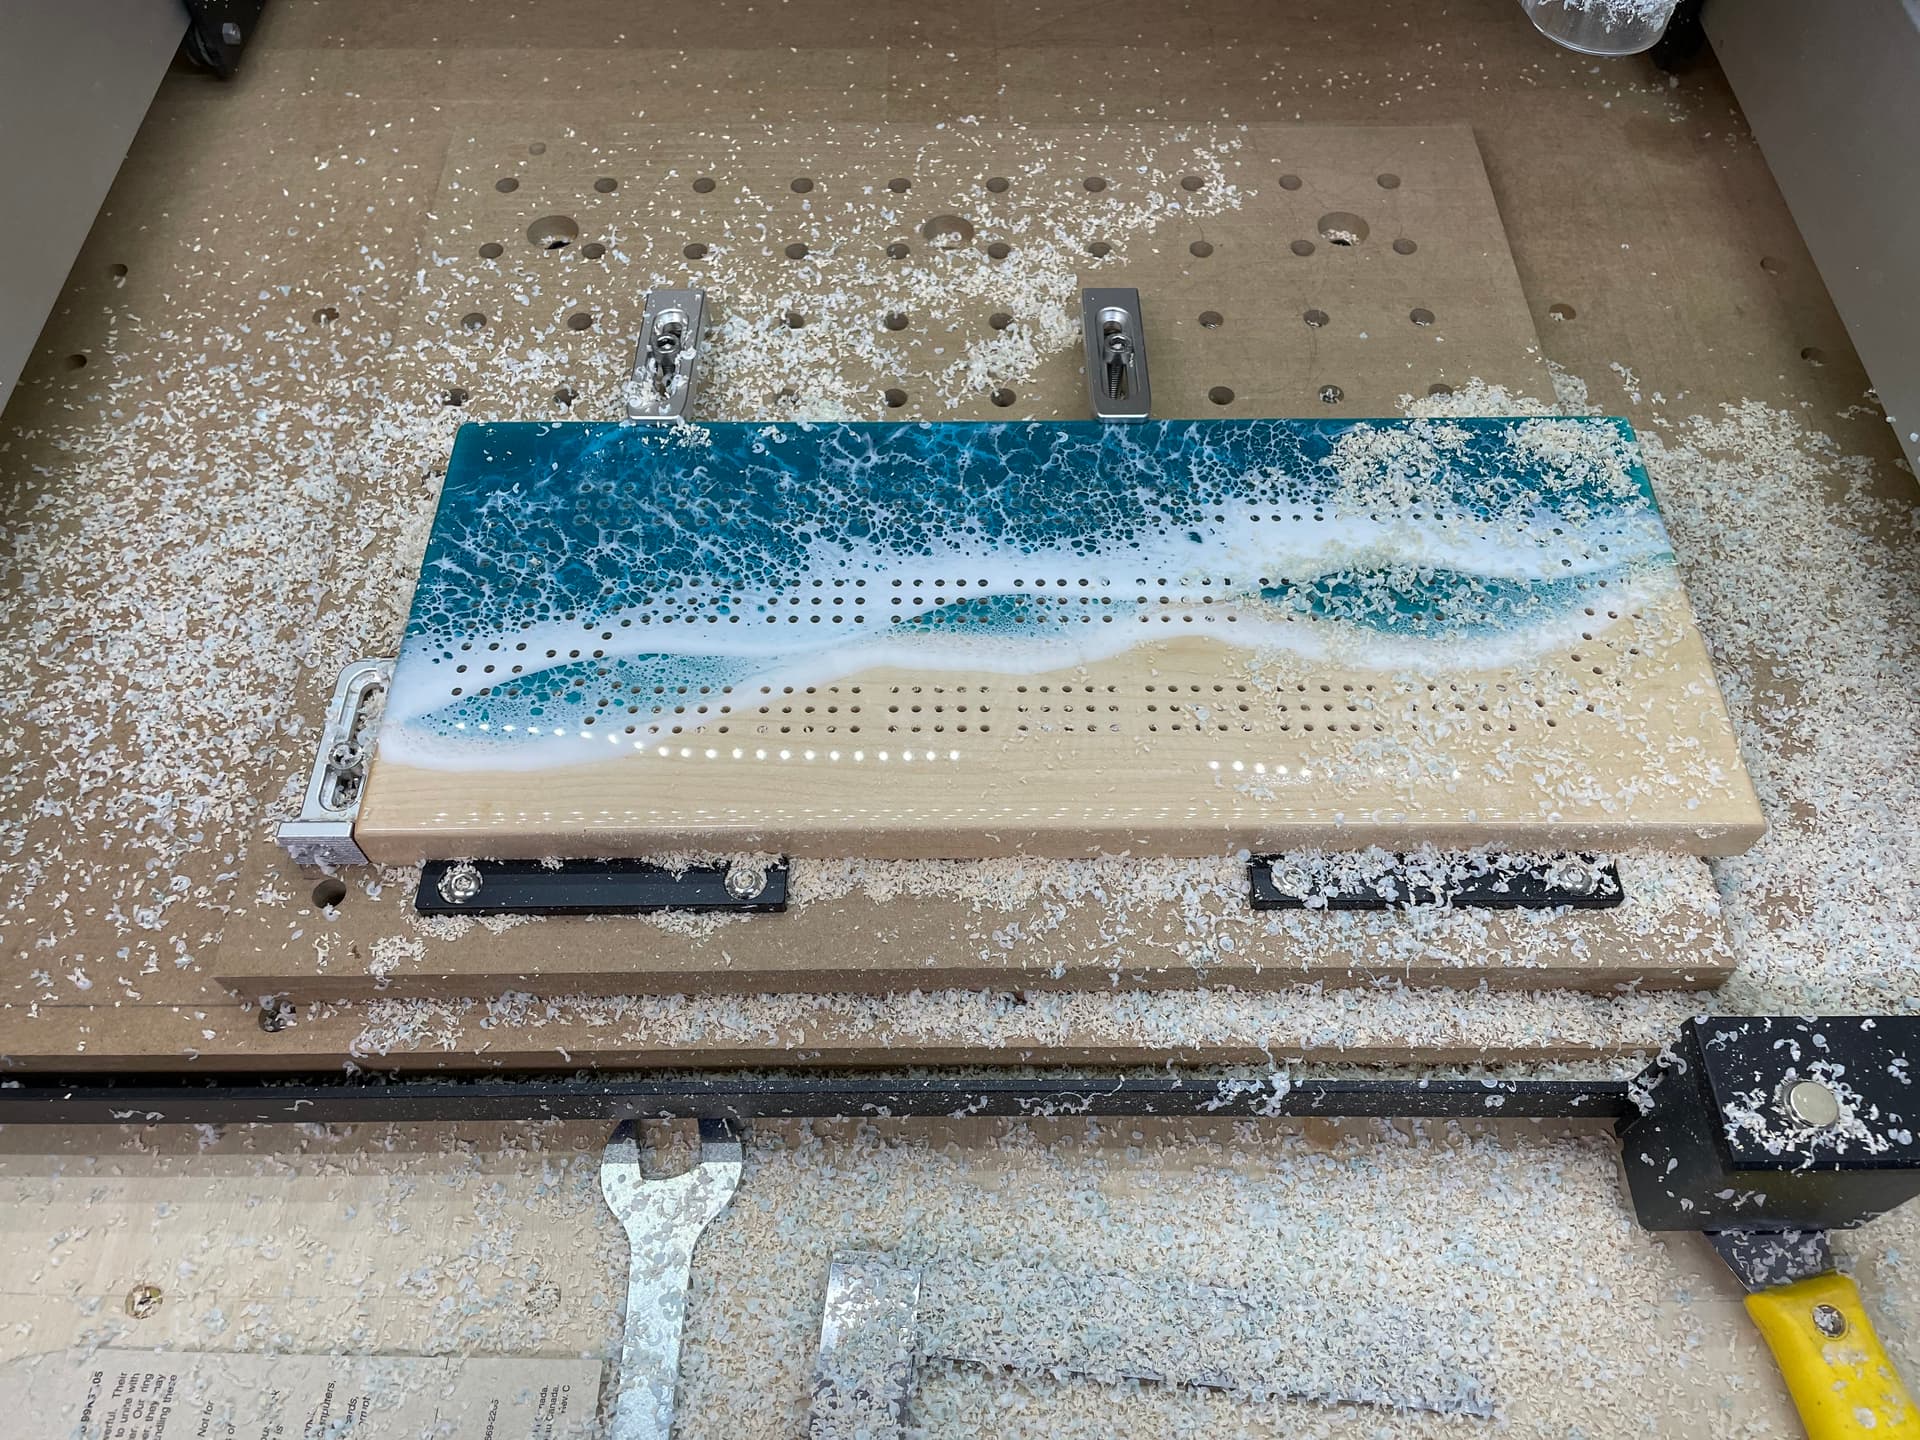
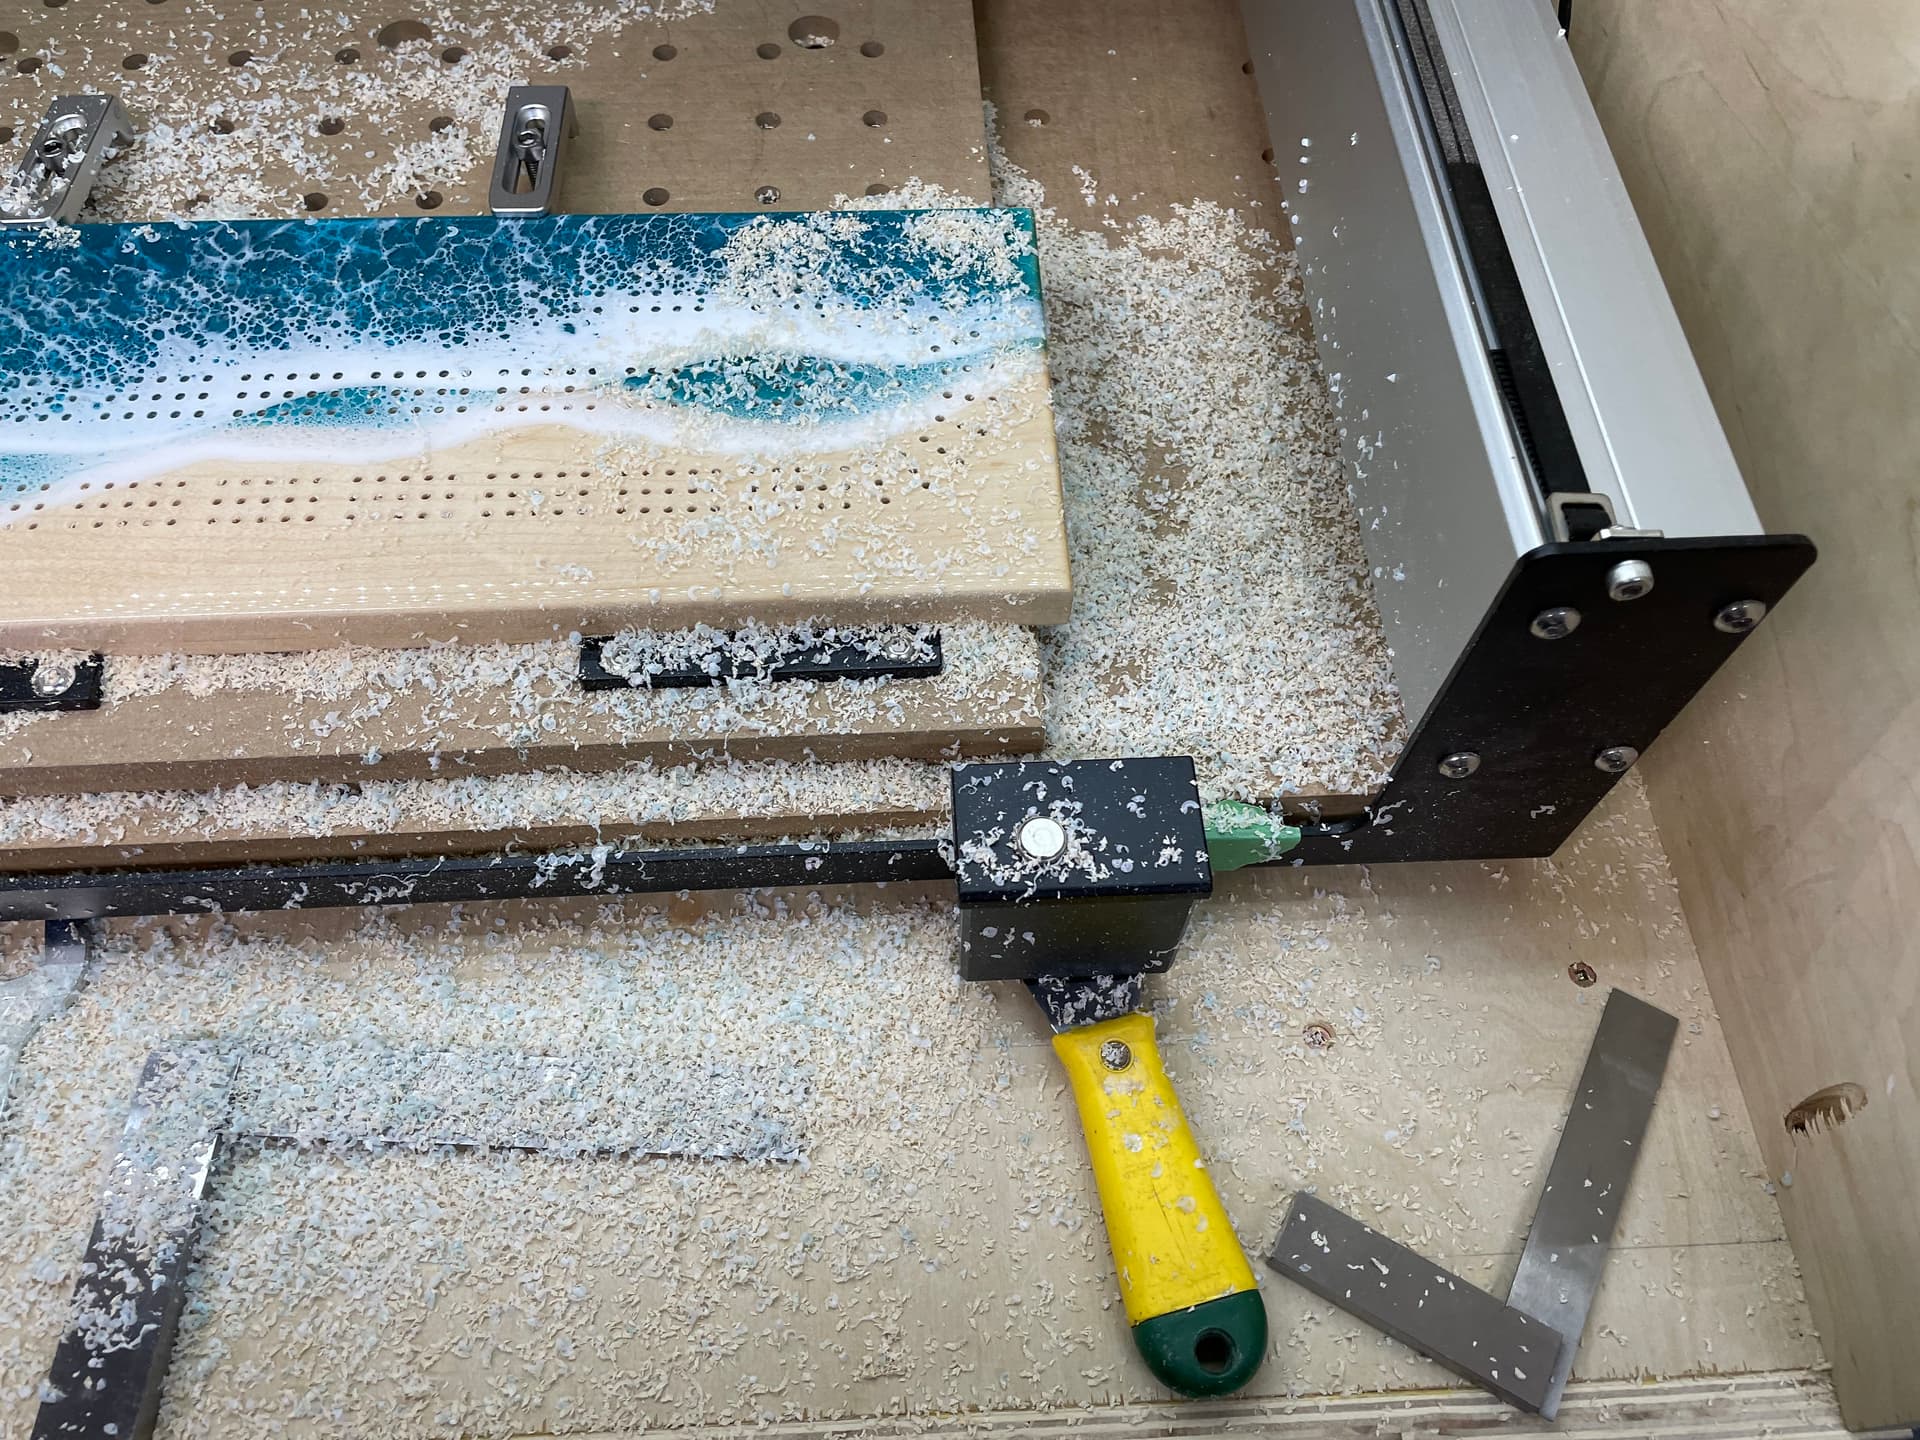
I posted this Drill Mill in a Shapeoko in earlier this year and have since processed 5 crib boards for a 1,985 holes. I’m drilling into epoxy covered maple to a depth of 0.4".
I was working on the fifth one yesterday and I noticed that the holes weren’t as round as the first 4 and they was a smell of burnt wood. It seems I wore out that end mill much quicker than I expected. I’m running the drill mill in a DeWalt at setting 1 (yes I’m ware that I can’t get to the recommend lower RPMs) but its what I have at the moment.
Given the above I have a couple of questions:
Is the short tool life an artifact of running at high a RPM?
How long should I expect a tool to last?
The tool vendor has a TiALN coated version of the tool. I’m wondering if it would be better to purchased the coated tool to improve tool life?
Very likely. Higher than recommended surface speed = higher than recommended heat = shortened tool life.
I don’t think anyone can tell you, tool life depends on so many things: tool, material, toolpath, cooling, chip evacuation and many more factors.
I think your use-case of running the tool faster than recommended is too unusual to really say. That said, TiAlN is meant to be better for high-temperature applications so it might help.
Have you considered switching to a spindle? There are variants that can reach much lower RPMs.
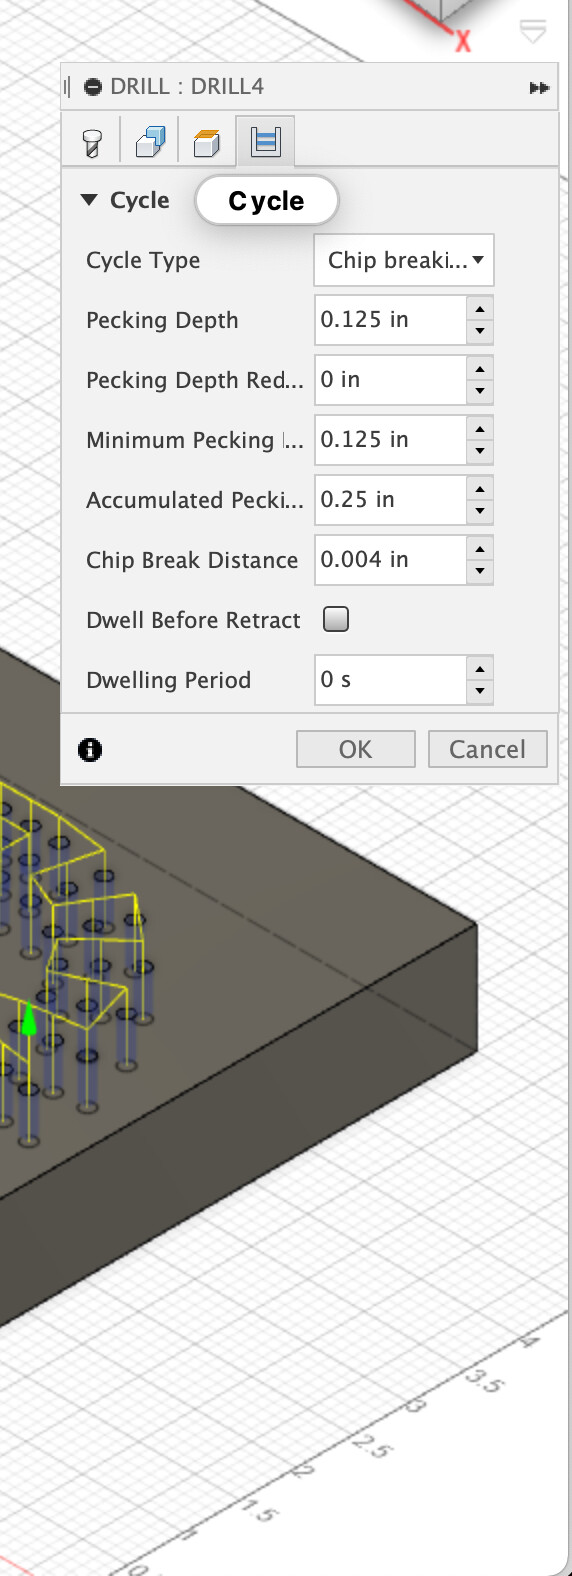
It needs to run slower to keep the heat down. You could buy a Makita or c3d router or a water cooled spindle. Other options are to see how much you can safely increase the drilling feed so you spend less time generating heat and adding a $50 aquarium air blast to cool the mill will help a lot. Are you peck drilling or interpolating?
I realized Fusion gave me the incorrect number of holes during my selection, so I have actually only drilled 1,985 holes which makes the wear out much worse than I thought.
I haven’t considered a spindle upgrade yet as I just started processing these cribbage boards for my sister-in-law’s business. I have thought of going to the Carbide 3D compact router as it will go down to 10,000 RPM.
Even 10k RPM is really quite fast for drilling. I was thinking more along the lines of a cheap water cooled spindle. For your purposes a Chinese one should do just fine and cost around $200.
To reduce heat, try the deep drilling with full retract and less peck depth. It will take more time, but might help with tool longevity.
Honestly almost 2,000 holes out of any tool is good. Epoxy can be hard on tools as well as the heat of the RPM and peck depth. Have you tried air blast to help with chip clearing and cooling?
Like @SLCJedi says, that many holes in wood covered in epoxy with less than ideal RPM is pretty good. I own a business in the woodworking industry and can verify that epoxy is very hard on tools.
Keep in mind that an endmill is NOT a drill. It’s intended to cut primarily on the outside of the tool, compared to a drill, which cuts at the end of the tool. Using an endmill like this is acceptable, but the toolpath will be hard on the end of the tool (look under magnification). A helix entry will probably help some (don’t know what sort of toolpath you’re using in those holes), but obviously requires a hole a little bigger than the tool to do that.
The other option is to use cheapo carbide uncoated endmills. They’ll wear out, but might keep your cost/board down…maybe.
Usual preface, I’m with PreciseBits so while I try to only post general information take everything I say with the understanding that I have a bias.
While I don’t have any experience with drill mills, I can say that is a low number of holes to get in a standard carbide drill. We normally see about double that in FR4 which is quite a bit tougher on carbide.
I guess I’m going to be the odd man out here as I don’t see the real issue being your RPM. It might not be ideal but I don’t think it’s the primary issue for the tool life. Barring a lot of runout, the issue I see is that you are running much too low of a chipload to keep from burning up the tool. There’s lots of explanations why (heat transfer, rubbing, cleaving size, etc) but at the end of the day lower chip loads produce more heat and reduce tool life. Enough heat and you’ll actually leach the cobalt from the tool and greatly decrease tool life.
Without specific knowledge of the bit being used what I would do is run some test cuts. Basically run a set of holes and on each one increase the feed by 5IPM. Since you are running a multi-material cut look for where one of the materials start to give you a bad cut or you reach a setup limit. Back it off 10% to allow for tool wear and you should have a decent setup. I’d expect you to have no issue and much better tool life around 66IPM. Again though, I’m not familiar with the geometry of that specific tool or potential runout so I’d test for it.
On coatings:
TiAlN coatings might help a little as it can add a harder layer and smooth out the grinding marks. But you won’t be able to form the oxide layer as the temperature required is too high for wood. If you are able to find them, better coatings to try to preserve an edge with a low chipload in softer materials would be ZrN or some of the DLC coatings that don’t effect the cobalt binder.
Keep in mind though that all coatings are increasing the thickness of the edge of the tool (you’re coating ALL of the tool). This is functionally slightly dulling it in exchange for a higher wear resistant surface.
In my opinion, all of the coatings won’t give you as much extra life as running a higher chipload.
@SLCJedi Thanks for the comment, I haven’t thought of air blasting, do you have some links as to how to add that to the Shapeoko?
@TDA Thank you for your lengthly reply. I am using these drill mills with the speeds and feeds chart here
I used this calculator to help me work of the correct settings. From the chart and the calculator it look like I’m a little low on my chip load as it’s 0.0015" and should be closer to 0.002". I will try adjusting that.
I’ve bought a few misters off of Amazon with good results. In my case I use them with isopropyl alcohol on aluminum, but for your use, but using the mist would have it work great for air blast.
This was the last one I bought, and it works great.
Looking at those numbers the closest material you have is plastic and at a 1/4" diameter. However, more importantly the feed chart is “per flute”. Unless it’s has a VERY strange non-standard geometry it’s a 2 flute cutter. Meaning that the total chipload for plastic with the 1/4" would be 0.006" or 99 IPM at the 16,500 RPM. Might want to scale some for diameter but I wouldn’t go as low as the 0.002" you listed.
That being said the feed chart you listed looks to be generic for “end mills”. So most likely a chart for milling and none of those are going to transfer perfectly to a drilling operation.
Thank you for the suggestions, increasing the feeds and speeds seems to have solved the issue of the bit wearing quickly. This past weekend I drilled 9 boards for total of ~3,573 holes and the bit was still sharp, no sign of burning.
I - On my SO3, I drilled and trapped a hole that bolted on the mister on the side of the router mount. On the SO4 and SOPro, they were nice enough to have holes already drilled and tapped in the side of the router mount.
2 - Yep. Just don’t install the fluid siphon tube. It runs dry just fine.