I finally am getting my Shapeoko Pro setup for the first time as I had many setbacks between the enclosure and getting an electrician to put outlets in where it is located.
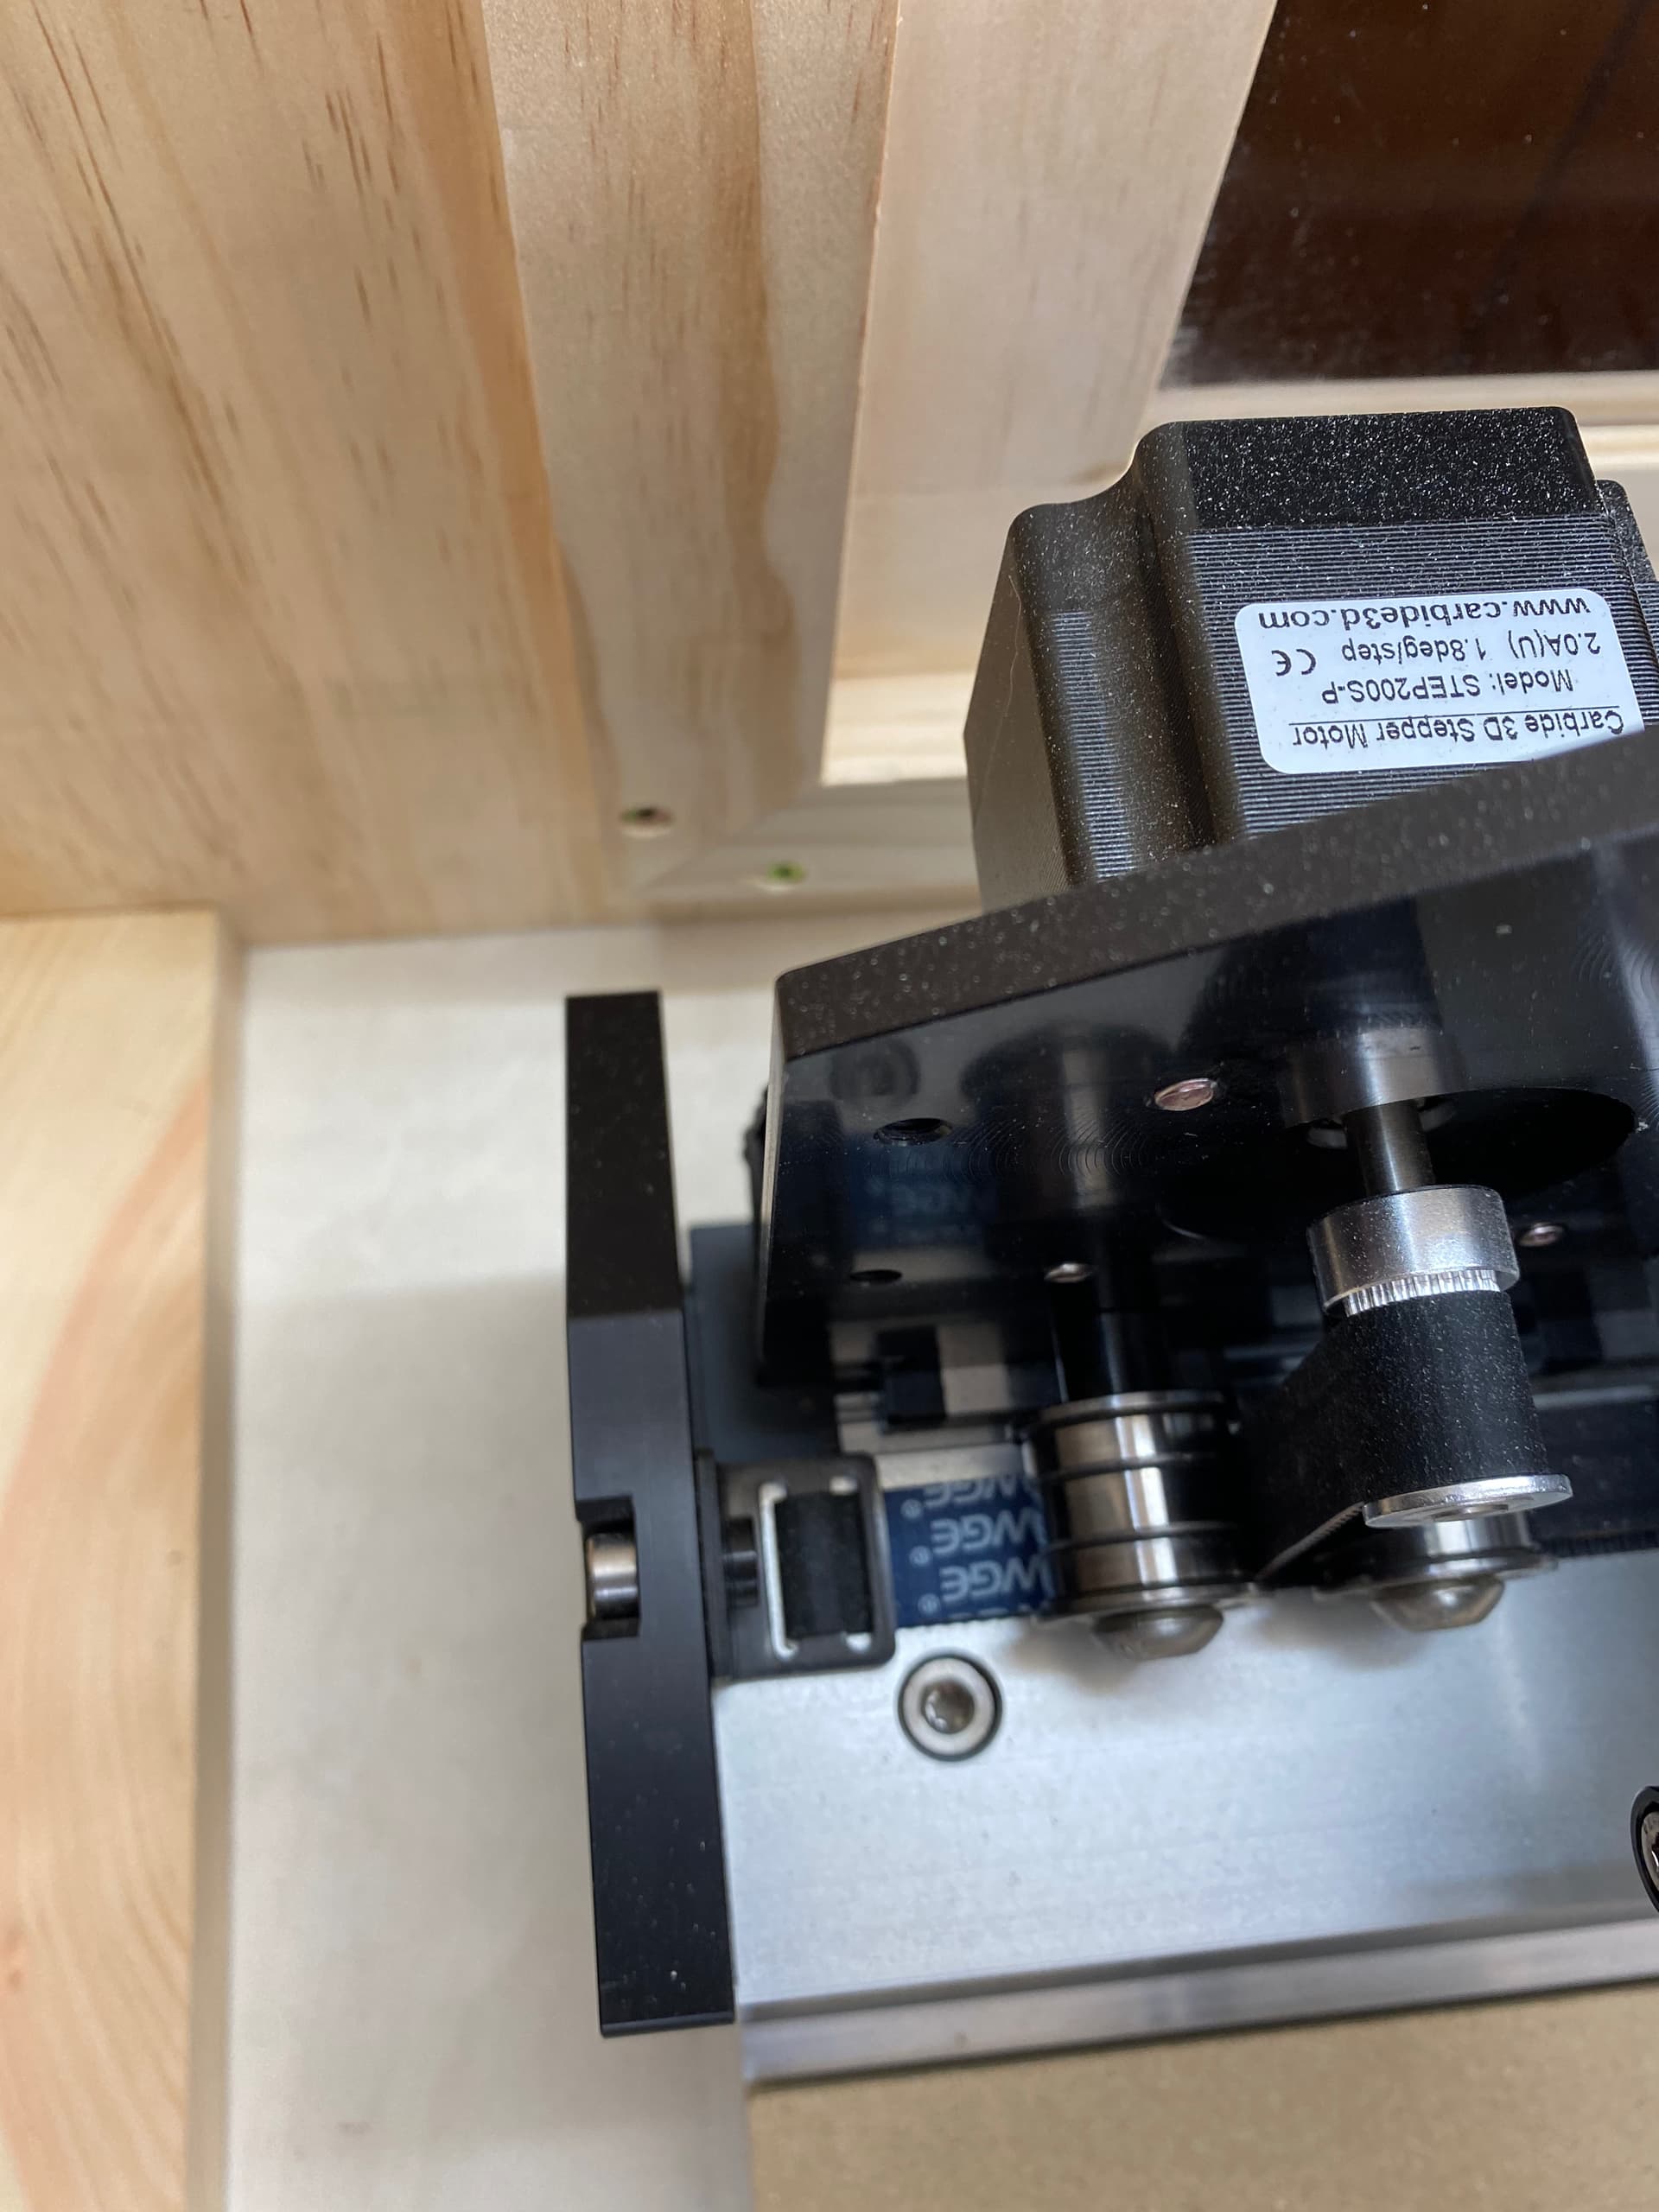
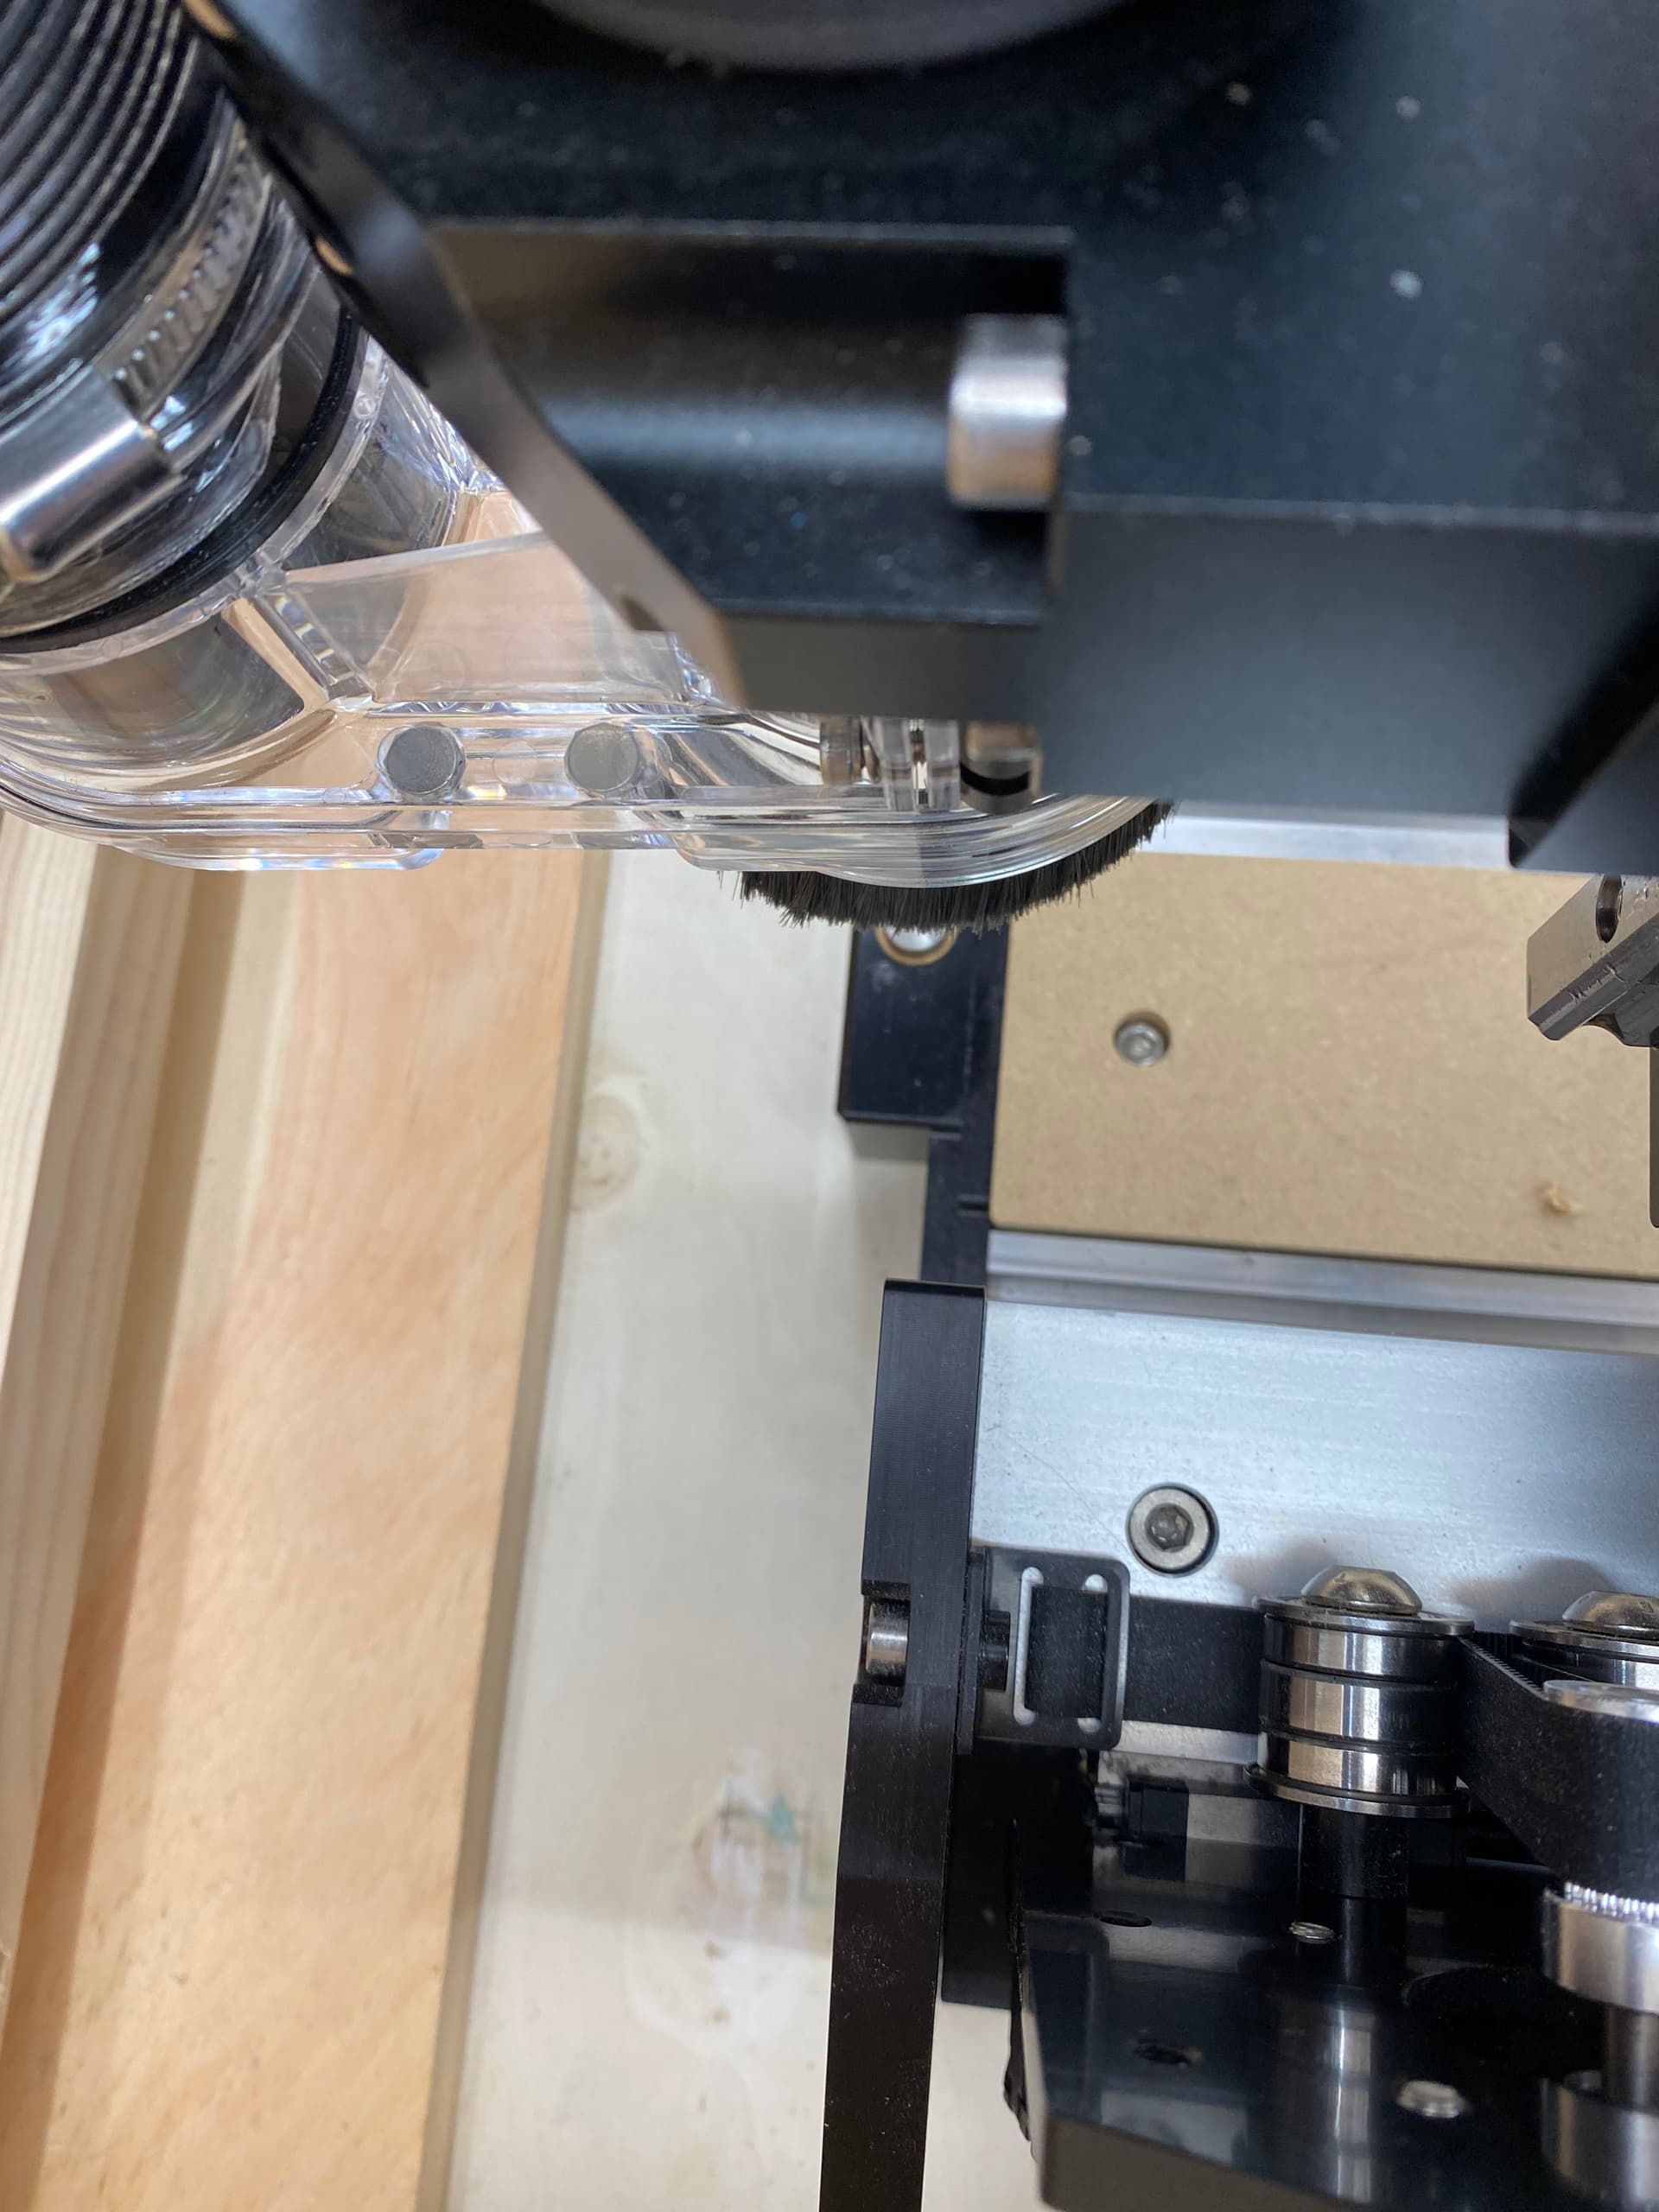
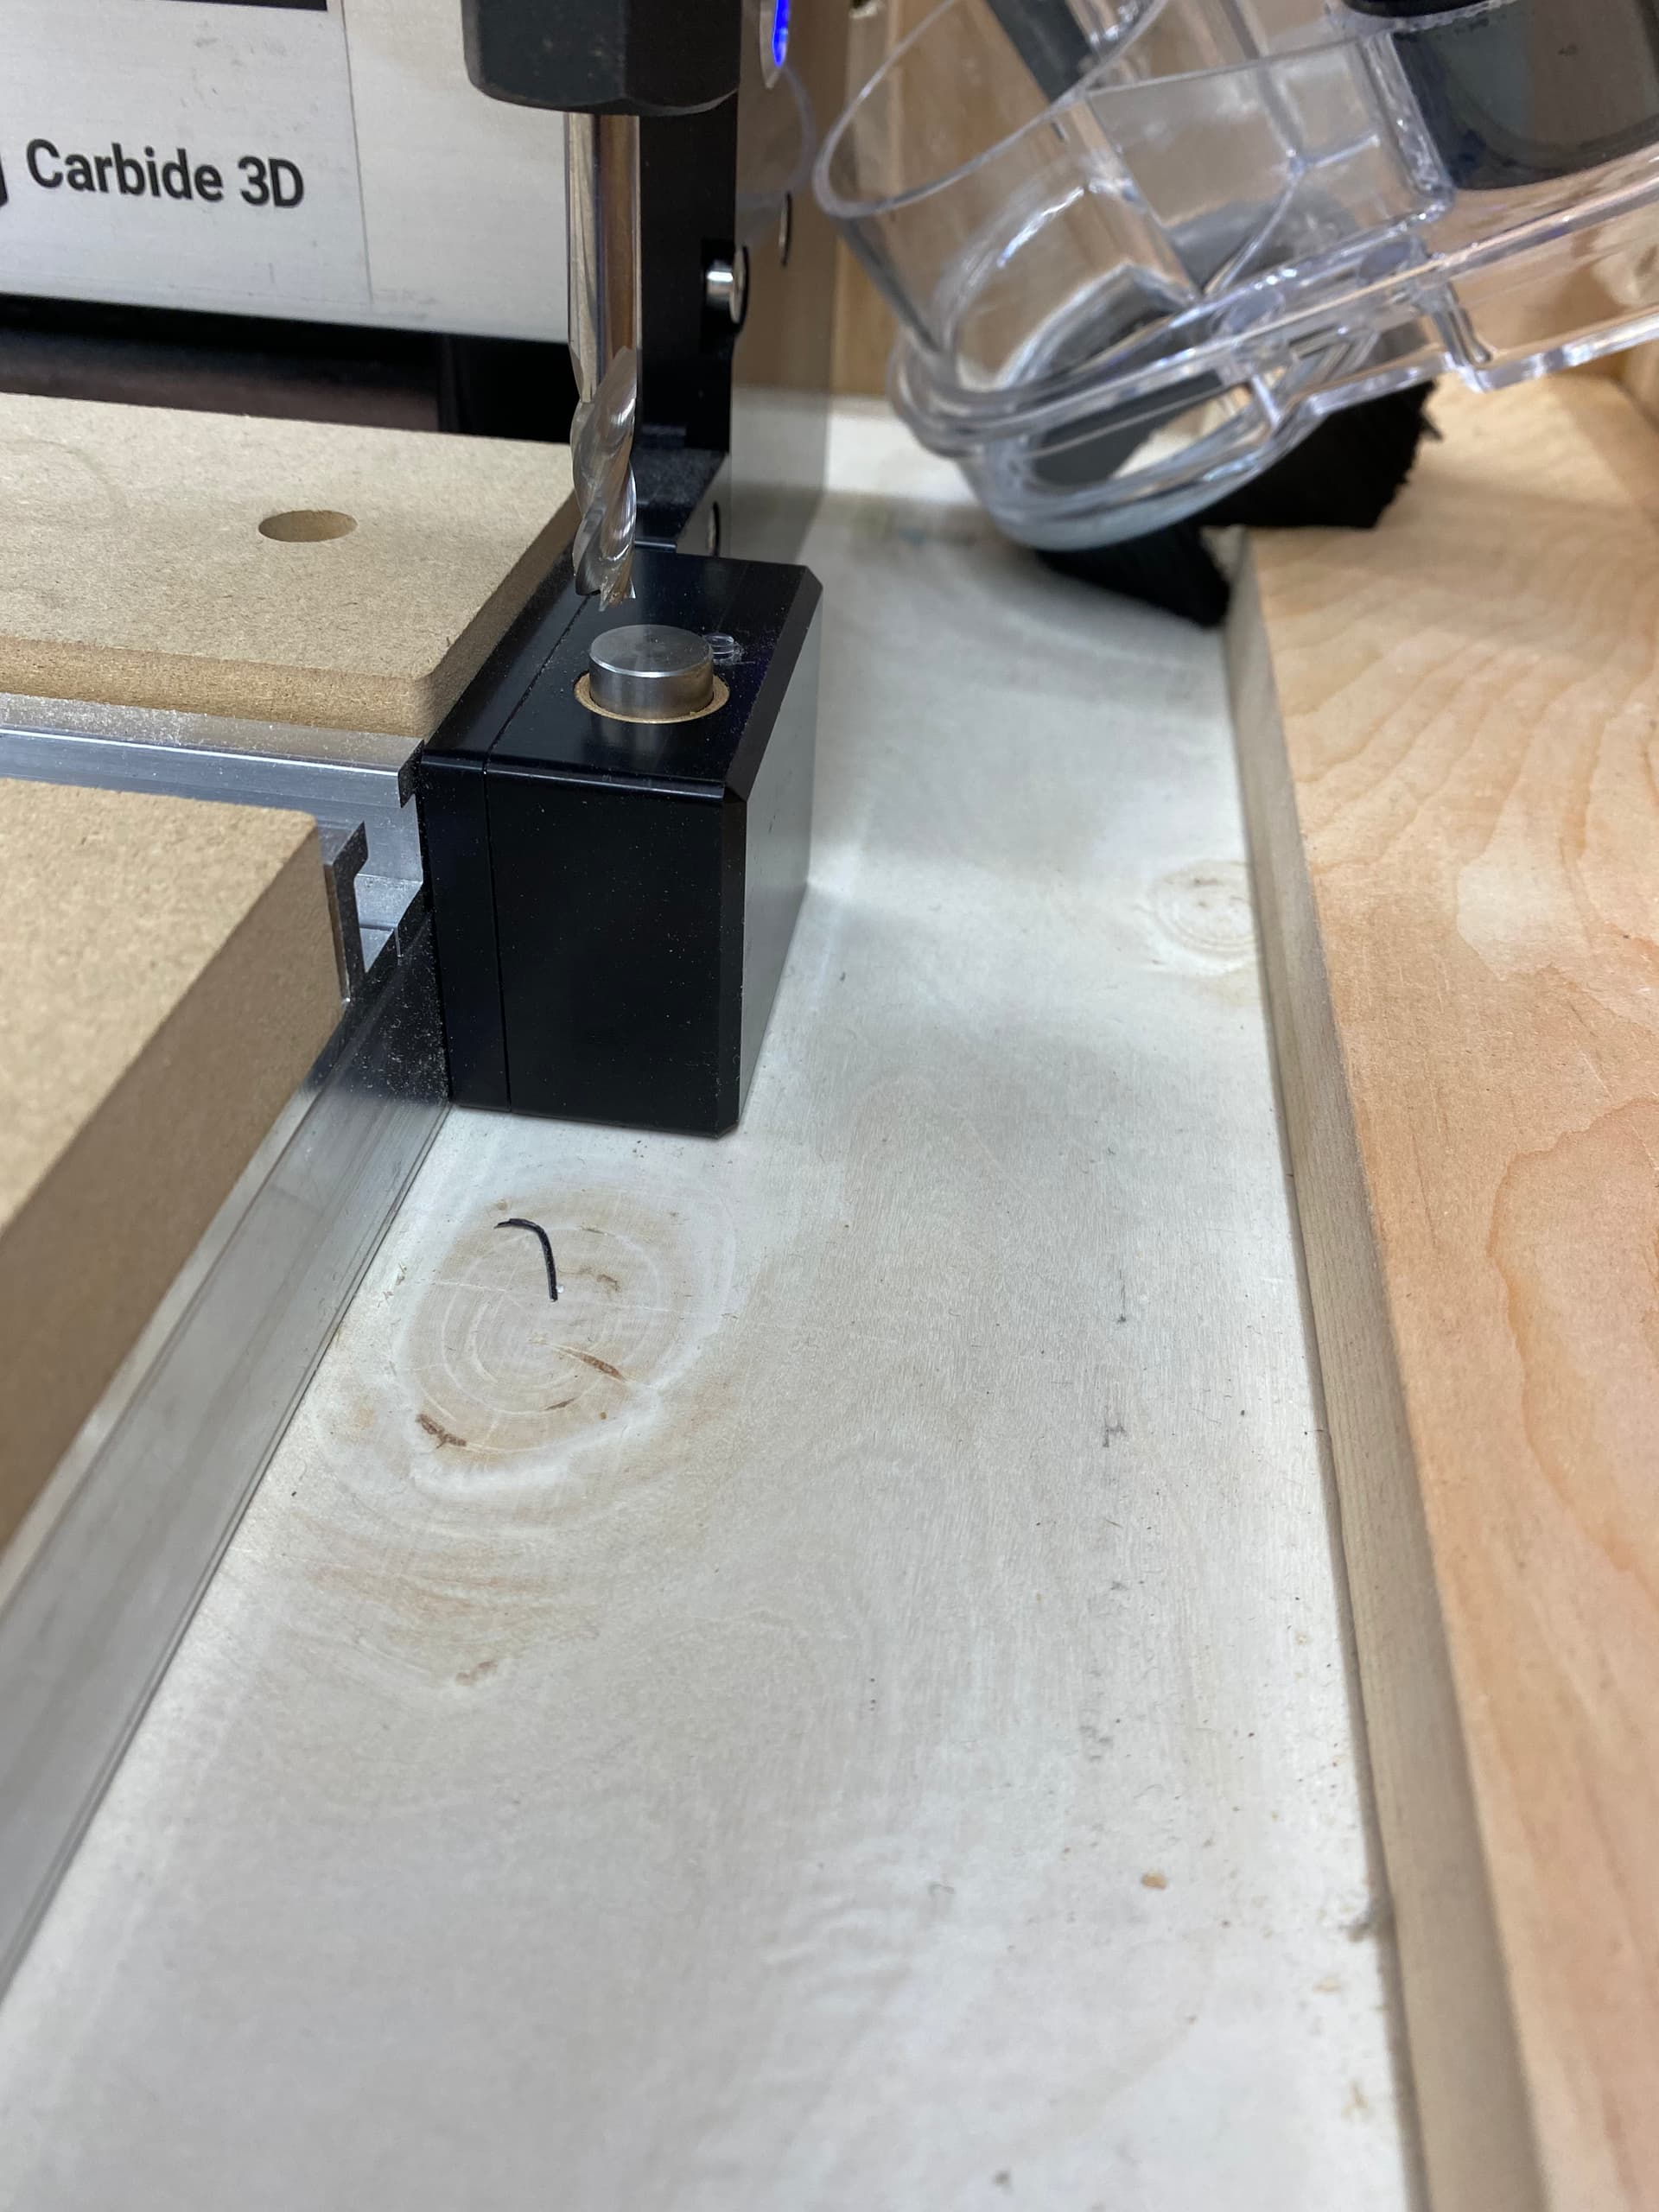
Anyways i am on page 60 trying to setup BitSetter and the -Y access will not go far enough forward to hover the routers bit centered above the bit setter. It seems as if the gantry stops short and I don’t know why.
Trying to get this up and running so I can run a project for mothers day.
Is there a trick to getting the belt fastener closer to the screw without brute force? The manual says not to overtighten the belts but according to the belt tension guide above its way to loose.
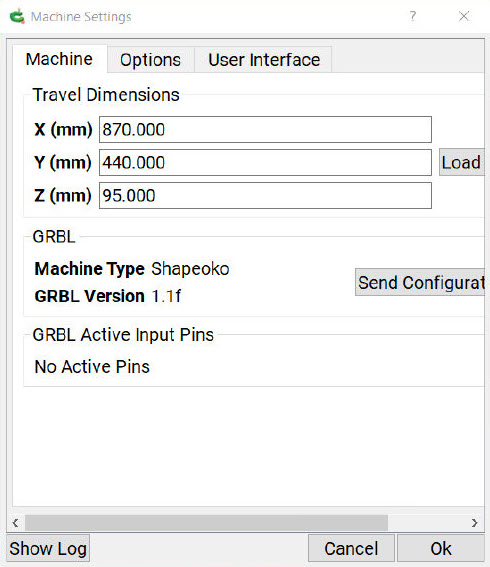
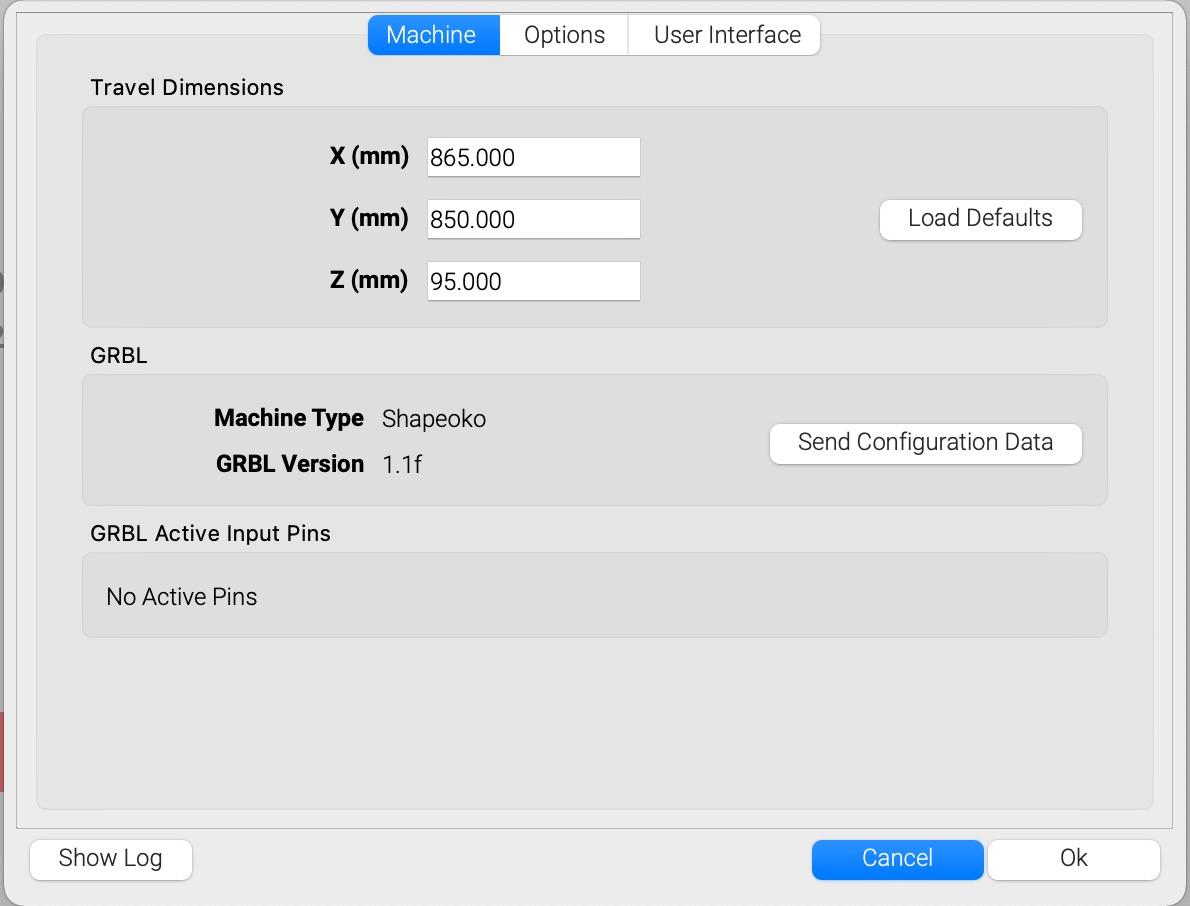
You dont say what machine you have but check your travel dimensions
Open Carbide Create
Click on Connect to Cutter
Click on Settings
Look at the X Y Z travel dimensions
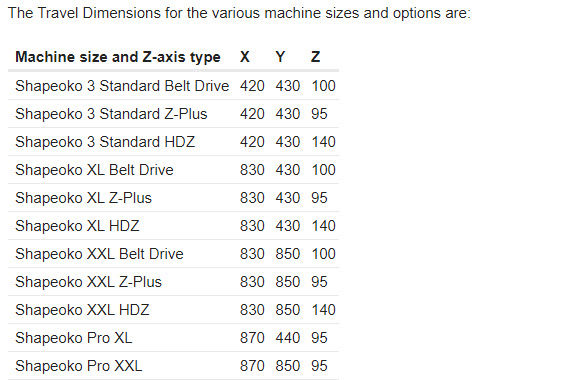
Attached are the correct settings for the Pro XL
Also the correct travel settings for all machines
You may need to correct the Y setting for your machine if you cant move far enough to the front of the machine to reach the bit setter
First i would turn off all the power and slowly move the carriage all the way to the front of the machine and make sure it is physically able to move all the way to the front stop without binding.
I found that looping the belt through and then pressing down on the tensioner so that the teeth of the upper and lower part of the belt interlocked whilst doing up the bolt allowed me to get to the target tension.
The problem I am finding is my finger strength in getting the tensioner clip close enough to engage the screw while maintaining 83hz in tension.
This belt tensioner leaves a lot to be desired for such an expensive machine. It should be some sort of insert belt into end and turn dial to tighten system then it would be much more precise.
One way to address this is to move the machine towards the belt clip you are trying to tension, then power it up to grip the belt, then pulling gently on the machine to reduce tension on the belt and make it easier to secure things.
I found it helpful to start with a longer screw, tighten the belt enough for the correct screw to reach. Then clamp the belt near the clip to the rail with a quick grip clamp, change screws, release the clamp and finish the adjustment.
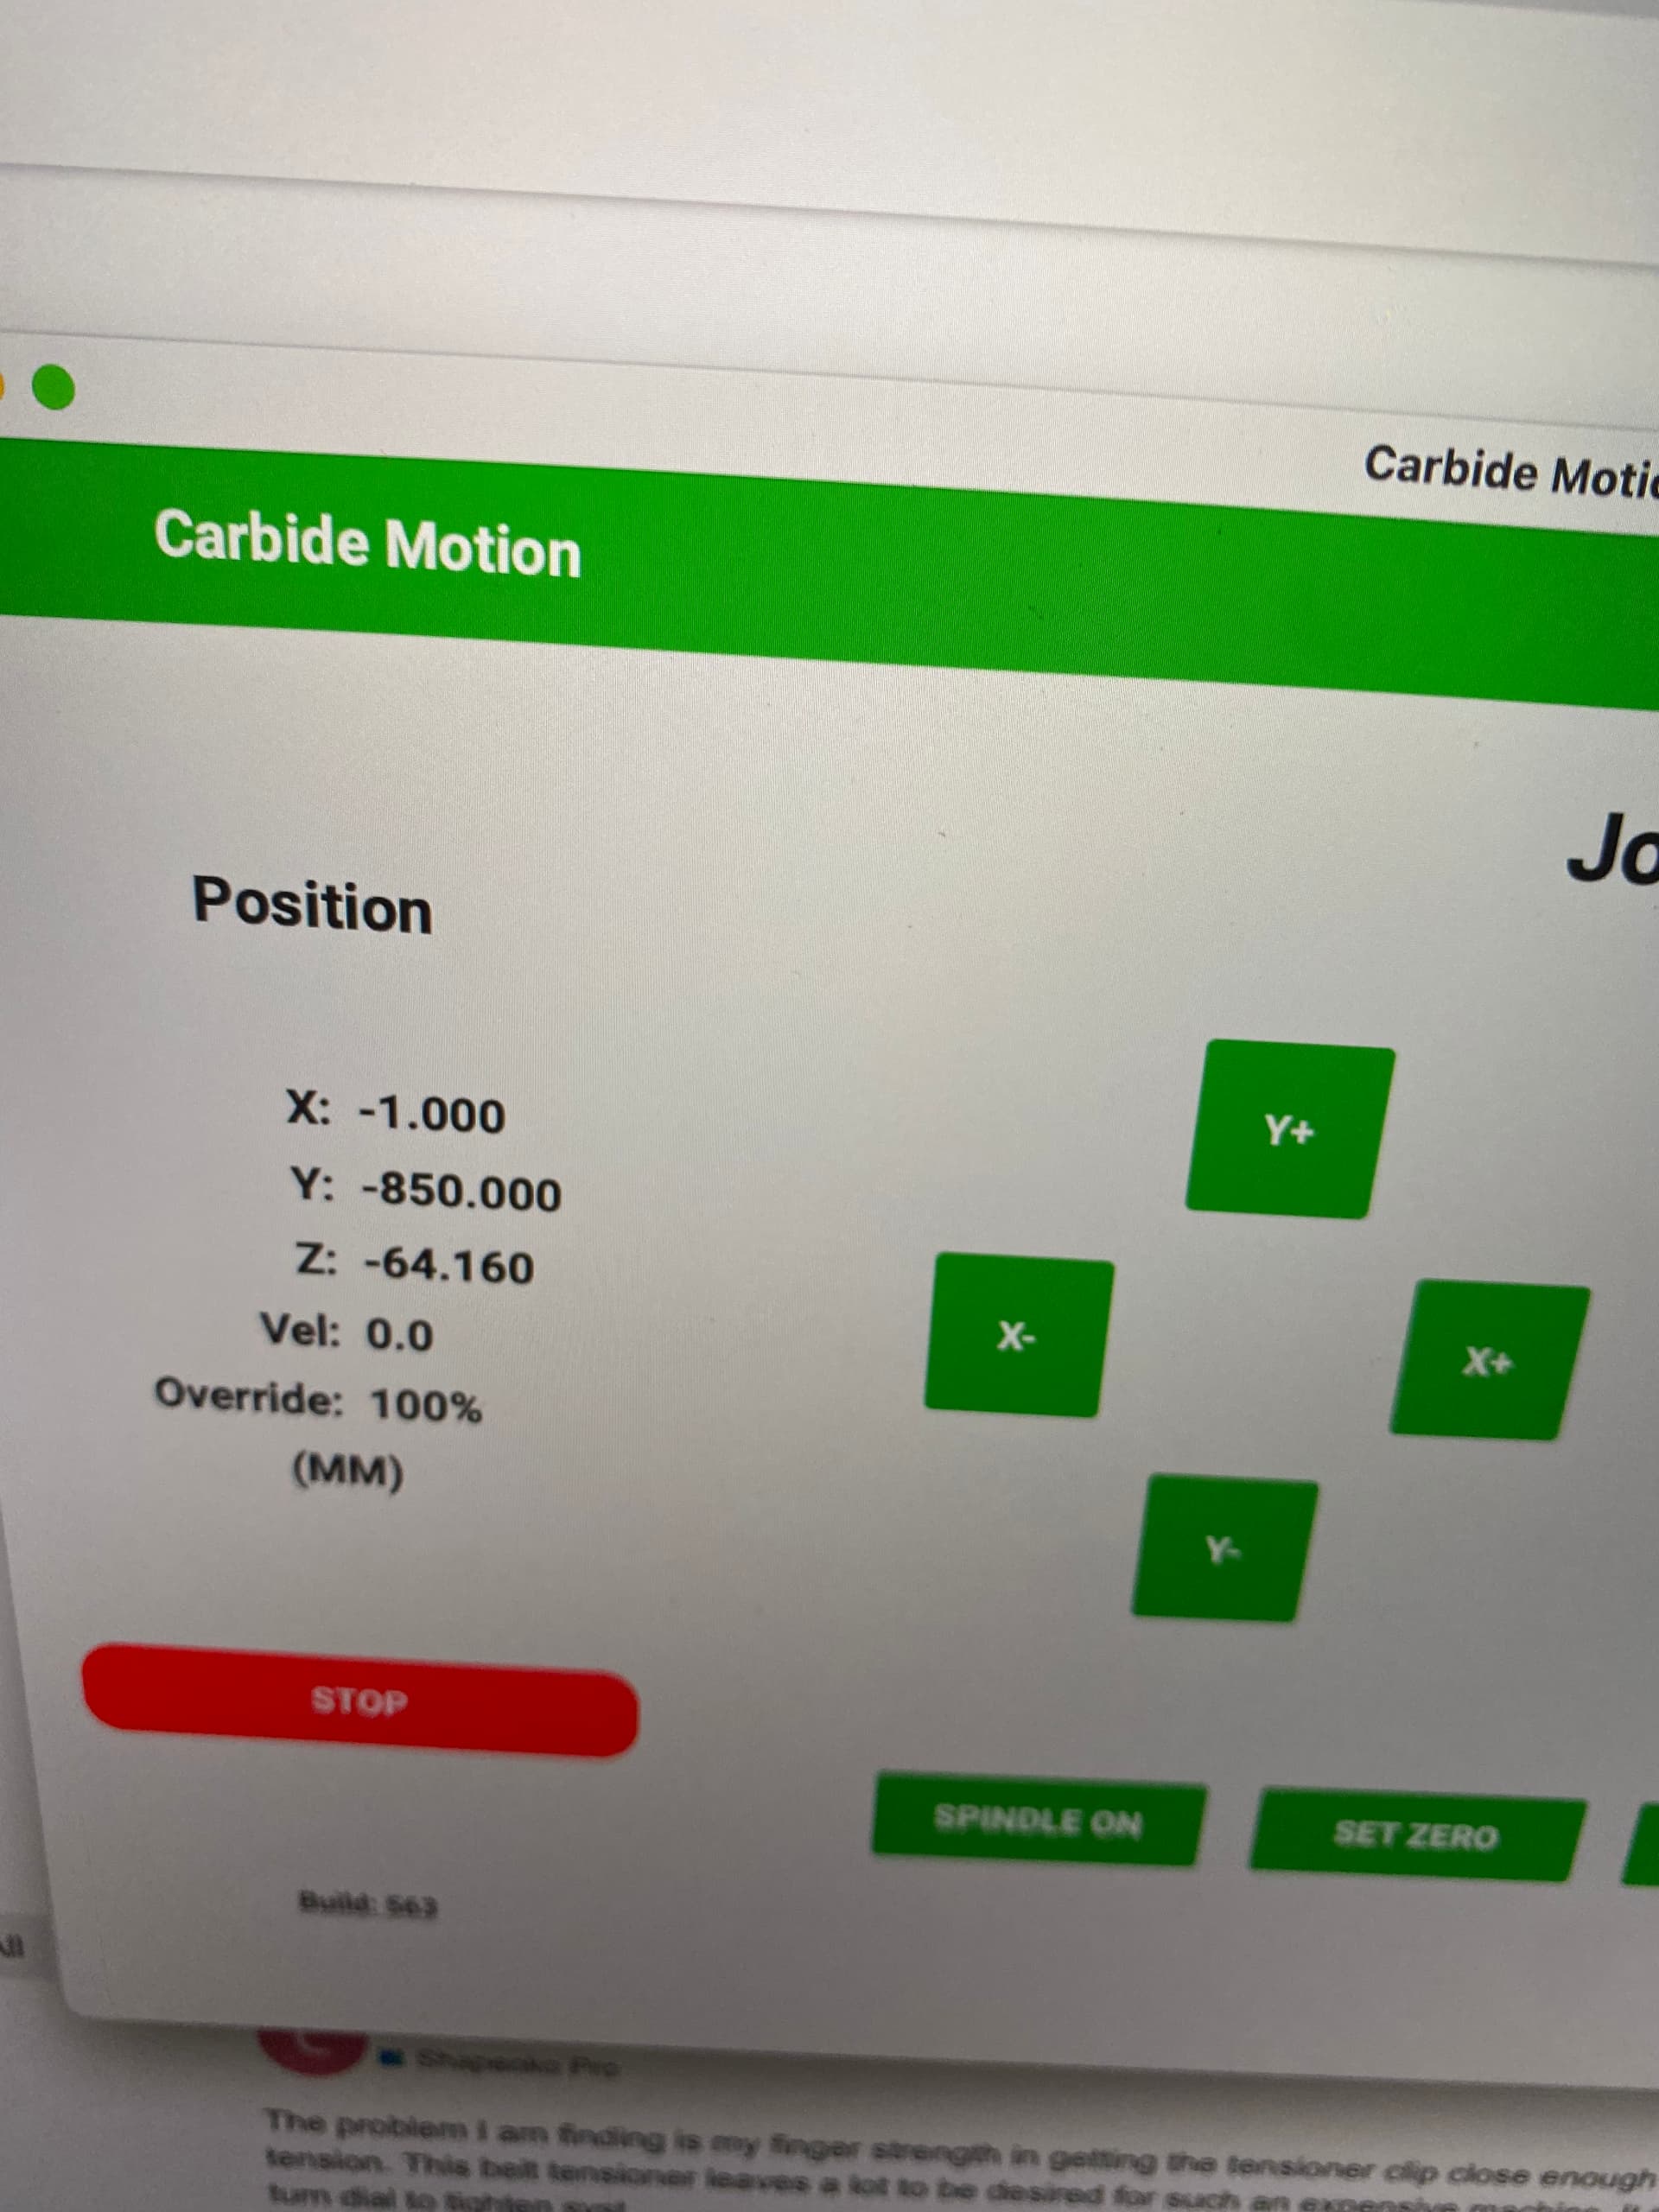
I went into the control software and if i put the Y axis to -865 but use -862 it centers the bit right over the bit setter.
Are the instructions incorrect? As it says to center it over the bit setter and then set the bit setter option. is the default configuration measurements missing the distance to the center of the bitsetter since that extends beyond the table ?
I understand but i have tightened them according to guide. I can achieve 84hz on my Shapeoko Pro XXL and tightening the belts made no difference. Still travels the same distance
I’ll start by saying I don’t have a 4 Pro just a 3 XXL upgraded with proximity switches. Is it possible the Y axis home switch is at its extreme rearward adjustment and the travel range is just shifted back further than “normal”?
And now the belt tensioner clip and screw are stripping out because of the tendency for the top of the belt tensioning clip to point down when you are using brute force to try to stretch the belt far enough to reach the screw to get the belt into the 80+ Hz range.
This is THE WORST design for a belt tensioning system for a $3,000 machine.
The most precise important part of the machines function to operate properly and it has no fine adjustment to it and was designed with the cheapest, most difficult, crude adjustment system possible.
I found i had a spare tensioner clip. I got a longer screw as per Lester Shaws recommendation( Thank you Lester) .
I have literally spent hours this morning on the Y axis belts. I can get the right one at 94hz and the left at 101hz thats the best I can do to get then close to each other in terms of hz.
On page 60 it says
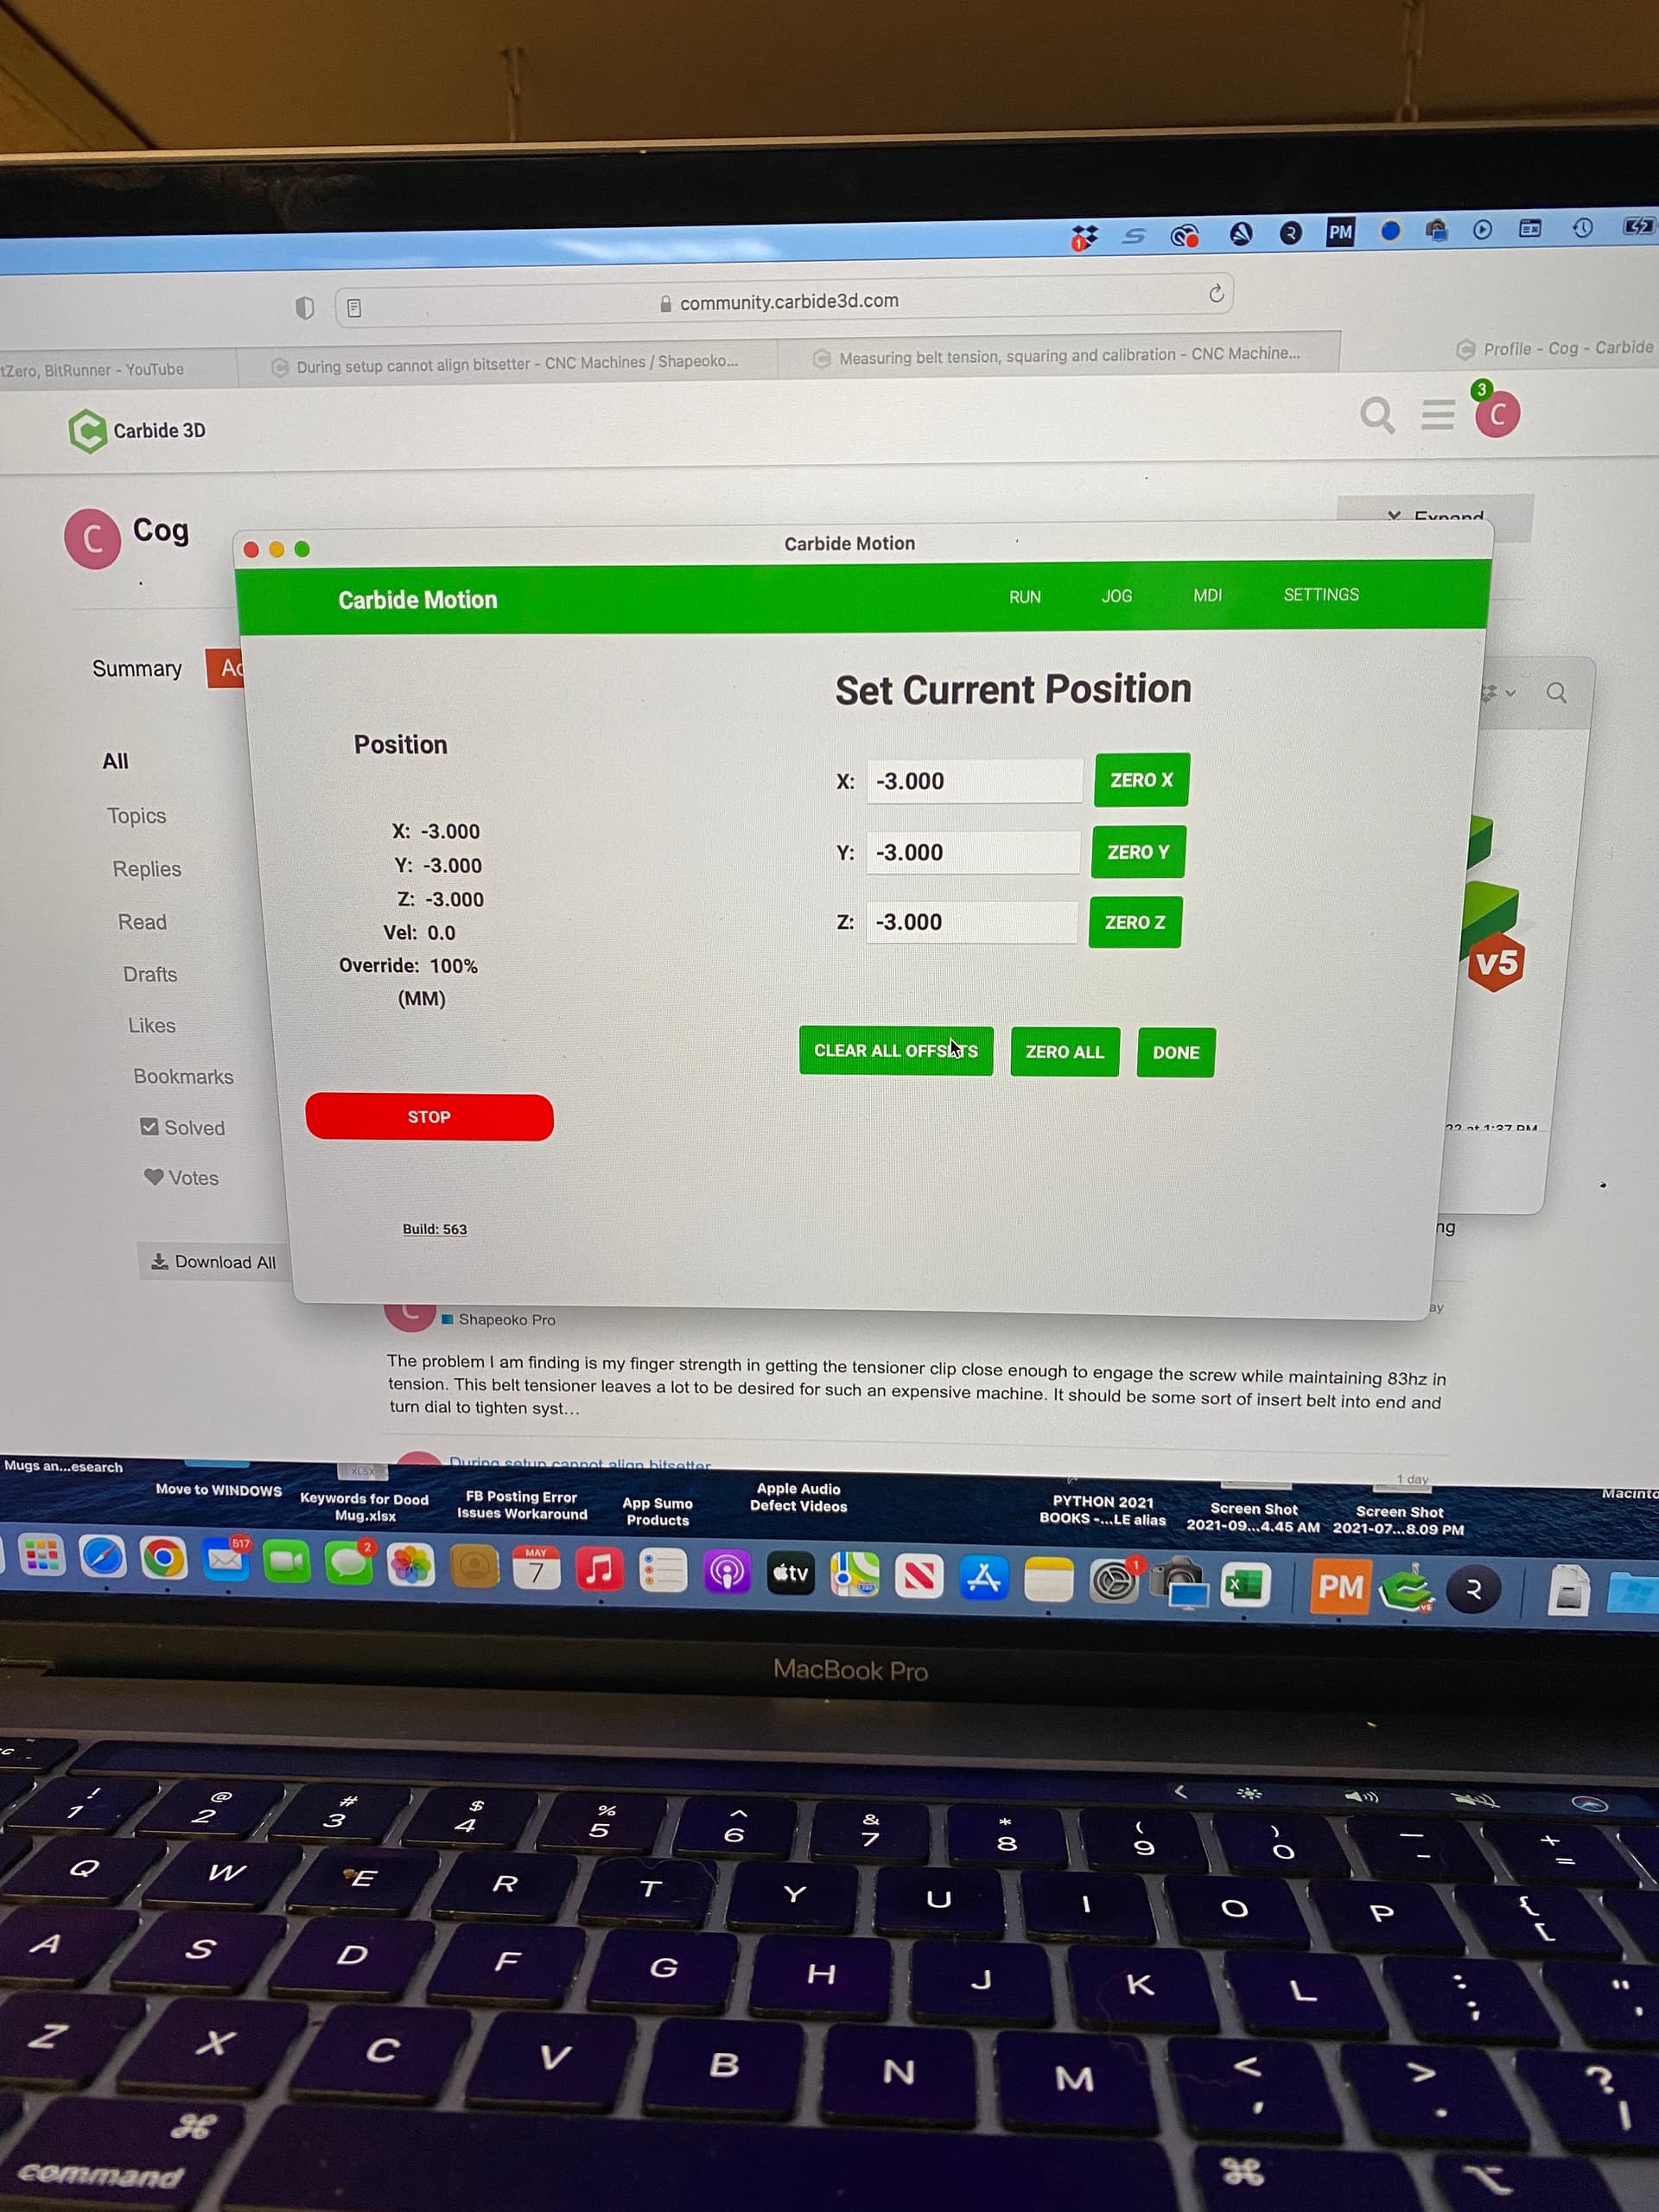
Click jog
On Jog screen click set zero button
Click the Clear all offsets. ← when I do this it ends up showing -3.0 on all 3 axis instead of 0. If I set this to 0 for all 3 axis it the Y axis stops even shorter from the front of the machine where the bit setter is
And when i move the machine to its most forward position it is stopping short still you can see the gap in the photos. The software is causing this stop because if i put in -865 for the Y axis I can center over the bitsetter at -862
Just noticed something else the information posted above says the travel dimension for the Shapeoko Pro XXL is 870 on the X axis why does the default in software load 865 then ?