Hi All
I got my new XXL pro recently and am having a great time with it. Part of the fun has been making it right for me. Pi controller, custom wire covers on the machine thanks to @CNCInspiration, vacuum system, new enclosure … All good fun.
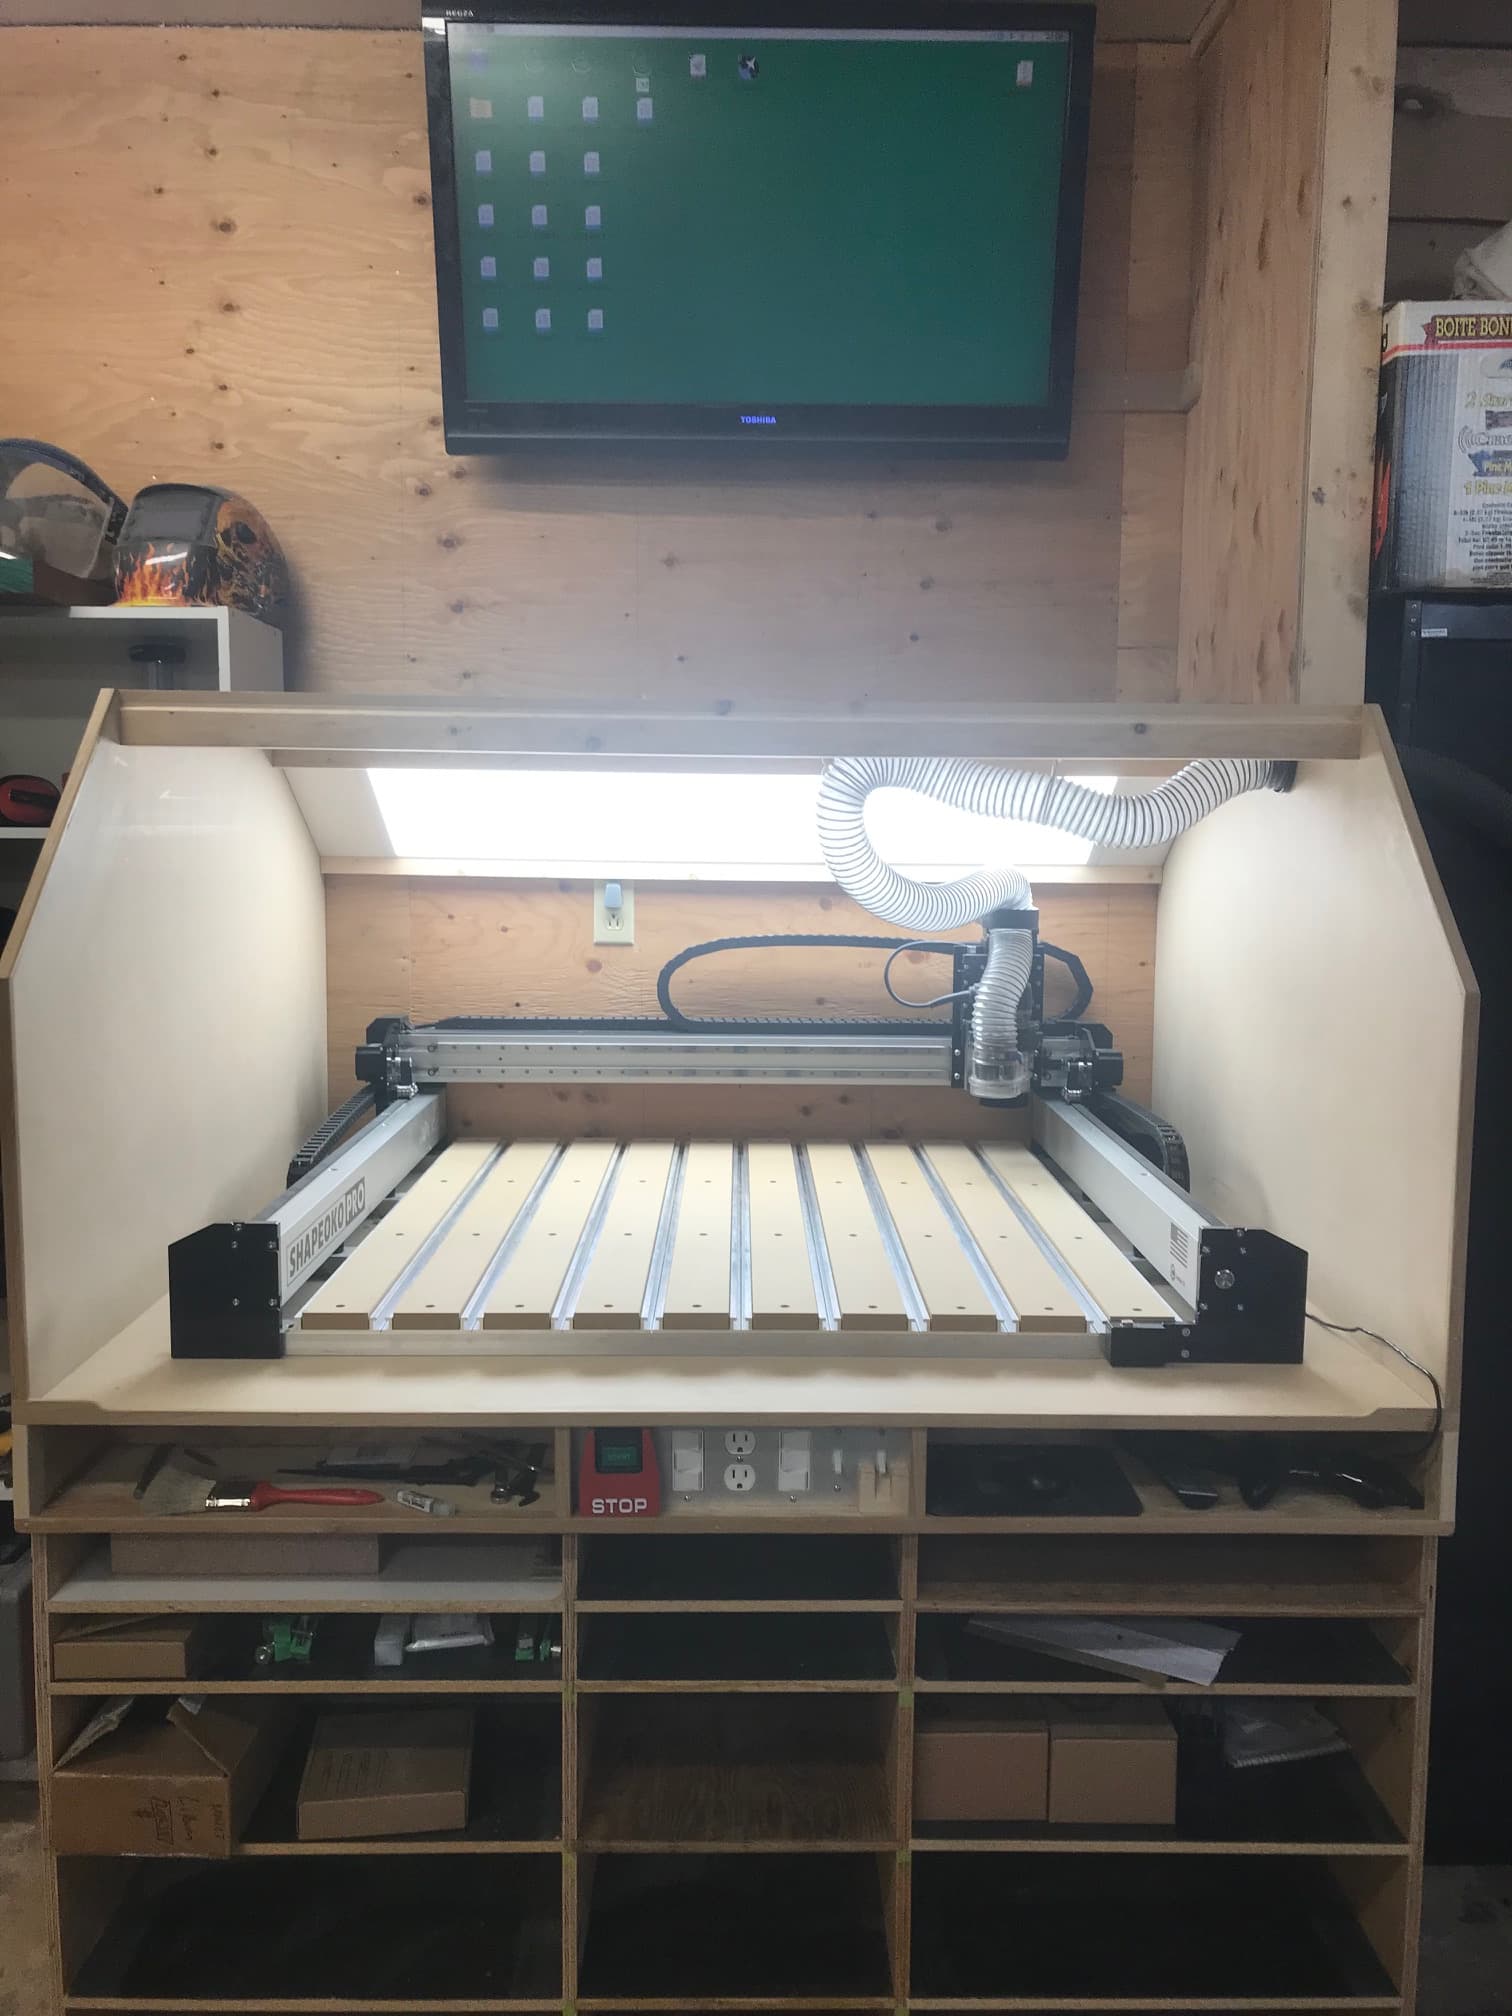
The closure is coming along good. Still need to add the acrylic doors and drawers.
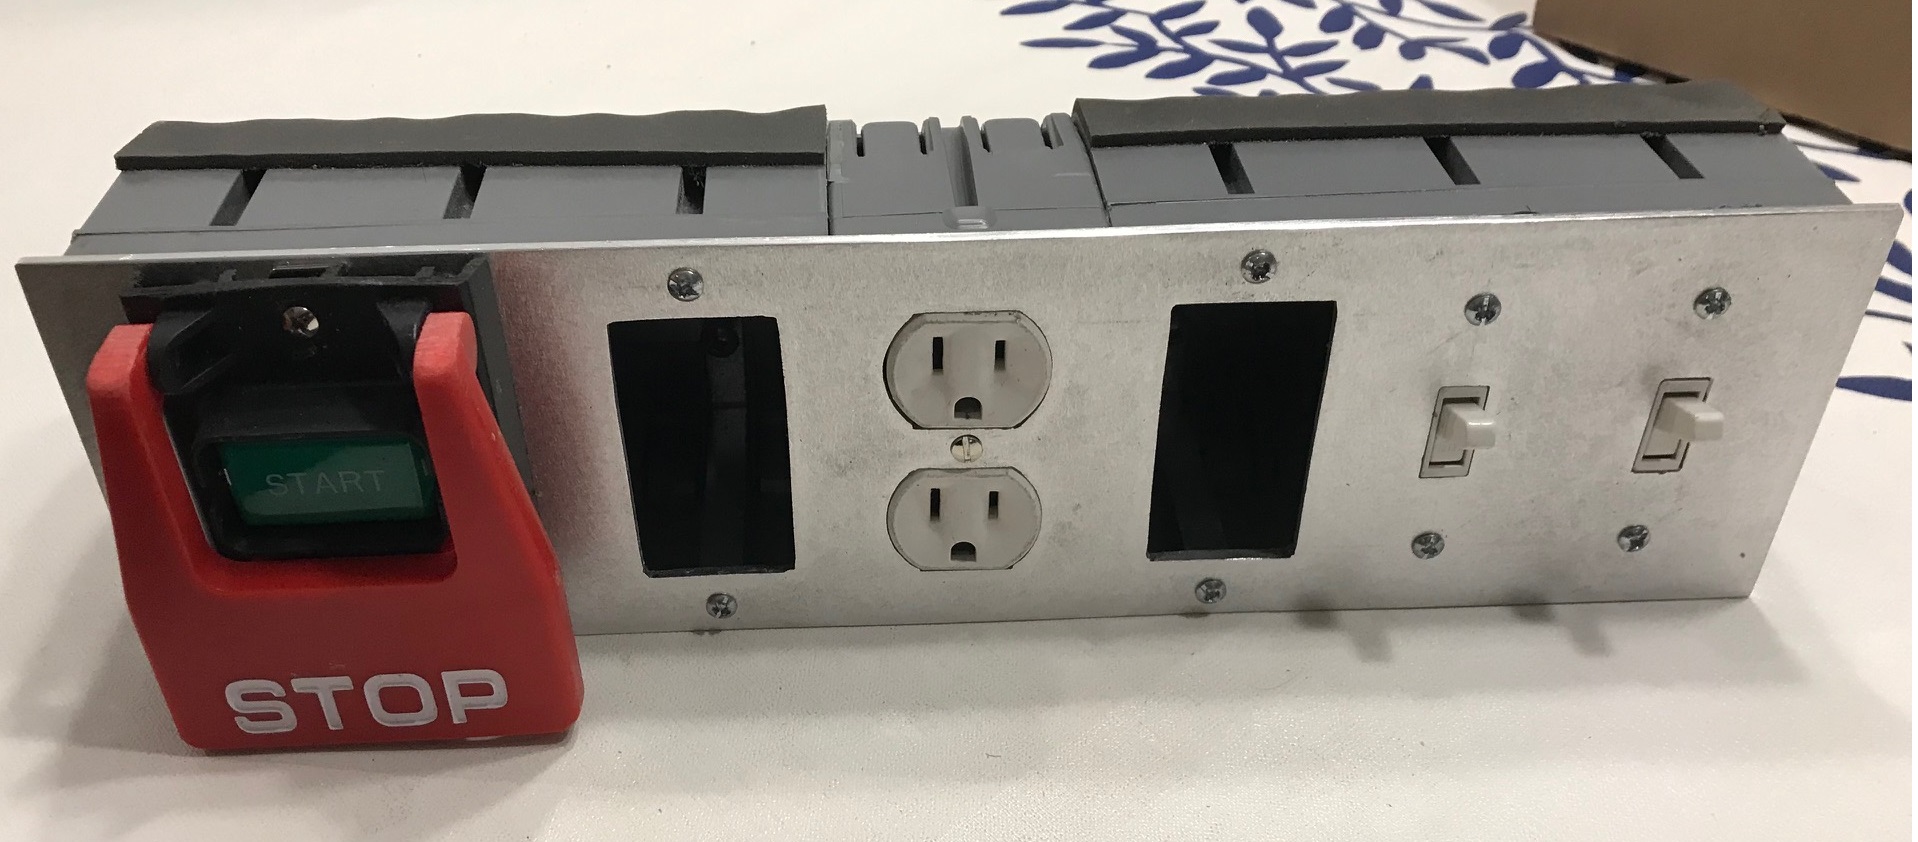
Yesterday I finished the electrical wiring and custom hand made electrical panel.
The deck is a torsion box with the front open to give a small self for the tools on the left , electrical panel in the middle and on the right is a cubby hole where the mouse, mini keyboard and game pad live (this keeps them dust free ish)
The Pi and other electrical are inside the torsion box which is assessible via accesses holes through the top of the upper drawers.
There are Aux receptacles on either side of the machine inside the enclosure and one in the middle of the electrial panel.
I used a little wooden block as a safety for the router switch. The switch to the left of that is the vacuum. The rest of the switches are, the Shapeoko, the Pi, Aux Power, Lights, Monitor
I still need to add some labels but I know what they are
The vacuum hose is on a small I beam curtain rod which allows it to move around freely as needed.
The enclosure is 58" W 48" D 30"H O.D.
In between projects I do a little more here and there to customize my machine. It is a work in progress
I love that custom electrical panel. That is very similar to what I am designing for ours.
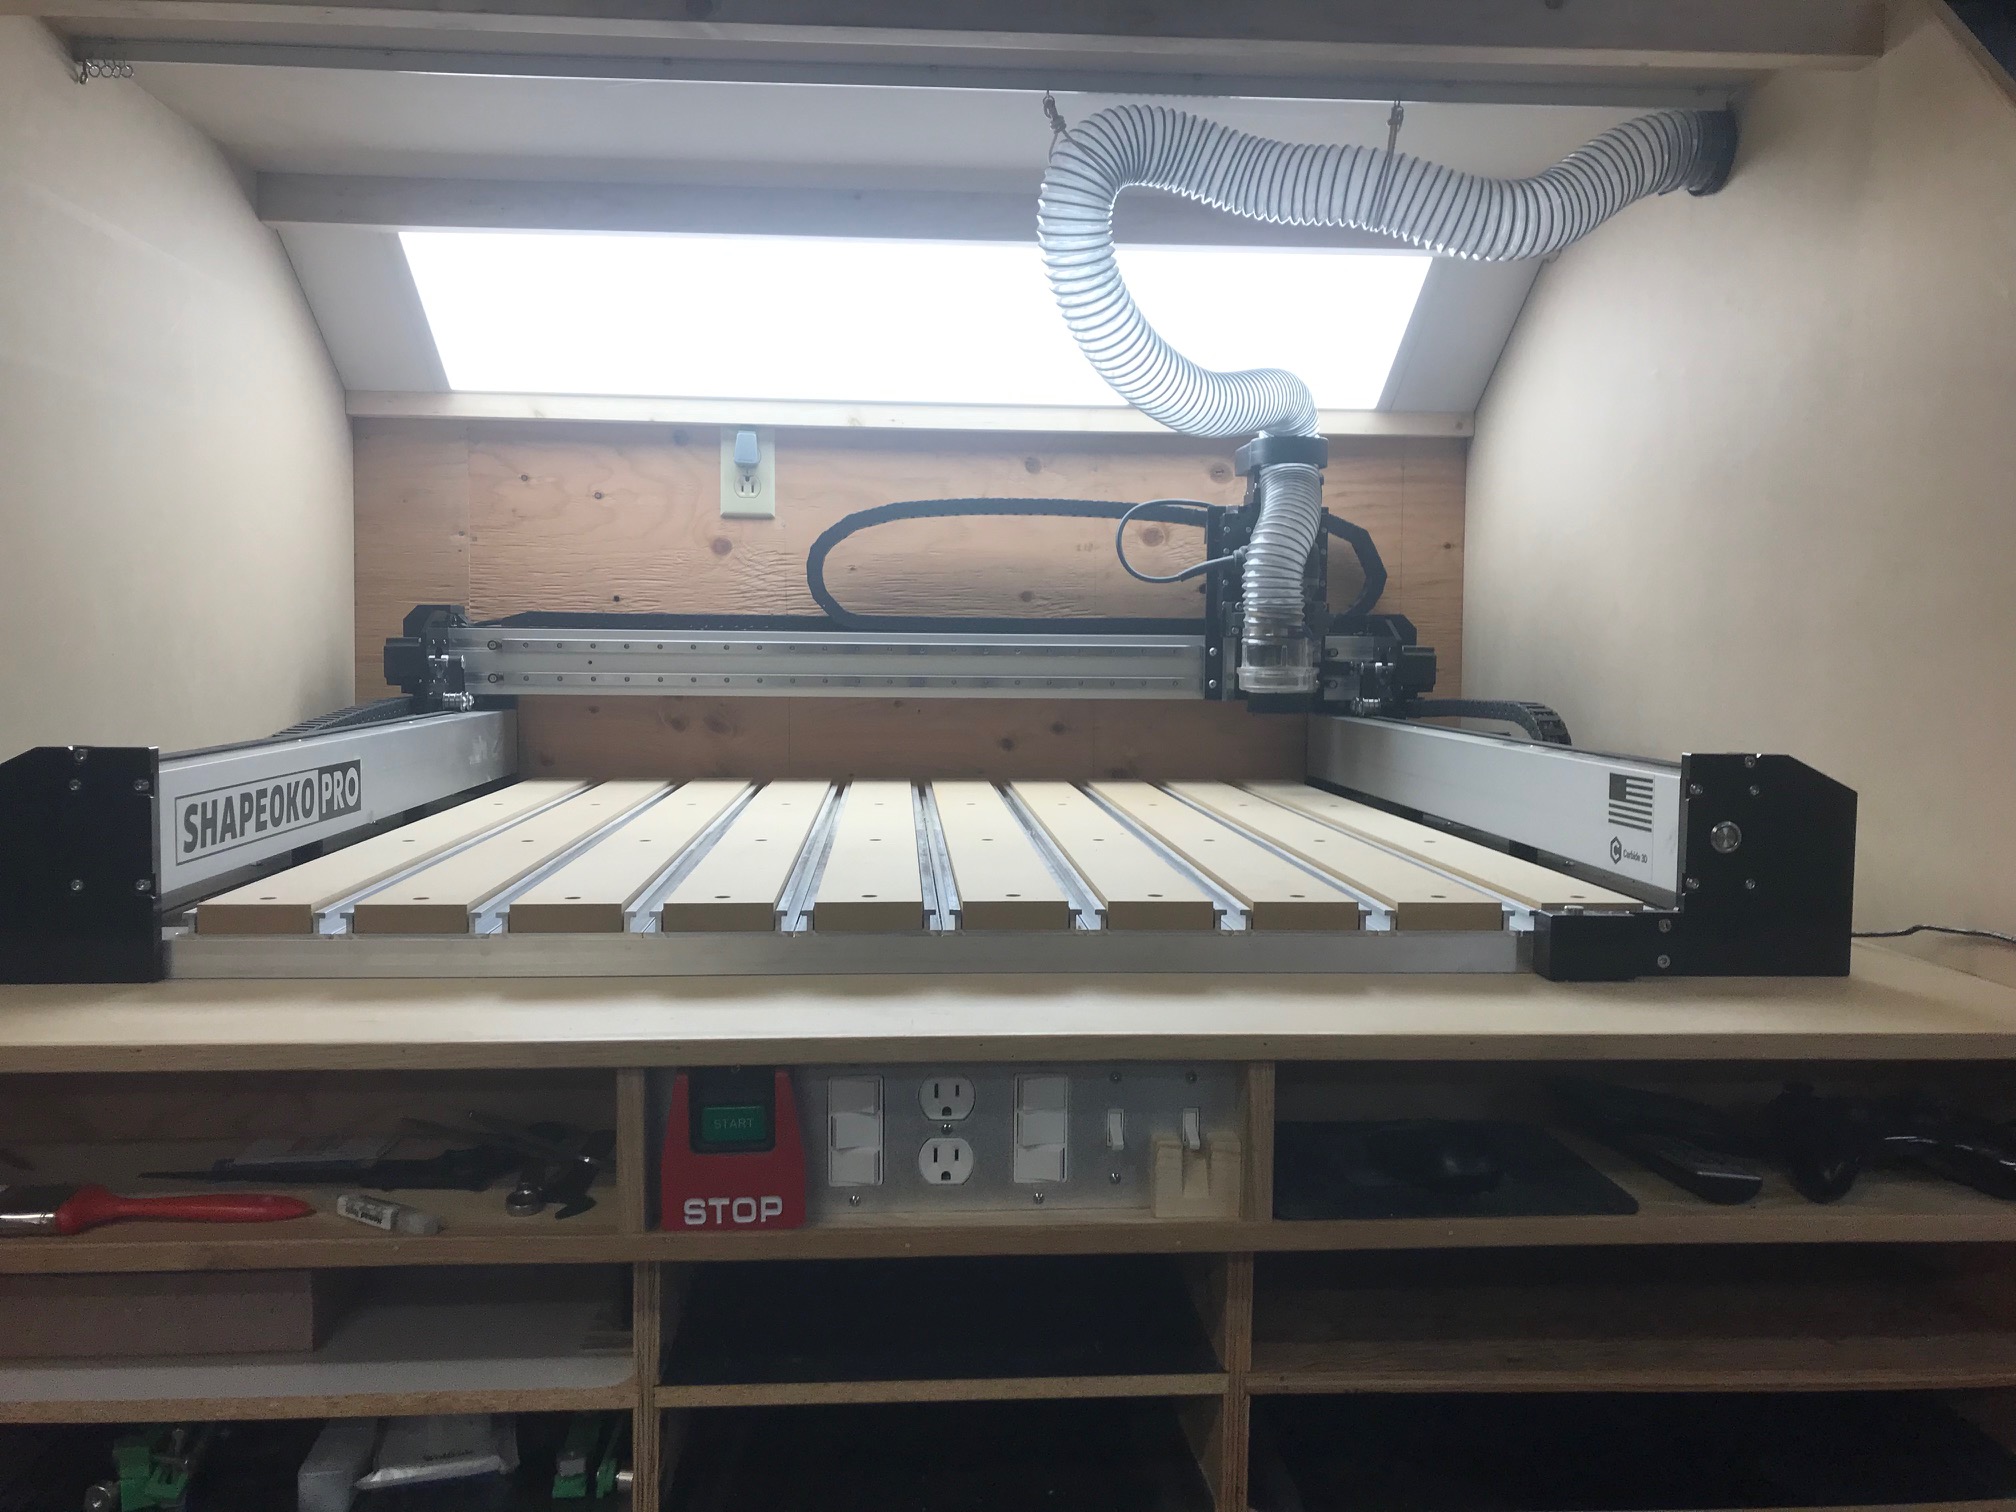
You seem to have enough space at the front of the machine with it only being 48" deep. Do you have any clearance issues at the back of the machine? (It looks like it sits right against the back of the enclosure.)
I have a 5/8 or 3/4 inch spacer behind each Y rails to prevent it from hitting the back wall.
The enclosure uses the shop wall as its back Therefore the deck is 48 inches off the wall, and the doors are inset 3/4 inches, This means the ID is 47 1/4 inches. There is a bit of free space between the dust collection and the front doors. 48 inches is the min. IMHO.
I took lots of measurements and mocked it up for the depth and the height.
As for the electrial panel, it was fun to build. It uses plastic gang boxes, 3,1,3. I trimmed them right back to just the box. I glued and riveted them together and drilled a 3/4 hole between them. Lesson learned: I made the torsion box with 4" rails, I later realized/ forgot Decora switch covers mount “outside” the box. oops. So there was some creative trimming. I fixed this by using the switch mounting screws to hold the switch and the cover plate with the same screw. whew The paddle switch is from overseas so it took some good tweaking as the screws didn’t line up and it didn’t fit well in a standard gang box. I installed it between two gangs by tapping the cover and mounted it to the cover plate. “It was highly tweaked”
One of the requirements was I wanted to know what switch was what by feel to try reduce errors They are recessed to prevent accidental oopses and I used different switches, a bump cover on the router switch. and just the layout itself, to achieve this.
The panel is 1/4 of an inch wider then the electrical box. The wood sides have a small dado to accept the over hang of the panel, that’s what hold it recessed and in place.
The finish was done with a random orbital sander which produced a textured hazy look. It was a beat up scrap piece of aluminum that was kicked around the shop. Looks great now :).
I bought it off Amazon.
I played with it until I had the right length. I found that when the dust boot is on and the vacuum is running it shrinks a bit.so I made it a bit longer and it works perfect.
Due to the lower head room. I let it freely move on the I beam. I had a very long light spring on the last curtain hook pulling it to the center but found it better without it. Running around the edges is easy. Running back on itself in the middle I found it better to just let it go where it wants, so no spring
I hole sawed a smaller hole then needed and used a sanding drum on my drill to sand the hole to a nice tight fit. I pressed in the Screw End Coupler through the hole and then put a regular hose coupler on the other side. This pinches the 5/8 MDF wall from each side. Then I plug in my shop vac hose, I also have a receptacle on that side that the Shop Vac plugs into and I control it from the electrical panel
I need to find the center of travel front to back to mount the curtain track. Then I simply attached the I beam track with pan head screws flat to the top. Putting screws on either side pinching the top rail -between them. I suspended the hose a inch or so below that to give it some room to fold back in itself.
There is a ground wire that comes from the light box to the top of the hose that is wire nutted to the spring coil
The hose guide on the router is just made of MDF and pressure fits on the top stepper motor. I posted that in another thread “Why I chose Shapeoko” near the bottom
Hope this helps
2-1/2" x 10’ Ultra-Flex Clear Vue PVC Hose - Made in USA!
POWERTEC 70191 Screw End Quick Coupler, 2-1/4x2-1/2-Inch