Epoxy river trivet [lots of pics]

Hi,

Last week while procrastination was looming over me, I decided to grab something random from my stock and improvise a project. I picked a bamboo end-grain trivet, 9.5"x9.5"x1.2", that I bought a long time ago in a home decoration store and never used (“too nice to spoil” syndrome)

Epoxy river tables seem to be all over youtube these days, so I figured I would try a scaled-down version of that with that trivet.

While googling about how to generate coarse/layered heightmaps, I stumbled upon that site which randomly generates greyscale patterns:

I could probably have imported that greyscale image in CAD/CAM and generated a 3D surface from that (I hear CC Pro can do it, Aspire, etc…), but I wanted to stick to a process that I could use without any fancy CAD feature. So I saved one generated image I liked, opened that bitmap image (in Gimp) and filled the gray regions alternatively with full black and full white color:

This was to prepare for the bitmap tracing step below, it’s probably unnecessary but that way I was sure I would not have to mess with the settings/thresholds to get a very clean vector set out of this.

I downloaded and installed Inkscape 1.0(beta1) for the specific reason that it is the first to include the “Autotrace” bitmap tracing engine, which does “centerline” tracing and that’s what I needed to get a clean set of vector lines out of that black and white bitmap:

The resulting vector is nice and smooth (original bitmap on the left side, vector on the right):

Next I saved that as an SVG file, and imported it in a 2D sketch in Fusion360:

and used the Press Pull tool to raise each area to the desired height, in my case I chose 2mm per step, from 0 at the bottom to 22mm (0.9") max height:

and then created an adaptive clearing toolpath for roughing:

  • 1.4" 2-flute 6mm upcut square endmill
  • 20.000RPM (I’m slowly trying to shift my old habits of using low-ish RPMs, and now using high RPMs to minimize cutting forces as per @gmack advice)
  • Since this is adaptive clearing, I went for “narrow and deep” (small WOC, high DOC) approach:
    • for optimal load (stepover) I went for ~15% of endmill diameter, and rounded that to 1mm (0.039")
    • for DOC (“max stepdown” in F360) I chose 10mm (0.39"), that’s 170% of endmill diameter.
  • I then went for my usual guideline of targeting 0.002" chipload for a 1/4" endmill in hardwood, and plugged that in the calculator to figure out the required feedrate (INCLUDING taking chip thinning into account, which matters at 15% stepover):

  • so feedrate is going to be 2726mm/min (~107ipm)
  • helical plunge rate = 400mm/min (15.7ipm) (slower than I usually use, for no good reason)
  • Since I am using an upcut endmill, I was concerned I was going to get burrs on the edges, so I configured 0.5mm (0.02") radial stock to leave, that a finishing pass would take care of.

Fusion360 generated this:

For the finishing pass, I used a 6mm downcut square endmill (to get nice clean edges), reusing the same cutting parameters except I halved the feedrate to limit the chipload to 0.001". With the magic of REST machining, Fusion generated this toolpath that would just shave off the extra 0.5mm from all walls:

My plan was to cut the piece, pour the epoxy, and then use the shapeoko to surface it (much faster and precise than sanding the top surface manually), so I figured I would need some kind of jig to hold the trivet throughout the process. I used a square piece of MDF slightly larger than the trivet, and tape&glue’d that onto my HDPE wasteboard:

Then I cut a shallow pocket (2mm deep), same size as the trivet:

Prepared tape&glue again to secure the trivet onto the MDF jig:

and I was ready to cut (after quadruple checking everything, since I only had one shot at this):

I held my breath and launched the roughing toolpath, which ran fine. Feeds and speeds were quite ok, nice clean cutting sound. However, my sub-optimal custom fixed-Z height dust shoe and the deep DOC of that toolpath led to a big mess of chips that did not get sucked (still, that is nothing compared to the huge amount of chips that did make it into the bucket):

Note to myself: I definitely have a design issue in my dust shoe, some of the chips found a way up and to the back, and filled up the bottom of the HDZ. Yikes! I’ll need to take care of that.

Anyway, a little vacuuming later I was very pleasantly surprised with the result. Even with the upcut endmill, the edges turned out to be perfectly clean, so I decided to not even run the finishing toolpath:

Next, I used double-sided tape to stick hard foam strips on each side of the trivet, as a mold for the epoxy:

I applied a first thin coat of epoxy manually to seal the wood (to prevent bubbles later) and let it dry:

I prepared the mix of epoxy, hardener, and random blue pigments I had, and poured the first layer (about 1/4" thick), using a torch to get rid of bubbles:

Let it dry for 24hours, and poured the second layer:

Repeated that process, using less pigments for each new layer, with the intent to go from a deep blue at the bottom, to clearer and clearer blue layers until the final layer was done:

And finally removed the foam strips

So this is where I ended up for now. Next step: use a 1/4" endmill to do a profile cut all around the perimeter to get perfect edges, and then surface it such that the highest “islands” of wood are flush to the surface.

And that’s where I need help from you guys who have sanded/polished epoxy before: what’s your routine to get from the rough translucent surface I will get after surfacing, back to a perfect transparent finish ?
I only have wet sandind paper up to 1000grit, that’s not going to cut it I think, I have seen youtubers use up to 5000grit and special polishing pastes ?

17 Likes

I’ve seen many folks just use more epoxy on top (thin layer) to go back to mirror smooth top layer…

4 Likes

Mmmh. I’ll need to look that up, thanks.

I use micro mesh pads all the time to get highly polished surfaces. Works great on even unsealed wood if sanded with 600 grit or better… but I mainly use it to restore finishes and repairs on guitars. It works well on epoxy and polyesters

You can get different sized sheets and pads, furniture makers often put them on rotary sanders for large surface and also use with water for wet sanding

3 Likes

Thank you ! that will make the Amazon searching way easier with the right keywords.
12000grit, that should do it :slight_smile:

like @fenrus said, it is super easy to pour a finish coat on top. That’s what I usually do, and there are multiple types of final coat options. (Way easier than polishing)

Just to be sure, are we talking about pouring a thin coating of epoxy on top of a rough-ish epoxy surface? Could you maybe point me to a video of this process ? I keep finding videos of epoxy finish coat on wood/paintings/etc…but not epoxy on epoxy?

EDIT: I found one that represents just the case I was considering

and it is indeed like magic !

1 Like

So an easy way to see if a top coat of epoxy will be your answer is to wet the area after sanding. This is essentially what it will look like with another coat of clear. If its still cloudy sand down to a finer grit, until it appears clear. Otherwise those little imperfections will show through.

3 Likes

Hahaha! 12,000 grit is essentially rubbing a piece of paper on it. That’s above what they use on cars. Typically above ~4,000 grit they switch to liquid polishing compounds.

Lots of good ideas. The water technique is often used in woodworking as well except it’s more common to use mineral spirits to see what the wood will look like.

A final thin layer of epoxy will be easiest as opposed to polishing it back to a smooth layer.

3 Likes

Surfaced and perimeter cut completed:

Now the dilemna…I kinda like the cloudy look of the epoxy after all, and if it’s going to be a trivet, it might as well have a slightly rough surface since it will get scratched over time anyway.

I’ll sleep on it.

6 Likes

C’mon! I want to see that thing crystal clear!

2 Likes

I couldn’t figure out how I would pour an extra layer of epoxy without messing up the side walls (I like the sharp edges), so I went for the hard way (sanding). I stopped at 1000grit, and got this:

Which turned into this, after applying a coat of mineral oil:

The colors are a bit less vivid after wiping, but that’s a good thing as far as I am concerned, so I’ll call this project done

9 Likes

Julien, very cool of you to share the entire process plus links and references. I believe even I could come up with an epoxy river project simply by following this thread.

Bookmarked for future reference.

1 Like

FWIW I use crazy high grits (up to 12,000) when I turn wooden pens and candle holders, then finish with a paper towel (Bounty brand, probably doesn’t matter, but I stick with what works for me). The difference between that and my usual “rough” finish (1000-1200 grit) is like “super smooth” versus “smooth as glass”. On my oil + HUT wax I usually do the rough, but when I want something really nice I finish with CA glue and up to 12,000. Just depends on the work and what you’re trying to achieve. Some wood just won’t benefit from the added work, but tight dense woods like walnut do.

Dan

4 Likes

For protecting the side edges, you could use 2 pieces of masking tape, with one sticky side out to put the backside towards the inside (since the backside of painter’s tape has a release coating on it so things don’t stick) and the other strip sticky side inside to stick to the side of the part.

This is probably confusing to talk and not show a diagram of so let me know and I could write out a picture.

I may or may not have understood that :slight_smile:
My primary concern was that whatever protection I put around the perimeter, the surface tension would make tthe edges “rounded the wrong way” (if that makes sense).
I will have a chance to test the “final layer of epoxy” method soon anyway, I stumbled upon these end-grain bamboo trivets again and bought two more, for practice and fun (and gifting to family if they turn out to be nice enough)

I made these coasters a while back and experimented with a few techniques. I ended up painting the different layers with acrylic paint and then filling with clear epoxy. I also sanded to a high grit then finished with a super thin layer of epoxy. Basically I flooded the surface then wiped it off with a paper towel leaving an extremely thin layer.

10 Likes

I started playing around with this site that @Julien linked in his first post and started playing with the idea of making some coasters using those generated gray scale maps. I did not like the low resolution of the maps, or the border and crosshairs, so I forked the program and just edited out the stuff I didn’t want, and then increased the size from 512 x 512 to 1024 x 1024. Here’s that version if anyone is interested. If you want to make the map bigger, just go to the JS window
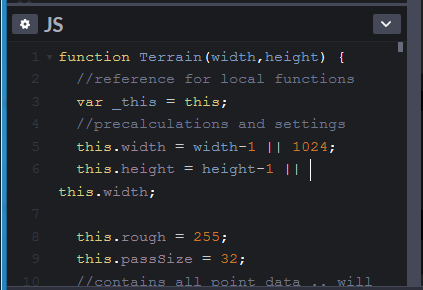
image
and edit the line:

5 this.width = width-1 || 1024;

By replacing the 1024 with whatever you want. EDIT: You’ll have to log in and fork it to work properly after changing the value. Sorry, I forgot. I know just enough to be dangerous.

I found a simple Java program on Thingiverse that once you follow the instructions installing Java and modifying the path, you just use the DOS command window (CMD) and the command:

java -jar heightmap2stl.jar ‘path to imagefile’ ‘height of model’ ‘height of base’

I created a directory 'C:\Random Height Maps. Then I put all my images in there. Don’t use spaces in the file name (directory name is fine though), the Java program doesn’t like it.

RHM_001.png
RHM_002.png
. . .
RHM_030.png

Then I put the ‘heightmap2stl.jar’ program in the same folder as my pictures. Then I ran the dos command window (CMD) and navigated to that folder and entered:

‘java -jar heightmap2stl.jar RHM_001.png 110 10’

image

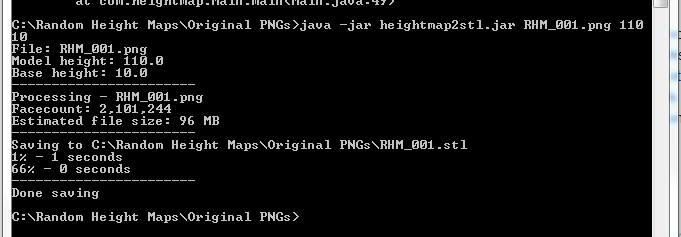
Then it generates the STL from that image file. To do the next one is even easier.

  • Hit ‘F3’, which brings up your last command
  • Use left arrow to go back to the ‘1’ and use backspace to delete it and put in a ‘2’
  • Hit enter, and it generated the STL for RHM_002
  • Hit ‘F3’. . . .
    I processed 30 height maps in about 10 minutes like this.

Repeat that for all the gray scale height maps you created.

Then I used FastStone Image Viewer to create negatives of the original images with the batch command, and it processed all 30 pics in about 30 seconds., then I used the same process to make STLs of those as well.

Then, you get these:

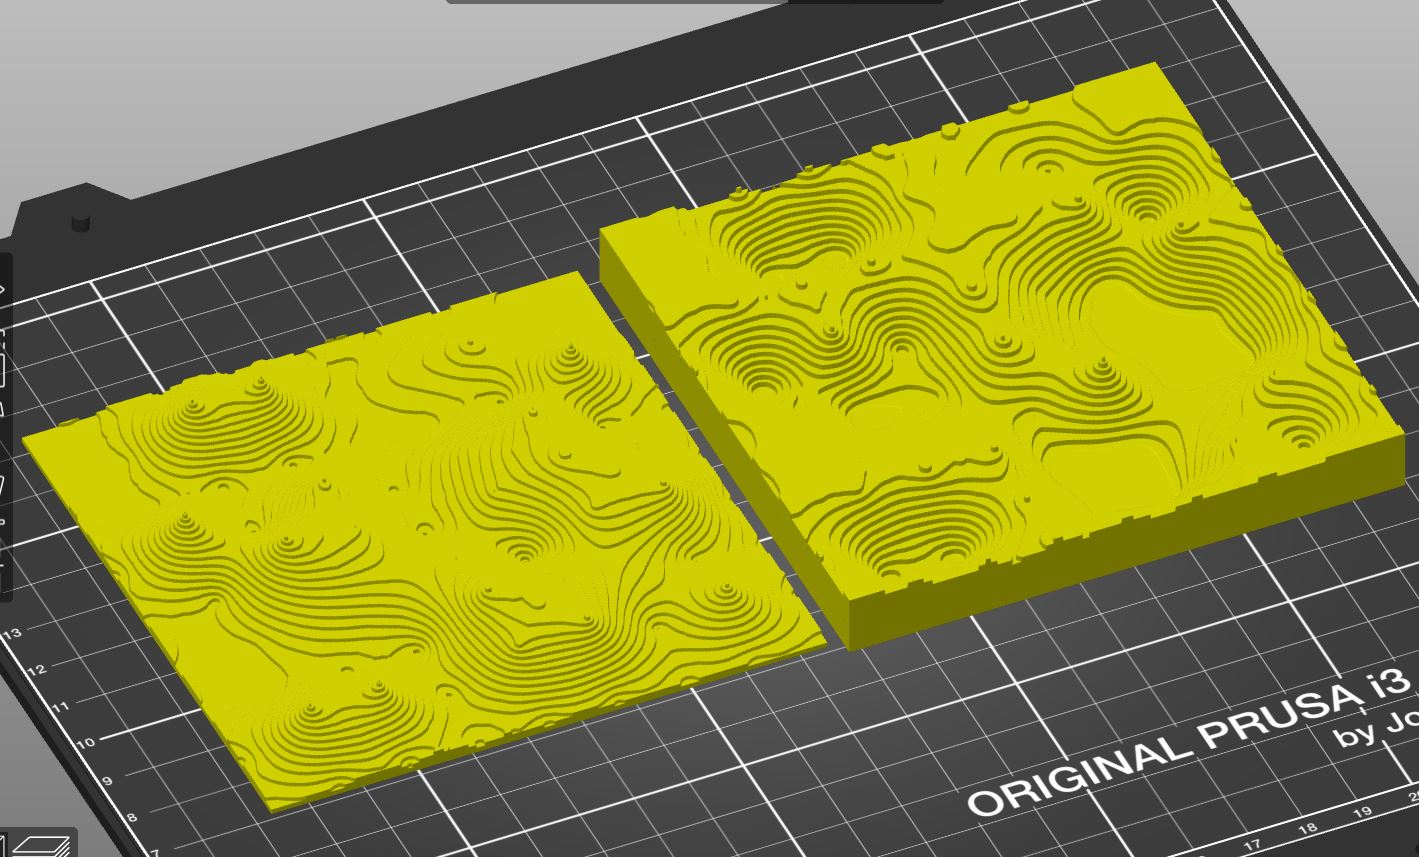
The Java program makes the STLs 1mm per pixel it seems, so they come in at over 1,000mm, but using a proportional resize easily gets them down to a printable (or CNC-able) size easily.

7 Likes

This is very cool, I will definitely use this for my next try and report here. Thanks for sharing!

1 Like

This topic was automatically closed 30 days after the last reply. New replies are no longer allowed.